
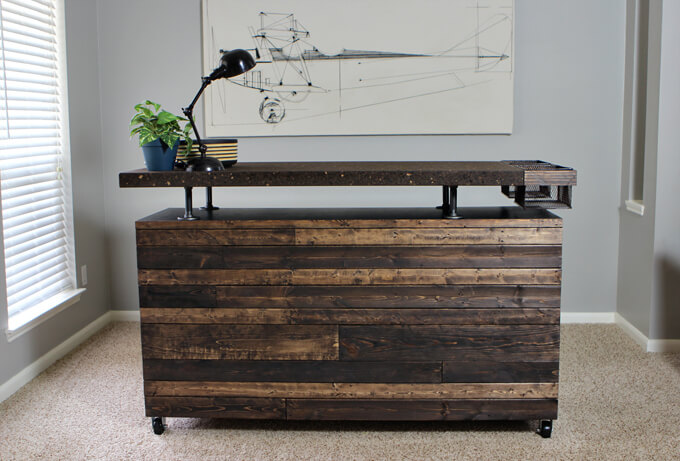
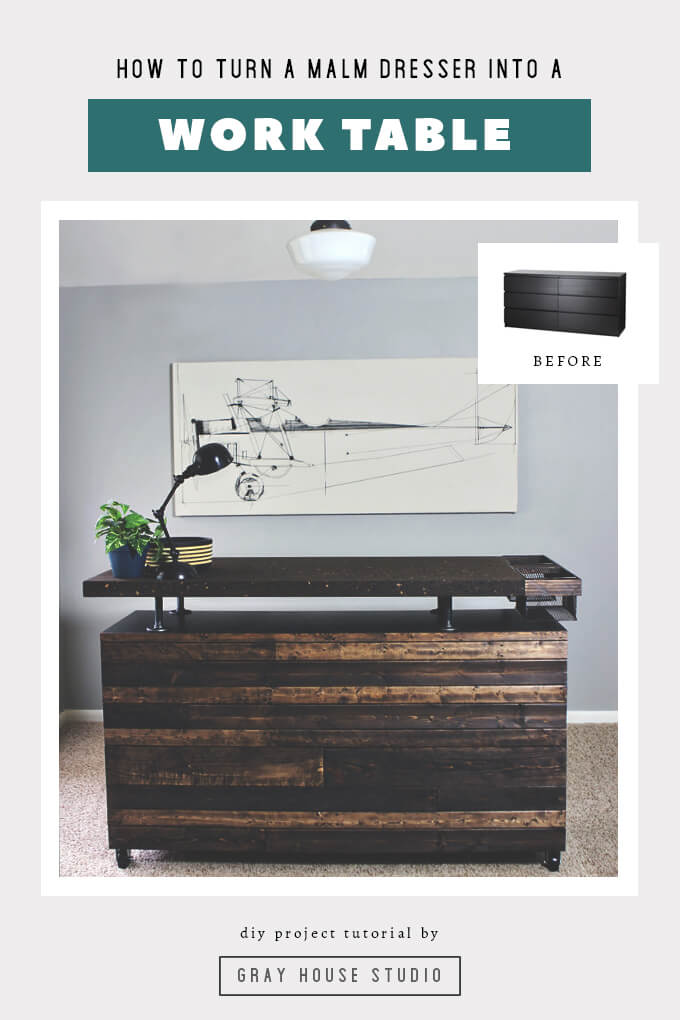
For our latest IKEA hack we transformed the MALM dresser into a work table for our studio. Today we are sharing all the details about our DIY work table and MALM Dresser IKEA hack.
Some DIY home projects we spend a lot of time planning before we begin and other projects pop up on our radar quickly and we are so excited to jump right into it and make it happen that we just have to figure it out as we go. For our latest project, a DIY work table, we took the latter approach and it turned out awesome!
Our formal living room (the room next to our library) is still sitting empty these days and we are in desperate need of a place to keep our “messes” contained (the downside of exploring creativity – lots of clean-up is involved) so we decided to finally start working towards making the front room our studio area.
We needed a consistent work space with storage as well as a large table top so we decided to build a piece of furniture that would satisfy all our needs as well as fit our industrial-rustic-eclectic style.
The project turned in to an IKEA hack because we decided it would be easier to use the IKEA MALM 6-drawer dresser as the base of our work table. But we needed to make a few modifications to it first to fit the aesthetic in our home.
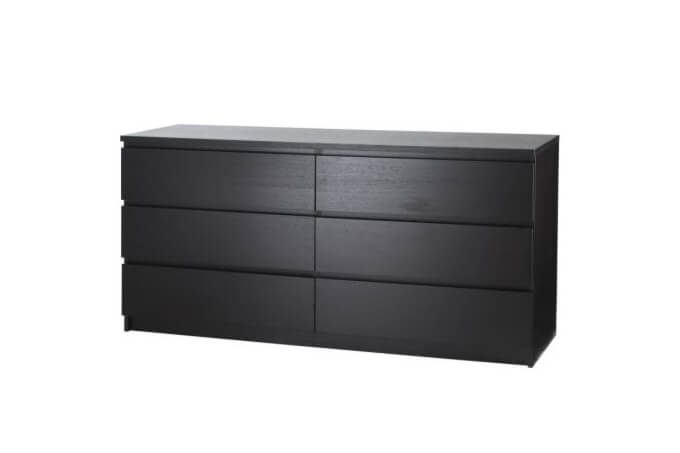
We had a rough idea of what we wanted the table to look like so we headed to IKEA looking for the pieces for our table. We needed the table to have storage and preferably large drawers which is why we choose the MALM 6-drawer dresser in black.

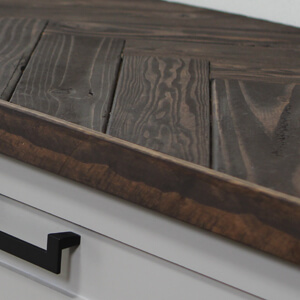
We went in looking for either a wood or laminate gray table top. After looking at all the options we ended up choosing the SINNERLIG dark cork table top. The thick cork was different than anything else we had seen and we liked how the color and texture fit with the design we had in mind. Once we had our two pieces from IKEA we started finalizing our concept for our studio table work space.

How We Upgraded the IKEA MALM Dresser into an Industrial Work Table
SUPPLIES
- MALM Dresser (similar dresser)
- SINNERLIG Dark Cork Table Top
FYI: This post contains a few affiliate links to products we used to make this project. Gray House Studio does receive commissions for sales from these links but at no extra cost to you. We appreciate you supporting this site. Read our privacy and disclosure policy. You can also easily shop our recommended products here.
STEPS
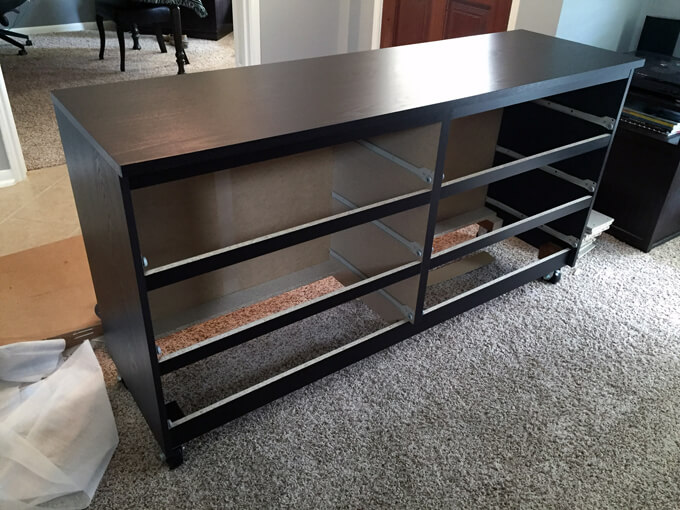
1. First we assembled the MALM dresser as normal per the instructions.
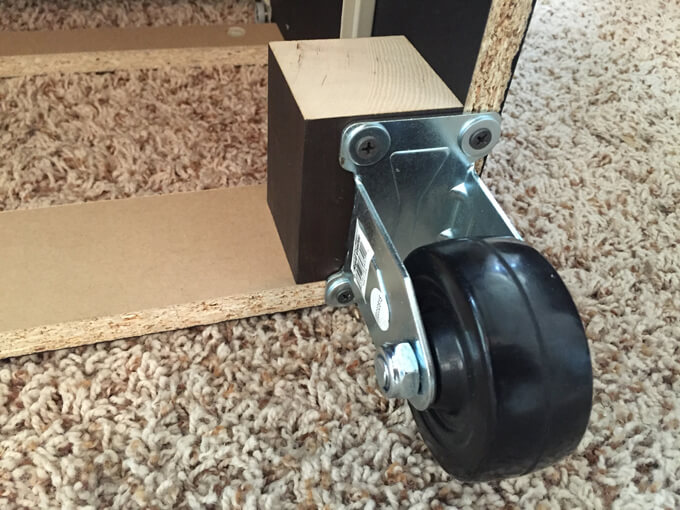
2. We needed the dresser to not only be taller but also to be able to move the table depending on the project so we added casters to the bottom of the piece by screwing blocks of wood to the base of the dresser and attaching casters to those blocks of wood.
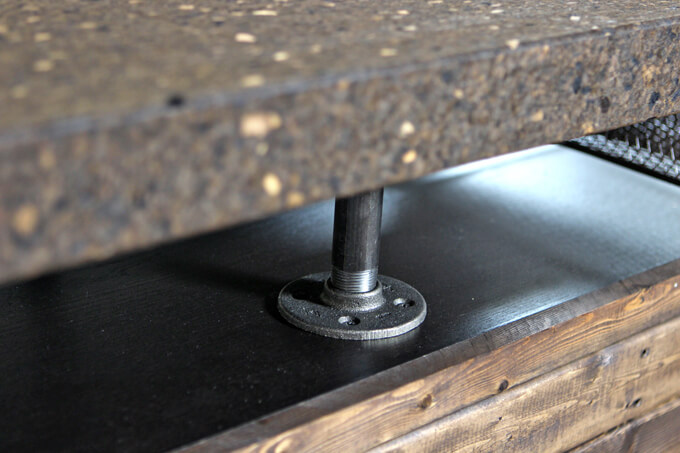
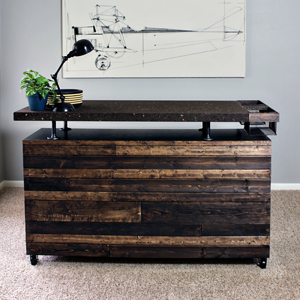
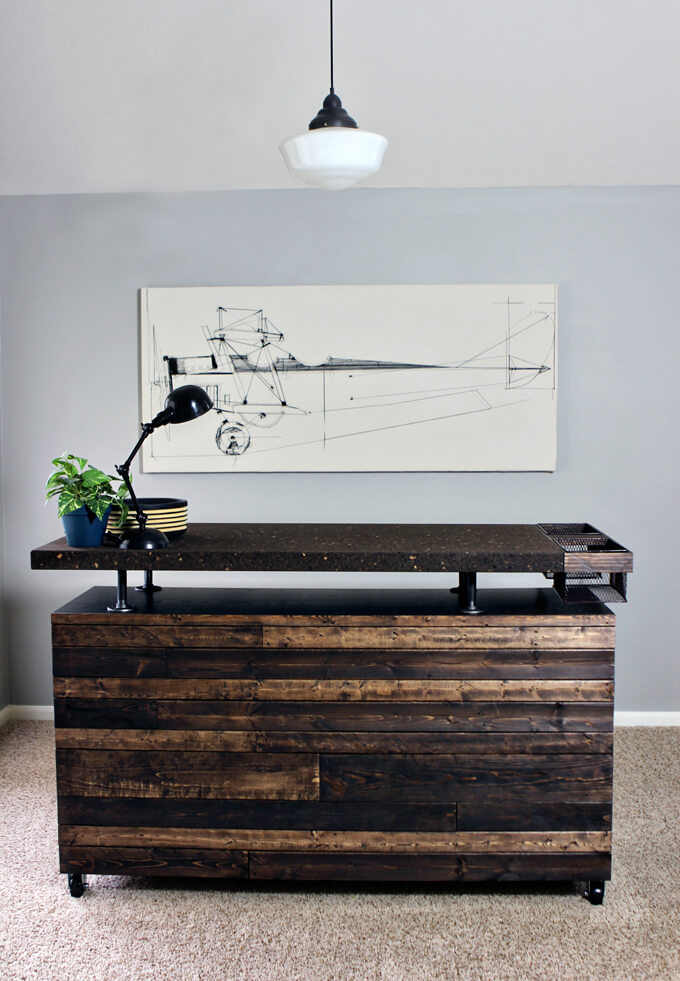
3. Since the table will be in our “studio” which is next to our library we decided to bring the industrial style to our work table so we took the same black pipes we used on our shelves to attach the cork table top to the top of the MALM dresser.
By raising up the table top with the pipes, we made the table bar height so we can sit at bar stools while working. Currently, we are just dragging in some from the kitchen but we hope to eventually have designated bar stools for this space.
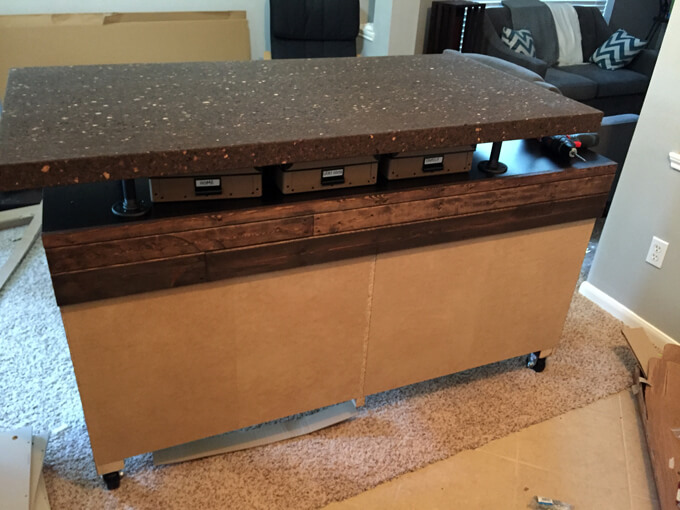
4. We needed the drawers for storage but didn’t want them to be visible from the entryway so we flipped the dresser around so the back of the dresser is facing the entrance of the room.
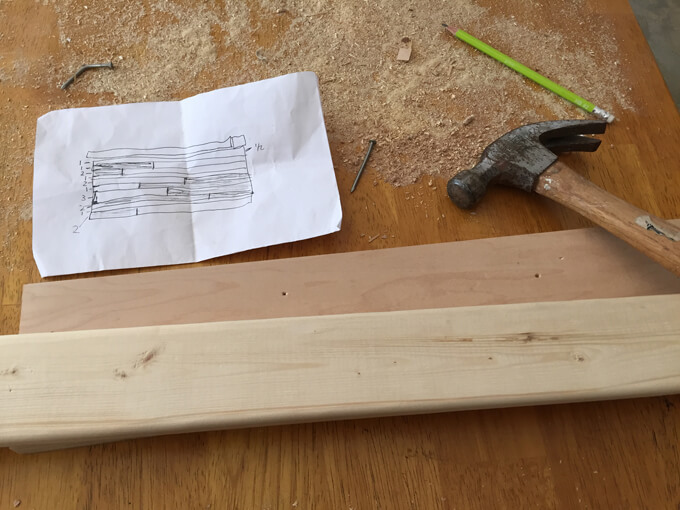
5. We obviously didn’t want to leave the back of the dresser exposed so we covered the back of it with distressed wood planks using our weathered wood technique like we did on our reading nook wall and our coffee bar base.
This feature really made the work table feel complete and like an entirely different piece than the IKEA dresser we started with. I just love those worn wood planks. It really ties the piece in with the rest of our home.

6. We ran into a snag because the dresser was a few inches longer than the table top. If it were the other way around it would have been fine but this dilemma left us puzzled. We spent almost an entire day bouncing ideas back and forth on how to make the top balanced with the bottom.
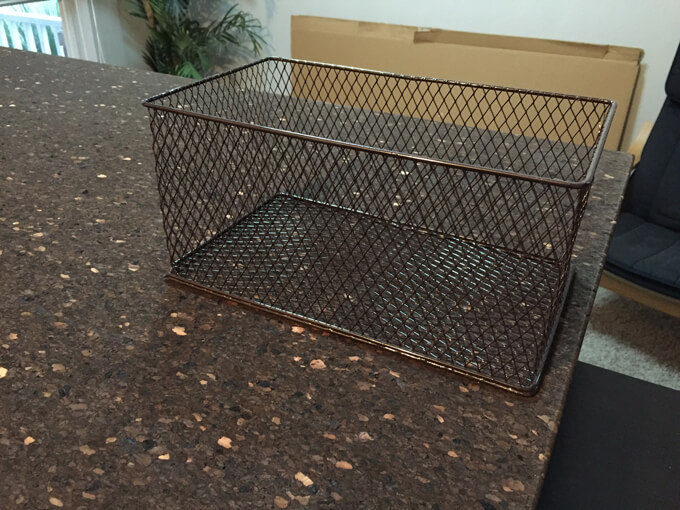
7. We came up with a solution to build a mounting frame to attach two wire baskets to the side of the cork table top. We found two wire baskets at HomeGoods where we can store smaller supplies that we use frequently. They matched our table perfectly.
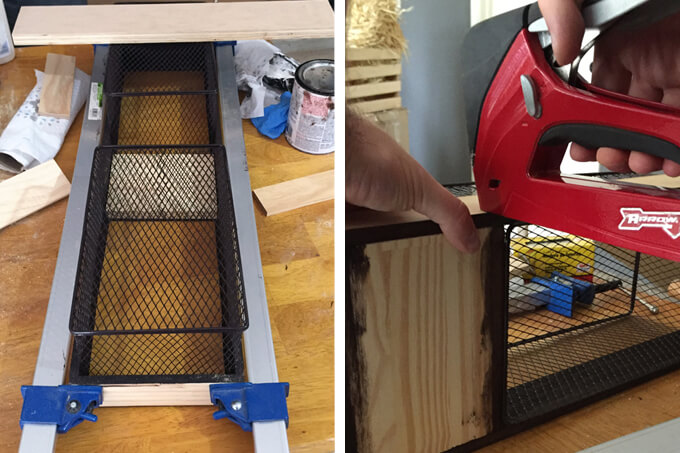

8. We were able to make a frame out of scrap wood we had from previous projects to hold the two baskets. The boards were cut to be the same thickness as the cork table top. After staining the boards, clamping the frame together around the baskets, and letting the glue dry the baskets were ready to attach to the side of the cork table top.
Now the front of our work table is technically the back of the dresser
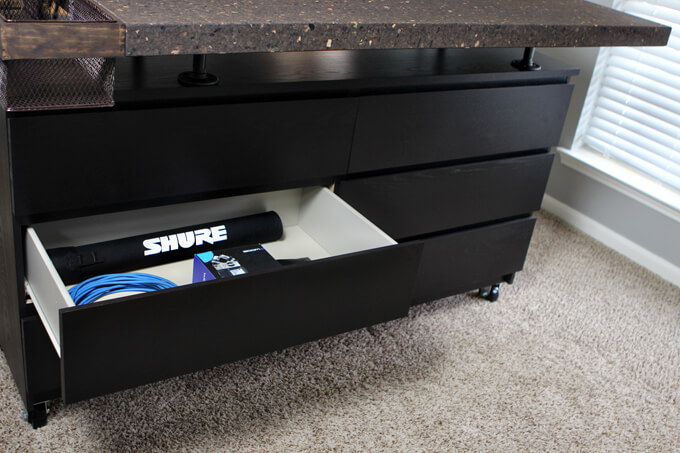
And the back of the work table is where the drawers are located which makes it easy to store and access all of our supplies.
We are extremely pleased with how our featured piece in this room, our DIY work table, came together. It not only has multiple purposes but we love how it looks when it is not being used as well. We are calling this one a success!
Learn how to create a weathered wood look using brand new boards like we did for the front panel of our DIY work table.
PIN FOR LATER
How did you attach the cork top to the pipes? Is it glued on?