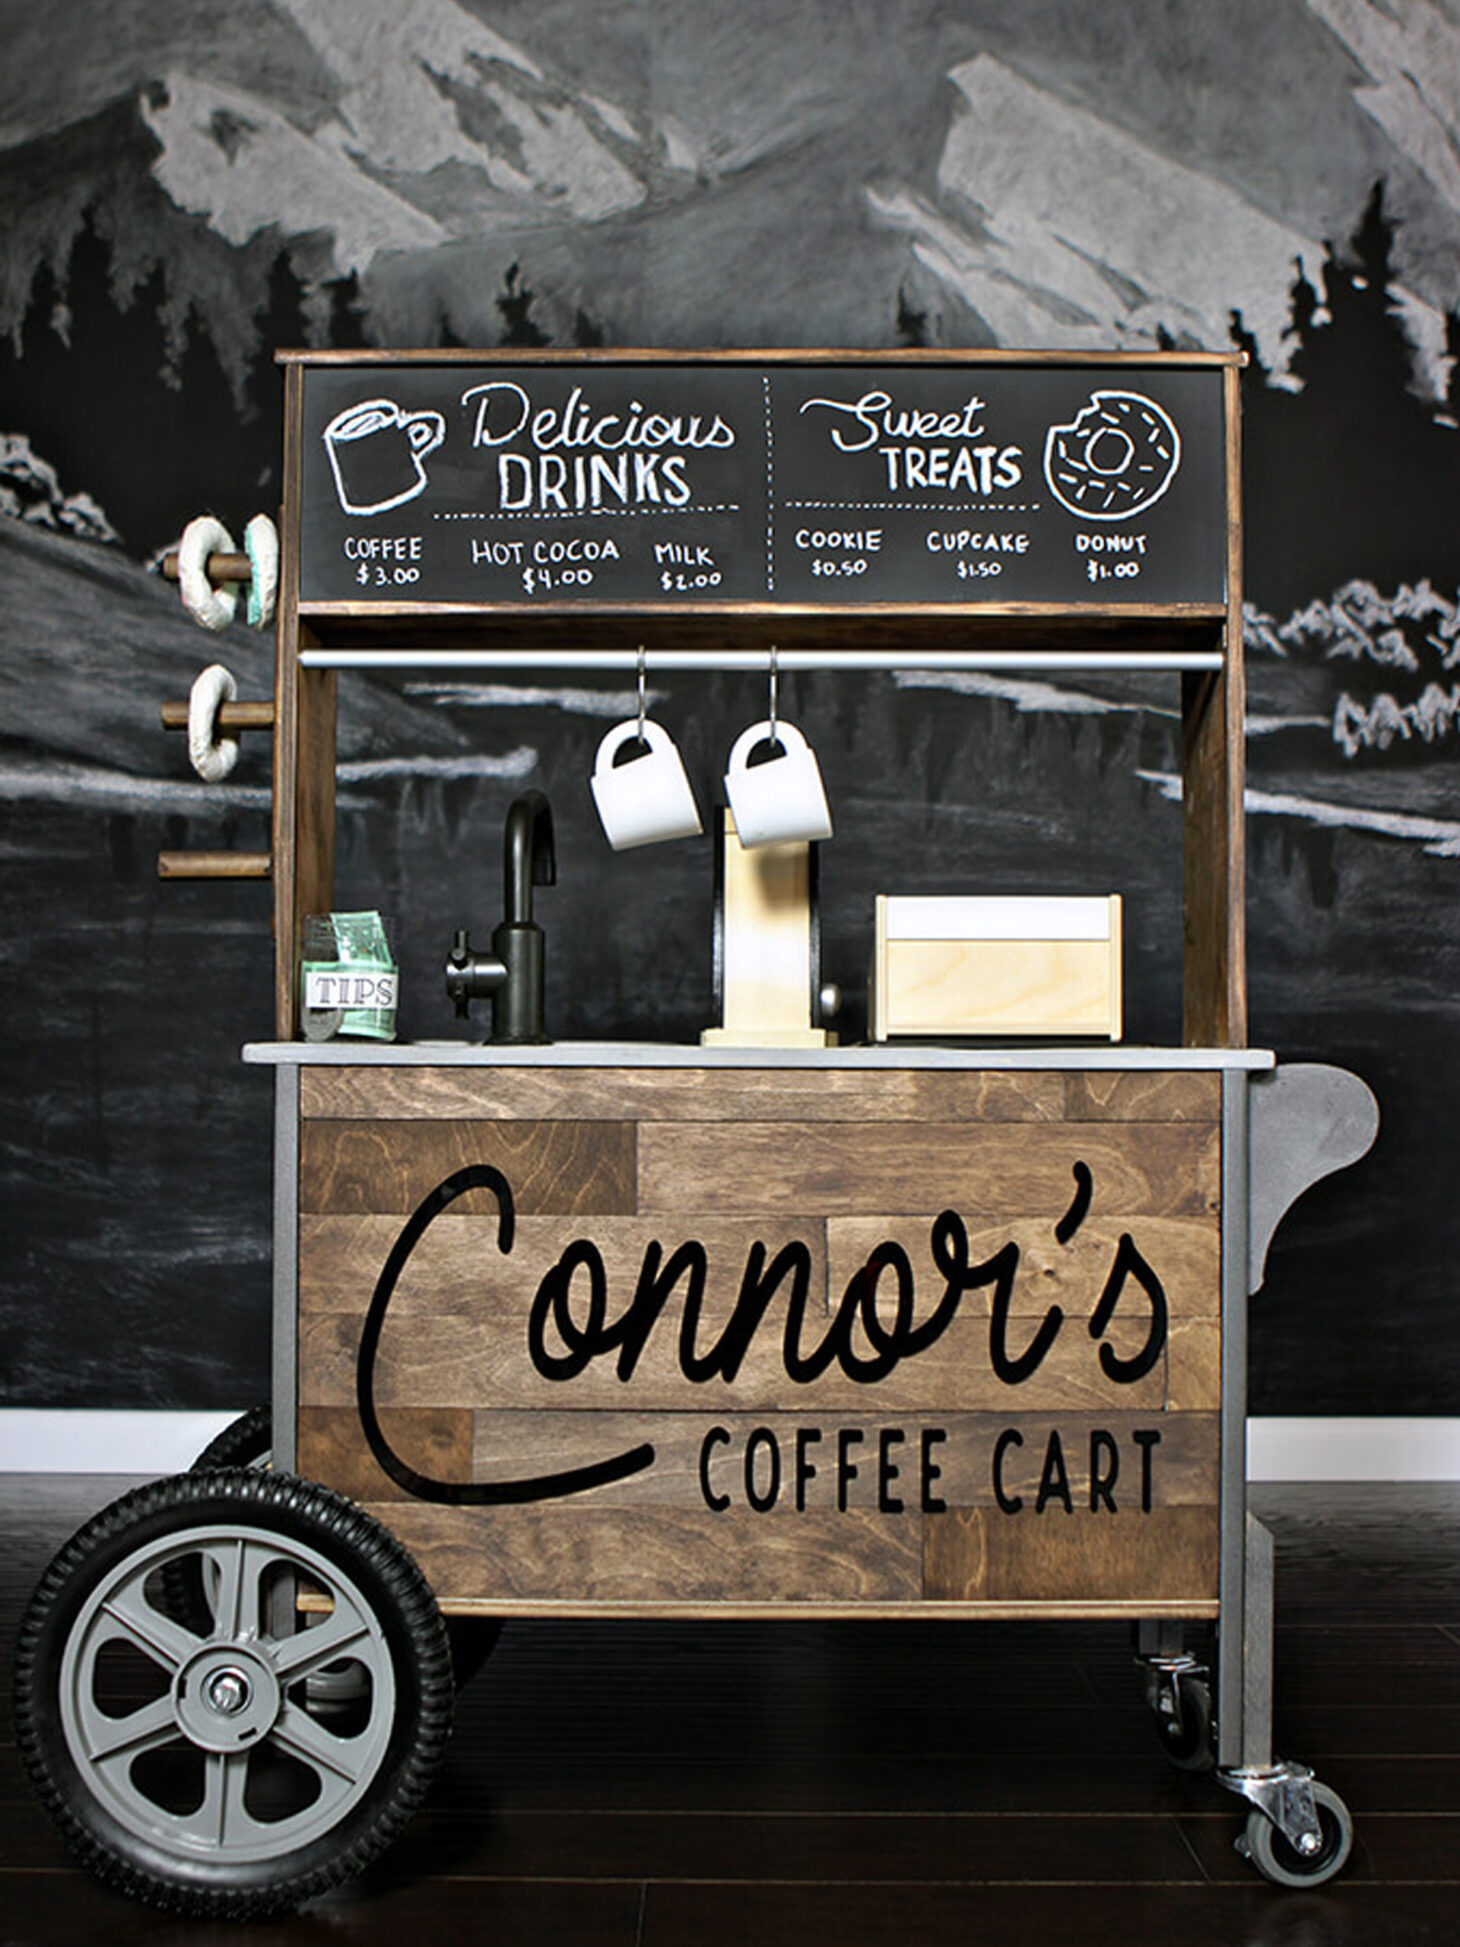
For this DIY transformation we did our own version of an IKEA play kitchen hack. Scroll down to see how we transformed the DUKTIG toy kitchen from IKEA into a toddler size coffee cart for pretend play.
FYI: This post contains affiliate links to products we used and liked for our Ikea play kitchen hack. As an Amazon Associate Gray House Studio earns from qualifying purchases. This is at no extra cost to you. We appreciate you supporting this site. Read our privacy and disclosure policy.
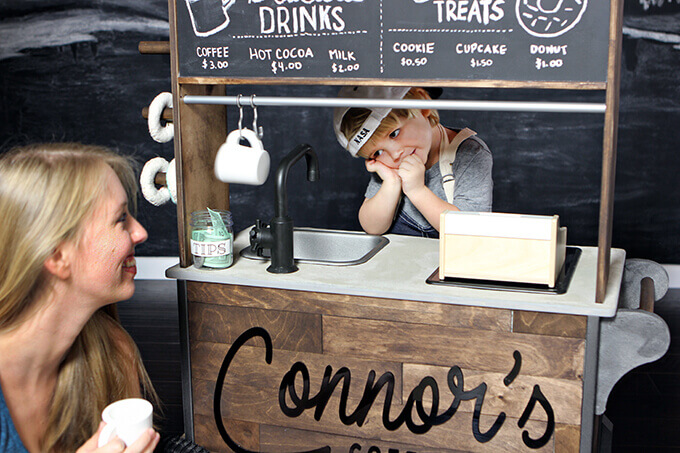
We have seen quite a few IKEA DUKTIG play kitchen makeovers so we decided to try our hand at our own – Gray House Studio style. We had a blast working on this project and the final result was a win with our toddler! Why have a play kitchen when you can have your own mobile coffee cart!?
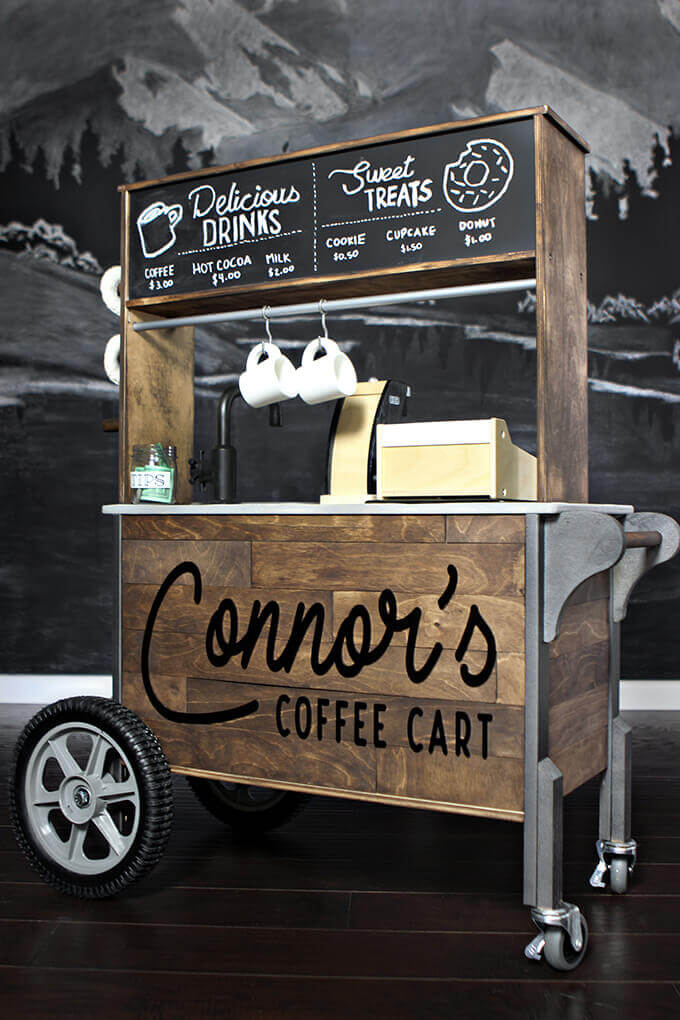
The back side of the DUKTIG toy kitchen became the front of our coffee cart. We designed it to look very similar to our large coffee bar.
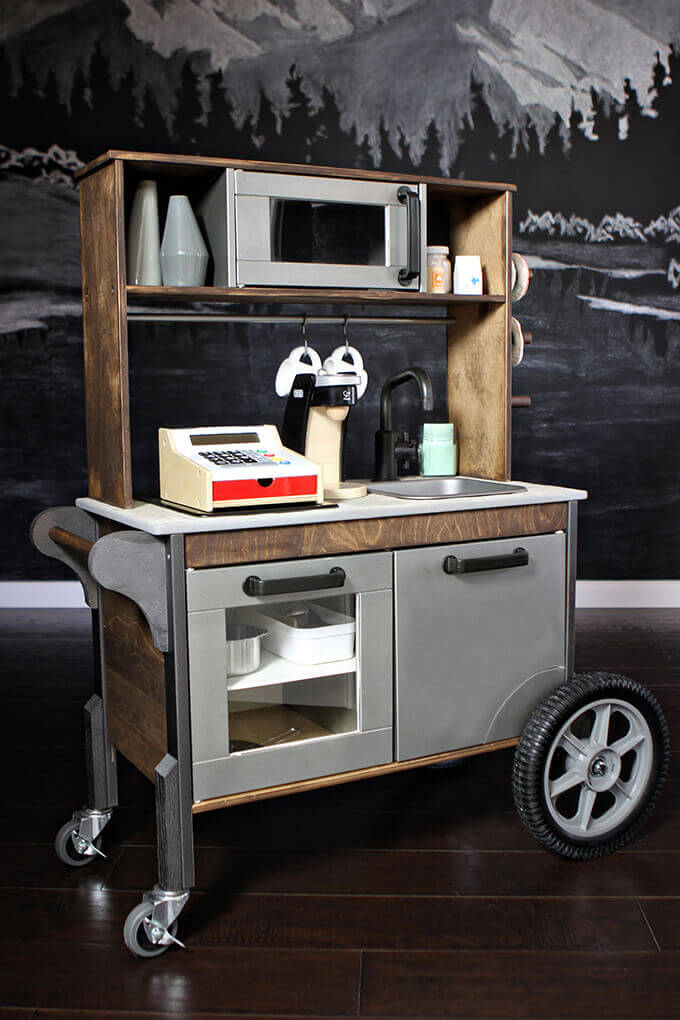
The front side of the kitchen is the same, just different colors than the original kitchen so the pretend play can be the same but with the added function of it being mobile.
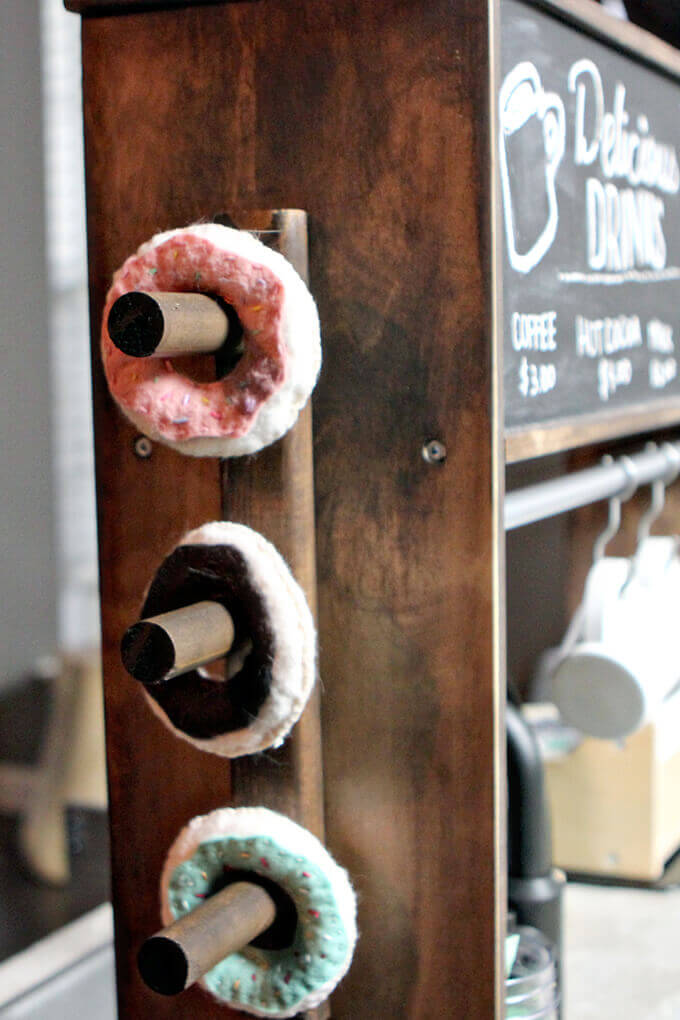
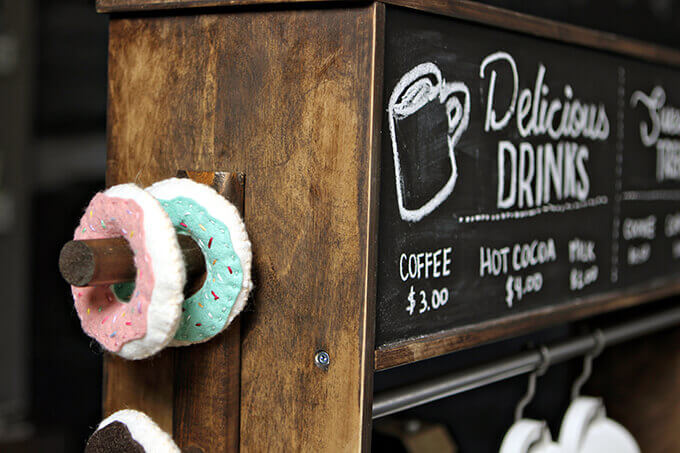
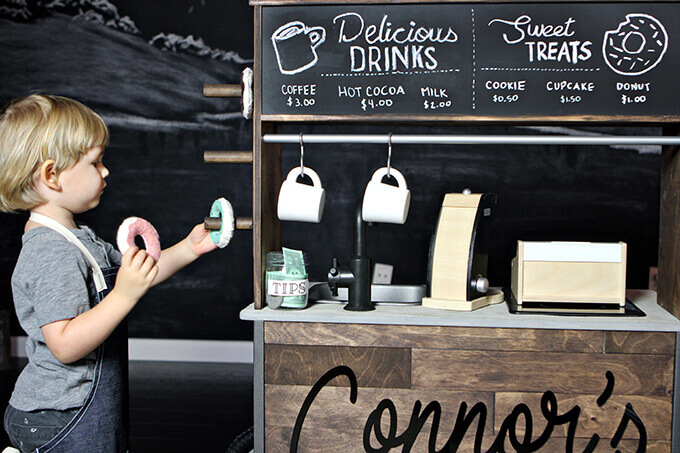
We made and attached a donut holder on the side of the coffee cart opposite of the push bar. This was just a fun added feature to display the felt donuts I made for Connor to “sell”.
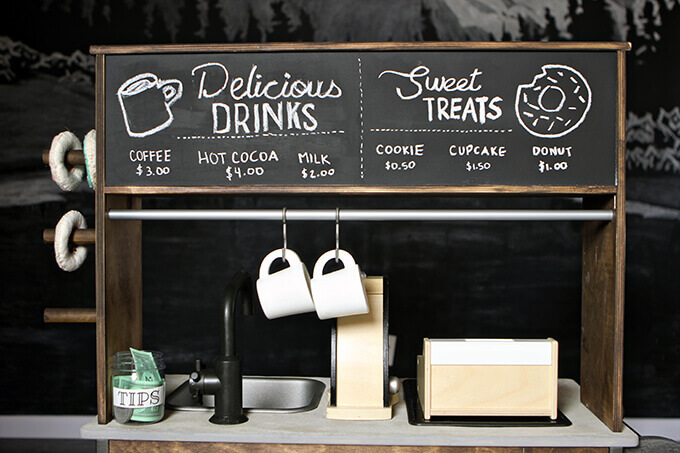
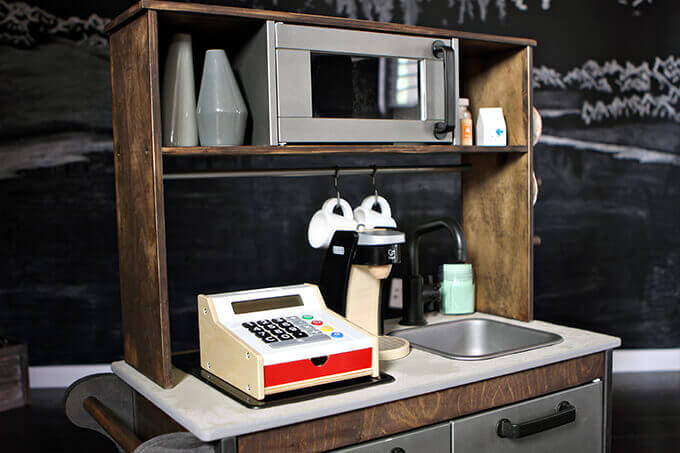
I designed a chalkboard menu and drew it on the back of one of the pieces that came with the kitchen.
IKEA Play Kitchen Makeover
Shop the products we used for this project in one place.
materials:
- Ikea Duktig Mini Kitchen
- Rust-Oleum Kona Wood Stain
- Rust-Oleum Flat Metallic Soft Iron Spray Paint
- Rust-Oleum Flat Metallic Antique Nickel Spray Paint
- Rust-Oleum Matte Black Spray Paint
- Rust-Oleum Chalk Board Paint
- 3 mm 1/8 x 12 x 24 Birch Plywood
- (2) 12″ X 2” Plastic Wheels
- (2) 3 in. Swivel Caster with Brake. 175 lb. Load Rating
- 7/8″ x 7/8″ x 48″ Hardwood Round Dowel
- 3/4″ x 2′ x 2′ Plywood Panel
- 1″ x 2″ x 8′ Red Oak Board
- 2″ x 2″ Red Oak Board
- Scotch Permanent Mounting Tape
- Vinyl Concrete Patch
- Mini Paint Roller with 6-Inch High-Density Foam Paint Roller
tools:
FYI: This post contains affiliate links to products we used and liked for our Ikea play kitchen hack. As an Amazon Associate Gray House Studio earns from qualifying purchases. This is at no extra cost to you. We appreciate you supporting this site. Read our privacy and disclosure policy.
tutorial video
steps
PART 1: PAINTING & STAINING ALL THE PIECES
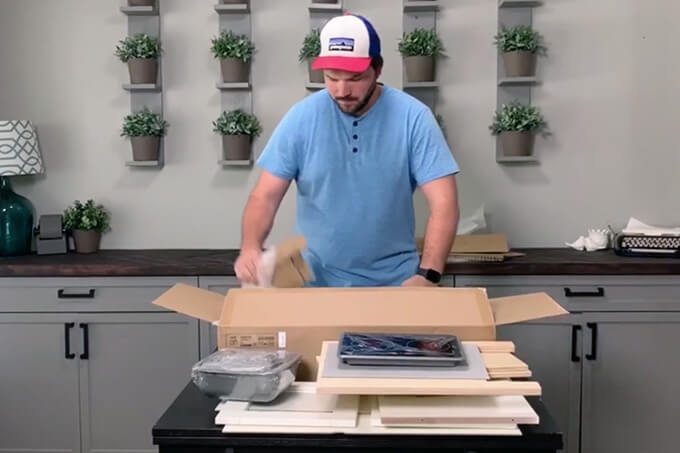
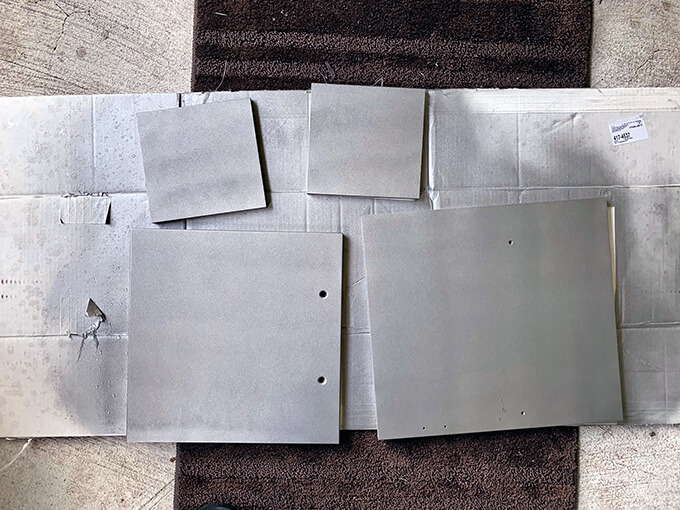
1. To begin the IKEA play kitchen hack we opened the IKEA DUKTIG play kitchen box with all the pieces and separated the pieces into groups depending on what color they needed to be painted or stained. We created a little cheat sheet for ourselves to keep track of what stain or paint we needed to paint each piece.
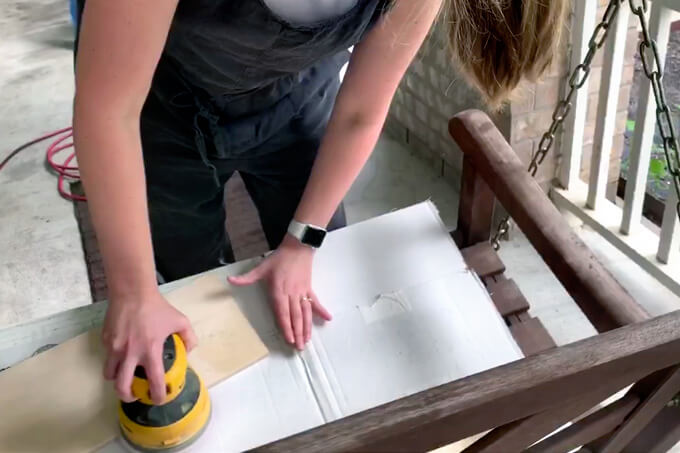
2. The pieces come with a coating on top of the wood so I used an orbital sander with a 5 in. 120-Grit orbital sanding disc to take off the top clear coat layers so our stain would take to the wood.

3. We decided to stain the boards that make up the top section of the IKEA toy kitchen with our favorite stain, Rust-Oleum Ultimate Kona Wood Stain.
The back of the top piece will eventually be a mini version of the framed chalkboard above our coffee bar.

4. While I was sanding and staining, Brent sanded and spray painted the legs of the kitchen.
For the legs we chose to go with a metallic soft iron spray paint and primer in one because this color was very close to the color we chose to spray paint our DIY coffee bar legs.
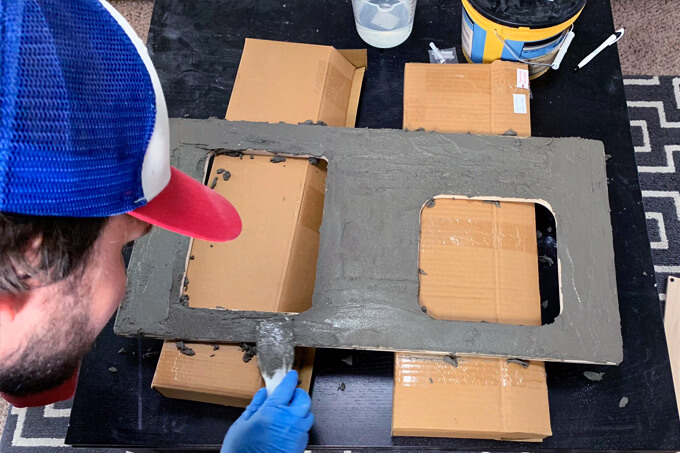
5. We wanted an authentic version of our coffee bar and as you know, our coffee bar has a concrete countertop so our coffee cart had to as well!
For this part we sanded down the countertop piece that came with the IKEA play kitchen so it would have some grit for the concrete to attach. We spread a very thin layer of vinyl concrete patch on the countertop piece.
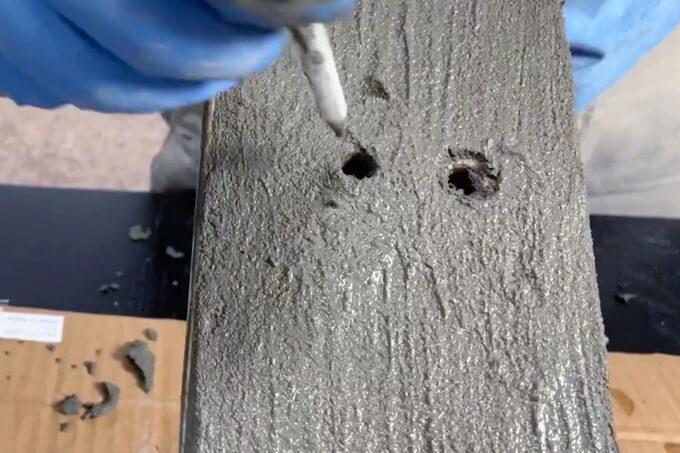
6. When doing this it was important to make sure we removed any concrete that got into the predrilled holes because we knew we would need them later to attach the top shelving piece!
We did this by using a pencil and clearing the concrete out of all the holes in this piece.
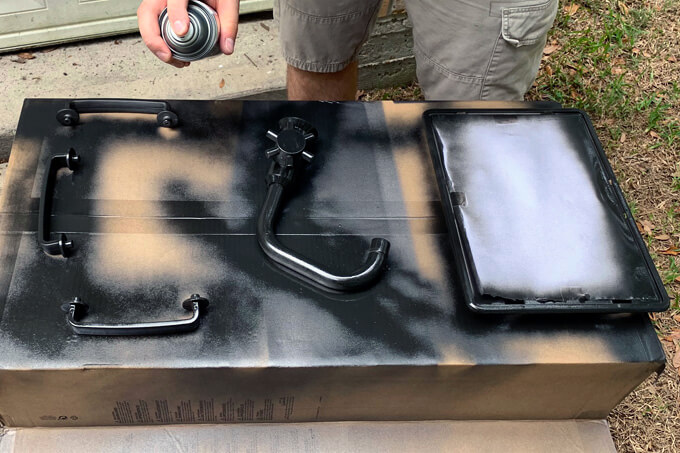
7. While the concrete was drying, we moved on to sanding (with 150 grit sandpaper) and painting all the hardware pieces (handles, faucet, outer part of the stove) with a black matte finish spray paint.
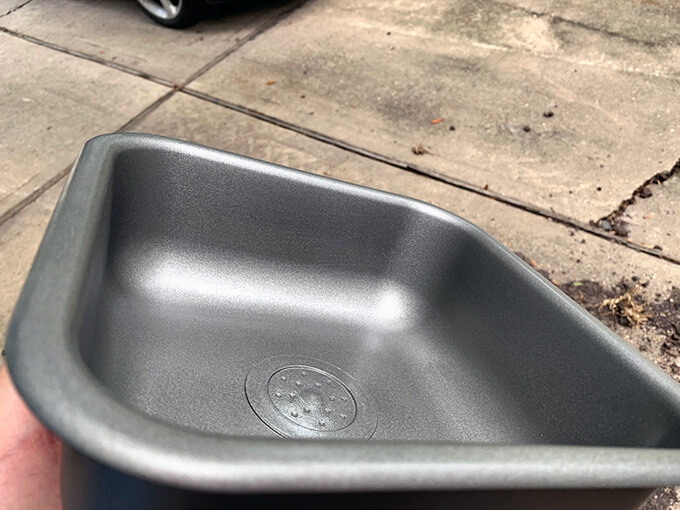
8. Since we designed the coffee cart with an industrial vibe in mind, we decided to paint the sink, microwave pieces, and oven/cabinet to look like stainless steel.
We painted all these pieces with a Rust-Oleum flat metallic antique nickel spray paint.
We would recommend painting the shelf inside the “oven” as well with this same antique nickel color. We ran out of spray paint but plan to do update this in the future.
9. We want to store this piece with the back facing out so the design on the back of his IKEA play kitchen would be equally as important as the front.
We have a large framed chalkboard over our coffee bar so it only makes sense to somehow incorporate a chalkboard menu into our play coffee cart.
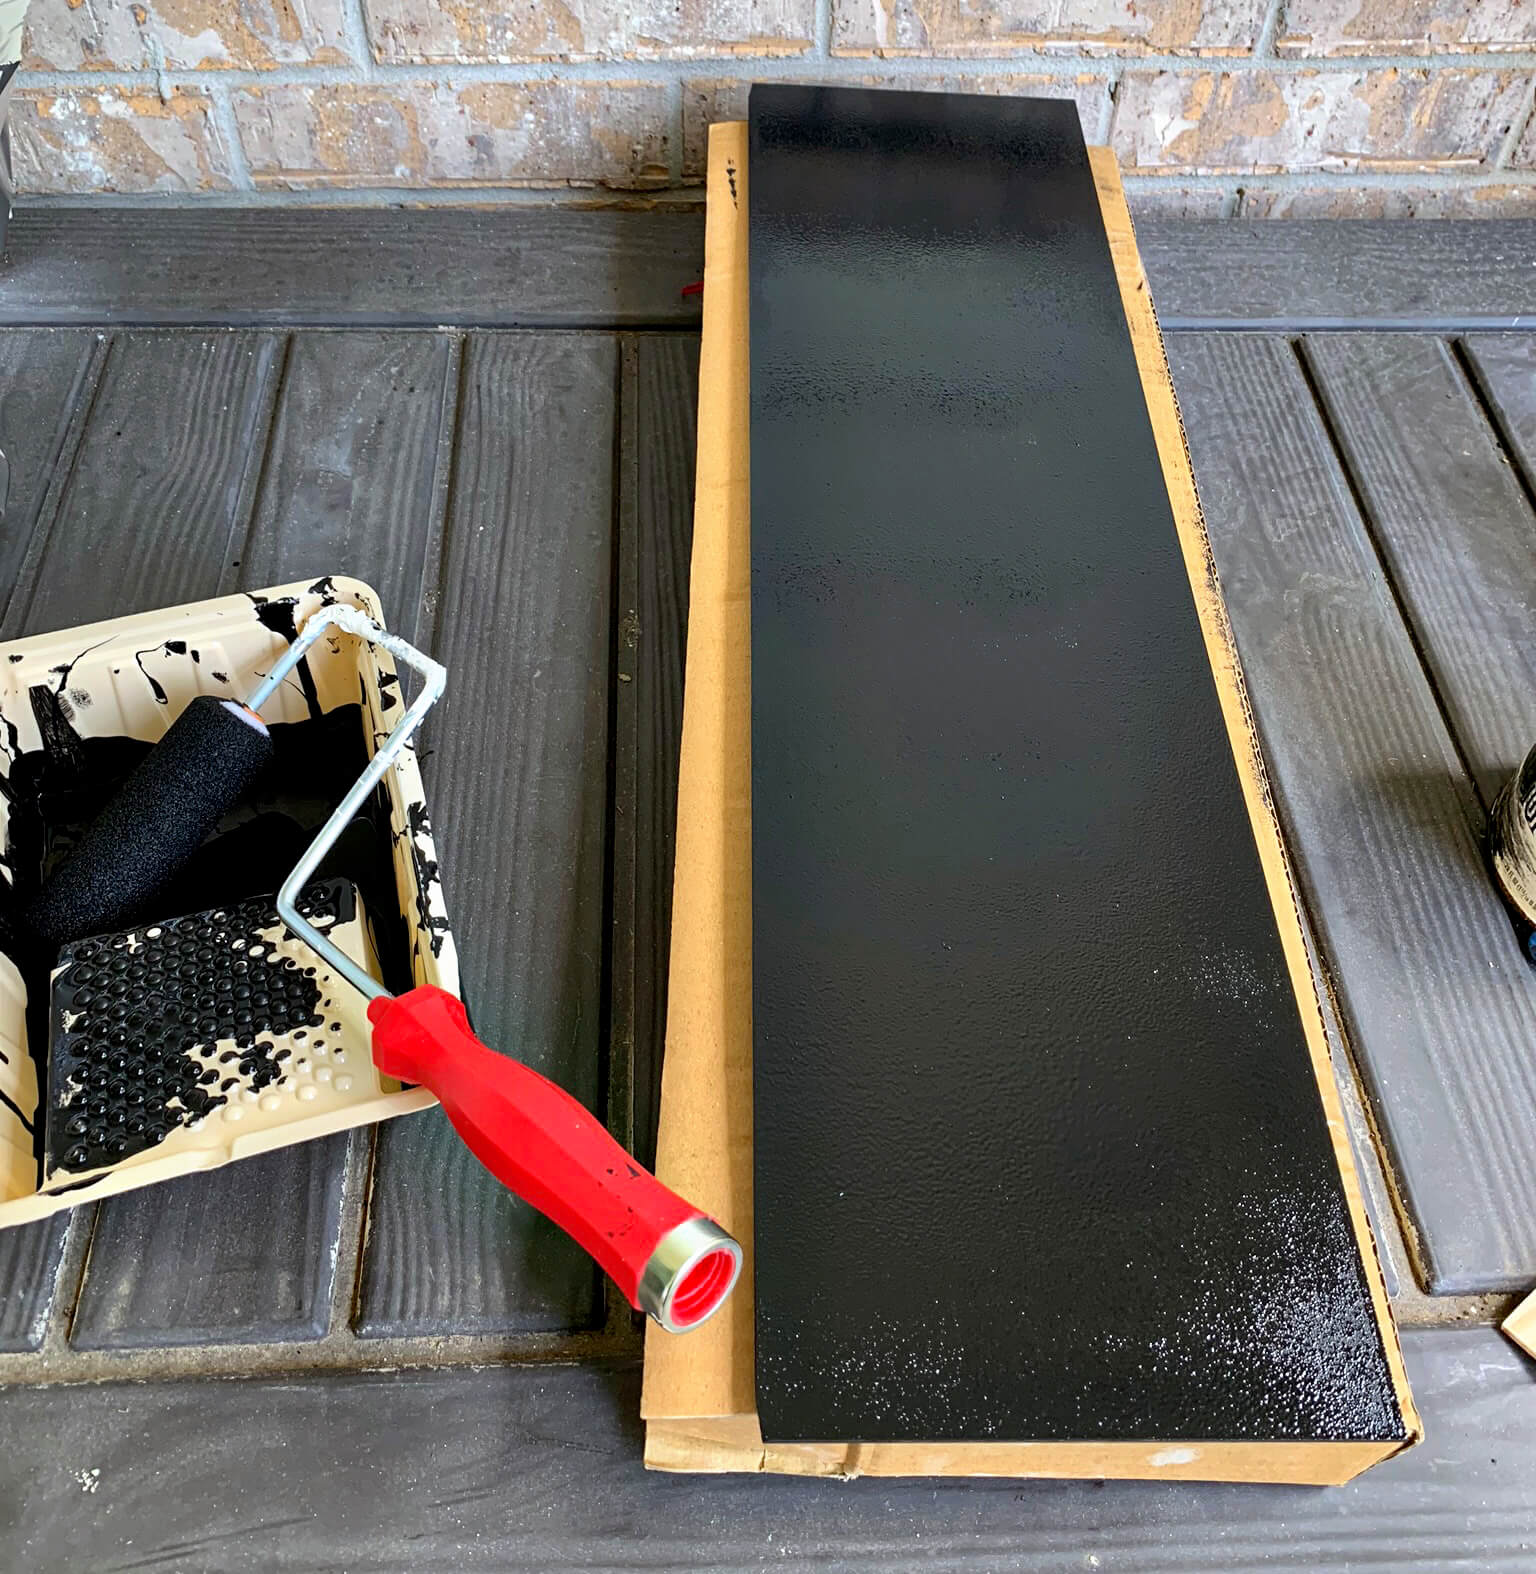
The thin board that is the backing on the top shelf actually makes for the perfect mini chalkboard. I sanded and then painted both sides of this board with Rust-Oleum black chalk board paint and a high-density foam mini paint roller.
PART 2: ASSEMBLE THE IKEA PLAY KITCHEN
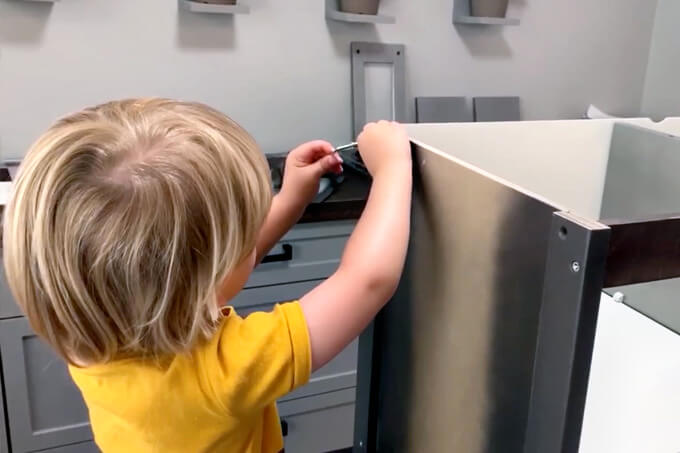
Once the paint dried on all the pieces, we were excited to finally start assembling our IKEA play kitchen. For this part we just followed the instructions that came in the box. We didn’t modify anything. Connor really enjoyed helping putting it together.
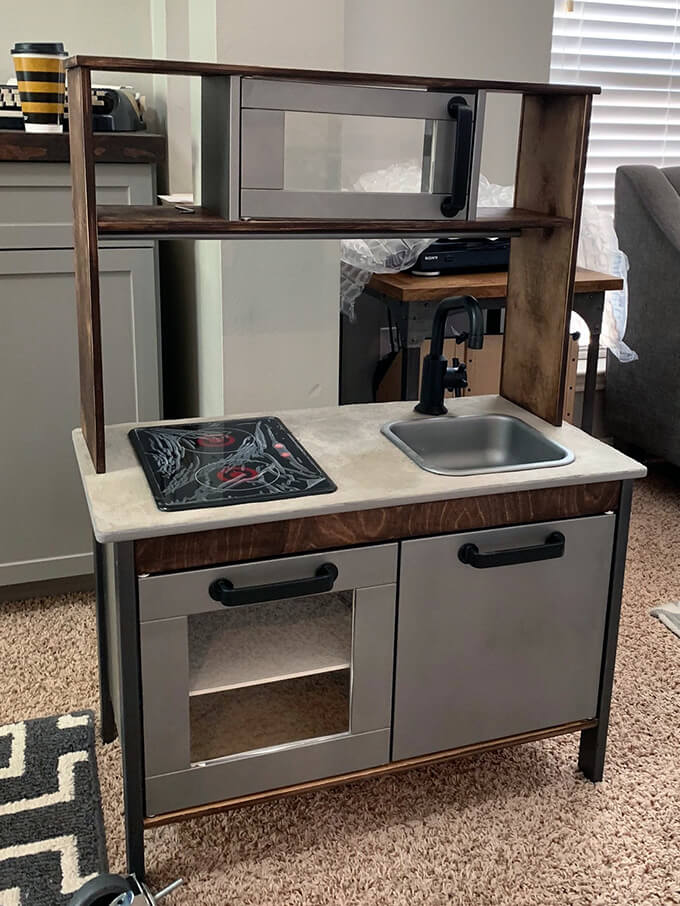
At this point the IKEA play kitchen is pretty much finished. Up to this point all we really did was the change the colors of the pieces.
Next, we moved on to making it look more like our coffee bar and add the cart functionality.
PART 3: ADD THE WOOD PANELS AND SIGN
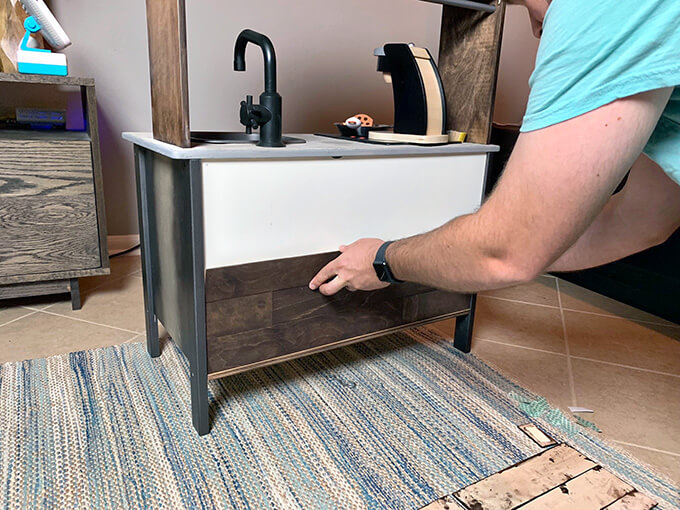
10. Next, to make our mini coffee cart look like our coffee bar we had to add wood paneling to the front and sides of the cart.
To make these we used our table saw to cut pieces out of ⅛” plywood at various lengths.
We then stained all the boards with the Rust-Oleum Kona wood stain and attached them to the front and sides of the play kitchen with permanent mounting tape.
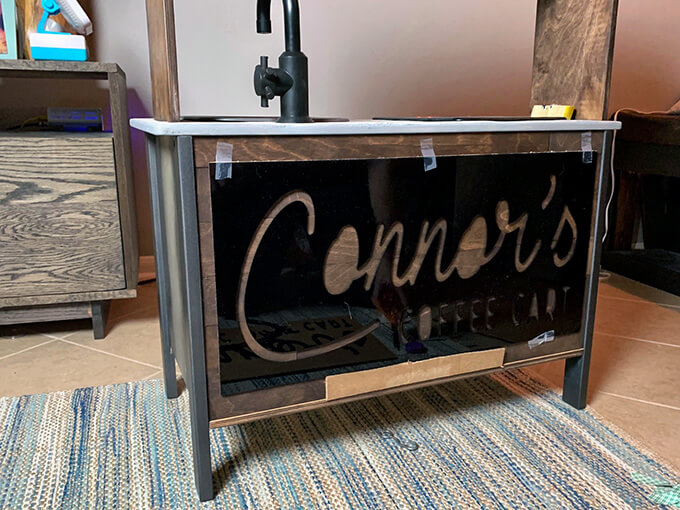
11.Then we attached our acrylic coffee sign on the wood panels. Since the letters are all individual pieces, we have a little trick for making sure they are all centered properly and line up correctly. To do this we took out all the individual letters and taped the back piece it was cut out of centered on the front of our cart.
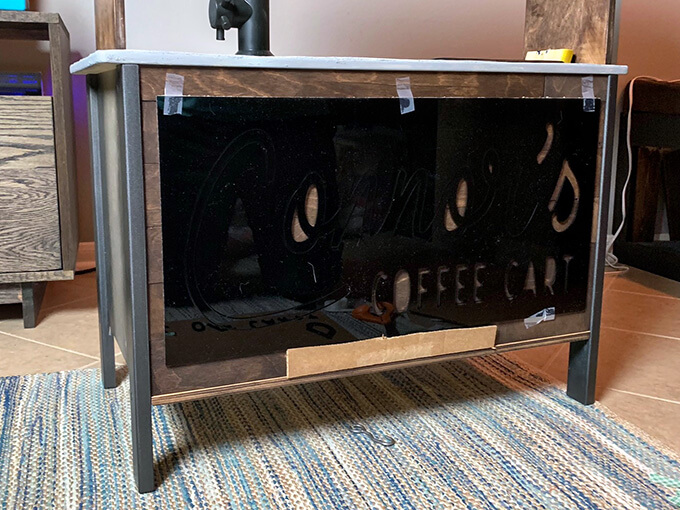
12. Next, we cut small pieces of mounting tape and put them on the back of each letter. We put the letter back in the space where it was cut out and stuck it to the coffee cart.
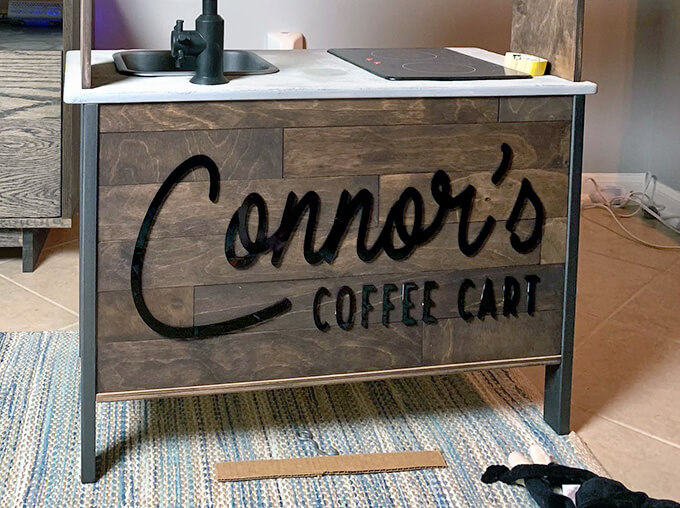
13.Once we did this for all the letters we took the original acrylic piece off and discarded it. This is a simple way to make sure all the individual letters are perfectly lined up how they should be.
Some of the pieces were small and you could see white tape, this wouldn’t be an issue if the sign was white. But since our sign is black, I took a black sharpie and colored over the white tape and it blended right in with the black sign.
PART 4: ADD THE HANDLE
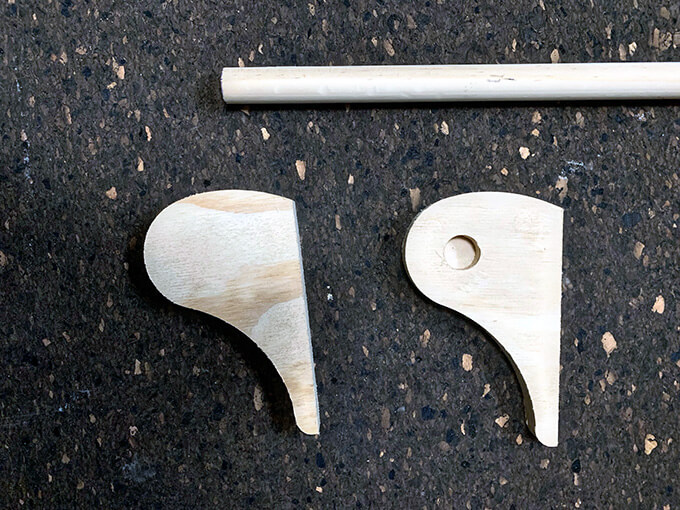
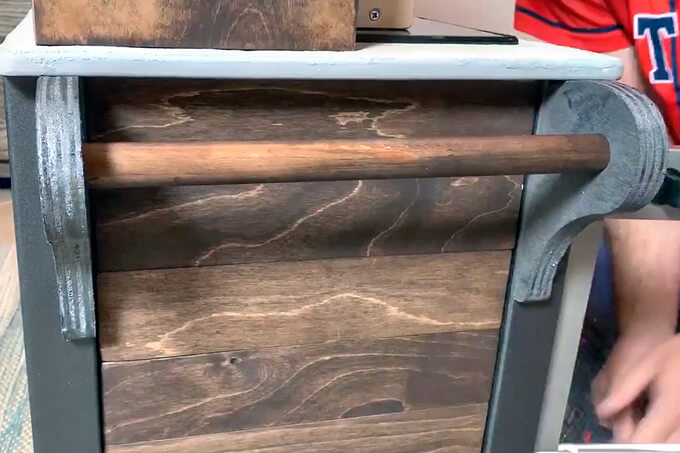
14. Next, we started working on the handle of our coffee cart.
The handle is made up of three parts. Two side pieces that we cut out of 3/4″ plywood.
These pieces are connected by the dowel rod.
We stained the dowel rod with the Kona wood stain and spray painted the side pieces with the metallic soft iron spray paint to match the legs of the IKEA play kitchen.
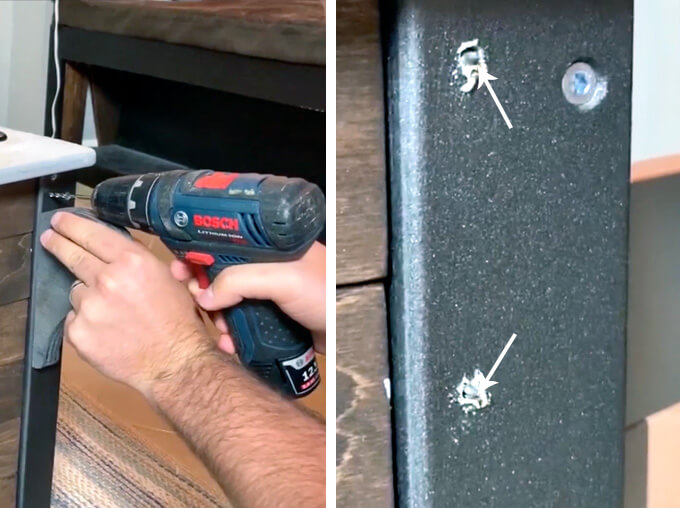
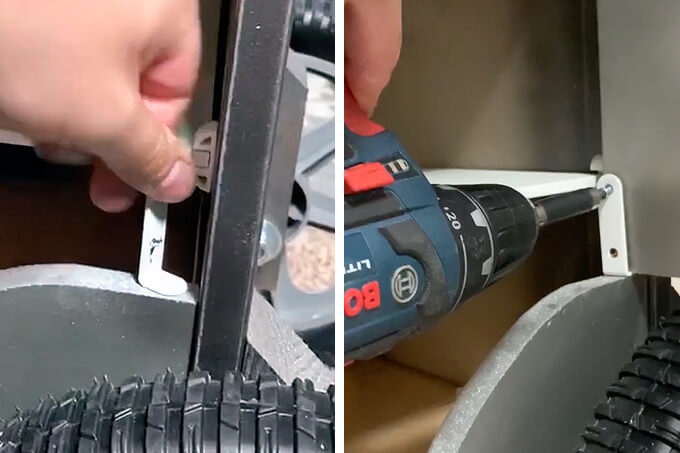
15. To attach the handle we used a drill to drill two pilot holes.
Then we came from the inside and stuck the drywall screws through the holes so they were slightly sticking out.
16. We pushed our side handle piece into the screws so they would make indentations in the side handle piece.
This provided a guide for us to drill pilot holes on the side handle piece.
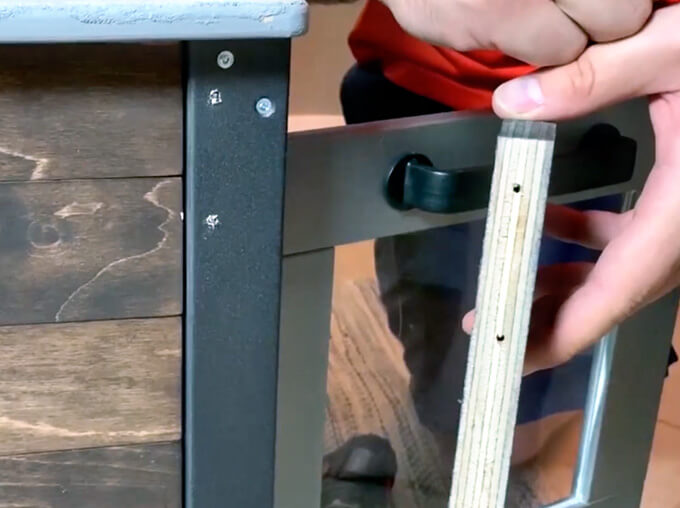
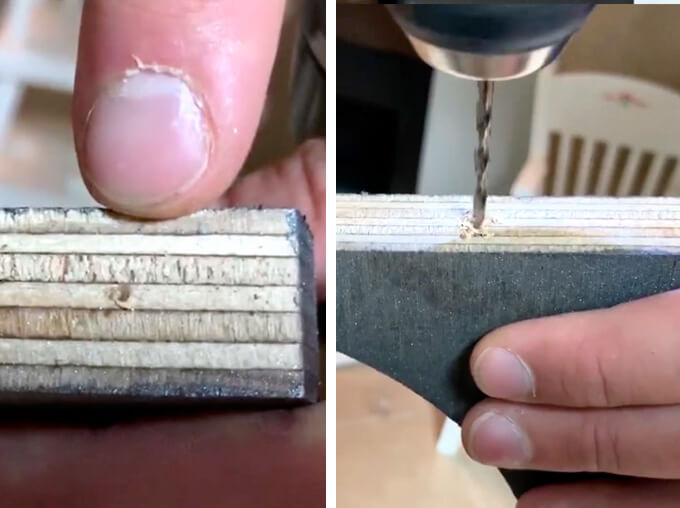
17. Once we had holes drilled in the leg and our side handle piece, we matched the holes up and attached the two pieces together with drywall screws.
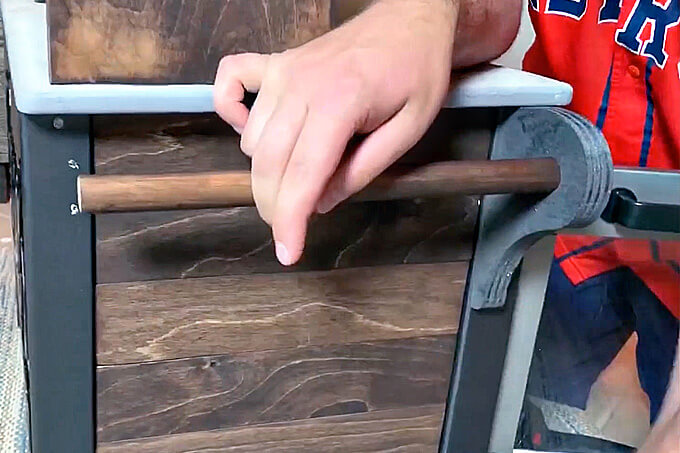
17. Next, we put the dowel rod into the slot in the side piece handle
18. Then repeated the previous step to attach the second side handle piece.
PART 5: ADD THE WHEELS
18. We cut two pieces of 1″ x 2″ red oak board down to size and spray painted them with the flat metallic soft iron spray paint so they would blend in with the toy kitchen’s legs.
We attached a 3 in. swivel caster with a brake to each piece. These pieces made up our front wheels.
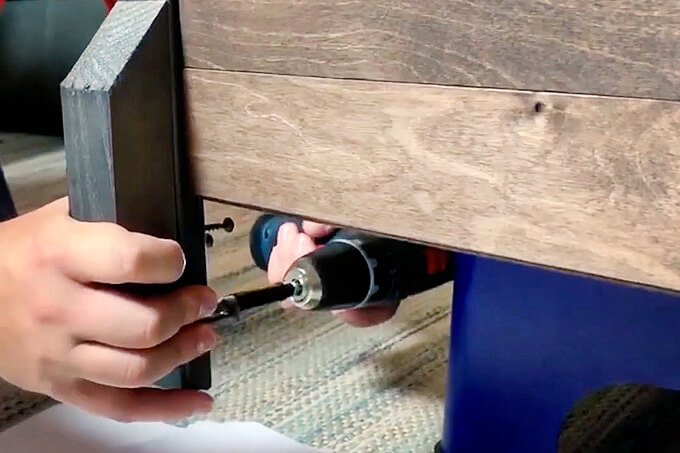
19. To attach the front wheels we drilled pilot holes and then used the sharp tips of the screws poking through the holes to make marks on the board attached to the caster to get the correct spacing.
Then we screwed in the board with the caster to the leg of the play kitchen.
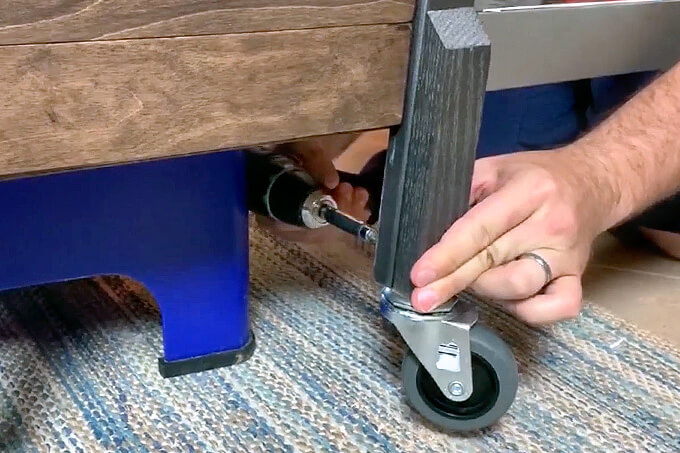
The large wheels were attached using 2”x2″ oak boards.
We cut two pieces down to the size we needed.
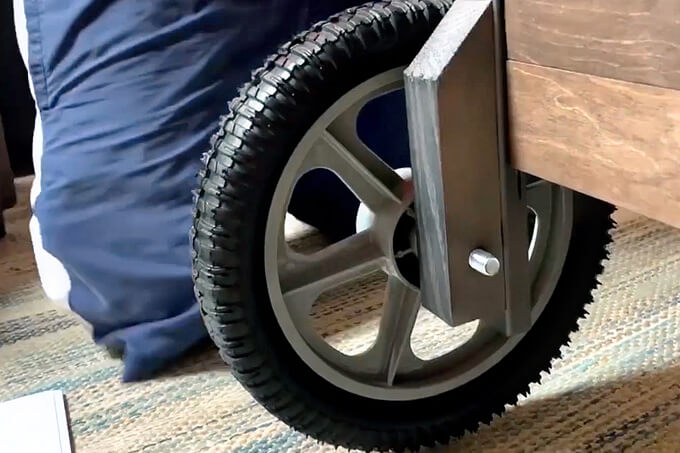
We drilled a hole for the bolt that would attach the 12″ X 2” plastic wheels in each of these pieces.
Once we attached the wood pieces to the cart, we attached the large plastic wheels and it was mobile!
A problem we ran into with the wheels is one of them covers up the bottom door hinge.
I didn’t want to lose the functionality of the door because it would take away storage space and that is part of the fun for toddlers, opening and closing cabinets.
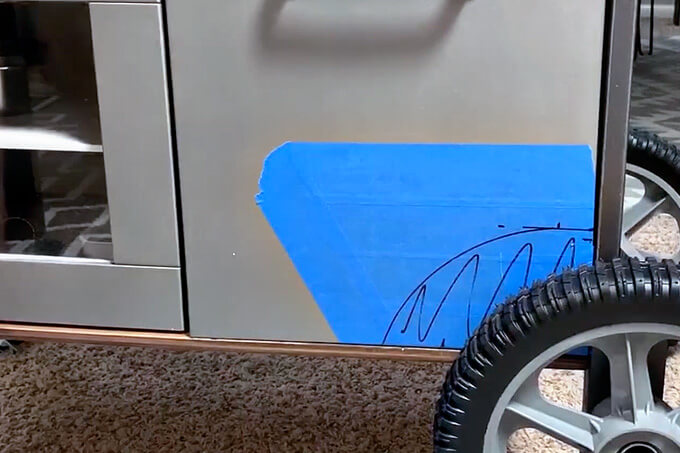
Brent’s solutions was to cut a wheel well into the door. He put blue painter’s tape over the area he was cutting. This allowed him to draw a template of the area he needed to cut and helped to not mess up the paint.
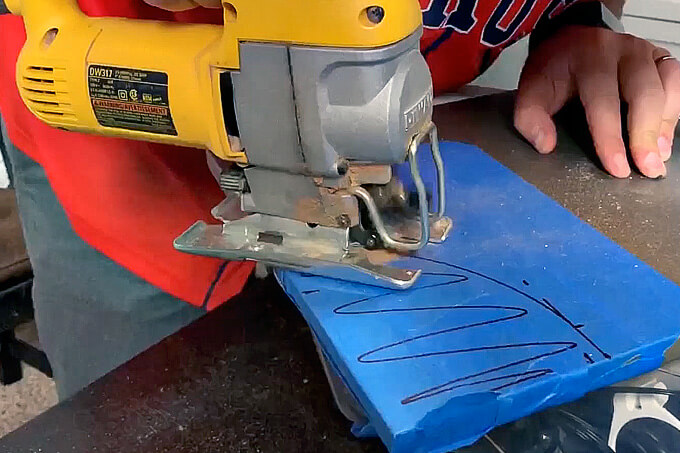
He used a jigsaw to cut out the piece of the door that needed to stay in place in front of the wheel.
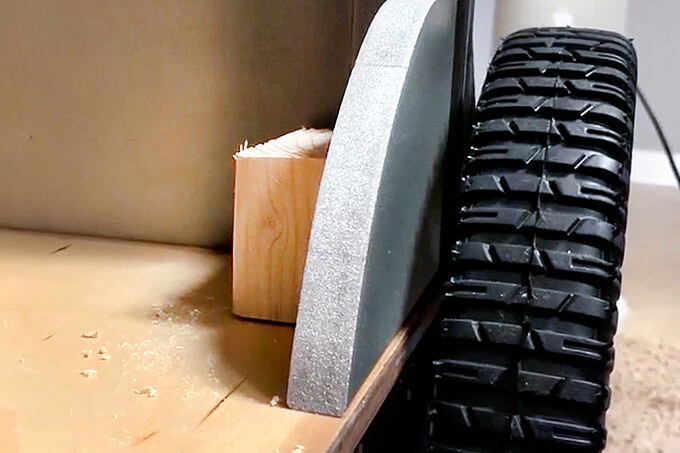
He added a piece of 2”x4” to hold the small bottom piece of the door in place.
Then we reattached the hinge to the top of the small bottom section of the door. Then we reattached the large piece of the door back to the hinge the same way that was in the initial IKEA Duktig play kitchen assembly instructions.
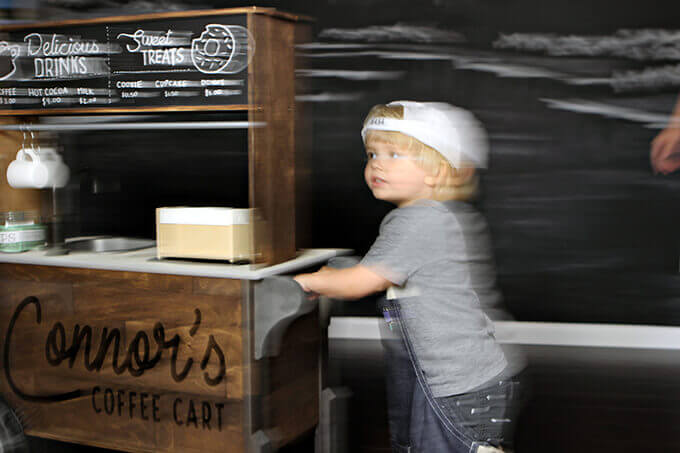
He was so excited to jump in and play that there was not a chance we were going to be able to get a picture of him posing next to his new coffee cart. This is the best picture we could get but that is okay!
This was a project the whole family got to work on together! We had a lot of fun coming up with the new design of our IKEA play kitchen hack and executing our plan in turning it into a play coffee cart.
We all three enjoy playing with our finished project!
coffee cart decor
- Felt Donuts: I made mone! (similar ones you can buy here)
- Play Coffee Maker: Hape
- Wood Play Cash Register: similar one here
- Kid’s Denim Apron: similar one here