House

Linen Closet Organization

Linen Closet Organization

Linen Closet Organization

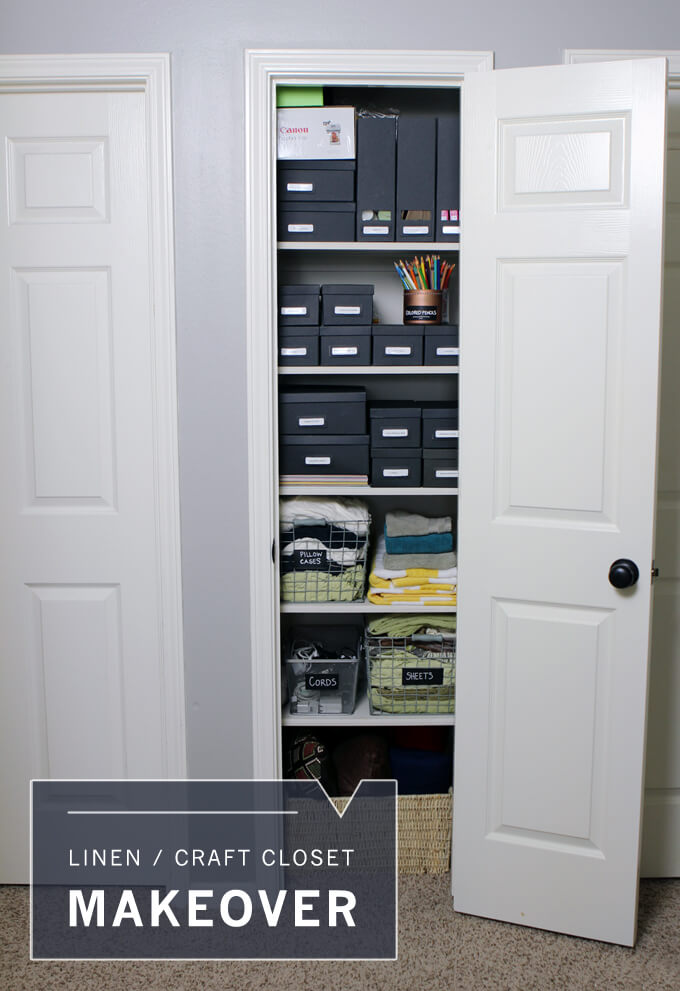
This week we took advantage of the extra hour to work on some linen closet organization. There is just something about a freshly organized closet that makes me super happy. Ah, it is the little things like purging old junk and storing supplies in matching boxes to make it a good week.

When we started working on our home gym we pulled all the craft supplies out of the closet in that room and have been “storing” it on the guest room floor for the past three months. It has been difficult to find supplies for our projects. I was anxious to create a system so the next time Brent asks me where our double sided tape is I can give him a definite answer rather than “somewhere on the guest room floor”. Life is glamorous sometimes over here at Gray House Studio.

We have been planning on building a craft cabinet but other projects have come along and bumped it further down our to-do list so we started looking for a quick solution to get all the stuff off the floor (so our guests don’t have to walk through a maze of paints and pencils to get to their bed) and decided that our hall linen closet would be the perfect place to store all of our craft supplies.
Linen Closet Organization

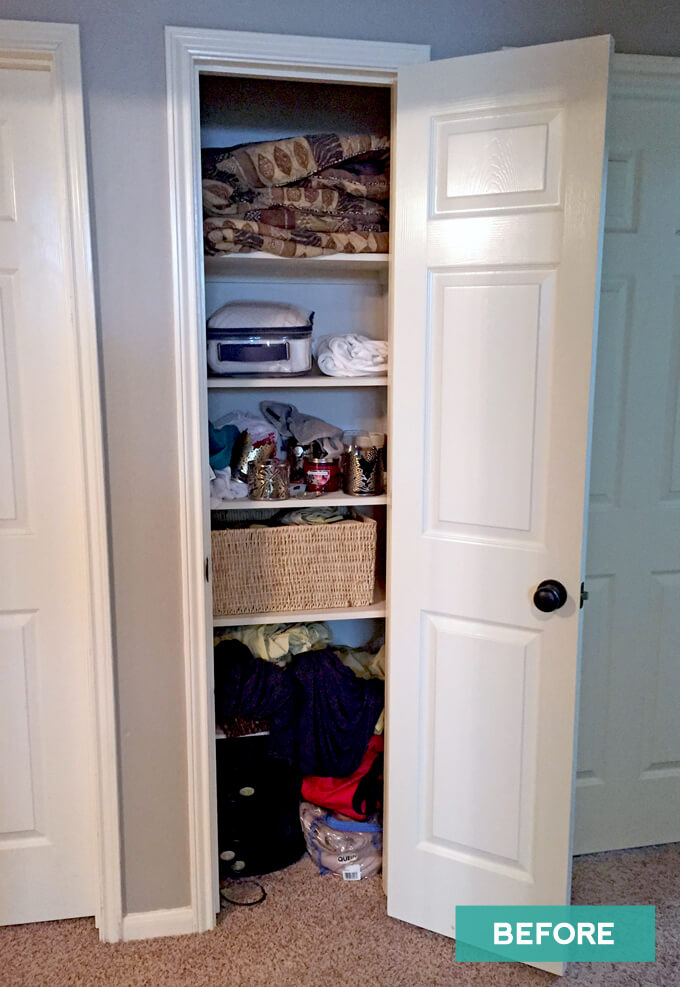
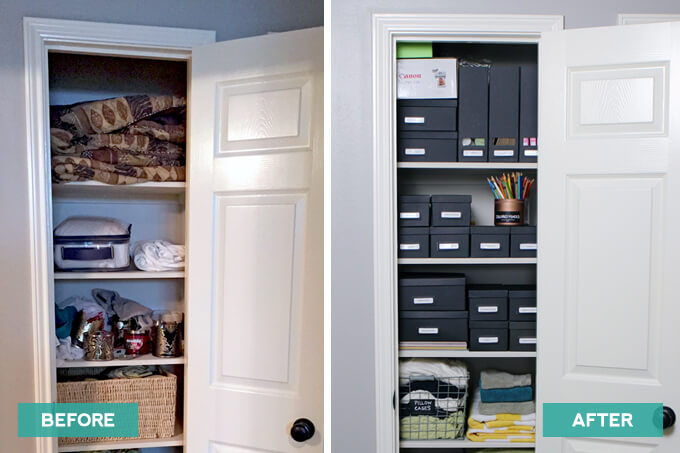
Here is what our linen closet looked like this time last week. There were some sheets, some blankets, pillow cases, towels, etc. It resembled a linen closet but there just seemed like so much wasted storage space. It isn’t a huge closet but if organized properly, I was sure we could fit both linens and craft supplies in this space.
Linen Closet Organization

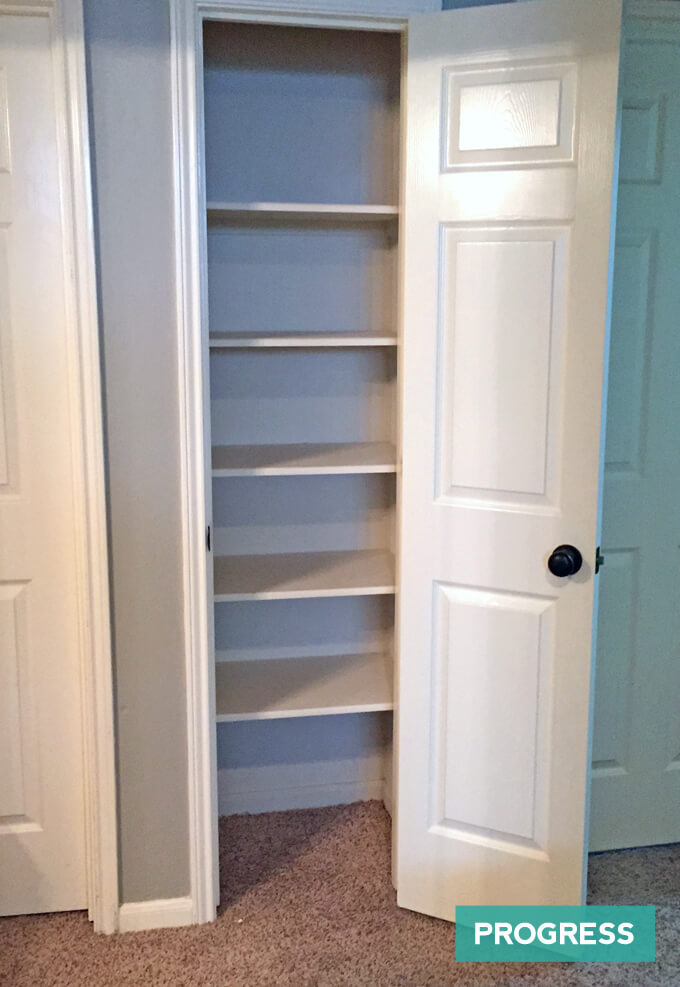
The first thing we did was pull everything out of the closet and create an even bigger mess in the guest room and the hall and the entry way. Doesn’t it seem like you have to create a mess to organize a mess? I like starting organization projects with a blank slate so I can get a good idea of how much space I am actually working with.
Linen Closet Organization

The one thing that holds me back from organizing is money. It is a dream of mine to have all our cabinets, drawers and closets neatly organized with matching baskets, bins and boxes but I can’t ever seem to pull the trigger on purchasing these items because you can’t just buy one or two you have to buy several and they can add up quick.

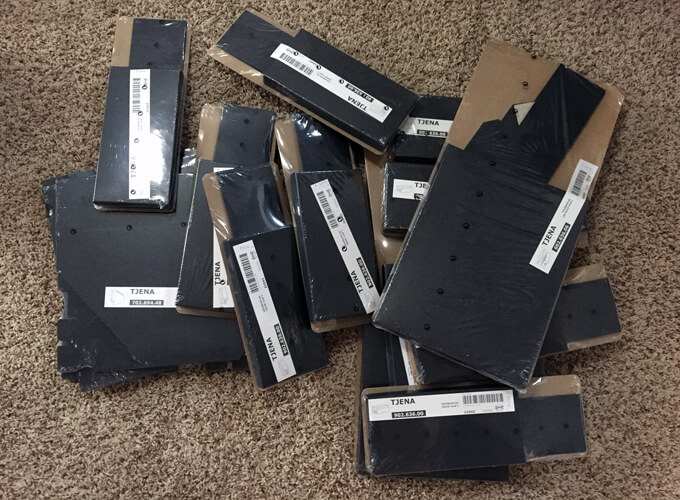
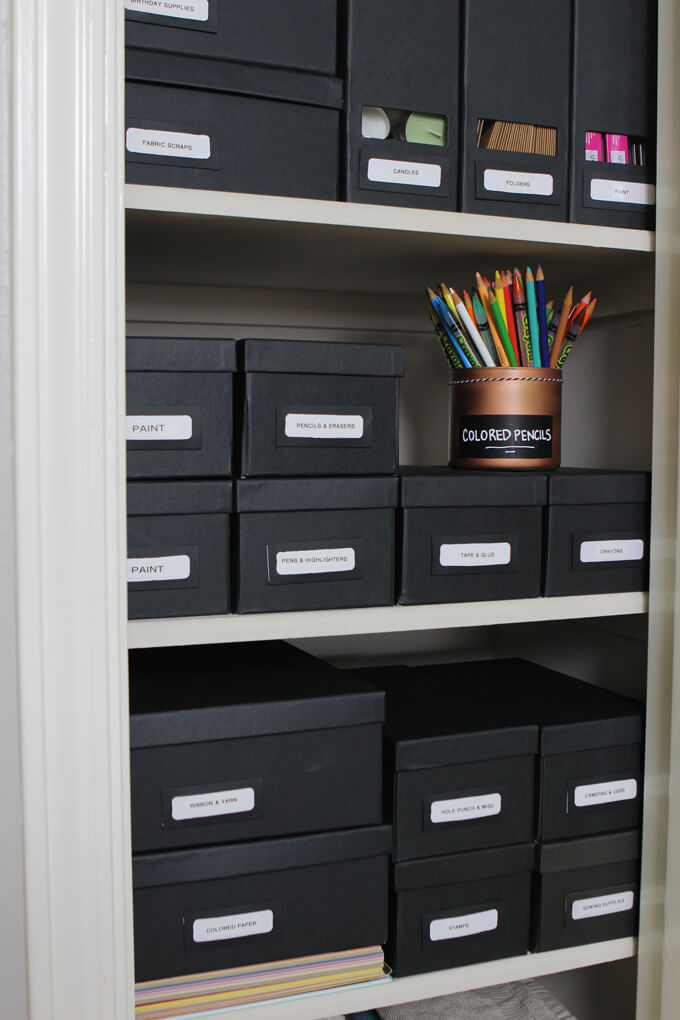
This closet was going to take a plethora of boxes because we needed to store a lot of small items like glue bottles, ribbon, tape, pencils, etc. We ended up using three different sizes of the TJENA boxes in black from IKEA.
Linen Closet Organization

The price was great ($3.99 for the large box that came with an option to add compartments, $1.99 for the smaller box, and $3.99 for a two pack of the magazine files).

They were paper boxes so I was skeptical about how sturdy they would be but we are very pleased with the quality. They are easy and quick to assemble. I used our label maker to create labels for each of the boxes to create a uniform look.
Linen Closet Organization

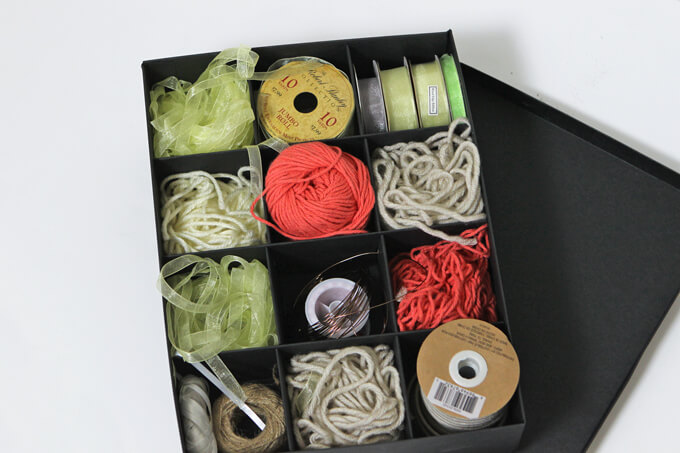
The large box comes with another piece that you can add to break up the inside into small compartments. It was perfect for storing all of our left over ribbon, yarn, twine, etc. I also used these large boxes to store paper and fabric scraps. I’m just over here in organization heaven.
Linen Closet Organization

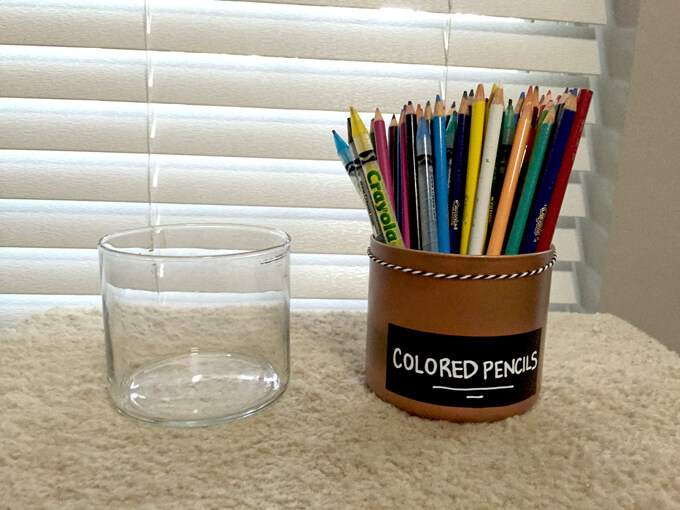
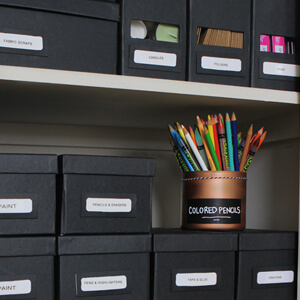
We use our colored pencils the most for sketching project ideas. I wanted to create an easy way to grab them out of the closet but I didn’t want to spend any money.

I took one of my old candles from Bath & Body Works that just had a tiny amount of wax at the bottom and cleaned it out using a trick I found online which involves pouring boiling hot water into the jar so all the wax can come up to the top of the jar. I let it cool for a few hours so then I could just pop the wax and the wicks out. It works great and I like finding ways to recycle these jars.

After I cleaned it out really well, I spray painted it and stuck my favorite chalk tape onto it. It was a fast, easy and free storage solution.
Linen Closet Organization

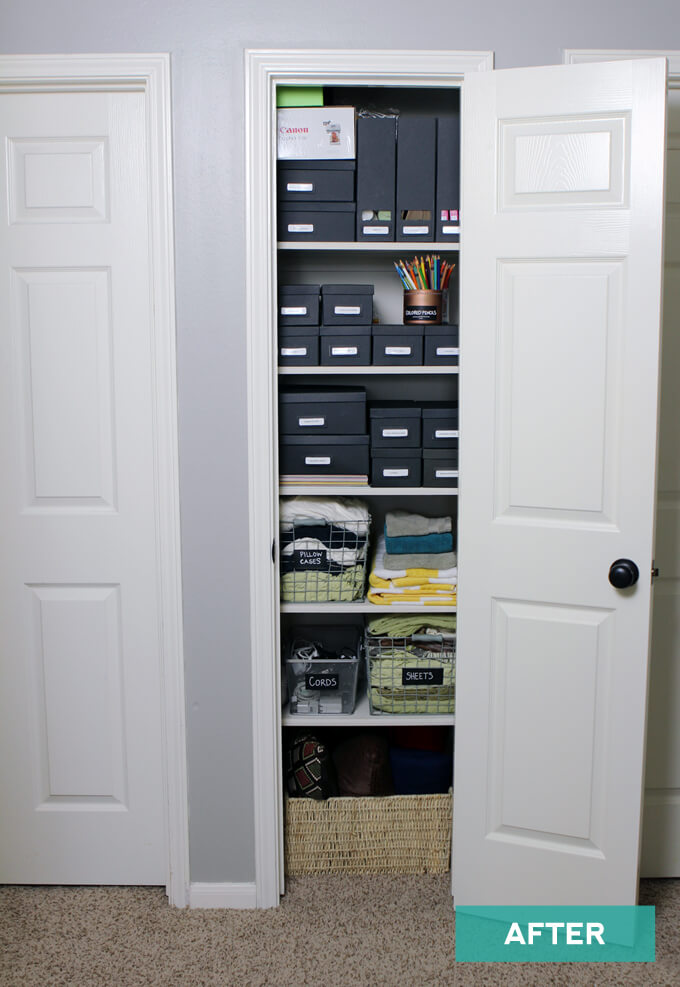
Once all of our craft supplies were nicely organized in the top half of the closet, I started working on arranging the linens in the bottom half. We purchased two inexpensive wire baskets from HomeGoods. In these we are storing our extra sheets and pillowcases. Eventually I would love for all these to match. All white pillowcases and sheets for guests would be ideal and for the designer in me, look a lot nicer matching in the closet.

We store all the guest towels in the guest bathroom, all of our blankets in our living room ottoman and the extra blankets in the guest room closet. We just don’t have a ton of extra linens to fill up an entire closet in this stage of our life.
Linen Closet Organization

What a difference, no more wasted space! Does it mean that we are not grown ups yet if we have more craft supplies then linens in our newly organized linen closet?

It may seem like a strange choice, but Brent and I like making spaces work for us and to use them to create solutions to solve our storage problems or fit our interests and our recent linen closet organization project is the perfect example of just that.

DIY Concrete Countertop

DIY Concrete Countertop

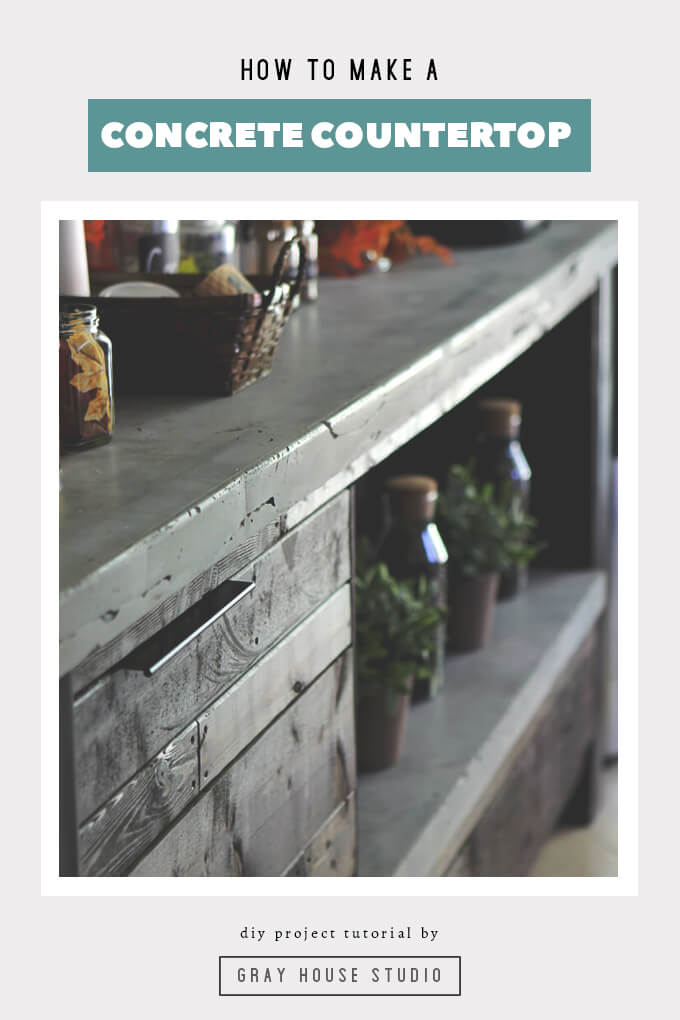
In this DIY tutorial we will show how to make a DIY concrete countertop as well as 5 concrete mistakes to avoid.

DIY Concrete Countertop

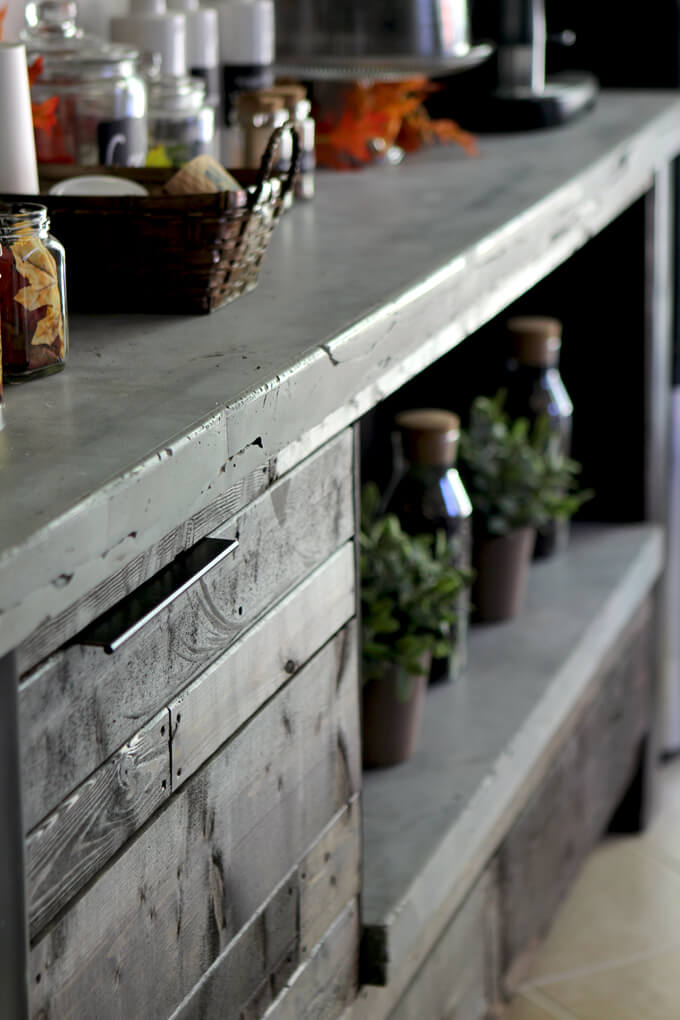
Hey everyone! It’s Brent here today sharing all the details about the DIY concrete countertop we built for our coffee bar.

It has been several months since we finished the concrete countertop on our coffee bar and we haven’t been anxious to post about it because it was a pretty frustrating experience.

However, we have been asked several questions about how we made the top of our coffee bar so now that the appropriate amount of time has passed that we can laugh about our mistakes, we are sharing the whole messy process.

This was our first time to use concrete on such a large scale so needless to say there were aspects of making the DIY concrete countertop that were frustrating.

Despite how crazy the process was, we are extremely pleased with the finished result. It turned out amazing. So we are here to tell you the never give up pep talk works.

Before we jump in and show you how we poured the concrete slab, we thought it would be important to share five DIY concrete countertop mistakes to avoid to help others bypass the battle that we went through.

5 DIY Concrete Countertop Mistakes to Avoid

DIY Concrete Countertop

1. OVER TIGHTEN SCREWS IN THE FORM

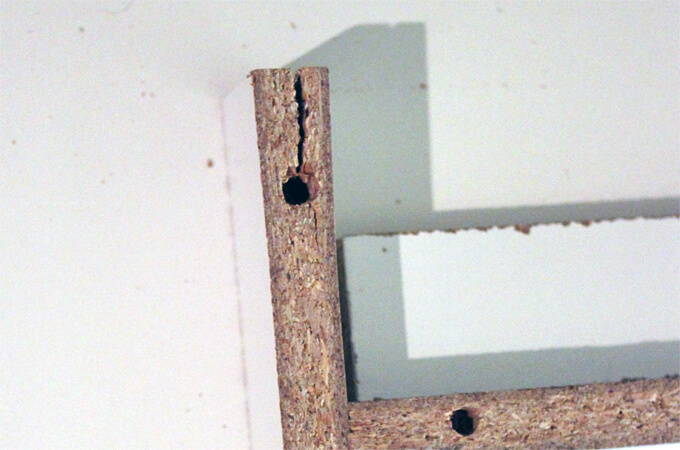
The walls of the melamine form is attached to the base with screws. If the screws are over tightened the walls of the form will split and warp.

DIY Concrete Countertop

2. FLY SOLO

The plan was for Courtney to document the project but it didn’t take long before I was frantically asking her to put the camera down to help me. Since concrete only has a small window to work with it is important to have an extra pair of hands around.

DIY Concrete Countertop

3. MIX BY HAND

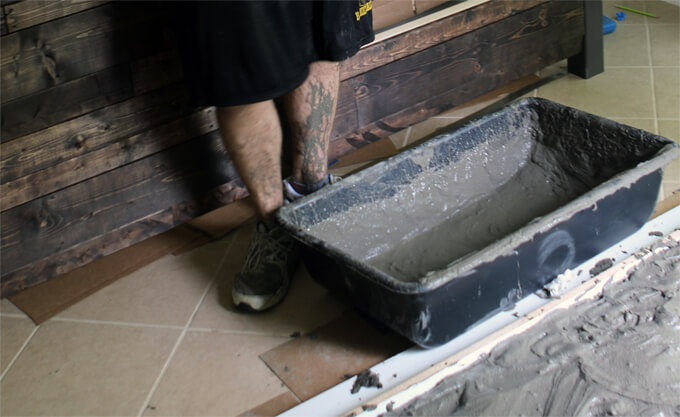
We bought a large tub to mix the concrete in and thought we were prepared because we would be able to mix two bags at one time. We needed five bags for the largest slab.

While the tub did allow us to mix more concrete in a single batch, doing it by hand took way too long and the concrete started setting up in the tub. Plus, the more concrete we mixed in the tub the tougher it was to transport to our form.

A mixer allows you to mix and transport multiple bags of concrete without worrying about the concrete setting up. It is worth $45 dollars to rent a concrete mixer for a day.

DIY Concrete Countertop

4. THINK YOU WON’T MAKE A MESS

We didn’t have enough space in our garage for this project and we figured since the piece of furniture would ultimately be situated in our breakfast nook, we might as well build it there.

We covered the tile floor with plastic and cardboard to protect it from any stray concrete and luckily no concrete escaped the plastic.

However, there was one moment where I slipped coming in from outside with 80 lbs. of mixed concrete in my arms.

It was in that moment while I was trying desperately not to spill any of the concrete onto our kitchen floor that I realized you can’t guarantee a project with no mess and it is best to take every precaution when planning a project.

It is also probably wise to make sure you have plenty of time to complete a project before you begin.

DIY Concrete Countertop

5. BELIEVE CONCRETE IS EASIER TO CLEAN AFTER DRY

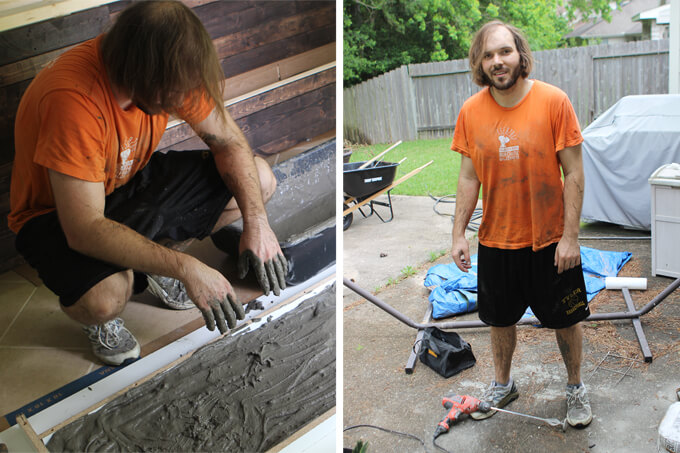
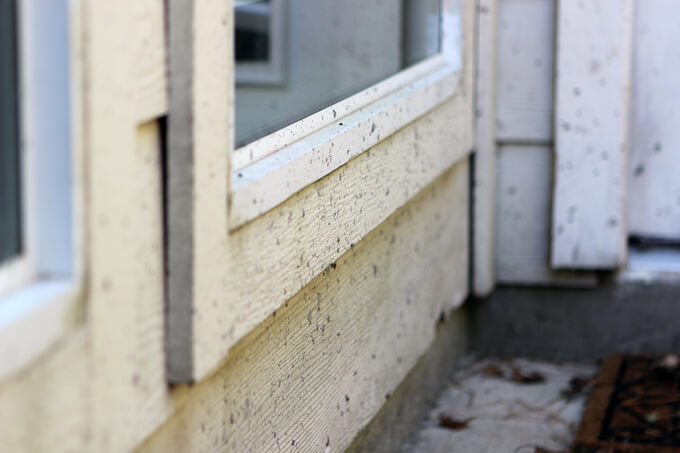
Dry concrete flakes off slick surfaces easily but we learned not painted surfaces. We mixed the concrete on our back patio and in the disarray of the time crunch, splattered quite a bit of wet concrete on the house.

Worried about the concrete mix drying, we assumed the concrete splatter would flake off once dry.

Well, you know what happens when you assume. The concrete fused to the paint and the only way we found to remove it was to pressure wash it AND the paint completely off the siding.

Repainting the back of the house has now been moved up on our to-do list. Oops.

How We Made the DIY Concrete Countertop for our Coffee Bar

SUPPLIES

FYI: This post contains a few affiliate links to products we used to make this project. Gray House Studio does receive commissions for sales from these links but at no extra cost to you. We appreciate you supporting this site. Read our privacy and disclosure policy. You can also easily shop our recommended products here.

STEPS

DIY Concrete Countertop

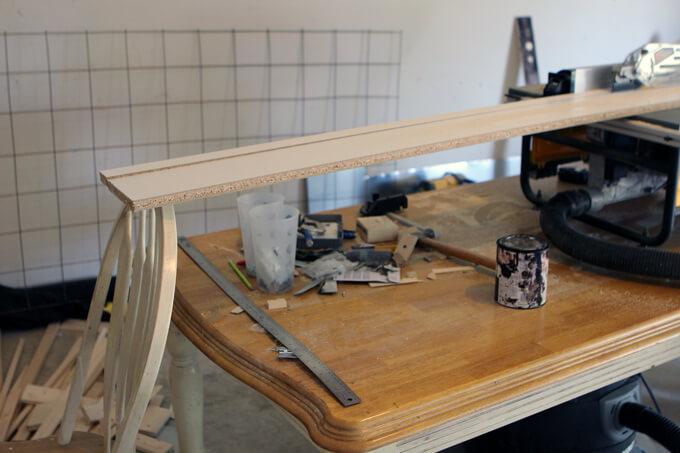
1. First we took a 4’x8′ sheet of 3/4″ melamine board and cut into strips.

The width of each melamine strip should be the same size as the DIY concrete counter top will be thick.

DIY Concrete Countertop

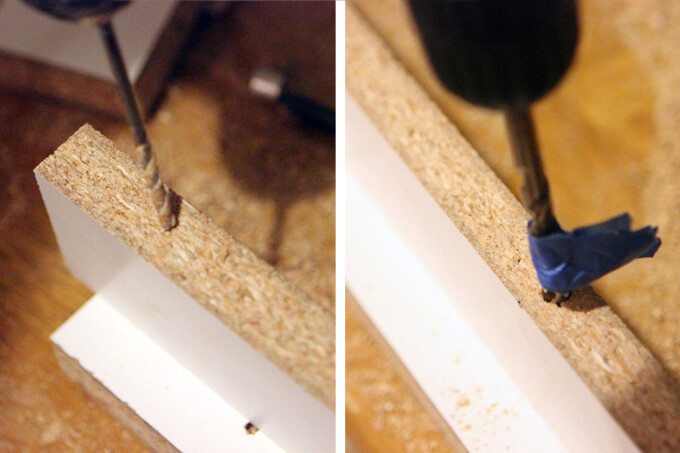
2. Once the strips were cut to the correct length to frame the outside of each slab, we used a drill and drill bit to pilot holes for the screws.

First we used a drill bit slightly larger than the threads of each screw and drilled all the way through each melamine strip.

After drilling through the entire width of the melamine strips, we used a drill bit slightly larger than the head of the screw to drill down about 1/4″ allowing the screw to be countersunk below the surface.

To avoid drilling too deep with the larger drill bit we wrapped painter’s tape around the bit to mark the correct depth.

After drilling all the pilot holes we attached the strips to the surface of a second sheet of melamine with screws.

DIY Concrete Countertop

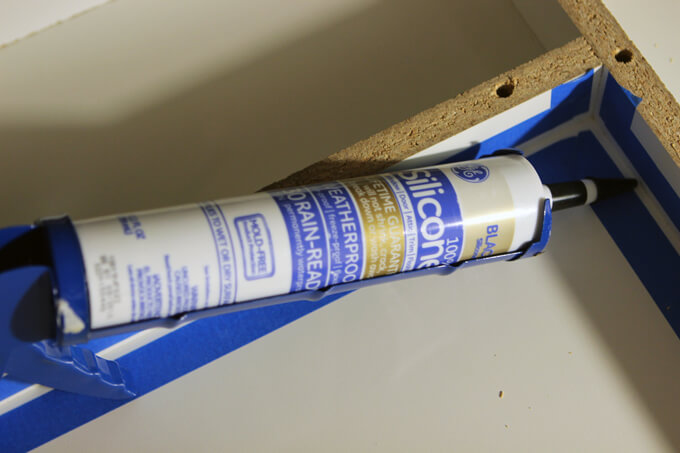
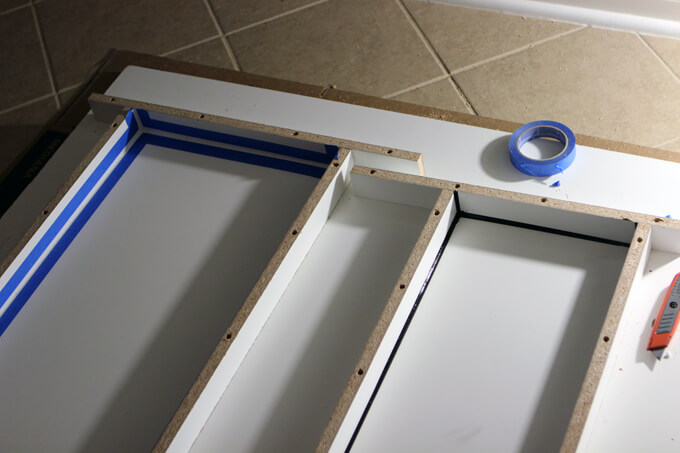
3. To create a water tight form for the concrete, we used black silicone caulk to fill the seams. We used painter’s tape to mask the surface of the melamine and create a clean caulk line.

DIY Concrete Countertop

4. After smoothing the caulk with our fingers, we removed that tape before the caulk dried to create a smooth finish.

The dark color of the caulk made it easy to see where any caulk is out of place.

DIY Concrete Countertop

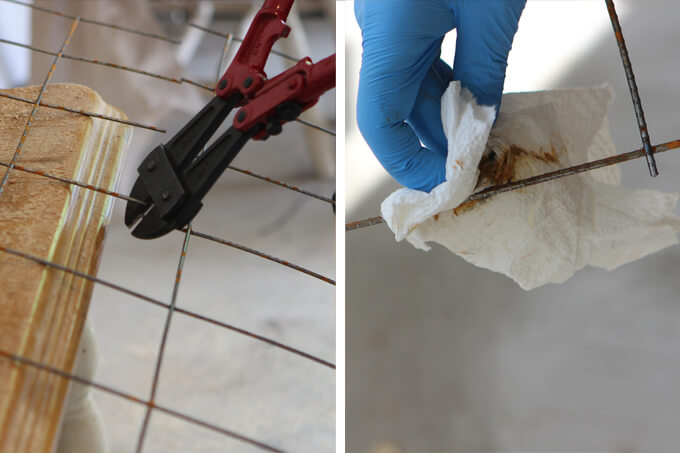
5. To create the strongest slab possible we used welded steel wire to reinforce the concrete.

After cutting the wire with a pair of bolt cutters we used denatured alcohol and a rag to wipe off any rust.

DIY Concrete Countertop

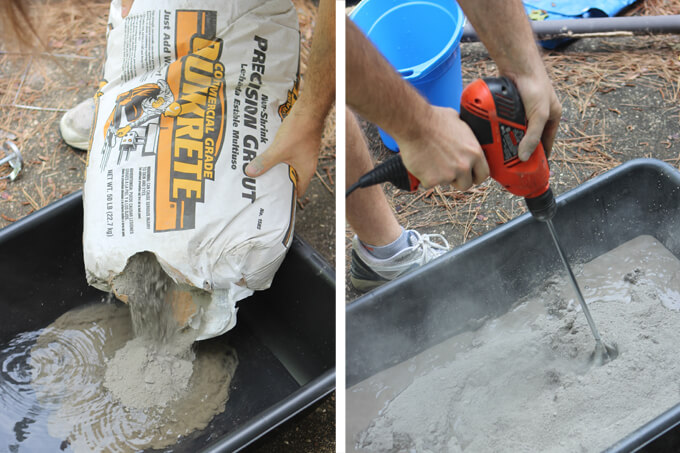
6. With the form complete it was finally time to mix the concrete.

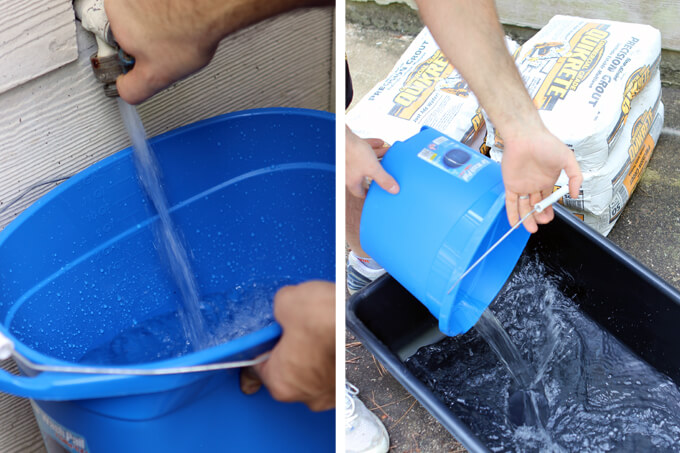
We used precision grout by Quikrete to make our counter top.

We started by using the recommended water to concrete ratio but realized after the first batch that we needed to pour slightly more water from a bucket than the bag recommended to provide adequate dry time.

DIY Concrete Countertop

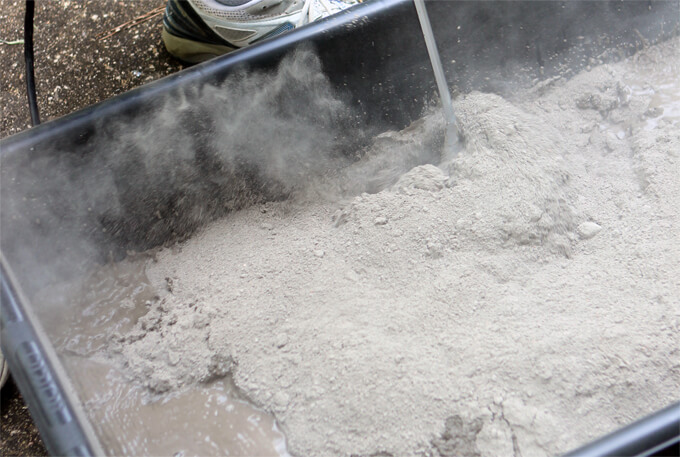
7. We poured half the mix into a large concrete mixing tub and all the water from the bucketbefore using a mixing paddle attached to a drill to blend the concrete together.

Once it blended into a consistent mixture, the rest of the dry mix was added.

DIY Concrete Countertop

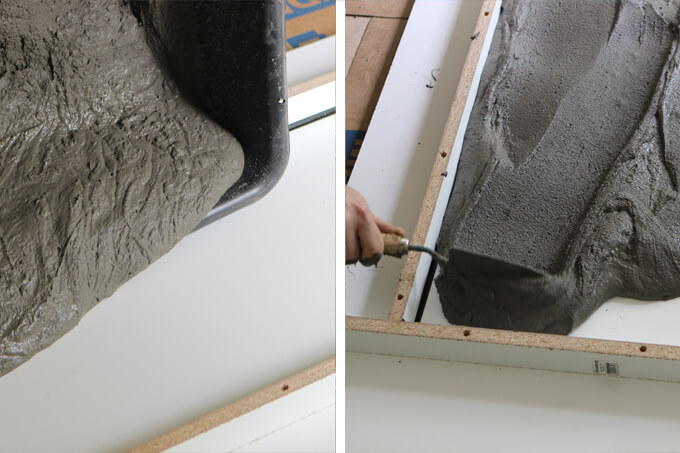
8. We mixed two bags of concrete at a time and it definitely takes more than one person to lug that much concrete around.

After pouring the concrete into the form we used a trowel and shovel to spread the concrete out.

DIY Concrete Countertop

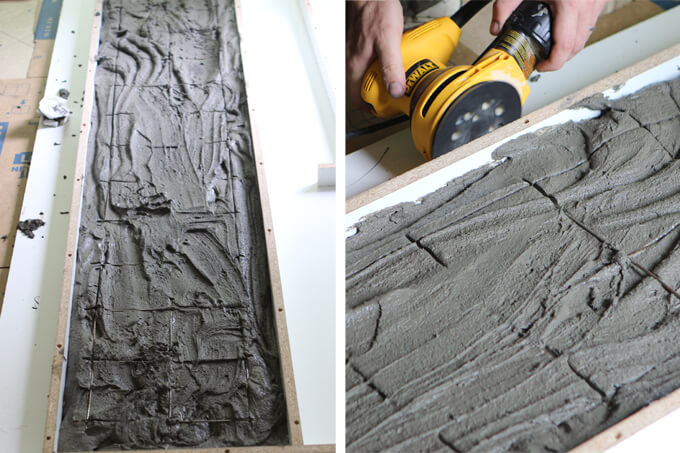
9. After the first batch was in the form and smoothed out we added the metal wire mesh. We used an orbital sander to vibrate the mixture to shake any air pockets to the surface to create a smooth finish.

We mixed the second batch of concrete and filled the rest of the form. With the entire form filled we vibrated it once more and covered the two slabs with plastic to allow the concrete to cure as slowly as possible.

DIY Concrete Countertop

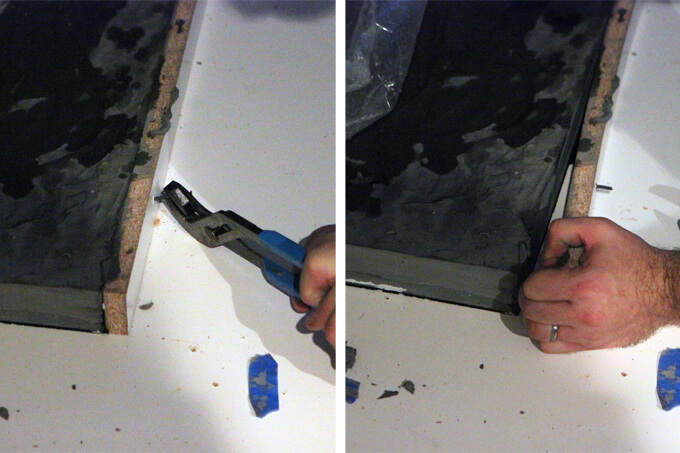
10. Once the counter top had time to cure we unscrewed the walls of the form from the base but found that it was difficult to remove the boards.

We were able to remove the boards by attaching screws to the side of each board and pulling on the screws with pliers.

After we had the concrete slab loose, we lifted it up and placed it on top of the coffee bar base we built.

DIY Concrete Countertop

We could pretend that we are experts on everything DIY but that just wouldn’t be true.

We are still learning as we go and a lot of the times we just don’t know what problems could arise until we are knee deep in the middle of the project and run right into them.

But the best thing to do is to not give up, push through the challenges and learn from your mistakes for the next time. This was our experience making the DIY concrete countertop.

We hope this post will shed some light on our process of making a concrete countertop for our coffee bar.

Don’t forget to see out how we built the base of our coffee bar as well as check out how our finished coffee bar turned out.

I can’t wait to work on my first woodworking project with my new upgraded dust collector.

2022 Personalized Christmas Ornaments
*** Thanks so much for supporting our small shop – Moon Rock Prints – this holiday season! ***

PIN FOR LATER

How to make DIY concrete countertops for the kitchen. In this DIY home renovation tutorial we will show how to make a concrete countertop from a concrete form for a bar top or top of a kitchen island.

Framing a Book Page

Framed Book Page

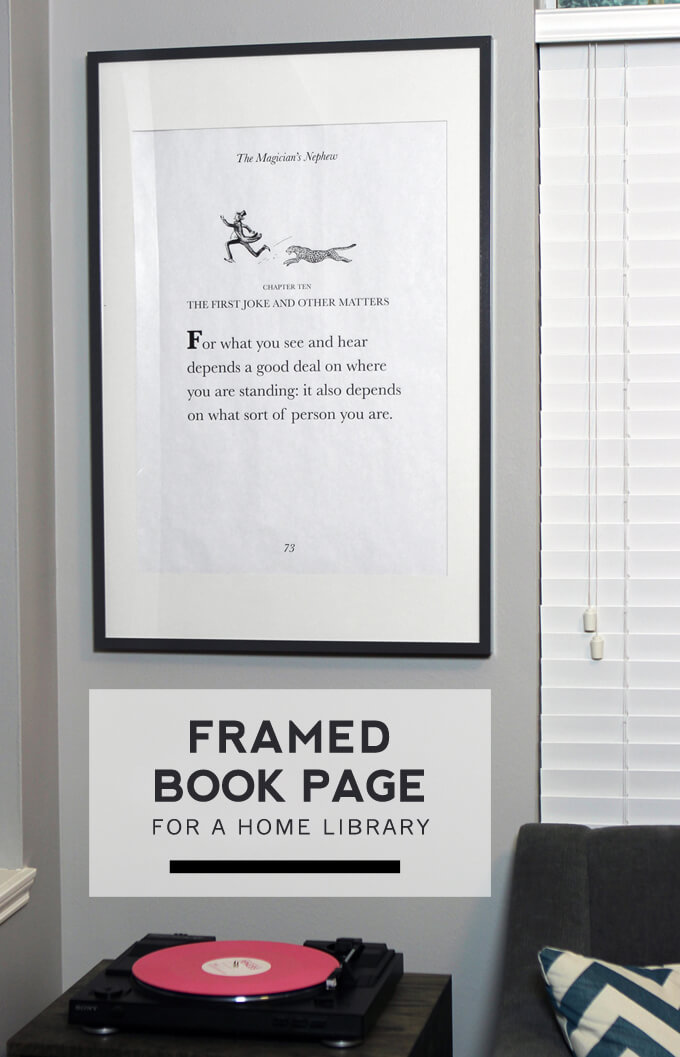
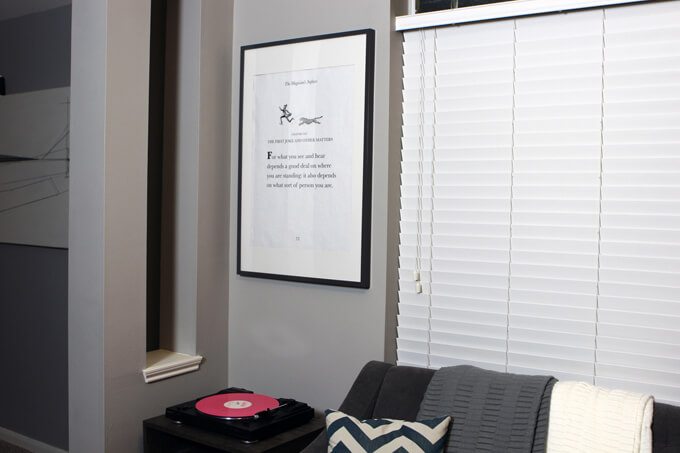
To fill in a tricky empty corner in our home library we hung an enlarged framed book page that we created featuring a favorite quote.

Framed Book Page for Library

Do you have a spot in your home that you don’t quite know what to do with? For us it was a corner in our library. We are closing in on having our library finished, short of our flooring but that is a rant for another day. The library is not huge so we are cautious of making it feel overcrowded with too much “stuff”. For awhile we had our traveling tree filling up this corner.

I call it our traveling tree because I bought this tree back when I was decorating my first “grown-up” apartment. I still like the tree but since we moved into our house I have not found the right spot for it. So I move it around from room to room, corner to corner to act as a temporary fill in for empty spaces. But I never like how it looks there so it ends up moving on to the next empty spot once I find something better to replace it with.

Poor, sad traveling tree, maybe someday it will find a place to call its forever home.

It wasn’t until I moved the tree that I realized how much I didn’t like it in that corner because it was too much next to the love seat. While browsing Pinterest one evening I stumbled across an example of a large framed book page.
A lightbulb went off. What would be better in a library than a large framed book page? It would be just big enough to fill up the corner without looking too crowded.

I remembered that sitting in our closet unused was a huge frame Brent found in the IKEA reject section for $5 that looks perfectly fine. Ah, we love when a project that is a solution to an empty space costs us almost nothing and is easy to quickly put into action.

Our Framed Book Page Project

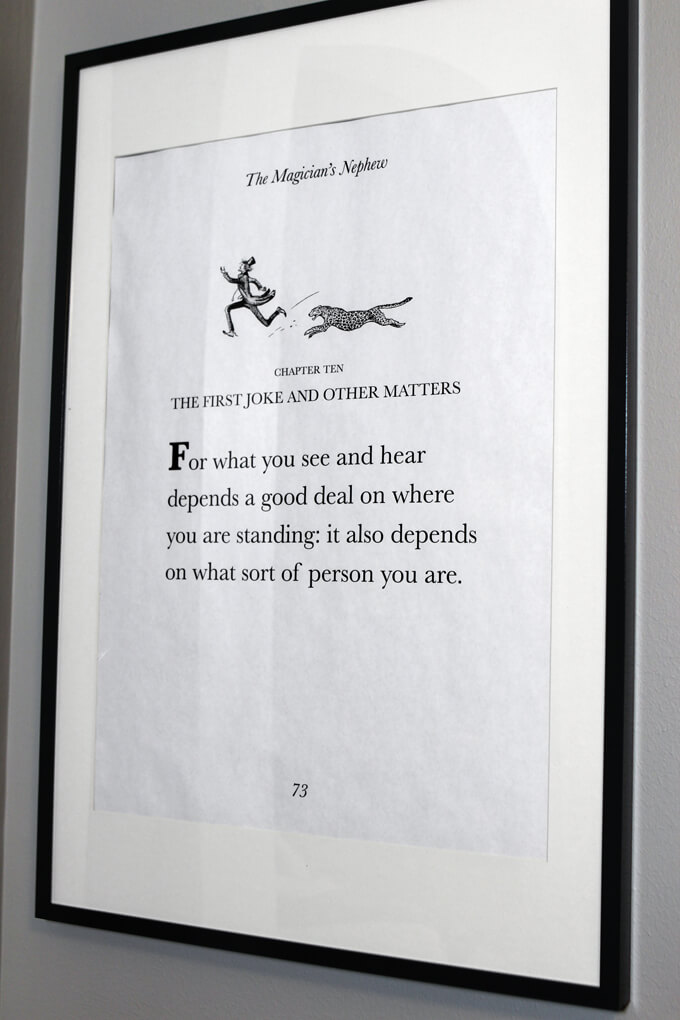
The hardest part was determining what page in what book out of the hundreds of books we have to use. We sat in our library and flipped through tons of books and then I remembered a line about perspective that I really liked from the Magician’s Nephew (part of The Chronicles of Narnia series). “For what you see and hear depends on where you are standing: it also depends on what sort of person you are”.

The line was buried in the page which was all text so Brent and I decided to get creative and create our own fake book page featuring this quote so it would be more prominent. I really liked the title page for the chapter it was in so I scanned that page of the book and opened it up in Illustrator.
Framed Book Page for Library

I created a new document that was the size we wanted to print so that would fit in our large frame and all the text and graphics would be the right size and resolution. Then I created our new fake book page by adding the the graphic from the title page and typing the book title at the top, chapter title in the middle, the quote we wanted to feature and included the page number at the bottom.

We needed all the text a lot larger so it would be visible and easy to read. We then had it printed, cut it to size, popped it in the frame and hung it up.

Framed Book Page for Library

The whole project took us about two hours from finding the quote to hanging it on the wall and cost us $5 for the frame and maybe $2 to have it printed.

We had two copies printed just in case we messed one up while cutting it to fit in the frame. While we love building huge detailed projects, we are quite fond of these quick Sunday afternoon decor projects too.

We think a framed book page is the perfect solution to that tricky corner and addition to the library. Plus, since I tend to have commitment issues when it comes to decor in our home, I love pieces that are flexible and easy to switch out. If Brent or I find a new favorite quote from a book we can inexpensively change out the book page in the frame, keeping our library feeling fresh.

PIN THIS PROJECT

Framed Book Page for Library

How to Use a Jigsaw

How to Use a Jigsaw

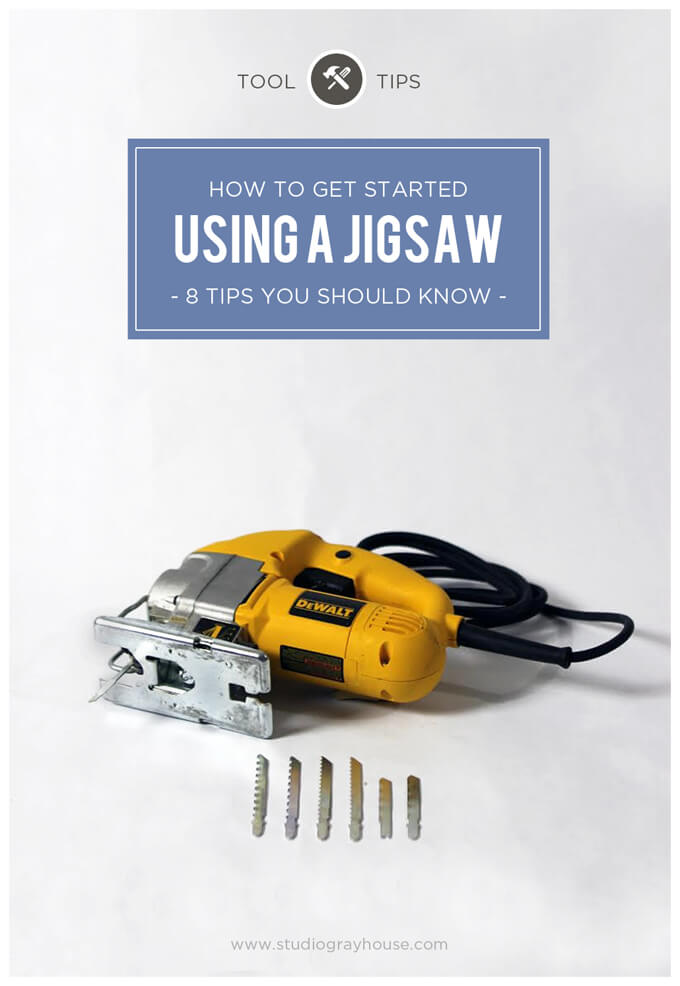
In this tool tip tutorial we are showing you how to use a jigsaw.

How to Use a Jigsaw

Hey! It’s Brent here today talking about how to use a jigsaw. The jigsaw is a fun tool that can really come in handy to allow you to create fun projects like our yoga mat rack we built last weekend.

It is a fairly easy tool to use but as with any tool it is helpful the more you understand about how a tool functions and the best way to use it. Watch the video below or scroll down to see eight of my tips for getting started using a jigsaw.

We use the DEWALT DW317K 5.5 Amp Top Handle Jig Saw.

FYI: This post contains an affiliate link to a product we used. Gray House Studio does receive commissions for sales from these links but at no extra cost to you. We appreciate you supporting this site. Read our privacy and disclosure policy. You can also easily shop our recommended products here.

HOW TO Use A Jigsaw Tips

DIRECTIONS WATCH

Never Miss A Gray House Studio DIY Video Subscribe to our YouTube Channel

DIRECTIONS READ

How to Use a Jigsaw

1. Safety Glasses and Ear Protection

It might seem self-explanatory but it is easy to forget to wear safety glasses, especially if you don’t normally wear glasses.

Believe me when I say the jigsaw is not a tool you want to risk it. Put on some safety glasses and eye protection before starting to cut.

How to Use a Jigsaw

2. Secure the Foot Plate

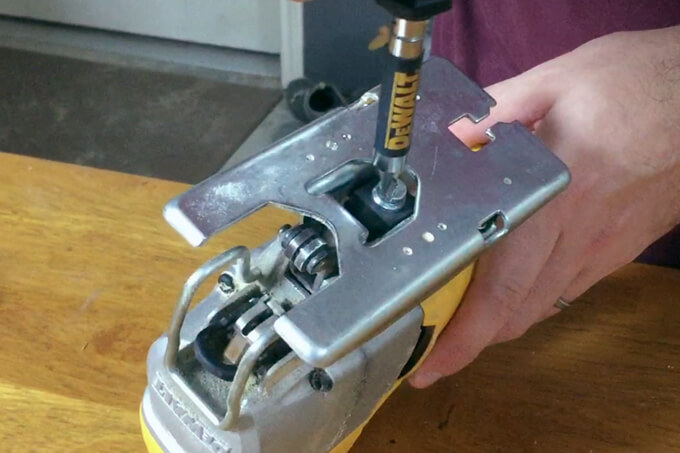
Grab your jigsaw and look for the screw or mechanism that locks the foot plate in place and double check that it is as tight as possible.

Most foot plates are designed to rotate allowing users to cut angles but rarely is that the desired application.

Usually if I ignore this step the screw will shake loose as I use the jigsaw and the plate will slowly rotate messing up my cut.

How to Use a Jigsaw

3. Choose the Correct Blade

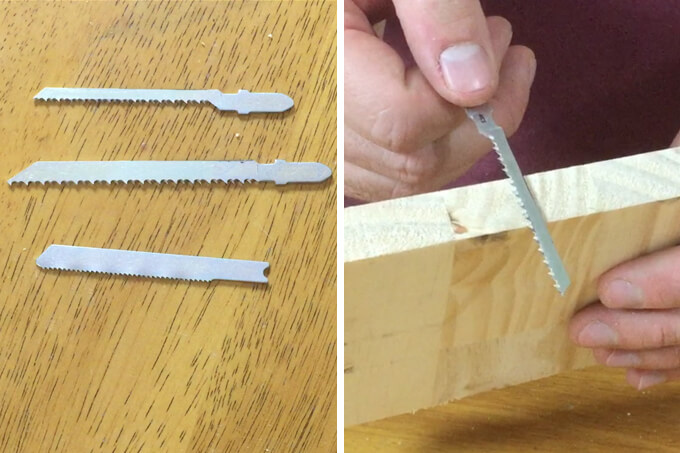
All jigsaw blades are not created equally. Each jigsaw blade has a specific application and it is important to select a blade based on your material and cut design.

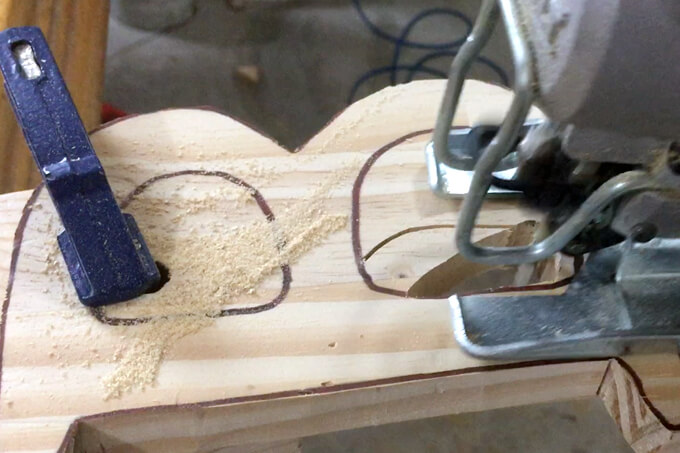
Left: Most blades are labeled by what type of material they cut and the type of cut. (i.e. wood/clean cut) The top two blades in the picture are for cutting wood and the bottom one is for cutting metal. Wide blades make it easier to cut straight lines while skinnier blades make it easier to cut curves.

Right: Be sure the cutting surface of the blade is at least one inch longer than the material is thick. As the jigsaw moves the blade up and down the blade can bend or break if it is too short and jams into the wood.

How to Use a Jigsaw

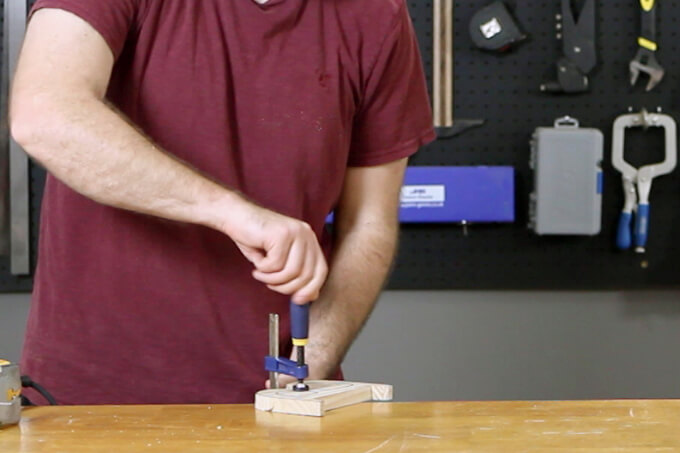
4. Clamp Your Project Down

Before starting to cut with a jigsaw always clamp the material to a solid work surface. It is difficult to hold the material steady and unsafe to grip the material being cut.

With the piece clamped down you can focus on the saw and where you are cutting without worrying about the work piece moving.

How to Use a Jigsaw

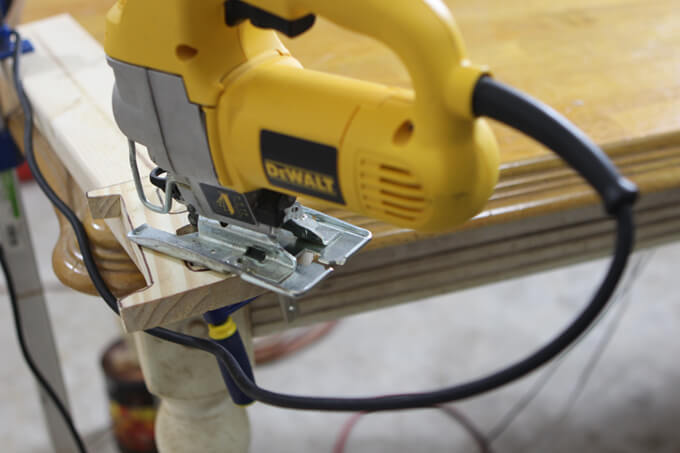
5. Keep Track of the Cord

It is easy to get in the zone when using a jigsaw. Often times the cord can get caught or pulled tight around the table or work piece and come dangerously close to the blade when doing curvy cuts.

Before turning the jigsaw double check that the cord is safely behind the saw and not under the piece being cut.

How to Use a Jigsaw

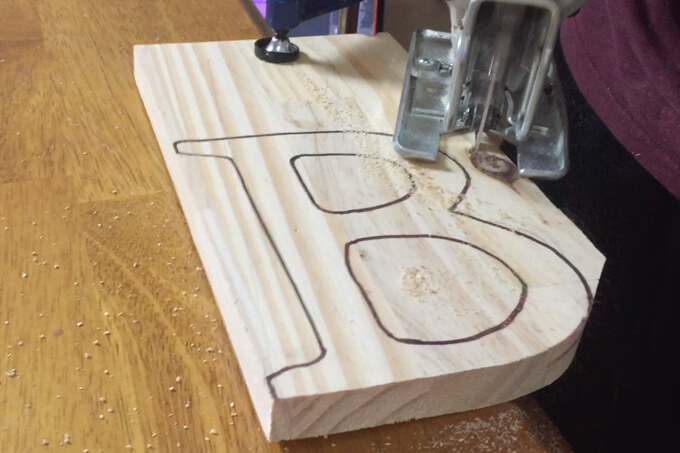
6. Cut from Outside to Inside

Start by cutting away the material that surrounds the outside of the object. Leaving the inside until the end helps keep the work piece strong and prevent breakage.

How to Use a Jigsaw

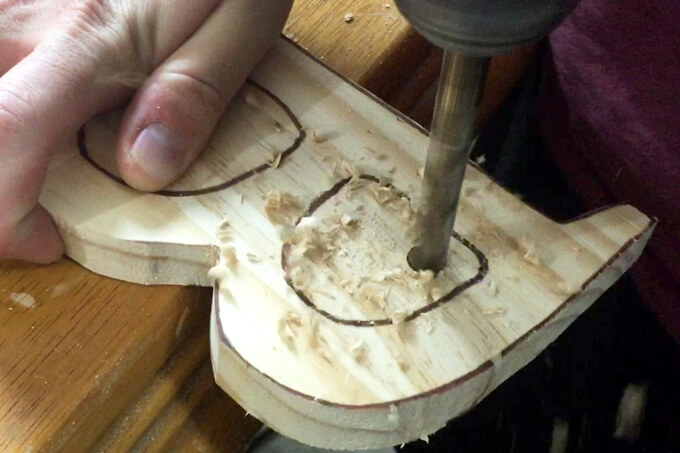
7. Drill Holes for Internal Cutting

To cut out internal shapes without cutting through the outside of an object drill a hole larger than the width of the jigsaw blade.

With holes drilled the jigsaw blade can move freely through the material and begin cuts anywhere.

How to Use a Jigsaw

8. Make Multiple Cuts

Even when you use the skinniest blade for curvy cuts there are times when the jigsaw just can’t turn quick enough.

The trick cutting out small objects with tons of curves is to make multiple cuts in the same location from different angles.

I hope these tips help you get started using a jigsaw. If you have any specific questions about how to use a jigsaw, feel free to leave them in the comments section below and I would be happy to answer them.

Feel free to check out our additional tool tips about choosing the right drill bit and how to use a biscuit joiner.

DIY Yoga Mat Rack

Yoga Mat Rack

We designed and built a wall-mounted yoga mat rack out of wood to hang on the wall in our home gym.

DIY Yoga Mat Rack

We were back at work on a new DIY project for our home gym this weekend. We built a yoga mat rack to hang on the wall in our gym.

Now before you go thinking Brent and I are a pair of yoga masters, let me stop you right there and say we are not.

In fact it is safe to say we have a long way to go in the flexibility department. We use an iPad app and follow along with a virtual instructor so she is never too strict with us.

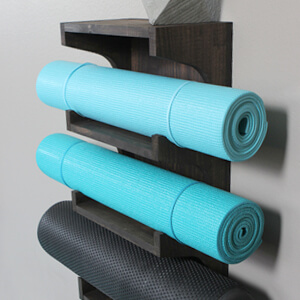
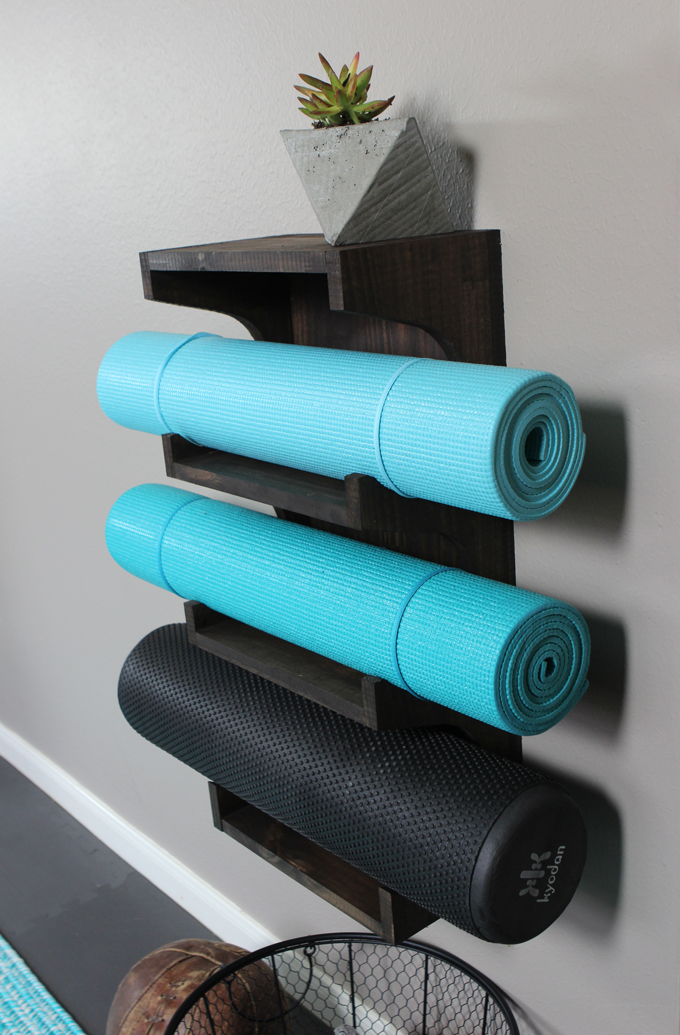
Now that I had my new yoga mat we needed a place to store our mats. We designed and built our yoga mat rack that we hung on the wall in our home gym.

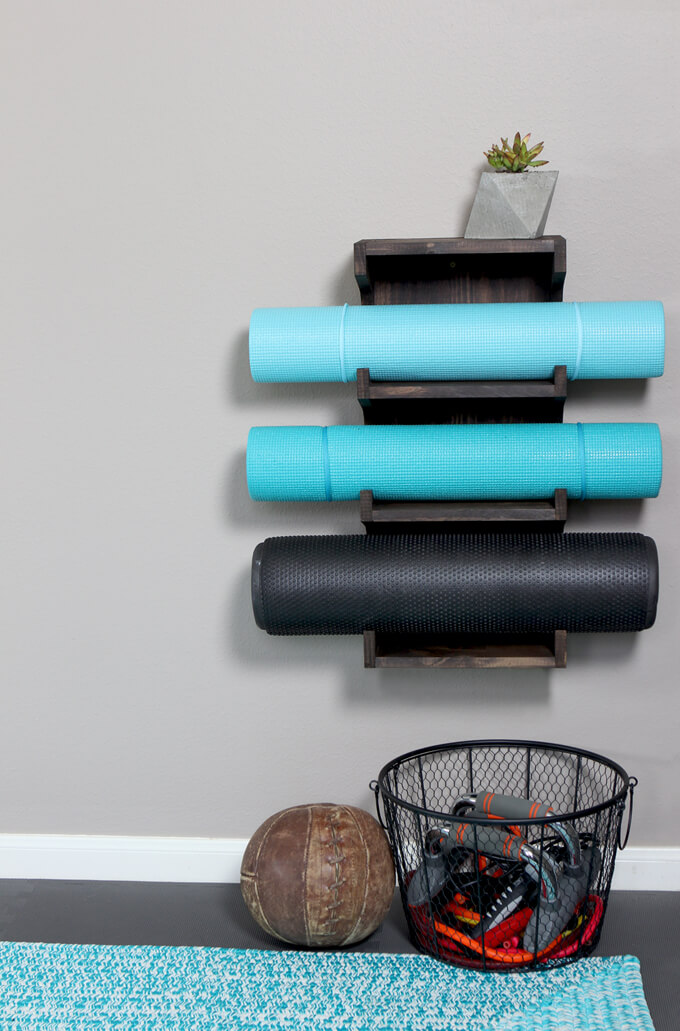
Our yoga mat rack was designed to hold two yoga mats and our foam roller. It is a great solution if you want a place to store your mats that takes up little space and makes them readily available.

We’ve got the tutorial on how to make our yoga mat holder below.

2022 Personalized Christmas Ornaments
*** Thanks so much for supporting our small shop – Moon Rock Prints – this holiday season! ***

How To Build A Yoga Mat Rack

SUPPLIES

FYI: This post contains a few affiliate links to products we used to make this project. Gray House Studio does receive commissions for sales from these links but at no extra cost to you. We appreciate you supporting this site. Read our privacy and disclosure policy. You can also easily shop our recommended products here.

PROJECT PLANS

DIY Yoga Mat Rack Plans

Get our Yoga Mat Rack Plans

When you purchase our yoga mat rack plans you get a six page PDF with a detailed materials list, a cut list, exact dimensions for each piece, building instructions and the side panel template – all for only $7. We appreciate your support!

STEP BY STEP GUIDE

DIY Yoga Mat Rack

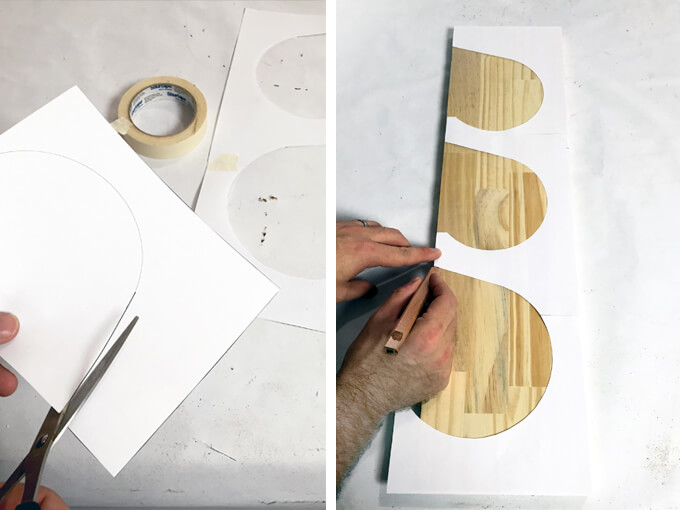
1. First we printed off the side panel template. After cutting the template out and taping it together we used the template to trace the two side panels.

DIY Yoga Mat Rack

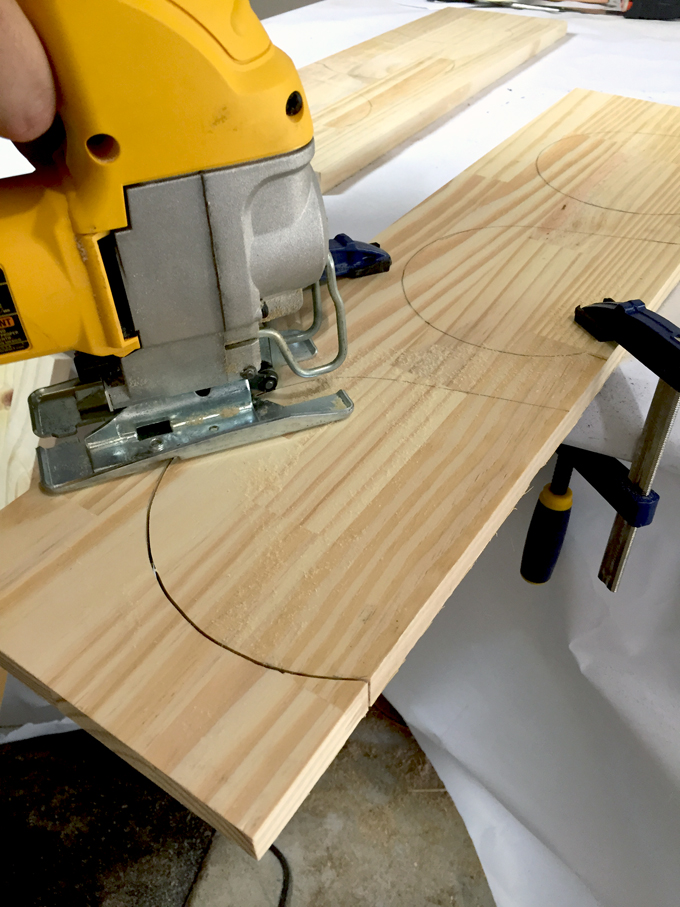
2. We then used our jigsaw to cut out the shape we traced on the side panels.

DIY Yoga Mat Rack

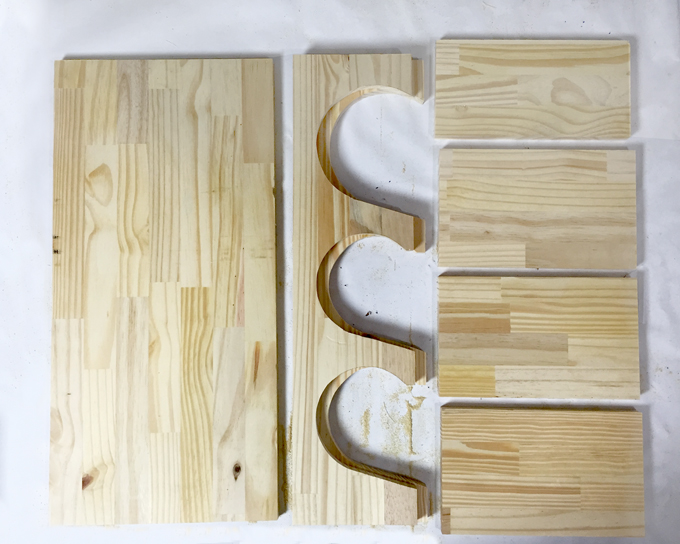
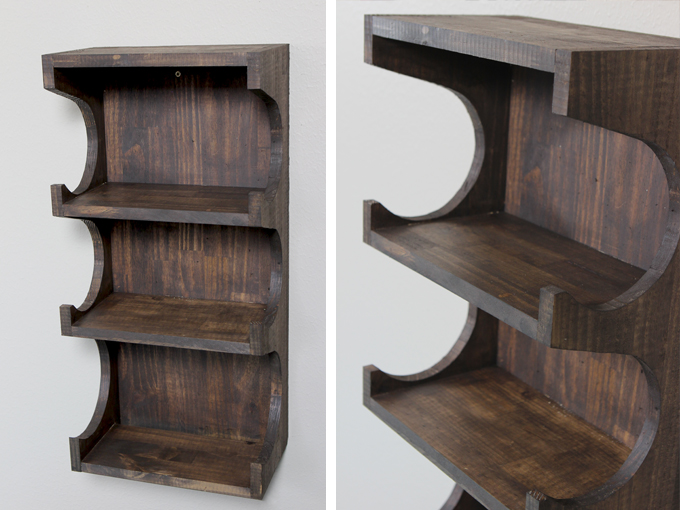
After making all of our cuts on our pine panels, these are what our pieces looked liked.

DIY Yoga Mat Rack

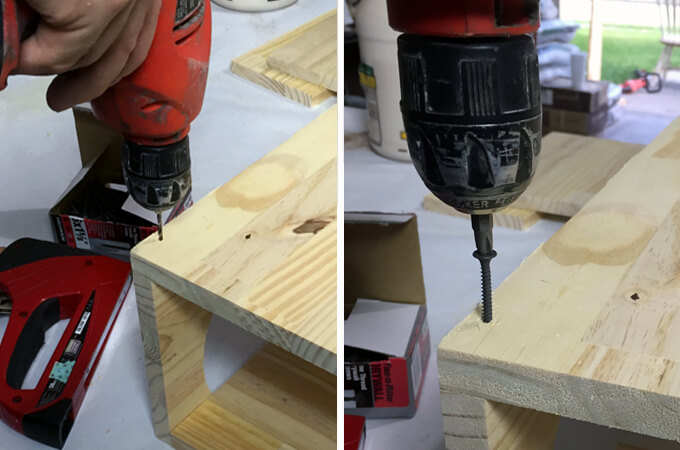
3. Using our drill we pre-drilled four holes through the back panel into each side panel.

We attached the back panel to the side panel using 1-1/2″ screws. We made sure the screws were aligned with each rung of rack.

DIY Yoga Mat Rack

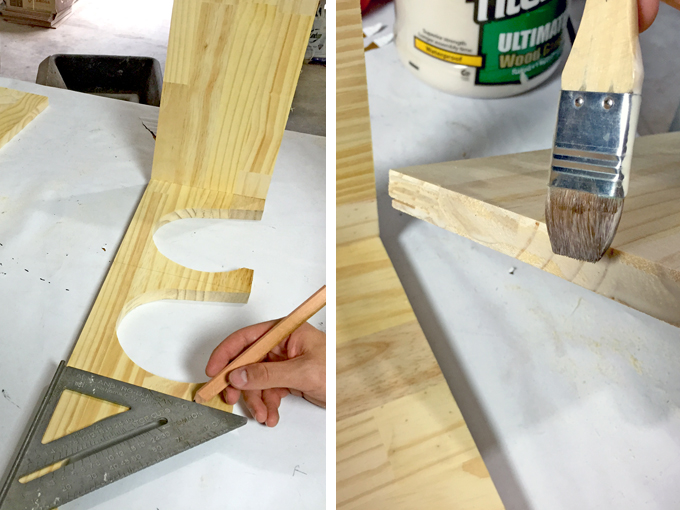
4. On the two inside shelves we used a square and a pencil to mark reference lines indicating where the shelf needed to be attached so it would be level.

We applied a thin bead of wood glue to the three sides of each shelf that would touch the side and back panels.

DIY Yoga Mat Rack

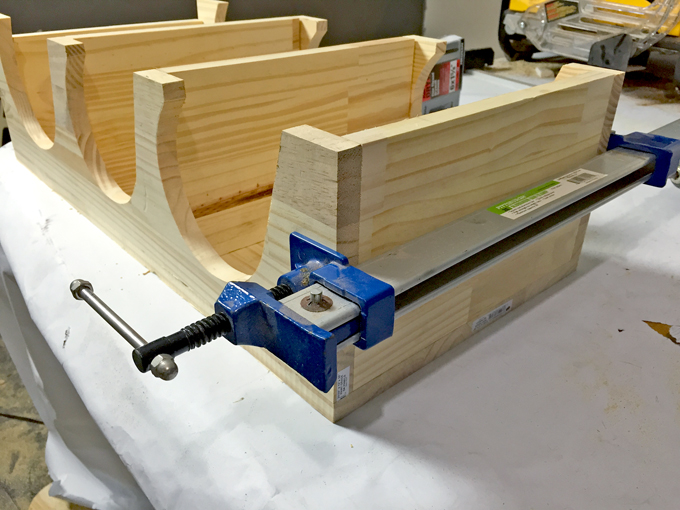
5. We used clamps to hold each shelf in place while the glue dried.

DIY Yoga Mat Rack

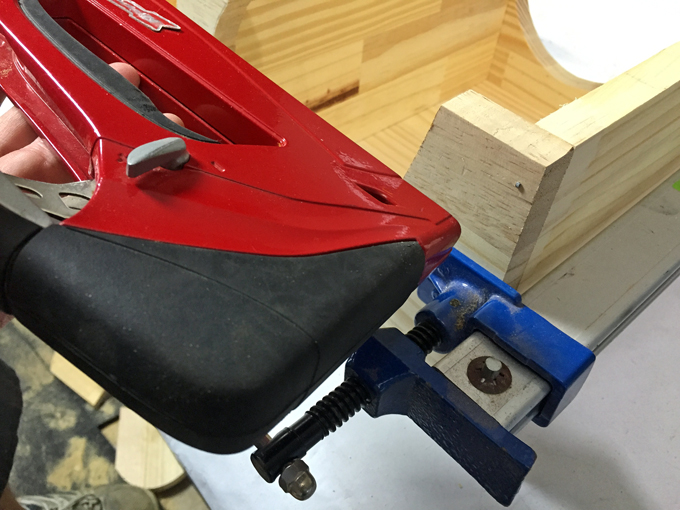
6. We secured each shelf in place by using a staple gun to drive four finishing nails through the side panel and into each shelf.

DIY Yoga Mat Rack

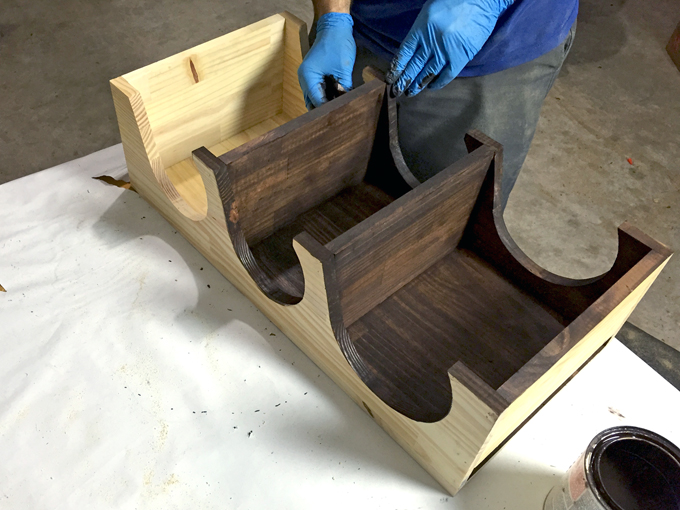
7. Finally, we stained it with our favorite Rust-Oleum Ultimate Wood Stain in Kona.

DIY Yoga Mat Rack

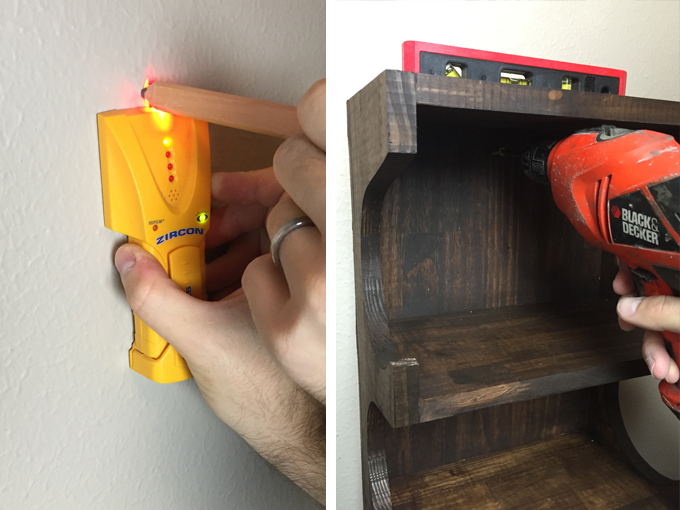
8. To secure the rack to the wall we used a stud finder to locate a stud, used a level to make sure it was straight and then drilled two screws (one at the top of the rack and one at the bottom) through the back panel into the stud.

DIY Yoga Mat Rack

Our completed rack is ready to hold some yoga mats! Like I mentioned earlier it could also be made to hold rolled up towels or to use as shelves to display smaller items.

DIY Yoga Mat Rack

By building and installing our yoga mat rack this weekend we are on our way to filling up the big empty wall in this room. The perk of being late in the game to pick out yoga mats is that I could match them to the rug in this room.

Even though the rack is meant for storage and organization purposes, we still wanted it to stand out as a good-looking decor piece for the room and I think Brent did a fantastic job making it happen.

PIN IT FOR LATER

How to Build A Yoga Mat Rack

Fall DIY Front Porch Projects

4 Fall DIY Front Porch Projects

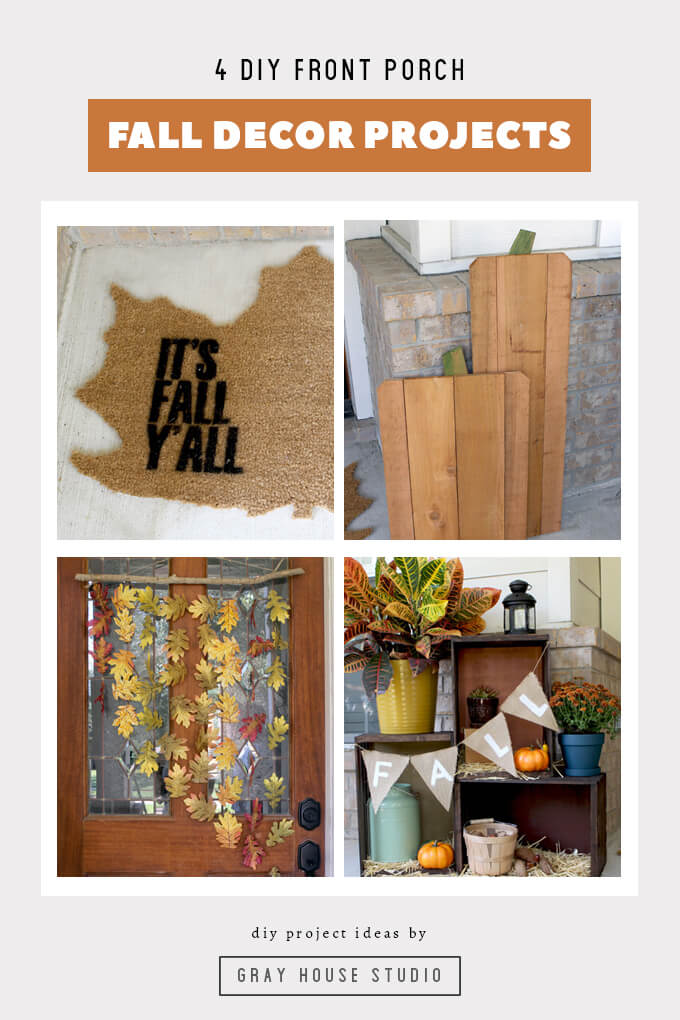
Looking for easy ways to decorate you front porch this Fall? Check out these 4 Fall DIY front porch projects we came up with to make your front porch festive for the Fall season without spending a fortune. These simple DIY Fall projects are not only adorable, they are inexpensive too!

Fall DIY Front Porch Projects

I am lighting my favorite fall scented candle (leaves from Bath & Body Works) today because it is officially autumn!

This time last year Brent and I visited Boston and my favorite part was to see all the leaves changing colors on the trees, they were gorgeous! I wanted to pack up all the foliage in my suitcase and bring it home with me since it usually takes awhile to see and feel fall outside here in Houston.

I love autumn but Brent and I have never been big on decorating for the seasons. One reason is lack of budget and another reason is a lack of storage. We just don’t have enough space to store decor for spring, summer, winter and fall.

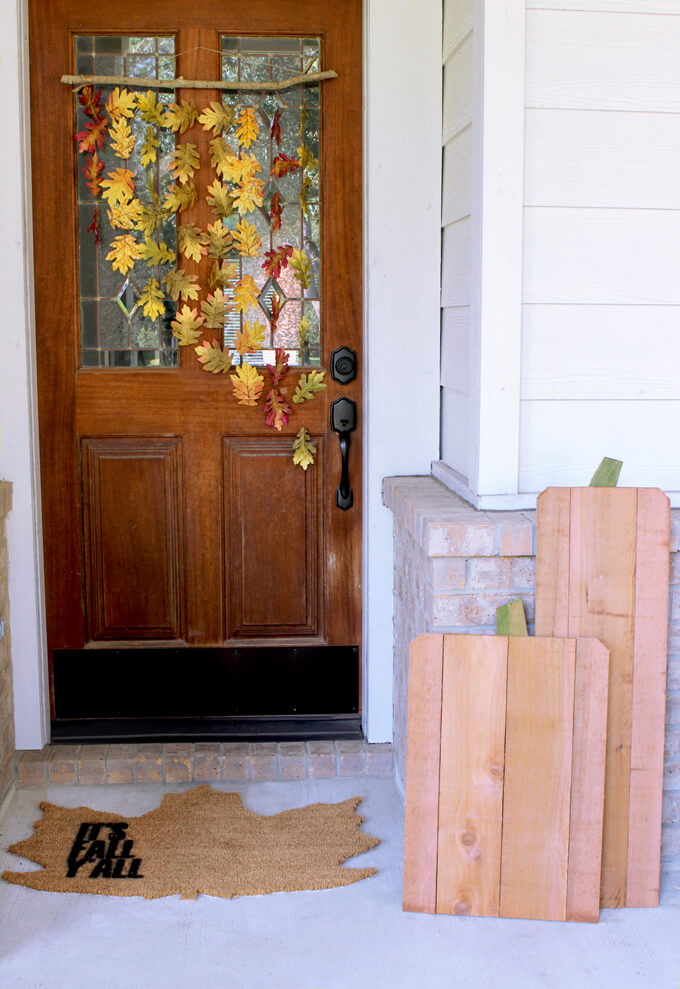
However, we have this great covered front porch that is spacious and we like to spend a lot of time on in the cooler months and I mean who doesn’t love a porch decorated for fall?

We wanted to bring fall to our front porch this year so we got to thinking and came up with four fall DIY front porch projects that included the following criteria.

Inexpensiveprojects that would allow us to use the free decor from nature laying around in our yard
Easy to storeprojects that didn’t include a lot of pieces and could lay flat
OR
Can effortlessly transitionprojects that we could use for the next season or recycle for another project

2022 Personalized Christmas Ornaments
*** Thanks so much for supporting our small shop – Moon Rock Prints – this holiday season! ***

Here are our DIY Fall Front Porch Projects

Fall DIY Front Porch Projects

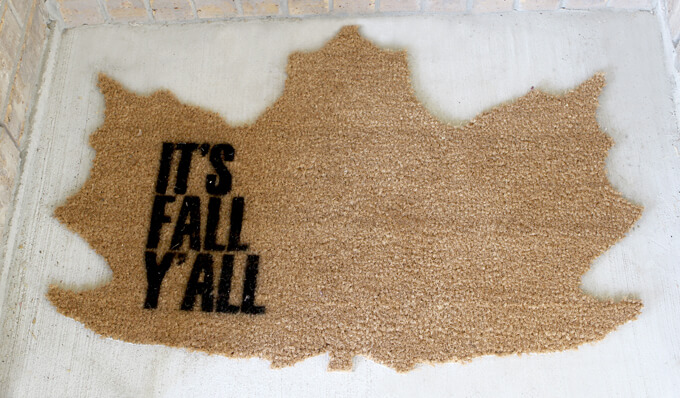
1. Leaf-Shaped Doormat
The first thing we made was a Fall themed custom shaped doormat for our doorstep. This one is inexpensive and easy to create so it was a no brainer.

Plus, it lays flat so it should be easy to wrap in plastic and store under a bed if it is still in good condition by the end of the season. If not, the doormat only cost us $10 so it wouldn’t be a huge loss if it gets a lot of love and needs to be tossed by the time December rolls around.

We purchased our plain doormat from IKEA and decided to cut out a maple leaf shape. Because we live down here in Texas we spray painted the saying “It’s Fall Y’all” onto it. Sure, it is a little corny but that way when we walk out the door our doormat can remind us that despite the temperature, it is in fact Fall.

Whether you have a huge front porch or live in an apartment with just a doorstep, this is a great way to bring a little fall or Halloween decor to your outside entry.

To see how to make this project, check out our full tutorial on our custom shaped doormats.

Fall DIY Front Porch Projects

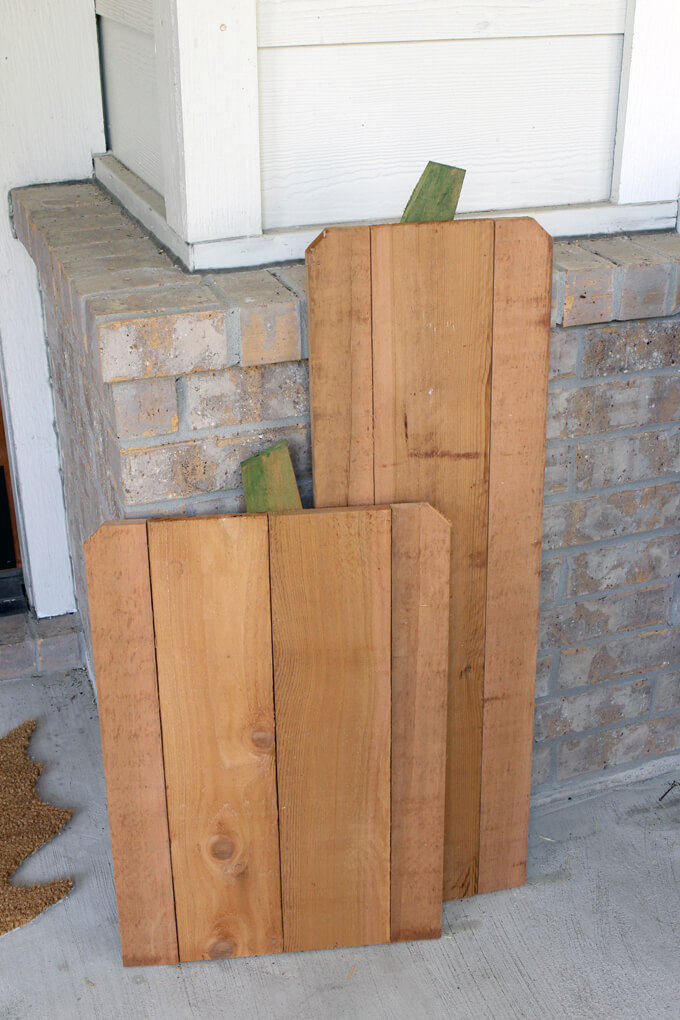
2. Cedar Picket Pumpkins

Our next project to tackle was to make a pair of rustic pumpkins out of cedar dog-ear wood fence pickets. This is another extremely inexpensive project because each piece of fence costs around $2 and each pumpkin only needs one fence picket.

It was really quick to make as well because we dug around the stack of fence pickets at the hardware store until we found two that had the deepest natural orange shade so we didn’t even have to paint them!

SUPPLIES

FYI: This post contains a few affiliate links to products we used to make this project. Gray House Studio does receive commissions for sales from these links but at no extra cost to you. We appreciate you supporting this site. Read our privacy and disclosure policy. You can also easily shop our recommended products here.

We wanted two pumpkins that were different heights so for the taller pumpkin Brent cut the cedar fence picket in half with a miter saw to create two pieces that were the same length.

For the shorter pumpkin he cut three pieces the same length. Then for the piece that had the corners cut off he cut it in half vertically using a table saw and placed each piece on the outside of the middle board(s) for each pumpkin.

To attach the boards together, Brent cut a strip of 1/8 inch masonite the width of the pumpkin and used a drill to screw through the masonite into each picket with 1/2″ screws.

He created the stems by cutting a scrap piece of wood into trapezoids and then painted them with watered down green paint.

He attached the stem to the pumpkin with a 3/4″ screw.

They are flat so they would also be easy to store under a bed or because we did nothing to the wood, we could recycle and use it for another project such as making a box or a tray.

Fall DIY Front Porch Projects

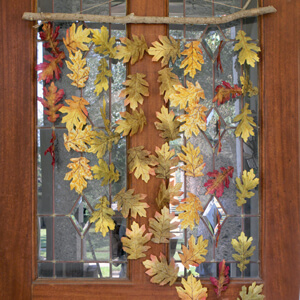
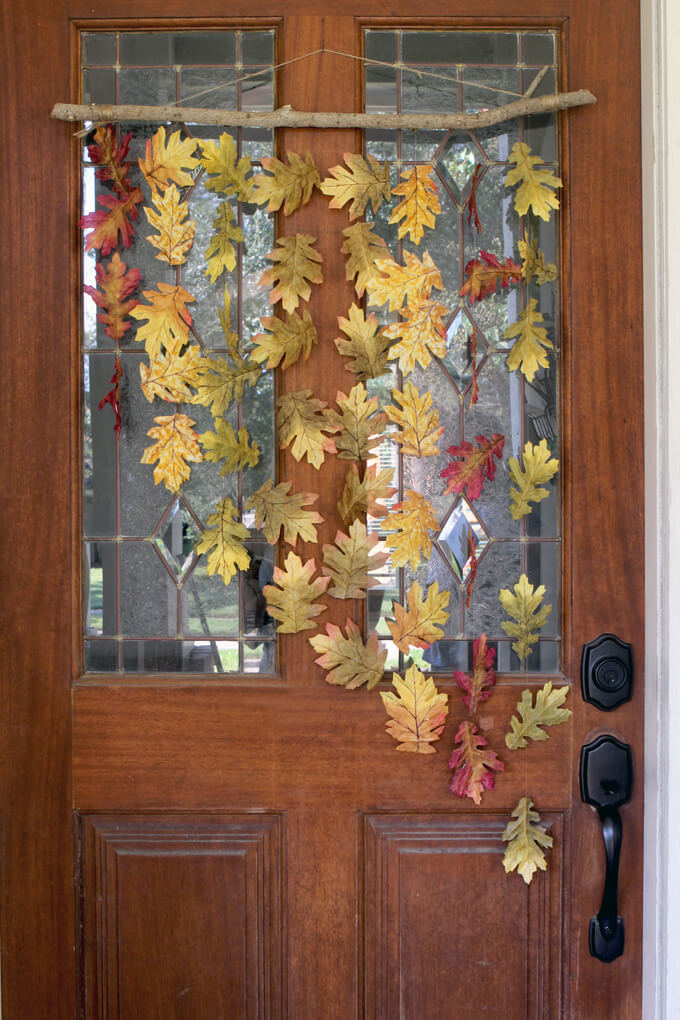
3. Natural Leaf and Branch Door Hanging

For our third project we were in search of an alternative to a traditional fall wreath for our front door.

We decided to make a natural leaf and branch door hanging. This one cost us around $12 only because we couldn’t find any leaves outside I liked where we lived. We don’t have the best looking leaves in our yard so we opted to buy some artificial leaves. You could use also paint leaves from outside or make paper leaves.

SUPPLIES

FYI: This post contains a few affiliate links to products we used to make this project. Gray House Studio does receive commissions for sales from these links but at no extra cost to you. We appreciate you supporting this site. Read our privacy and disclosure policy. You can also easily shop our recommended products here.

To make it we used a branch off one of our trees that we had just trimmed and cut it down to fit our door. You could also used one of these pretty faux birch branches.

Then we used a needle to thread clear fishing line though the leaves. We varied the lengths of the strands of the leaves and situated the individual leaves in different positions to give the appearance that they were falling and to create visual interest.

For the bottom leaf on each strand we positioned a washer between two leaves so that it would hold the weight of the strands of leaves down and prevent them from blowing around and getting tangled.

We attached each line of leaves to the branch with thumb tacks.

Finally, we wrapped jute twine around the branch to create a loop to hang the leaf and branch display on a hook on our front door.

I love this project because it looks like the leaves are just floating on my front door.

To store this one I will most likely pull off the silk leaves, washers and thumb tacks and store them in a plastic bag and discard the branch. That way I don’t have to store the entire thing and I can start fresh next season with a new branch and create a new pattern.

Fall DIY Front Porch Projects

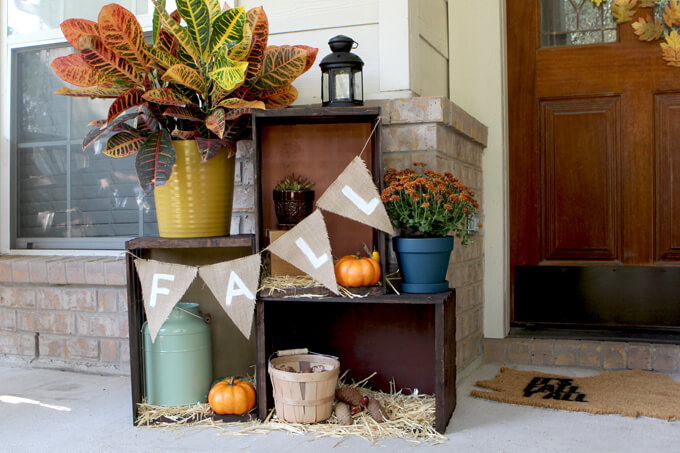
4. DIY Fall Crate Display

We wanted to create a display on our porch where we could pull together a few additional decor items into a place with purpose. Using crates to give varying heights allowed us to incorporate a variety of items.

The three wood crates were the most expensive item we purchased for these projects but the beauty of them is they can easily transition with each season by just switching out the back panels we created and adding different natural decor and seasonal flowers.

The majority of the items we put in and on the crates we already had around the house such as the lantern and the green tin. We picked up some new plants and some hay to finish the look.

To see how to make this project, check out our full tutorial on our fall crate display.

Fall DIY Front Porch Projects

We completed all of our fall DIY porch projects on one Sunday afternoon and now our entry way is ready for fall!

Fall DIY Front Porch Projects

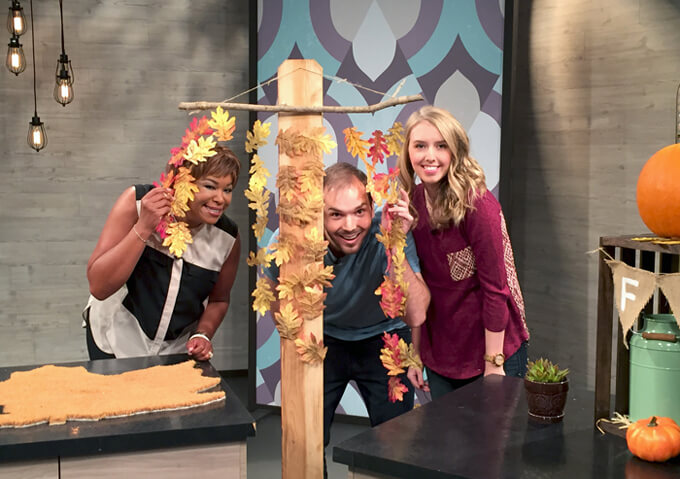
We had the fun opportunity to share these Fall DIY front porch projects on Great Day Houston last week. It was our first time on TV and it was live so we were a little nervous but host Deborah Duncan is so sweet and fun and we had a blast spending the morning at the studio.

If you missed it live or don’t live in Houston, you can watch via the link below to see and hear more about our do-it-yourself fall decorations.

Watch our DIY segment on Great Day Houston

PIN FOR LATER

Looking for easy ways to decorate you front porch this Fall? Check out these 4 Fall DIY front porch projects we came up with to make your front porch festive for the Fall season without spending a fortune. These simple DIY Fall projects are not only adorable, they are inexpensive too!