House

Handmade Father's Day Gift

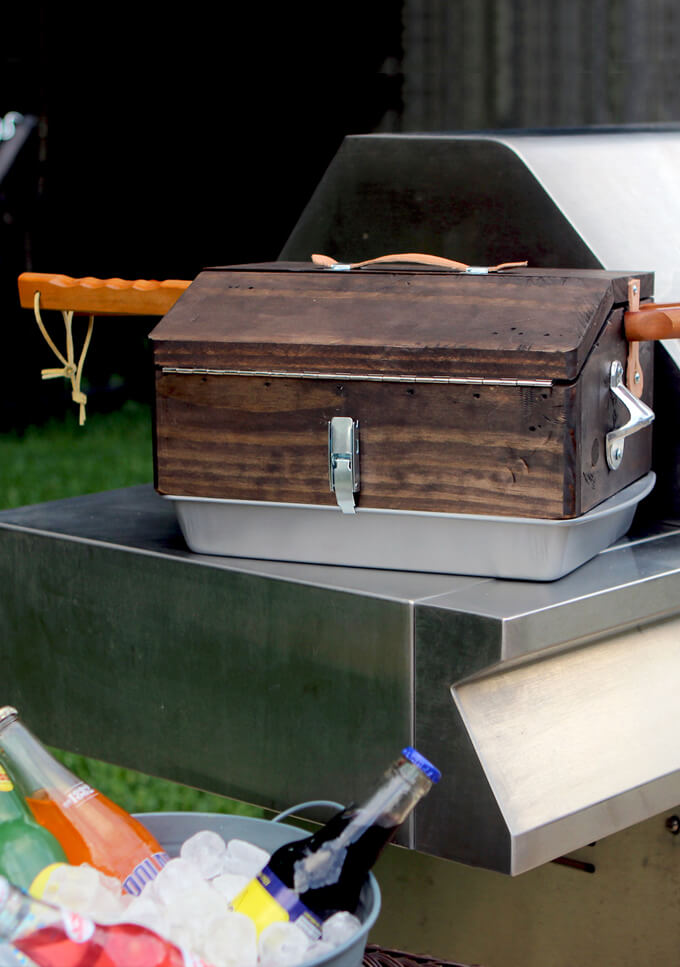
Handmade Grill Supplies Box

How we built a handmade grill supplies box for both of our dads for Father’s Day gifts to store and organize their grill tools and supplies.

Handmade Grill Supplies Box

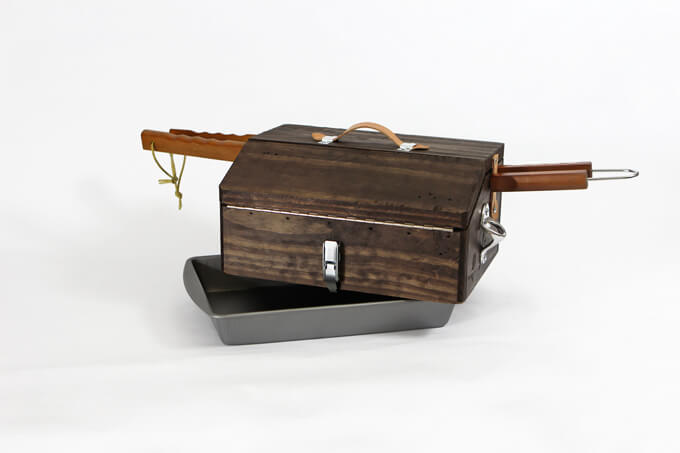
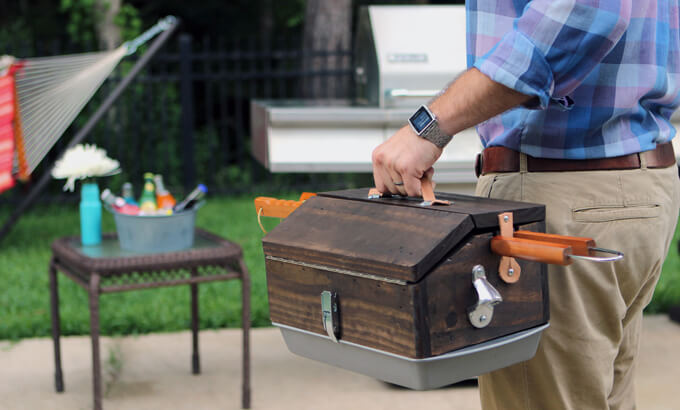
Summer is right around the corner and that means pool parties, grilling, and Father’s Day are fast approaching! This year we crafted a handmade Father’s Day gift for the dads in our lives that love to cook out on the grill. We designed and built our own custom handmade grill supplies box.

Over the years I started to notice that my dad always had to take multiple trips in and out of the house to collect all of the supplies he needed for the grill. I saw this as a bit of a hassle because my dad loves hosting summer pool parties but he was spending a lot of his time running inside to grab a plate, seasonings or a spatula rather than enjoying the party with his guests.

We thought it would be really handy if there were a simple wood box to store grilling utensils, seasonings, foil, a pan and even a bottle opener in one easy to carry container. It was actually harder than we thought to find what we were envisioning this box would look like.

There are a plethora of tackle boxes for fishing gear out there and a wide variety of toolboxes for organizing and storing tools but it turns out storage containers for grill supplies are not really a thing. If they are, we could’t find them.

Handmade Grill Supplies Box

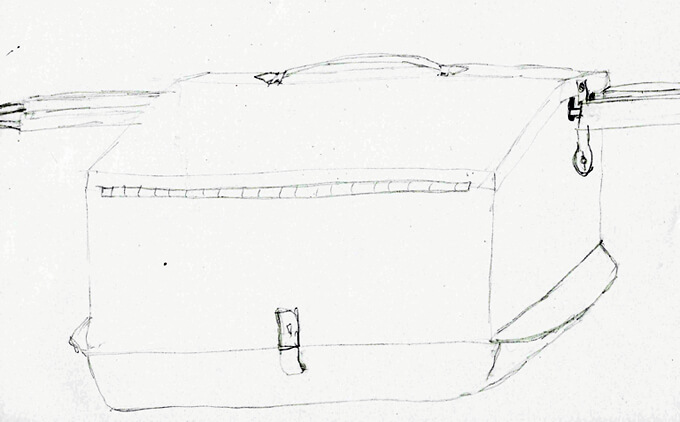
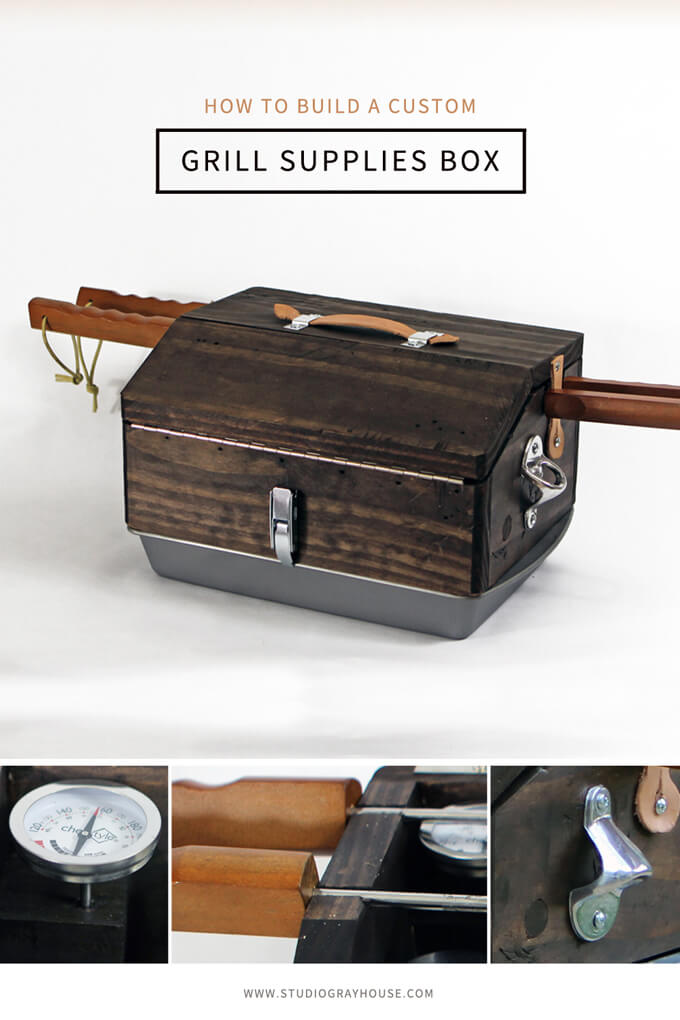
So we made our own. This was really fun because we could design it to look and function however we thought would best fit a griller’s needs. We modeled the exterior of our grill box after a vintage toolbox but needed to adapt the inside to fit the shape of the grill utensils and supplies.

VIDEO TUTORIAL

To see new DIY videos on Thursdays, be sure to subscribe to our channel ⇾


HANDMADE GRILL SUPPLIES BOX FEATURES

Handmade Grill Supplies Box

THE GRILL SUPPLIES BOX INCLUDES:

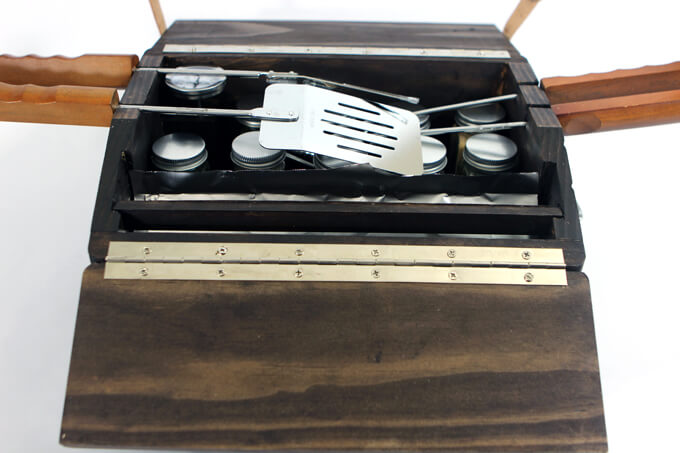
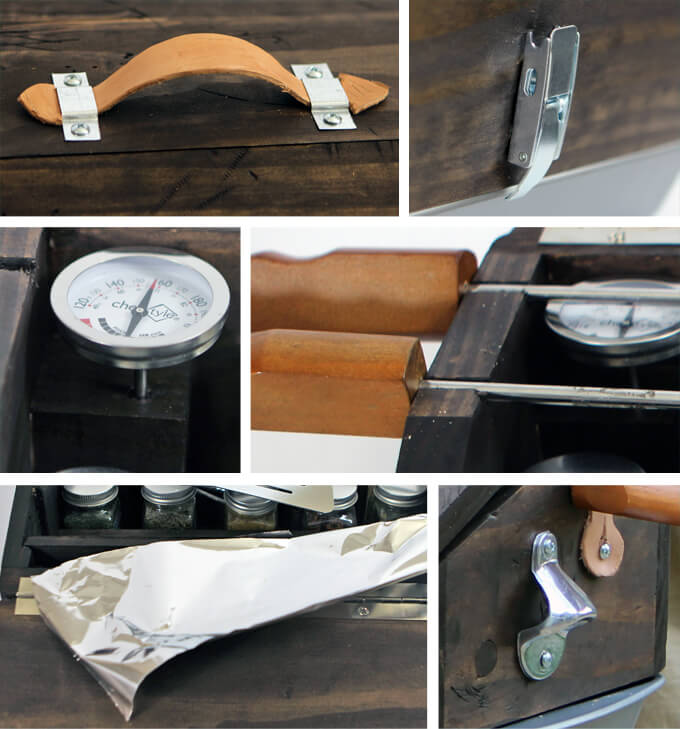
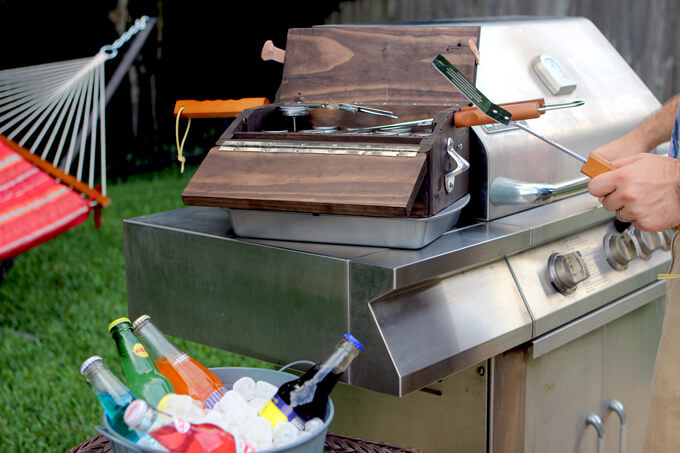
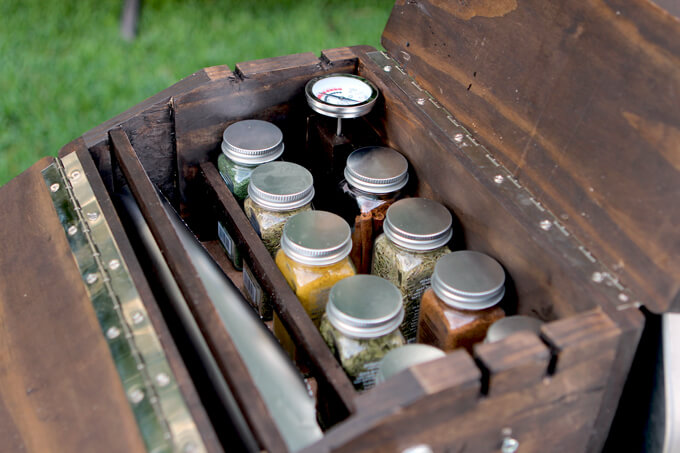
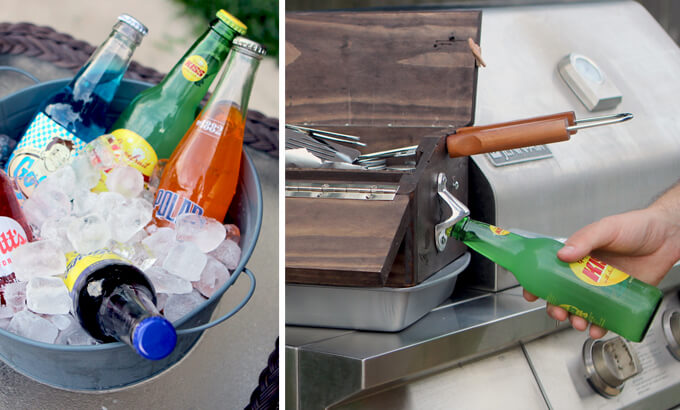
slots for tongs, spatula and grilling fork, plenty of space for a variety of seasonings, a bottle opener on the side of the box, roll of aluminum foil on a dowel rod and mounted metal tear strip for easy cutting, a special opening to store a meat thermometer and a pan attached to the bottom of the box.

Handmade Grill Supplies Box
My favorite part (which was Brent’s idea) is how we added hinges on the front and back of the box so a normal sized baking pan could attach to the bottom. This way they always have a plate to carry all their grilled items at their fingertips.

All they have to do is rip off a piece of foil from inside the box; line the pan with it and they are ready to go serve all the delicious items they cooked up!

Handmade Grill Supplies Box
We wanted to build a sturdy box for our dads that could be a practical spot for them to store all their grill supplies and an easy way to carry it all out to the grill. That way they can spend more time outside enjoying the party with friends and family rather than running around trying to gather all their grilling necessities.

Handmade Grill Supplies Box
A host should have a good time at their own party!

Handmade Grill Supplies Box
The cool thing about the grill supplies box is whether they are just walking to the grill in their own backyard or taking it on a camping trip, they can be sure their supplies will fit nice and neat and will be readily accessible.

Brent and I hope our handmade Father’s day gift makes our dads’ lives just a little bit easier because after all they have done for us, it is the least we can do.

PIN THIS PROJECT

Handmade Grill Supplies Box

PROJECT FEATURED ON DOMINO.COM

We were excited and honored to have our handmade grill supplies box and the story behind this Father’s Day gift featured on domino.com. Click the read story link below to learn more about this project.

a diy father’s day gift idea

A thoughtful gift for the Dad who loves to grill.

Read Story

DIY Yarn Wall Art

Branch & Yarn Wall Hanging

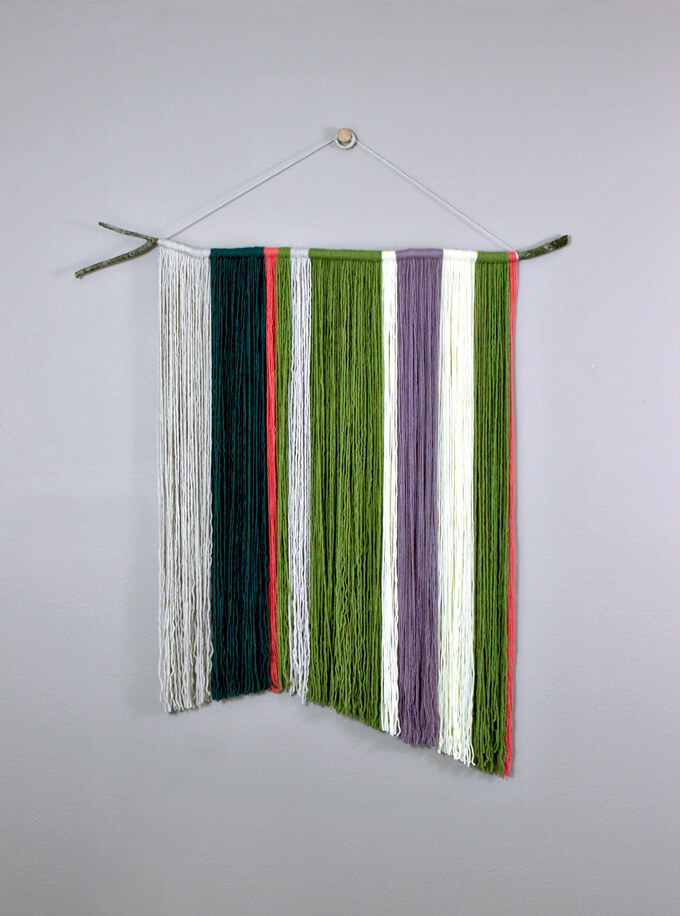
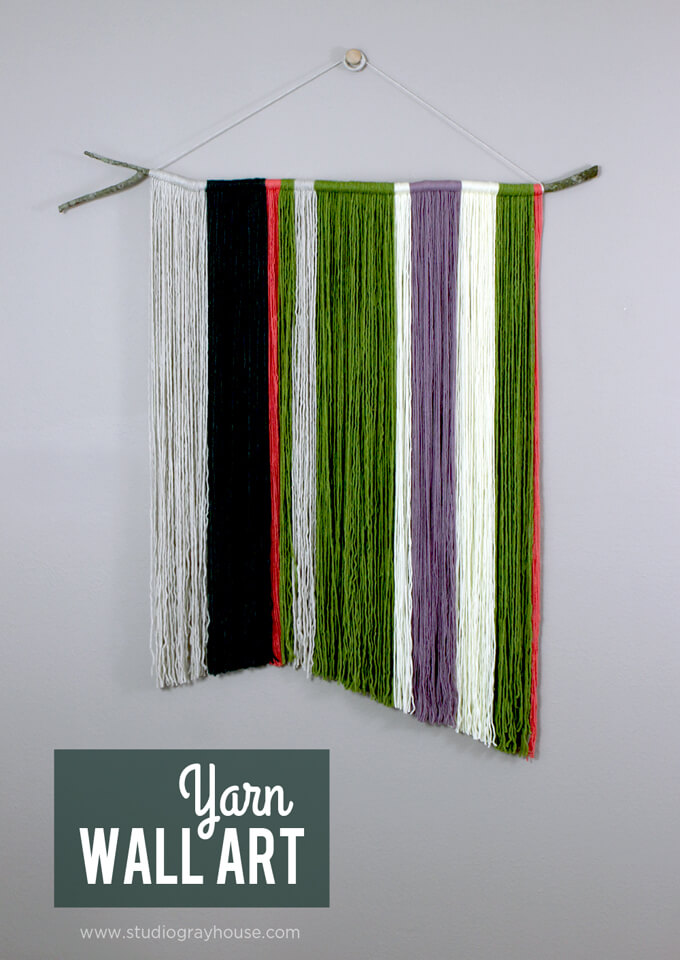
Check out how we made a colorful branch & yarn wall hanging for our guest bedroom.

Yarn Wall Hanging

One room that we haven’t shared yet on the blog is our guest room. If I am being honest that is because the design of that room is still all over the place. I found a new colorful duvet cover that I love but we just haven’t been able to give much time and attention to this room. There is a lot of mixing and matching of furniture going on and not in a good way, more of an any left over piece that didn’t have anywhere else to go kind of way.

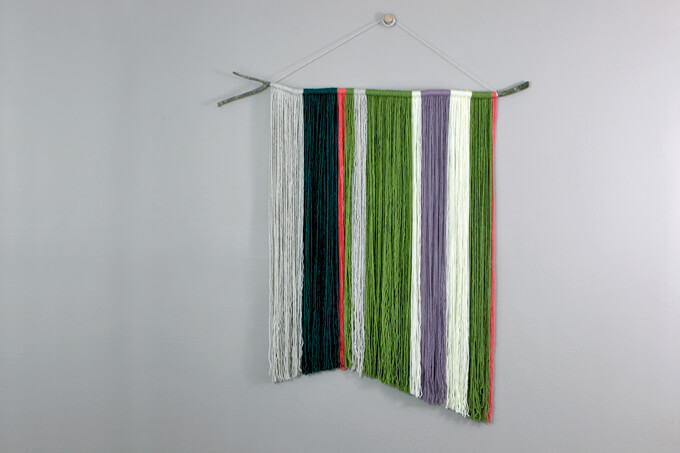
A branch and yarn wall hanging was the perfect solution. This project was really easy and fun to make. We put it together in just a few hours and love the results. Today we are sharing how we made our branch and yarn wall hanging.

SUPPLIES

MATERIALS

  • Yarn in multiple colors
  • Branch
  • Metal loop
  • Cabinet pull knob
  • Double end threaded screw
TOOLS

  • Scrap Wood
  • Clamps
  • Scissors

HOW WE MADE OUR Yarn Wall Hanging

Yarn Wall Hanging
1. I loved picking out all the colors of yarn I wanted to incorporate into the wall hanging. I choose a few greens that matched the duvet cover in the room and then selected contrasting colors and neutral colors for balance.

Yarn Wall Hanging
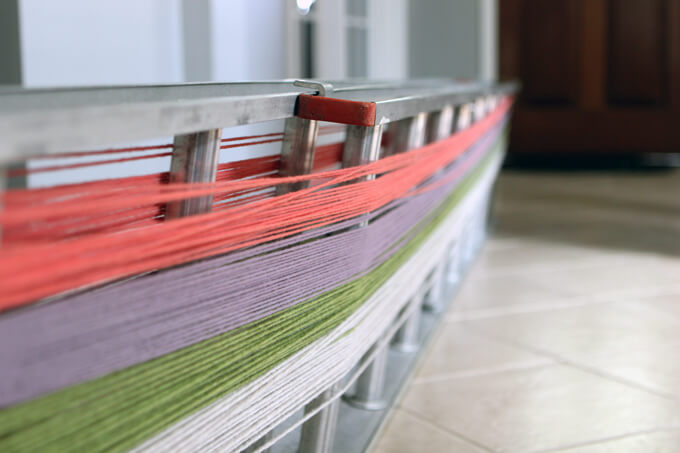
2. We measured how high we wanted the yarn wall hanging to be on the wall and then doubled the height to determine the length the yarn needed to be cut. For ours we wanted it pretty large so we cut all our yarn into individual 8 1/2 ft. pieces.

To do this quickly we wrapped all the yarn around a ladder (set to 8 1/2 feet). Then we cut all the yarn at once at both ends. We did this for each color of yarn.

DYarn Wall Hanging
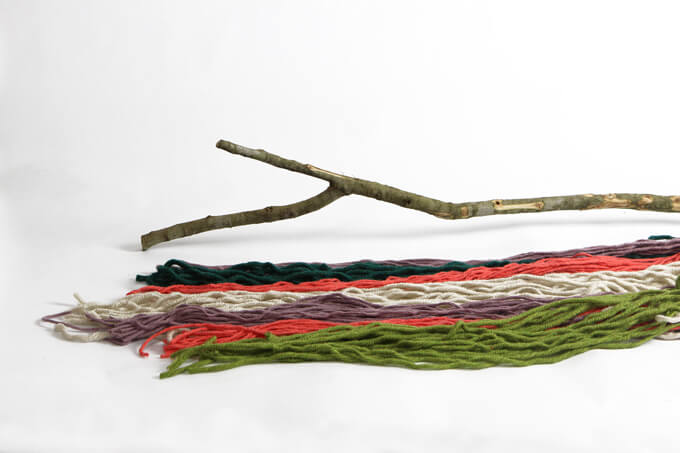
3. After we cut all the yarn, we went on the search for a branch. We got our branch off a tree in our front yard. Don’t worry, it needed to be trimmed anyway. Win, Win. Before we used it we cut it to the length we wanted and then cut off all the knots on the branch.

We wanted a consistent surface and it didn’t really matter what most of the middle of the branch looked like since we were going to cover it up with yarn anyway.

Yarn Wall Hanging
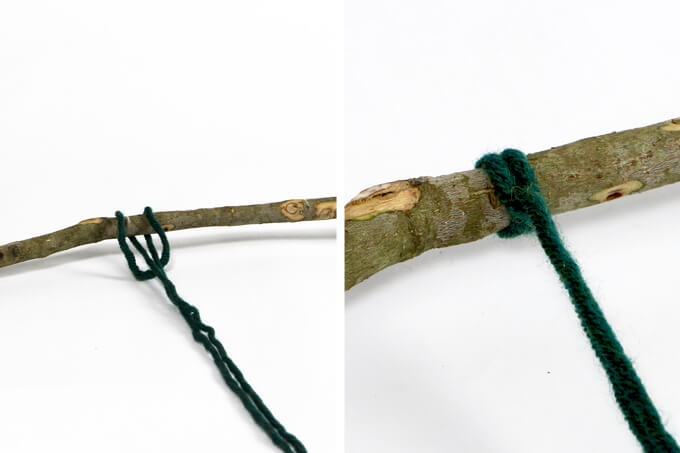
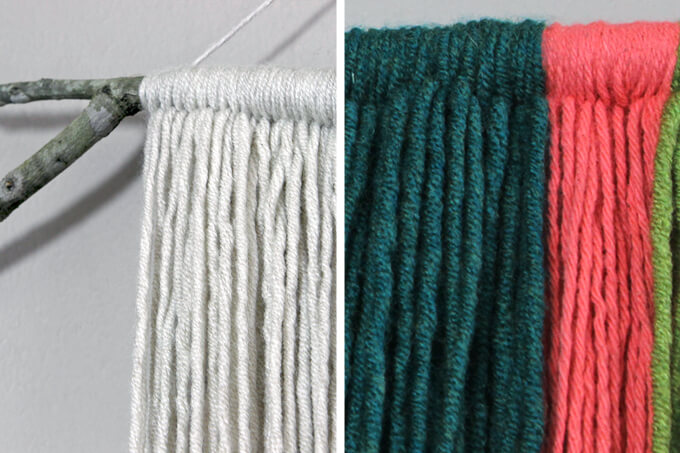
4. To attach the yarn to the branch, we folded a piece in half and then ran the folded end under the branch. After laying the fold over the top of the branch, we pulled the two loose ends through the loop.

This created a simple knot that is often called a Lark’s Head Knot. We repeated this step with each strand of yarn varying the colors to create our desired pattern.

Yarn Wall Hanging
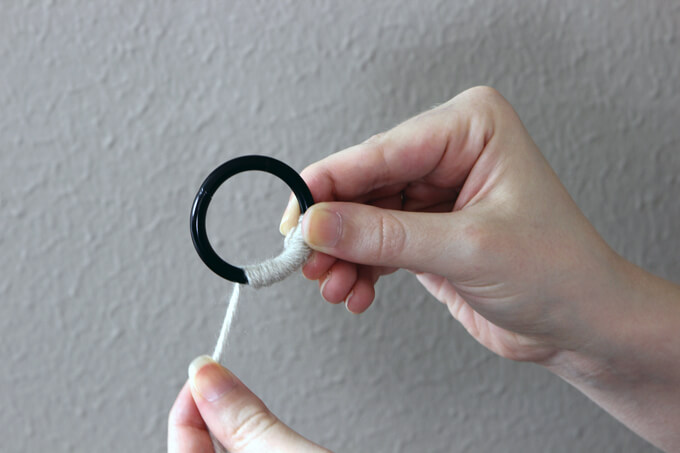
5. To hang the branch we tied it to a metal loop that is often used to hang curtains. The color of the metal ring was too dark for the look we were going for so we wrapped it with an extra piece of yarn to make it blend in and be less noticeable.

DIY Yarn Wall Art
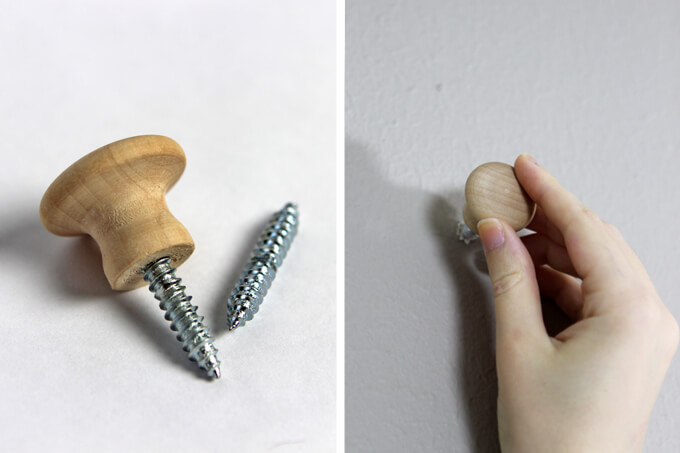
6. We hung the metal ring on a cabinet pull knob. Instead of using the screw that came with the knob that is intended go through the face of cabinets, we used a double end threaded screw.

This allowed us to screw into the knob and into the wall making it secure enough to hold the wall hanging.

Yarn Wall Hanging
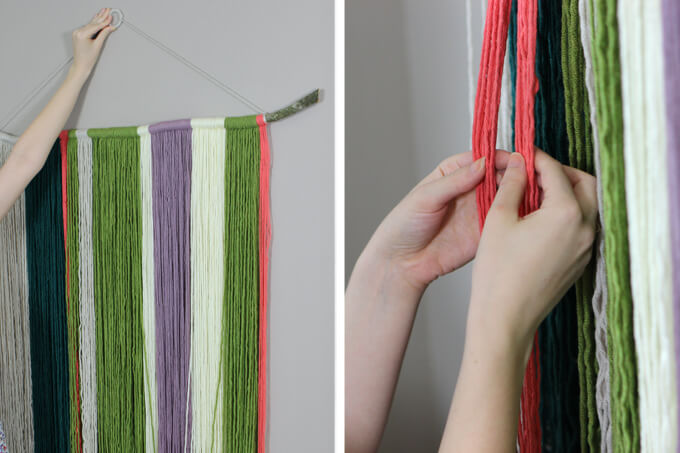
7. After we hung the branch and yarn wall hanging, we straightened the yarn to make sure all the strands were in the right place.

Yarn Wall Hanging
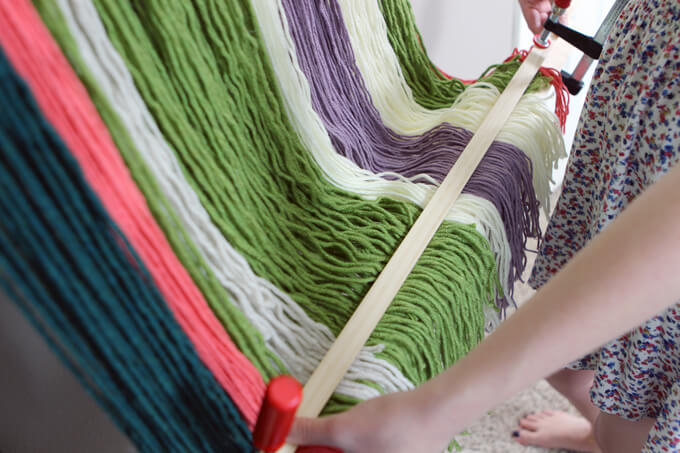
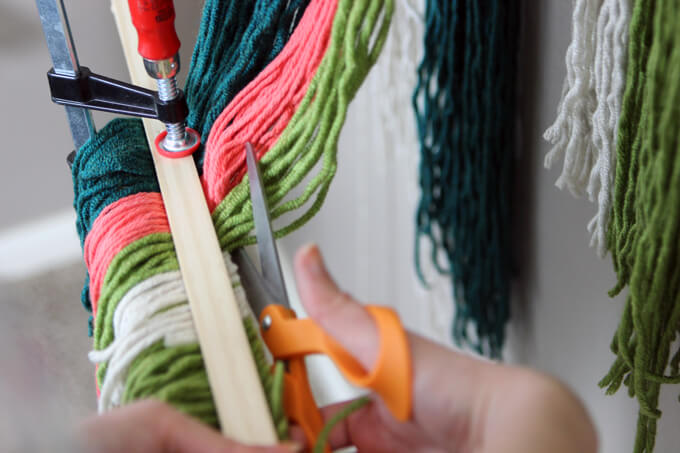
8. To provide a straightedge to cut the yarn we clamped the yarn where we wanted to cut between two boards.

Yarn Wall Hanging
9. Finally, we cut the yarn against the board. This shaped the bottom of the yarn and made it look even.

Yarn Wall Hanging
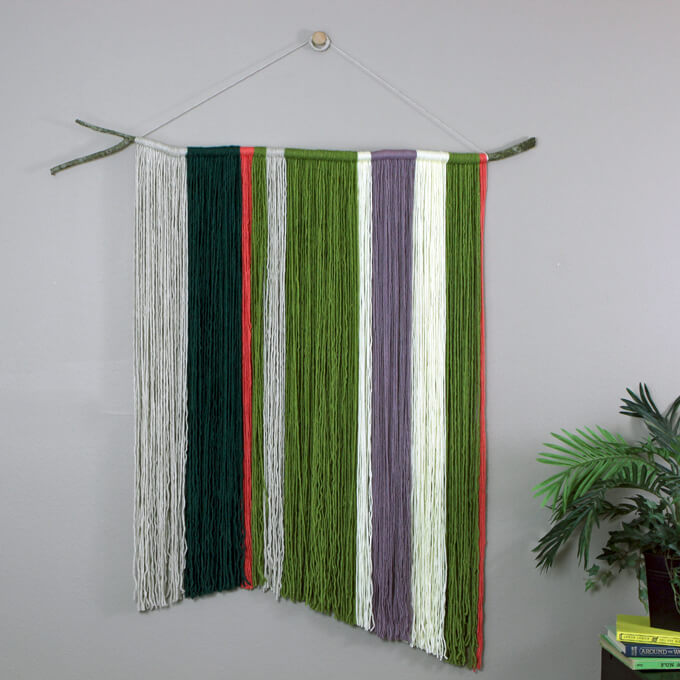
The branch and yarn wall hanging brings cheer, color and whimsy to our guest room. I love how it brightens up a blank wall. You know what else I adore about this project? How low maintenance it was to make. I did the majority of it while sitting on the couch watching TV at night.

Yarn Wall Hanging
Yarn Wall Hanging
From picking out the colors of yarn, to drawing up a pattern, hunting for the perfect branch and hanging up the finished product, this project was extremely fun to create.

PIN THIS PROJECT

Yarn Wall Hanging

DIY Gutter Installation

DIY Gutter Installation

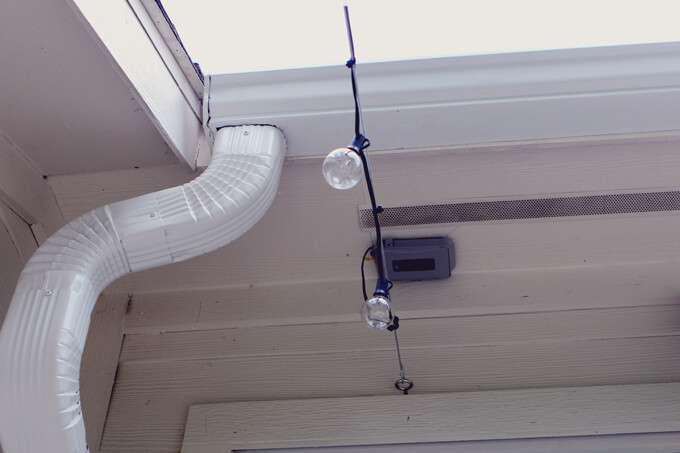
Follow along as we share how to DIY gutter installation. We decided to add gutters to the back of our house to keep the water off our back patio.

DIY Gutter Installation

Today I (Brent) am sharing our latest unexpected project. Well, I don’t know if you can call it unexpected because it has been long over due but it was one of those boring home maintenance projects that is necessary but not the most fun way to spend a Saturday. The project I am talking about is DIY gutter installation.

The saying goes when it rains, it pours and that literally couldn’t be more true about the weather the past few weeks in Houston and all over Texas. Although the water on our street was at one point up over our curb, we count ourselves extremely fortunate that we didn’t experience any major damage. Our problem was insignificant compared to what many others faced and we are so thankful for that.

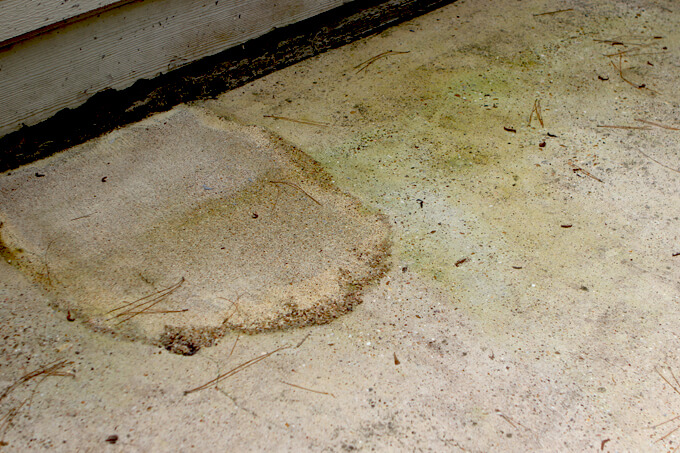
Our issue was we had no gutters on the back of the house and the concrete back patio was proof that this was not an ideal situation to be in with all this rain.

The inadequate drainage had spelled disaster for the slabs. Let’s just say the concrete has turned all kind of unnatural colors. Heavy rain also caused the run off from the roof to splash off the concrete and hit the back of our house causing problems with the siding.

DIY Gutter Installation

We had to bite the bullet and install gutters to help avoid any excess water from pooling on the concrete and causing mold and mildew to grow.

DIY Gutter Installation

SUPPLIES

FYI: This post contains a few affiliate links to products we used to make this project. Gray House Studio does receive commissions for sales from these links but at no extra cost to you. We appreciate you supporting this site. Read our privacy and disclosure policy. You can also easily shop our recommended products here.

STEPS

DIY Gutter Installation

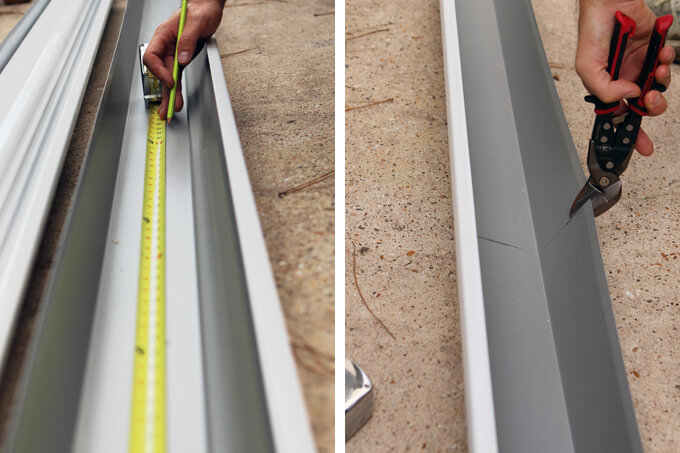
1. The span of the roof over the patio is 16 feet wide and since the gutters that can be purchased from our local hardware store only come in 10 foot lengths we had to use offset snips to cut the second section of gutter to the correct length.

DIY Gutter Installation

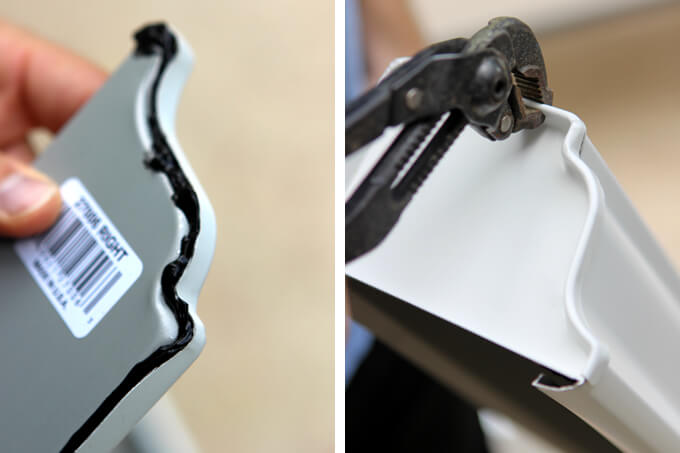
2. Before hanging the gutters on the eave of the roof we installed the end caps on each side of the gutters.

We will eventually be painting the gutters to match the eave so we used a black paintable caulk to seal the joint between the gutter and the end cap.

We used a pair of vise grip pliers to crimp the cap to the gutters.

DIY Gutter Installation

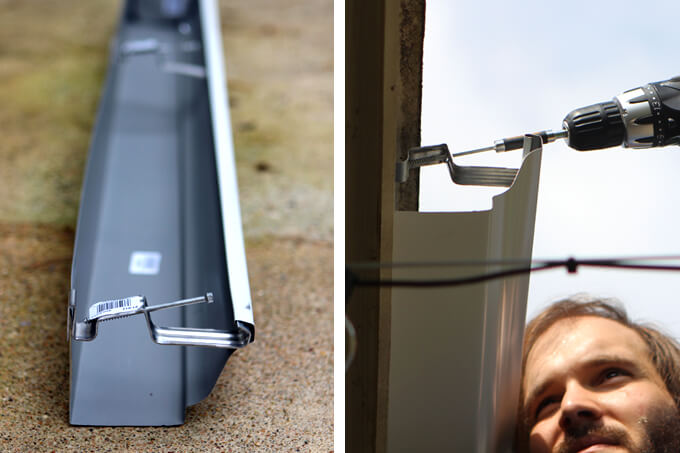
3. There are several different types of hangers to secure the gutters to the eave of the house.

We chose to use gutter bracket hangers that slide into the gutter and can’t be seen from the ground when the gutter is installed.

We used our drill to secure each screw through the siding into a roof rafter.

DIY Gutter Installation

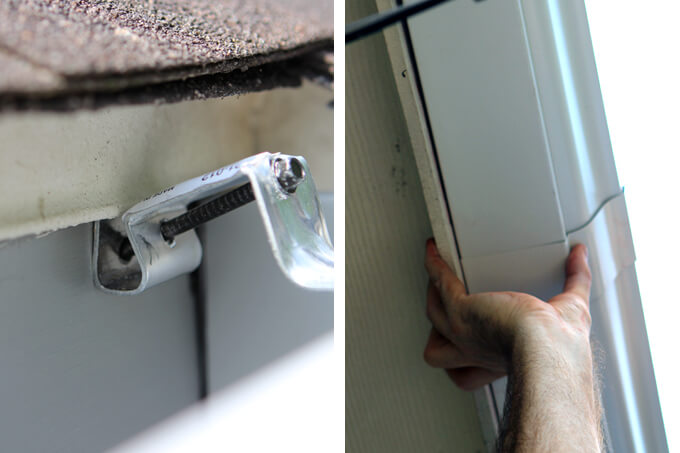
4. To make certain that the maximum amount of water enters the gutter and stays in the gutter, we installed flashing under the shingles and over the back edge of the gutter.

This prevents water from getting underneath the shingles and on the roof sheathing. For the seam where the two pieces of gutters connect, we wrapped a slip joint over that seam and applied caulk to prevent leaking.

DIY Gutter Installation

5. To allow the gutter to drain effectively, the gutter was installed at a slight angle and on the low side we installed a downspout.

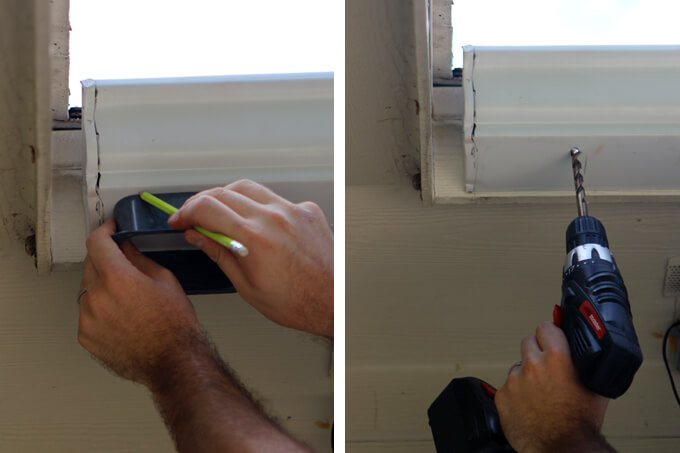
To install the downspout, we marked a hole the size of the downspout outlet. Then we used a drill to make a hole next to each place where we marked to make it easier to cut open the hole for the outlet with offset snips.

DIY Gutter Installation

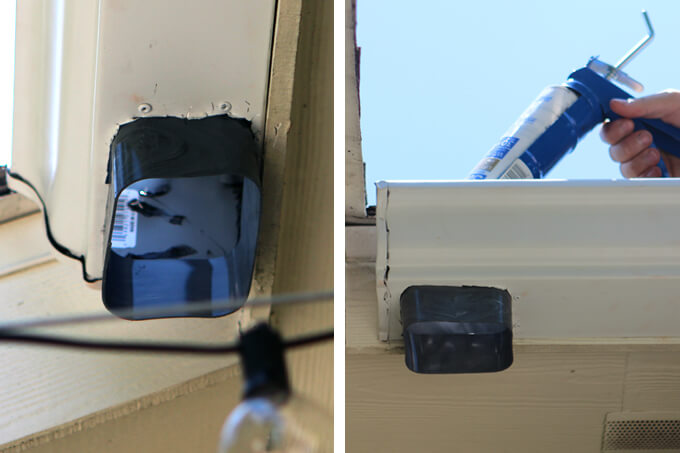
6. The downspout outlet was installed with a rivet gun and rivets to avoid having the sharp point of a screw being exposed through the bottom of the gutter.

After we installed the connector we used caulk to seal all the seams inside the gutter.

DIY Gutter Installation

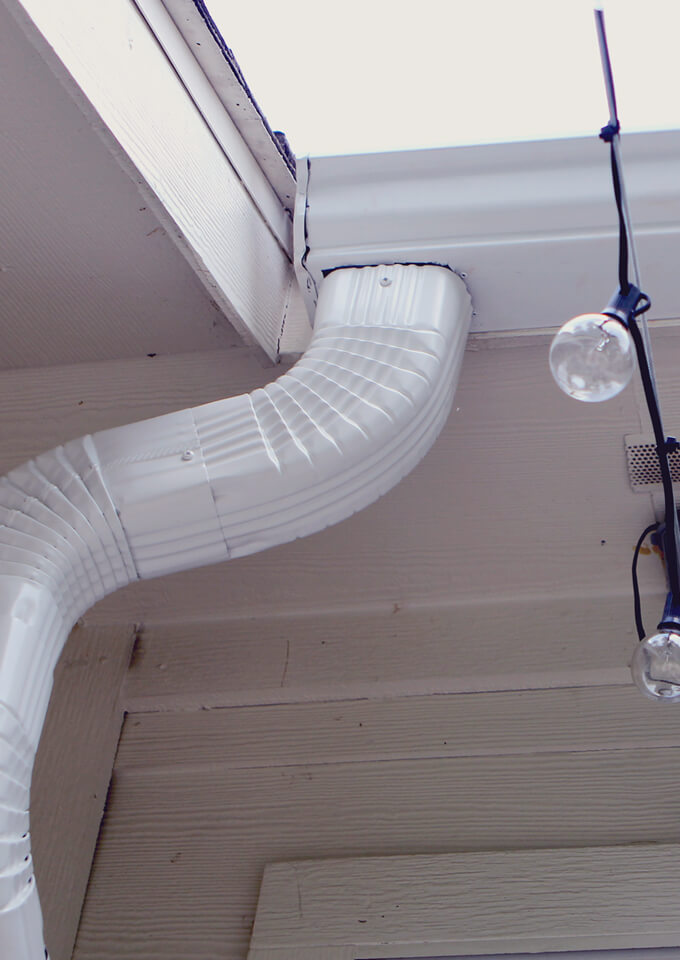
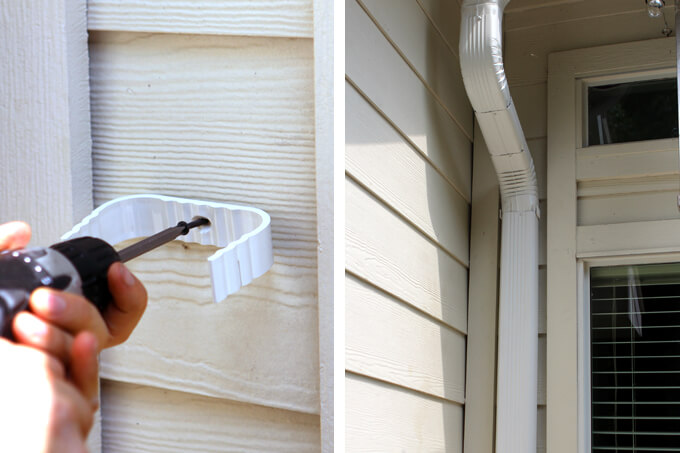
7. The downspout pipe is held to the siding of the house with downspout clips.

DIY Gutter Installation

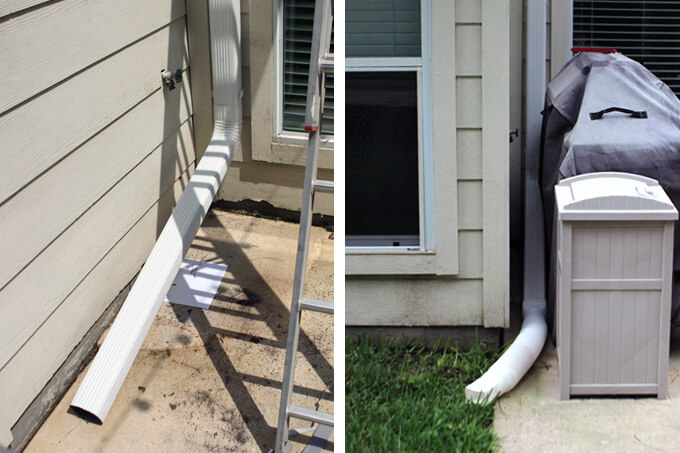
8. One foot off the ground we turned the downspout away from the house using an an elbow piece to allow the pipe to have a gradual slope.

Once past the house the downspout was finished off with a plastic flexible pipe.

As we finished the last several steps, we started hearing thunder in the distance. Which was not a bit surprising. It wasn’t long before we were running around frantically trying to get the tools inside before the next downpour.

On the bright side we got to put the gutters through the ringer within minutes of installation and so far so good.

DIY Gutter Installation

The backyard still has a long way to go and I promise the projects to come in the backyard will be much more exciting. Now that we have solved the water drainage problem, we are hoping to start working on a deck.

PIN FOR LATER

A DIY home renovation tutorial showing how to install gutters.

Invisible Bookends

How to Make Invisible Bookends

In this super simple DIY tutorial we will show you how to create sturdy invisible DIY bookends.

Invisible Bookends

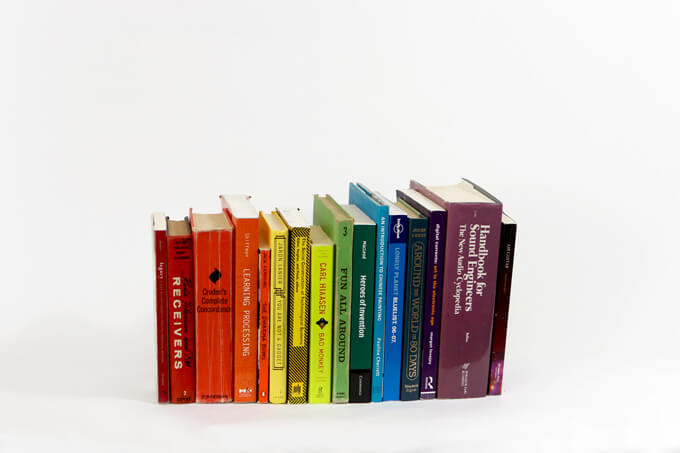
After we built our floor to ceiling industrial shelves in our library it was a common occurrence for our large and really heavy books to just fall off the ends of our shelves.

They would make a booming noise as they slammed against the tile below. No matter where we were in the house when books would fall it would scare us half to death.

We would joke that it must have been Walter (our friendly house ghost). It is a joke Brent and I have to blame Walter when doors get left open or lights start to flicker, the cat gets shut in a random room or books randomly fall off the shelf.

The truth was we had no bookends for our shelves so I tried to use our heaviest books on the end to act as bookends and keep the rest of the books propped up because I liked the books being able to free stand without anything pushed up against them. This worked for awhile until the weight of the books was too substantial for the large book and it came crashing down to the floor.

Thank goodness the cat was never walking by when that happened! We needed a lot of bookends for our large shelves and didn’t want to spend a ton of money on them. To keep the shelves from looking extremely cluttered, we planned to incorporate only a few decorative bookends and have the rest be as concealed as possible.

Even better would be if they were invisible. This is not a new concept, invisible bookends, but we challenged ourself to try and make them with materials we already had in our garage and found a straightforward way to make them that worked like a charm. They are both durable and simple to “install”.

Today we are sharing our technique for creating the visual effect of having books appear to be standing on their own but are actually being held nice and secure in place.

How to Make Invisible DIY Bookends

Invisible Bookends

SUPPLIES

FYI: This post contains a few affiliate links to products we used to make this project. Gray House Studio does receive commissions for sales from these links but at no extra cost to you. We appreciate you supporting this site. Read our privacy and disclosure policy. You can also easily shop our recommended products here.

STEP BY STEP GUIDE

Invisible Bookends

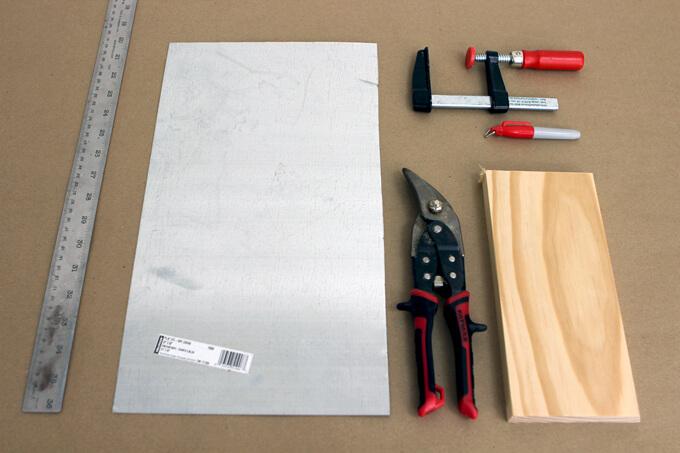
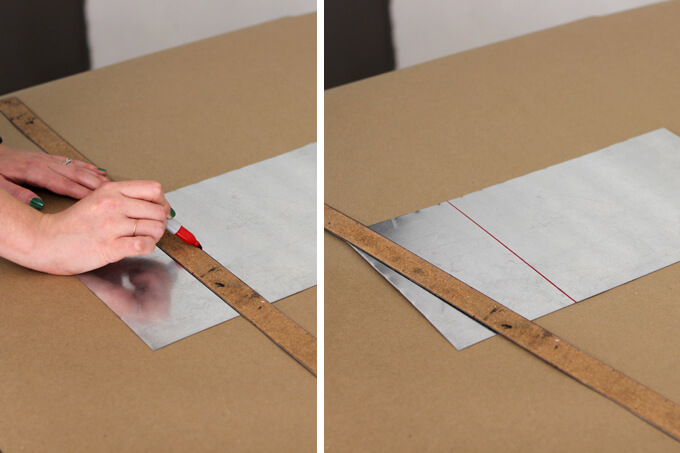
1. First we used a yard stick to mark the correct size for the bookend on the piece of sheet metal. It is easiest to use a sharpie to draw on the metal. The width of the bookend should be at least two inches smaller than the book’s width.

The height of the piece of sheet metal needs to be almost twice the height of the book because you will be folding the piece of metal in half and you want it tall enough to support the book without sticking out the top.

Invisible Bookends

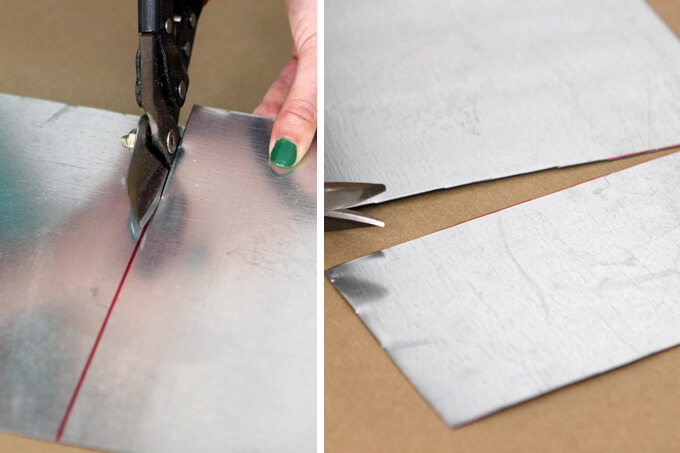
2. Once the size of the bookend was marked, we used a pair of offset snips to cut the metal.

If you are planing on buying snips, pick a pair out that is angled and the blades turn at the end.

The angled pairs are made to be specific for the right or left hand so be sure to pick the tool that matches your dominant hand.

The angle in the tool works well for long cuts because the handles does not interfere with cutting the material.

Invisible Bookends

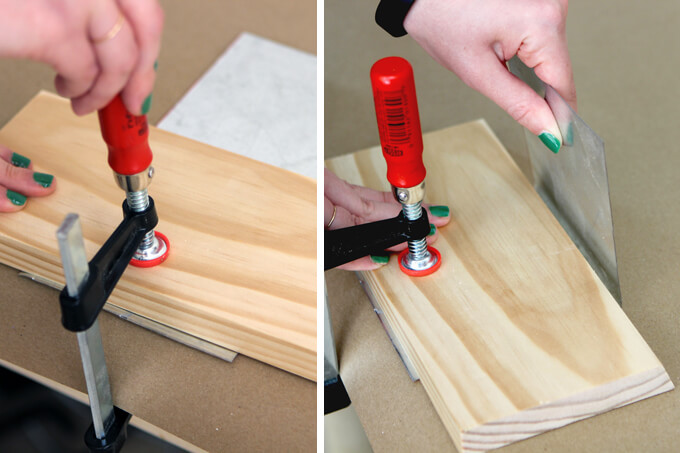
3. Finally, we bent the sheet metal in half. In order to bend the piece of metal it is helpful to use a clamp and clamp the sheet metal under a scrap block of wood.

The wood provides a straight edge for the metal to bend over.

The bend should be made at the center of the piece of metal. Once the bend reaches 90 degree the bookend is finished.

Invisible Bookends

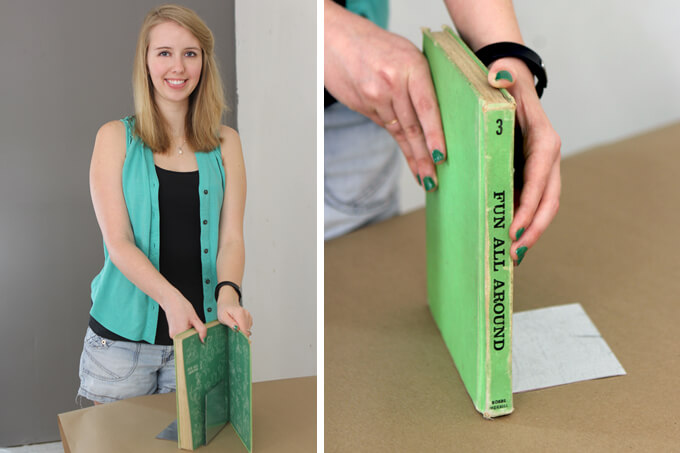
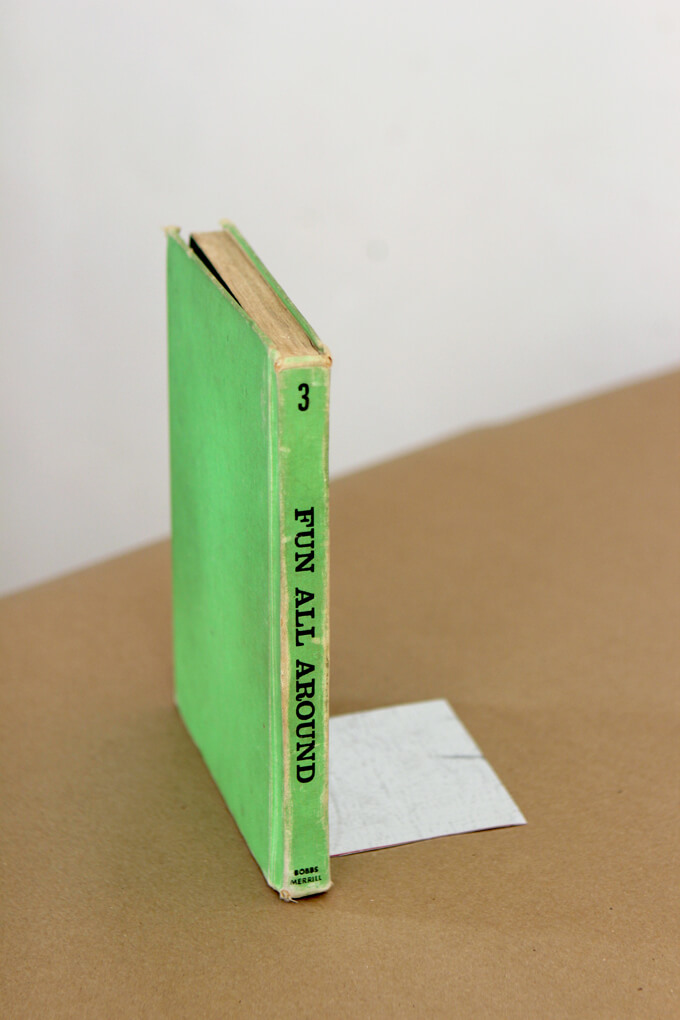
4. To make the bookend “invisible” place the vertical piece of metal inside the front cover.

Invisible Bookends

When you place additional books next to this book they will cover up the bottom piece of sheet metal making it appear as if the books are free standing on their own with no support. That means your invisible bookend is working!

Invisible Bookends

Our invisible bookends were a lifesaver on our shelves. The danger of falling books has now been prevented! Hidden sheet metal bookends are a great solution for keeping shelves clean and uncluttered. They also make for the perfect alternative if you don’t have a cat to hold up your books.

PIN IT FOR LATER

A super simple tutorial showing how to make invisible DIY bookends out of sheet metal.

Library Ladder

DIY Ladder for the Library

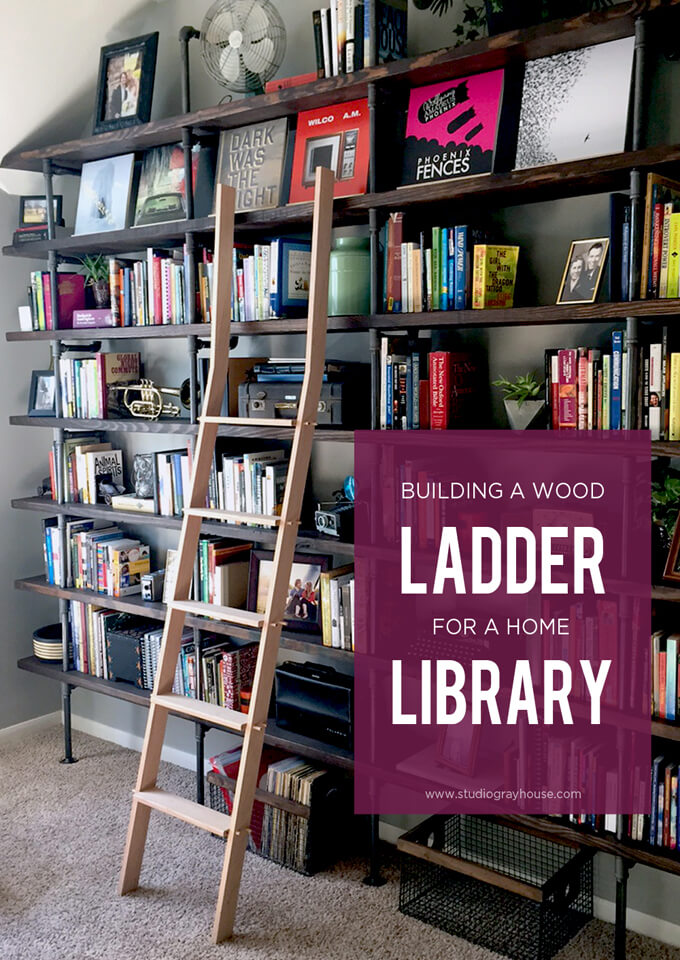
We are sharing how we built a DIY ladder for our home library to reach the top shelves of our large wall of industrial shelves.

DIY Ladder

Hey, Brent here. I’ve never said this out loud before but since the internet is the safest place to share your deepest and darkest secrets, I feel comfortable expressing that I fell in love with libraries after watching Beauty and the Beast. I can’t speak for Courtney but I think you would be hard pressed to find someone who wasn’t inspired to create their own library after watching the feelings of joy sweep across Belle’s face as she explored the Beast’s library only moments after being abducted.

So I got to thinking that it would only stand to reason that a guest that would willingly visit our home might be even more impressed to find a large library in our entryway.

A couple of months ago we shared how we turned our formal dining room into a library by building floor to ceiling bookshelves. We had a lot of positive feedback on our library shelves but two of the most common questions we received were, “What about a ladder?” and “How do you reach the top shelf?”

When we found out Better Homes and Gardens was coming to our home to photograph our library, it was finally the kick in the pants we needed to build a ladder for the bookshelves. Courtney and I have always been on the same page when it came to wanting a ladder for the library so it was awesome to finally make our dream a reality.

DIY Ladder
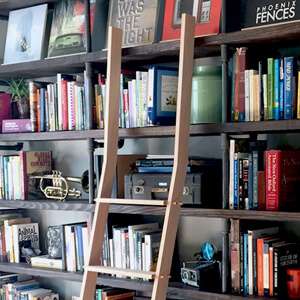
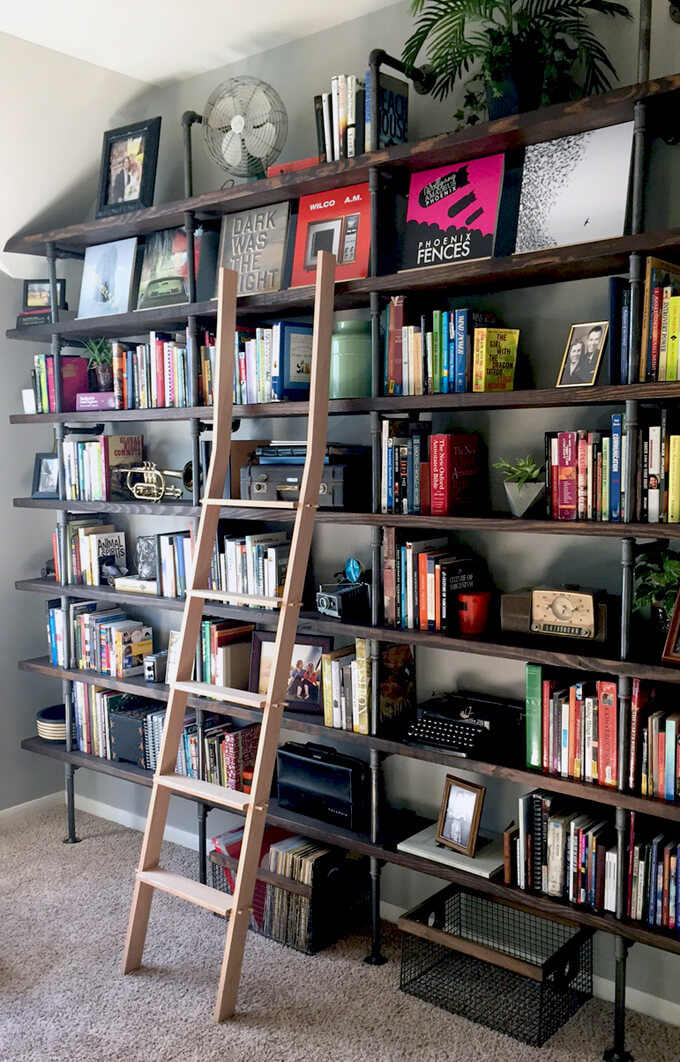
Here is the finished DIY ladder with my beauty. Isn’t the resemblance uncanny? Believe it or not I didn’t even have to kidnap her to get her to agree to this photo.

How to Build a DIY Ladder for Library Shelves

DIY Ladder
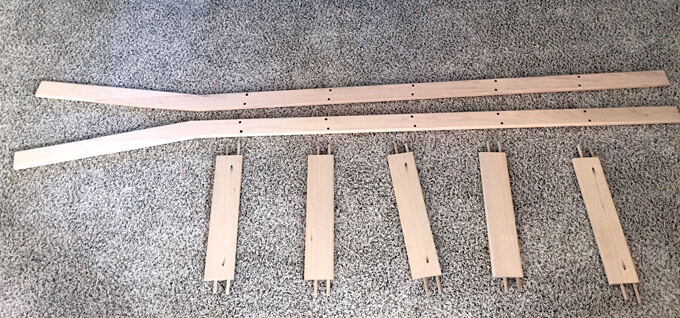
1. The design for our DIY ladder is fairly simple. We built it so each rung of the ladder has two dowel rods that extend through the vertical supports. Every other step screws into the vertical supports locking everything in place.

DIY Ladder
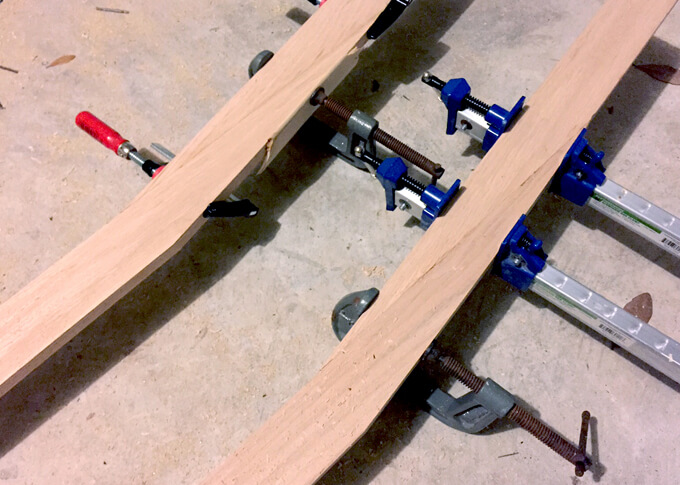
2. The top quarter of the ladder was cut at an angle and glued back together to create a bend. This allows the steps of the ladder to sit at a comfortable incline without extending too far away from the bookshelf.

DIY Ladder
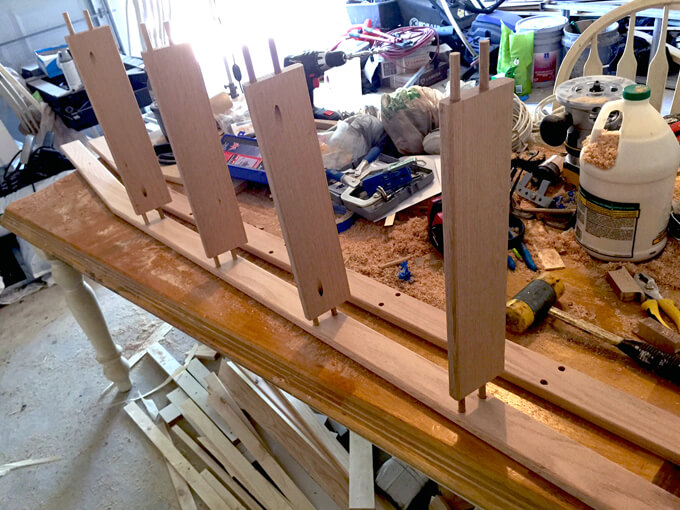
3. Here is a candid behind the scenes photo of the ladder building process in the garage. Notice the extreme lack of organization that is happening in the background.

This is a realistic shot of what it looks like when you rush to build something between the very few hours of getting home from work and going to bed.

As the project progressed the pile of tools and leftover supplies grew larger and larger because cleaning during a project is not on my list of priorities. The pro to this approach is every tool in your garage is within hands reach.

The con is within reach usually means on the floor or some other inconvenient location for walking.

DIY Ladder
4. Once the ladder was assembled I got to be the first to test it. I didn’t get a photo of this part because the stakes were really high and I was afraid I might shed a few tears if anything went wrong.

I only had one shot and two days to get the ladder designed and built so it not only looked nice but was also functional and safe for the photoshoot.

Our first thoughts were to make a rolling ladder but then we decided that we would rather the ladder have a minimal design as to not take too much away from the shelves. Since the style of the ladder we built makes it light weight, it is easy to pick up and move to the spot we need to reach.

It is functional and adds character without overwhelming the already large and heavily occupied space. This decision ended up saving us quite a bit of money and the total cost to build the ladder came out to be about $60.

Our library is far from complete but getting closer with each project we finish. The ladder is a perfect addition to our bookshelves and one of our favorite parts of our library.

Don’t forget to check out how we built our large wall of industrial shelves.

PIN THIS PROJECT

DIY Ladder

DIY Framed Chalkboard

DIY Framed Chalkboard

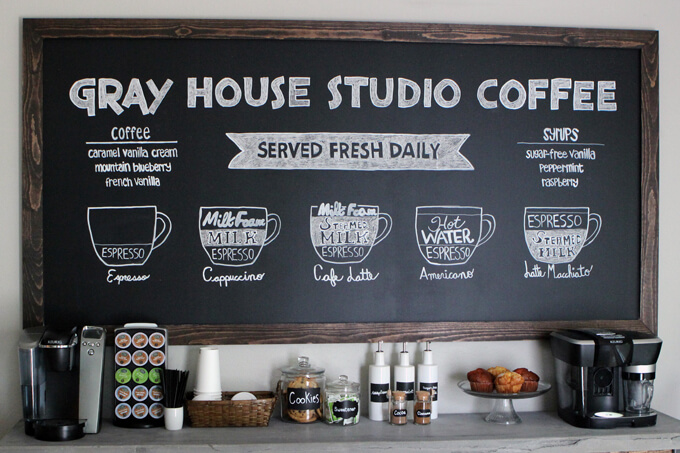
For this simple and versatile DIY decor project tutorial we will show how we made a custom sized framed chalkboard to hang above our coffee bar.

DIY Framed Chalkboard

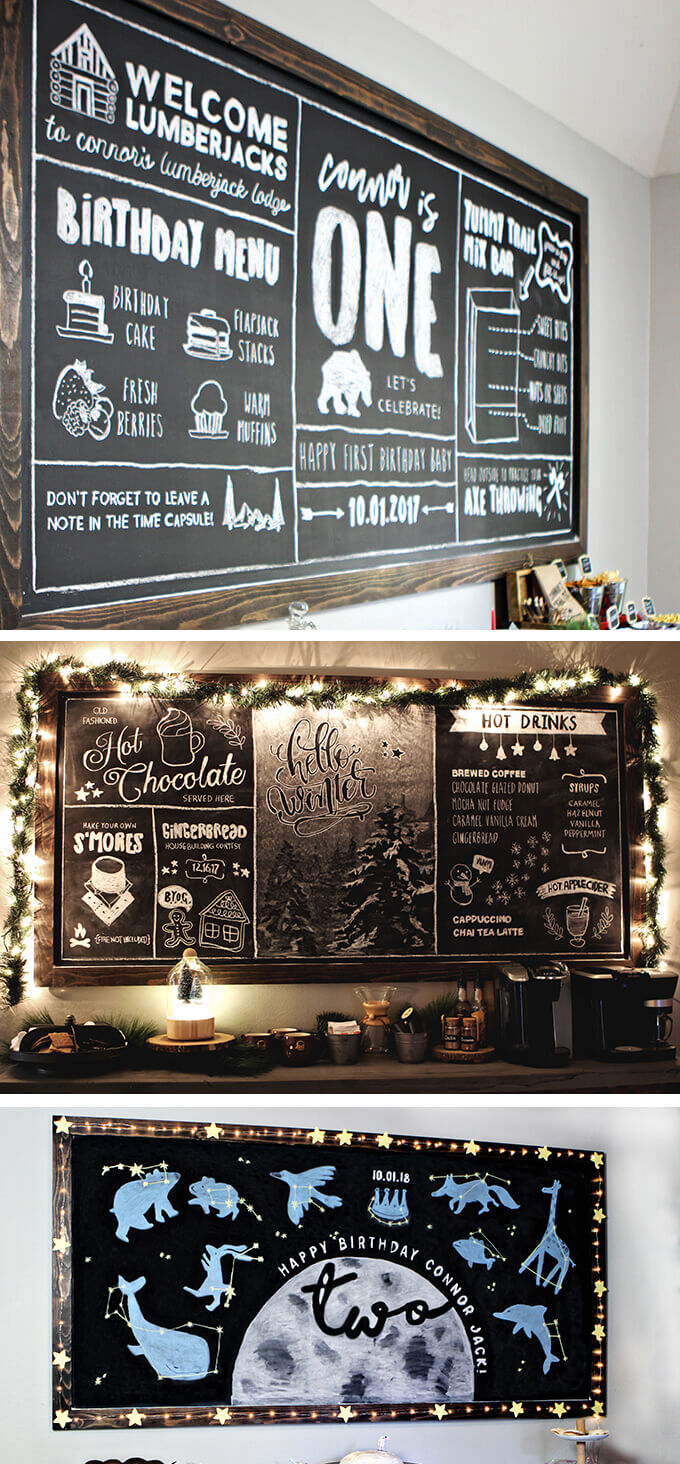
I think it is safe to say large chalkboards have long since moved from being a staple item in classrooms to being a staple item in coffee shops. When looking for inspiration for our coffee bar, we looked at the interior design of lots of coffee shops (both in photos and in person). One of the common design choices we noticed is to utilize large chalkboards to display menus or art.

Having large chalkboards in the home is now becoming more popular as well to keep track of schedules or chores, weekly menu planning or allowing kids to conveniently express their creativity by having a place to draw on the wall (without actually drawing on the wall).

I love this idea because I always had a chalkboard hanging on my wall in my room when I was growing up. I loved to force er… I mean ask my little brother and his friends to play school with me. I was always the teacher of course.

We knew a chalkboard was a necessity for our breakfast nook to capture an authentic coffee bar feel. We just had to decide what form our chalkboard would take. When it came down to it we couldn’t make the commitment to painting the entire wall or even part of the wall with chalkboard paint since we just painted it gray. All the chalkboards we found to purchase were either not big enough or way too expensive.

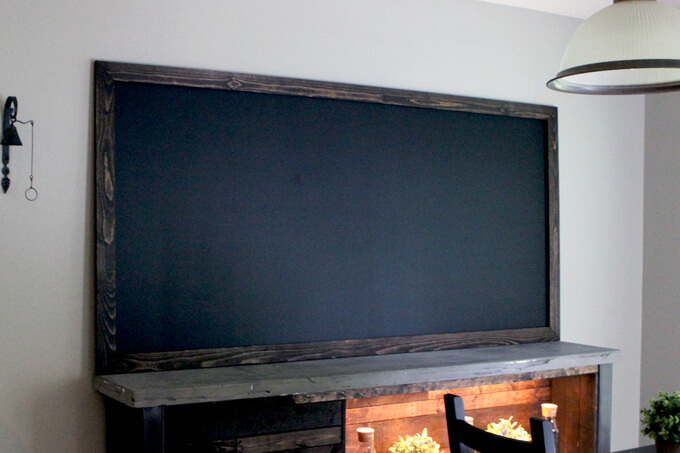
We decided to create our own 7 foot framed chalkboard. This was the best solution for us because we could make it the exact length of the coffee bar, it would fill up the large wall and we could customize the frame to match the wood on the bar.

2022 Personalized Christmas Ornaments
*** Thanks so much for supporting our small shop – Moon Rock Prints – this holiday season! ***

How To Make a DIY Framed Chalkboard

SUPPLIES

FYI: This post contains a few affiliate links to products we used to make this project. Gray House Studio does receive commissions for sales from these links but at no extra cost to you. We appreciate you supporting this site. Read our privacy and disclosure policy. You can also easily shop our recommended products here.

STEPS

DIY Framed Chalkboard

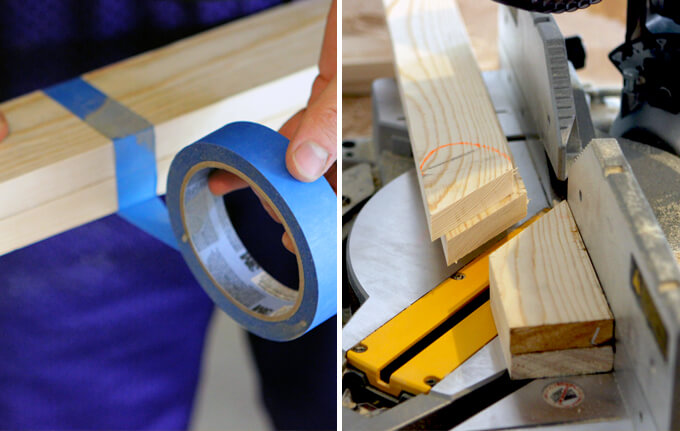
1. The first step was to make our frame. We used painters tape to tape together two of the pine boards that would be on the opposite sides of the frame together.

We taped the two longer horizontal pieces together and then taped the two shorter vertical pieces together.

This allowed us to make one cut through two boards and guaranteed that the matching sides of the frame would be the exact same size. We made our cuts with our miter saw.

After we cut the four pieces for the frame, we stained the boards with a Kona stain to match the wood on the coffee bar.

DIY Framed Chalkboard

2. For the chalkboard surface we used a piece of 4 ft. x 8 ft. hardboard tempered panel.

We chose to use this material because it was really cheap (less than $10 for a 4ft. x 8ft. piece) and it has a smooth finish.

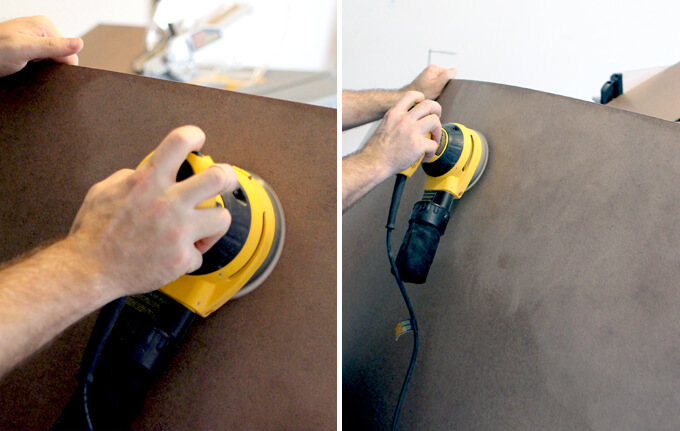
However, with no prep the chalkboard paint would most likely flake off the board. To prevent this, we sanded the entire surface with 120 grit orbit sand paper on our orbital sander.

It provides enough tooth for the paint to have something to grab but it does not make it too rough where the paint surface would look scratchy or bumpy.

DIY Framed Chalkboard

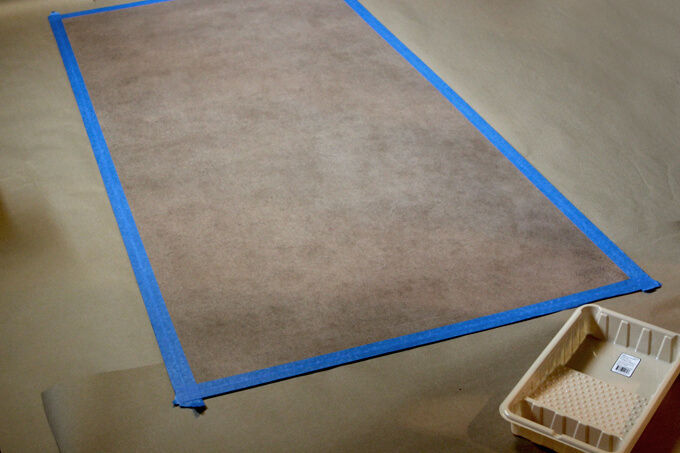
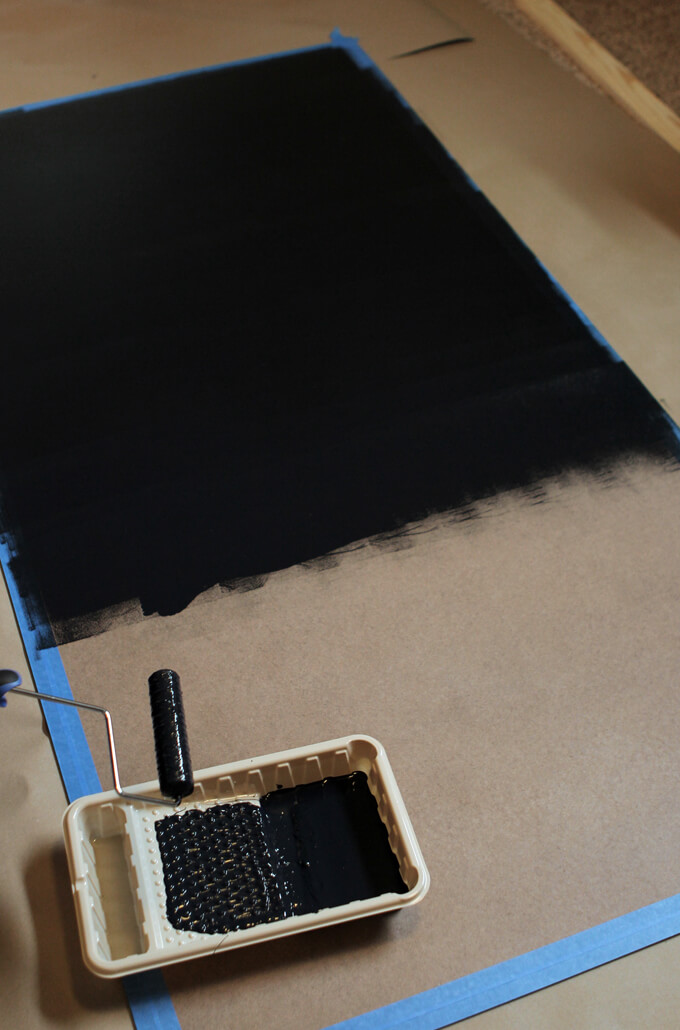
3. We planned to glue the frame to the chalkboard with wood glue so we taped off an area of the board with painters tape before we applied the paint.

We knew the glue wouldn’t adhere well to the chalkboard paint so we needed to make sure we still had an area of the original board to attach the frame.

DIY Framed Chalkboard

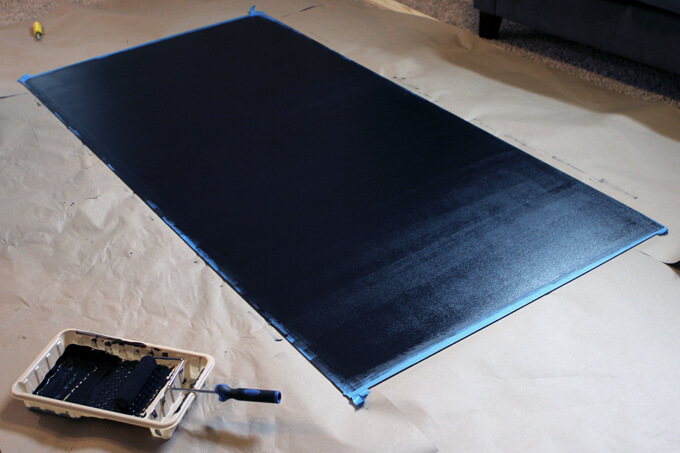
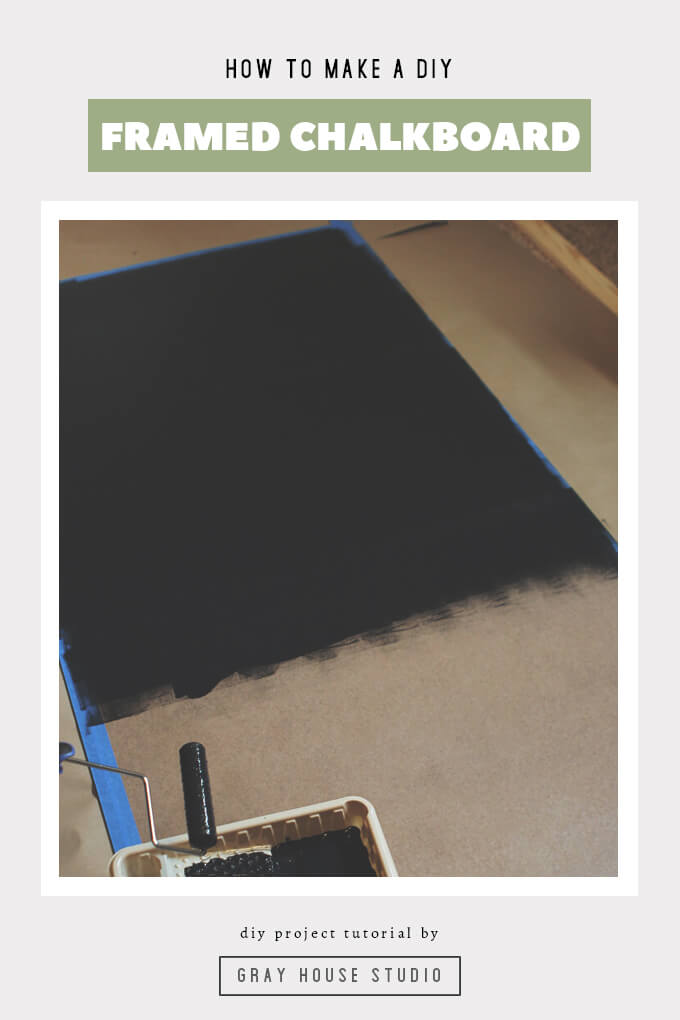
4. To apply the chalkboard paint we poured it into a plastic tray liner and used a foam roller to apply the paint to the board.

It worked really well to create a smooth finish. It took us two coats to ensure that all areas where completely and evenly covered.

DIY Framed Chalkboard

5. After we finished painting the board, we let it dry for awhile.

DIY Framed Chalkboard

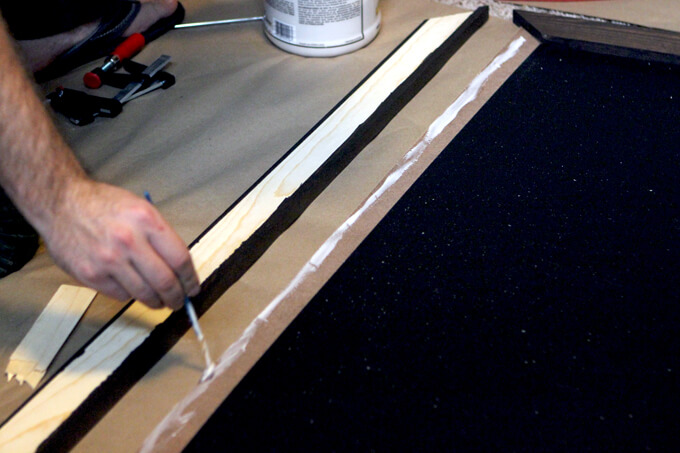
6. When it came time to attach the pieces of the frame to the board, we pulled off the tape and applied wood glue to the unpainted area of the board.

To avoid applying too much glue and having the glue squeeze out from under the frame onto the chalkboard surface, we applied the glue sparingly with a small paintbrush.

DIY Framed Chalkboard

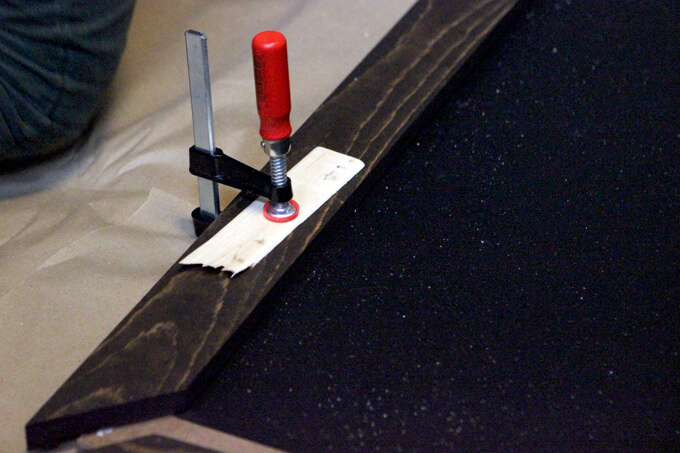
7. After the glue was applied to one side, we used small clamps to hold the piece of the frame to the chalkboard while they dried.

The pressure of the clamp can mess up the finish of the wood so as always we place a piece of scrap wood between the clamp and the frame.

DIY Framed Chalkboard

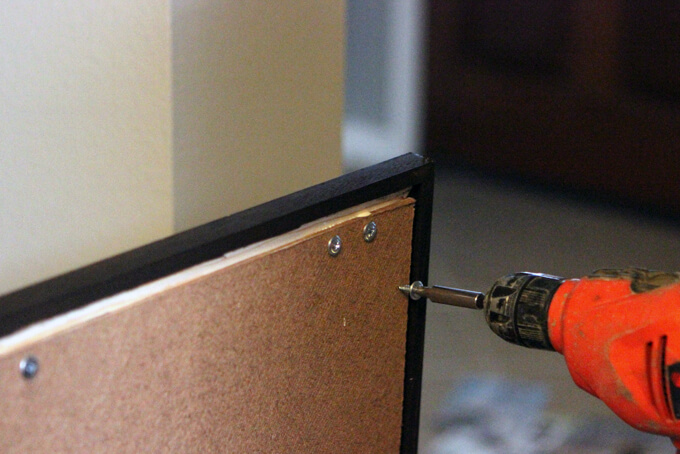
8. Once the frame was clamped to the board we attached the pieces of the frame together and the frame to the board with our drill and screws.

This provided extra strength to the bond and made sure everything was nice and secure.

DIY Framed Chalkboard

9. After we completed our framed chalkboard we added D-Ring hangers to the back and hung it above our coffee bar.

DIY Framed Chalkboard

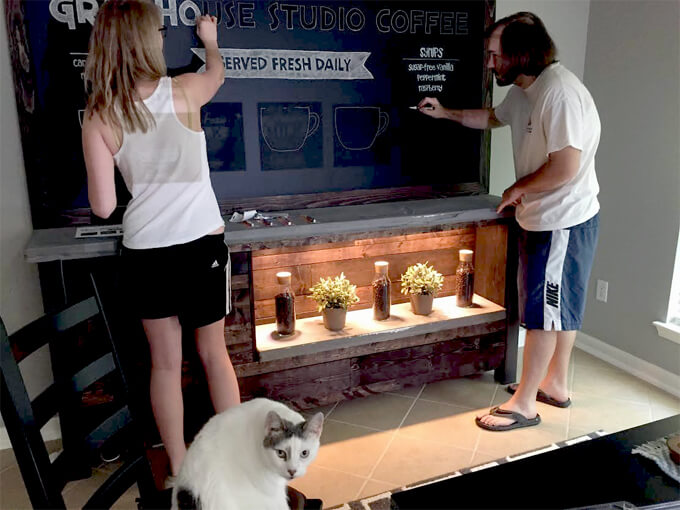
10. I designed our chalkboard art in PhotoShop first. I have pretty good handwriting but it was going to be nearly impossible with the scale of the chalkboard to make everything straight and scaled evenly.

I wanted the design to be personalized but also fairly minimal and clean. We worked in some common coffee shop phrases like “Served Fresh Daily”.

But I am thinking about adding our additional slogan, “At Gray House Studio Coffee, it’s not made until you make it yourself”. I printed out a copy of our design as reference.

Then we used a projector to display the graphic we designed on the computer onto the chalkboard to trace. I would recommend doing this in a dark room or at night but since we were in a bit of a rush I did most of the tracing in the middle of the day with the sun shining through the windows so it was really hard to see what I was tracing.

Loading Preview…

Powered by Creative Market

If you are looking for graphics you can use on your home coffee bar chalkboard, Creative Market has a lot to choose from! They are my favorite source to buy fonts and graphics for my DIY framed chalkboard designs.

DIY Framed Chalkboard

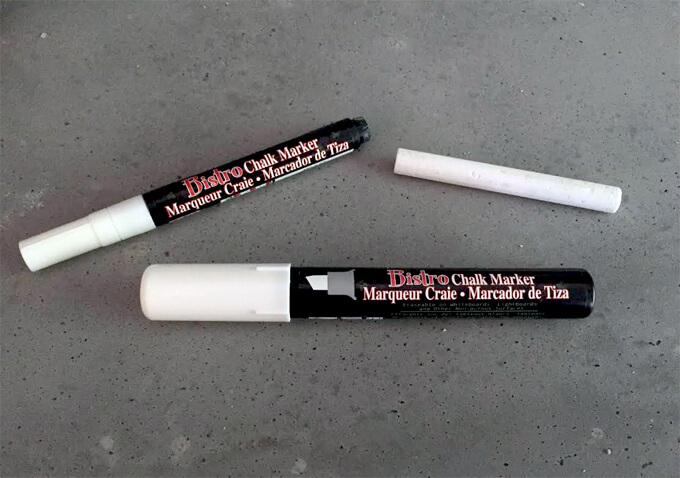
12. We used these Bistro chalk markers and they wrote nice and smooth. The fat tip one works really well for outlining because it makes for smooth, thick lines that you have quite a bit of control over.

I used the thin one for smaller details and smaller text where I wanted to trace over the words several times to make the letters thicker giving it a shaded appearance.

We used regular chalk to do all the shading. Regular chalk gives it gives it an authentic old fashioned chalkboard feel.

UPDATE: We left our chalkboard design for over two years and the chalk marker was pretty much impossible to get off. We had to eventually repaint a new coat of chalkboard paint over it.

I am not sure if that is because the chalkboard markers are meant to be more permanent or because we left it on there too long but while they wrote nice and smooth, I didn’t want to have to repaint the chalkboard after every design.

So now when we create a new design for our DIY framed chalkboard we use Anti-Dust chalk and a pencil sharpener to sharpen the chalk to a point so it is easier to trace.

There is nothing wrong with the chalk markers. If you clean your board off regularly or are looking for more of a permanent solution that won’t wipe off easily when you brush up against it, chalk markers might be the way to go.

However, this is our preferred method now when we redesign our chalkboard because the chalk wipes off very easily but by sharpening the chalk you have more control over the smaller details.

DIY Framed Chalkboard

A large framed chalkboard is a fun element to incorporate into the home.

DIY Framed Chalkboard

Whether they are intended to be functional, as art or both they bring personality to a room. They are especially perfect for home coffee bars to create that cozy and eclectic coffee bar feel.

DIY Framed Chalkboard

We love creating our own framed chalkboard because it really allowed us to get creative both in the size and the appearance of the chalkboard. Having the framed chalkboard span the entire wall of our breakfast nook really catches our guests attention and makes it one of our favorite spaces in our home.

PIN FOR LATER

A simple and versatile DIY decor project tutorial that show s how to make a custom sized frame chalkboard to hang in the home or to use and decorate for holidays or parties.