Being the home owners on a budget that we are, we set out to build a knockoff version of a West Elm outdoor sectional. Ours was made for a fraction of the cost using cedar fence planks and we have building plans for you to make one too!
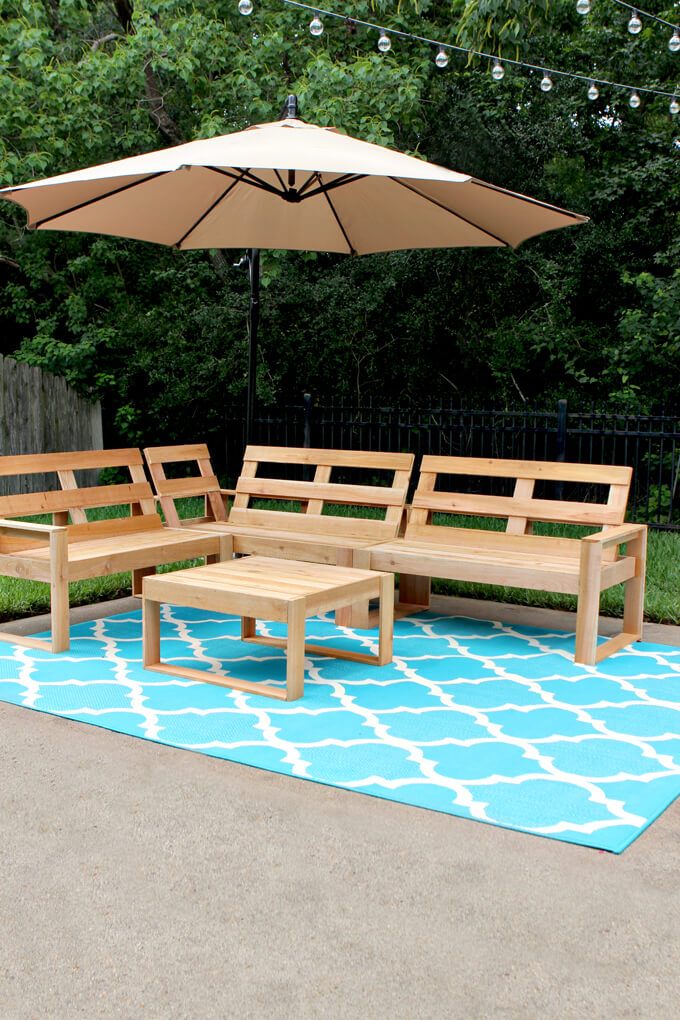
I had my eye on this beautiful outdoor sectional from West Elm but we live in Houston where the rain and mildew is a plenty. I just couldn’t stomach dropping that kind of cash on something that would be ruined quickly or require a lot of time and maintenance to keep clean.
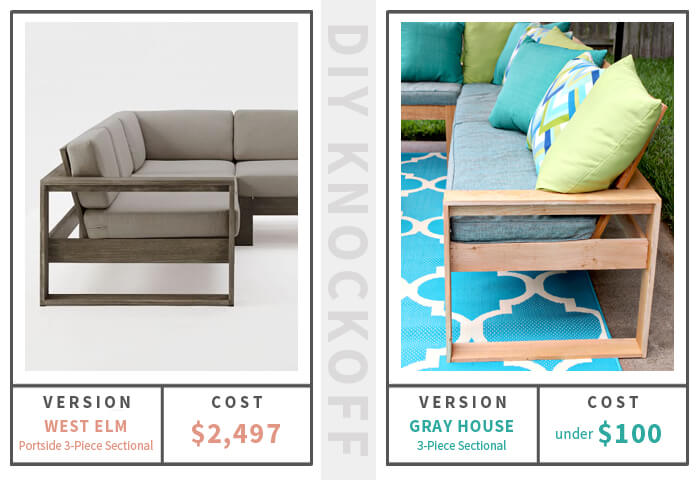
I challenged Brent to build an outdoor sectional that looked similar with a much lower price tag. Brent never turns down a challenge. Oh, he definitely wasn’t enthusiastic about a weekend full of work but he just can’t say no to a building challenge so I had him hooked.
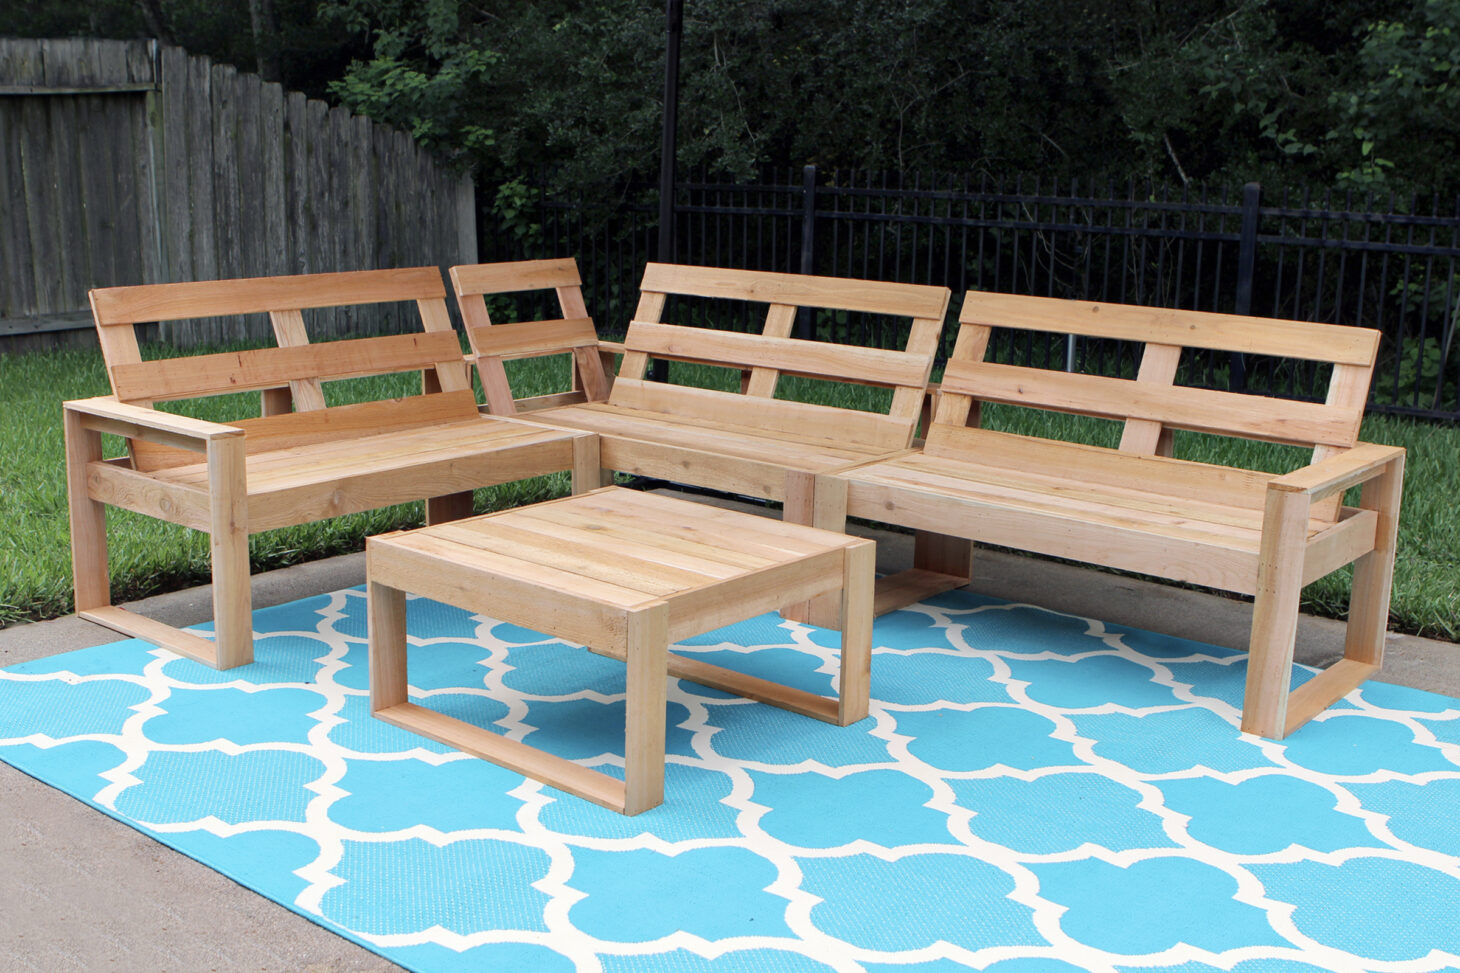
Our outdoor sectional build required us to put on our thinking caps, do a lot of measuring and remeasuring and estimate how many boards we could fit in the back of the jeep at one time. But we are proud to say we built a three piece, sturdy outdoor sectional entirely out of cedar fence pickets for under $100. And we will show you how.
Build an Outdoor Sectional
Supplies
- Outdoor Sectional Woodworking Plans
- 5/8 in. x 3-1/2 in. x 6 ft. Western Red Cedar Dog-Ear Fence Pickets
- 1/4″ finishing nails
- Miter Saw
- Table Saw
- Drill
- Kreg Jig
- Nail Gun
- Wood Glue
- Clamps
- Framing Square
FYI: This post contains affiliate links tools and products we used to make this project. Gray House Studio does receive commissions for sales from these links but at no extra cost to you. We appreciate you supporting this site. Read our privacy and disclosure policy. You can also easily shop our recommended products here.
Outdoor Sectional Project Plans
Purchase Outdoor Sectional Plans
When you purchase our Outdoor Sectional Build Plans you get a 22 page PDF with a detailed materials list, a cut list, exact dimensions for each piece, building instructions for the end piece and middle piece of the outdoor sectional. We appreciate you supporting Gray House Studio!
Steps:
Follow along below to see how Brent built the left and right arm pieces of our outdoor sectional.
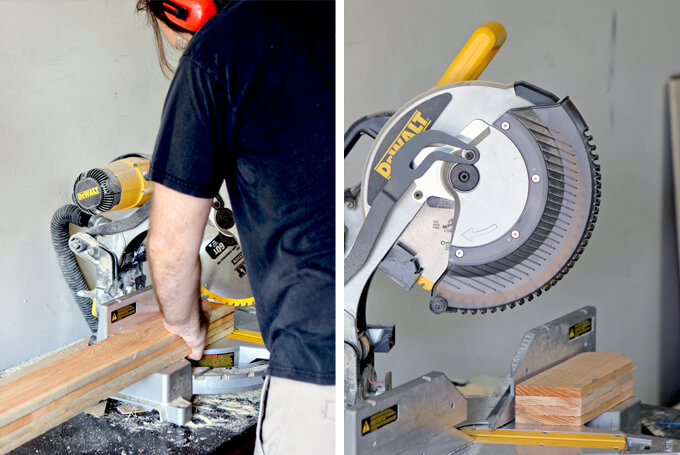
1 | First I cut the bench supports. These boards support the weight placed on the bench. They are attached vertically to prevent bowing.
I cut the boards the same depth of the seat cushion, which was 16″ for our cushions.
Gray House Tip We purchased the cushions first and built our outdoor sectional based on the size of the cushions so we knew they would fit.
The back of each board was cut at a 22.5 degree angle with a miter saw to allow the back of the bench to angle allowing more room for our pillows and making it more comfortable to lounge.
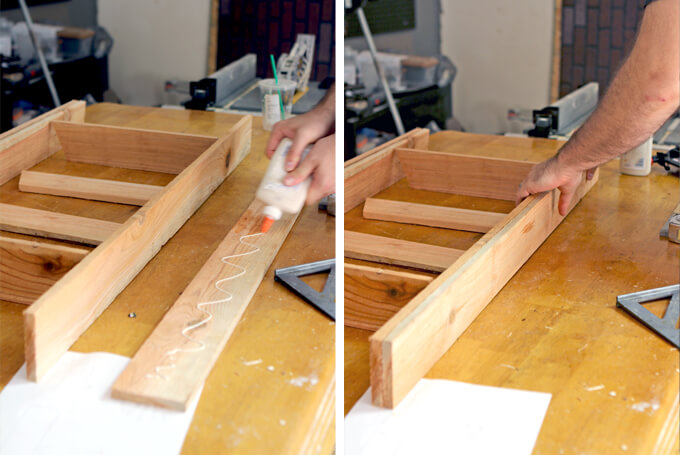
2 | I cut the front and back boards of the sectional piece the same width as our seat cushion. These boards attached to the bench supports (which I cut in the previous step).
I doubled the boards in this area by laminating two cedar planks together with wood glue. This created a stronger bench and will prevent the bench from bowing when weight is placed on it.
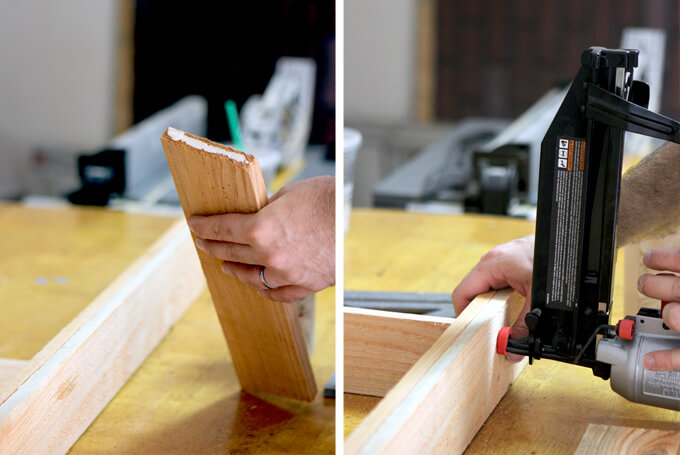
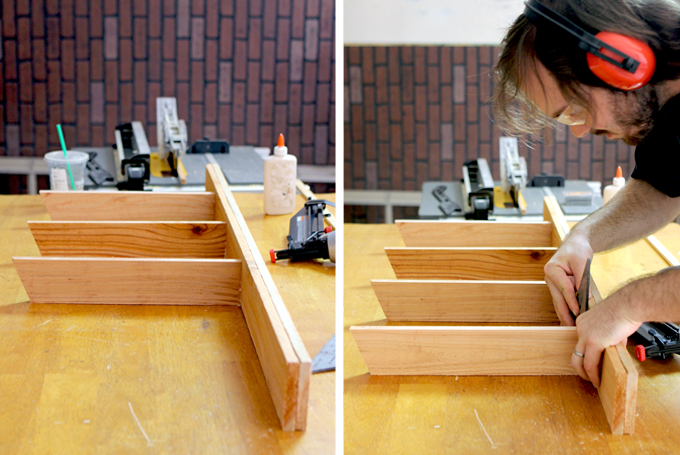
3 | Next, I attached the seat supports to the front board with wood glue and 1-1/2 inch finishing nails nine inches apart from each other.
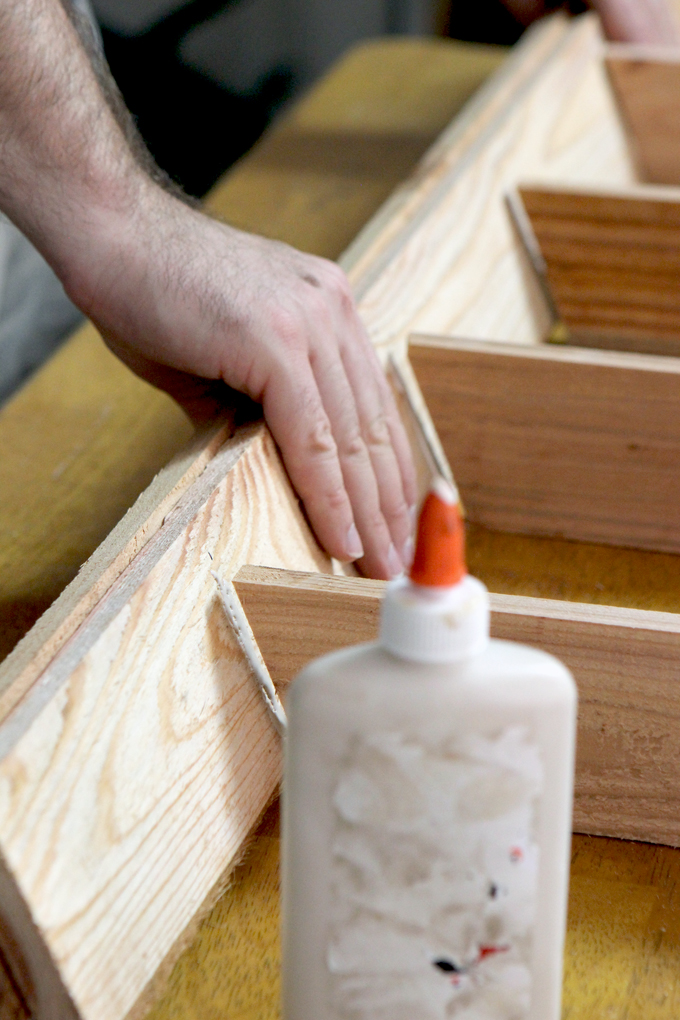
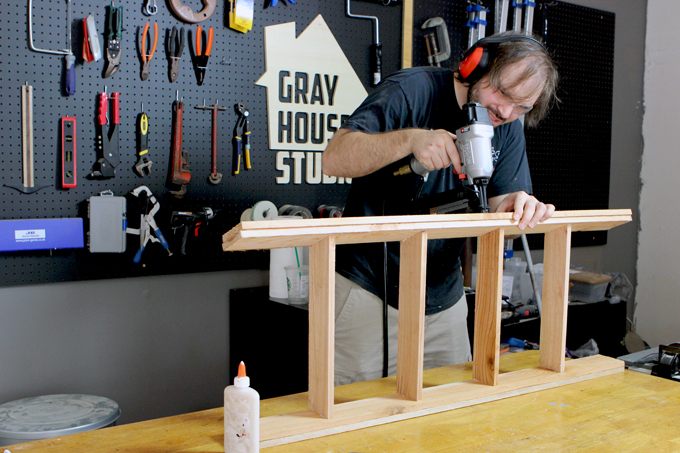
4 | I doubled up the boards for the back horizontal support and attached the back support to the angled side of the seat supports using 1-1/2 inch finishing nails and our nail gun.
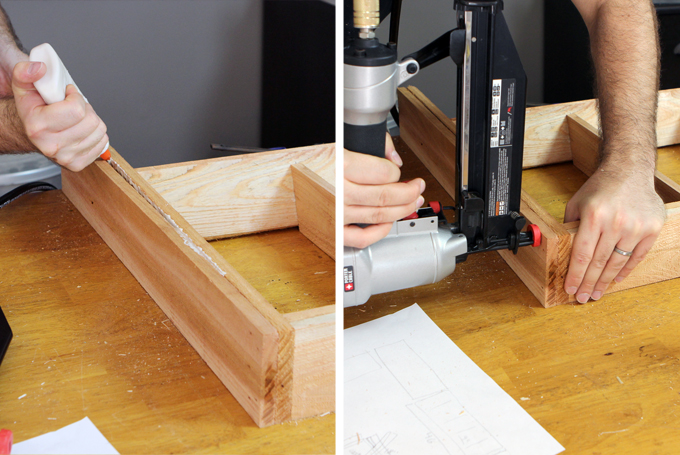
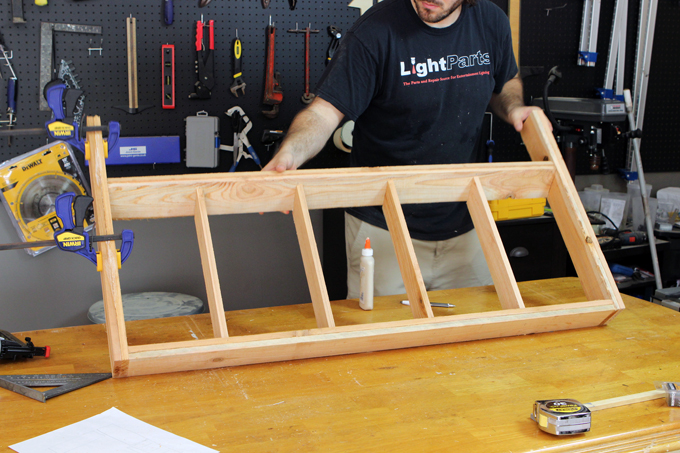
5 | The side braces are doubled up as well. I attached the side braces flush with the front of the bench but cut them to extend deeper than the seat so they could support the angled back.
How to make the corner piece:
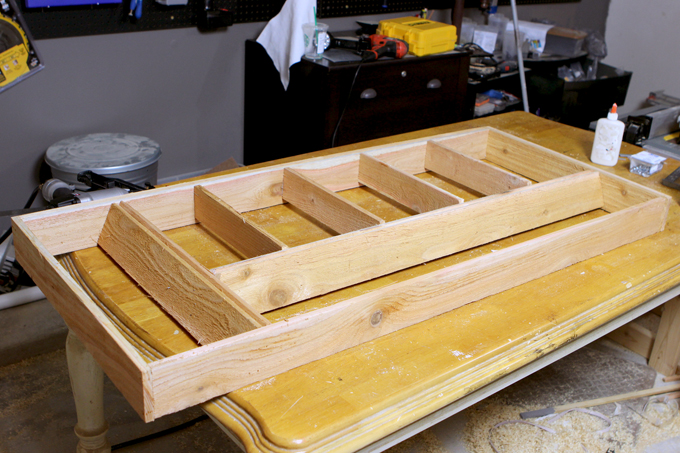
6 | I built the corner piece the same way as the right and left arm sofa pieces except I built the left side brace so it was angled 22.5 degrees to allow the angled back to wrap around. To accommodate the wrap-around back, I extended the outside frame on the left side to support the back.
How to make the legs:
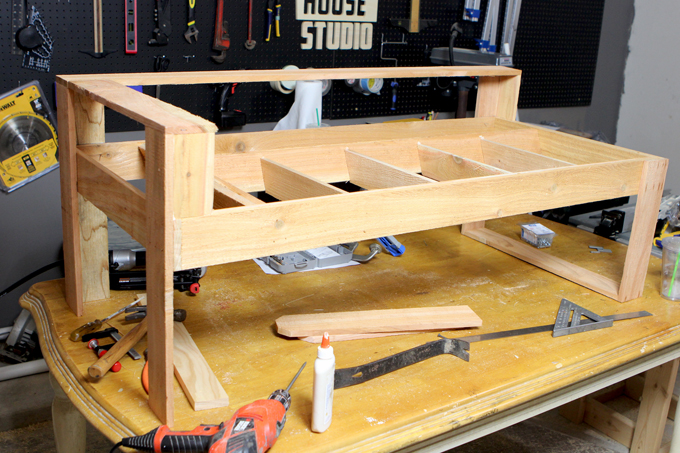
7 | The legs on the front side of each bench are 15 inches tall and we attached them flush to the top of the seat. For the legs in the back where there is an arm rest, I extended those above the seat to support the angled back.
How to make the back:
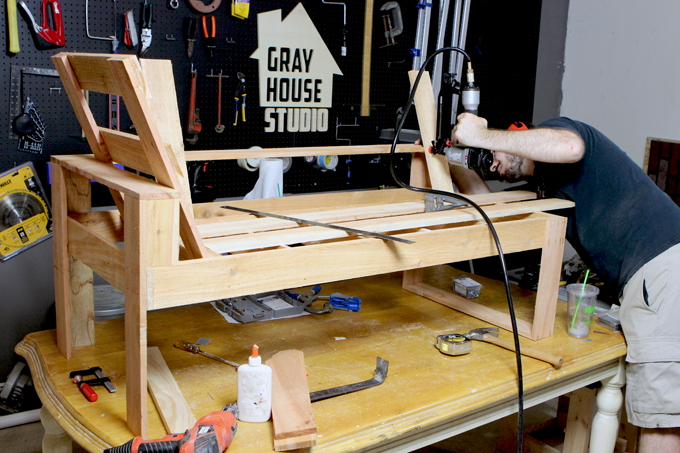
8 | For the back pieces of the sectional I built those to extend 18 inches above the seat and attached them to the angled seat brace. Then built it so the back brace connected to the legs.
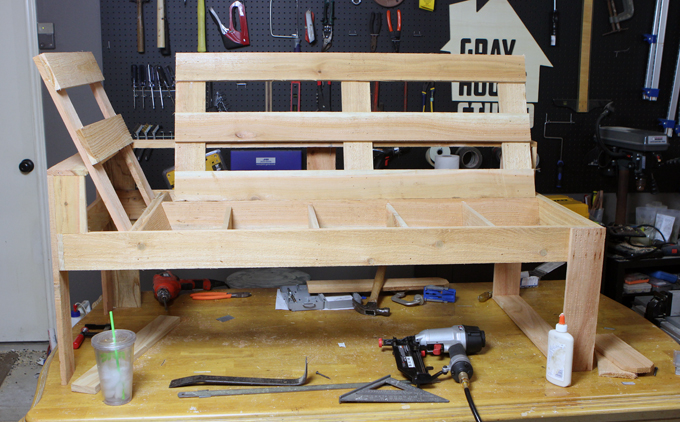
9 | Finally, I attached horizontal slats to the back and seat areas with with wood glue and 1 inch finishing nails.
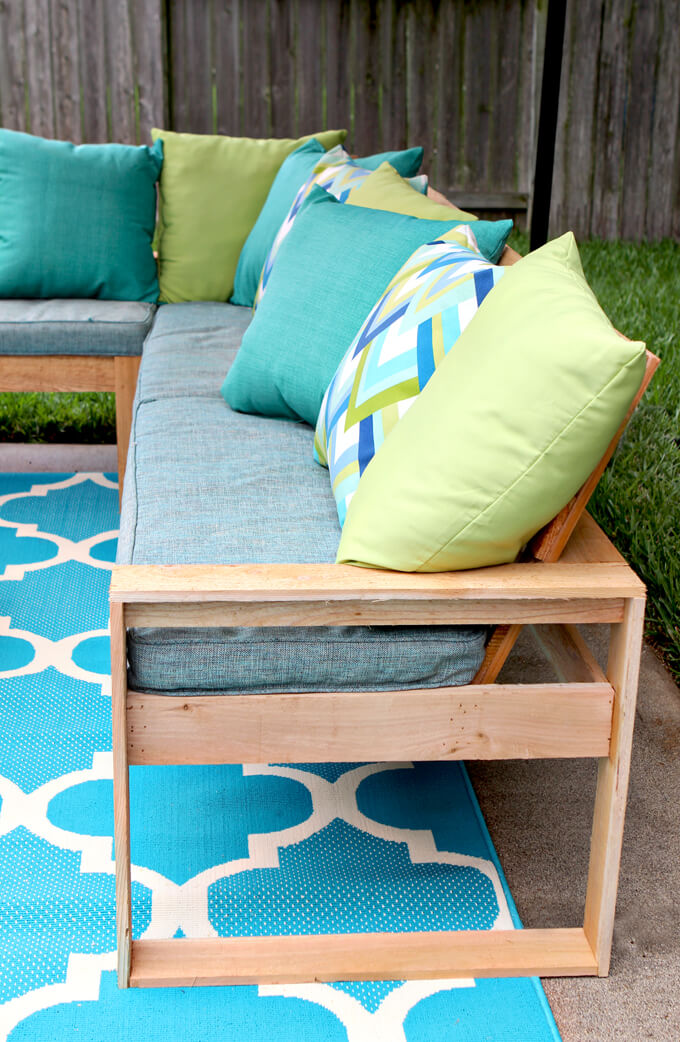
I know what you are thinking, cedar fence pickets, really? Really! While I was building our outdoor sectional I tried to factor in ways to make it stronger.
Are there much more sturdier options, of course. But if you are looking for a good compromise of sturdy and low cost, then don’t be afraid to give it a try and build one for your patio.
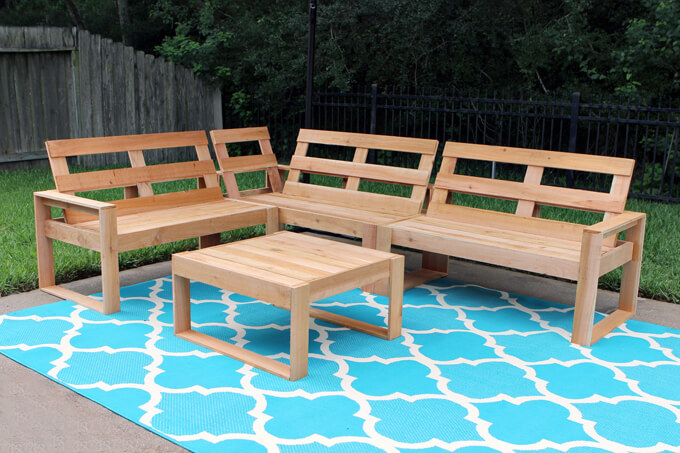
For a much more affordable knockoff version we think it turned out great.
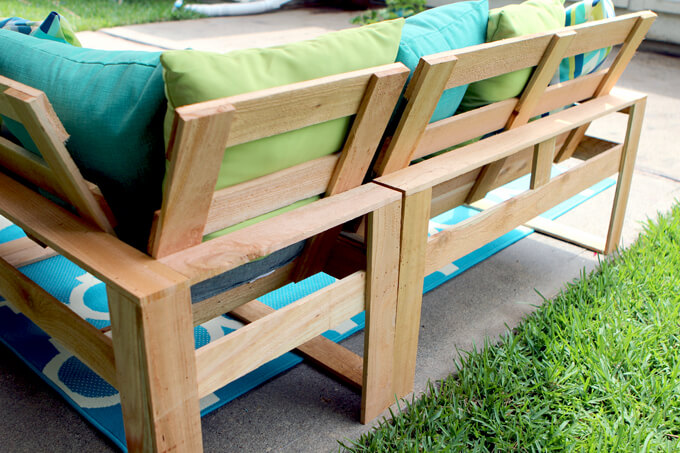
Outdoor furniture is so hard to keep clean. Mildew does not discriminate whether you have a $100 outdoor sectional or a $2,000 outdoor set. I think our Outdoor Sectional build turned out awesome and is comfy with all the cushions and pillows.
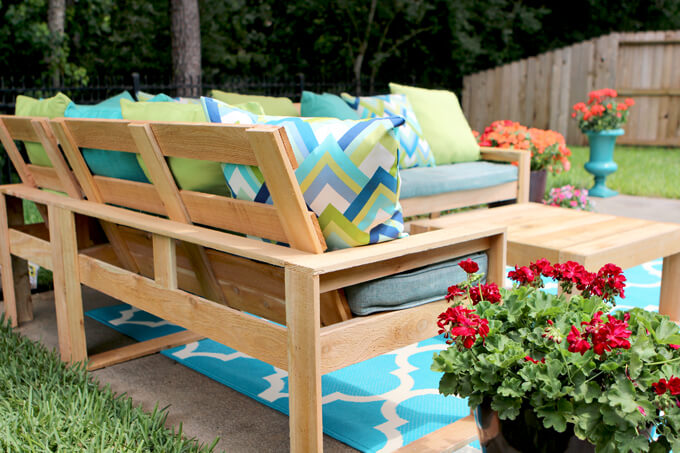
It is exciting to have lots of seating on our back patio now for us and our company to enjoy.
We have been so excited though to see all of your outdoor sectional builds. It is so cool to see the improvements and changes you make as you build. Keep making and keep tagging us @grayhousestudio so we can share your awesome work.
Keep on Making!
Courtney + Brent

Hi there. Beautiful job on the sectional! We will be building one this spring. Wondering how the outdoor cushions are holding up? Are you still glad you purchased those or did you have to upgrade and if so, where did you get them from? thanks!
Thank you! It has been about six years since we built this and I believe we finally switched out the cushions for some fresh ones about two years ago. We are still using the pillows.
Do you still sell the plans for the furniture? Thanks.
The plans are spectacular. Really thorough and we’ll designed. I made a few changes to accommodate 24″ sqaure cushions. I also laminated 2 boards for the seat braces. I used the kreg jig and added 1 5/8″ screws to the corners of the horizontal and side braces. I also used the kreg jig on the front of the seat braces, since you can’t see back horizontal brace when it’s built I screwed into seat braces on the 22 degree angle. I also screwed into the legs from the inside. These small additions really firmed everything up. Thanks for a great design Gray house! The whole family loves it.
Incredible! Nice job! May I ask approximately how long this project takes to complete start to finish? My husband is very handy and has all the tools and lots of woodworking experience. Also it seems the west elm original has deeper bench/cushion. Would it be easy/possible to adapt your plans to make the seat a bit deeper
Thanks so much Jolene! Brent built the outdoor sectional over a long weekend (about three days). We built the depth of the bench to be the size of the cushion we could easily find and afford from a store called “At Home”. That is why we built the seats the depth we did. You can feel free to adapt/modify the plans to best fit your outdoor space and the depth of the cushion you feel comfortable using. 🙂
My wife and I just finished ours using your plans and it came out great. The only different change we did was sand all the boards first with 60 grit then went back over with 220 grit to smooth them out. Once complete we put a water sealer on them and it really brought the colors of the red cedar out. We just need the plans to the coffee table if you have those completed and we will be complete with out back patio.
That is awesome! We are hoping to add the coffee table plans soon.
Can the size be modified to fit a particular area. I’d like to build one for our covered porch but I’m not even sure of the finished size. Also, is it easy to change the direction of the sectionals arms and the corner piece as well?
Hi there, what size pillows did you use and how many to fill the space? Thanks!
We used the 20″ pillows from At Home and we used 10 as the back cushions of our sectional.
We are building this now! How many cushions/pillows did you end up needing?
Hi, it looks beautiful! I am excited to start making this.
How strong are the legs and the whole structure? The planks are so thin, it feels like they will just snap at some point if heavier people sat down. How did it do overtime for you?
I I was really hoping that you would have the plans for the coffee table as that is the actual item that I would like to make for my patio are those plans available to purchase? Love your site!
Hi Lori! We are working on making plans for the outdoor coffee table. We should have them available to purchase soon. Thanks for your interest.
“Under $100”. There is more than $100 just in cushions… The West Elm sofa is a good model though.
Thanks Jake. Yeah, we added the cushions after the fact so I guess you have a point. You can build the base of the outdoor sectional for under $100. But we actually got a good deal on the cushions and pillows so we didn’t spend over $100 on the cushions either.
Wow! That looks incredible – can barely believe it’s 100% DIY’ed. Beautiful share, thank you!
Looks great! We just started the project today! Where did you get the cushions and what dimensions are they?
Hi Patty – we purchased them from the store “At Home” (athome.com). The dimensions of the ones we got are Length: 47.0 in. / Height: 3.0 in. / Width: 17.0 in.. They have a variety of sizes.
Did you make or buy the cushions?
Hi Nichole! We purchased the cushions from the store “At Home” (www.athome.com).
Hi – I’m trying to build this for a party in a few weeks at our new house but can’t find planks on the size indicated on your plans. The 5/8 x 3.5 x 6’ anywhere. Where did you get them?
This looks great! what are the final dimensions of the sectional??
My husband is currently building this for our patio. Where did you get the cushions, and what size are they? Thanks!
Sorry! I misread it. I thought you said you found them “at your home.” I assume At Home is a homegoods store?
my wife and I have been looking for outdoor furniture the stuff is quite pricey happened to see your website on pinterest love the look of the outdoor sectional so I downloaded the plans cant wait to get started on it this coming up weekend thanks
Hi Rob – that is great to hear. We would love to see your project when you are finished! Happy building this weekend!
Do you think this would be sturdy enough for a house with kids? The cedar planks seem awfully thin to be structural over time.
Great work. How have the cedar planks held up over time? What would you do differently if you were to do it again today?
The cedar planks have held up great! If we did it again we would probably seal all the board before we started assembling. It would be much quicker to seal all surfaces when the boards were just fence planks. It is difficult to work around all the angles of the assembled chairs. Even the weathered look of unsealed boards looks great too.
Beautiful sectional! Can’t wait for plans!!!
would love to see detailed plans of the sectional
Thanks everyone for your feedback! We are working on plans and will be sharing them on the site soon!
This sectional is amazing. I’ve been looking for some outdoor furniture to really make my backyard livable but everything I’ve found has been so expensive. Thanks for sharing this, I can’t wait to get my husband on it! 😀
Would love to see plans for this!
Wow, this is marvelous! I would love plans too! Pretty please!
I would LOVE plans for this and would totally build it!!
YES PLEASE to detailed plans! This looks amazing and when you break down the steps looks do-able! I would much appreciate plans 🙂