In this tutorial we are showing how to frame bathroom mirrors. We will also show how to build the frames and how to hang them on the wall.
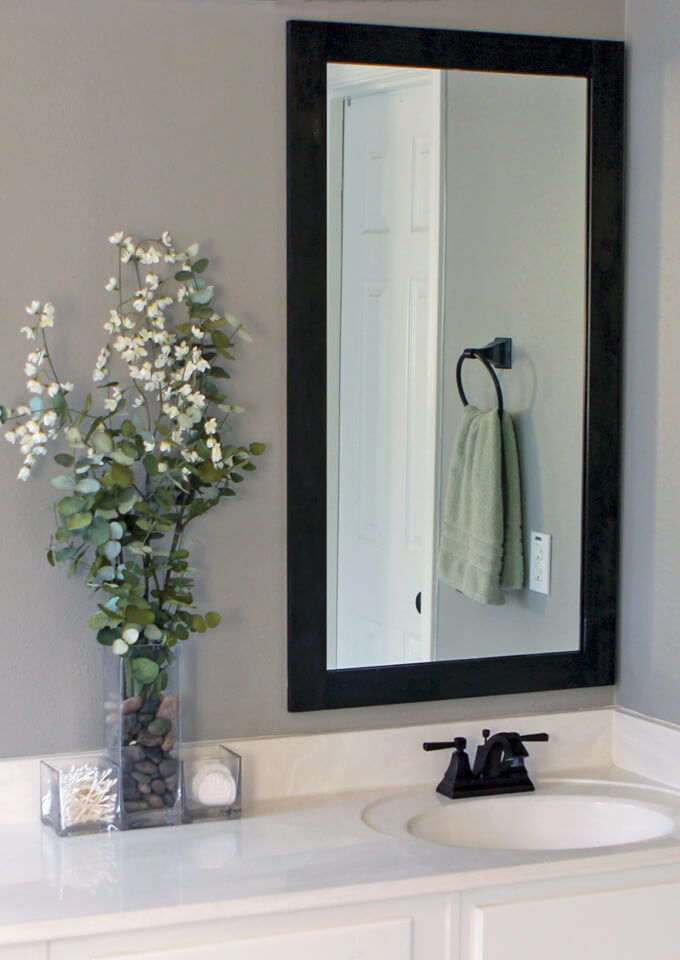
Remember back in January when we showed how we cut our large bathroom mirror into two pieces? Today we are sharing the second half of the project which includes how to frame bathroom mirrors and hang them back up on the wall. We have found that a simple and inexpensive way to freshen up a bathroom’s appearance is to take down the large unframed mirror and replace it with two narrow mirrors over each sink.
In both our master bathroom and now our guest bathroom we cut the large builder grade mirror that came with the house into two pieces, built frames for each one out of wood and then stained the wood to match the bathroom. By cutting the mirrors and building the frames ourselves, we saved money and had complete control over the size and appearance of our mirrors.
We really like the look of tall narrow mirrors but finding that style without the high price tag was a difficult task. Building the frames ourselves was a great solution for us.
SUPPLIES
- (2) 1″ x 6″ boards of select pine (1 for each frame)
- Wood Glue
- Rust-Oleum Wood Stain, Kona
- All Purpose Adhesive Caulk
- Brown Acrylic Latex Sealant
- D-Ring Hangers
- Table Saw
- Clamps
- Screwdriver
*This post contains an affiliate link. You can read our disclosure policy here.
How to Frame Bathroom Mirrors
1. To save money we bought a 1″x6″ board that we cut down the middle to be the width of one side of the frame. Cutting the board in half gave us both the left and right side of the frame.
2. We cut all the boards to our desired width for the mirrors. Then we made two cuts using the table saw to create a recessed area in the board where the mirror would sit.
The first cut, which is shown in the photo above, determined how far the mirror will sit inside the frame. We chose to make the lip on the inside of the frame 1/4 of an inch.
3. Next we raised the blade to meet up with the line of the previous cut and ran the boards through the table saw.
The two cuts we made removed the piece of the wood on the left. The piece of wood on the right is what we used for the frame.
4. After measuring the length of each side of the frame so we could mark where the cut needed to be, we cut the left and right side pieces of the frame at the same time and the top and bottom pieces at the same time to guarantee that there would be no variations between the matching sides of the frame and that the four pieces would make a rectangle.
5. Finally, we made two cuts on each side of the top and bottom board of the frame. This cut removed a piece of the wood allowing the side boards of the frame to be glued on top of the top and bottom board. This type of joint is called a rabbet joint.
6. This is what the top and bottom boards of the frame looked like after the previous step once the pieces of wood on each side were removed.
7. By cutting the pieces of wood out, each piece of the frame fit perfectly over the other piece of the frame. This process makes for a very strong joint and prevents the need to nail or screw the frame together.
8. We then applied glue to each board and clamped the frame together. After several projects we finally remembered to put a scrap board between the wood and the clamp. When we forget to put a scrap piece in between the board and the clamp, a lot of times the surface of the project will get indentations from the clamp.
9. To match all the other stain in our bathroom, we decided to stain the frame with a Kona stain. We learned from staining our first set of mirrors that it is important to stain the back as well as the front of the frame.
The mirror reflects the backside of the frame. If only the front side is stained, once the mirror is glued in place, you will be able to see the non stained wood in the reflection.
10. We placed the mirror in the frame and lined it up so it was centered. Then we traced the mirror outline on the back of the frame so we would know where to apply the adhesive. To secure the mirror to the frame, we used an all purpose adhesive caulk.
We could only find it in white which caused a little bit of an issue because the mirror will reflect the underside of the frame and the white caulk would be very noticeable. Our solution was to run a bead of brown acrylic latex sealant on the side of the white caulk that is closer to the inside of the frame.
The brown sealant is not a great adhesive but it does a good job concealing the white caulk that is actually holding the mirror and frame together.
11. After the adhesive dried, we screwed a D-Ring hanger in each side of the back of the frame for easy hanging.

12. The final step was to put two picture hanger nails in the wall to hang the frames on.

Now we have two (like) brand new mirrors for only the cost of the two boards since we already had most of the supplies left over from our previous framing project. It is nice to have mirrors back in the guest bathroom again and just in time for our guests coming in a few weeks.

We have a few more projects we will be working on this weekend for the guest bathroom. It is fun seeing our ideas start to become a reality in this room. I did some preliminary decor shopping last week and picked up some guest bathroom items along with a few tropical elements that I can’t wait to incorporate into the room.

Stay tuned for more guest bathroom posts and progress photos coming soon.
Check out how to cut a large bathroom mirror into two smaller pieces.
PIN THIS PROJECT


Could I do all this with a miter saw?
Thank you for posting this. Now I can show my husband that it is possible to cut down a mirror and frame it. How would you frame a circle mirror?
It might be hard to find a cost effective way to frame a circle mirror. Maybe if you can find a used circle picture frame the same size you can switch the glass for the mirror.
Wow!!! This unique wooden walking stick is an excellent demonstration of traditional art and utmost experience.
I wanted to frame my mirrors since like… forever 😀 This is a really useful post for me, thanks!
Glad it will come in handy! Good luck on your project!