Rustic Christmas Tree Stand Box

Rustic Christmas Tree Stand Box

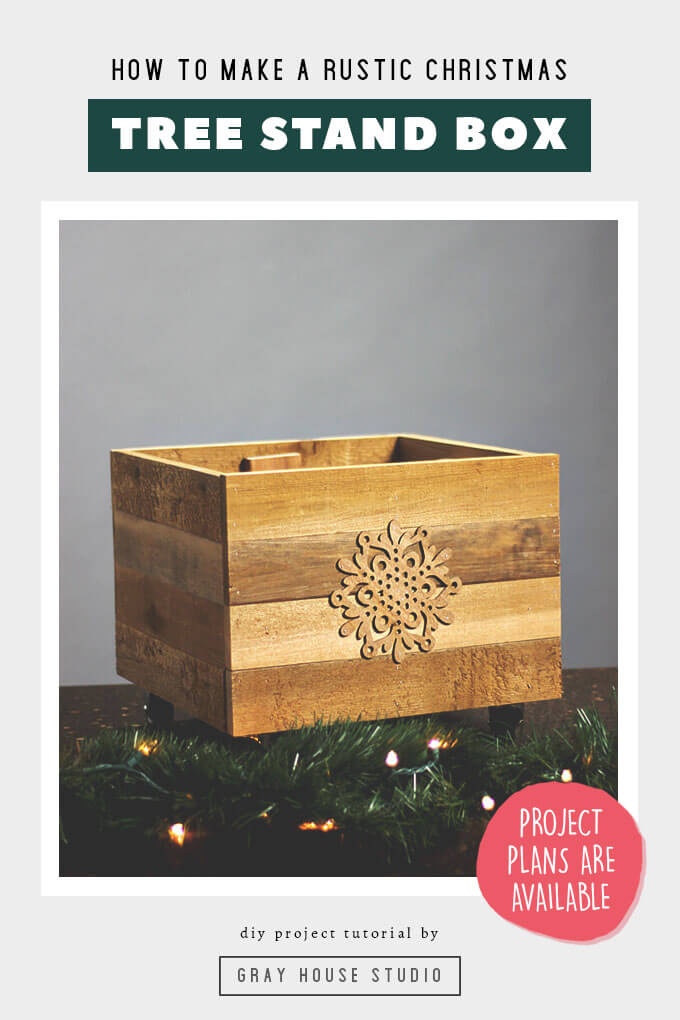
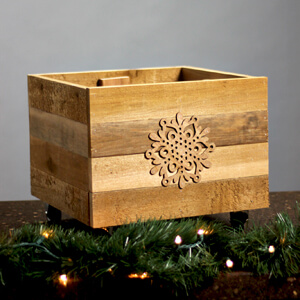
We built a rustic Christmas tree stand box as an alternative to a Christmas tree skirt.

Rustic Christmas Tree Stand Box

About a week after we put up our Christmas tree and had it all decorated, we decided we wanted to do something different under the tree. I liked how our white tree skirt looked but was growing tired of how it showed every little thing that landed on it and it was always getting all crumpled up. Mostly because it is Jake the cat’s favorite pastime to lay under it and try and chew on the branches.

Brent’s reasoning is it reminds him of a poodle skirt. Okay… But he admits he hasn’t seen a poodle skirt in a long time. Which I then in return question how old he is that he remembers seeing a poodle skirt. I hope he is just referring to a Halloween costume and not when it was in style. Because then the only logical explanation for that would be he is a vampire. And that would be a bummer because I am not into vampires.

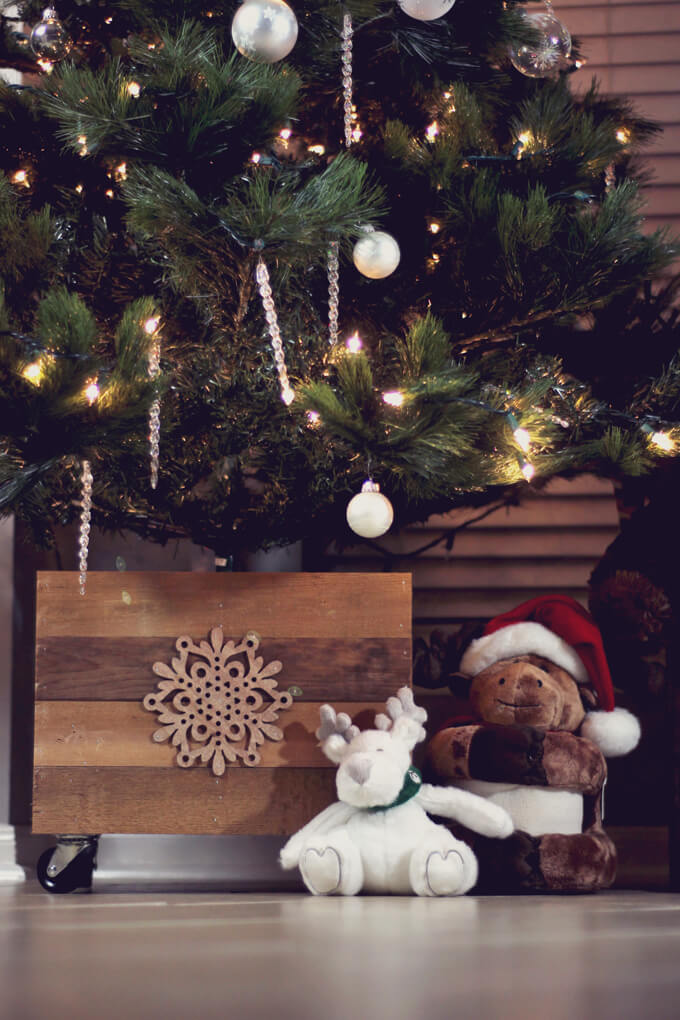
Anyway, we had seen a few examples of Christmas tree stand boxes and really liked how they looked under the tree. For one it would make the tree sit up a little higher and it would better hide our unappealing stand. We wanted it to have a rustic appearance to tie in with our rustic tree topper we got several years ago AND we wanted to put in on casters.

I joked with Brent that we could put it on casters so I could wheel it into each room I am in at the time. Which was met with an eye roll from Brent. But hey if the majority of our house is going to be covered in tile for the time being, I might as well take advantage of it around the holidays.

Rustic Christmas Tree Stand Box

For more practical reasons it could be really helpful to have the tree on wheels when you are decorating so you can roll it out away from the wall to easily decorate all sides. Because whether we like to admit or not we have all accidentally fallen into the tree or at least had a really close call trying to reach around to to hang an ornament in that “perfect” spot. Then you can just gently roll it back against the wall when you are done.

Or if you are one of those lucky few that I have been reading about that have an entire closet dedicated to storing a Christmas tree, you can just wheel it right in with ease. Every December and January I am tempted to ditch the coat closet and turn it into a Christmas tree closet because I dread the tedious task of setting up and taking down the tree and the whole stuffing it back into the box part.

2022 Personalized Christmas Ornaments
*** Thanks so much for supporting our small shop – Moon Rock Prints – this holiday season! ***

So this week we set out to build our own version of a rustic Christmas tree stand box. You can follow along with our project in the video below or the steps below that. We have also included the plans for our rustic Christmas tree stand box if you want to make your own.

How We Made A Rustic Christmas Tree Stand Box

SUPPLIES

FYI: This post contains affiliate links to the supplies and tools we used to make our rustic Christmas tree stand box. As an Amazon Associate Gray House Studio earns from qualifying purchases. This is at no extra cost to you. We appreciate you supporting this site. Read our privacy and disclosure policy.

TUTORIAL VIDEO

PROJECT PLANS

Rustic Christmas Tree Stand Box Plans

Get our Rustic Tree Box Plans

When you purchase our rustic Christmas tree stand box plans you get a 6 page PDF with a detailed materials list, a cut list, dimensions for each piece, and building instructions – all for only $3. We appreciate your support of Gray House Studio!

STEPS

Be sure to get our rustic Christmas tree box plans to help with this DIY project!

Rustic Christmas Tree Stand Box

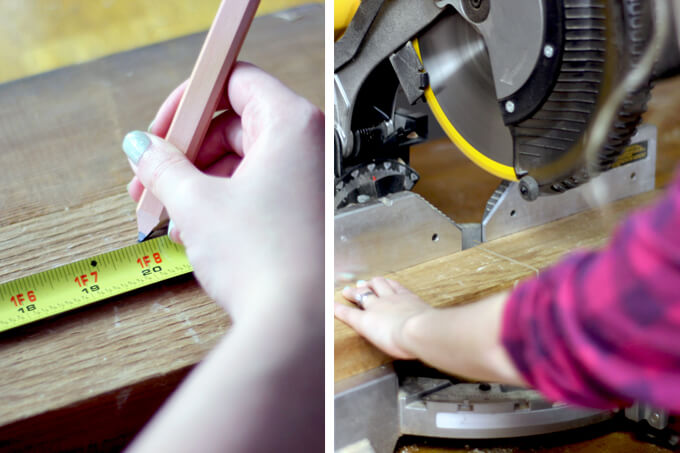
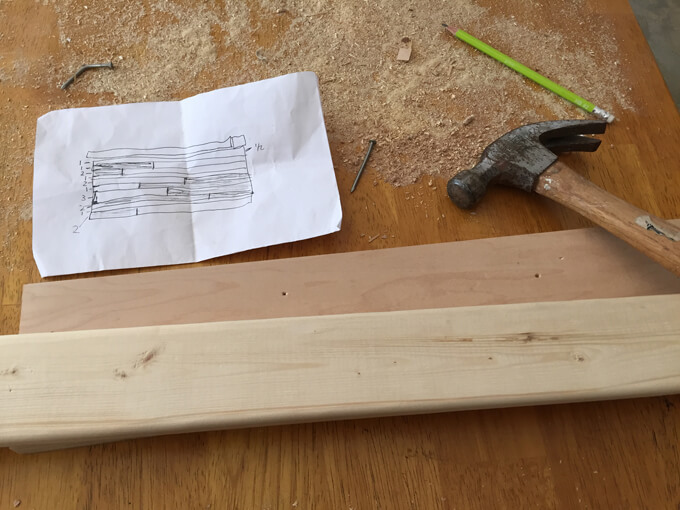
1. My first step was to measure our existing tree stand to determine the size of our box.

I took that measurement and using a tape measure marked the width on two cedar 2″x4″ boards.

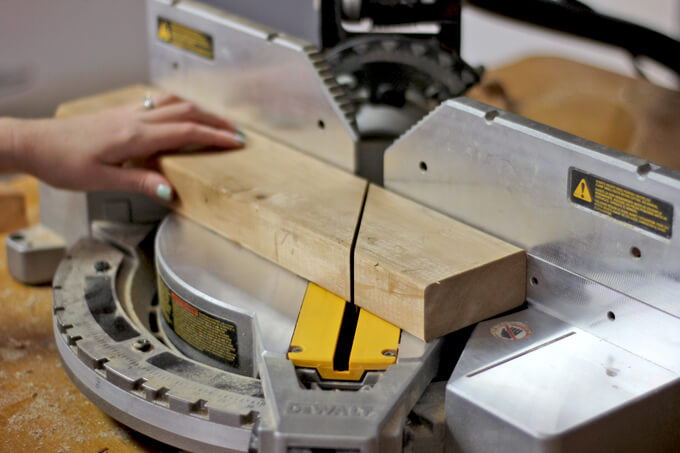
It is a good idea to give yourself a little extra padding to make sure your stand will fit all the way in the box. Using a miter saw, I cut the two cedar boards to the size we needed.

Rustic Christmas Tree Stand Box

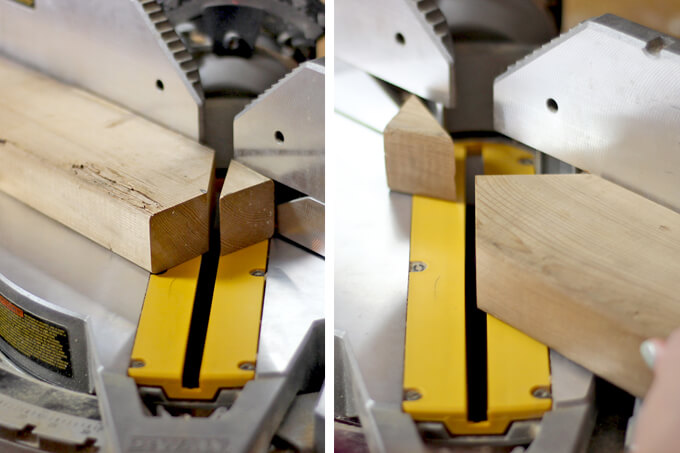
2. Once I had them cut, at the ends of the boards I measured and marked the center. Using that mark as a reference I cut off the corners of the board at a 45 degree angle with the miter saw.

This created an arrow shape on both ends of the board. I did this for both boards.

Rustic Christmas Tree Stand Box

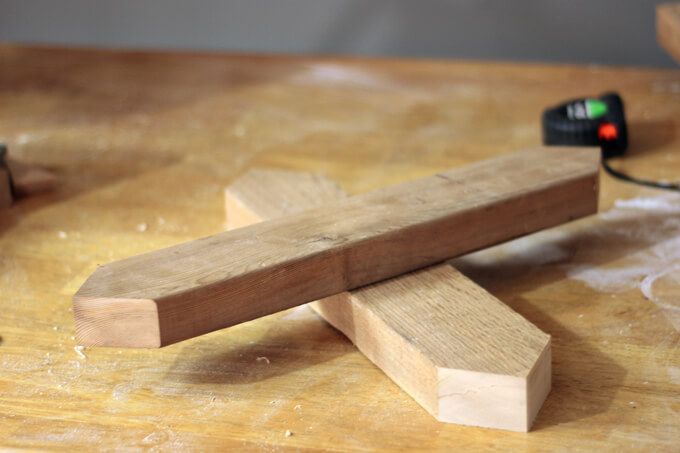
These pieces formed the corners of our box.

Rustic Christmas Tree Stand Box

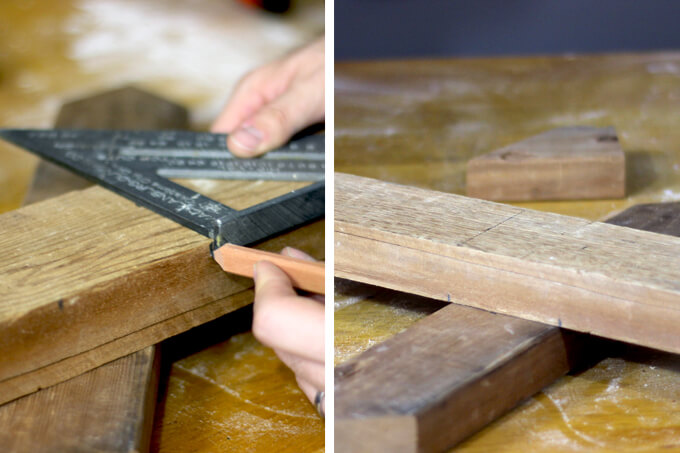
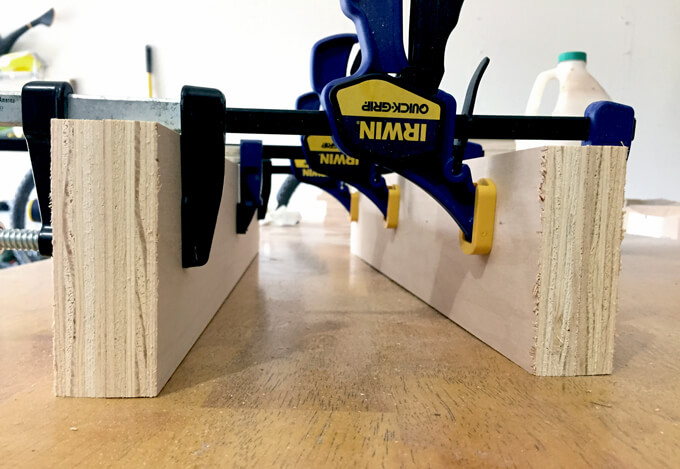
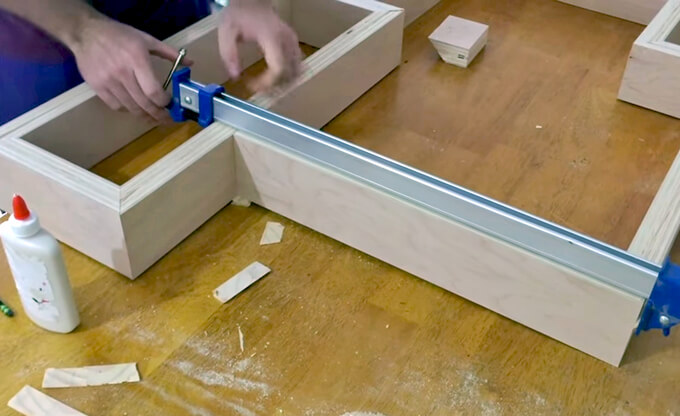
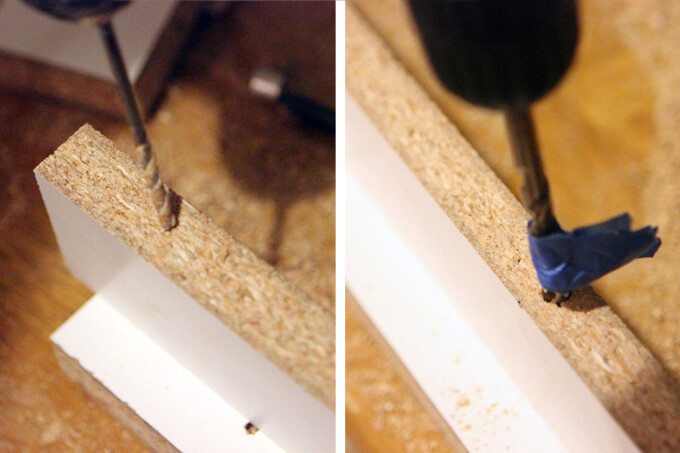
3. Next, Brent marked the center of each of these boards and used a square to draw a line on the top and sides of the boards indicating how the boards needed to fit together at a 90 degree angle.

Rustic Christmas Tree Stand Box

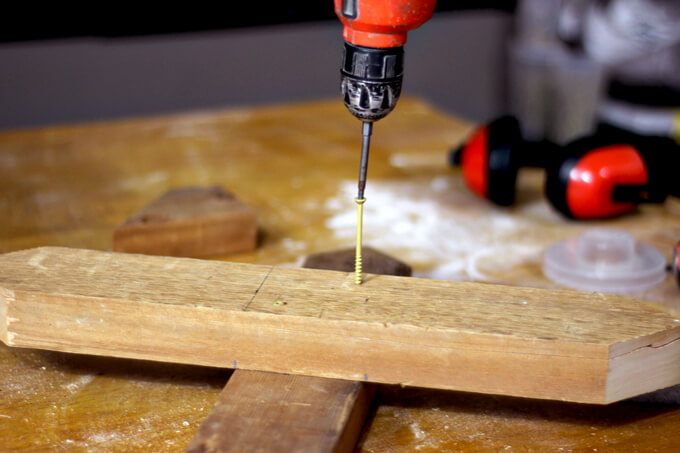
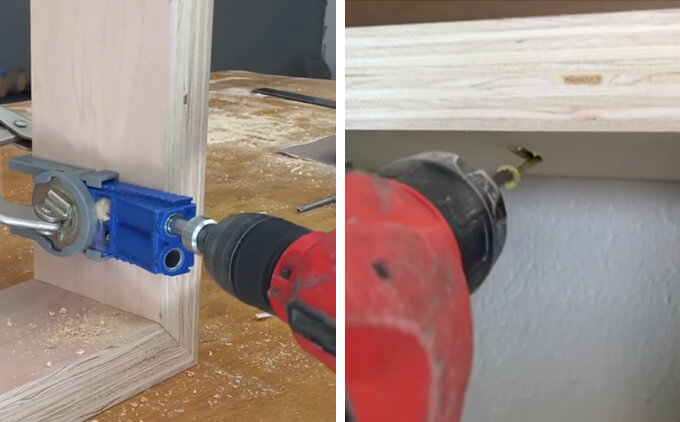
4. Using a drill and two 2 1/2 inch decking screws, Brent attached the two boards together.

Rustic Christmas Tree Stand Box

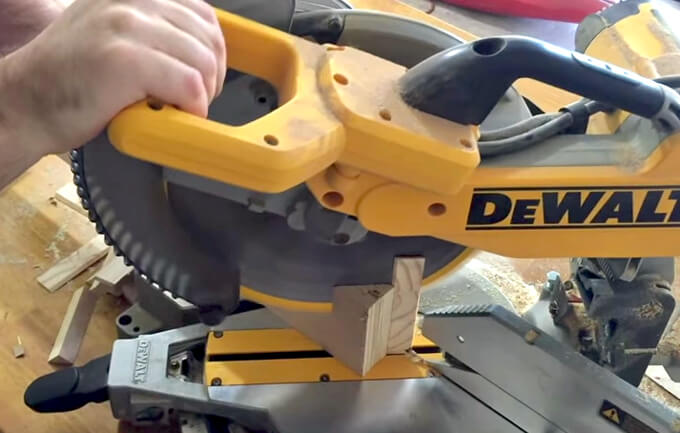
5. Using the extra piece of cedar 2″x4″, I cut four smaller pieces at a 45 degree angle on the miter saw.

Rustic Christmas Tree Stand Box

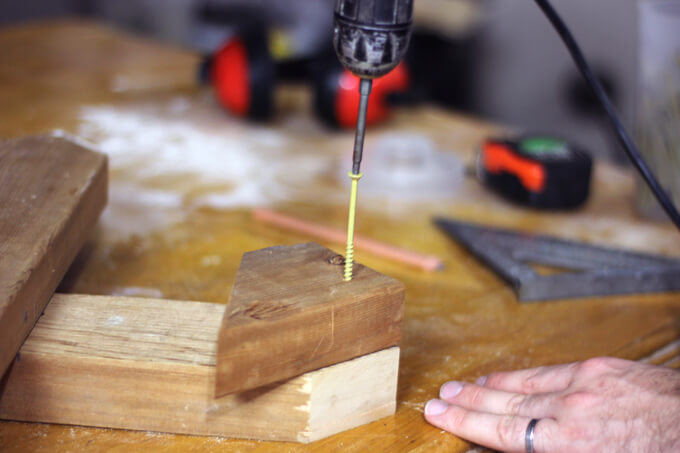
6. Brent used 2 1/2 inch decking screws to attach the small pieces I cut to the ends of each board to make all the corners of the box the same height.

Rustic Christmas Tree Stand Box

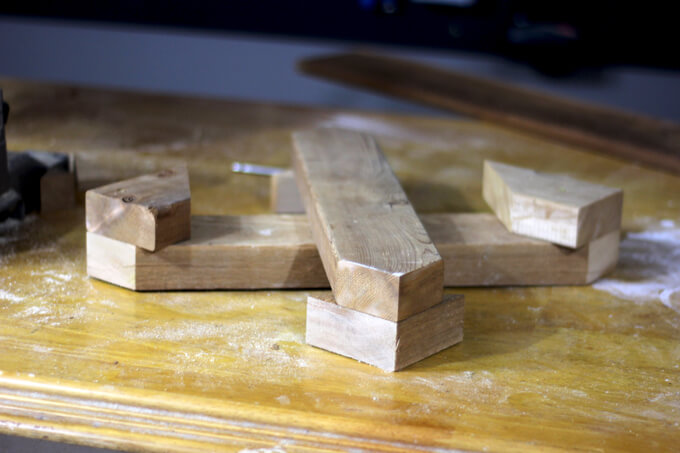
Now we had our x base assembled.

Rustic Christmas Tree Stand Box

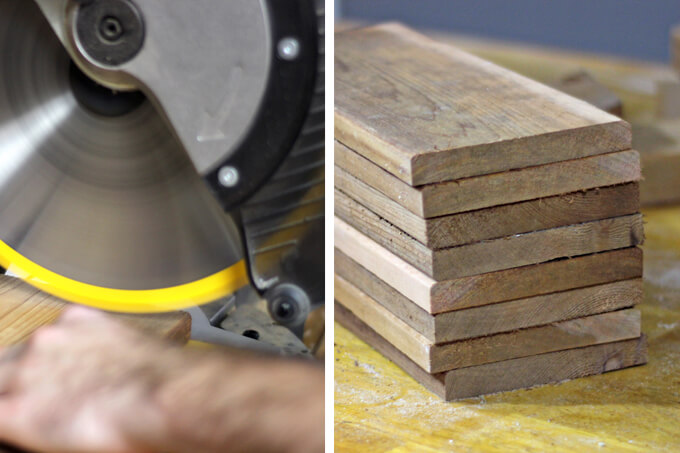
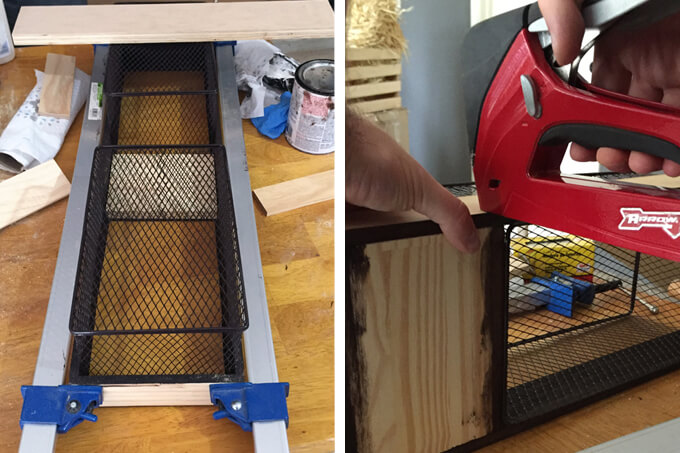
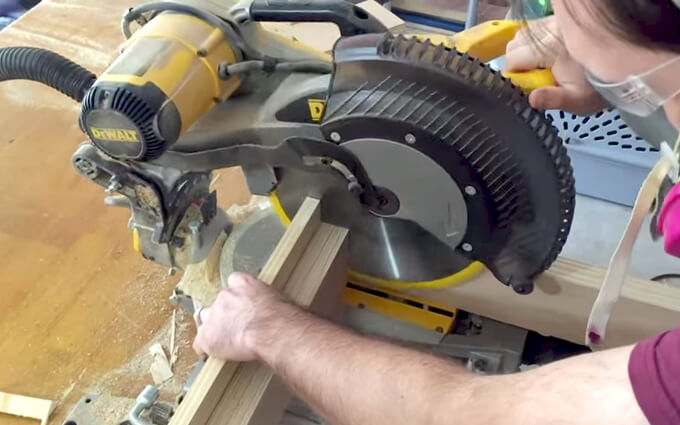
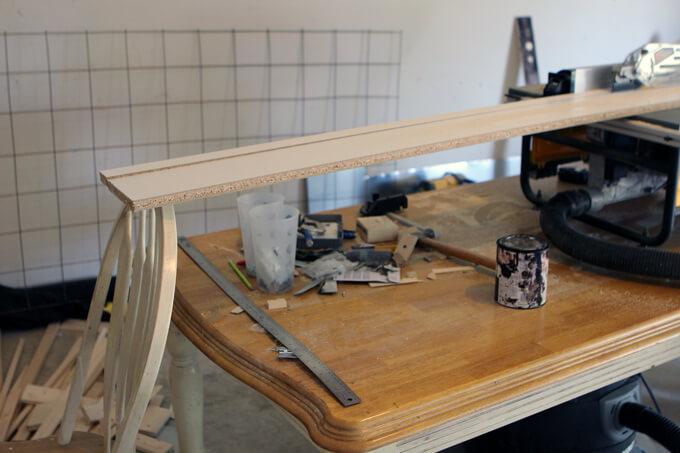
7. Next, Brent used the miter saw to cut the cedar fence planks down to the length we needed in order to create the frame of the box.

Rustic Christmas Tree Stand Box

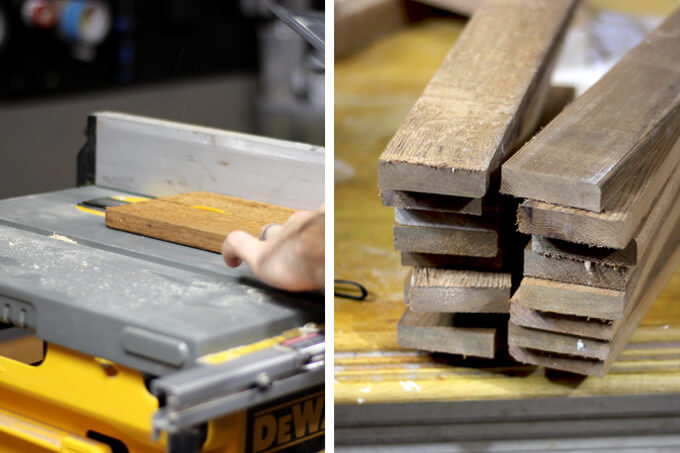
8. I wanted the planks on the side of the box to be more narrow to Brent used a table saw to cut each piece in half.

Rustic Christmas Tree Stand Box

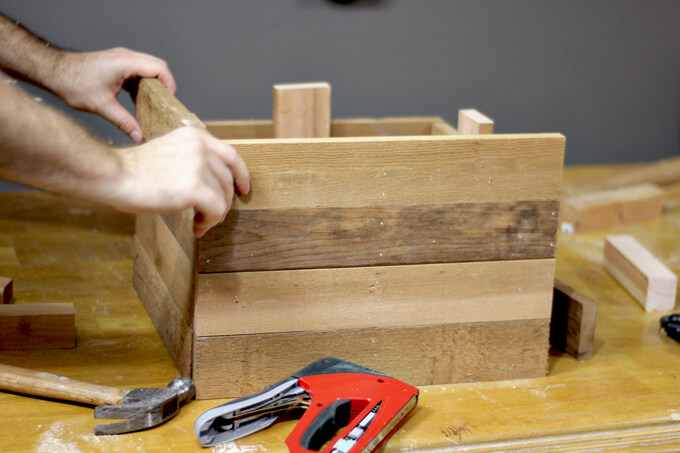
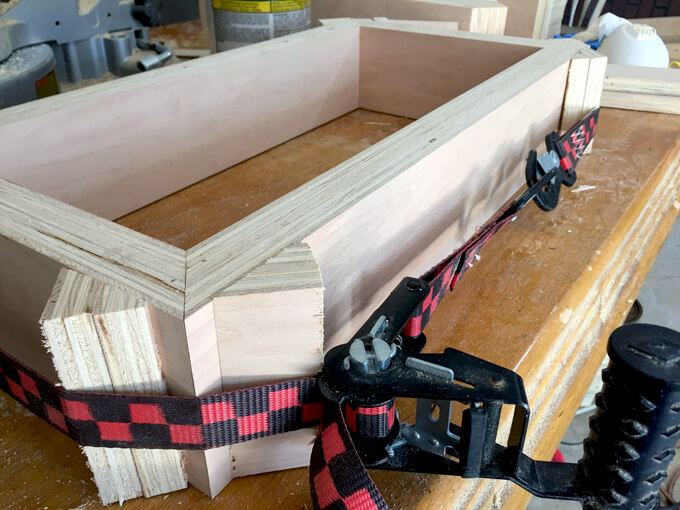
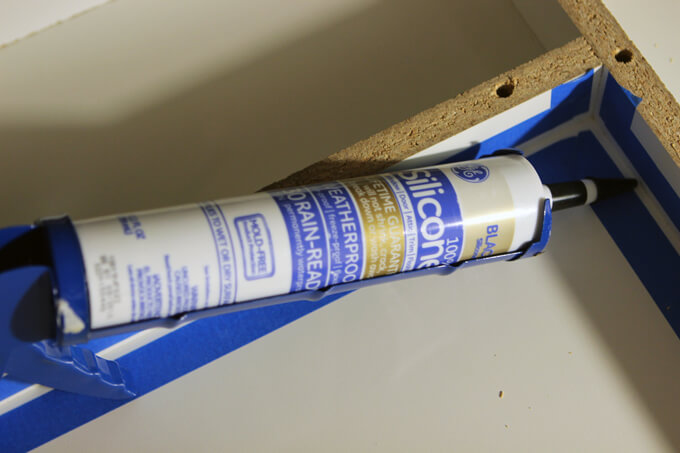
9. Brent used a staple gun that holds 1 1/2 inch finishing nails to attach all the planks to the base and also a center support. To achieve the look we were going for we alternated between using light and dark planks.

Rustic Christmas Tree Stand Box

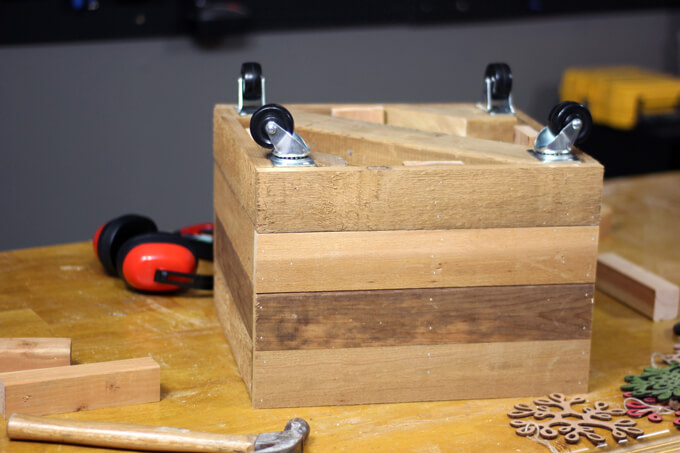
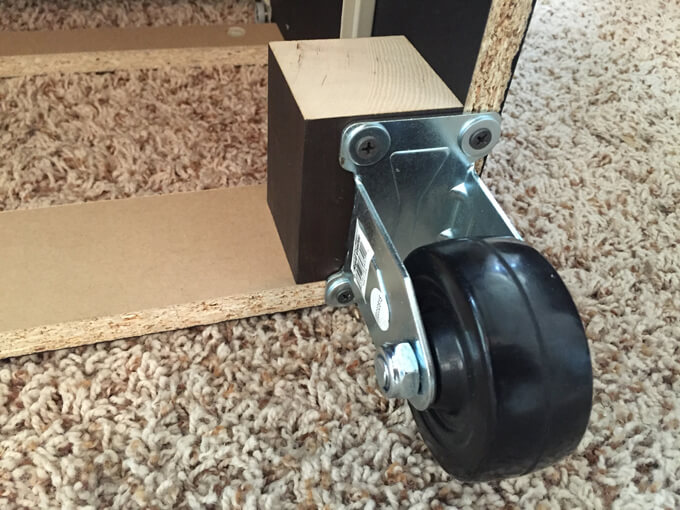
10. Once the box was complete, Brent flipped it over and attached casters to the bottom using 1 inch screws.

We used two different types of casters, swivel casters on the back and rigid casters on the front.

Rustic Christmas Tree Stand Box

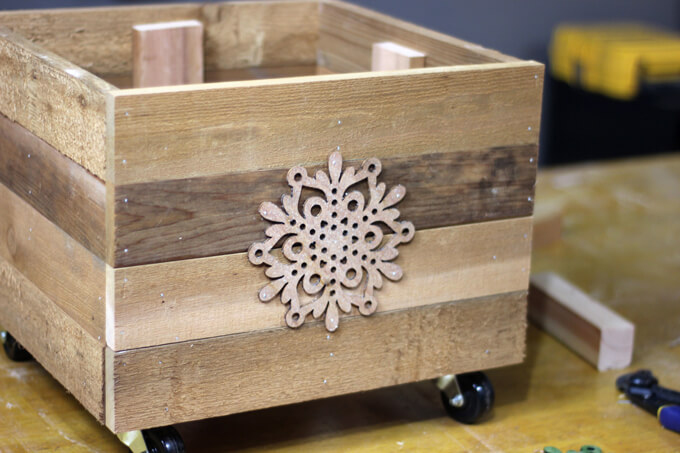
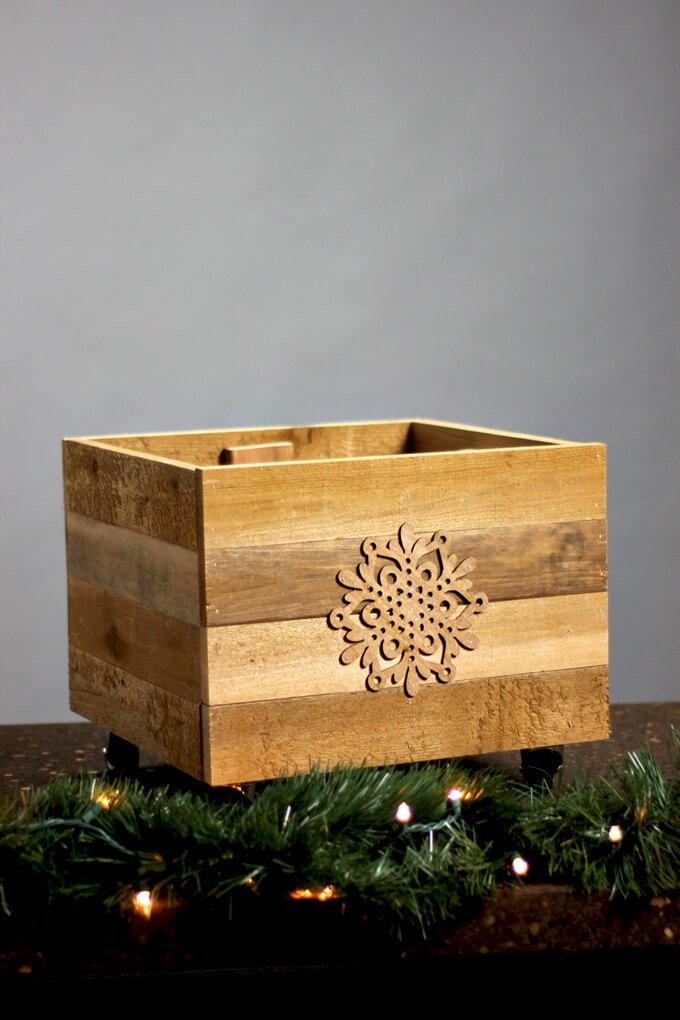
11. For an extra special touch we added wooden snowflakes to the front and back of the box.

Rustic Christmas Tree Stand Box

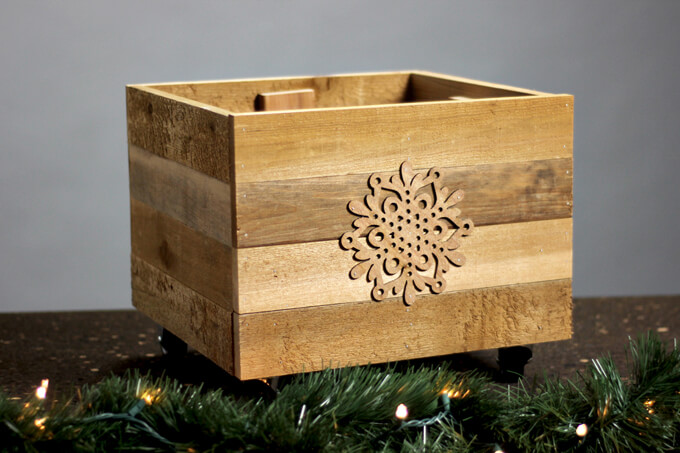
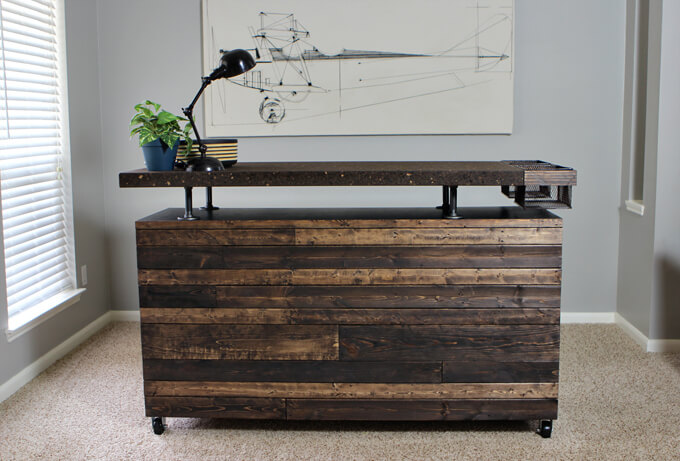
Here is our completed rustic Christmas tree stand box on casters!

Rustic Christmas Tree Stand Box

We are so happy with how it turned out. It was a very quick Christmas decor project that not only makes a statement on its own but also goes great with our rustic star tree topper.

Maybe next year we will branch out and create some rustic ornaments we can add. Hopefully we will get an earlier start decorating next year.

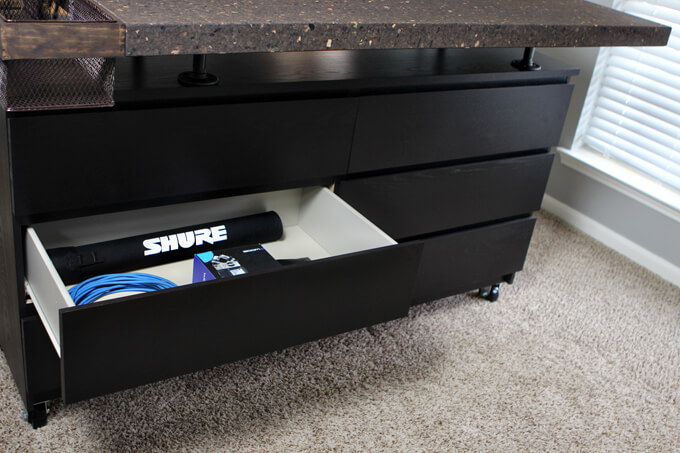
If you already have the situation under the tree covered, this box could also make for a cute storage solution for blankets.

PIN THIS PROJECT

This simple DIY Rustic Christmas Tree Stand Box is a great way to disguise boring a boring tree stand! Check out how to make a rustic Christmas tree stand box on casters as an alternative to a tree skirt. A video tutorial is included and plans are available to assist in the building process.

DIY Work Table

DIY Work Table / MALM Dresser Hack

For our latest IKEA hack we transformed the MALM dresser into a work table for our studio. Today we are sharing all the details about our DIY work table and MALM Dresser IKEA hack.

DIY Work Table - IKEA MALM Dresser Hack

Some DIY home projects we spend a lot of time planning before we begin and other projects pop up on our radar quickly and we are so excited to jump right into it and make it happen that we just have to figure it out as we go. For our latest project, a DIY work table, we took the latter approach and it turned out awesome!

Our formal living room (the room next to our library) is still sitting empty these days and we are in desperate need of a place to keep our “messes” contained (the downside of exploring creativity – lots of clean-up is involved) so we decided to finally start working towards making the front room our studio area.

We needed a consistent work space with storage as well as a large table top so we decided to build a piece of furniture that would satisfy all our needs as well as fit our industrial-rustic-eclectic style.

The project turned in to an IKEA hack because we decided it would be easier to use the IKEA MALM 6-drawer dresser as the base of our work table. But we needed to make a few modifications to it first to fit the aesthetic in our home.

DIY Work Table - IKEA MALM Dresser Hack

We had a rough idea of what we wanted the table to look like so we headed to IKEA looking for the pieces for our table. We needed the table to have storage and preferably large drawers which is why we choose the MALM 6-drawer dresser in black.

DIY Work Table - IKEA MALM Dresser Hack

We went in looking for either a wood or laminate gray table top. After looking at all the options we ended up choosing the SINNERLIG dark cork table top. The thick cork was different than anything else we had seen and we liked how the color and texture fit with the design we had in mind. Once we had our two pieces from IKEA we started finalizing our concept for our studio table work space.

2022 Personalized Christmas Ornaments
*** Thanks so much for supporting our small shop – Moon Rock Prints – this holiday season! ***

How We Upgraded the IKEA MALM Dresser into an Industrial Work Table

SUPPLIES

FYI: This post contains a few affiliate links to products we used to make this project. Gray House Studio does receive commissions for sales from these links but at no extra cost to you. We appreciate you supporting this site. Read our privacy and disclosure policy. You can also easily shop our recommended products here.

STEPS

DIY Work Table - IKEA MALM Dresser Hack

1. First we assembled the MALM dresser as normal per the instructions.

DIY Work Table - IKEA MALM Dresser Hack

2. We needed the dresser to not only be taller but also to be able to move the table depending on the project so we added casters to the bottom of the piece by screwing blocks of wood to the base of the dresser and attaching casters to those blocks of wood.

DIY Work Table - IKEA MALM Dresser Hack

3. Since the table will be in our “studio” which is next to our library we decided to bring the industrial style to our work table so we took the same black pipes we used on our shelves to attach the cork table top to the top of the MALM dresser.

By raising up the table top with the pipes, we made the table bar height so we can sit at bar stools while working. Currently, we are just dragging in some from the kitchen but we hope to eventually have designated bar stools for this space.

DIY Work Table - IKEA MALM Dresser Hack

4. We needed the drawers for storage but didn’t want them to be visible from the entryway so we flipped the dresser around so the back of the dresser is facing the entrance of the room.

DIY Work Table - IKEA MALM Dresser Hack

5. We obviously didn’t want to leave the back of the dresser exposed so we covered the back of it with distressed wood planks using our weathered wood technique like we did on our reading nook wall and our coffee bar base.

This feature really made the work table feel complete and like an entirely different piece than the IKEA dresser we started with. I just love those worn wood planks. It really ties the piece in with the rest of our home.

DIY Work Table - IKEA MALM Dresser Hack

6. We ran into a snag because the dresser was a few inches longer than the table top. If it were the other way around it would have been fine but this dilemma left us puzzled. We spent almost an entire day bouncing ideas back and forth on how to make the top balanced with the bottom.

DIY Work Table - IKEA MALM Dresser Hack

7. We came up with a solution to build a mounting frame to attach two wire baskets to the side of the cork table top. We found two wire baskets at HomeGoods where we can store smaller supplies that we use frequently. They matched our table perfectly.

DIY Work Table - IKEA MALM Dresser Hack

DIY Work Table - IKEA MALM Dresser Hack

8. We were able to make a frame out of scrap wood we had from previous projects to hold the two baskets. The boards were cut to be the same thickness as the cork table top. After staining the boards, clamping the frame together around the baskets, and letting the glue dry the baskets were ready to attach to the side of the cork table top.

DIY Work Table - IKEA MALM Dresser Hack

Now the front of our work table is technically the back of the dresser

DIY Work Table - IKEA MALM Dresser Hack

And the back of the work table is where the drawers are located which makes it easy to store and access all of our supplies.

We are extremely pleased with how our featured piece in this room, our DIY work table, came together. It not only has multiple purposes but we love how it looks when it is not being used as well. We are calling this one a success!

Learn how to create a weathered wood look using brand new boards like we did for the front panel of our DIY work table.

PIN FOR LATER

For our latest IKEA hack we transformed the MALM dresser into a work table for our studio. Today we are sharing all the details about our DIY work table and MALM Dresser makeover.

DIY Plywood Shelves with an Exposed Edge

Plywood Shelves for our Home Gym

Check out how we made wall-mounted plywood shelves for our home gym.

Plywood Shelves with an Exposed Edge

The past few weekends we tackled a pretty large project for our home gym, a huge wall of plywood shelves with an exposed edge.

Plywood Shelves with an Exposed Edge

We had initially intended to have a large piece of art on this wall but I am learning that it is always a good idea to be flexible when it comes to designing and decorating your home because you never know when a better idea could come along.

After giving it some more thought we changed our minds and decided it would be fun to make the shelves into a form of art by creating a design of different shapes. It is quirky but we love it!

Plywood Shelves with an Exposed Edge

Can you believe we made all those shelves with just one piece of plywood?Check out how we made our DIY wall-mounted plywood shelves below.

2022 Personalized Christmas Ornaments
*** Thanks so much for supporting our small shop – Moon Rock Prints – this holiday season! ***

” alt=”2022 Personalized Christmas Ornaments” style=”padding-bottom:15px;”>

*** Thanks so much for supporting our small shop – Moon Rock Prints – this holiday season! ***

How to Build Plywood Shelves

SUPPLIES

Shop the products we used for this project in one place.

FYI: This post contains a few affiliate links to products we used to make this project. Gray House Studio does receive commissions for sales from these links but at no extra cost to you. We appreciate you supporting this site. Read our privacy and disclosure policy. You can also easily shop our recommended products here.

TUTORIAL VIDEO

[yotuwp type=”videos” id=”esLVUz1g8dY” title=”off” description=”off” player=”width=590&modestbranding=0&showinfo=0″]

Subscribe to our YouTube Channel

Like our video? Subscribe and help us reach our goal of 100k subscribers.

STEPS

Plywood Shelves with an Exposed Edge

1. We used blue painters tape to first create the shapes of the shelves on the wall. This helped us determine the exact measurements we needed to cut the wood.

Plywood Shelves with an Exposed Edge

2. We bought a large piece of really nice plywood to use for our shelves. We had our local hardware store cut down the piece into smaller sizes so it would be easier to work with and fit in our car.

Plywood Shelves with an Exposed Edge

3. Next, we had to cut down the large pieces of plywood into many, many, many smaller pieces using our table saw.

Brent made a crosscut sled to make the process easier and to make sure each board was cut to the exact the same size.

I helped keep the boards steady. To save time and energy, we cut all the boards to be the same size which was the longest side on the shelves.

Plywood Shelves with an Exposed Edge

4. We wanted the shelves to be nice and thick so for each piece of the plywood shelves we used wood glue to attach the boards together and then used our small clamps to keep them together them while they dried in place.

Plywood Shelves with an Exposed Edge

5. After the boards were dry, we used a miter saw to cut the boards down to size at a 45 degree angle so the boards would go together like a picture frame.

We used a backing board to prevent tear out so all the boards would be nice and smooth.

Plywood Shelves with an Exposed Edge

6. We applied wood glue to each corner of the smaller shelves and then put them together using scrap boards and a ratchet strap that held the pieces tightly in place as they dried.

Plywood Shelves with an Exposed Edge

7. For the large shelf we used the miter saw to cut the piece into two L shapes.

Plywood Shelves with an Exposed Edge

8. We glued the two L shape pieces to the two smaller shelves and then used large clamps to hold the piece in place while the glue dried. This completed the large shelf assembly.

Plywood Shelves with an Exposed Edge

9. Back in the room we used our stud finder to located where each screw needed to go so it was in a stud. We marked these spots with painters tape. We also marked these same spots on the shelves.

Plywood Shelves with an Exposed Edge

10. Before removing the tape on the wall, we used the marks we made with the tape to locate where to secure the screws in the wall and used a drill to make holes in the shelves in the same location to match.

Plywood Shelves with an Exposed Edge

11. We used a Kreg Jig pocket hole jig system to create pocket holes to anchor the shelves into the wall with the wood screws.

Plywood Shelves with an Exposed Edge

12. Finally, we got all of our shelves up hanging on the wall.

Plywood Shelves with an Exposed Edge

I went out one day shopping to try and find items to fill up our new shelves that would fit the right depth, had a vintage/industrial feel, were quirky, and not too expensive.

Plywood Shelves with an Exposed Edge

I am a shopping novice so I was a little intimidated to get all the items in one trip but with my measurements, a tape measure and a photo, I managed to get the exact right amount of items to decorate the shelves.

Plywood Shelves with an Exposed Edge

This bike was a really cool find.

Plywood Shelves with an Exposed Edge

I did measure everything depth wise before I bought it to make sure it would fit on the plywood shelves but I didn’t realize the bike would fit perfectly on the one area of the shelf. It was like it was like the bike was made for the shelf or the shelf was made for the bike.

Plywood Shelves with an Exposed Edge

I love playing volleyball so obviously I had to display my super awesome summer 2012 runner-up Parks & Recreation co-ed volleyball team plaque from back when I lived in Dallas. We did win a couple of seasons but somehow when we got runner-up it was my turn to take the plaque home.

Funny how that works…oh well. I have been waiting patiently to find a place to showcase this beauty. Haha.

Plywood Shelves with an Exposed Edge
We are extremely happy with how the shelves turned out. They are quirky and fun which makes us happy. If there was anywhere you could get away with eclectic shelving, I think a home gym is the place.

I would like to report that since the shelves went up in the home gym last weekend I have worked out in there 4 out of the 5 week days this week which is my new record since we bought the treadmill. Is there a correlation? Maybe, just maybe.

The room is shaping up to be a really enjoyable space to spend our time. We only have a few projects left in this room which include building a locker area, new lighting, building a stand for weights, and to do something cool with the window. We can’t wait to get this room finished!

In the meantime be sure to catch up on some of our other home gym projects:
painting a faux brick wall, yoga mat rack, gym details, vintage gymnasium clock, choosing gym floor mats

PIN IT FOR LATER

A DIY home tutorial showing how to make a unique set of wall-mounted plywood shelves. This tutorial includes the materials needed as well as the steps to make this DIY shelving project. This would be perfect for living room shelving or home gym shelving. A video tutorial is also included.

DIY Wood Candle Holder

DIY Wood Candle Holders

We gave new life to old spindles by transforming them into wood candle holders.

Wood Candle Holders DIY made from SpindlesY

Hello! Courtney here today sharing a project that I worked on this past week that meant a lot to me. My grandparents are doing a little remodeling around their house and decided to open up the space above their wet bar by taking down the spindles that ran from the bar to the ceiling. These spindles were original to the house which makes them older than me!

My grandparents gave them to us in case we could use them for a project. I then had the idea to recycle the spindles and use them to make wood candle holders as a gift to give my grandmother for her birthday this week. It came together really quickly with very little supplies and I am so proud of how it turned out.

SUPPLIES

MATERIALS

TOOLS

  • Miter Saw

*This post contains an affiliate link. You can read our disclosure policy here.

Wood Candle Holders DIY made from Spindles

How To Make DIY Wood Candle Holders

Wood Candle Holders DIY made from Spindles
1. I wanted to change the colors of the spindles but the spindles had a clear coat on them so I needed to sand them down. It was a tricky task because of the details on the spindles there were lots of tiny areas to try and sand down. I HATE the sound and feel of sanding so I usually wear gloves and headphones while tackling this process.

Wood Candle Holders DIY made from Spindles
2. After I sanded down the area, I stained the sanded parts with our favorite color stain, Rust-Oleum Ultimate Wood Stain in Kona. I put two coats on to make sure it was nice and covered.

Wood Candle Holders DIY made from Spindles
3. After the stained dried, I cut down the spindles to the area I stained with the miter saw. I decided to make them varying heights.

Wood Candle Holders DIY made from Spindles
4. I made two cuts with the miter saw. The first was to trim down the square part and the second was to cut right above one of the circle sections so I would have a nice flat area to attach my top wood disc. It came out great!

Wood Candle Holders DIY made from Spindles
5. Don’t let that bottle fool you, that is not Elmer’s glue but rather super strength wood glue. Brent put it in an old glue bottle to make it easier to use. Brilliant! I used a tiny dab of wood glue to attach the two wood discs to the spindle to create the candle holder.

Wood Candle Holders DIY made from Spindles
6. I had a hard time using a clamp to hold the pieces in place without the pieces getting moved off center so I went for option B, old paint cans. Paint is tedious to dispose of which is why we still have old paint cans that were here when we moved in still sitting in our garage. However, they came in handy in this situation. I set them on top of the candle holders to apply pressure.

Wood Candle Holders DIY made from Spindles
7. Once the top and bottom pieces were attached to the spindle, I stained the wood discs the same Kona colored stain to match the spindle.

Wood Candle Holders DIY made from Spindles
In just a day I was able to give new life and purpose to old spindles. I love the design of the spindles and while they definitely looked out dated in their original location they look perfect as candle holders! Plus, the sentimental side of me loves the fact that they come from grandparents’ home.

We have plenty more spindles and we can’t wait to make another project with them.

Wood Candle Holders DIY made from Spindles
Brent and I were super excited to surprise my grandmother with them for her birthday last night. All my hard work sanding was rewarded when I saw her eyes light up the minute she realized they were made from her spindles. It made my day.

Those spindles were a part of their home for 33 years so now she has the best of both worlds. Their home is more modern with them removed, but she has a touch of nostalgia with the wood candle holders sitting on her coffee table.

Have you re-purposed spindles for another use? We would love to hear your ideas or suggestions for our next spindle project.

PIN THIS PROJECT

Wood Candle Holders DIY made from Spindles

Linen Closet Organization

Linen Closet Organization

Linen Closet Organization

This week we took advantage of the extra hour to work on some linen closet organization. There is just something about a freshly organized closet that makes me super happy. Ah, it is the little things like purging old junk and storing supplies in matching boxes to make it a good week.

When we started working on our home gym we pulled all the craft supplies out of the closet in that room and have been “storing” it on the guest room floor for the past three months. It has been difficult to find supplies for our projects. I was anxious to create a system so the next time Brent asks me where our double sided tape is I can give him a definite answer rather than “somewhere on the guest room floor”. Life is glamorous sometimes over here at Gray House Studio.

We have been planning on building a craft cabinet but other projects have come along and bumped it further down our to-do list so we started looking for a quick solution to get all the stuff off the floor (so our guests don’t have to walk through a maze of paints and pencils to get to their bed) and decided that our hall linen closet would be the perfect place to store all of our craft supplies.

Linen Closet Organization

Here is what our linen closet looked like this time last week. There were some sheets, some blankets, pillow cases, towels, etc. It resembled a linen closet but there just seemed like so much wasted storage space. It isn’t a huge closet but if organized properly, I was sure we could fit both linens and craft supplies in this space.

Linen Closet Organization

The first thing we did was pull everything out of the closet and create an even bigger mess in the guest room and the hall and the entry way. Doesn’t it seem like you have to create a mess to organize a mess? I like starting organization projects with a blank slate so I can get a good idea of how much space I am actually working with.

Linen Closet Organization

The one thing that holds me back from organizing is money. It is a dream of mine to have all our cabinets, drawers and closets neatly organized with matching baskets, bins and boxes but I can’t ever seem to pull the trigger on purchasing these items because you can’t just buy one or two you have to buy several and they can add up quick.

This closet was going to take a plethora of boxes because we needed to store a lot of small items like glue bottles, ribbon, tape, pencils, etc. We ended up using three different sizes of the TJENA boxes in black from IKEA.

Linen Closet Organization

The price was great ($3.99 for the large box that came with an option to add compartments, $1.99 for the smaller box, and $3.99 for a two pack of the magazine files).

They were paper boxes so I was skeptical about how sturdy they would be but we are very pleased with the quality. They are easy and quick to assemble. I used our label maker to create labels for each of the boxes to create a uniform look.

Linen Closet Organization

The large box comes with another piece that you can add to break up the inside into small compartments. It was perfect for storing all of our left over ribbon, yarn, twine, etc. I also used these large boxes to store paper and fabric scraps. I’m just over here in organization heaven.

Linen Closet Organization

We use our colored pencils the most for sketching project ideas. I wanted to create an easy way to grab them out of the closet but I didn’t want to spend any money.

I took one of my old candles from Bath & Body Works that just had a tiny amount of wax at the bottom and cleaned it out using a trick I found online which involves pouring boiling hot water into the jar so all the wax can come up to the top of the jar. I let it cool for a few hours so then I could just pop the wax and the wicks out. It works great and I like finding ways to recycle these jars.

After I cleaned it out really well, I spray painted it and stuck my favorite chalk tape onto it. It was a fast, easy and free storage solution.

Linen Closet Organization

Once all of our craft supplies were nicely organized in the top half of the closet, I started working on arranging the linens in the bottom half. We purchased two inexpensive wire baskets from HomeGoods. In these we are storing our extra sheets and pillowcases. Eventually I would love for all these to match. All white pillowcases and sheets for guests would be ideal and for the designer in me, look a lot nicer matching in the closet.

We store all the guest towels in the guest bathroom, all of our blankets in our living room ottoman and the extra blankets in the guest room closet. We just don’t have a ton of extra linens to fill up an entire closet in this stage of our life.

Linen Closet Organization

What a difference, no more wasted space! Does it mean that we are not grown ups yet if we have more craft supplies then linens in our newly organized linen closet?

It may seem like a strange choice, but Brent and I like making spaces work for us and to use them to create solutions to solve our storage problems or fit our interests and our recent linen closet organization project is the perfect example of just that.

DIY Concrete Countertop

DIY Concrete Countertop

In this DIY tutorial we will show how to make a DIY concrete countertop as well as 5 concrete mistakes to avoid.

DIY Concrete Countertop

Hey everyone! It’s Brent here today sharing all the details about the DIY concrete countertop we built for our coffee bar.

It has been several months since we finished the concrete countertop on our coffee bar and we haven’t been anxious to post about it because it was a pretty frustrating experience.

However, we have been asked several questions about how we made the top of our coffee bar so now that the appropriate amount of time has passed that we can laugh about our mistakes, we are sharing the whole messy process.

This was our first time to use concrete on such a large scale so needless to say there were aspects of making the DIY concrete countertop that were frustrating.

Despite how crazy the process was, we are extremely pleased with the finished result. It turned out amazing. So we are here to tell you the never give up pep talk works.

Before we jump in and show you how we poured the concrete slab, we thought it would be important to share five DIY concrete countertop mistakes to avoid to help others bypass the battle that we went through.

5 DIY Concrete Countertop Mistakes to Avoid

DIY Concrete Countertop

1. OVER TIGHTEN SCREWS IN THE FORM

The walls of the melamine form is attached to the base with screws. If the screws are over tightened the walls of the form will split and warp.

DIY Concrete Countertop

2. FLY SOLO

The plan was for Courtney to document the project but it didn’t take long before I was frantically asking her to put the camera down to help me. Since concrete only has a small window to work with it is important to have an extra pair of hands around.

DIY Concrete Countertop

3. MIX BY HAND

We bought a large tub to mix the concrete in and thought we were prepared because we would be able to mix two bags at one time. We needed five bags for the largest slab.

While the tub did allow us to mix more concrete in a single batch, doing it by hand took way too long and the concrete started setting up in the tub. Plus, the more concrete we mixed in the tub the tougher it was to transport to our form.

A mixer allows you to mix and transport multiple bags of concrete without worrying about the concrete setting up. It is worth $45 dollars to rent a concrete mixer for a day.

DIY Concrete Countertop

4. THINK YOU WON’T MAKE A MESS

We didn’t have enough space in our garage for this project and we figured since the piece of furniture would ultimately be situated in our breakfast nook, we might as well build it there.

We covered the tile floor with plastic and cardboard to protect it from any stray concrete and luckily no concrete escaped the plastic.

However, there was one moment where I slipped coming in from outside with 80 lbs. of mixed concrete in my arms.

It was in that moment while I was trying desperately not to spill any of the concrete onto our kitchen floor that I realized you can’t guarantee a project with no mess and it is best to take every precaution when planning a project.

It is also probably wise to make sure you have plenty of time to complete a project before you begin.

DIY Concrete Countertop

5. BELIEVE CONCRETE IS EASIER TO CLEAN AFTER DRY

Dry concrete flakes off slick surfaces easily but we learned not painted surfaces. We mixed the concrete on our back patio and in the disarray of the time crunch, splattered quite a bit of wet concrete on the house.

Worried about the concrete mix drying, we assumed the concrete splatter would flake off once dry.

Well, you know what happens when you assume. The concrete fused to the paint and the only way we found to remove it was to pressure wash it AND the paint completely off the siding.

Repainting the back of the house has now been moved up on our to-do list. Oops.

How We Made the DIY Concrete Countertop for our Coffee Bar

SUPPLIES

FYI: This post contains a few affiliate links to products we used to make this project. Gray House Studio does receive commissions for sales from these links but at no extra cost to you. We appreciate you supporting this site. Read our privacy and disclosure policy. You can also easily shop our recommended products here.

STEPS

DIY Concrete Countertop

1. First we took a 4’x8′ sheet of 3/4″ melamine board and cut into strips.

The width of each melamine strip should be the same size as the DIY concrete counter top will be thick.

DIY Concrete Countertop

2. Once the strips were cut to the correct length to frame the outside of each slab, we used a drill and drill bit to pilot holes for the screws.

First we used a drill bit slightly larger than the threads of each screw and drilled all the way through each melamine strip.

After drilling through the entire width of the melamine strips, we used a drill bit slightly larger than the head of the screw to drill down about 1/4″ allowing the screw to be countersunk below the surface.

To avoid drilling too deep with the larger drill bit we wrapped painter’s tape around the bit to mark the correct depth.

After drilling all the pilot holes we attached the strips to the surface of a second sheet of melamine with screws.

DIY Concrete Countertop

3. To create a water tight form for the concrete, we used black silicone caulk to fill the seams. We used painter’s tape to mask the surface of the melamine and create a clean caulk line.

DIY Concrete Countertop

4. After smoothing the caulk with our fingers, we removed that tape before the caulk dried to create a smooth finish.

The dark color of the caulk made it easy to see where any caulk is out of place.

DIY Concrete Countertop

5. To create the strongest slab possible we used welded steel wire to reinforce the concrete.

After cutting the wire with a pair of bolt cutters we used denatured alcohol and a rag to wipe off any rust.

DIY Concrete Countertop

6. With the form complete it was finally time to mix the concrete.

We used precision grout by Quikrete to make our counter top.

We started by using the recommended water to concrete ratio but realized after the first batch that we needed to pour slightly more water from a bucket than the bag recommended to provide adequate dry time.

DIY Concrete Countertop

7. We poured half the mix into a large concrete mixing tub and all the water from the bucketbefore using a mixing paddle attached to a drill to blend the concrete together.

Once it blended into a consistent mixture, the rest of the dry mix was added.

DIY Concrete Countertop

8. We mixed two bags of concrete at a time and it definitely takes more than one person to lug that much concrete around.

After pouring the concrete into the form we used a trowel and shovel to spread the concrete out.

DIY Concrete Countertop

9. After the first batch was in the form and smoothed out we added the metal wire mesh. We used an orbital sander to vibrate the mixture to shake any air pockets to the surface to create a smooth finish.

We mixed the second batch of concrete and filled the rest of the form. With the entire form filled we vibrated it once more and covered the two slabs with plastic to allow the concrete to cure as slowly as possible.

DIY Concrete Countertop

10. Once the counter top had time to cure we unscrewed the walls of the form from the base but found that it was difficult to remove the boards.

We were able to remove the boards by attaching screws to the side of each board and pulling on the screws with pliers.

After we had the concrete slab loose, we lifted it up and placed it on top of the coffee bar base we built.

DIY Concrete Countertop

We could pretend that we are experts on everything DIY but that just wouldn’t be true.

We are still learning as we go and a lot of the times we just don’t know what problems could arise until we are knee deep in the middle of the project and run right into them.

But the best thing to do is to not give up, push through the challenges and learn from your mistakes for the next time. This was our experience making the DIY concrete countertop.

We hope this post will shed some light on our process of making a concrete countertop for our coffee bar.

Don’t forget to see out how we built the base of our coffee bar as well as check out how our finished coffee bar turned out.

I can’t wait to work on my first woodworking project with my new upgraded dust collector.

2022 Personalized Christmas Ornaments
*** Thanks so much for supporting our small shop – Moon Rock Prints – this holiday season! ***

PIN FOR LATER

How to make DIY concrete countertops for the kitchen. In this DIY home renovation tutorial we will show how to make a concrete countertop from a concrete form for a bar top or top of a kitchen island.