In this week’s DIY tutorial we share our tips for painting faux brick embossed hardboard paneling. If you want a DIY painted brick wall the easy and cheap way, we’ll show how to get a brick interior wall aesthetic on a budget.
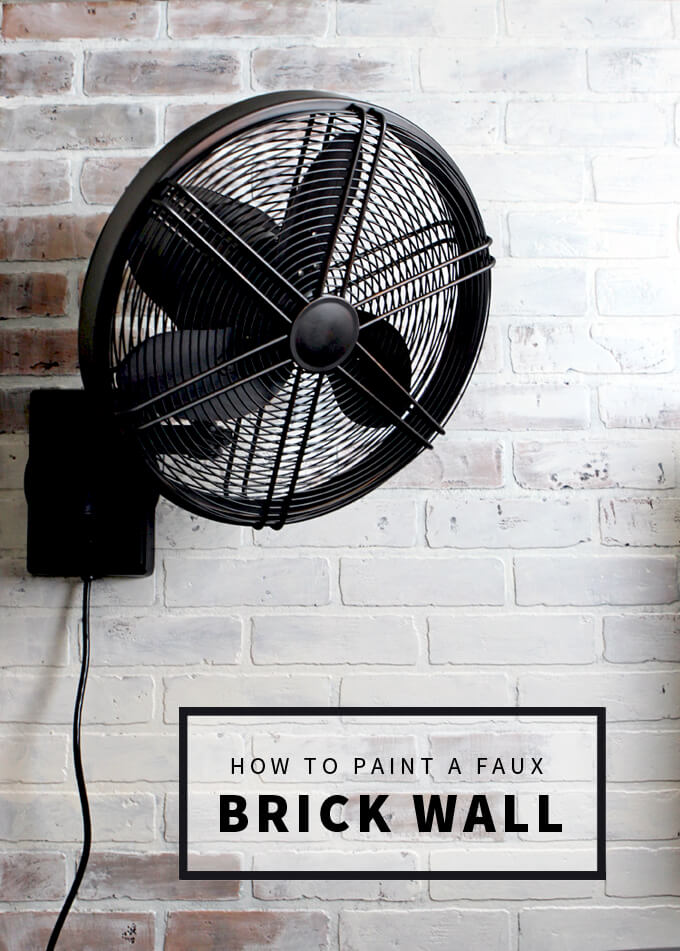
Today we are going to share how to paint a faux brick wall. We posted a teaser about our technique a few weeks back but now we are going to break it all down on how we made our industrial loft style brick accent wall for our home gym that we love.
An important lesson we have learned during our home renovation process is you don’t necessarily have to have a huge budget to pull off your dream room. You just need inspiration, creativity, perseverance, and in my case, trust.
Trust that when your husband says that he thinks we should use EIGHT different paint colors to paint the wall panels that you know to just let him do his thing because it will turn out great. I’ll admit I had no clue where he was going with it but he is the one with art degree and I should know by now that I always love what he comes up with.
But I am getting a little ahead of myself so let’s start at the beginning. As I’m sure you know by now we are in the process of transforming our spare bedroom into a home gym. We both liked the idea of having a brick accent wall somewhere in our home so when we decided to create an industrial loft styled home gym, we knew this was the perfect room for it.
When we are brainstorming projects for our home we always start out, “Well, if we were rich, we would do this…” in this case our “if money were no option” choice would have been to have someone else come and install brick or our second choice would have been to install these pretty brick veneers.
But we are of course renovating our home ourselves on a budget so our only option for what we were willing to spend was to buy three sheets of embossed hardboard wall panel that looked like brick. Well, kind of looked like brick.
Today we are going to show you how we transformed faux brick embossed hardboard paneling into a realistic looking brick accent wall by painting it with a new color palette. It turned out to be a lot easier than we anticipated and only cost us around $130 for the entire wall.

Get a FREE digital file of our hand painted Summer Bucket List print over at our print shop website: MoonRockPrints.com
How to make a DIY Faux Brick Accent Wall on a Budget
SUPPLIES
- (3) Brick Embossed Hardboard Paneling
- Jigsaw
- Staple Gun
- Gray Caulk
- Large Piece of Cardboard
- Various Colors of Sample Paint (see below)
- Foam Roller
- Paint Pail Liner
- Paintbrush
FYI: This post contains a few affiliate links to products we used to make this project. Gray House Studio does receive commissions for sales from these links but at no extra cost to you. We appreciate you supporting this site. Read our privacy and disclosure policy. You can also easily shop our recommended products here.
Handmade Christmas 2021 Ornaments

Thanks for supporting our small shop this holiday season!
TUTORIAL VIDEO
STEPS
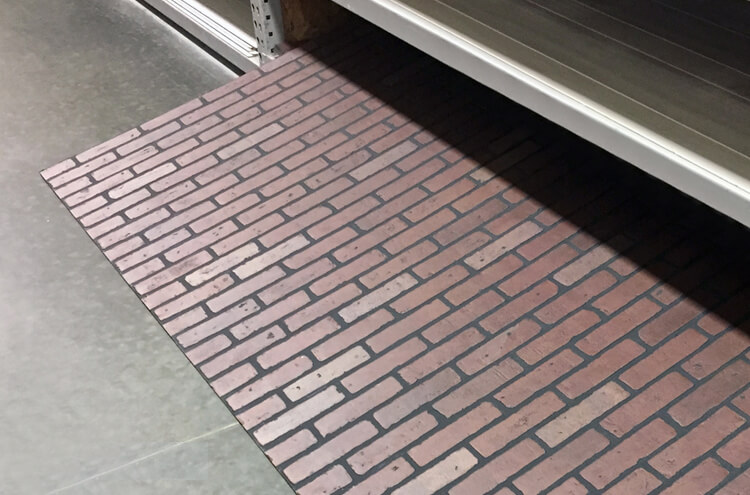
1. First, we needed to find our brick embossed hardboard paneling. It turned out the only paneling we could find came in the unattractive combination of red brick and black mortar.
We knew we were going to have to put some work into it to get it to the style we wanted but Brent assured me that if we painted the wall with an entirely new color palette first rather than just painting all the paneling white, that is would drastically change the space into the old industrial loft look we desired.
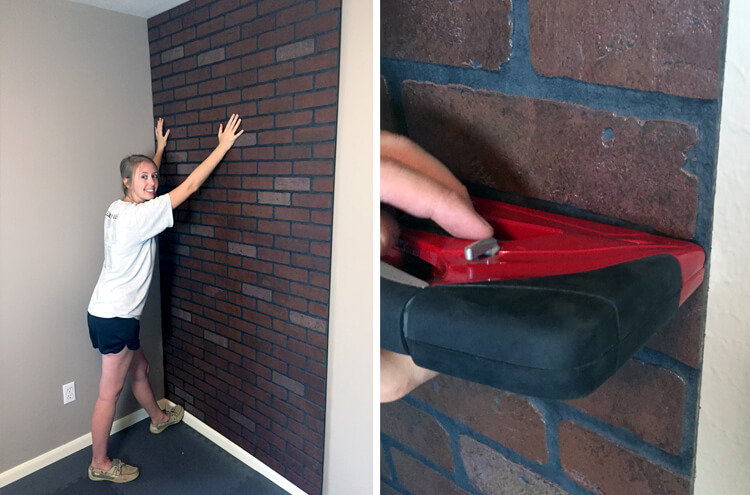
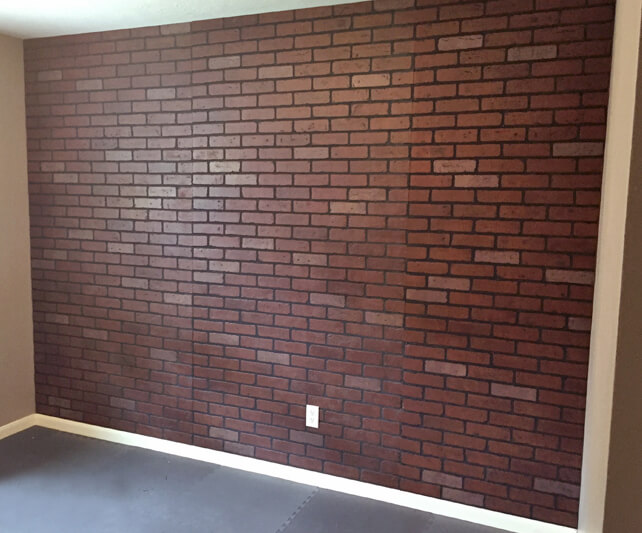
2. Next, we installed our wall panels. We needed three hardboard panels to cover our wall.
We did this step first so we could paint across all three boards at one time making the paint job look cohesive.
We used a jigsaw to cut around the half bricks on all the panels on the inside sides so the panels fit together like a puzzle.
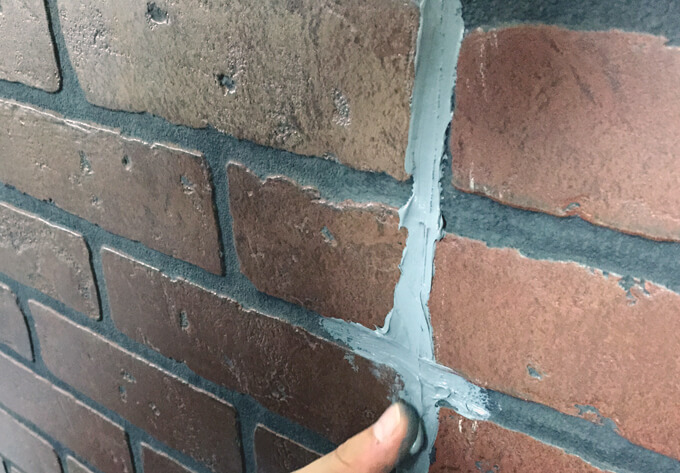
3. Our goal was to make the wall seamless so you could not tell it was three separate pieces of paneling.
We did our best to line up the bricks as close as possible and then used gray caulk to cover the lines where the boards came together. We used a color similar to the paint we got to paint the mortar.
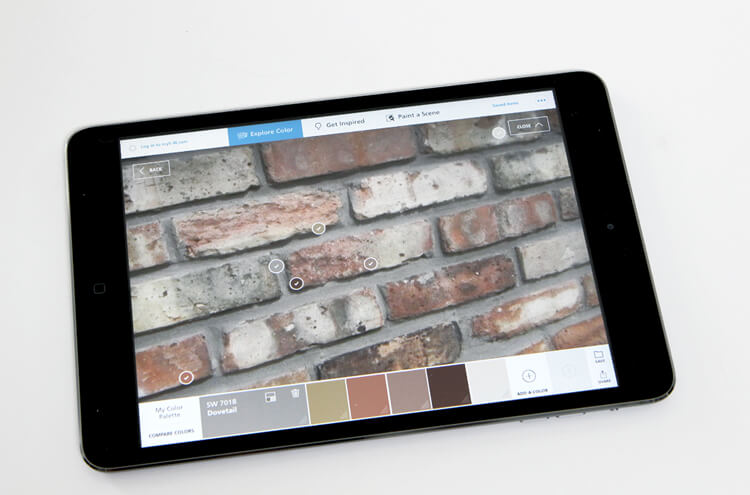
4. After we had determined what we wanted our wall to look like, we needed to pick out the paint colors that would be in our new color palette.
To do this we used the Sherwin-Williams ColorSnap app to pull the colors from the screen in our inspiration photo and translate them into actual paint colors we could purchase to use to paint our brick wall.
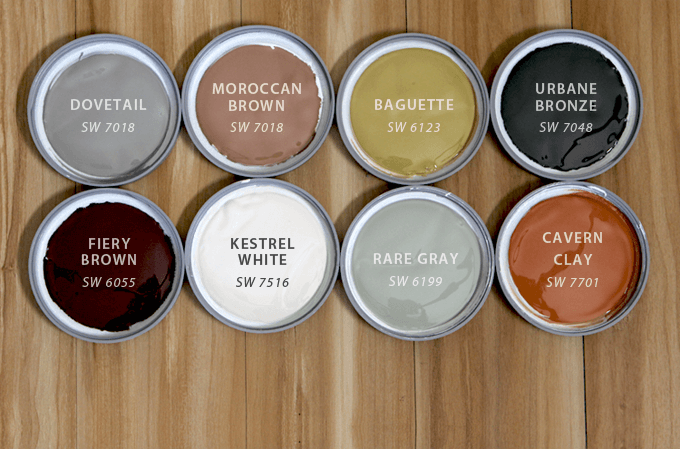
5. Once we had the colors available to us on the app, we had to narrow them down to the ones that would form the best color combination for our faux brick.
There are a lot of options so our formula consisted of choosing two mid-tone colors, two highlight colors and two to three accent colors. We also selected a new lighter color for the mortar.
Our New Color Palette:
- Cavern Clay SW 7701 (midtone)
- Moroccan Brown SW 6060 (midtone)
- Fiery Brown SW 6055 (accent)
- Baguette SW 6123 (accent)
- Urbane Bronze SW 7048 (accent)
- Rare Gray SW 6199 (highlight)
- Dovetail SW 7017 (mortar)
- Kestrel White SW 7516 (whitewash)
We bought sample sizes of the paint because we only needed to use a small amount of each color. It was plenty to get the job done and have some of each color left over for future projects.
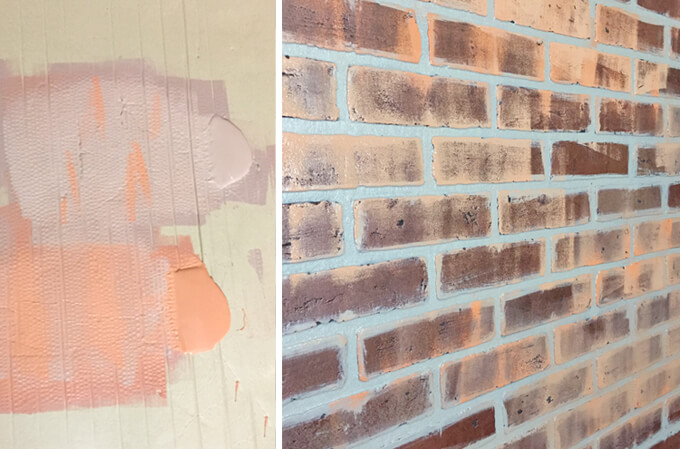
6. We started with our two mid-tone colors, Cavern Clay and Moroccan Brown.
We poured the two paint colors on a large piece of cardboard. We chose to use a piece of cardboard because it allowed us plenty of space to roll the paint together and let it mix naturally.
We chose to use a foam roller because we liked the authentic texture it gave the paint when it was rolled across the embossed surface.
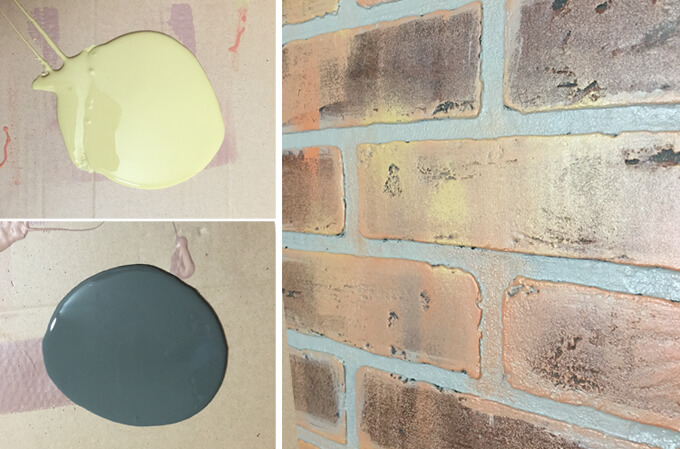
7. We completely covered the wall with a light coat of both mid-tone colors and then moved on to our accent colors.
For the accent colors we did not cover the entire wall but instead concentrated them to certain areas. We chose to use a bright yellow (Baguette), dark brown (Fiery Brown) and dark gray (Urbane Bronze) for our accent colors.
For this step we got a new foam roller so the lighter color did not get muddied down and poured our paint on a clean-ish section of our cardboard.
Next, we applied our highlight color. We applied it to the wall liberally but if it looked too overpowering in areas, we went back and rolled in more of our mid-tones to tone it back down. We didn’t want any particular section to stand out.
For our highlight color, we used Rare Gray.
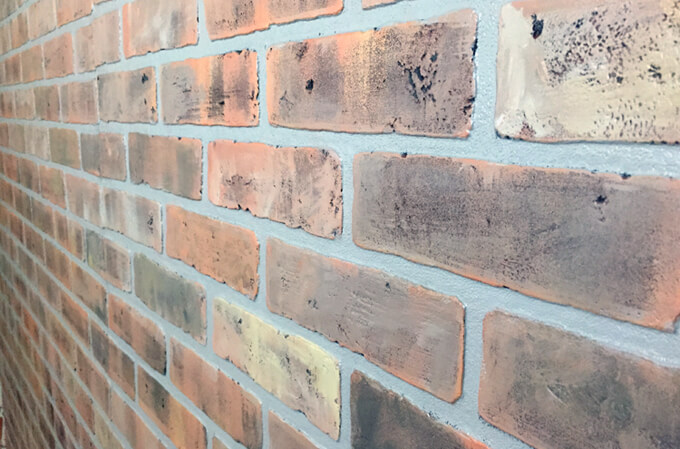
8. We started the whole process by painting the black mortar a gray color, Dovetail.
But we didn’t mention this as the first step because this actually created double work for us because once we rolled in the other colors, stray paint got into this area.
So we had to come back and touch up the mortar again.
If we were to do this again we would wait until the very end to paint over the black mortar.
Then we could just take the paintbrush and cover this area once. But once we touched up the mortar color, it really changed and cleaned up the look of the brick paneling.
9. You could stop there but we wanted to replicate an old industrial loft wall.
Our vision was to have it appear as if the entire wall was painted white but time has passed and now the paint is wearing off.
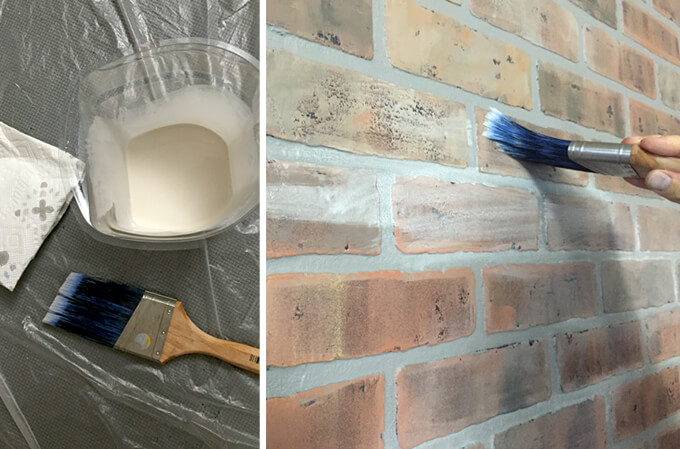
To achieve this look we whitewashed sections of our brick wall with various shades of white paint.
To begin this process we significantly watered down our Kestel White paint in a paint pail liner. We used a paintbrush to lightly brush on the paint in a pattern similar to our inspiration photo.
With the white paint being very light we could see our entire pattern and then come back with more opaque paint to fill it in. We left some areas untouched on purpose so that these areas would look like the really worn and exposed brick.
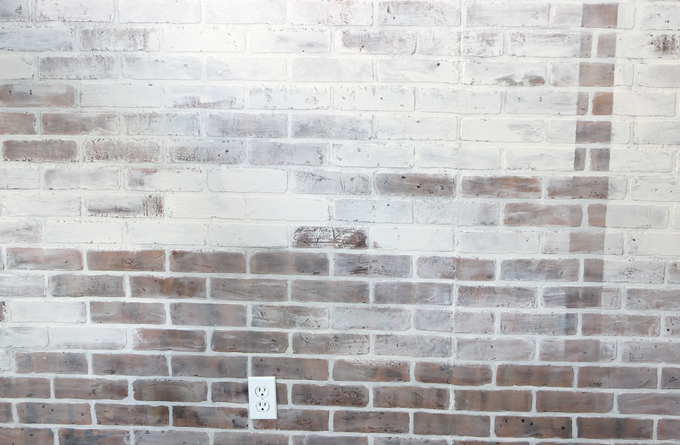
10. Next, we used our paintbrush and less diluted white paint to cover the parts of the pattern that had more paint and less exposed brick showing through.
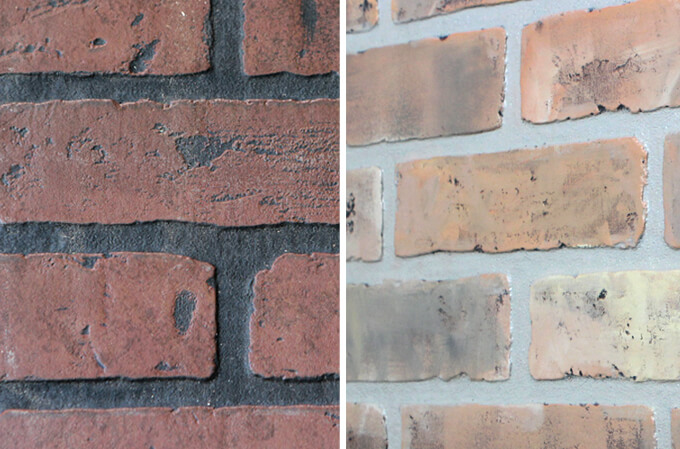
We are extremely pleased with how easily we were able to transform our wall with our new color palette. The new colors made a huge difference. Check out this before and after of the same wall.
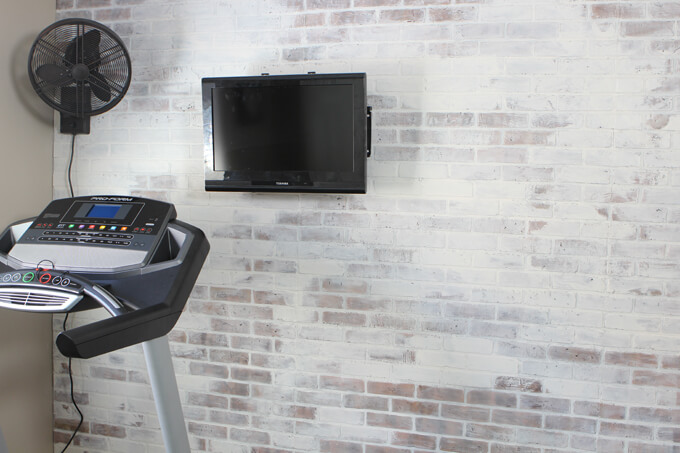
Here is what our faux brick wall looks like once we finished the whitewashed pattern.
We are pretty much ecstatic we were able to pull off this brick accent wall for only $130. It is an essential feature in our industrial loft gym.
From a distance it passes for real brick much more easily then it did when we first hung the hardboard paneling on the wall.
It just makes me so happy every time I walk into the room to see this wall. For some reason it makes running on that treadmill so much more fun. And that is what I love about creating unique spaces in our home.
I feel encouraged and inspired with each new project that we complete to see our overall vision come to life. We pour our time, heart and creativity into these projects and it is definitely worth it when we get to enjoy spending time in these rooms.
PIN FOR LATER


That looks great, but for future reference, Home Depot sells a similar product that already has gray mortar lines and a brick color similar to what you ended up with prior to wiping the white over everything.
Hi!! I just came across your YouTube video and then your blog. I have Earth Stones faux brick paneling. I was wondering if your color scheme would work well with my light colored brick?
I love the look of yours before the whitewash.
Thanks, Elena.
Hi,
I just now found your blog after reading this months Better Homes and Gardens article. I love all your ideas and I have a similar wall in the kitchen. Previous owners installed that red brick black mortar paneling. I actually wasn’t feelin’ that, but now…Now I have hope. I am going to do your exact technique. (well at least I’m gonna try!)
Thanks for your inspiration.
Vicki
Hi Vicki!
Thanks for finding our blog! We can understand not liking that red brick paneling. You’ll do great painting it and if you have any questions, don’t hesitate to ask. ????
-Courtney