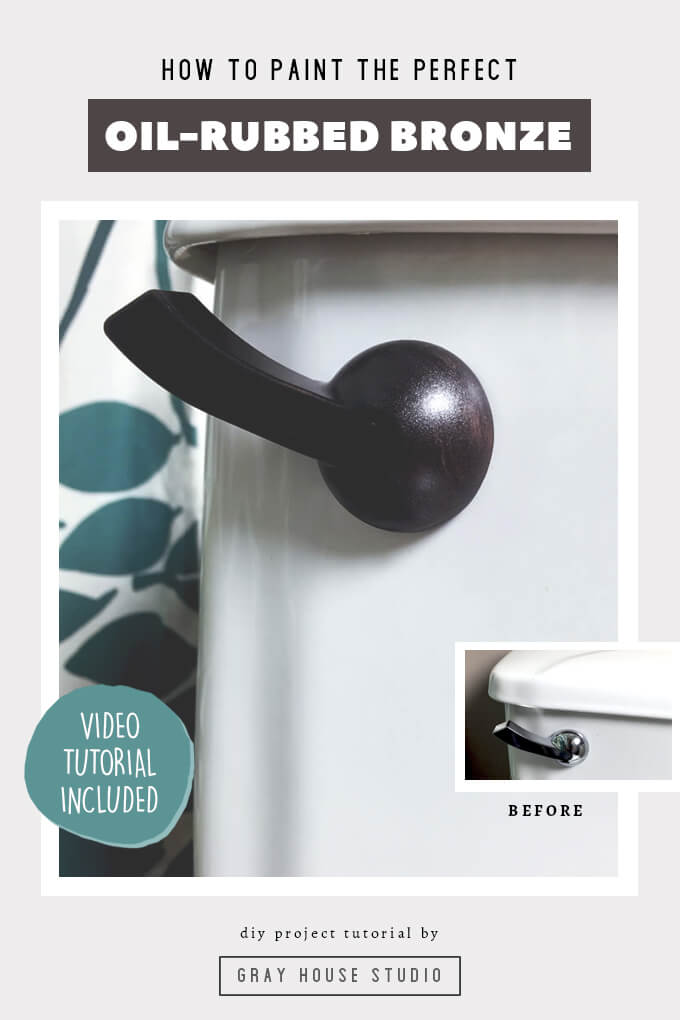
Want an easy DIY win? Give your toilet handle a makeover with this simple painting an oil-rubbed bronze finish technique.
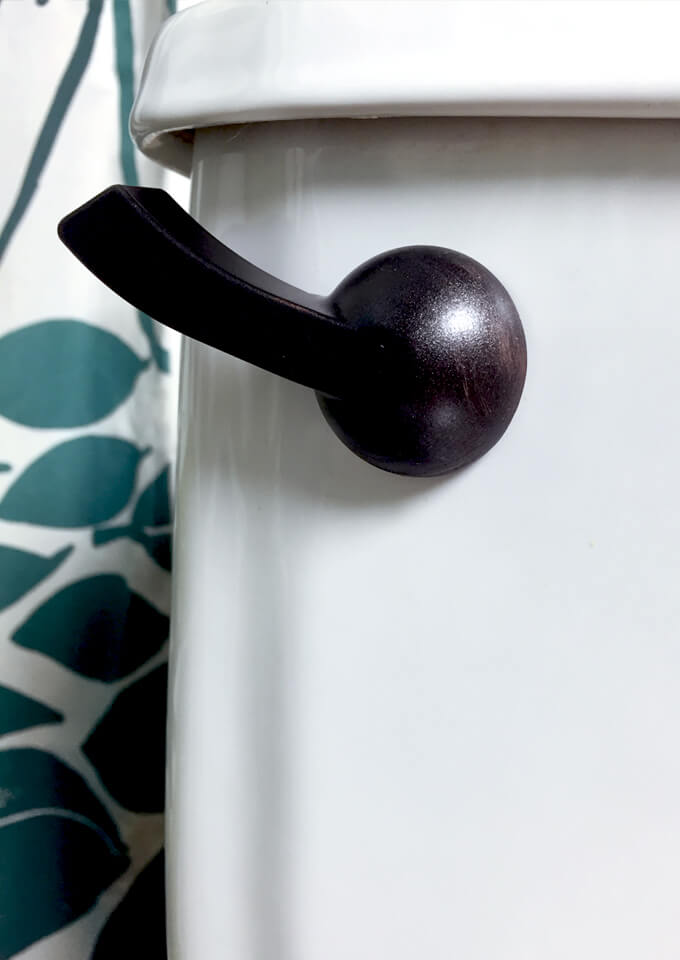
Brent’s parents recently completed a bathroom makeover and shared with us that it turned out exactly how they wanted and everything went smoothly except for of all things, a toilet lever. They bought a brand new toilet but it came with a silver handle.
They purchased a new lever to match the other new oil-rubbed bronze hardware in their bathroom but once it was installed they soon learned that it stuck out too far and prevented the seat from staying up.
Then they bought a new slow closing toilet seat but the handle still stuck out too far. They thought they were going to have to put the original lever back on and live with the silver when Brent suggested we could paint it with an oil-rubbed bronze finish ourselves.
So when they came to visit this past weekend we gave it a try and it turned out great!
That got us thinking that toilet handles are often one of the last pieces of hardware that get upgraded in the bathroom.
We are working on converting all of our hardware throughout the house from a silver finish to an oil-rubbed bronze finish and we hadn’t even thought about switching out the toilet handle.
Once we realized how easy it was to remove the handle and paint the perfect oil-rubbed bronze finish to match our other bathroom hardware, we knocked out both toilet handles in one afternoon and had an instant upgrade!

Get a FREE digital file of our hand painted Summer Bucket List print over at our print shop website: MoonRockPrints.com
Today we are sharing our process of painting a perfect oil-rubbed bronze finish.
Paint a Perfect Oil-Rubbed Bronze Finish
SUPPLIES
- Krylon ColorMaster™ Primer Spray Paint in Black
- Krylon Copper Metallic Brilliance Spray Paint
- Sandpaper
- Rust-Oleum Metallic Satin Oil Rubbed Bronze Spray Paint
- Blue Painters Tape
- Toilet Handle
FYI: This post contains a few affiliate links to products we used to make this project. Gray House Studio does receive commissions for sales from these links but at no extra cost to you. We appreciate you supporting this site. Read our privacy and disclosure policy. You can also easily shop our recommended products here.
TUTORIAL VIDEO
STEPS
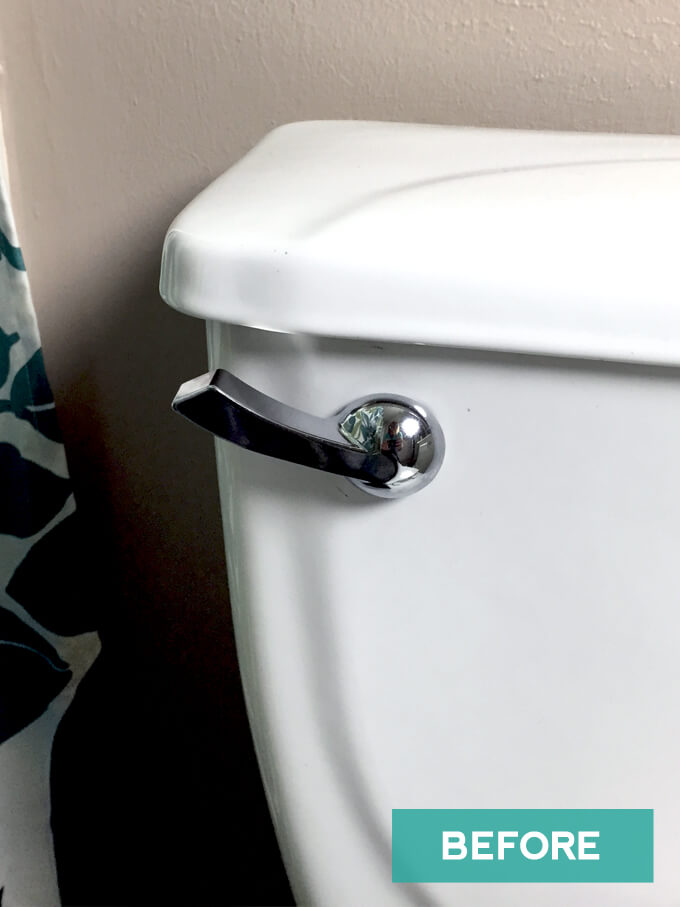
1. The first step is to remove the lever from the toilet.
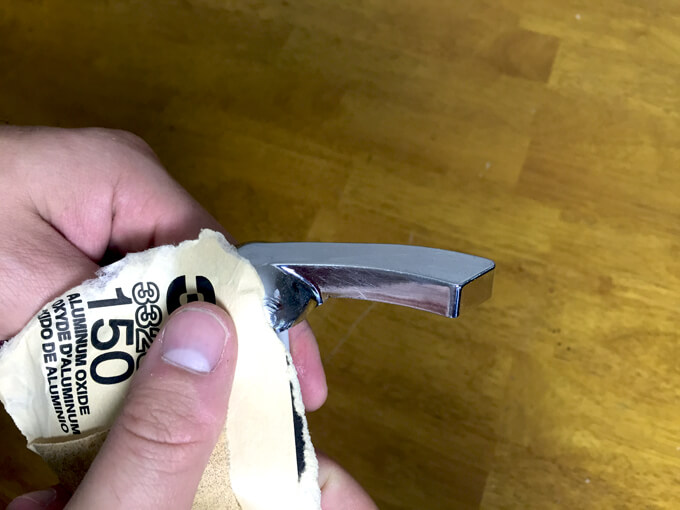
2. Use a piece of sandpaper to rough up the surface of the handle so the spray paint can grab on to it.
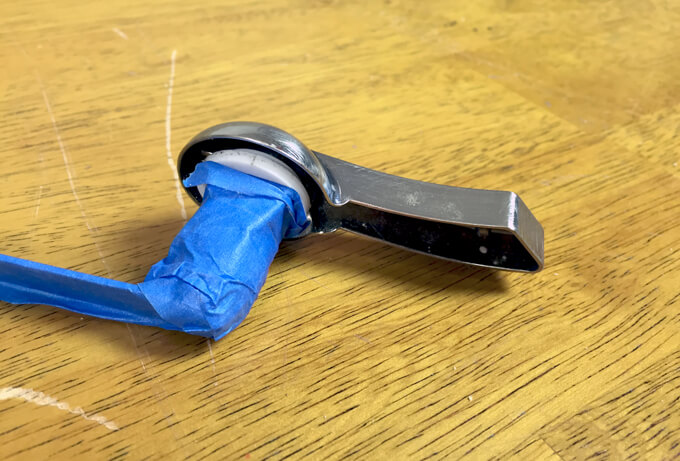
3. Tape off any areas of the handle with painters tape that you don’t want exposed like the threaded piece.
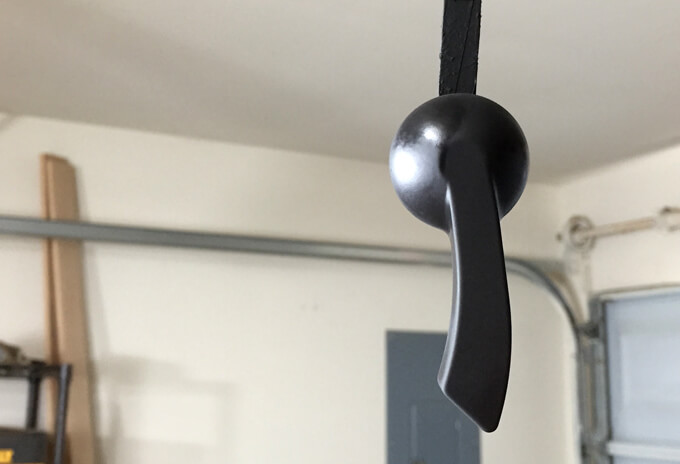
4. Spray paint an even layer of Krylon ColorMaster™ Primer Spray Paint in Black and let it dry for the recommended amount of time.
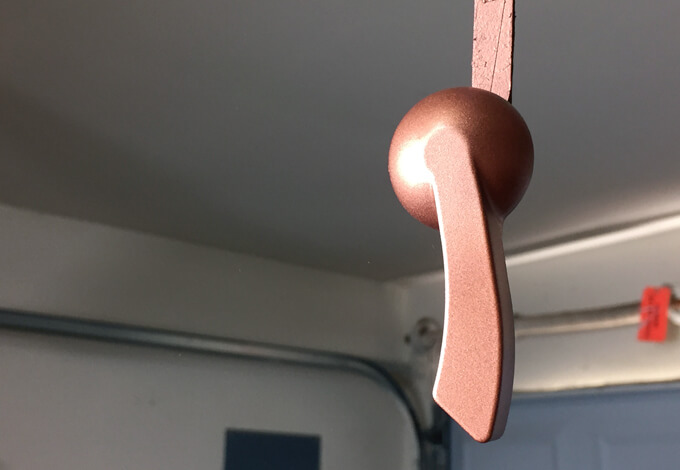
5. Then spray paint the copper layer with the Krylon Copper Metallic Spray Paint and let it dry for the recommended amount of time.
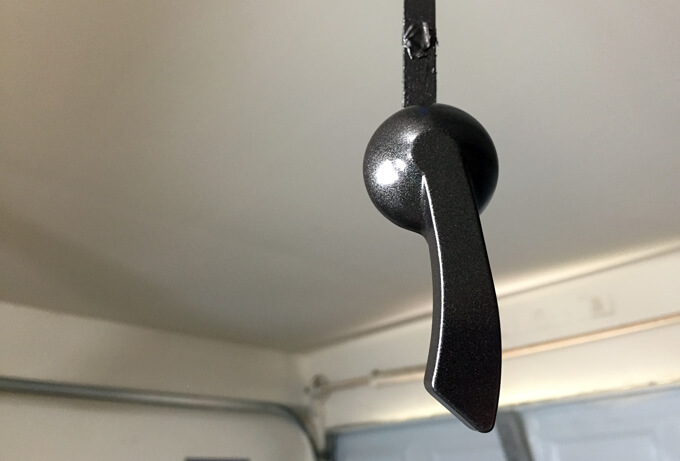
6. After the copper layer has dried, put on a coat of the Rust-Oleum Metallic Satin Oil Rubbed Bronze Spray Paint and let it dry for the recommended amount of time.
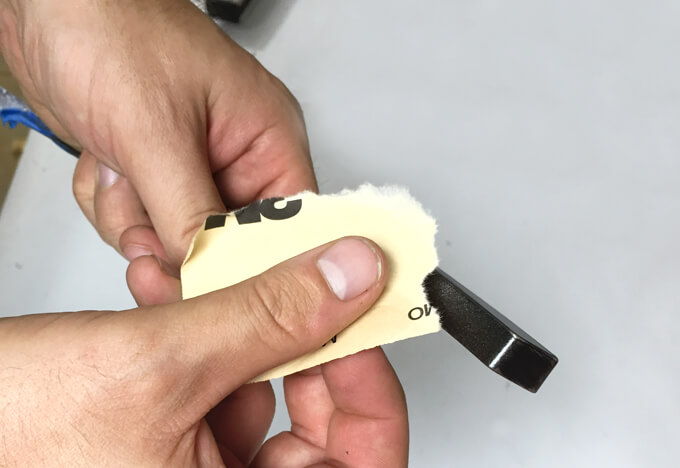
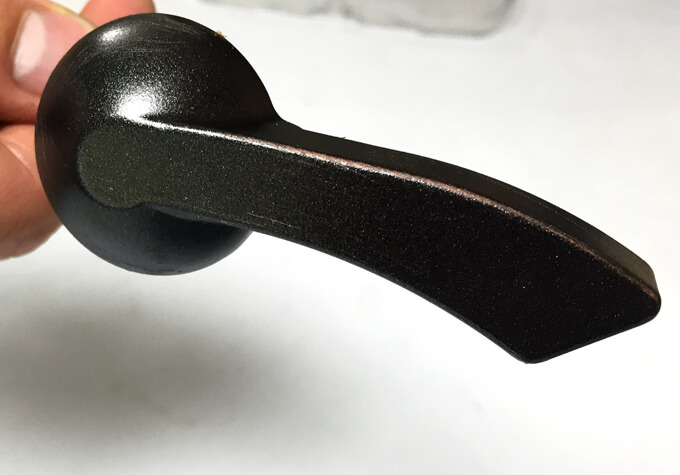
7. After it is nice and dry take a piece of sandpaper and gently scratch some of the oil-rubbed bronze paint away to reveal streaks of the copper paint layer underneath.
This process recreates the highlights that can be found on most manufactured oil-rubbed bronze hardware.
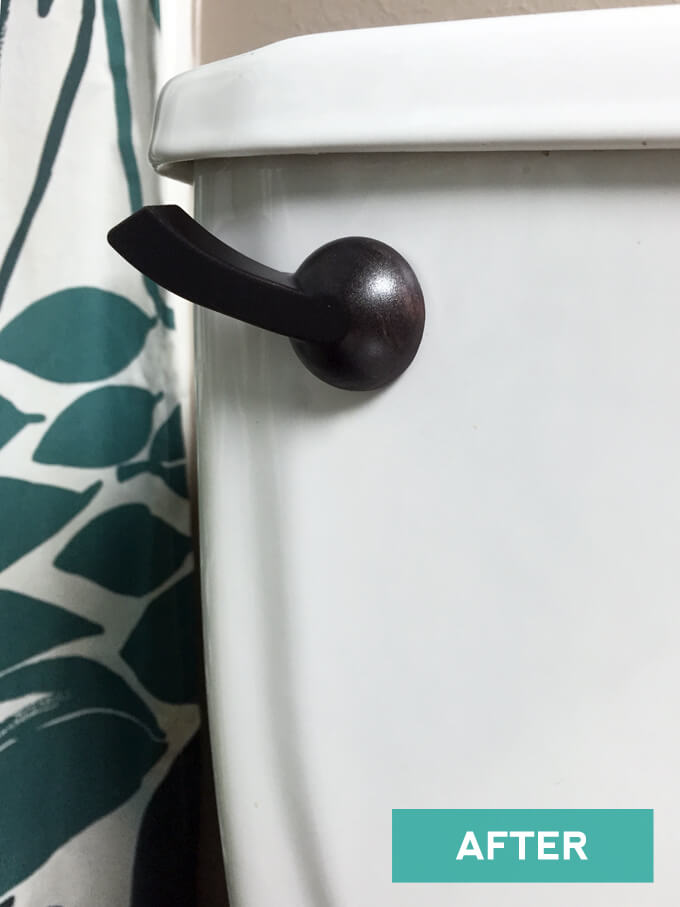
8. Finally, you can install the handle back on the toilet. It is that easy!
One piece of advice, it is important to let each layer of paint dry for the full recommended time, overestimate just to be safe.
We learned the hard way what can happen if you try and sand too soon.
On our first attempt we didn’t let it sit long enough or use a primer so when we went to scratch the oil-rubbed bronze paint layer away, it peeled off all the paint and exposed the original silver layer.
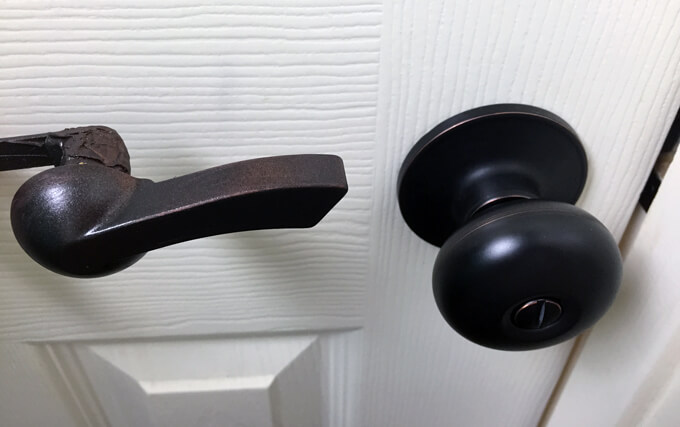
They do sell oil-rubbed bronze spray paint so you may be wondering what the purpose of the copper spray paint layer is.
We found that most of our hardware throughout the house that we purchased had areas of bronze exposed around the edges that perfectly matched the color of the metallic copper spray paint.
It is a subtle effect but really takes the look to another level and can’t be achieved with just one can of oil-rubbed bronze spray paint.
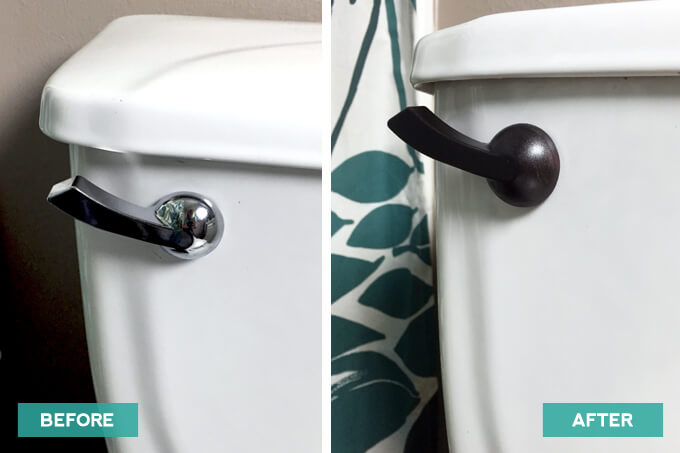
Our toilet got a face lift for only the cost of spray paint. It might not be the most glamorous project but it really makes a difference when updating a bathroom to have all the hardware in the room match.
PIN IT FOR LATER

Oh, and one more question…is it necessary / worth spraying some kind of clear finish coat to protect the work we’ve done?
Hi! I loved the look of this project, and I’ve seen it referenced in quite a few places across the Internet, so I imagine many folks are giving this a try. I have some questions and an alternate suggestion.
First: what happened? I just took my sandpaper to test out the final step and instead of revealing copper underneath, it immediately showed the original chrome. After all the spraying and purchasing lots of product (I’m doing this on a lot of things), I felt disappointed. I had let it dry for 24 hours. I tried a finer sandpaper just in case, and that didn’t really do much. I read where you said to “overestimate” the drying time, so I’ll give it another try in a bit.
Question: Do the brands of spray paint matter much? I used Rustoleum 2X Black Primer, a Rustoleum “Hammered Copper” for the middle, and the “Paint and Primer in one” Rustoleum Oil Rubbed Bronze spray. Wondering if the “primer” in my final spray caused the problem. These days the hardware stores don’t often stock the exact thing you’re looking for and we all need to work with what we can get. But if it matters a lot, I can try to track down the right paints.
Question: Does the quality of the underlying metal/chrome affect the result? I moved into a new home recently and I’m working with what’s here, but the fixtures are all pretty “cheap” and builder grade. So I’m not quite sure the original fixtures are metal, they may be a chrome-look plastic.
Alternate Suggestion: If I can’t get the look I want with this technique, it does seem that by “under-spraying” or strategically spraying the oil rubbed bronze, you can still get the copper to show through. It’s a bit trickier but I tried that with another fixture and I like the look, though it’s not quite as good as the results shown here.
Would certainly appreciate anyone’s comments and suggestions in case the original author of the piece isn’t monitoring this article.
great tutorial. thank you. i need to paint the toilet lever which sits on top of the toilet tank. i bought rust-oleum universal advanced formula metallic paint and primer in one. Aged copper is the colour. it seems too llght. is there a slightly darker shade to tie in with fixtures .
I loved the idea of the commode handle!
I’m curious as to why you used two different brands of spray paint – the Krylon for the first two layers then switched to Rust-Oleum for the top coat? I haven’t worked with spray paints much, so I’m finding the vast array of color / finish / brand / price options a bit overwhelming.
Thank you for sharing! I want to paint a ceiling medallion to match my oil-rubber bronze chandelier.
Nice Article. I enjoyed it. Question: I wonder if you have thought about using a Dark Brown Satin Paint instead of the Oil Rubbed Bronze Paint. The reason why I ask is because I see that the Oil Rubbed Bronze paint looks pretty shiny and metallic. The Oil Rubbed Bronze hardware don’t look metallic and flat. Thanks.
I want to change Grab Bars on a bathtub from Chrome to Oiled Bronze – please send method to use – Thnx
Better method, after the copper is dry, coat it with several layers of lacquer, each drying thoroughly. Then, cover with the O.R.B. paint, and while still wet, gently wipe down on the edges until you get the look you want. Then when dry, cover with lacquer, matte finish.
Had a quick question. Great tutorial, btw. When I used sandpaper to allow the copper to shine through, the chrome color (original color of the lever) was shining through.
Is there a specific grit of sandpaper to use? Should I spray paint 2 layers of each color? (I only did one coating.) I feel like I allotted enough time to allow all layers paint to dry well. How long did you both wait?
We are sorry to hear about that. Two coats could help but the most important thing would be to make sure that the original surface is thoroughly sanded. If the chrome surface is slick and not roughed up enough by the initial sanding before the copper coat the paint will not stick and produce results like you describe. We used 150 grit sand paper.
I’ll also suggest the last step to use auto clear coat X 2 for durability.
great tutorial! Do you think I could skip the first two steps on a mirror that already has a copper/gold frame? or would it still need to be sanded and primed first? TIA
That is a great point! You can use the existing color as the bottom layer. I would still suggest roughing the surface with steel wool or sand paper to make sure the top layer sticks.
Love this! Watch out door knobs, lamps. light fixtures and anything else I can paint, here I come. What else? Switch plates, cupboard door handles. There is no metal surface in my house that’s safe!!!!!
Haha, so true! We would love to see the progress as you start painting everything. Feel free to email us some pictures or tag us on social media.
I have been wanting to change out all my door knobs. Why not the bathroom too? Great tutorial! Thank you for sharing!