Check how this quick home DIY tutorial for adding shelves in bathroom cabinets. This simple update creates more storage space to organize all your bathroom essentials.
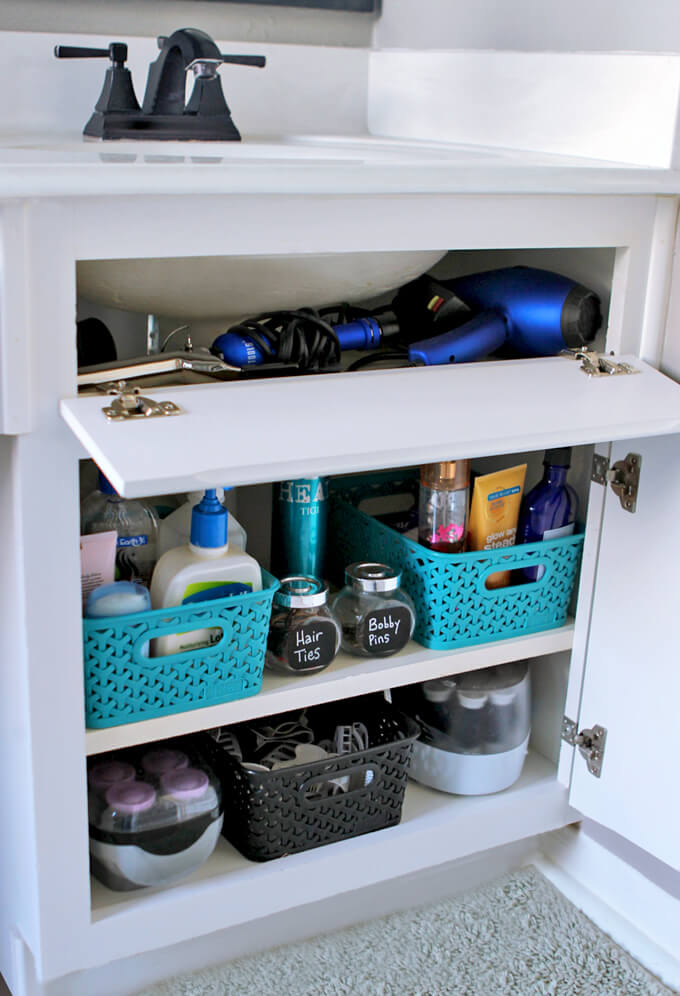
This morning Brent and I worked on a quick little organization project that really made me happy! Our project was adding shelves in the bathroom cabinets.
I don’t have a ton of beauty products but I do have the typical necessities and not a lot of places to store them. Don’t most bathroom cabinets seem to have so much wasted space at the top?
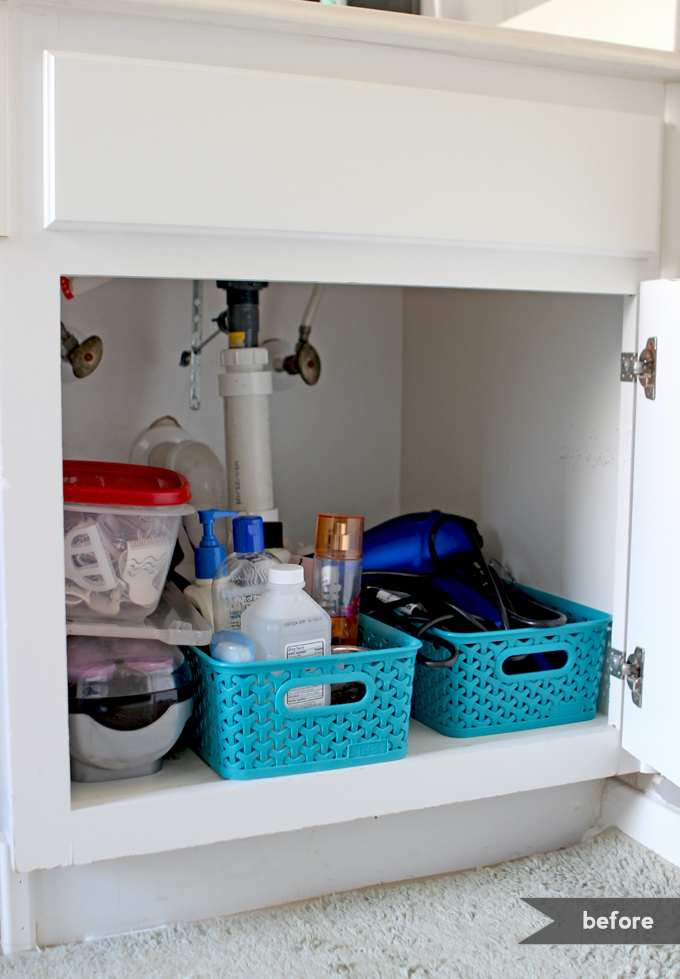
All of my stuff was just stacked on top of each other in one big pile on the bottom and if stuff got pushed to the back of the cabinet…well…it might as well have been lost forever as far as I was concerned.
I’ve tried to organize this area multiple times but I have found that without the proper set up, such as a designated space for each item, it doesn’t matter how many times you organize it, it quickly turns into a big messy pile again.
I am kind of embarrassed to be sharing this photo but for the sake of showing the drastic difference I feel like the shelves made, I’ll do it. Below is the disorganized mess it looked like before.
Brent built me two shelves in my cabinet using stuff we already had in our garage. Score! He built me one on the bottom and one at the top.
We decided to take the faux drawer above the cabinet door and add hinges to it so it could open up to a shelf we would install behind it where I could store my hair dryer and curling iron.
We have seen a few photos of this floating around on the internet but wanted to attempt to figure out our own Gray House style of making it happen.
Adding Shelves in Bathroom Cabinets
SUPPLIES
- Pliers
- 5/8-Inch Cabinet Hinges
- Drill
- Forstner Drill Bit & Hidden Hinge Template
- Soft Faced Mallet
- All-Purpose White Laminate Shelf
- Miter Saw
- Kreg R3 Jig Pocket Hole Kit With Clamp
- Small Green Baskets / Small Black Basket
- Chalkboard Tape
FYI: This post contains a few affiliate links to products we used to make this project. Gray House Studio does receive commissions for sales from these links but at no extra cost to you. We appreciate you supporting this site. Read our privacy and disclosure policy. You can also easily shop our recommended products here.
STEP BY STEP GUIDE
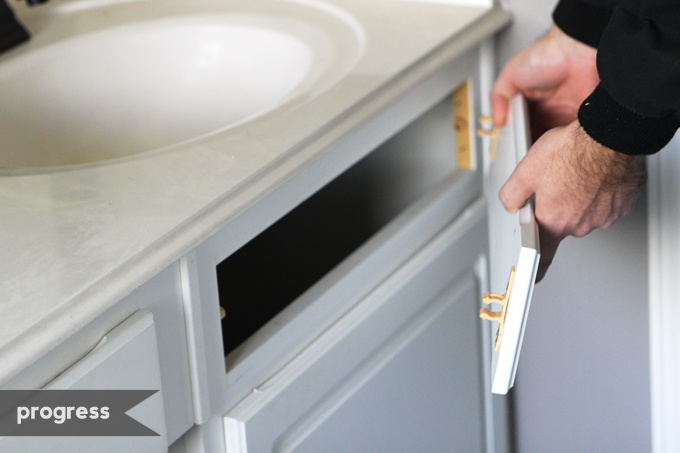
1. First we popped off the faux drawer. It came off really easy.
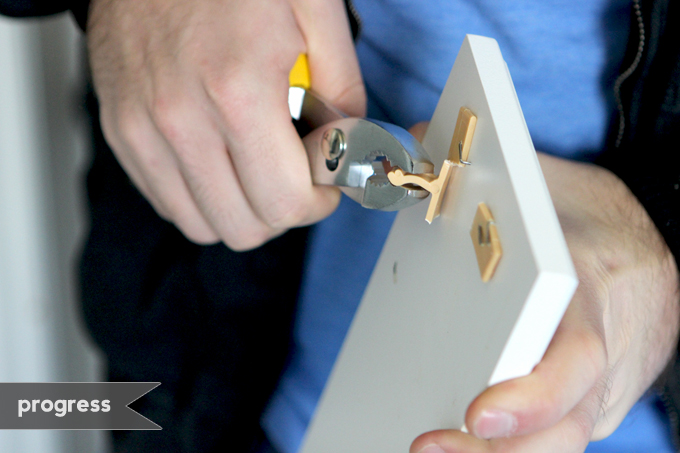
2. Then using pliers we removed the brackets and staples from the drawer face and the cabinet.
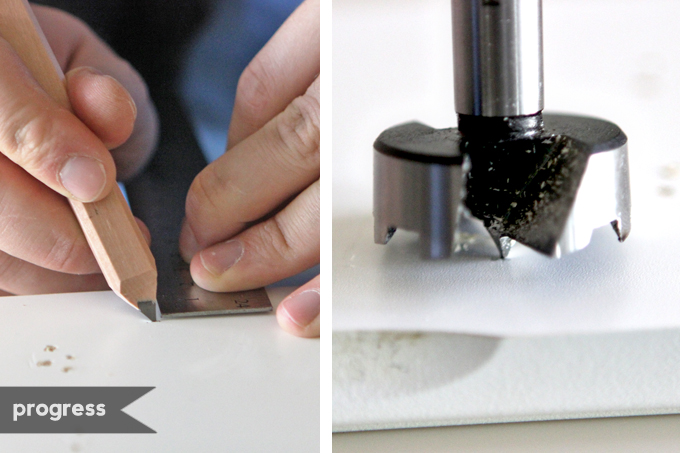
3. The 5/8″ cabinet hinges we bought came with instructions saying that the center of the hole should be 2 centimeters from the edge of the board and the diameter of the hole should be 35 millimeters.
So Brent measured where he needed to drill and then used this forstner bit and drill to drill the holes for the hinges.
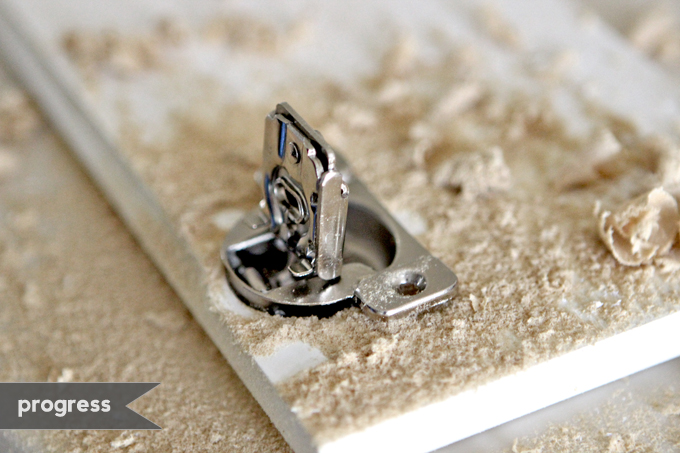
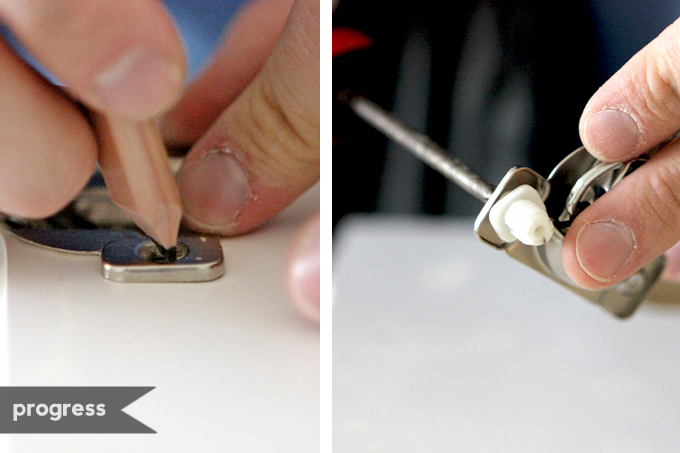
4. Brent marked a hole for the plastic screw anchor.
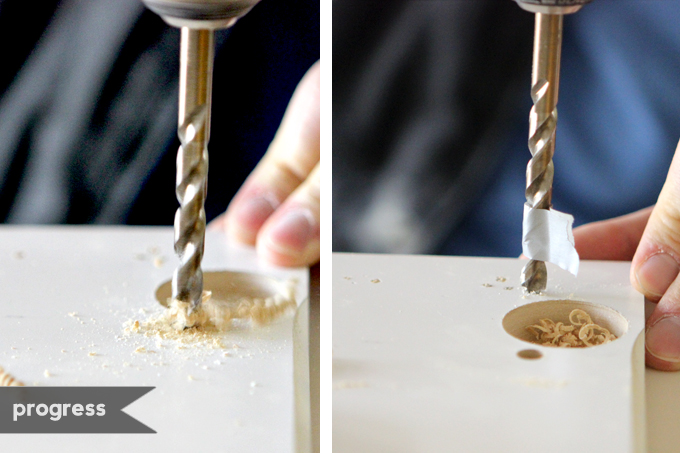
5. Then he used a piece of tape to mark the depth of the cut so he would know when to stop drilling.
This would prevent the drill bit from going all the way through the drawer face.
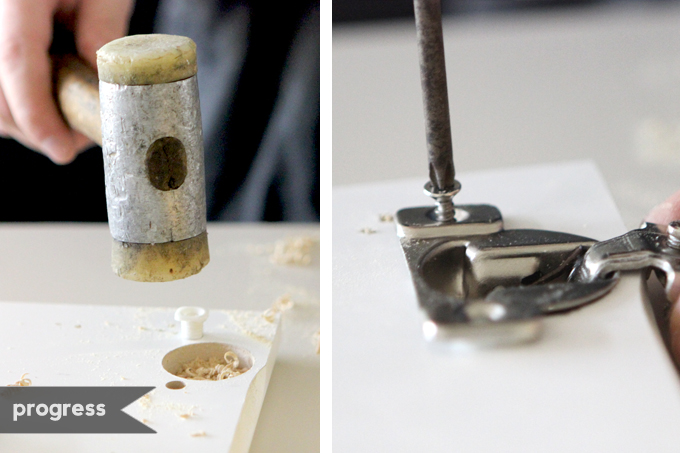
6. With a soft faced mallet, Brent hammered in the plastic screw anchors and then attached the hinge to the drawer face with the screws.
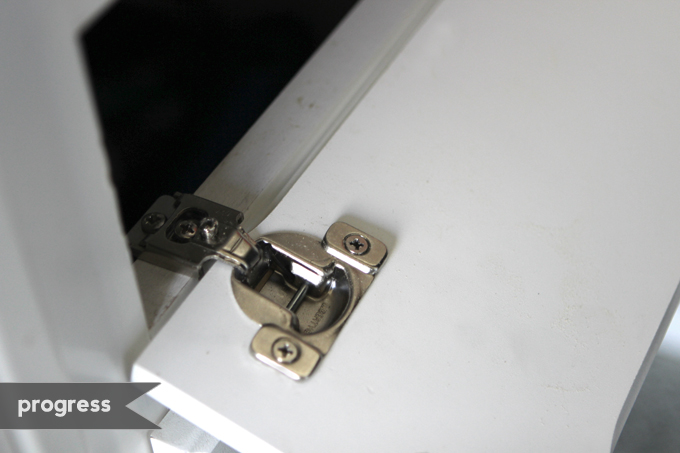
7. After centering the drawer face on the cabinet, he attached the other side of the hinge to the cabinet frame to make it a functioning door.
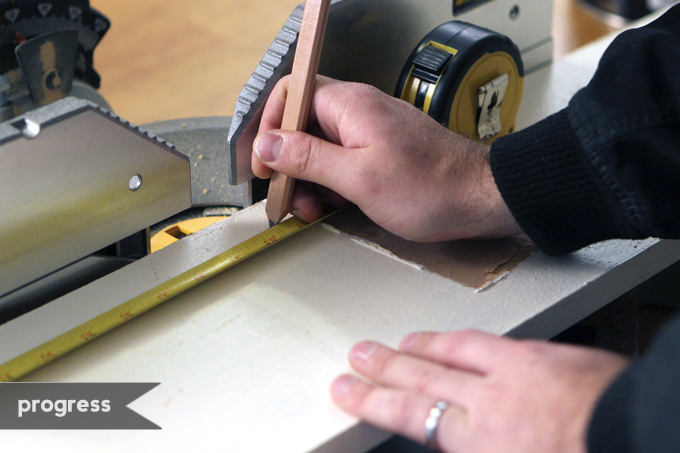
8. Then Brent started building the shallow shelf that would sit behind the hinged door.
He used a piece of scrap wood that came from a shelf we tore down in our garage. We found this white laminate shelf that you could use that is very similar.
Bonus: it was already painted white! That was a huge time saver. He measured the width the shelf needed to be to fit in the cabinet in front of the sink.
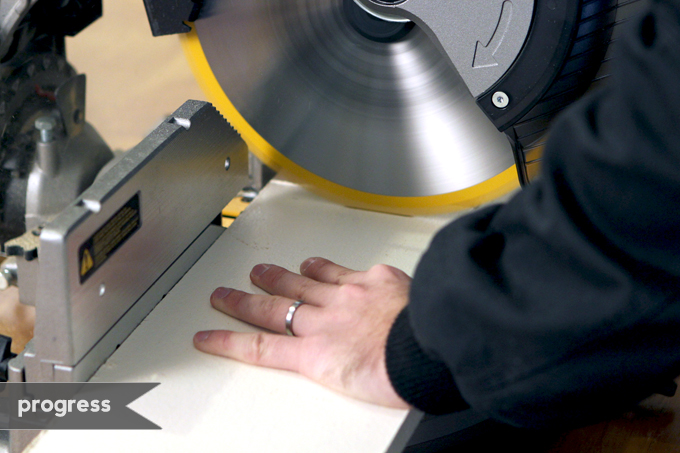
9. Next, he cut the shelf to size using a miter saw.
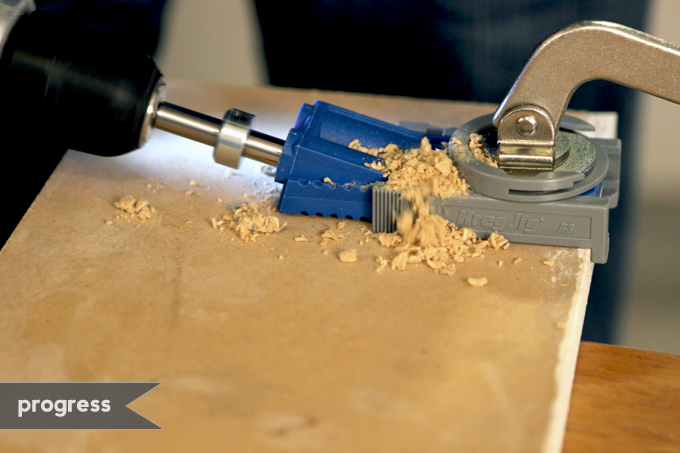
10. He flipped the shelf over and clamped a Pocket-Hole Kreg Jig to the board and then used it to drill a pocket-hole on the bottom of the board.
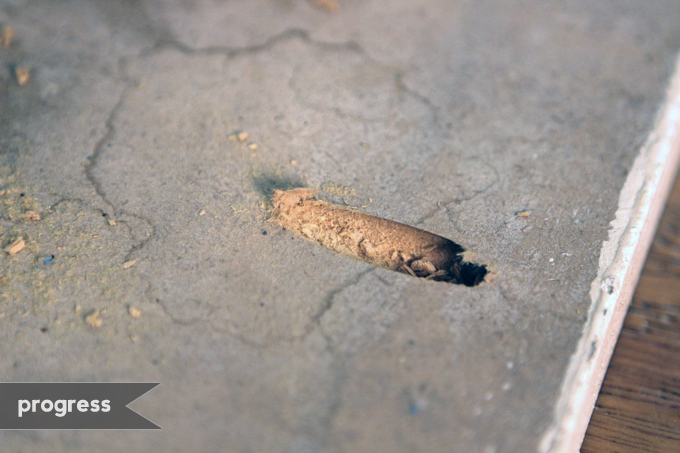
A close up of what the pocket-hole looks like.
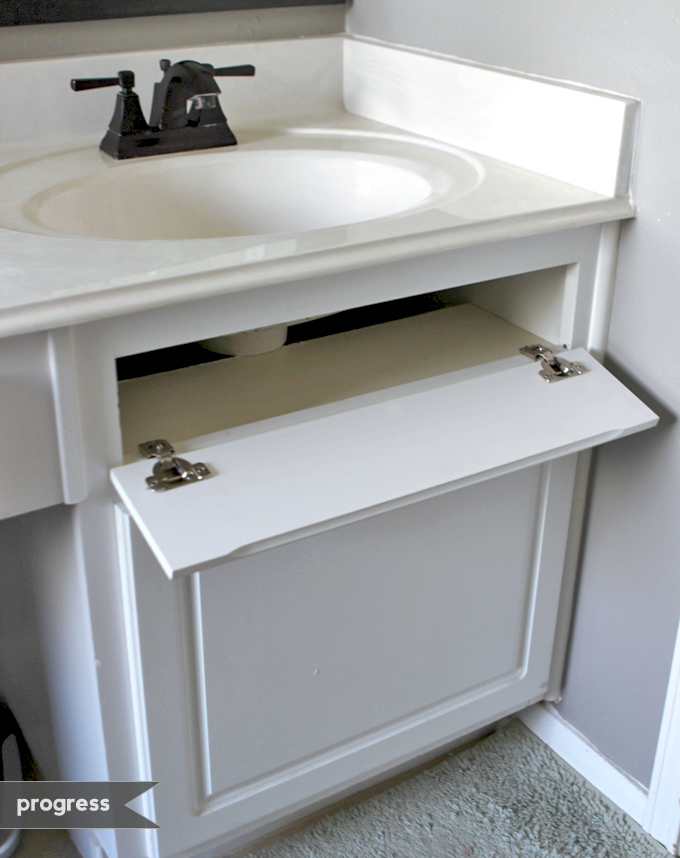
11. Finally, he installed the top shelf behind the hinged door. He used the same steps above for the bottom shelf as well.
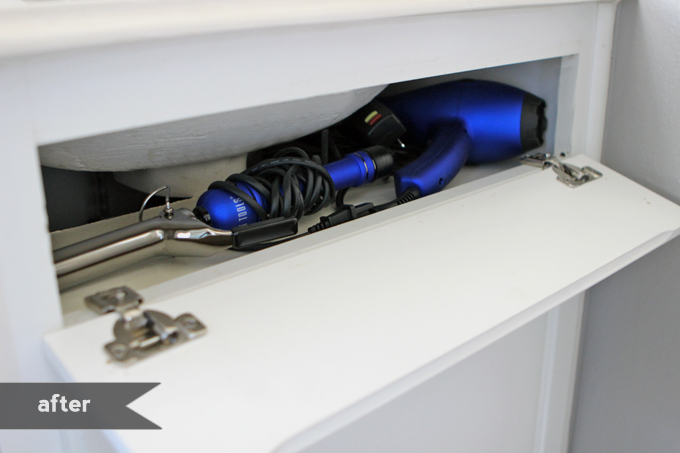
I am now storing my hair dryer and curling iron behind this secret little door. I like having these items up higher and within reach so they don’t fall towards the back of the cabinet.
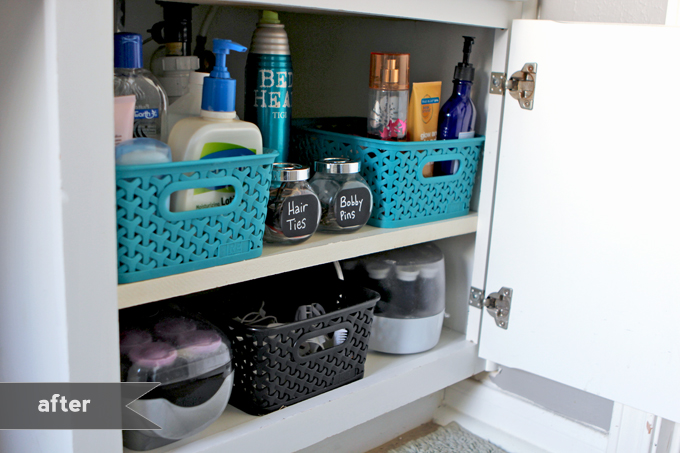
After Brent installed the bottom shelf, I finally got to organize this area like I have always wanted! I was able to add another inexpensive baskets now that I had two shelves.
As you may be able to see, I found another use for my chalkboard tape!
I found these little glass containers left over from our wedding and added some chalkboard tape labels to them and am now using them to store all my hair ties and bobby pins that were laying all over the place.
Hopefully by adding shelves in bathroom cabinets and having a place to store these things will keep them from getting lost and me having to buy new ones all the time.
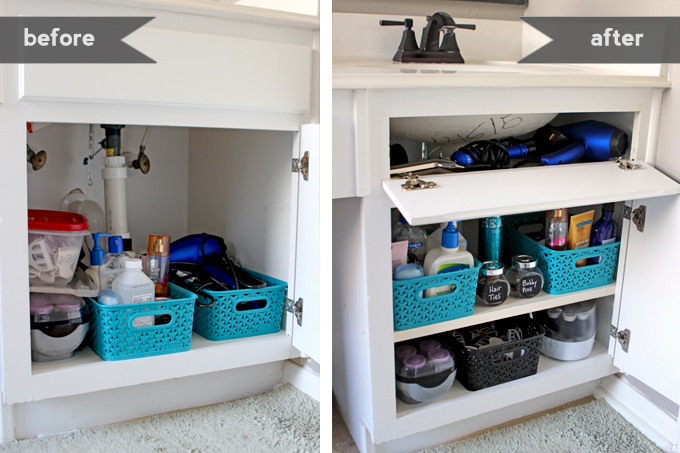
It was a small project with a transformation that has a huge impact on that space. I am so happy with the results of adding shelves in bathroom cabinets and grateful Brent took the time to work on this with me. I love that each item has a designated spot to be put back and that all the space in the cabinet is now being utilized to it’s max capacity.
If you have any questions about adding shelves in bathroom cabinets, feel free to leave them in the comment section below.
PIN IT FOR LATER


I want to try a version of this. We have two loooong fake fronts on our double vanity. There is so much space up there between the two sinks. My idea is to turn one of the fake fronts into a pull down like yours but, but instead of a shelf I’d like to install a pull out drawer on one side.
#1 : I’m worried about being able to clear the hinge. Do you know how high up it sits from the base when it’s opened flat?
#2: My front has a bevelled edge that hangs down from the actual front. Do you think that hinge would still let the front come down enough for a drawer to be pulled out?
Any help would be great.
Yours is the ONLY site that comes even close to what I’m hoping to do!!!
Could you please create an updated post with some instructions and/or pictures of how you did the work on the second shelf?
I loved your article about installing shelves in bathroom cabinets. I have the same problem with all my girly things in my bathroom. Since I don’t know anything about how to operate tools, I will call a professional to help me put that idea into action.
What size pocket screws did you use? I’m assuming the cabinets were the typical laminate board and not customs solid wood.
I built a wall cabinet for some of my less regularly used products plus cleaning products specific to the bathroom but would love to add shelves under the sink.
What kind of hinges did you use for the fake drawer?
Does the hair dryer ever fall through the back space to the lower shelf?
Hi Susie,
I haven’t had the hair dryer fall through because the bottom of the sink is right there behind the top shelf so there are just two small spaces on either side of the sink. I have a medium size hairdryer so it is too big for the whole thing to fit in the gaps next to the sink.
How did you secure screws for bottom shelf? Wouldn’t the shelf be too small to reach the sides since you have to cut it to fit through the doors?
Hi Deb, that is a great question! We were able to secure with screws because the shelf was flush with the inside walls of the cabinet. By tilting the shelf we were able to insert the shelf into the cabinet. Then, once past the face of the cabinet the shelf was turned straight.
Great job! I want to add a shelf in my bathroom cabinets as well. Since I’m very visual, I need help understanding how you screwed the shelf in. Thanks!
We screwed the shelf in with pocket hole screws under the shelf. I didn’t realize we only showed drilling the pocket holes in the bottom of the shelf but not screwing it in. Basically, the screw goes in the bottom of the shelf at a diagonal and when the screw exits the side of the shelf it screws into the inside wall of the cabinet. I hope this helps.
Love this site directions are easy to follow
Thanks Maryjane!
I love this – what was done for the bottom part of the cabinet where you added a shelf?
Thanks for asking! We should have mentioned that both shelves were done the same way. We cut a board to fit in the opening, then drilled two pocket holes on either side of the board. Using screws we secured the board in the cabinet to create our shelf.
-Brent