Throwing a Fall Party

A Fall Party on the Boat Dock

Throwing a Fall Party on a Boat Dock

Last weekend Brent and I had a blast throwing a fall party on my family’s boat dock. I love planning and hosting parties. In another life maybe I will be a party planner but for now I will just have to settle on hosting festive get-togethers when the occasion rises.

Throwing a Fall Party on a Boat Dock

FYI: This post contains affiliate links to products we used and liked for our fall party on a boat dock. As an Amazon Associate Gray House Studio earns from qualifying purchases. This is at no extra cost to you. We appreciate you supporting this site. Read our privacy and disclosure policy.

I’m an introvert so I am not a huge fan of big blow out bashes but rather intimate gatherings with friends and families with lots of time to chat one on one and nice thought out details to enjoy. I contribute this love to my parents always throwing me fantastic birthday parties growing up.


Throwing a Fall Party on a Boat Dock

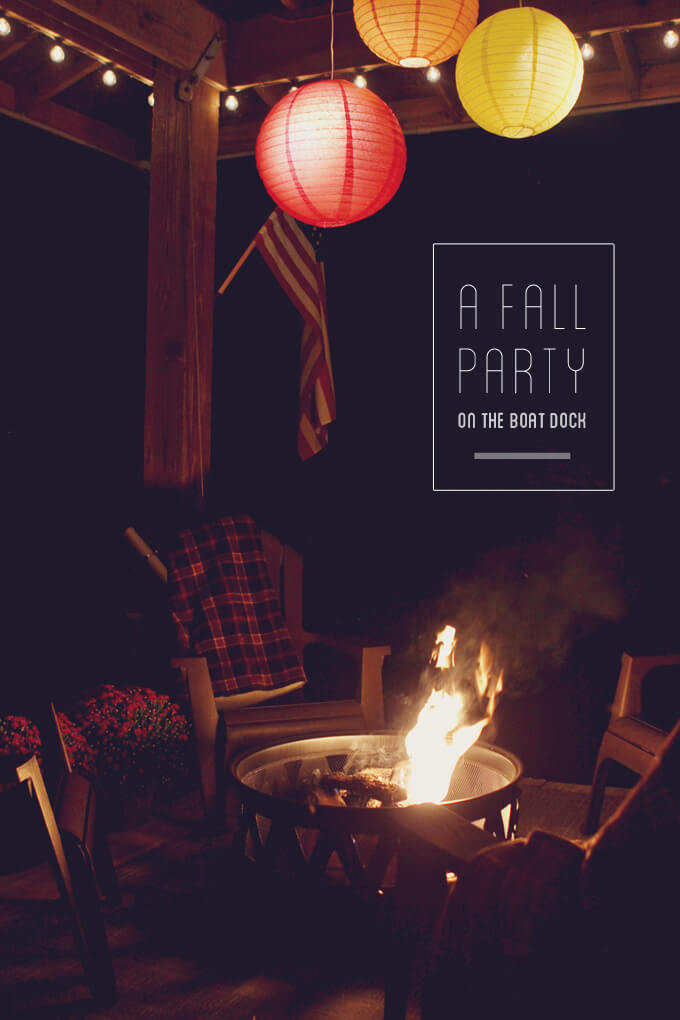
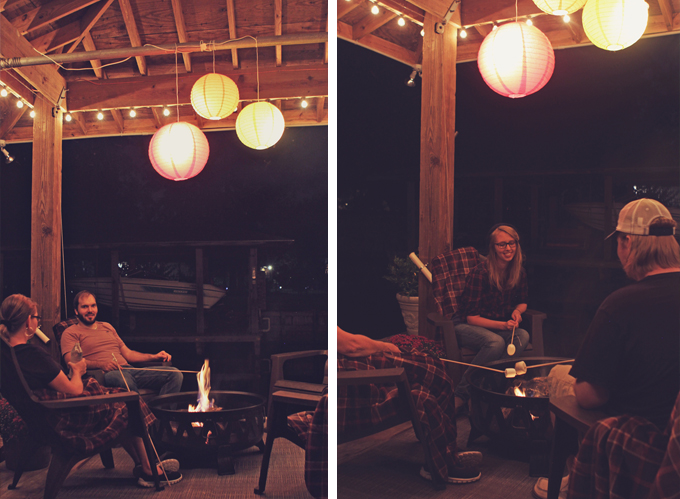
It was a cool (by Houston standards) October night as we gathered on the boat dock under the cozy string lights and carved pumpkins, drank apple cider from jars and sat around the fire talking and laughing while we made and ate our very messy s’mores.
Throwing a Fall Party on a Boat Dock

When it comes to parties, we really enjoy creating an atmosphere where guests can feel totally immersed in the setting from the music to the food, to the lighting and location. I wanted guests to feel transported to a cozy fall cabin in the woods even though we were really in the suburbs in Houston!
Fall Party - S'mores Bar

It is easy for Brent and I to get lost in all of our home projects and day jobs so it was a great opportunity to slow down for a bit and enjoy an evening with close friends and family where the hardest decision was one s’more or two.

Fall Party - Making S'mores

This party was a fun change of pace. We had a goal to keep it fairly simple and stick to a budget of next to nothing and it turned out better than we could have imagined. Below are the details of our fall party on the boat dock.

Fall Party Details

location: boat dock
Throwing a Fall Party on a Boat Dock

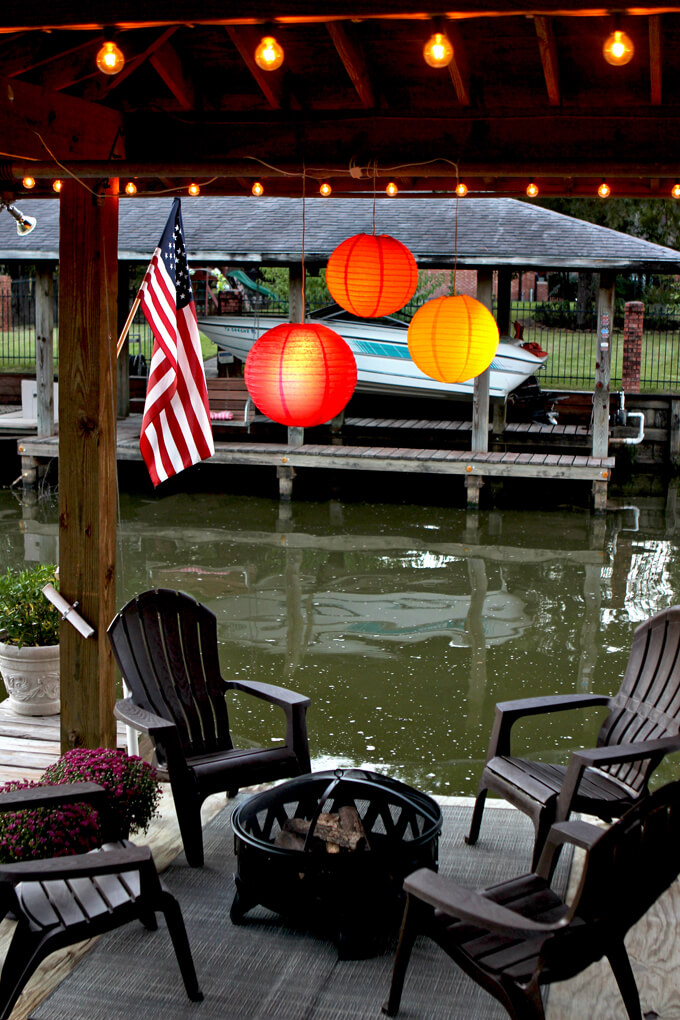
A boat dock may seem like a strange location for a fall party but I like a challenge. Thinking outside the box when it comes to the location for a party just adds that extra element needed to transport guests to a different place. Working with the smaller space forced me to get creative thinking about the different areas guest could enjoy but the unique setting on the water made it feel really peaceful, cozy and intimate.

** We are aware that this location wouldn’t have worked if we had more than 15 people at our fall party, there were small children in attendance or if a large amount of alcohol was consumed because it was dark and three out of the four sides were surrounded by water so there is a good possibility that if any of those factors had been present, someone would have taken a step in the wrong direction and ended up in the water.

That is why we make sure to pick our location first and plan the details accordingly. I am happy to report we all stayed perfectly dry.

lighting: string lights + paper lanterns

Fall Party - String Lights and Paper Lanterns

If you know anything about me by now, you know I am a sucker for string lights so it was a no brainer that I wanted them at the party. String lights just scream cozy to me. We used our favorite string lights from Hometown Evolution.

They are the same kind we used to create a canopy of string lights in our backyard and we love them because they hold up great (ours are still going strong in our backyard), are easy to install, look amazing and create the perfect ambiance.

We also tried out Hometown Evolution’s paper lanterns and they worked great for our party. We hung one large lantern and two small lanterns in fall colors over our conversational area. We used some LED lights from IKEA that were left over from our coffee bar inside of them and it worked perfectly. They really completed the whole magical lighting look we wanted.

activity: pumpkin carving
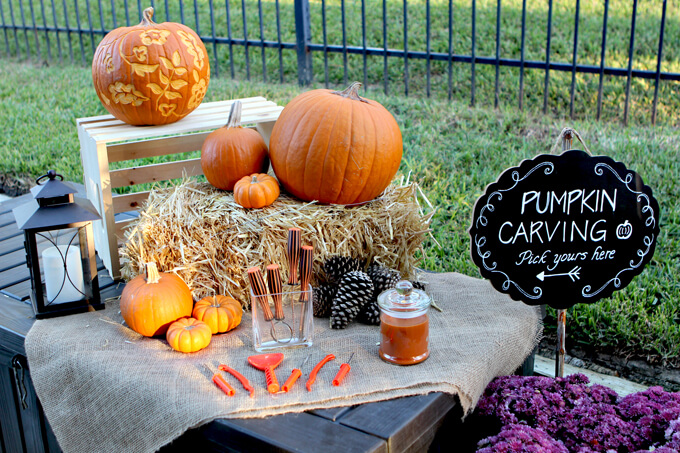
Fall Party Pumpkin Carving Station

My family is big on pumpkin carving. We have a yearly tradition of getting together to carve pumpkins and then making it into a contest by posting them online for our friends and family to vote to see who wins bragging rights. It’s all for the sake of friendly competition.

This year we decided to incorporate this family custom into our fall party. We created a pumpkin carving area. We asked guests to BYOP (bring your own pumpkin) but also made sure to have a few extras on hand in case anyone forgot. We supplied carving supplies and extra patterns for those who didn’t bring their own. If party goers were up to the challenge, they could enter their pumpkin in our annual contest.

Stay tuned because we will be posting this year’s entries next week for you to vote for your favorite and help us pick a winner!

drinks: apple cider station
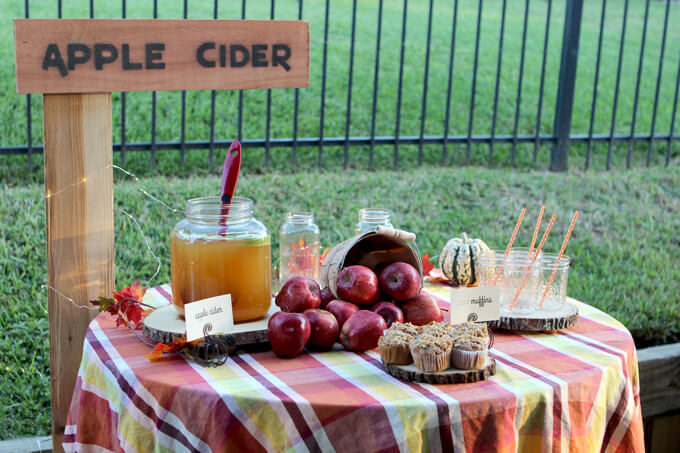
Fall Party Apple Cider Station

What is fall without apple cider? We created an apple cider station where guests could help themselves to cold apple cider (we are in Houston so it is not quite cold enough for hot apple cider) and apple and cinnamon muffins. My favorite part is the sign we made using two $3 cedar pickets, a stencil and spray paint.
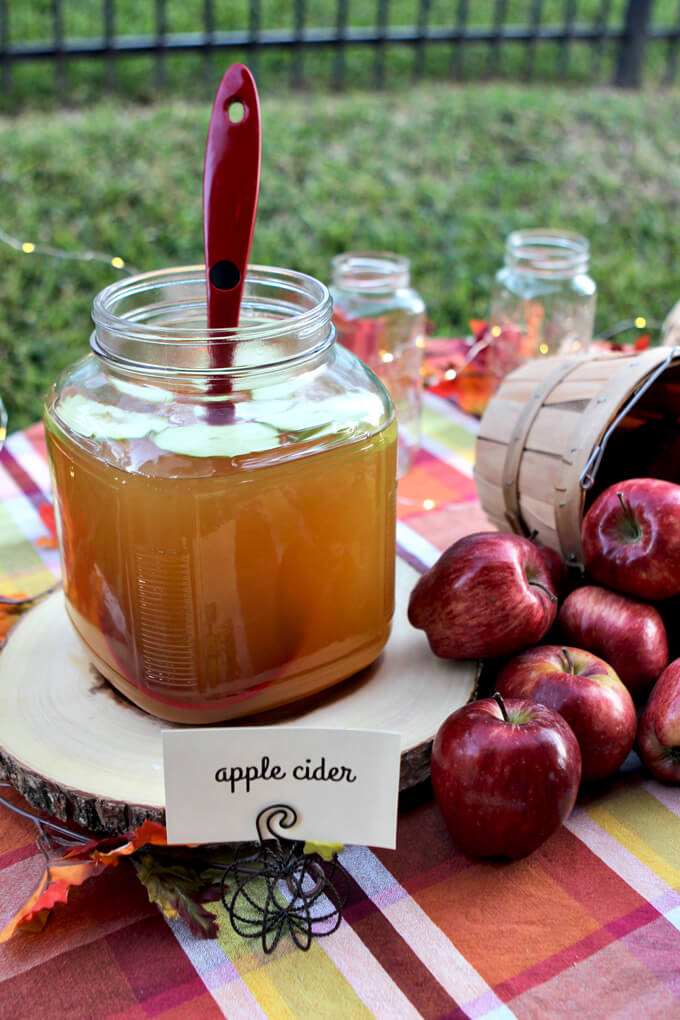
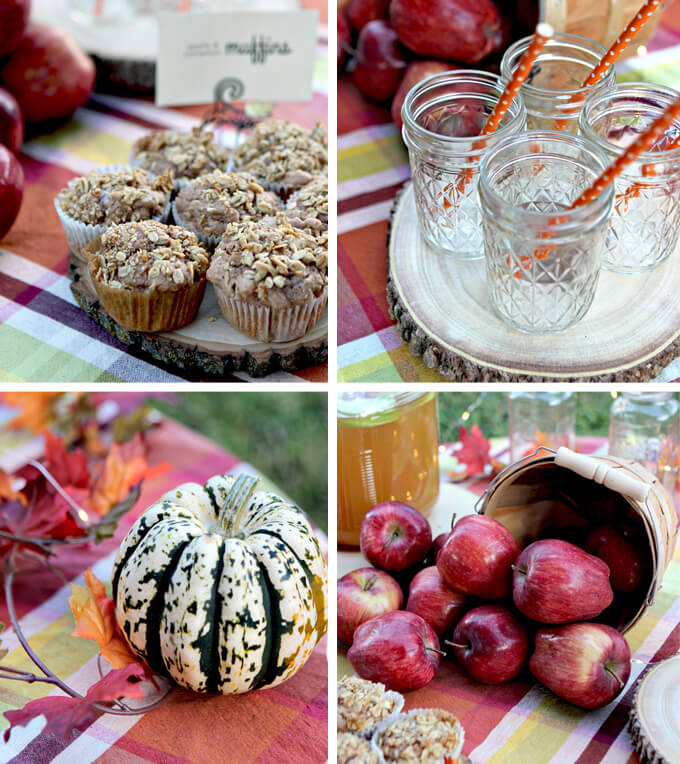
Fall Party Apple Cider Station
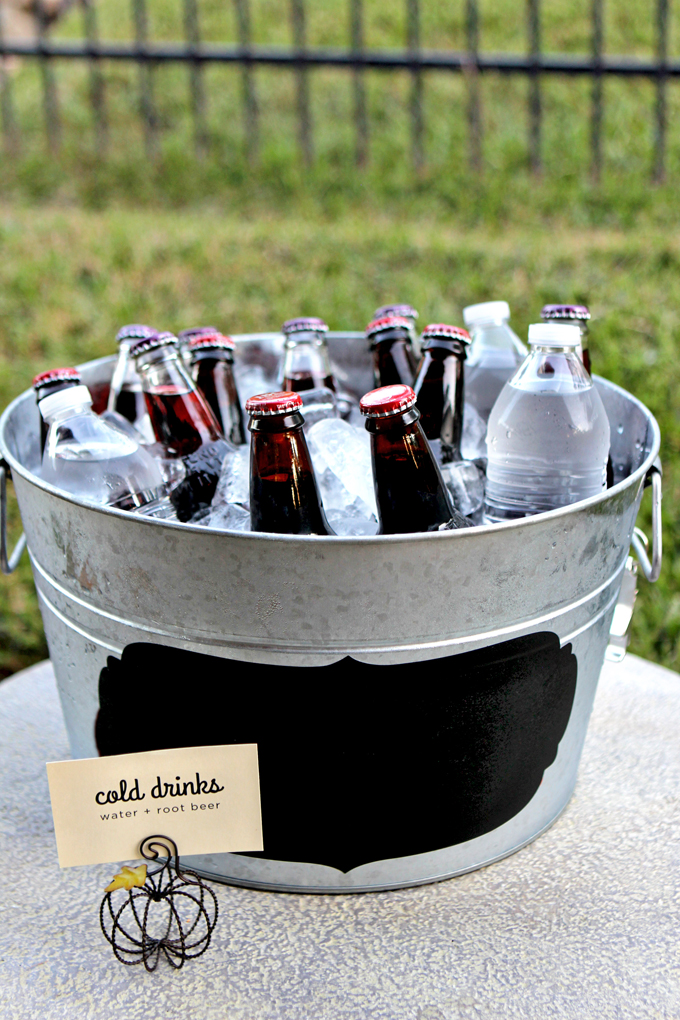
Cold Drinks Tub
If guests were not into apple cider we also had cold water and root beer on hand as well.

snacks: s’mores bar + grilled cheese
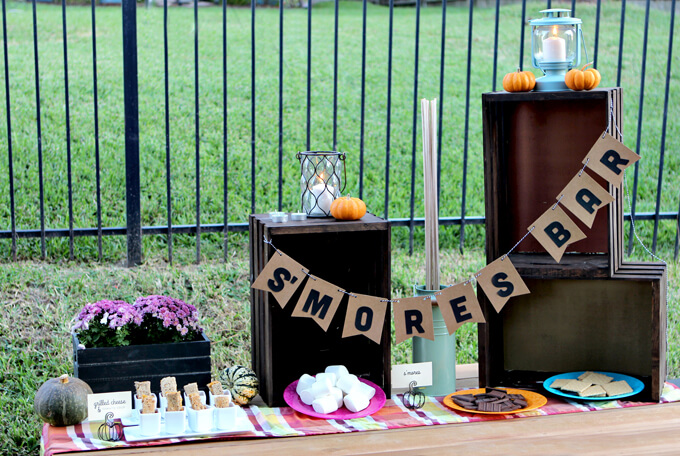
Fall Party S'mores Bar

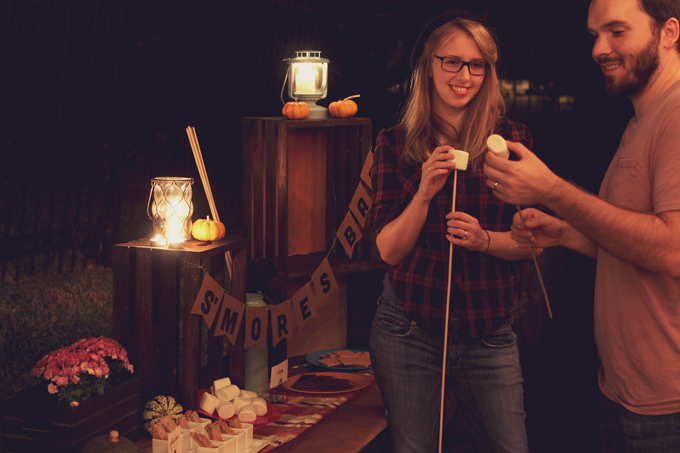
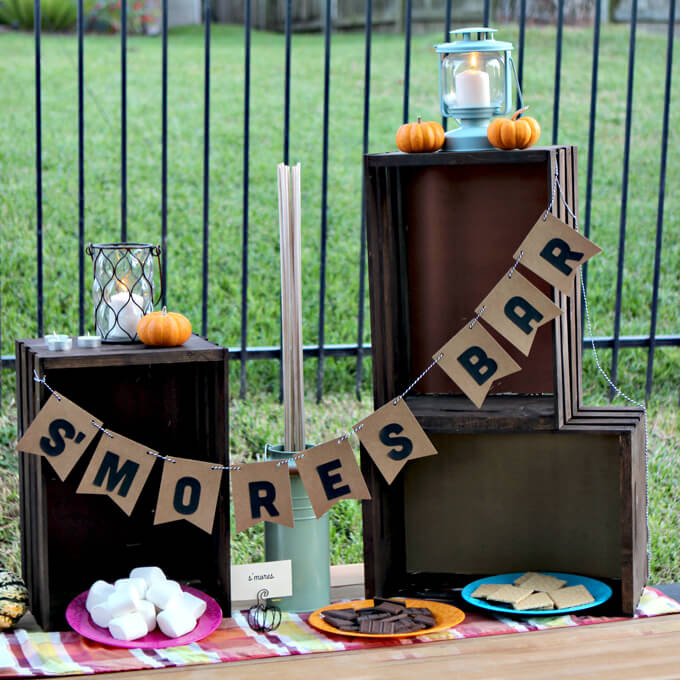
Our party started later in the evening so we had snacks and dessert available for guests. I recycled our fall crate display by cleaning the crates out and adding a new banner to make our s’mores bar. We used extra cedar pickets to create a wood plank table top and added a plaid table runner.
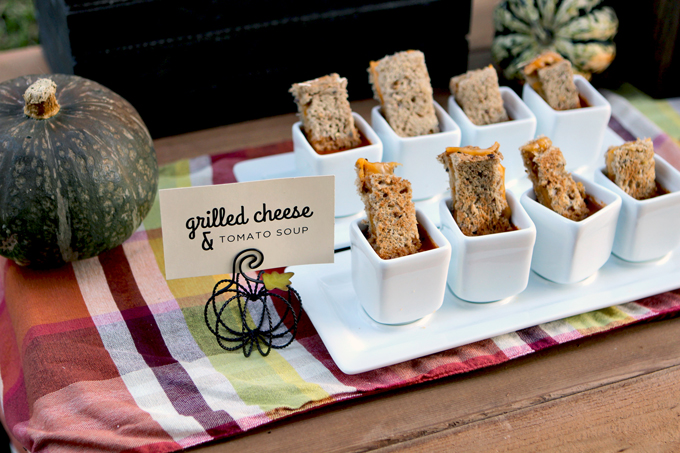
Fall Party Grilled Cheese
Fall Party S'mores Bar

details: pumpkins + lanterns + blankets
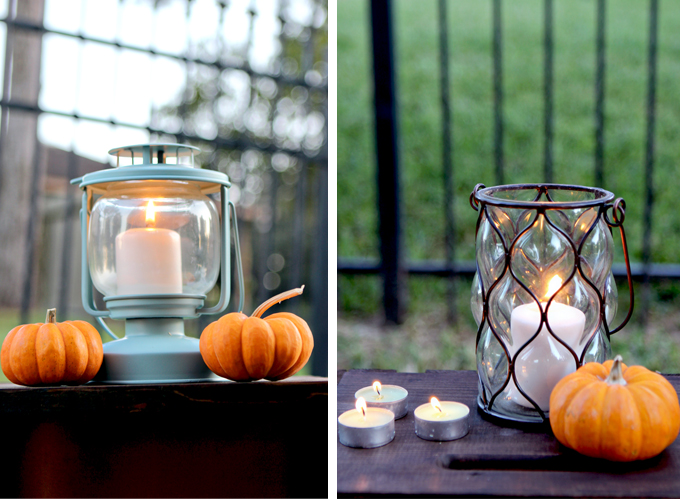
Fall Party Details - Lanterns & pumpkins

Mini pumpkins, lanterns and plaid blankets rounded out the details for our fall party to give it a rustic cabin vibe. I love the idea I saw of providing blankets to guests for when it gets chilly. It was fun to snuggle up so the conversation could continue even as the temperature dropped.
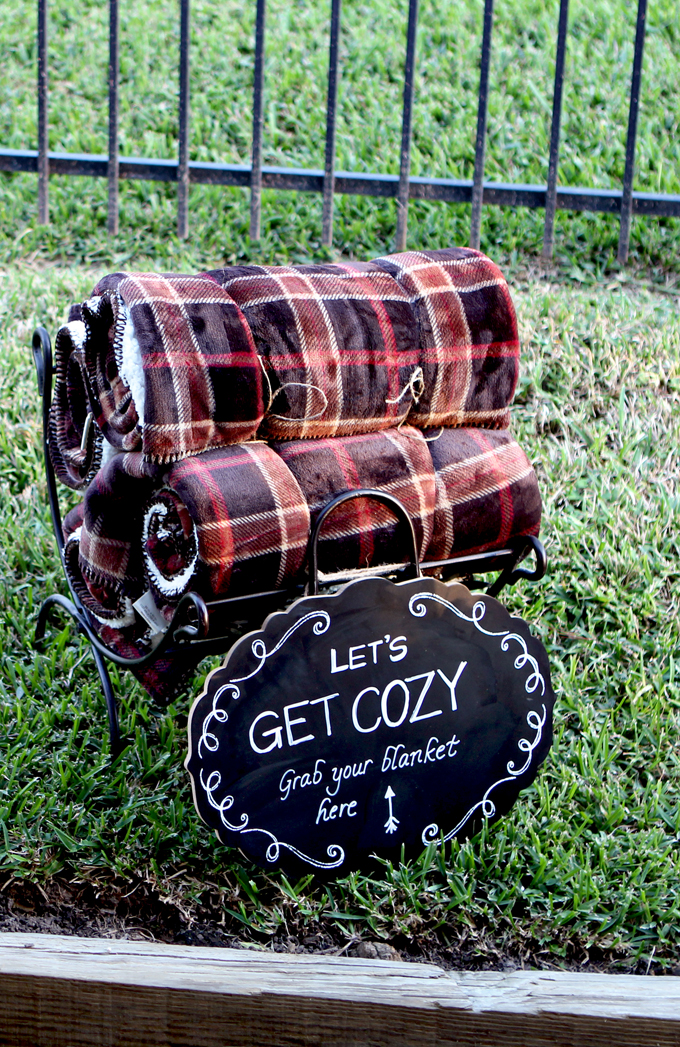
Fall Party Let's Get Cozy Blankets

And there you have it, our fall party on a boat dock. It was the perfect way to spend a fall evening and it was so much fun to plan and decorate. I think I have just as much fun setting up and photographing all the details as anything else. Do your friends and family have any fall traditions? Share them with us below!
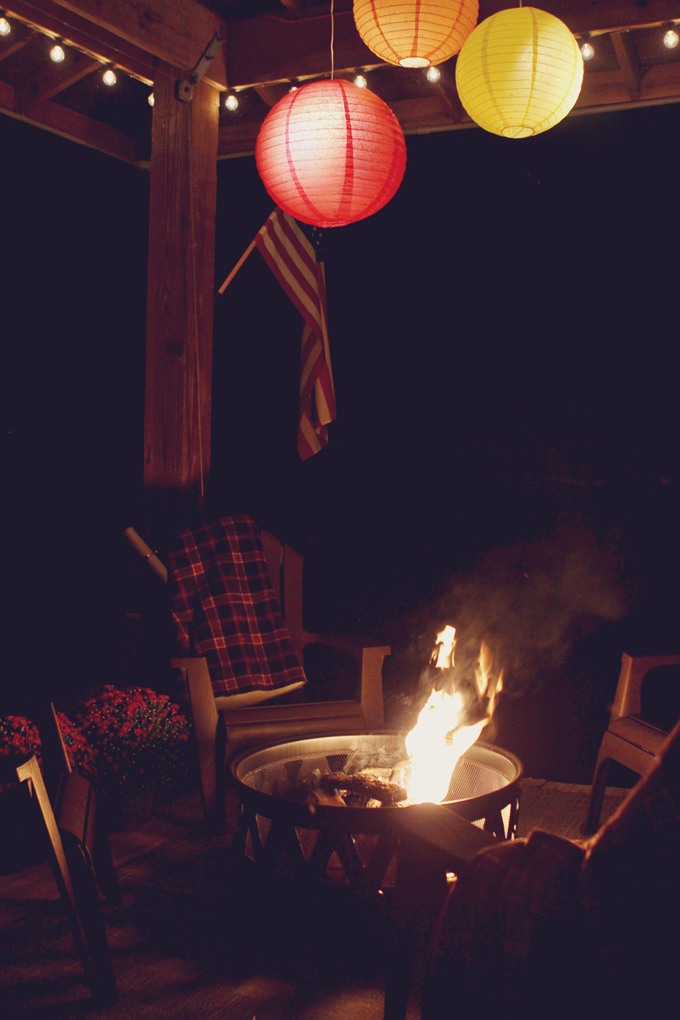
Throwing a Fall Party

*Thanks to Hometown Evolution for providing the string lights and paper lanterns for our fall party.

How to Use a Jigsaw

How to Use a Jigsaw

In this tool tip tutorial we are showing you how to use a jigsaw.

How to Use a Jigsaw

Hey! It’s Brent here today talking about how to use a jigsaw. The jigsaw is a fun tool that can really come in handy to allow you to create fun projects like our yoga mat rack we built last weekend.

It is a fairly easy tool to use but as with any tool it is helpful the more you understand about how a tool functions and the best way to use it. Watch the video below or scroll down to see eight of my tips for getting started using a jigsaw.

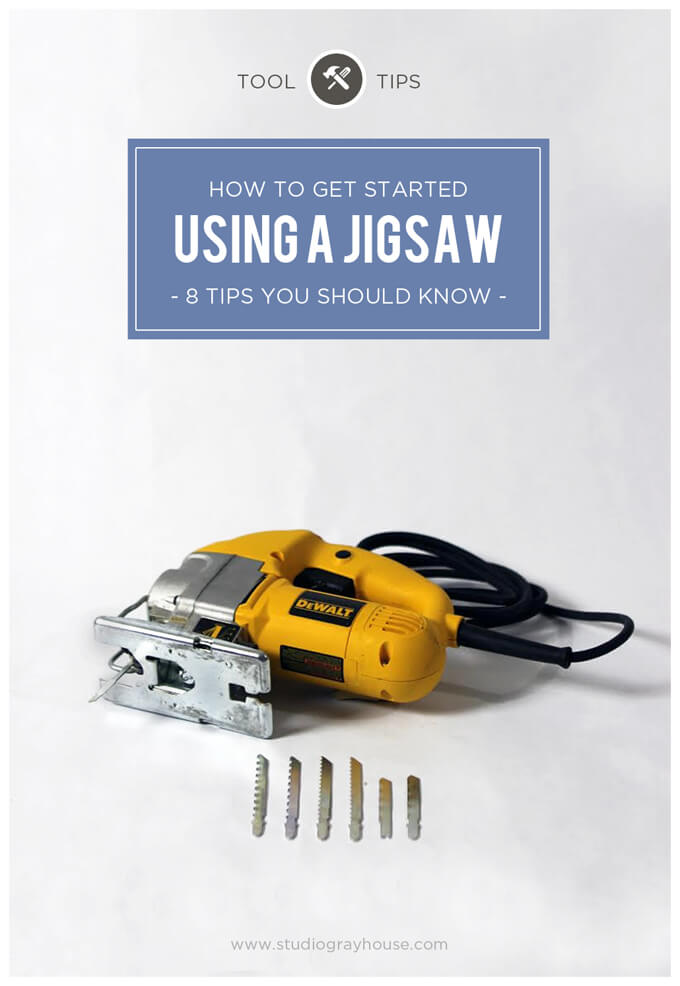
We use the DEWALT DW317K 5.5 Amp Top Handle Jig Saw.

FYI: This post contains an affiliate link to a product we used. Gray House Studio does receive commissions for sales from these links but at no extra cost to you. We appreciate you supporting this site. Read our privacy and disclosure policy. You can also easily shop our recommended products here.

HOW TO Use A Jigsaw Tips

DIRECTIONS WATCH

Never Miss A Gray House Studio DIY Video Subscribe to our YouTube Channel

DIRECTIONS READ

How to Use a Jigsaw

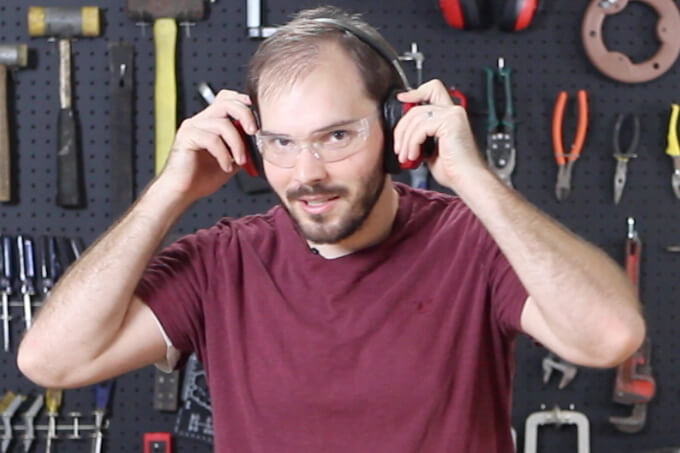
1. Safety Glasses and Ear Protection

It might seem self-explanatory but it is easy to forget to wear safety glasses, especially if you don’t normally wear glasses.

Believe me when I say the jigsaw is not a tool you want to risk it. Put on some safety glasses and eye protection before starting to cut.

How to Use a Jigsaw

2. Secure the Foot Plate

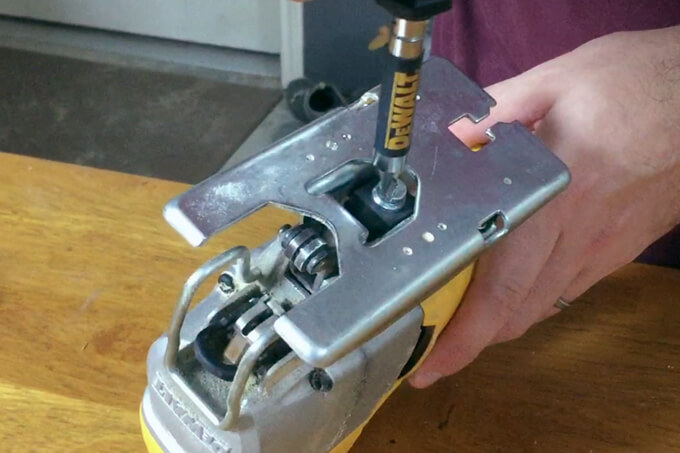
Grab your jigsaw and look for the screw or mechanism that locks the foot plate in place and double check that it is as tight as possible.

Most foot plates are designed to rotate allowing users to cut angles but rarely is that the desired application.

Usually if I ignore this step the screw will shake loose as I use the jigsaw and the plate will slowly rotate messing up my cut.

How to Use a Jigsaw

3. Choose the Correct Blade

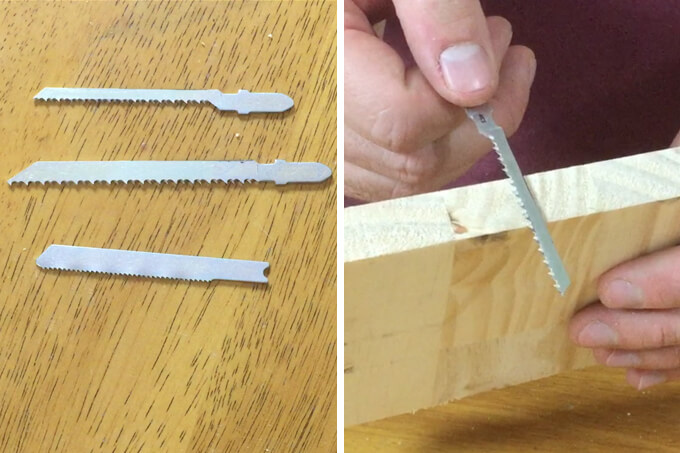
All jigsaw blades are not created equally. Each jigsaw blade has a specific application and it is important to select a blade based on your material and cut design.

Left: Most blades are labeled by what type of material they cut and the type of cut. (i.e. wood/clean cut) The top two blades in the picture are for cutting wood and the bottom one is for cutting metal. Wide blades make it easier to cut straight lines while skinnier blades make it easier to cut curves.

Right: Be sure the cutting surface of the blade is at least one inch longer than the material is thick. As the jigsaw moves the blade up and down the blade can bend or break if it is too short and jams into the wood.

How to Use a Jigsaw

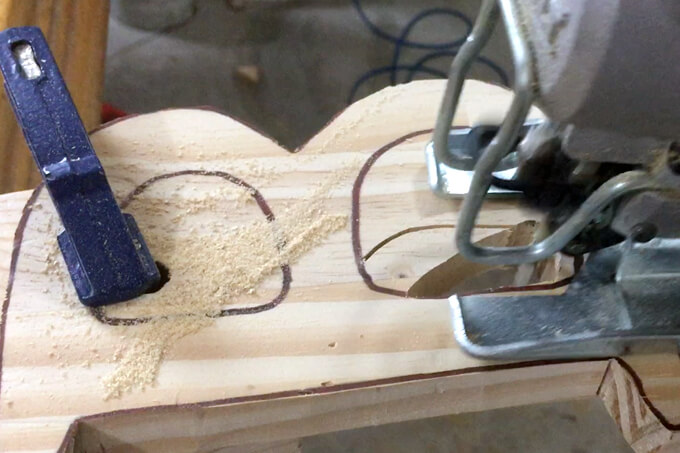
4. Clamp Your Project Down

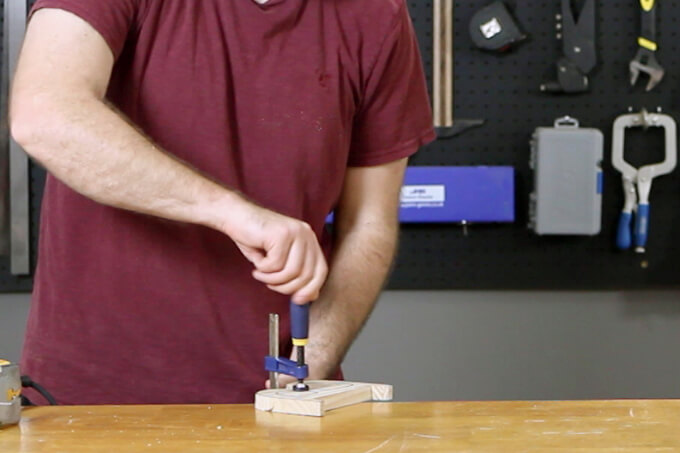
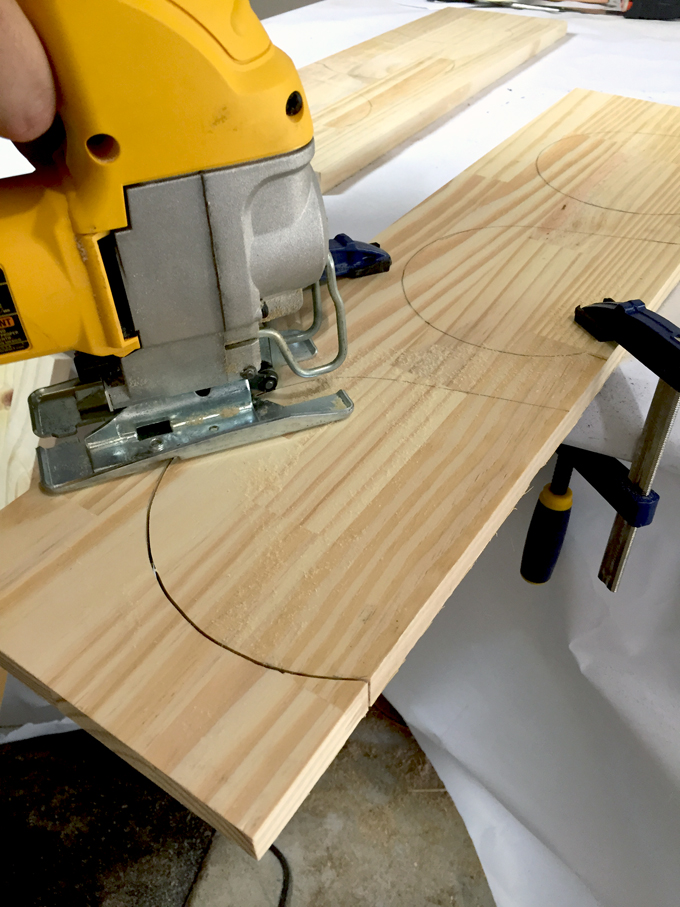
Before starting to cut with a jigsaw always clamp the material to a solid work surface. It is difficult to hold the material steady and unsafe to grip the material being cut.

With the piece clamped down you can focus on the saw and where you are cutting without worrying about the work piece moving.

How to Use a Jigsaw

5. Keep Track of the Cord

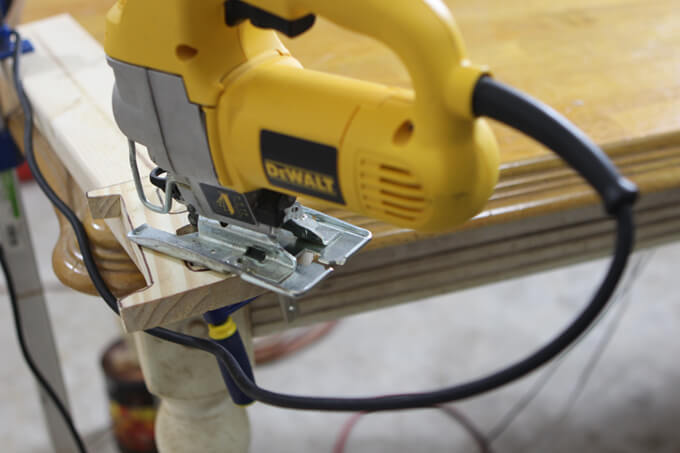
It is easy to get in the zone when using a jigsaw. Often times the cord can get caught or pulled tight around the table or work piece and come dangerously close to the blade when doing curvy cuts.

Before turning the jigsaw double check that the cord is safely behind the saw and not under the piece being cut.

How to Use a Jigsaw

6. Cut from Outside to Inside

Start by cutting away the material that surrounds the outside of the object. Leaving the inside until the end helps keep the work piece strong and prevent breakage.

How to Use a Jigsaw

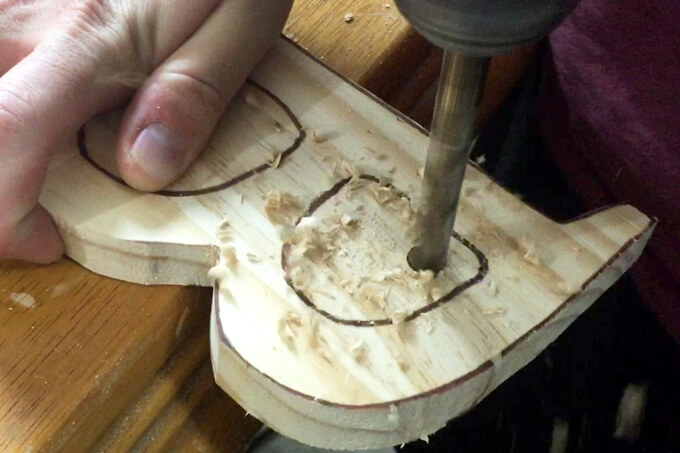
7. Drill Holes for Internal Cutting

To cut out internal shapes without cutting through the outside of an object drill a hole larger than the width of the jigsaw blade.

With holes drilled the jigsaw blade can move freely through the material and begin cuts anywhere.

How to Use a Jigsaw

8. Make Multiple Cuts

Even when you use the skinniest blade for curvy cuts there are times when the jigsaw just can’t turn quick enough.

The trick cutting out small objects with tons of curves is to make multiple cuts in the same location from different angles.

I hope these tips help you get started using a jigsaw. If you have any specific questions about how to use a jigsaw, feel free to leave them in the comments section below and I would be happy to answer them.

Feel free to check out our additional tool tips about choosing the right drill bit and how to use a biscuit joiner.

DIY Yoga Mat Rack

Yoga Mat Rack

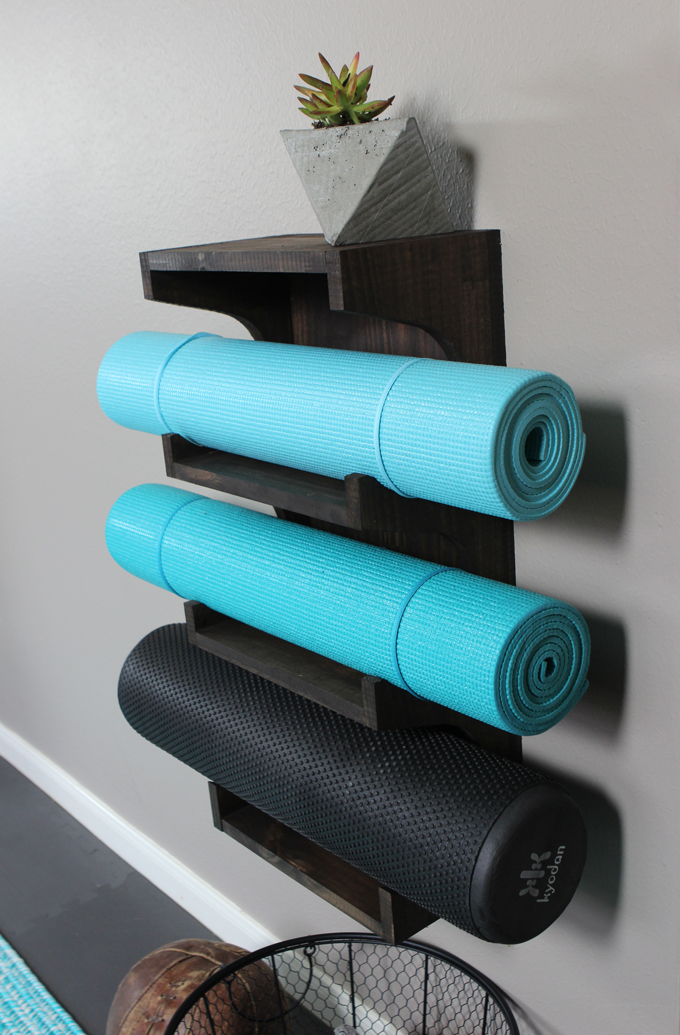
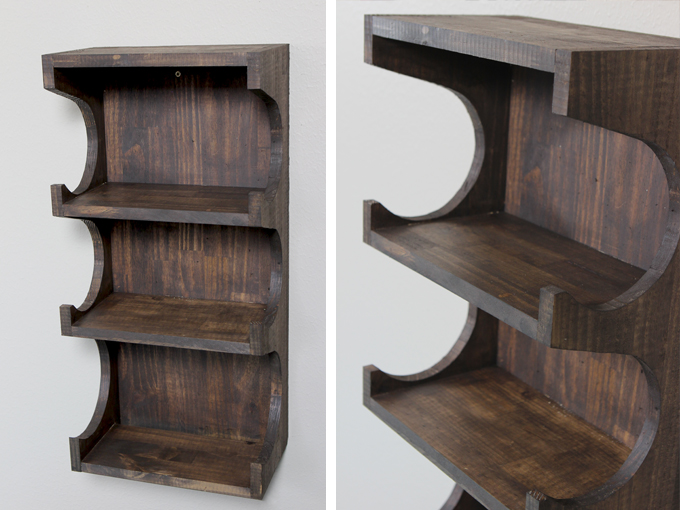
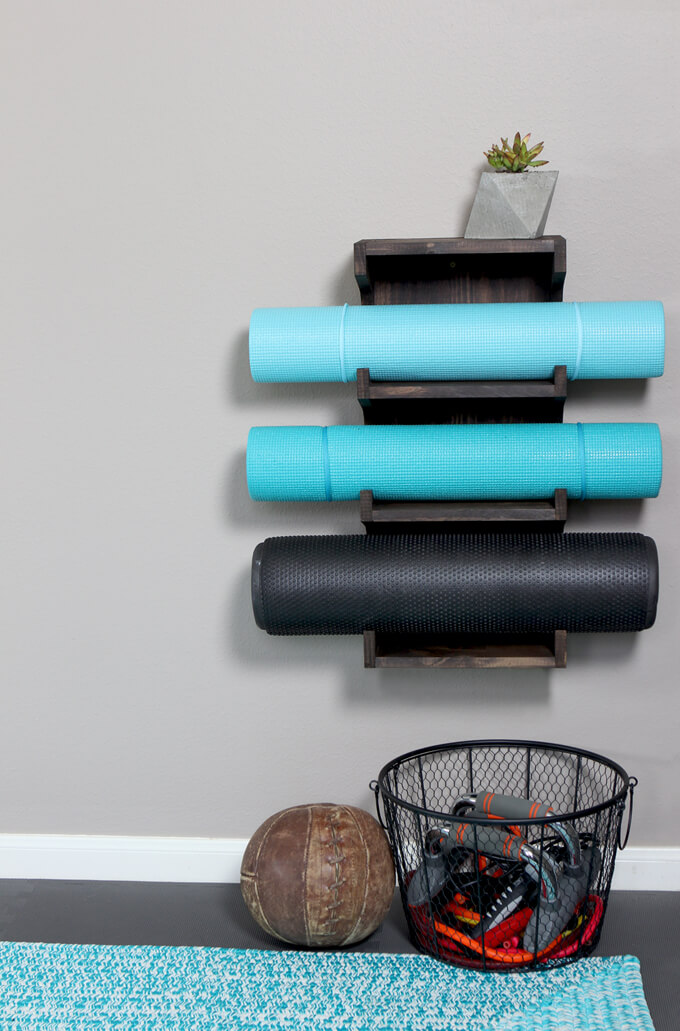
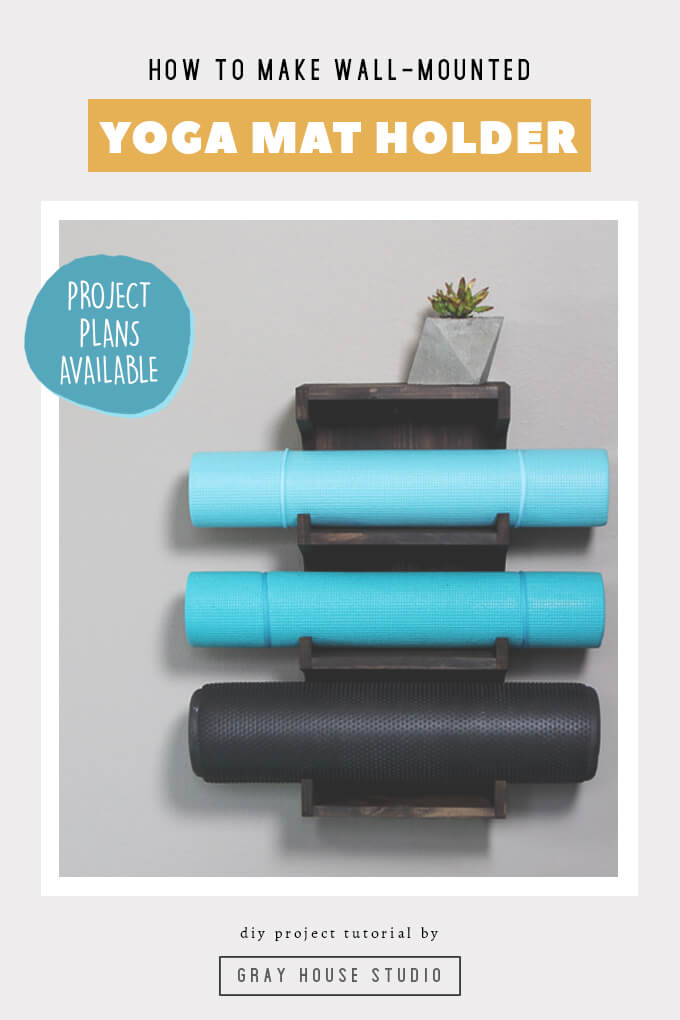
We designed and built a wall-mounted yoga mat rack out of wood to hang on the wall in our home gym.

DIY Yoga Mat Rack

We were back at work on a new DIY project for our home gym this weekend. We built a yoga mat rack to hang on the wall in our gym.

Now before you go thinking Brent and I are a pair of yoga masters, let me stop you right there and say we are not.

In fact it is safe to say we have a long way to go in the flexibility department. We use an iPad app and follow along with a virtual instructor so she is never too strict with us.

Now that I had my new yoga mat we needed a place to store our mats. We designed and built our yoga mat rack that we hung on the wall in our home gym.

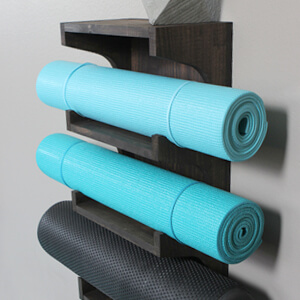
Our yoga mat rack was designed to hold two yoga mats and our foam roller. It is a great solution if you want a place to store your mats that takes up little space and makes them readily available.

We’ve got the tutorial on how to make our yoga mat holder below.

2022 Personalized Christmas Ornaments
*** Thanks so much for supporting our small shop – Moon Rock Prints – this holiday season! ***

How To Build A Yoga Mat Rack

SUPPLIES

FYI: This post contains a few affiliate links to products we used to make this project. Gray House Studio does receive commissions for sales from these links but at no extra cost to you. We appreciate you supporting this site. Read our privacy and disclosure policy. You can also easily shop our recommended products here.

PROJECT PLANS

DIY Yoga Mat Rack Plans

Get our Yoga Mat Rack Plans

When you purchase our yoga mat rack plans you get a six page PDF with a detailed materials list, a cut list, exact dimensions for each piece, building instructions and the side panel template – all for only $7. We appreciate your support!

STEP BY STEP GUIDE

DIY Yoga Mat Rack

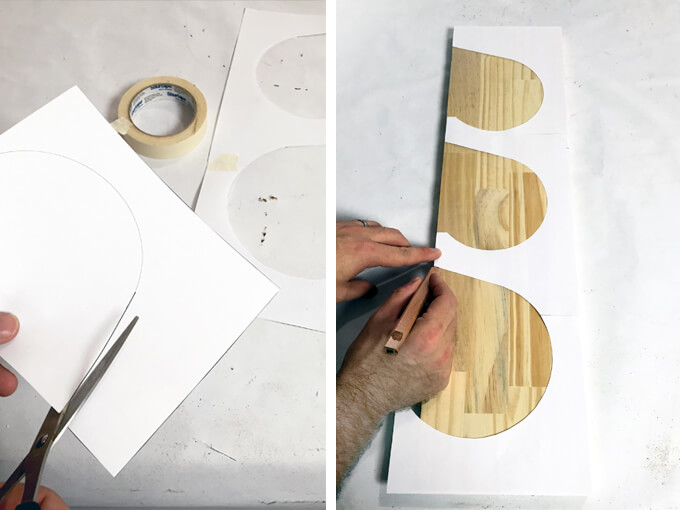
1. First we printed off the side panel template. After cutting the template out and taping it together we used the template to trace the two side panels.

DIY Yoga Mat Rack

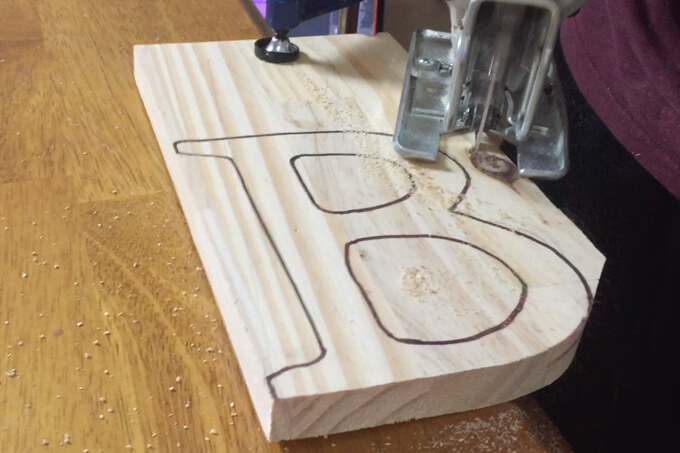
2. We then used our jigsaw to cut out the shape we traced on the side panels.

DIY Yoga Mat Rack

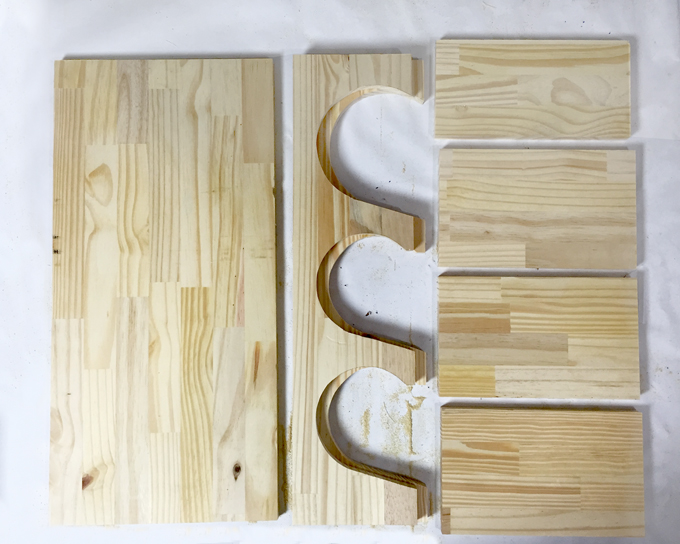
After making all of our cuts on our pine panels, these are what our pieces looked liked.

DIY Yoga Mat Rack

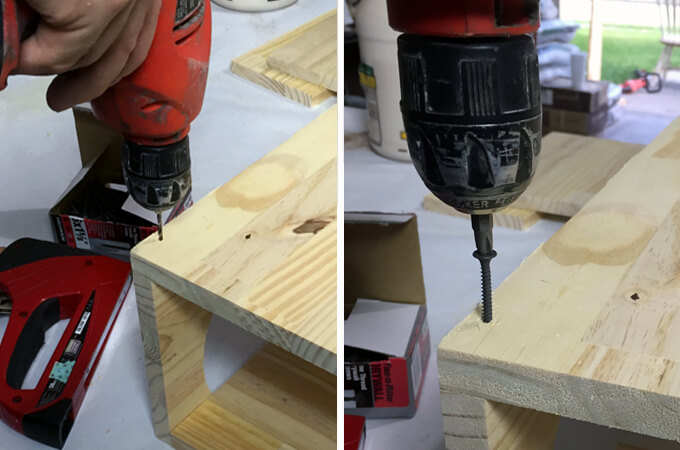
3. Using our drill we pre-drilled four holes through the back panel into each side panel.

We attached the back panel to the side panel using 1-1/2″ screws. We made sure the screws were aligned with each rung of rack.

DIY Yoga Mat Rack

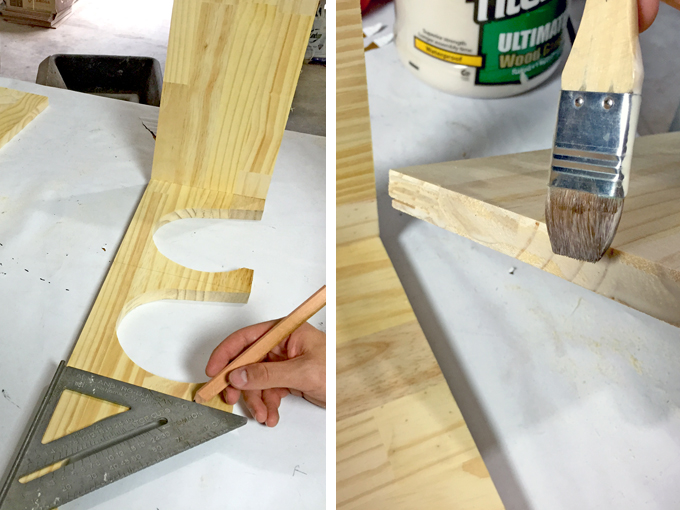
4. On the two inside shelves we used a square and a pencil to mark reference lines indicating where the shelf needed to be attached so it would be level.

We applied a thin bead of wood glue to the three sides of each shelf that would touch the side and back panels.

DIY Yoga Mat Rack

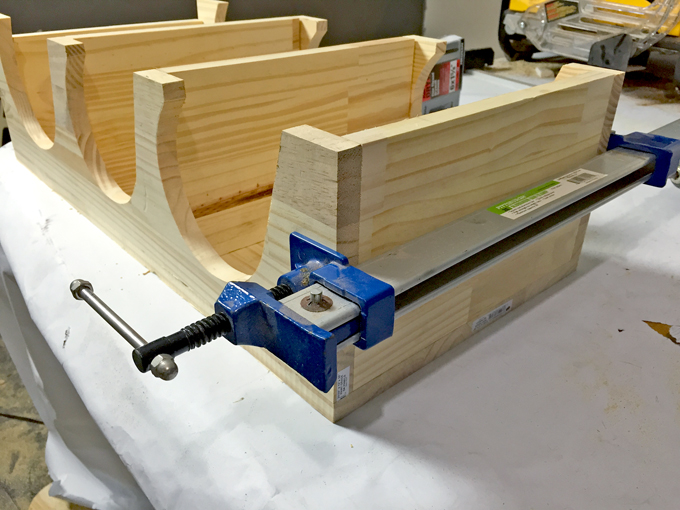
5. We used clamps to hold each shelf in place while the glue dried.

DIY Yoga Mat Rack

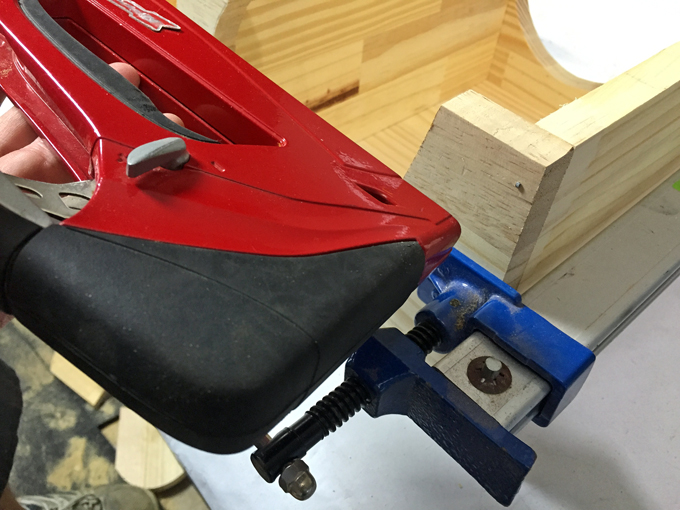
6. We secured each shelf in place by using a staple gun to drive four finishing nails through the side panel and into each shelf.

DIY Yoga Mat Rack

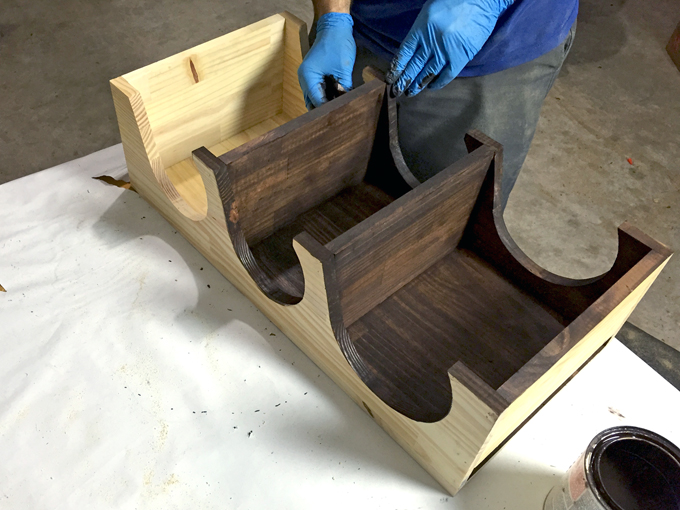
7. Finally, we stained it with our favorite Rust-Oleum Ultimate Wood Stain in Kona.

DIY Yoga Mat Rack

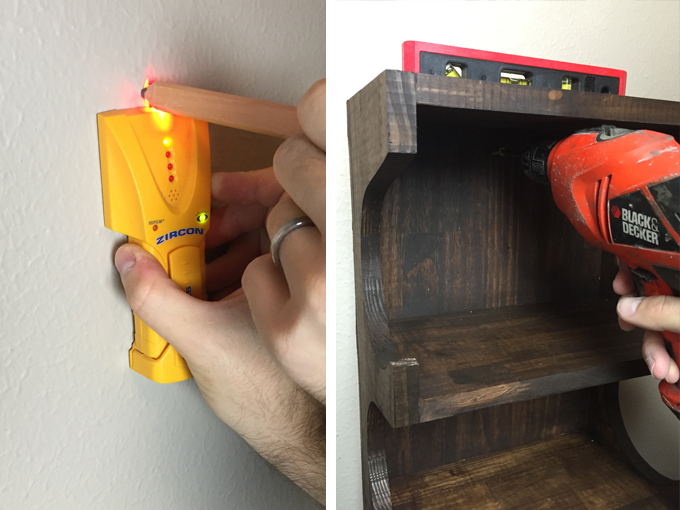
8. To secure the rack to the wall we used a stud finder to locate a stud, used a level to make sure it was straight and then drilled two screws (one at the top of the rack and one at the bottom) through the back panel into the stud.

DIY Yoga Mat Rack

Our completed rack is ready to hold some yoga mats! Like I mentioned earlier it could also be made to hold rolled up towels or to use as shelves to display smaller items.

DIY Yoga Mat Rack

By building and installing our yoga mat rack this weekend we are on our way to filling up the big empty wall in this room. The perk of being late in the game to pick out yoga mats is that I could match them to the rug in this room.

Even though the rack is meant for storage and organization purposes, we still wanted it to stand out as a good-looking decor piece for the room and I think Brent did a fantastic job making it happen.

PIN IT FOR LATER

How to Build A Yoga Mat Rack

Fall DIY Front Porch Projects

4 Fall DIY Front Porch Projects

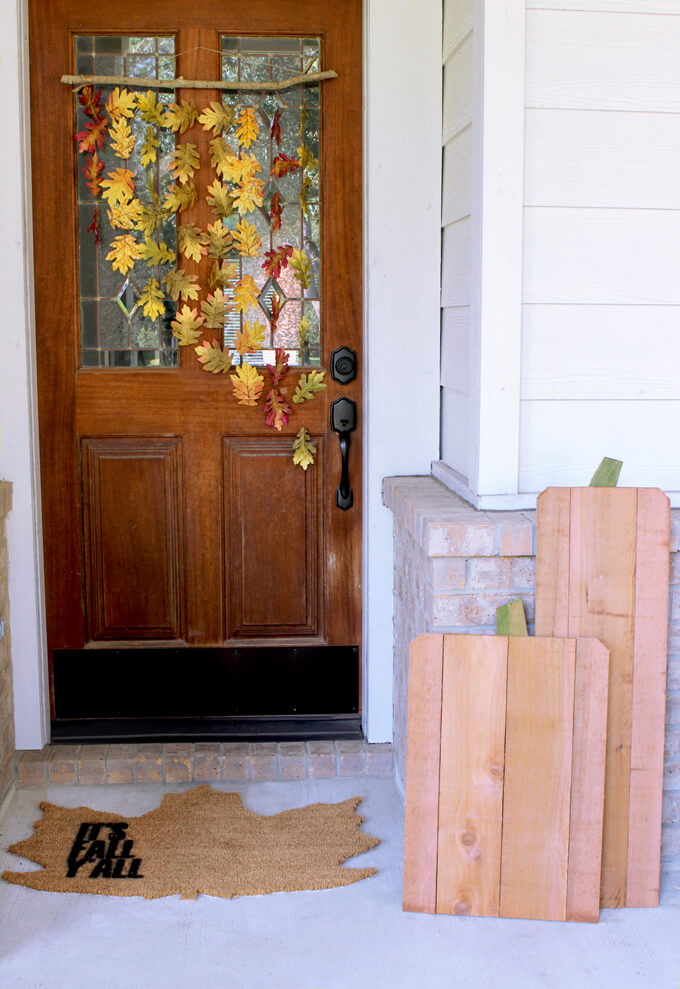
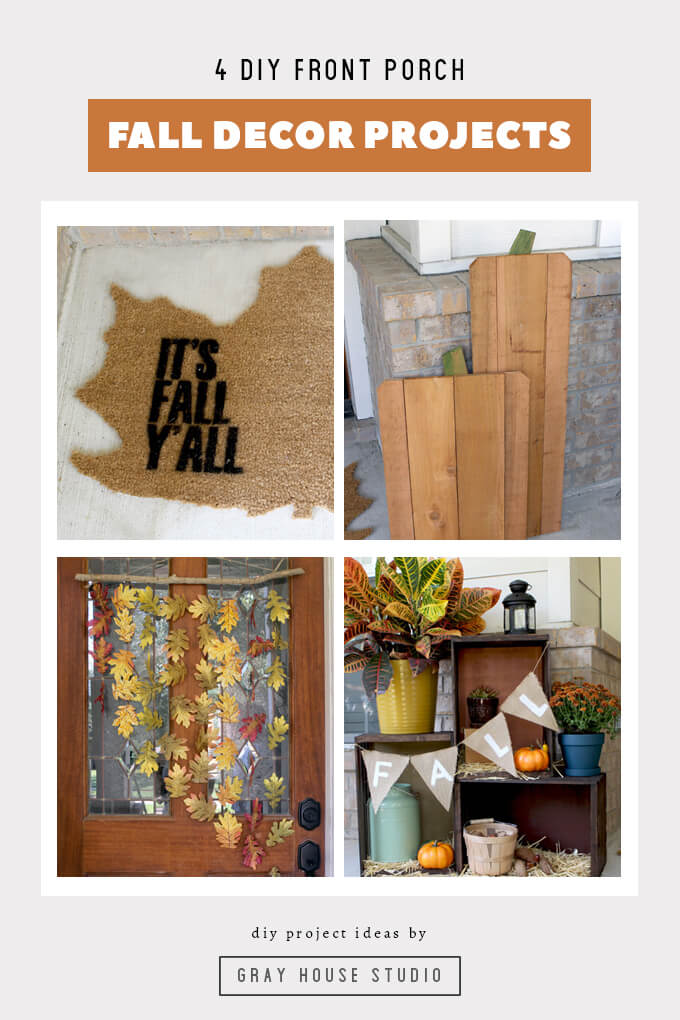
Looking for easy ways to decorate you front porch this Fall? Check out these 4 Fall DIY front porch projects we came up with to make your front porch festive for the Fall season without spending a fortune. These simple DIY Fall projects are not only adorable, they are inexpensive too!

Fall DIY Front Porch Projects

I am lighting my favorite fall scented candle (leaves from Bath & Body Works) today because it is officially autumn!

This time last year Brent and I visited Boston and my favorite part was to see all the leaves changing colors on the trees, they were gorgeous! I wanted to pack up all the foliage in my suitcase and bring it home with me since it usually takes awhile to see and feel fall outside here in Houston.

I love autumn but Brent and I have never been big on decorating for the seasons. One reason is lack of budget and another reason is a lack of storage. We just don’t have enough space to store decor for spring, summer, winter and fall.

However, we have this great covered front porch that is spacious and we like to spend a lot of time on in the cooler months and I mean who doesn’t love a porch decorated for fall?

We wanted to bring fall to our front porch this year so we got to thinking and came up with four fall DIY front porch projects that included the following criteria.

Inexpensiveprojects that would allow us to use the free decor from nature laying around in our yard
Easy to storeprojects that didn’t include a lot of pieces and could lay flat
OR
Can effortlessly transitionprojects that we could use for the next season or recycle for another project

2022 Personalized Christmas Ornaments
*** Thanks so much for supporting our small shop – Moon Rock Prints – this holiday season! ***

Here are our DIY Fall Front Porch Projects

Fall DIY Front Porch Projects

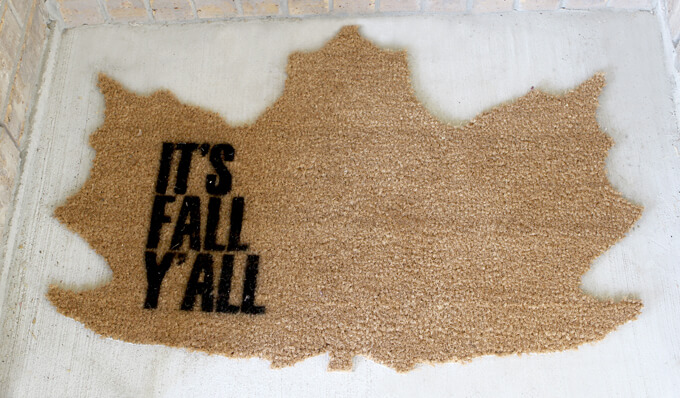
1. Leaf-Shaped Doormat
The first thing we made was a Fall themed custom shaped doormat for our doorstep. This one is inexpensive and easy to create so it was a no brainer.

Plus, it lays flat so it should be easy to wrap in plastic and store under a bed if it is still in good condition by the end of the season. If not, the doormat only cost us $10 so it wouldn’t be a huge loss if it gets a lot of love and needs to be tossed by the time December rolls around.

We purchased our plain doormat from IKEA and decided to cut out a maple leaf shape. Because we live down here in Texas we spray painted the saying “It’s Fall Y’all” onto it. Sure, it is a little corny but that way when we walk out the door our doormat can remind us that despite the temperature, it is in fact Fall.

Whether you have a huge front porch or live in an apartment with just a doorstep, this is a great way to bring a little fall or Halloween decor to your outside entry.

To see how to make this project, check out our full tutorial on our custom shaped doormats.

Fall DIY Front Porch Projects

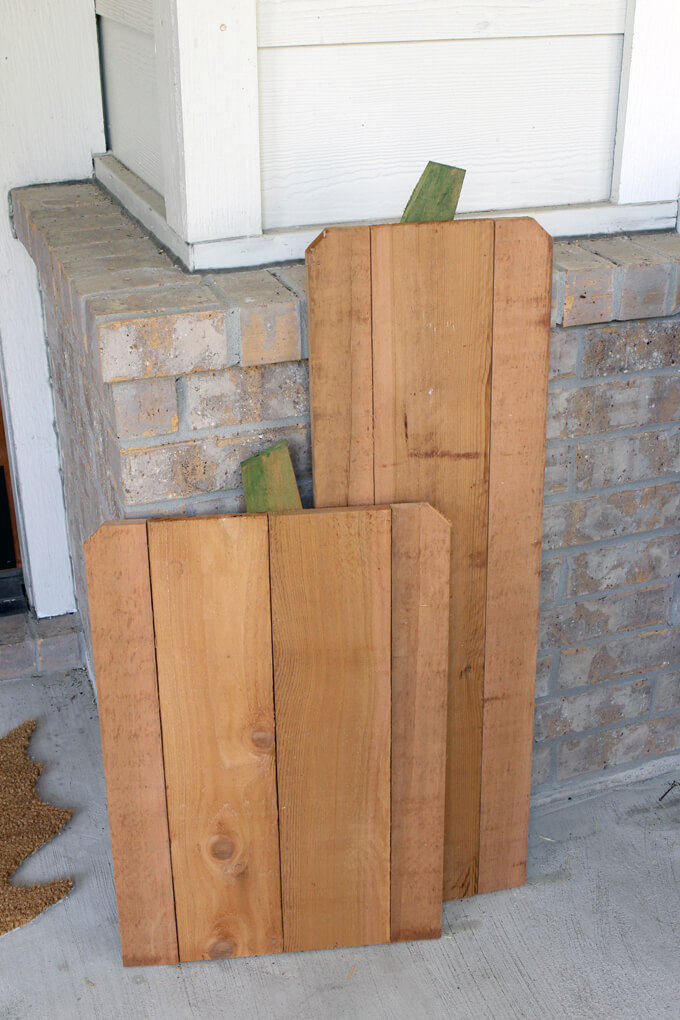
2. Cedar Picket Pumpkins

Our next project to tackle was to make a pair of rustic pumpkins out of cedar dog-ear wood fence pickets. This is another extremely inexpensive project because each piece of fence costs around $2 and each pumpkin only needs one fence picket.

It was really quick to make as well because we dug around the stack of fence pickets at the hardware store until we found two that had the deepest natural orange shade so we didn’t even have to paint them!

SUPPLIES

FYI: This post contains a few affiliate links to products we used to make this project. Gray House Studio does receive commissions for sales from these links but at no extra cost to you. We appreciate you supporting this site. Read our privacy and disclosure policy. You can also easily shop our recommended products here.

We wanted two pumpkins that were different heights so for the taller pumpkin Brent cut the cedar fence picket in half with a miter saw to create two pieces that were the same length.

For the shorter pumpkin he cut three pieces the same length. Then for the piece that had the corners cut off he cut it in half vertically using a table saw and placed each piece on the outside of the middle board(s) for each pumpkin.

To attach the boards together, Brent cut a strip of 1/8 inch masonite the width of the pumpkin and used a drill to screw through the masonite into each picket with 1/2″ screws.

He created the stems by cutting a scrap piece of wood into trapezoids and then painted them with watered down green paint.

He attached the stem to the pumpkin with a 3/4″ screw.

They are flat so they would also be easy to store under a bed or because we did nothing to the wood, we could recycle and use it for another project such as making a box or a tray.

Fall DIY Front Porch Projects

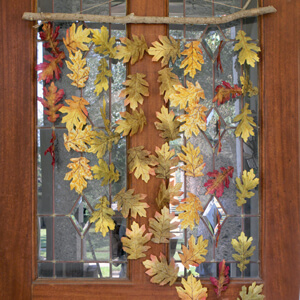
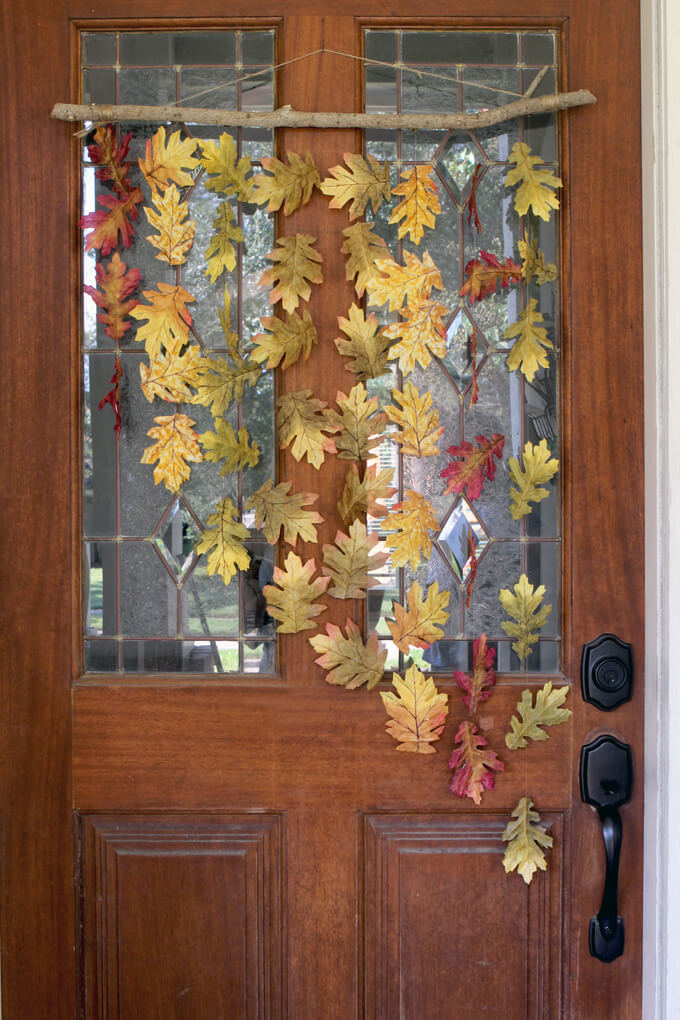
3. Natural Leaf and Branch Door Hanging

For our third project we were in search of an alternative to a traditional fall wreath for our front door.

We decided to make a natural leaf and branch door hanging. This one cost us around $12 only because we couldn’t find any leaves outside I liked where we lived. We don’t have the best looking leaves in our yard so we opted to buy some artificial leaves. You could use also paint leaves from outside or make paper leaves.

SUPPLIES

FYI: This post contains a few affiliate links to products we used to make this project. Gray House Studio does receive commissions for sales from these links but at no extra cost to you. We appreciate you supporting this site. Read our privacy and disclosure policy. You can also easily shop our recommended products here.

To make it we used a branch off one of our trees that we had just trimmed and cut it down to fit our door. You could also used one of these pretty faux birch branches.

Then we used a needle to thread clear fishing line though the leaves. We varied the lengths of the strands of the leaves and situated the individual leaves in different positions to give the appearance that they were falling and to create visual interest.

For the bottom leaf on each strand we positioned a washer between two leaves so that it would hold the weight of the strands of leaves down and prevent them from blowing around and getting tangled.

We attached each line of leaves to the branch with thumb tacks.

Finally, we wrapped jute twine around the branch to create a loop to hang the leaf and branch display on a hook on our front door.

I love this project because it looks like the leaves are just floating on my front door.

To store this one I will most likely pull off the silk leaves, washers and thumb tacks and store them in a plastic bag and discard the branch. That way I don’t have to store the entire thing and I can start fresh next season with a new branch and create a new pattern.

Fall DIY Front Porch Projects

4. DIY Fall Crate Display

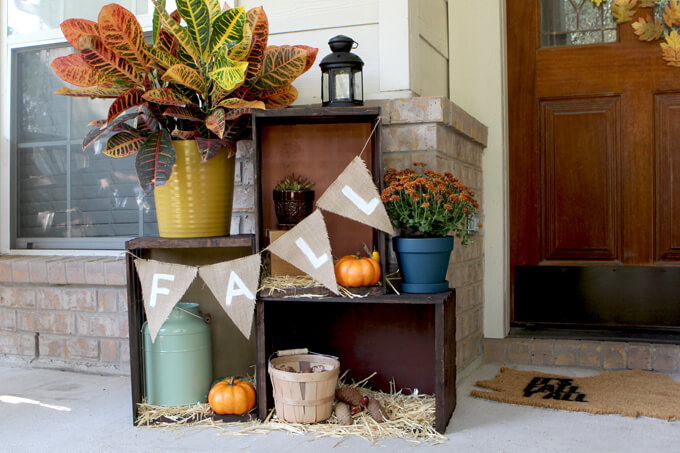
We wanted to create a display on our porch where we could pull together a few additional decor items into a place with purpose. Using crates to give varying heights allowed us to incorporate a variety of items.

The three wood crates were the most expensive item we purchased for these projects but the beauty of them is they can easily transition with each season by just switching out the back panels we created and adding different natural decor and seasonal flowers.

The majority of the items we put in and on the crates we already had around the house such as the lantern and the green tin. We picked up some new plants and some hay to finish the look.

To see how to make this project, check out our full tutorial on our fall crate display.

Fall DIY Front Porch Projects

We completed all of our fall DIY porch projects on one Sunday afternoon and now our entry way is ready for fall!

Fall DIY Front Porch Projects

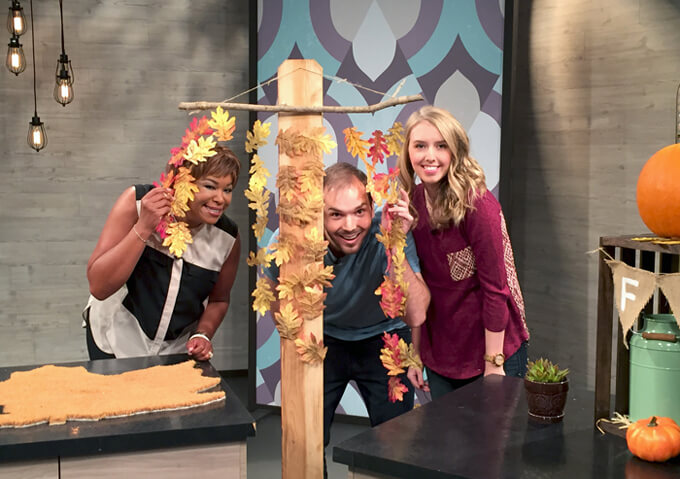
We had the fun opportunity to share these Fall DIY front porch projects on Great Day Houston last week. It was our first time on TV and it was live so we were a little nervous but host Deborah Duncan is so sweet and fun and we had a blast spending the morning at the studio.

If you missed it live or don’t live in Houston, you can watch via the link below to see and hear more about our do-it-yourself fall decorations.

Watch our DIY segment on Great Day Houston

PIN FOR LATER

Looking for easy ways to decorate you front porch this Fall? Check out these 4 Fall DIY front porch projects we came up with to make your front porch festive for the Fall season without spending a fortune. These simple DIY Fall projects are not only adorable, they are inexpensive too!

Better Homes & Gardens {I Did it} Feature

Better Homes and Gardens {I Did It} Feature

Better Homes & Gardens {I Did it} Feature

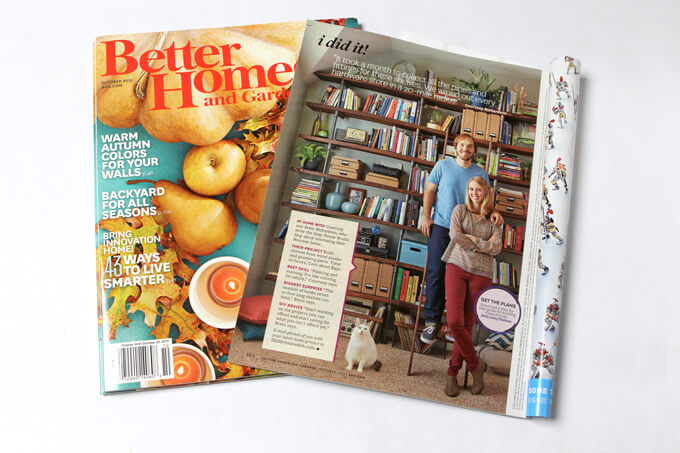
If you had asked me a year ago if I thought Brent and I would be standing in the checkout line of the grocery store looking at ourselves and one of our favorite Gray House Studio projects, our industrial shelves, in an issue of Better Homes and Gardens magazine I would have asked you, “What the heck is Gray House Studio?” Yes, it is true but hard to believe that this time last year our home renovation blog did not even exist.

But since we started in December we have poured so much of our energy and free time into our DIY projects and our blog so to see our hard work in such a well known and loved magazine this week has been incredibly surreal and overwhelming (in the best of ways).

So much so that we totally played it uncool and when we heard the issue was out, we rushed to the grocery store and had my brother take lots of photos of us posing with it in front of the magazine rack while shoppers looked at us like we were total goofballs. But we were just so happy and excited to see our Better Homes and Gardens {I Did It} Feature! There was no way you could wipe the smiles off our faces that day.

Behind the Scenes of our Photo Shoot

It is crazy to believe but this awesome adventure started all the way back in February of this year. A few weeks after finishing and posting our industrial shelves we received an email from Kit Selzer saying she thought our industrial shelves looked amazing.

To hear that kind of encouraging feedback felt outstanding. I mean sure our parents tell us our projects look great all the time but they also said that about the macaroni art we did in Kindergarten so their biased positive response doesn’t hold quite the same weight as an unbiased opinion that comes from a senior editor at Better Homes and Gardens magazine. Sorry Mom and Dad. We are still appreciative you are our biggest fans.

That wasn’t even the best part. She wanted to feature the shelves in an upcoming issue of the magazine in the I Did It! section and send a team to our house to photograph them and us. After reading the e-mail I immediately called Brent at work and started talking in my “super excited, high pitch voice” that somehow only my easygoing husband and dogs can comprehend. He was equally as enthusiastic.

Better Homes & Gardens {I Did it} Feature
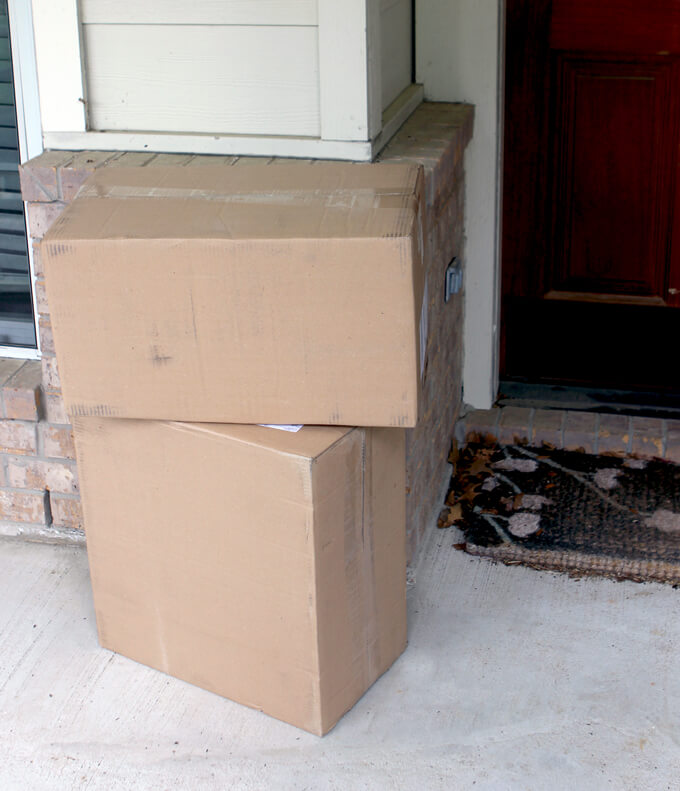
The photo shoot was scheduled for the last week of April and when two large boxes filled with the magazine files and stationery boxes ordered for the shoot were delivered two weeks prior, it started to sink in that this was really happening. And then panic set in that while our shelves might be ready for BHG, the rest of our house…umm not so much. I’m just going to keep it real and say we needed to do some MAJOR cleaning.

But what did we do first? Create an even bigger mess as we built our entire coffee bar in a week. It was an insane idea but how often do you have Better Homes & Gardens come to your house? We wanted to impress.

We managed to get our whole house looking cleaner than it has ever been since we moved in because of all our renovation projects just in time for Monday morning when Shelley, the art director and Janna, the photo stylist arrived to preview our space and our wardrobe for Thursday’s shoot.

Once we got talking about outfits and I admitted to having pretty much zero fashion sense outside of shorts and solid colored tank tops (my uniform of choice in Houston for spring, summer and fall) they asked to see our closet to get a sense of my style. While I was more than happy to show them my wardrobe, I cringed at the thought of them seeing our less than organized closet.

Because what do you do when visitors are on their way and you are in a hurry to clean up? You shove random junk you don’t know what to do with in the closet, right? Am I right? Anyone? Our closet is normally pretty straightened because Brent and I don’t have enough clothes to fill it up but at the last minute I stuck a bunch of random things in there to clean up some areas of our house. I was slightly embarrassed by the mess which we worked so hard to clean, get rid of and then at the last minute “hide”. But they were the sweetest ladies who were kind enough to focus on the clothes and not the environment where they were located.

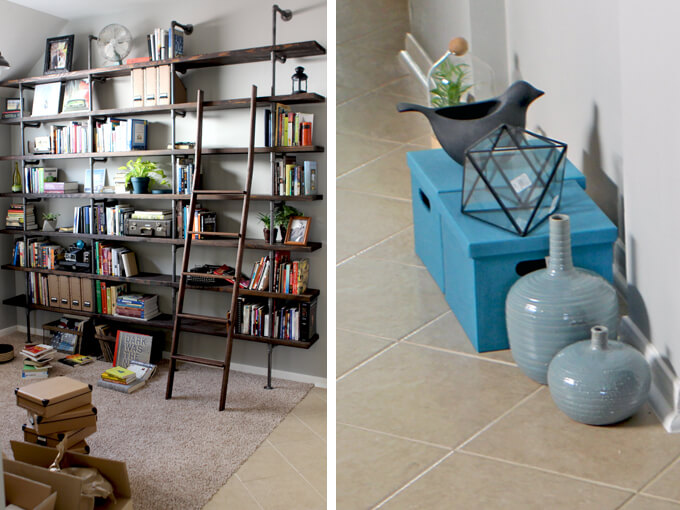
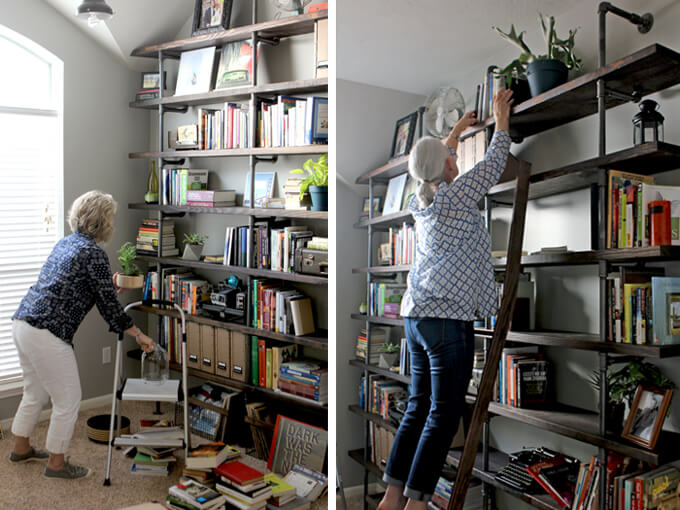
Then at the last minute there was talk of a ladder and how great a ladder would look in our library and Brent suggested he could build one in two days. We surprised them when they came back on the day of the shoot with a brand new custom built ladder that turned out to be essential to the day because they were able to use it to reach the top shelves to style and we could stand on it for the actual photo.

Better Homes & Gardens {I Did it} Feature
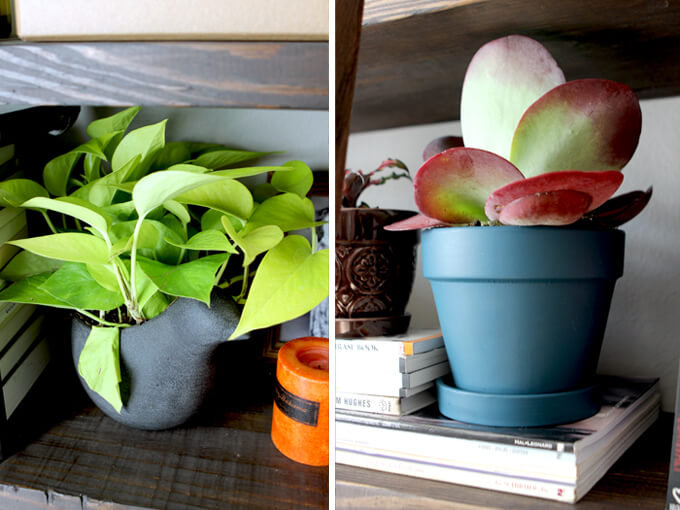
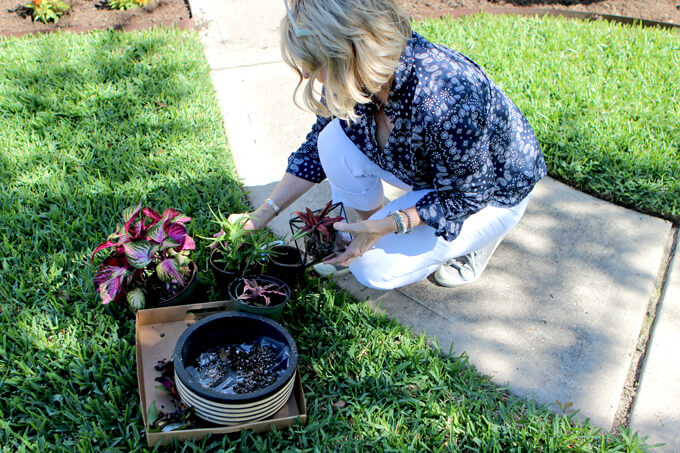
Thursday morning Shelley and Janna returned and brought lots of fun items for our shelves. They also brought some really cool plants that sadly are not still around because I can’t keep a plant alive to save my life. The first thing they did was to start pulling items off our shelves so they could rearrange things to look best for the camera.

Better Homes & Gardens {I Did it} Feature
It was so much fun to watch Janna and her assistant Becki style our shelves. She is an expert in this field and obviously has way more experience then me so while I probably should have been spending more time taming my hair, I couldn’t help but want to watch the entire time and take mental notes of how she arranged and styled items.

Better Homes & Gardens {I Did it} Feature

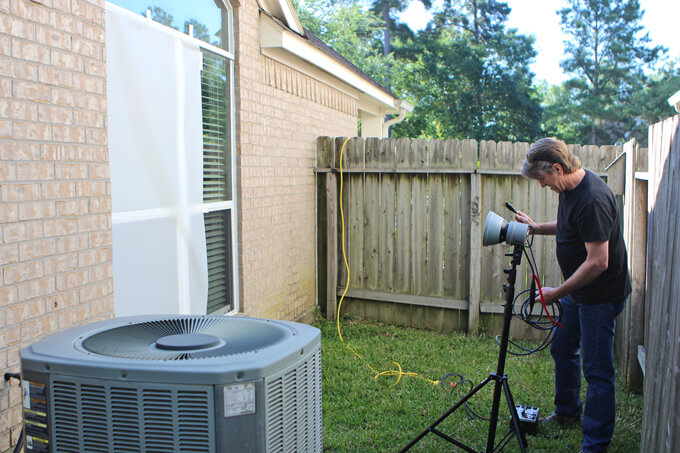
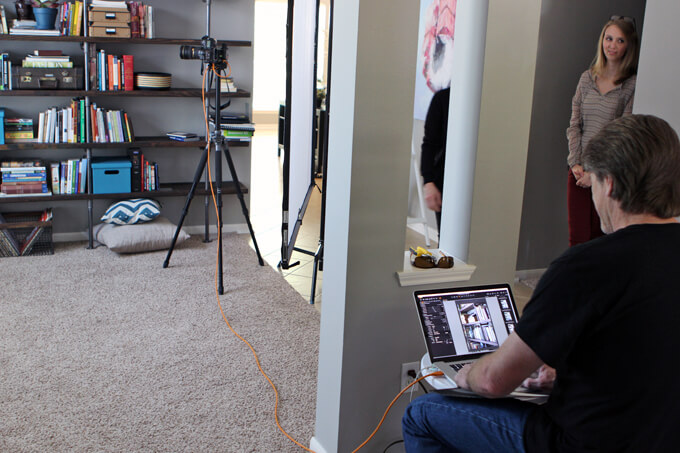
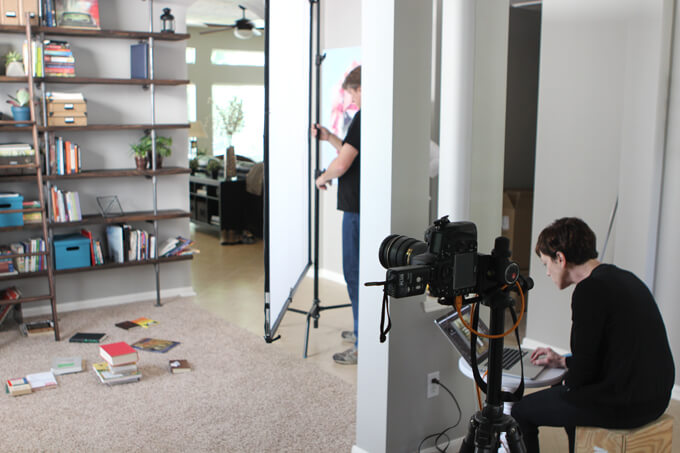
A little while later the photographer Brian McWeeney and his assistant/wife, Carolyn came and set up their equipment. They made the lighting in the room look incredible. They were a hilarious couple and always kept us laughing. Brian was kind enough to answer all of Brent’s photography questions and Carolyn was a lifesaver in helping me control my “super fine” baby hair that refused to lay down and became a running joke of the day.

Better Homes & Gardens {I Did it} Feature

Since we are used to being behind the camera, I found the process of how these magazine pages come together fascinating. Shelley definitely had the eye for noticing every little aspect that might look off in the photo or make it feel unbalanced. I really learned from her how to pay more attention to the tiny details when photographing our projects.

Better Homes & Gardens {I Did it} Feature

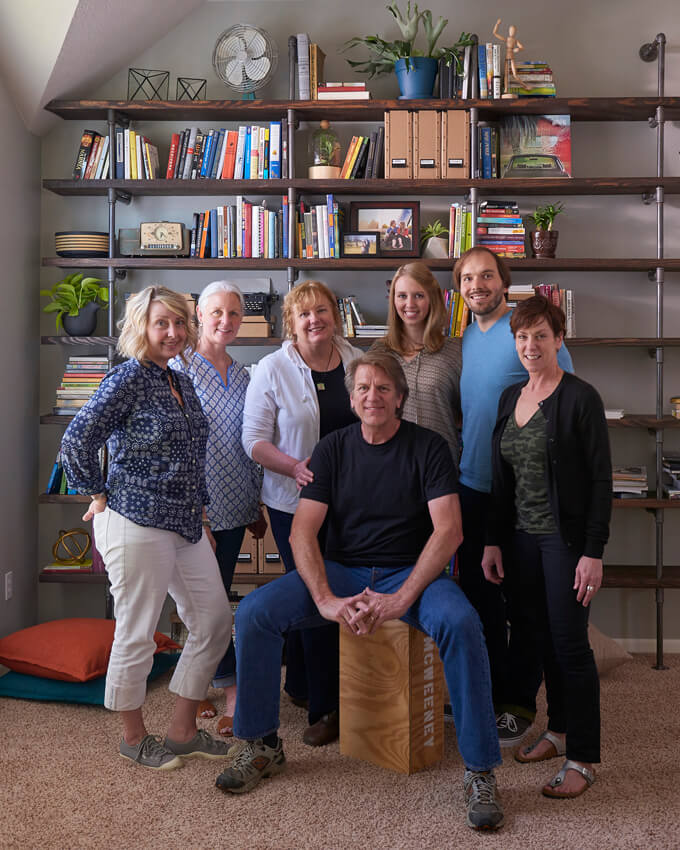
^^^ Thanks so much to Brian for taking this awesome group shot! ^^^

We couldn’t have asked for a better group of people to work with. We enjoyed getting to know each and every one of them. They were all so personable, encouraging and funny. We had a lot of laughs that day. I’m sure it was a lot of work on their part because those are some big shelves but they made the whole process feel effortless. We are so thankful for them for making this an amazing and unforgettable experience.

Better Homes & Gardens {I Did it} Feature
The best part of all is Jake (the cat) made it into the photo too! Which is pretty spectacular. I was planning on taking him over to my parents’ house for the day so he would be out of the way but when it was brought up that they might try and work him into the photo I wasn’t sure how it would go. On the first attempt he wouldn’t sit still and proceeded to very slowly walk out of frame. The key words here are very slowly. It was as if he was stalking prey or moving in slow motion. Everyone thought it was so humorous because they had never seen a cat move so slow before. The second time around he just plopped himself down and didn’t move one bit but just looked like a big ball of white fur laying on the ground. He eventually had to be removed from the scene because he refused to leave.

We are so appreciative of this opportunity because when you put yourself out there it can be a scary feeling but to have positive feedback like this gives us the drive to keep dreaming, keep making and keep creating. This just shows us that even our wildest dreams are possible. You never know what is around the corner when you take that leap and put yourself and your work out there.

Your kind e-mails, words of encouragement on social media and in our comment section mean the world to us as well, so thank you for supporting Gray House Studio.

The October 2015 issue of Better Homes and Gardens magazine is on stands now! Check out our I Did It! feature on the last page.

You can view our original Industrial Shelves Project post here.

Fall Crate Display

Fall Crate Display

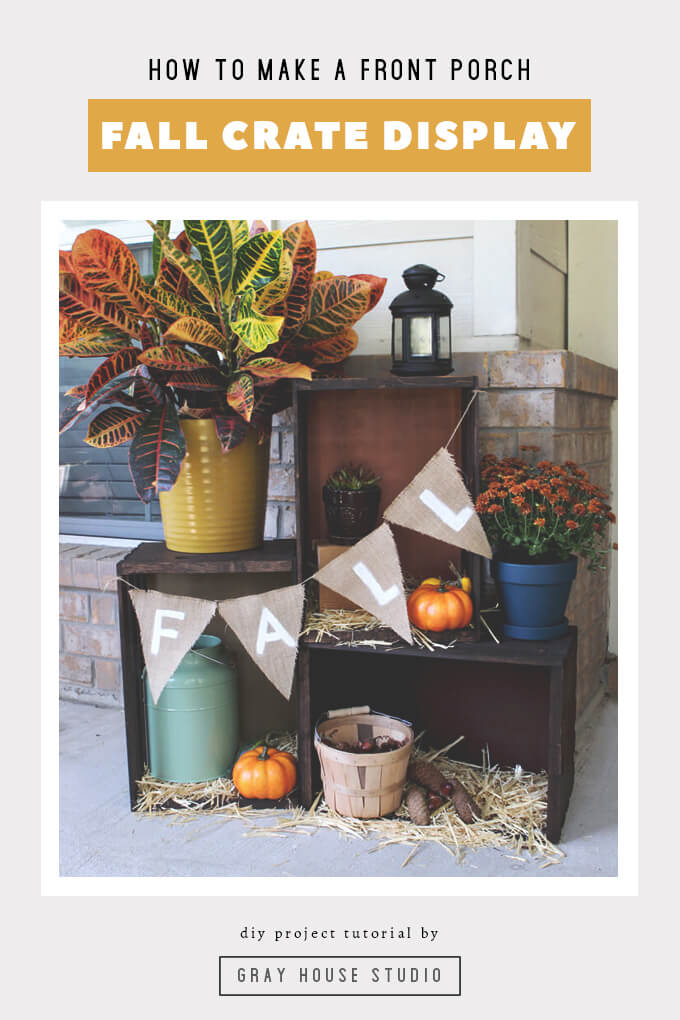
Create a fall crate display to decorate your front porch for the Fall season.

Fall Front Porch Decor

Even though you can’t tell by the weather here in Houston (Is it sad that when it gets to be about 96 degrees we say it feels good outside?) fall is fast approaching.

This year we decided to get a jump on the season and create a few DIY fall decor projects for our front porch. So when those cooler temperatures finally reach us way down here in Houston, we will be ready.

The first project we are going to share with you today is our Fall Crate Display. This is a really simple decor project to create and customize and can be set up anywhere from on your porch to in front of your fireplace.

Plus, it transitions well with the seasons so with just a little switching out it can become a winter crate display.

2022 Personalized Christmas Ornaments
*** Thanks so much for supporting our small shop – Moon Rock Prints – this holiday season! ***

How to Create a Fall Crate Display

SUPPLIES

FYI: This post contains a few affiliate links to products we used to make this project. Gray House Studio does receive commissions for sales from these links but at no extra cost to you. We appreciate you supporting this site. Read our privacy and disclosure policy. You can also easily shop our recommended products here.

STEP BY STEP GUIDE

Fall Crate Display

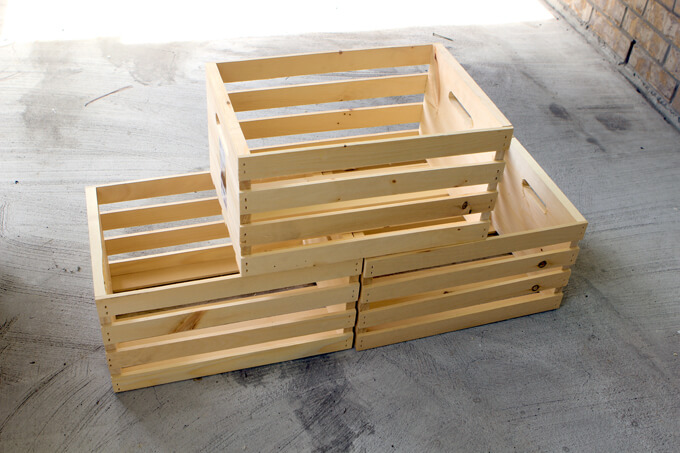
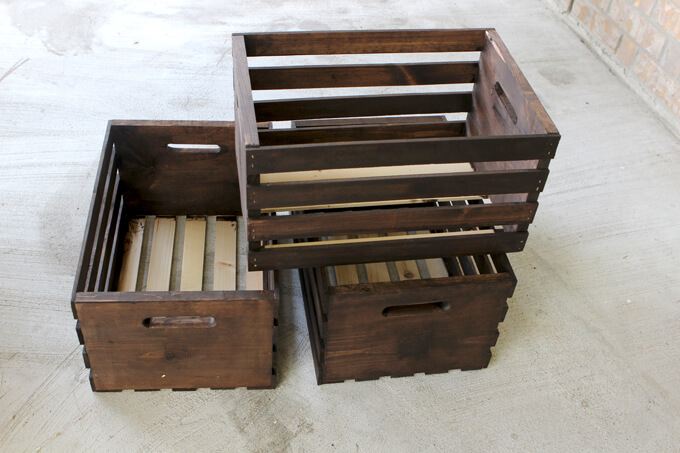
1. We bought three wooden crates. The ones we were made of unfinished pine.

You can have as many crates as you like in your display depending on the amount of decor pieces you intend to add. You can even incorporate different sizes of crate to create interesting shapes.

Fall Crate Display

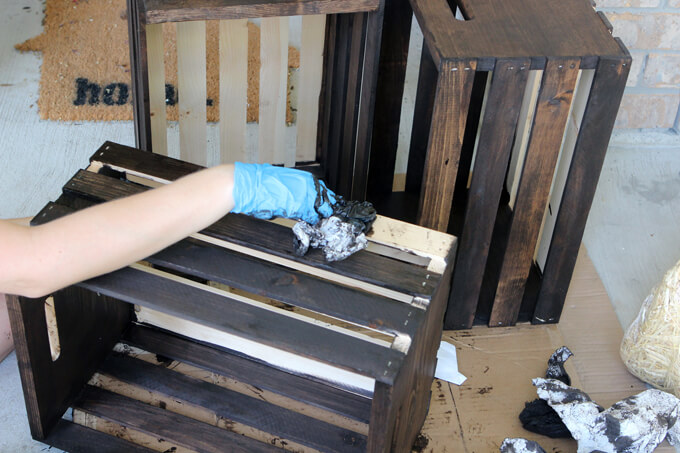
2. The next step was to stain the crates to give them a more high end feel. We used our favorite Kona color stain.

Staining these crates was kind of a pain and time consuming. It is not a hard task, just a tedious one.

Fall Crate Display

3. Once I was done it was worth it. We didn’t bother to stain the bottom of the crates and I will explain why in the next step.

Depending on the look you are going for you can rough up and weather the wood or even add a graphic or text to make it look like a vintage crate.

Fall Crate Display

4. We decided to take it a step further. To transform the crates into a cohesive display and add in more color to this set up.

We used scrap pieces of wood but you could also use plywood to cover the bottom of the crates.

When we flipped the crates on their sides these boards would be the background. There are endless possibilities in what you can do to create cool backgrounds.

Fall Crate Display

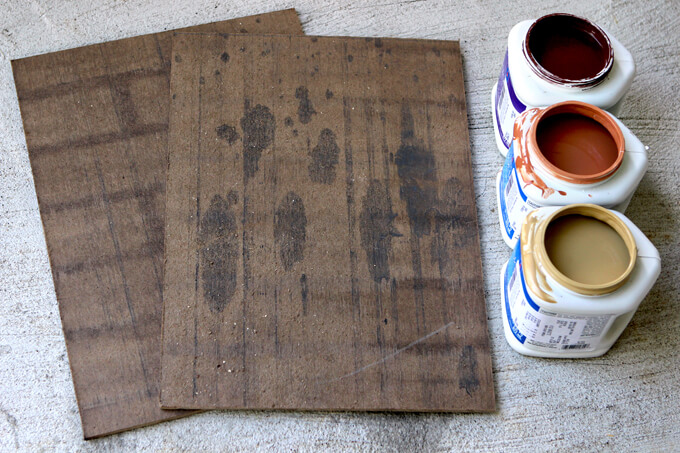
5. We decided to stick with simple backgrounds and paint them with mute fall colors. We used some sample paint colors we had left over from another project.

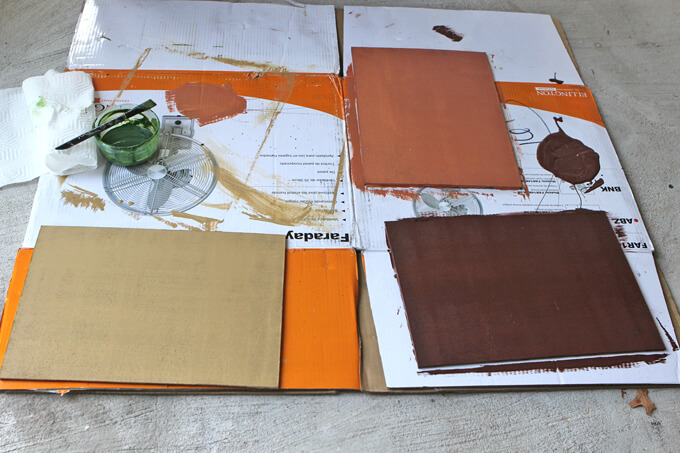
We used a high-density foam paint roller to paint the plywood boards Cavern Clay Sample Paint, Baguette Sample Paint, and Fiery Hue Sample Paint.

You won’t need much paint for these boards so inexpensive cans of sample paint are the way to go. I just poured some paint onto a piece of cardboard and rolled in onto my scrap pieces of wood that would become my crate back.

Fall Crate Display

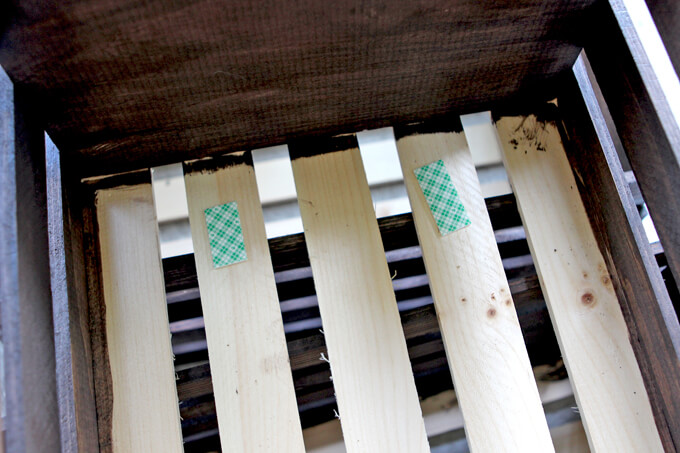
6. Once the painted pieces of wood dried, we secured them to the bottom of the crate with foam tape.

Fall Crate Display

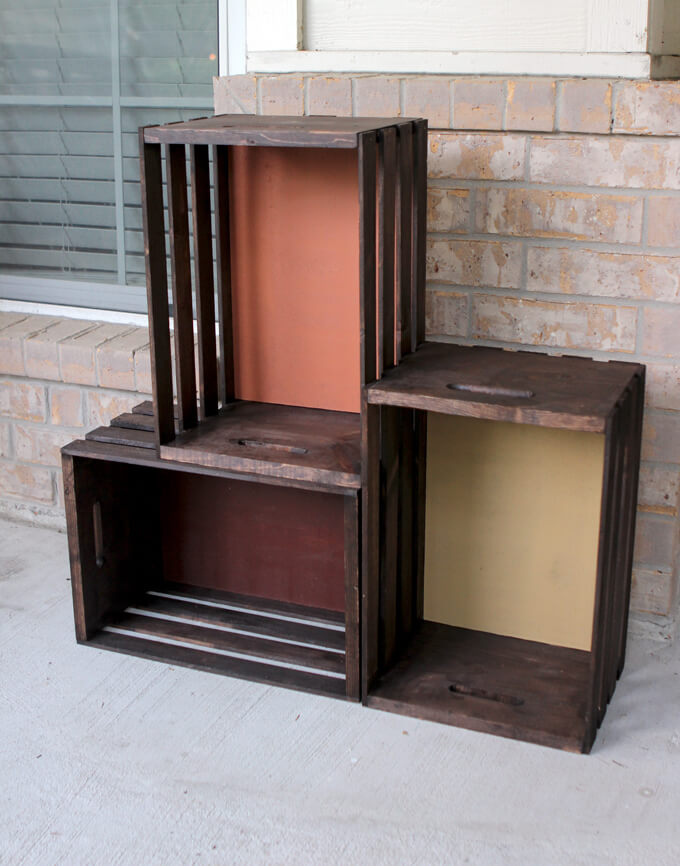
7. Next, we arranged and rearranged them until we found the best combination that would fit our decor pieces.

I tilted the crate that sits on top of the other crate at a slight angle to allow for more surface space so the items could spill out of the bottom of top crate onto the top of the bottom crate.

Fall Crate Display

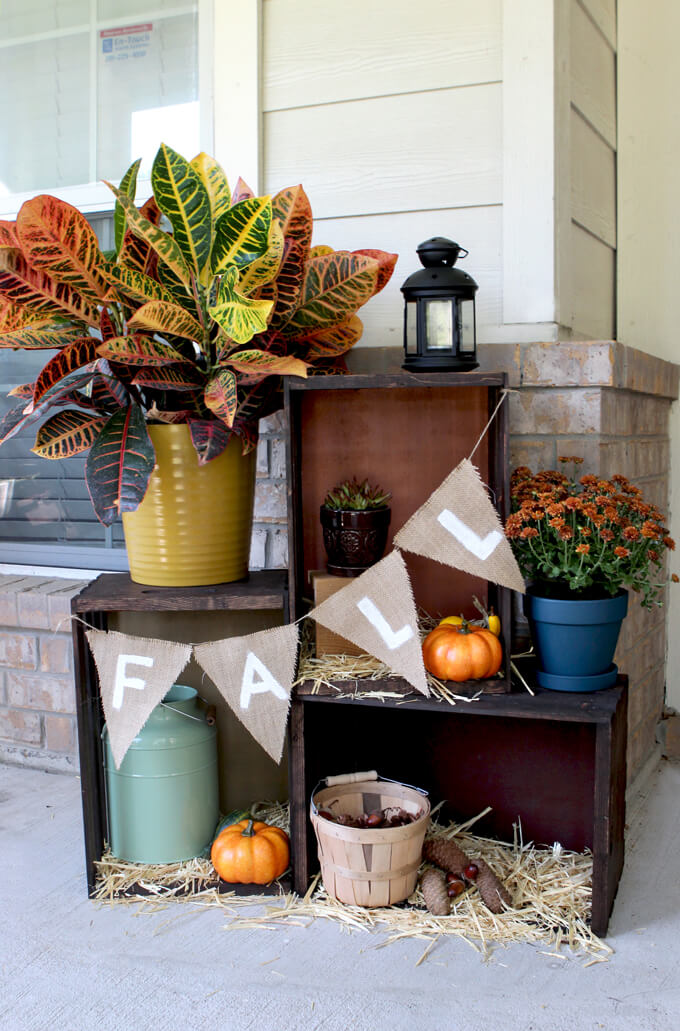
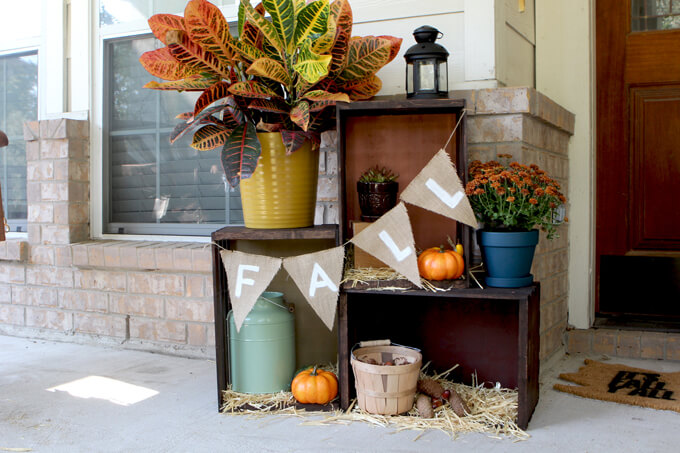
8. The last part is the fun part! To decorate our fall crate display we mixed traditional fall decor items such as pumpkins and a burlap banner with natural elements such as pine cones, acorns and leaves (which depending on your location you can find just laying around outside).

Adding flowers and plants to our front porch is always fun so we paired pretty colored mums with the more unique looking Croton plant.

Adding some hay to the bottom of the crates adds some texture, defines the bottom of the crate, breaks up the dark color of the crates and definitely gives it that authentic barn feel (and smell).

We have a lot of warm tones going on so we mixed in some contrasting color like shades of blue in the flower pot and tins to really make them pop. We have learned you don’t always have to buy a bunch of new pieces but can re-purpose things you may have sitting around somewhere else.

For this display we incorporated a lantern and tin we had sitting around inside to give it a rustic/barn feeling. When styling the crates we always try to pair taller items with shorter pieces to maximize space without making it look overcrowded.

What we love about this fall crate display is it creates a purposeful space for arranging and showcasing fall decor pieces on our front porch. The beauty of it is with just a switch of the back piece of wood and decor items it can effortlessly transition from a rustic fall look to a rustic winter look come December.

Looking for more fall inspiration? Check out these easy DIY fall porch decor projects or how to throw a fall party!

PIN IT FOR LATER

Create a fall crate display to decorate your front porch for the Fall season.