Dream Big With a Narrow Focus

Dream Big With a Narrow Focus

By now I am sure you have seen our reading nook, industrial library shelves and coffee bar projects that we have completed within the last year. What do all these projects have in common? They were all built in spaces of our home that got little to no use prior and they are our favorite projects to date.

One of our favorite challenges is to take spaces in our home that are blank and bare because either we had no furniture to put in them or decided against using them for their intended purpose (we’re rebels like that) and transforming them into places that not only make us happy but also function so we get the most use of them.

There are several things we consider when we start projects in empty areas of our home and we thought we would share them with you in a new series we are calling Tips for Turning Unused Spaces into Unique Settings. Over the next several weeks we will share suggestions on how to approach tackling those boring spaces in your home that get no attention and making them into an area that defines your style and makes your home one of a kind. First up we talk about dreaming big.
Turning Unused Spaces into Unique Settings: Dream Big with a Narrow Focus

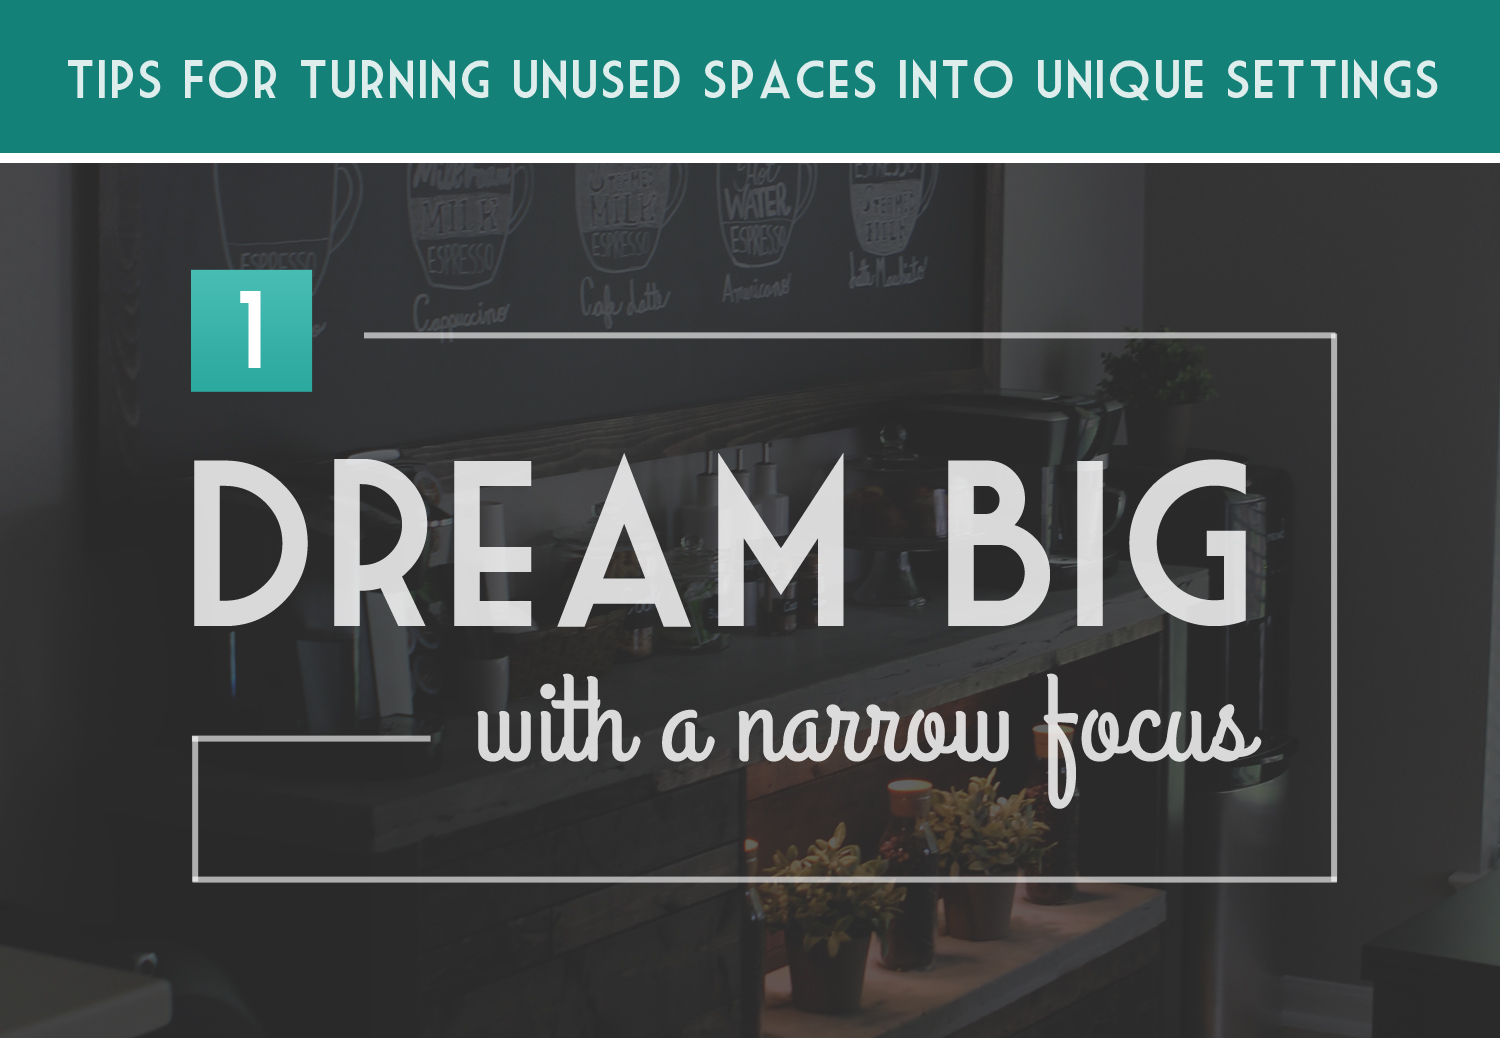
Our first tip for turning unused spaces into unique settings is to dream big. The fun thing about being a homeowner is you don’t have to limit your ideas for a room or a space to what a house should have or how a house should look. The visualizing part is exciting because it can get as grand and detailed as you can imagine.

While it is important to dream big for creativity sake, we feel it is equally essential to have a narrow focus when it comes to choosing which projects to complete. What we mean by this is to choose a specific area in a room, really put thought into what would make you the most happy to see in that spot and then focus all your creative attention on just that one area for the time being. It’s not necessary to makeover the entire room all in one shot. Having a narrow focus helps to guarantee that you won’t feel as overwhelmed and that projects will get completed quicker.

Unless you have a huge budget to spend on house renovations or no budget at all, your home will be a work in progress and that is okay! If you can only do one project a month or every two months but you absolutely love the projects you have done so far and get a lot of use out of those spaces, it is worth it. Taking your time and only purchasing or building items that your truly love and fit with your overall style will pay off in the end to have a home that is truly unique to you. You will also be creating areas you adore rather than having unused spaces just filled with stuff.
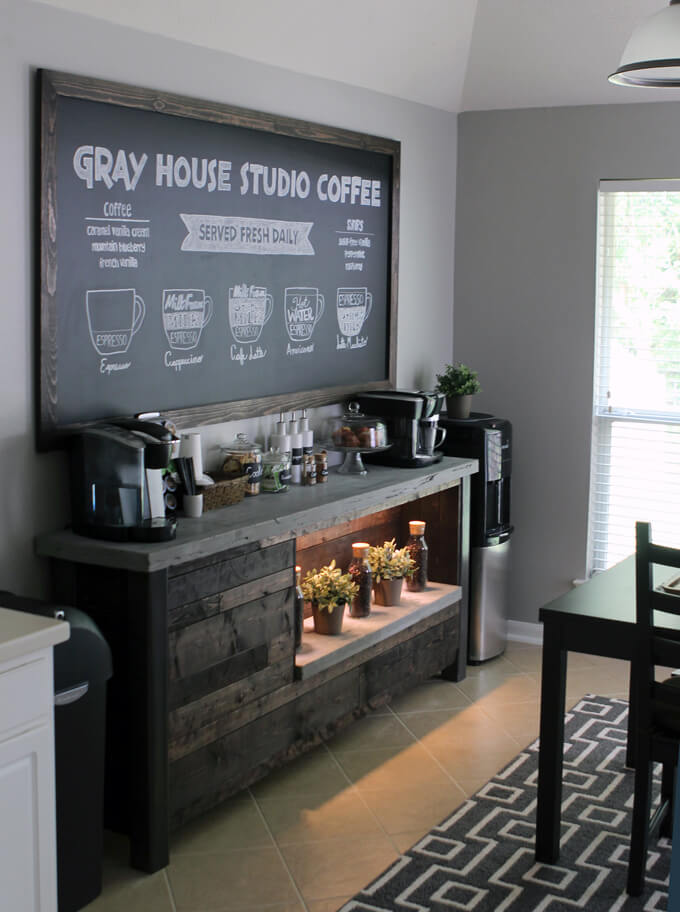
Turning Unused Spaces into Unique Settings: Dream Big with a Narrow Focus

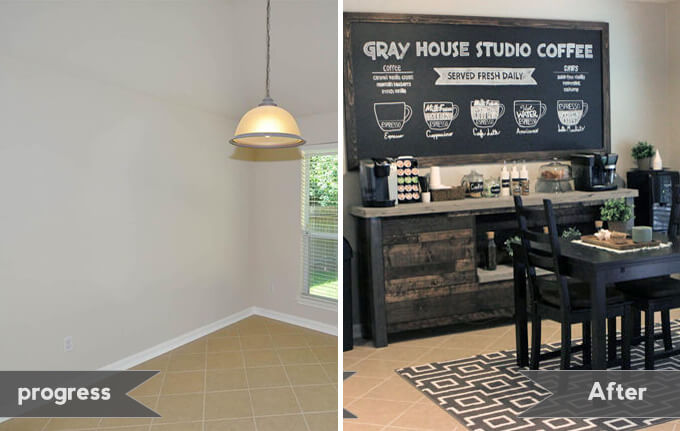
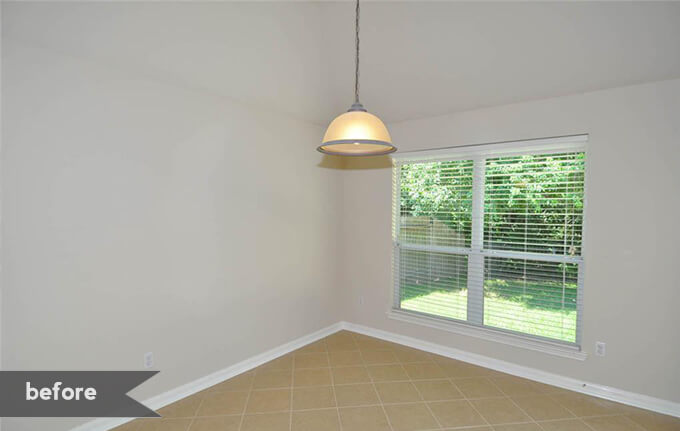
In our home we wanted to makeover our breakfast nook because it was bare and uninviting which led to the space not getting a lot of use unless we had company. An idea we had been kicking around was to add a coffee bar to our kitchen and the long blank wall in the breakfast nook was the perfect place. We started the process of dreaming big and rather than just build a standard coffee bar we ended up coming up with the idea to transform this unused little area into our own coffee shop. This idea may be a little out of the ordinary but it made us really excited.

Because we set budgets for our home renovation projects we knew we had to have a very precise scope for this project. We couldn’t afford to fully makeover the entire nook or the kitchen at one time. The floors are going to have to remain tan tile and the cabinets in the kitchen are still going to be white for a while longer.

It is going to look a bit mismatched in our kitchen area for now but as long we design our new projects with the same overall style, which in our case is a blend of industrial, rustic and eclectic, the house will slowly transform into a style that truly fits us. Having instant gratification and unlimited money would be amazing, but for most of us that doesn’t exist so for the time being we just focused all our attention on making our coffee bar wall look exactly like we wanted, like a counter you would see in an actual coffee shop.

Things to Keep in Mind:

1. Dream BIG!
2. Visualize how you would like a space in your home to look rather than settling for what “should” be in a certain room.
3. Have a precise scope and narrow focus when choosing to design unused areas.
4. You don’t have to makeover an entire room all at one time.
5. It’s okay for your home to be a work in progress.
6. Only purchase or build items that you truly love and contribute to your overall style.

Dreaming big is just one piece of the puzzle. Next we will talk about the importance of determining why a space is going unused and how to create an area that solves that problem.

Have you been dreaming big about a space in your home? We would love to hear your ideas! Share them with us in the comment section below.

Library Ladder

DIY Ladder for the Library

We are sharing how we built a DIY ladder for our home library to reach the top shelves of our large wall of industrial shelves.

DIY Ladder

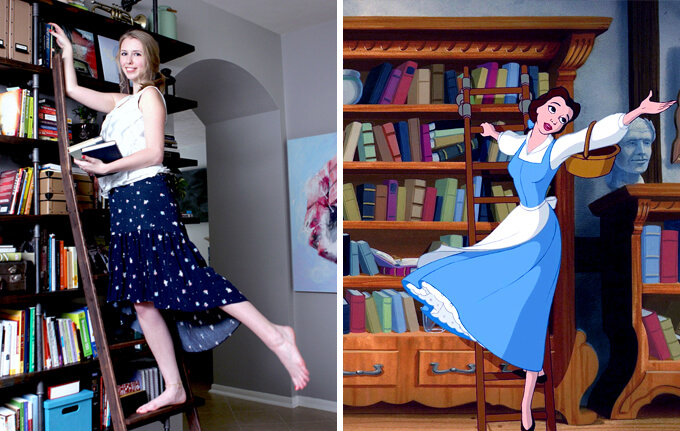
Hey, Brent here. I’ve never said this out loud before but since the internet is the safest place to share your deepest and darkest secrets, I feel comfortable expressing that I fell in love with libraries after watching Beauty and the Beast. I can’t speak for Courtney but I think you would be hard pressed to find someone who wasn’t inspired to create their own library after watching the feelings of joy sweep across Belle’s face as she explored the Beast’s library only moments after being abducted.

So I got to thinking that it would only stand to reason that a guest that would willingly visit our home might be even more impressed to find a large library in our entryway.

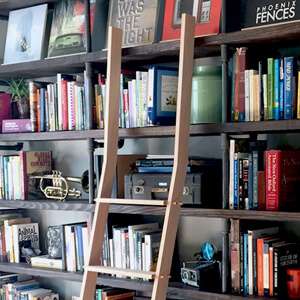
A couple of months ago we shared how we turned our formal dining room into a library by building floor to ceiling bookshelves. We had a lot of positive feedback on our library shelves but two of the most common questions we received were, “What about a ladder?” and “How do you reach the top shelf?”

When we found out Better Homes and Gardens was coming to our home to photograph our library, it was finally the kick in the pants we needed to build a ladder for the bookshelves. Courtney and I have always been on the same page when it came to wanting a ladder for the library so it was awesome to finally make our dream a reality.

DIY Ladder
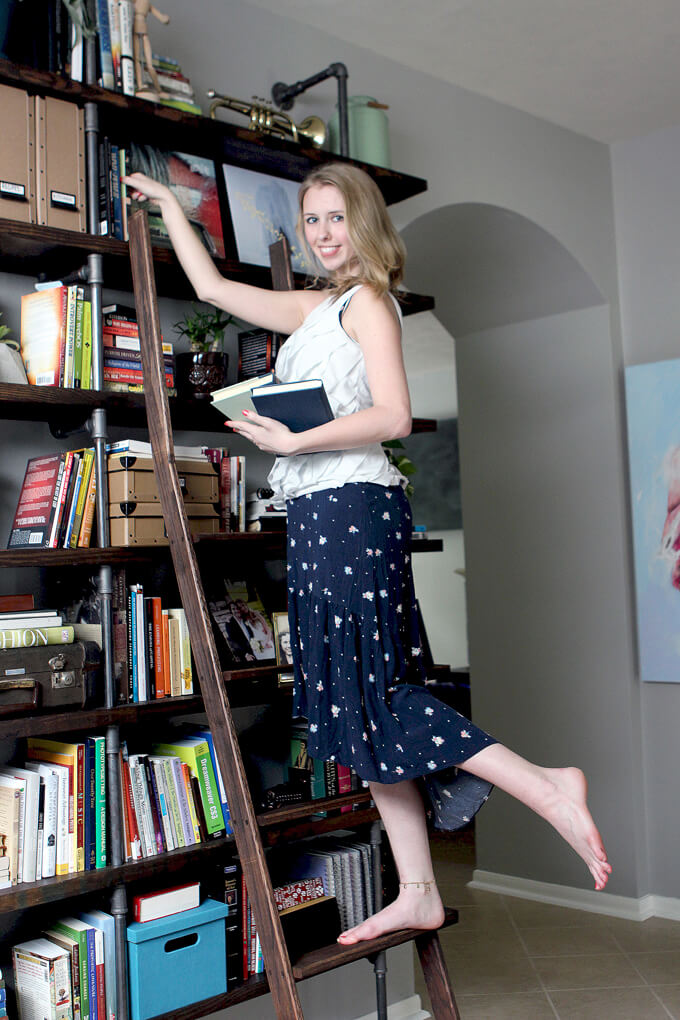
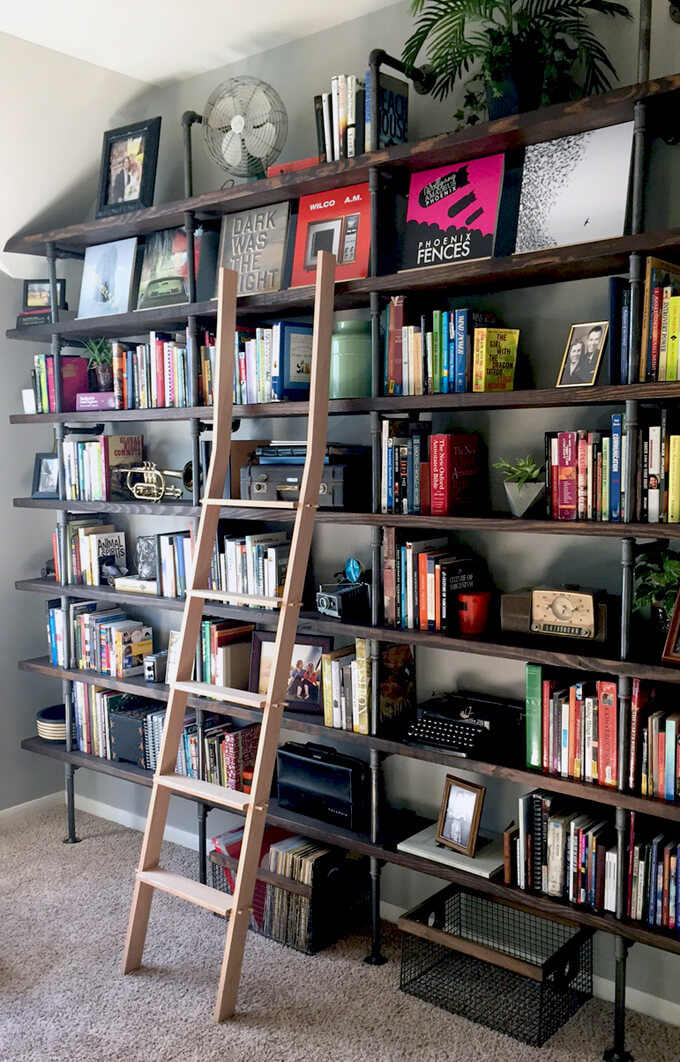
Here is the finished DIY ladder with my beauty. Isn’t the resemblance uncanny? Believe it or not I didn’t even have to kidnap her to get her to agree to this photo.

How to Build a DIY Ladder for Library Shelves

DIY Ladder
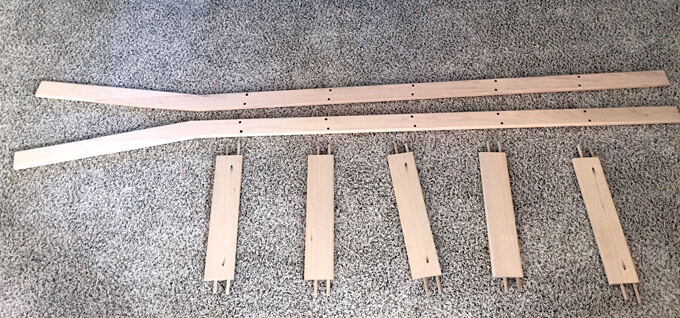
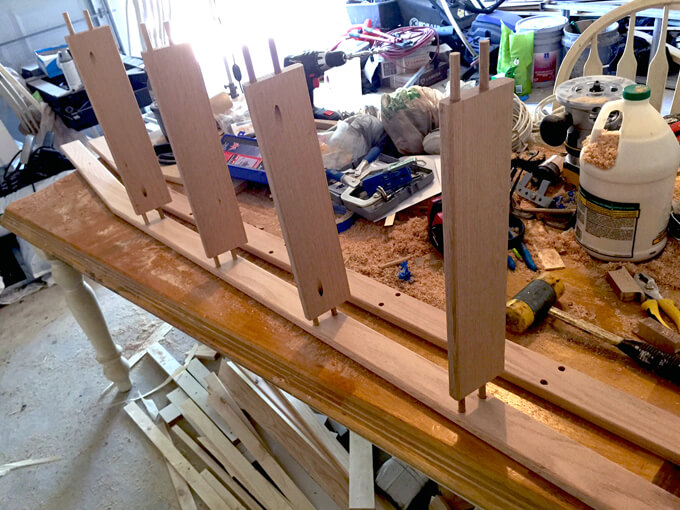
1. The design for our DIY ladder is fairly simple. We built it so each rung of the ladder has two dowel rods that extend through the vertical supports. Every other step screws into the vertical supports locking everything in place.

DIY Ladder
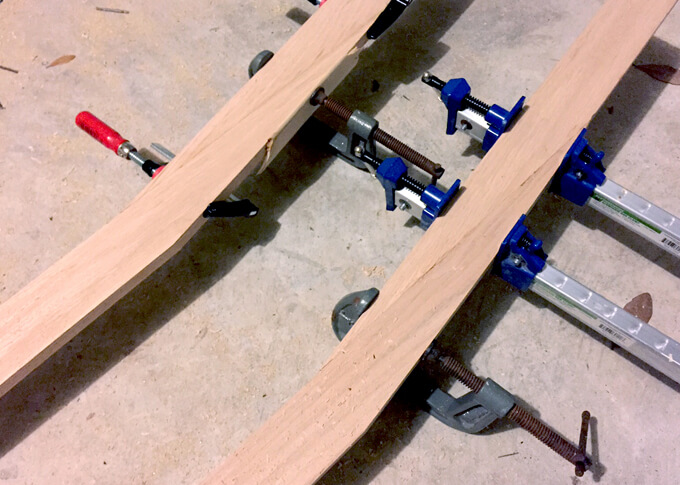
2. The top quarter of the ladder was cut at an angle and glued back together to create a bend. This allows the steps of the ladder to sit at a comfortable incline without extending too far away from the bookshelf.

DIY Ladder
3. Here is a candid behind the scenes photo of the ladder building process in the garage. Notice the extreme lack of organization that is happening in the background.

This is a realistic shot of what it looks like when you rush to build something between the very few hours of getting home from work and going to bed.

As the project progressed the pile of tools and leftover supplies grew larger and larger because cleaning during a project is not on my list of priorities. The pro to this approach is every tool in your garage is within hands reach.

The con is within reach usually means on the floor or some other inconvenient location for walking.

DIY Ladder
4. Once the ladder was assembled I got to be the first to test it. I didn’t get a photo of this part because the stakes were really high and I was afraid I might shed a few tears if anything went wrong.

I only had one shot and two days to get the ladder designed and built so it not only looked nice but was also functional and safe for the photoshoot.

Our first thoughts were to make a rolling ladder but then we decided that we would rather the ladder have a minimal design as to not take too much away from the shelves. Since the style of the ladder we built makes it light weight, it is easy to pick up and move to the spot we need to reach.

It is functional and adds character without overwhelming the already large and heavily occupied space. This decision ended up saving us quite a bit of money and the total cost to build the ladder came out to be about $60.

Our library is far from complete but getting closer with each project we finish. The ladder is a perfect addition to our bookshelves and one of our favorite parts of our library.

Don’t forget to check out how we built our large wall of industrial shelves.

PIN THIS PROJECT

DIY Ladder

DIY Framed Chalkboard

DIY Framed Chalkboard

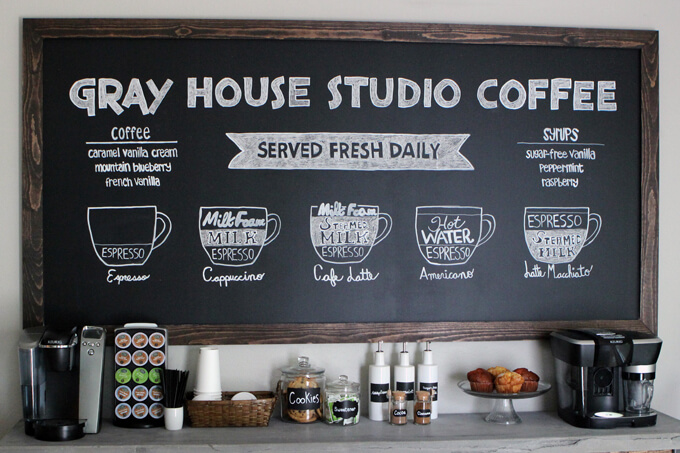
For this simple and versatile DIY decor project tutorial we will show how we made a custom sized framed chalkboard to hang above our coffee bar.

DIY Framed Chalkboard

I think it is safe to say large chalkboards have long since moved from being a staple item in classrooms to being a staple item in coffee shops. When looking for inspiration for our coffee bar, we looked at the interior design of lots of coffee shops (both in photos and in person). One of the common design choices we noticed is to utilize large chalkboards to display menus or art.

Having large chalkboards in the home is now becoming more popular as well to keep track of schedules or chores, weekly menu planning or allowing kids to conveniently express their creativity by having a place to draw on the wall (without actually drawing on the wall).

I love this idea because I always had a chalkboard hanging on my wall in my room when I was growing up. I loved to force er… I mean ask my little brother and his friends to play school with me. I was always the teacher of course.

We knew a chalkboard was a necessity for our breakfast nook to capture an authentic coffee bar feel. We just had to decide what form our chalkboard would take. When it came down to it we couldn’t make the commitment to painting the entire wall or even part of the wall with chalkboard paint since we just painted it gray. All the chalkboards we found to purchase were either not big enough or way too expensive.

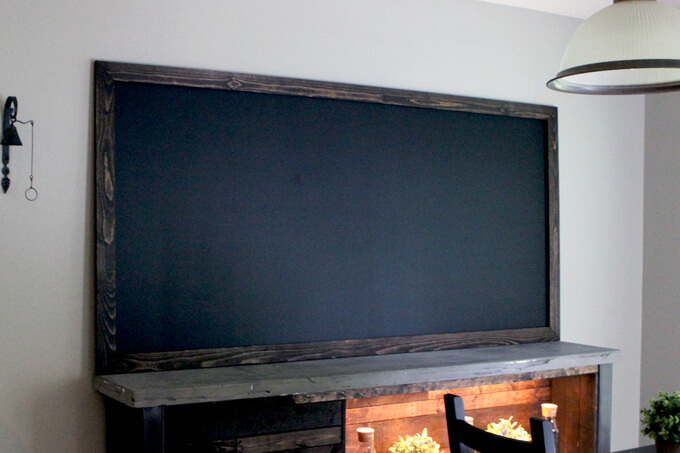
We decided to create our own 7 foot framed chalkboard. This was the best solution for us because we could make it the exact length of the coffee bar, it would fill up the large wall and we could customize the frame to match the wood on the bar.

2022 Personalized Christmas Ornaments
*** Thanks so much for supporting our small shop – Moon Rock Prints – this holiday season! ***

How To Make a DIY Framed Chalkboard

SUPPLIES

FYI: This post contains a few affiliate links to products we used to make this project. Gray House Studio does receive commissions for sales from these links but at no extra cost to you. We appreciate you supporting this site. Read our privacy and disclosure policy. You can also easily shop our recommended products here.

STEPS

DIY Framed Chalkboard

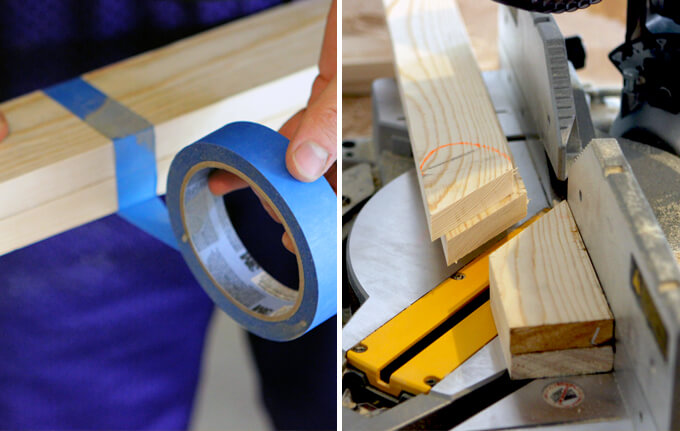
1. The first step was to make our frame. We used painters tape to tape together two of the pine boards that would be on the opposite sides of the frame together.

We taped the two longer horizontal pieces together and then taped the two shorter vertical pieces together.

This allowed us to make one cut through two boards and guaranteed that the matching sides of the frame would be the exact same size. We made our cuts with our miter saw.

After we cut the four pieces for the frame, we stained the boards with a Kona stain to match the wood on the coffee bar.

DIY Framed Chalkboard

2. For the chalkboard surface we used a piece of 4 ft. x 8 ft. hardboard tempered panel.

We chose to use this material because it was really cheap (less than $10 for a 4ft. x 8ft. piece) and it has a smooth finish.

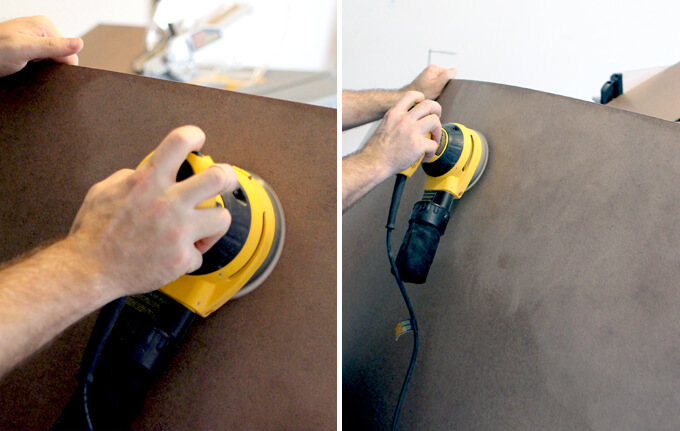
However, with no prep the chalkboard paint would most likely flake off the board. To prevent this, we sanded the entire surface with 120 grit orbit sand paper on our orbital sander.

It provides enough tooth for the paint to have something to grab but it does not make it too rough where the paint surface would look scratchy or bumpy.

DIY Framed Chalkboard

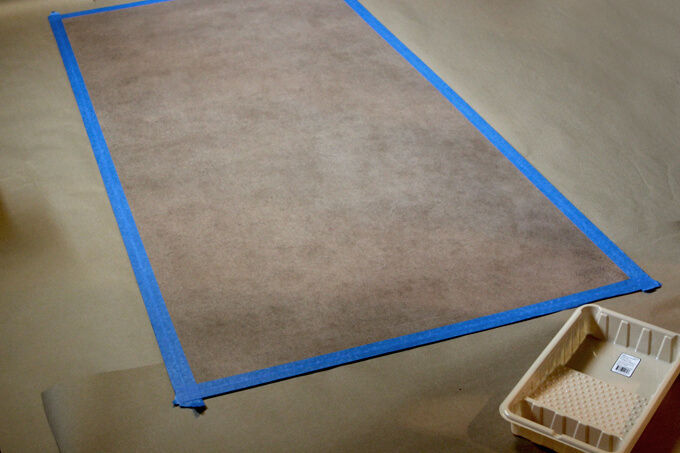
3. We planned to glue the frame to the chalkboard with wood glue so we taped off an area of the board with painters tape before we applied the paint.

We knew the glue wouldn’t adhere well to the chalkboard paint so we needed to make sure we still had an area of the original board to attach the frame.

DIY Framed Chalkboard

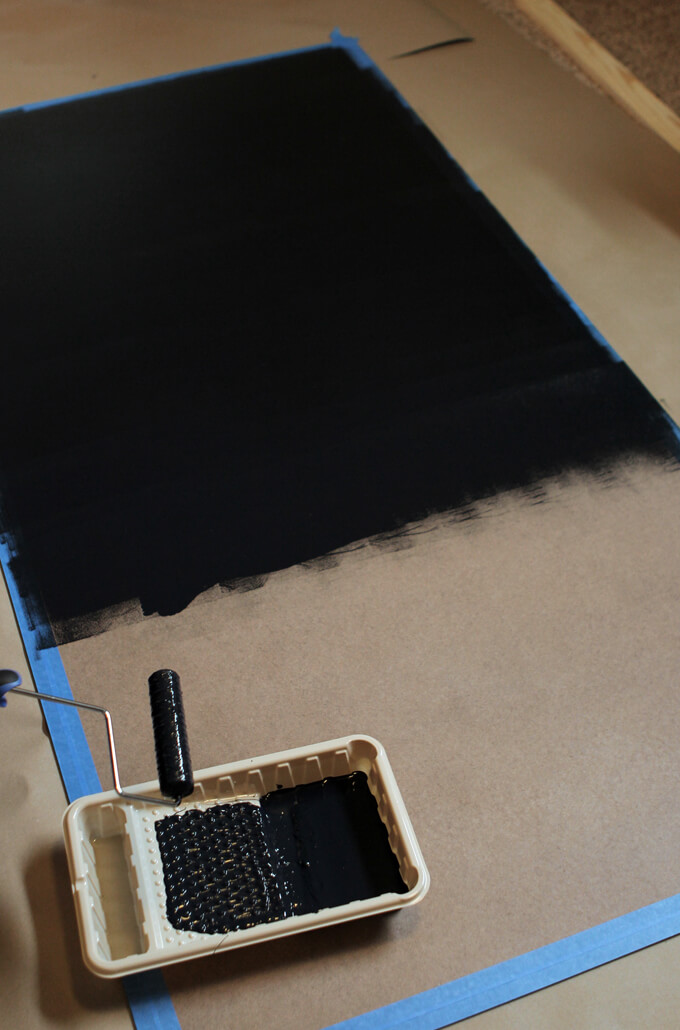
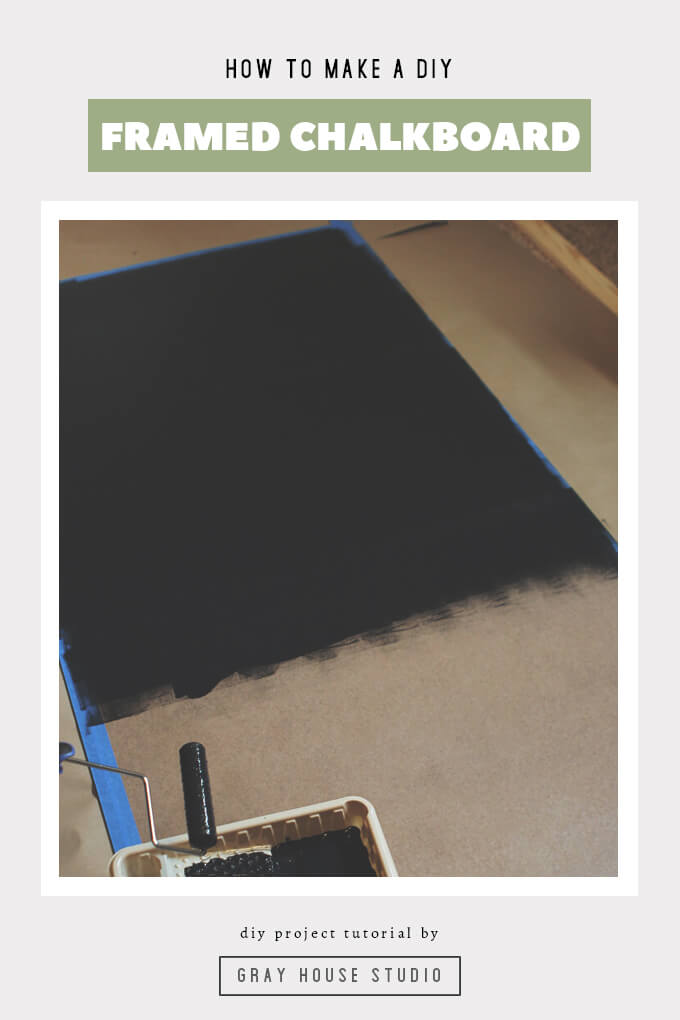
4. To apply the chalkboard paint we poured it into a plastic tray liner and used a foam roller to apply the paint to the board.

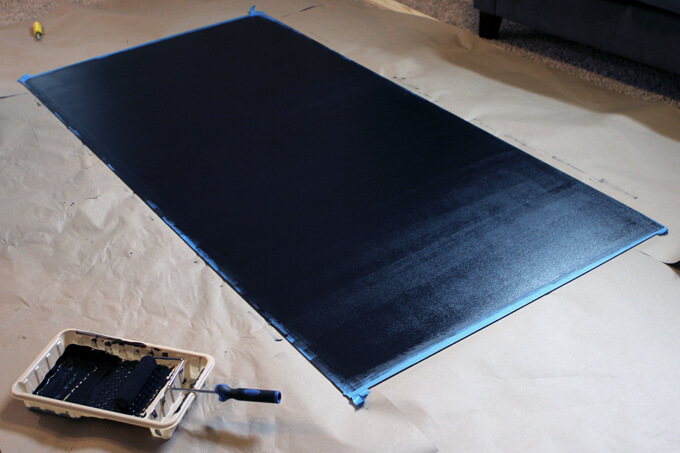
It worked really well to create a smooth finish. It took us two coats to ensure that all areas where completely and evenly covered.

DIY Framed Chalkboard

5. After we finished painting the board, we let it dry for awhile.

DIY Framed Chalkboard

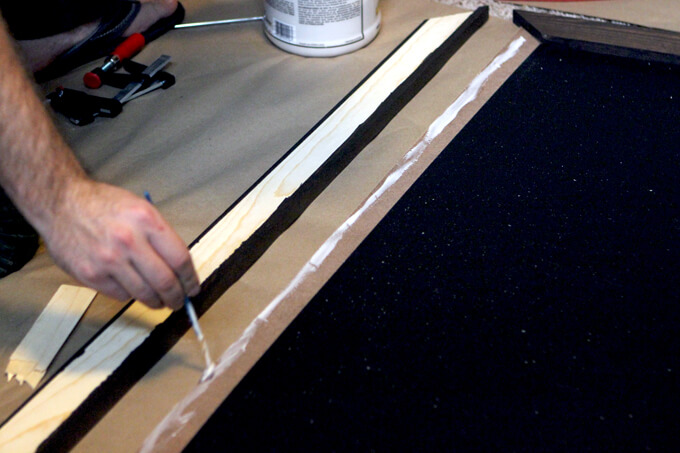
6. When it came time to attach the pieces of the frame to the board, we pulled off the tape and applied wood glue to the unpainted area of the board.

To avoid applying too much glue and having the glue squeeze out from under the frame onto the chalkboard surface, we applied the glue sparingly with a small paintbrush.

DIY Framed Chalkboard

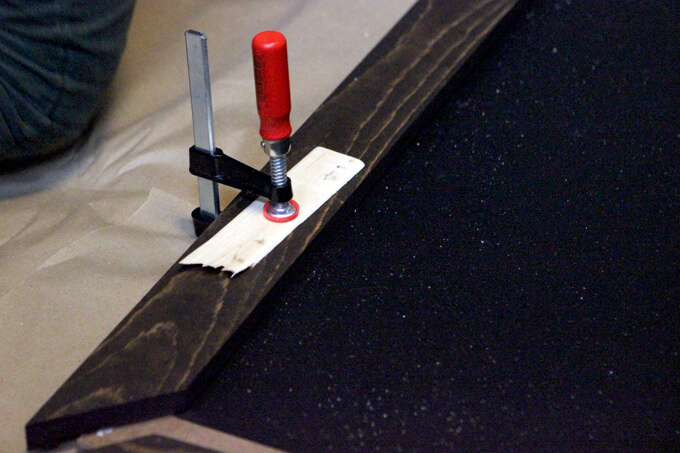
7. After the glue was applied to one side, we used small clamps to hold the piece of the frame to the chalkboard while they dried.

The pressure of the clamp can mess up the finish of the wood so as always we place a piece of scrap wood between the clamp and the frame.

DIY Framed Chalkboard

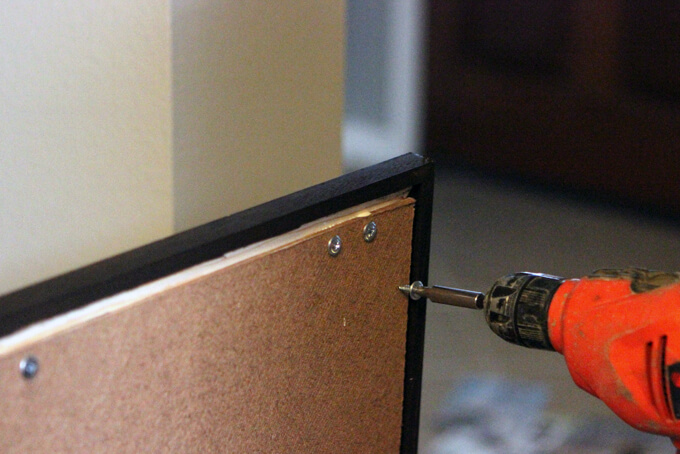
8. Once the frame was clamped to the board we attached the pieces of the frame together and the frame to the board with our drill and screws.

This provided extra strength to the bond and made sure everything was nice and secure.

DIY Framed Chalkboard

9. After we completed our framed chalkboard we added D-Ring hangers to the back and hung it above our coffee bar.

DIY Framed Chalkboard

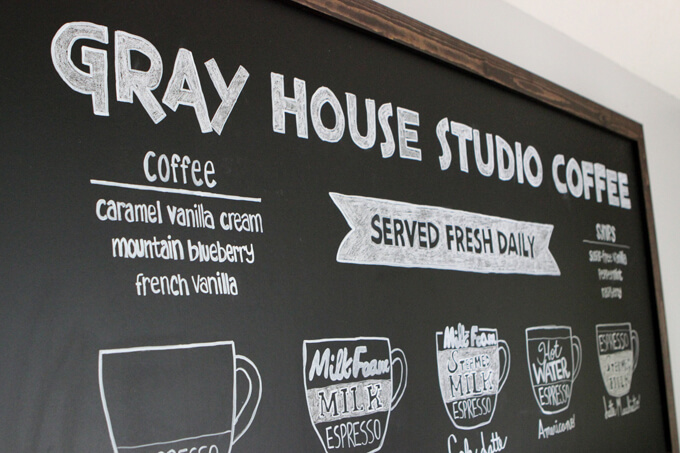
10. I designed our chalkboard art in PhotoShop first. I have pretty good handwriting but it was going to be nearly impossible with the scale of the chalkboard to make everything straight and scaled evenly.

I wanted the design to be personalized but also fairly minimal and clean. We worked in some common coffee shop phrases like “Served Fresh Daily”.

But I am thinking about adding our additional slogan, “At Gray House Studio Coffee, it’s not made until you make it yourself”. I printed out a copy of our design as reference.

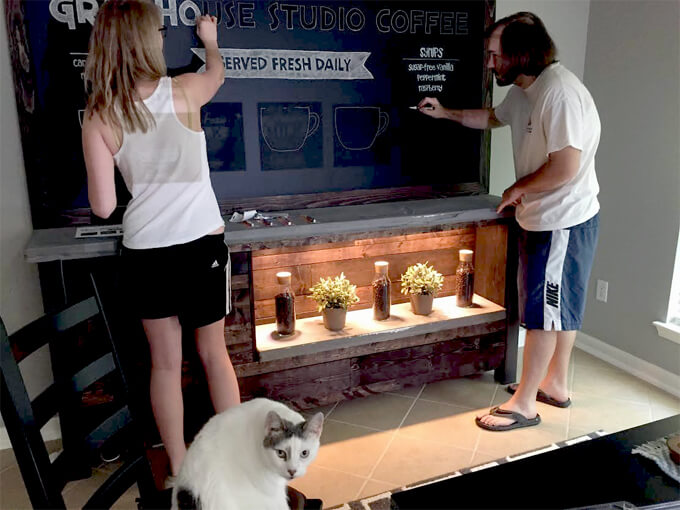
Then we used a projector to display the graphic we designed on the computer onto the chalkboard to trace. I would recommend doing this in a dark room or at night but since we were in a bit of a rush I did most of the tracing in the middle of the day with the sun shining through the windows so it was really hard to see what I was tracing.

Loading Preview…

Powered by Creative Market

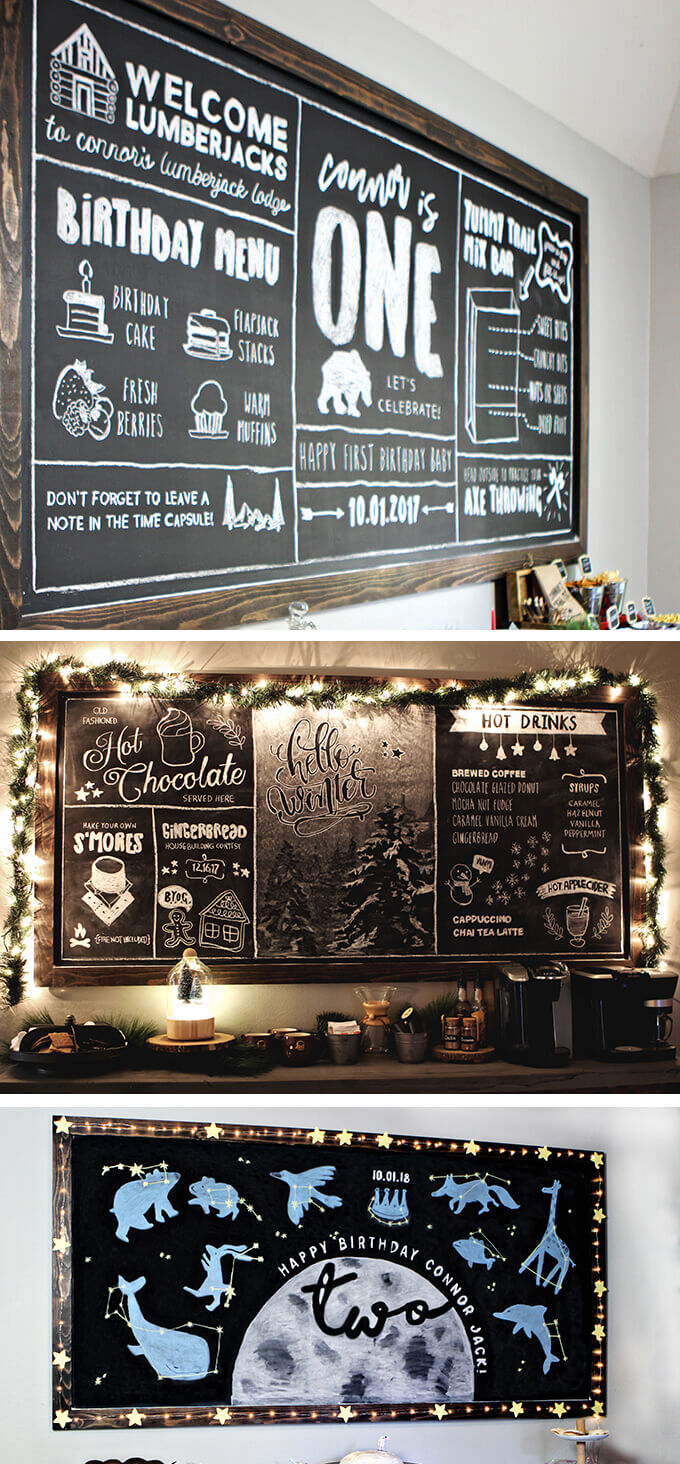
If you are looking for graphics you can use on your home coffee bar chalkboard, Creative Market has a lot to choose from! They are my favorite source to buy fonts and graphics for my DIY framed chalkboard designs.

DIY Framed Chalkboard

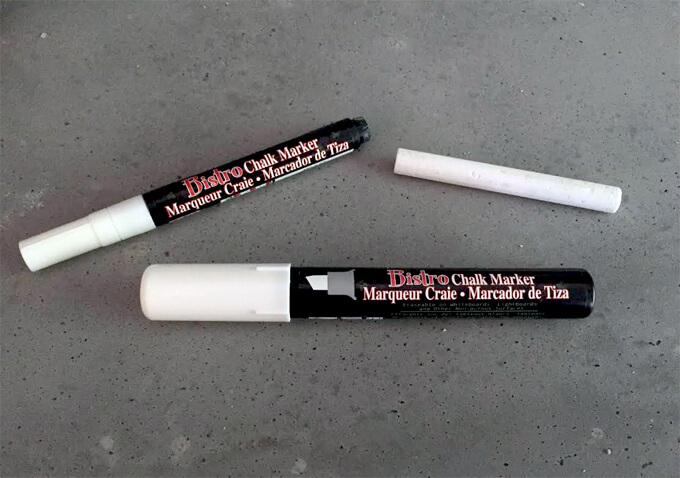
12. We used these Bistro chalk markers and they wrote nice and smooth. The fat tip one works really well for outlining because it makes for smooth, thick lines that you have quite a bit of control over.

I used the thin one for smaller details and smaller text where I wanted to trace over the words several times to make the letters thicker giving it a shaded appearance.

We used regular chalk to do all the shading. Regular chalk gives it gives it an authentic old fashioned chalkboard feel.

UPDATE: We left our chalkboard design for over two years and the chalk marker was pretty much impossible to get off. We had to eventually repaint a new coat of chalkboard paint over it.

I am not sure if that is because the chalkboard markers are meant to be more permanent or because we left it on there too long but while they wrote nice and smooth, I didn’t want to have to repaint the chalkboard after every design.

So now when we create a new design for our DIY framed chalkboard we use Anti-Dust chalk and a pencil sharpener to sharpen the chalk to a point so it is easier to trace.

There is nothing wrong with the chalk markers. If you clean your board off regularly or are looking for more of a permanent solution that won’t wipe off easily when you brush up against it, chalk markers might be the way to go.

However, this is our preferred method now when we redesign our chalkboard because the chalk wipes off very easily but by sharpening the chalk you have more control over the smaller details.

DIY Framed Chalkboard

A large framed chalkboard is a fun element to incorporate into the home.

DIY Framed Chalkboard

Whether they are intended to be functional, as art or both they bring personality to a room. They are especially perfect for home coffee bars to create that cozy and eclectic coffee bar feel.

DIY Framed Chalkboard

We love creating our own framed chalkboard because it really allowed us to get creative both in the size and the appearance of the chalkboard. Having the framed chalkboard span the entire wall of our breakfast nook really catches our guests attention and makes it one of our favorite spaces in our home.

PIN FOR LATER

A simple and versatile DIY decor project tutorial that show s how to make a custom sized frame chalkboard to hang in the home or to use and decorate for holidays or parties.

Picture Frame Planter

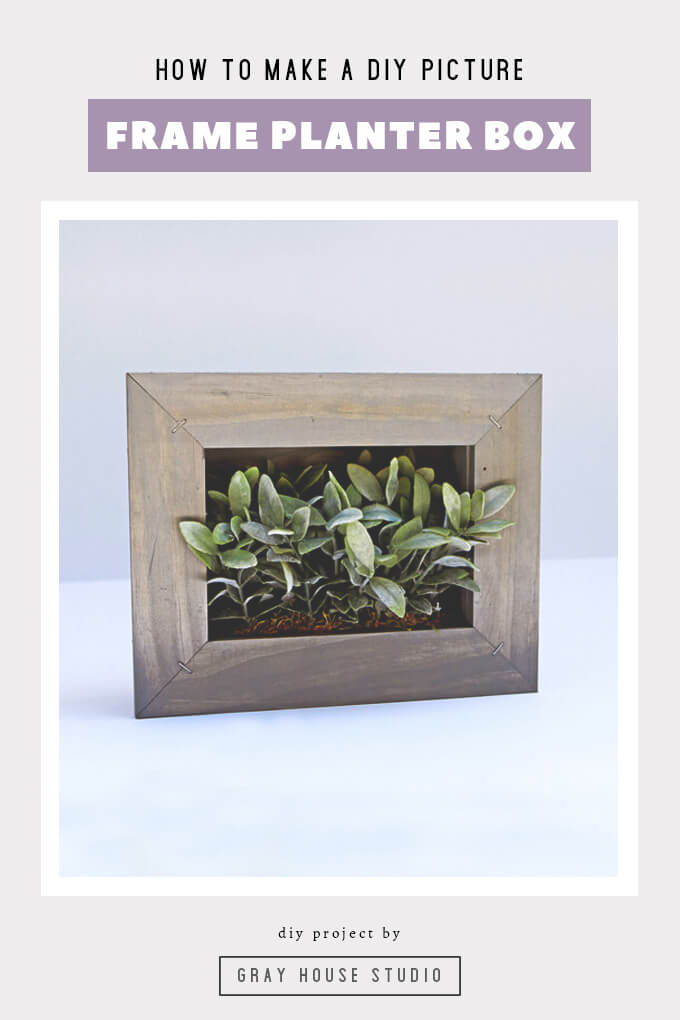
DIY Picture Frame Planter Box

If you are looking for a special homemade gift or you just want to build one for your own home, we are sharing how we built picture frame planter boxes. Plus, free PDF of the plans to help you build!

DIY Picture Frame Planter

Brent bought me the cutest picture frame planter last year for our anniversary. It had two tiny succulents that were adorable. And wouldn’t you know I killed one right off the bat.

I am just horrible at keeping plants alive, even little succulents. But I would like to make it known that the other one is still hanging in there, it just looks very lonely.

Anyway, I liked that framed planter so much that I wanted two more so I could hang three in our bathroom (the only place I can keep plants alive).

But I could not find the one he bought anywhere. However after looking at it closer we realized that it would be pretty easy and inexpensive to just build them ourselves.

Then it hit me, I enjoyed getting that picture frame planter box so much as a gift last year that I thought it would make for a perfect Mother’s Day gift. Plus, by making them ourselves we can customize them for each mom.

How To Build a Picture Frame Planter Box

DIY Picture Frame Planter

STEPS

DIY Picture Frame Planter

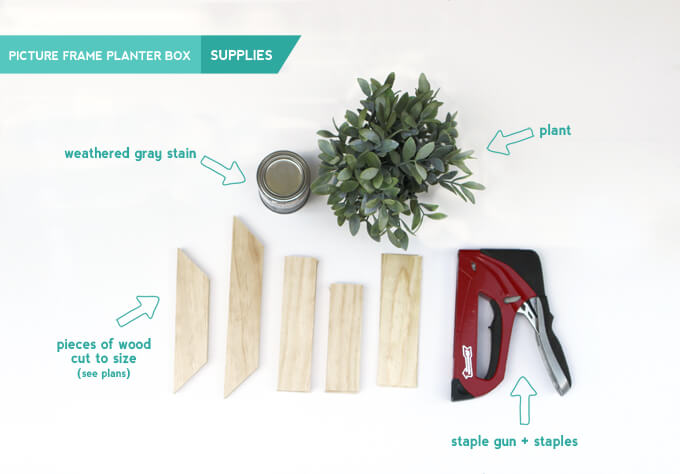
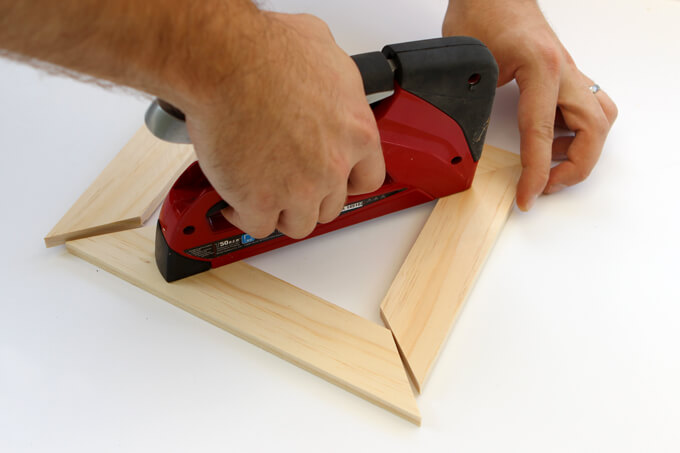
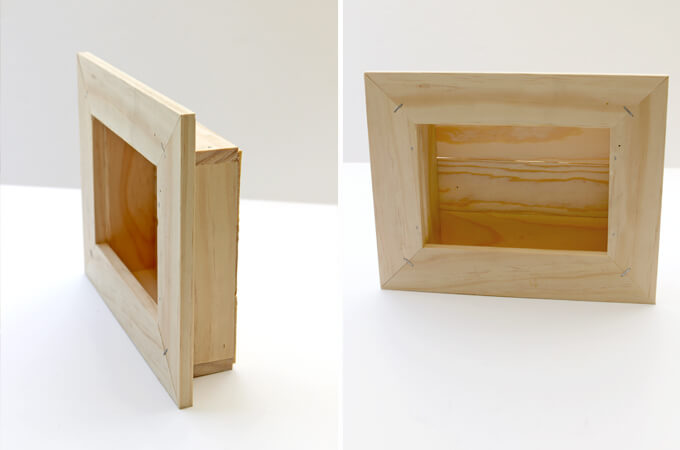
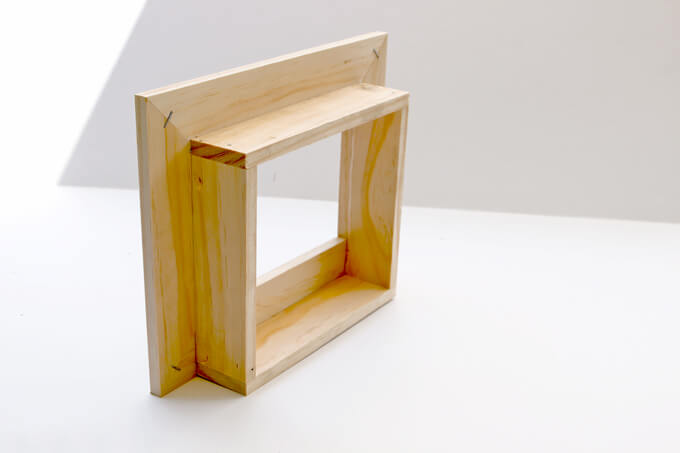
1. First we built the frame. We collected the four pieces of select pine we cut for the frame and pieced it together.

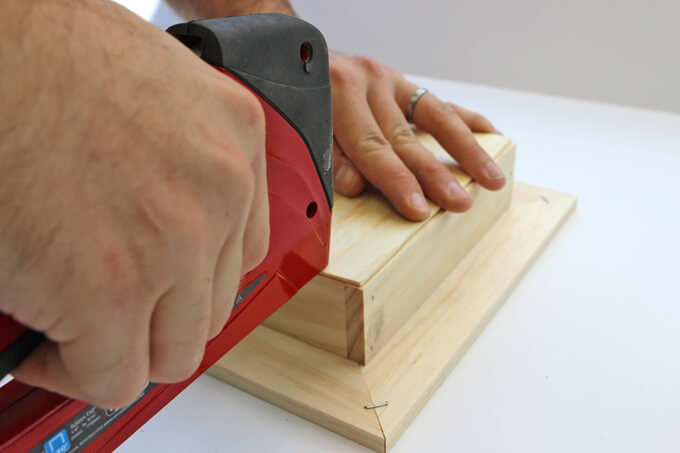
Then using the staple gun we stapled the pieces together at the joints to make the frame. We stapled each corner on both the front and back.

DIY Picture Frame Planter

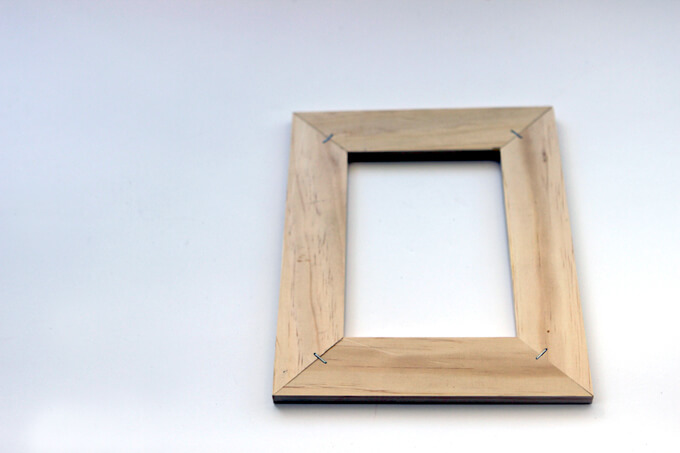
Here is the finished frame.

DIY Picture Frame Planter

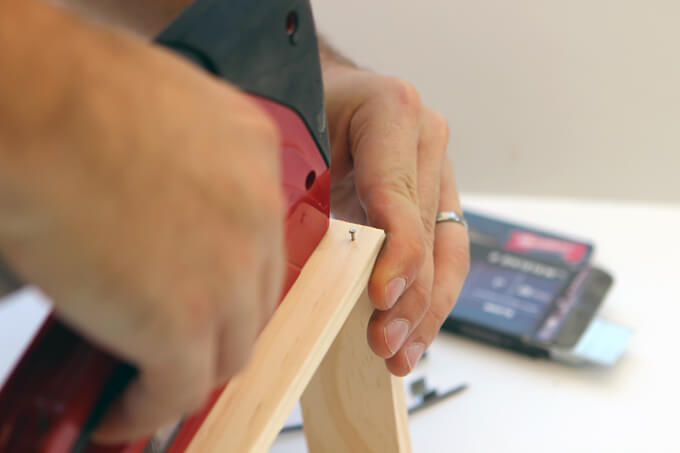
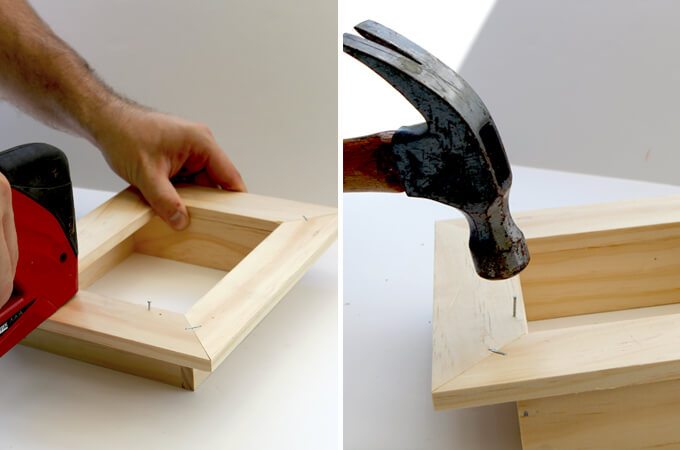
2. Next, we built the rim of the box. Our staple gun also uses finishing nails so we switched the staple gun over to finishing nails and nailed the sides of the box together.

DIY Picture Frame Planter

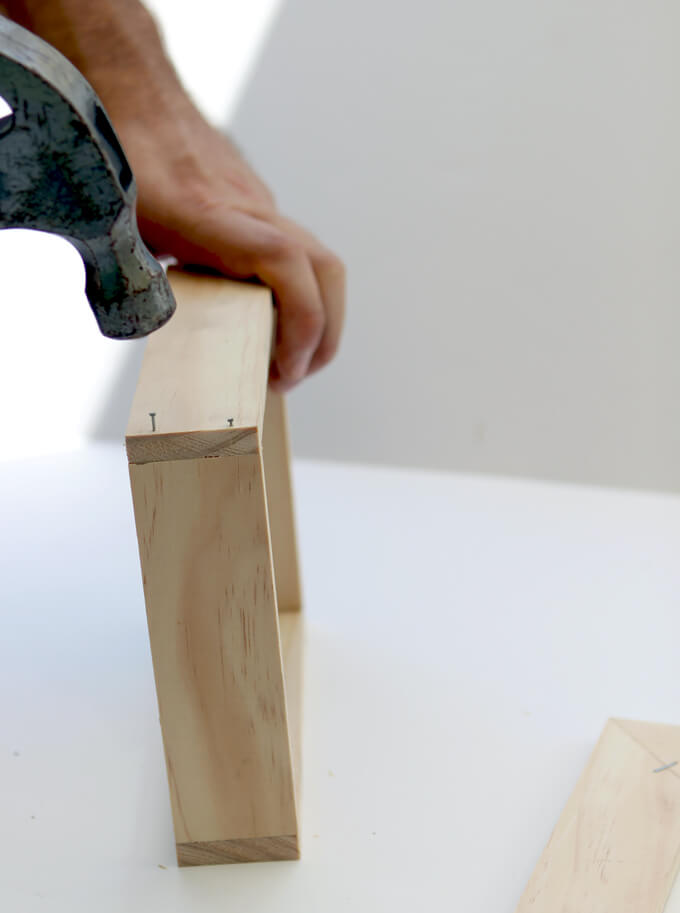
3. Although the staple gun is easy and convenient, it is not always powerful enough to go all the way through the boards but that is not a problem.

We just came back and used a hammer hammered the nails into the boards. If you are not using a staple gun, you can just hammer finishing nails into the boards.

DIY Picture Frame Planter

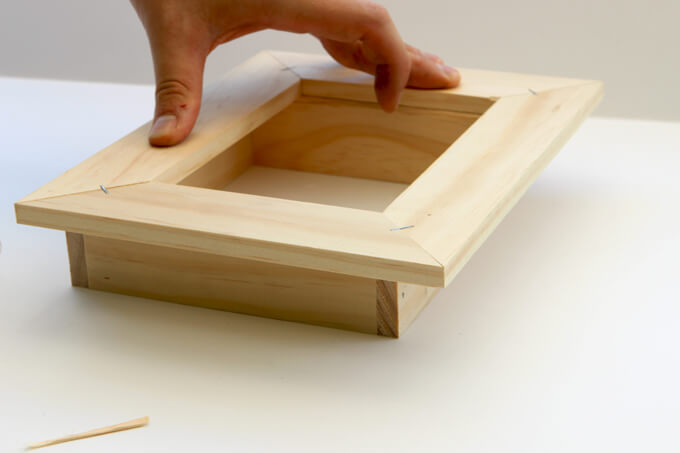
4. Once we assembled the rim of the box, we got ready to connect it to the frame. We lined up the bottom of the box with the bottom of the frame.

DIY Picture Frame Planter

5. We nailed through the face of the frame into the rim of the box close to the inside of the frame.

DIY Picture Frame Planter

This is what the assembled frame and rim of the box looks like.

DIY Picture Frame Planter

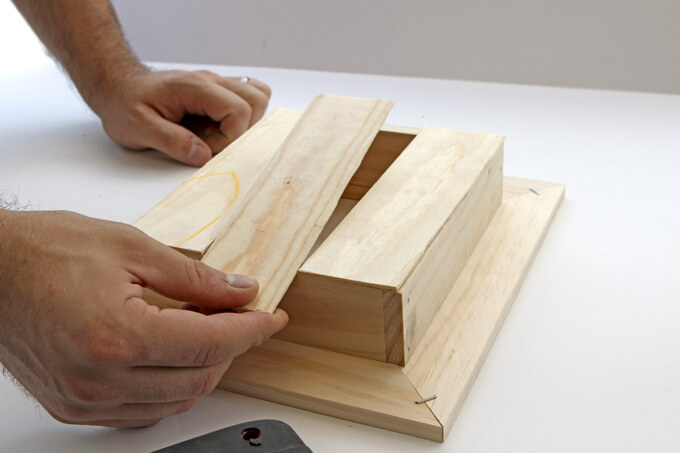
6. Next, we created the back of the box by attaching three thin slats of wood. You can also use one large piece as well.

DIY Picture Frame Planter

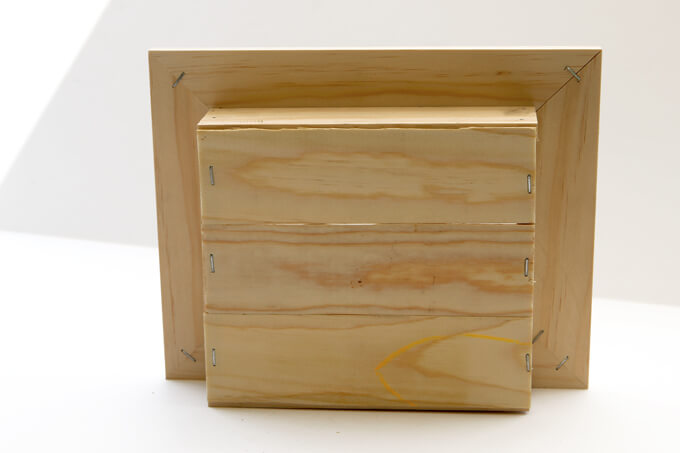
7. We secured the back slats to the rim of the box with a staple gun.

DIY Picture Frame Planter

DIY Picture Frame Planter

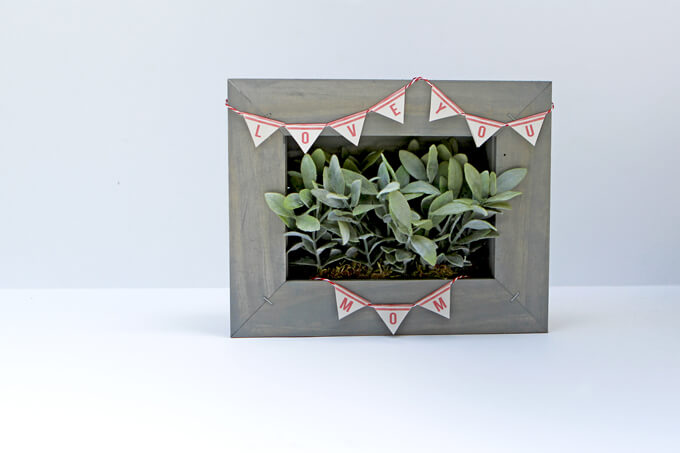
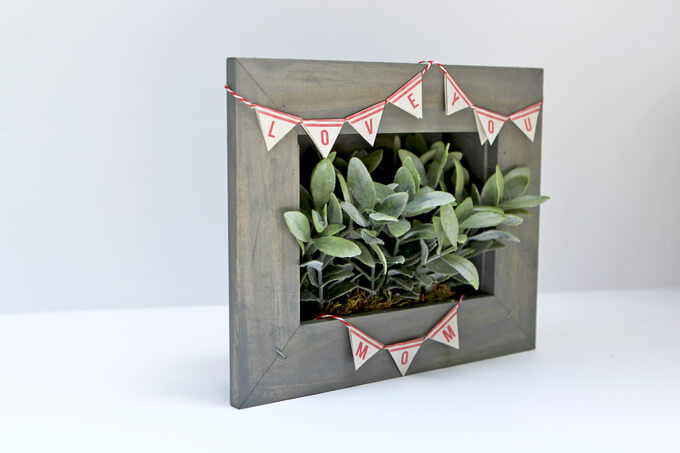
This is what the completed picture frame planter box looked like.

DIY Picture Frame Planter

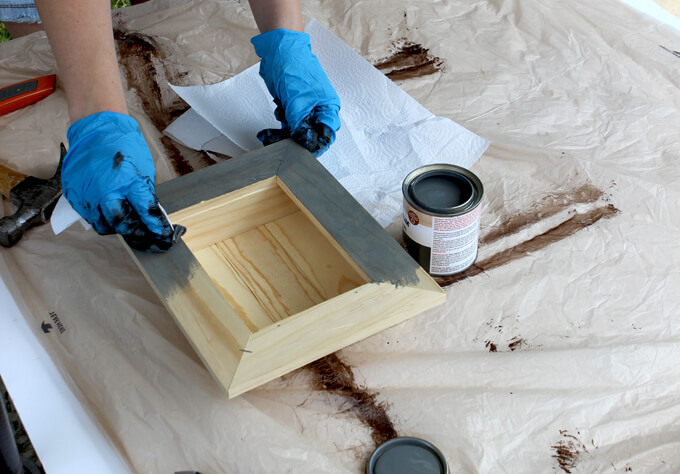
8. Next, we stained the box. We used a weathered gray stain but the possibilities are endless with what color stain or paint color you can choose depending on the style you are going for.

DIY Picture Frame Planter

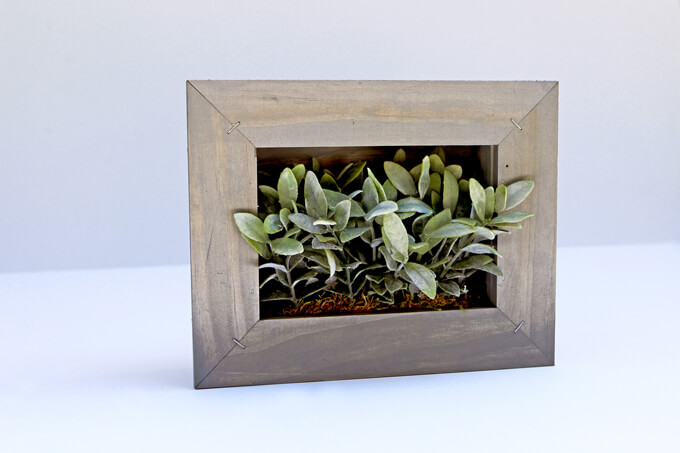
9. Once the planter box dried, we created our own simple artificial plant arrangement and added it the box. You can add your choice of live or artificial plants both would work great.

We love this planter because it is really versatile. You can set it on a table or attach picture frame hooks to the back and hang it up on a wall.

DIY Picture Frame Planter

If you are keeping it for yourself, then you are done! But we took it a step further since we will be giving it as a Mother’s Day gift. We wanted to give it a festive touch so we made a little “Love You Mom” banner.

The picture frame planter box is a really simple project that only take about an hour to put together. It is completely customizable, versatile and chances are you have most of the supplies in your garage.

Whether you are making it for yourself or someone else, they make for an awesome decor piece.

PIN FOR LATER

If you are looking for a special homemade gift or you just want to build one for your own home, we are sharing how we built picture frame planter boxes. Plus, free PDF of the plans to help you build!

Love Your Home

Love Your Home

Love Your Home

We were asked by Porch.com to share our favorite memories or “happy place” in our home as part of their love your home series (you can follow along at #loveyourhome). If you haven’t heard of Porch.com, it is a really cool home network that helps you find inspiration for your home, find the right professionals and get advice for all things home and DIY. We are so happy to be able to be a part of this series and share what we love about our home.

To us our home is our sanctuary. It is where we relax, recharge and our favorite part of all, create. Brent and I were paired up to work together on design projects as interns in high school and since then we have found that we are at our most happy when we are able to make, build and design things together. So it is no surprise to us that when we look at our home we don’t just see it as four walls where we live or just a place to come home to after work each night. We see it as a blank canvas full of possibilities and one of our favorite things about our home is not a particular piece of furniture or even a room but rather the process of making the house unique to us, making it our own.

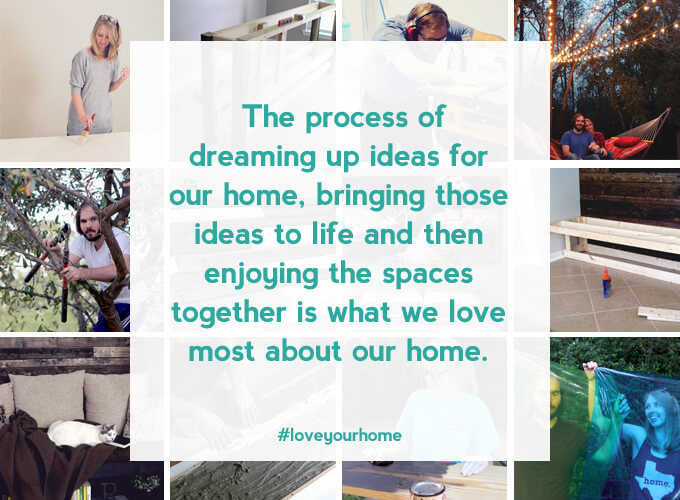
Now to be honest one of the main reasons we can so easily see our house as a blank canvas is because it is literally blank and bare. This is our first home and our one bedroom apartment’s worth of stuff didn’t come close to filling it up. Several of our rooms have sat empty for quite awhile now. However, rather than going out and buying a bunch of stuff to fill up the rooms (which we can’t afford to do anyway) we like to brainstorm for awhile on a way that we can make each empty space in our home have a purpose as well as incorporate our personal style. The process of dreaming up ideas for our home, bringing those ideas to life and then enjoying the spaces together is what we love most about our home.
Two of our current favorite spots in our home are areas that were completely empty and had nothing in them for over a year, our reading nook and our breakfast nook. These areas forced us to really put on our thinking caps, dream big and get creative to make the spaces work for us.

Empty Alcove to Reading Nook

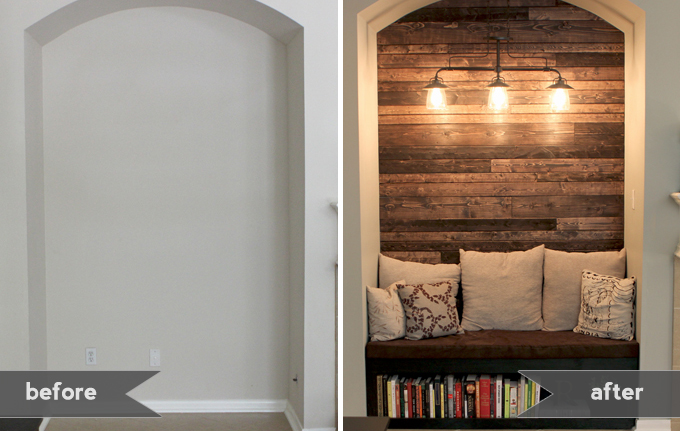
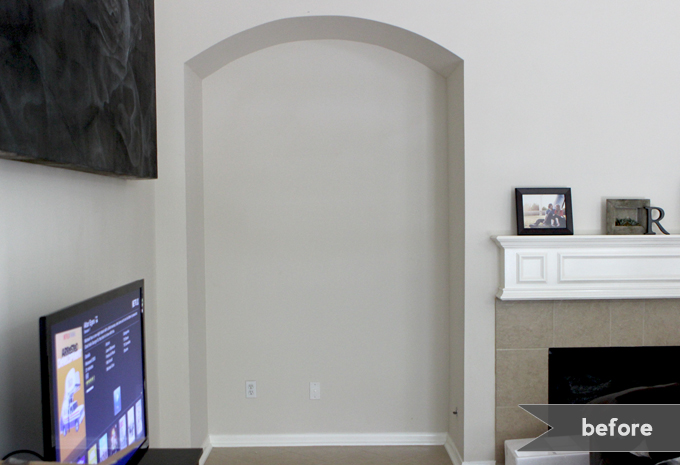
When we moved into our home we had an alcove next to our fireplace. There was an electrical outlet and a cable outlet in this area. Basically all signs (outlets) pointed to this being the place intended for the entertainment center and TV. However, we just didn’t like the feeling of the TV being off center so we opted to put it on a different wall. This decision left us with a big empty hole in our living room. We weren’t sure what we were going to do with it so we just left it and had to learn to be content with the void.

Empty Alcove to Reading Nook

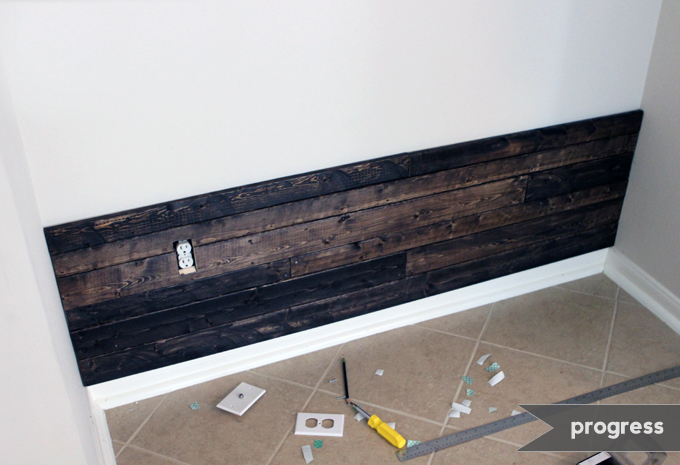
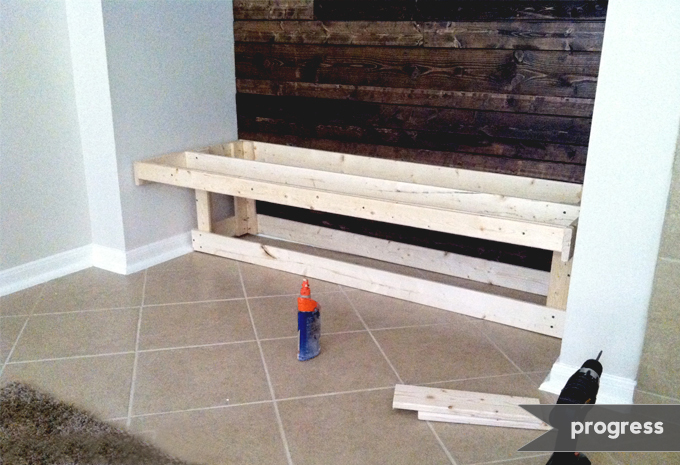
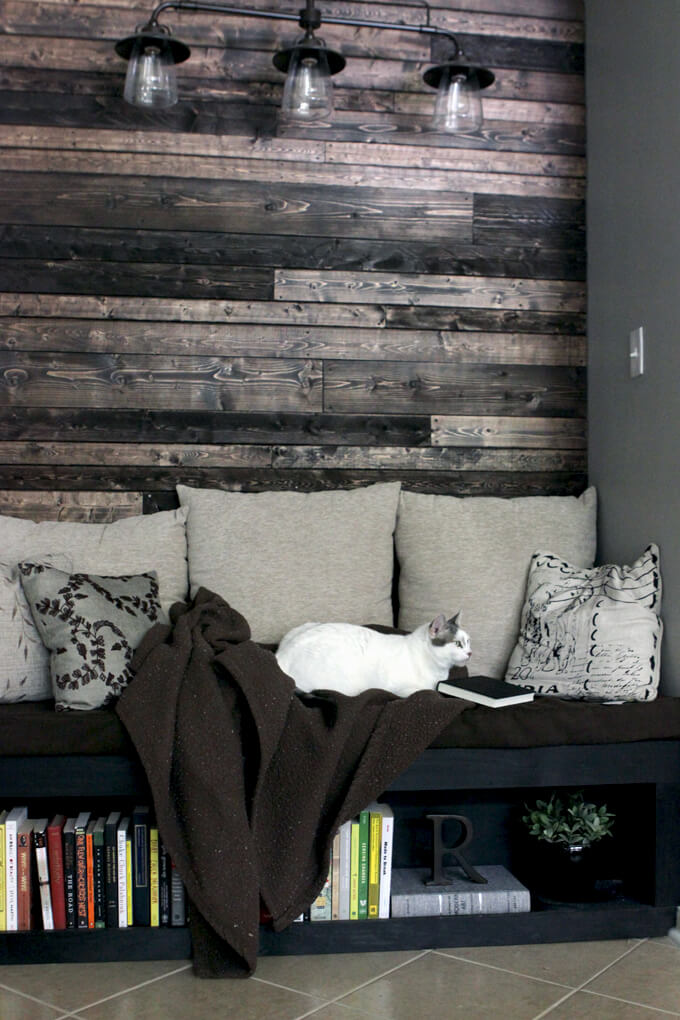
After about a year we started to give more thought to what we could do with the space and decided that based on our lack of seating issue in the living room, we could use the space to provide additional seating. One idea led to another and we ultimately came up with the idea of turning the empty alcove into a cozy reading nook. The process included cutting, roughing up, staining and installing the wood plank wall on the back of the niche. Then we built and stained a bench to fit exactly in the space as well as created our own custom cushion to fit the bench since it was not a typical size. Finally, we installed a fun light to really bring the space to life and brighten up a dark corner so it makes for the perfect spot to stretch out and read. This was our first major project in our home and really set the tone for our next projects and established our style.

Empty Alcove to Reading Nook

It is a favorite of ours because teamwork and a lot of laughs helped us to get through that never ending wood plank wall and the finished result has led to many cozy nights curled up reading in this inviting space. That is if the cat doesn’t beat us to it. Plus, it makes us happy when guests fight to sit in the reading nook over sitting on the couch.

Love Your Home

Empty Breakfast Nook to Coffee Shop Inspired Dining Area
Love Your Home

Another area that sat undecorated and unused for well over a year was our breakfast nook. I would like to say that is because we eat meals in our dining room but that is not true because we turned our dining area into our library. We are at that unglamorous stage of life where we eat most of our meals on the couch. There, I said it out loud. We had a small dining table set but the space it sat in was bare and cold.

Empty Breakfast Nook to Coffee Shop Inspired Dining Area

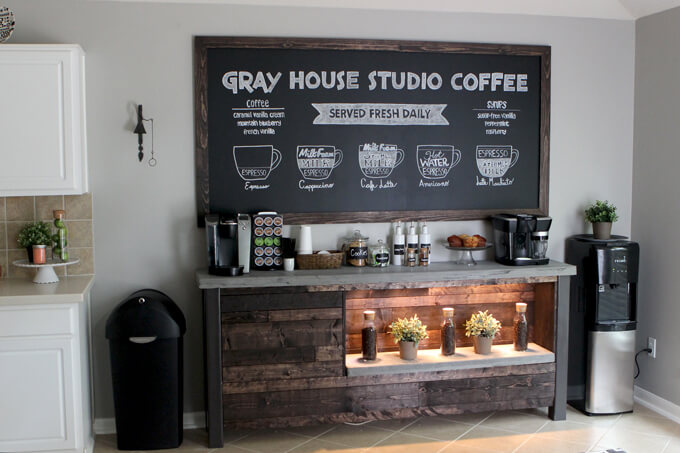
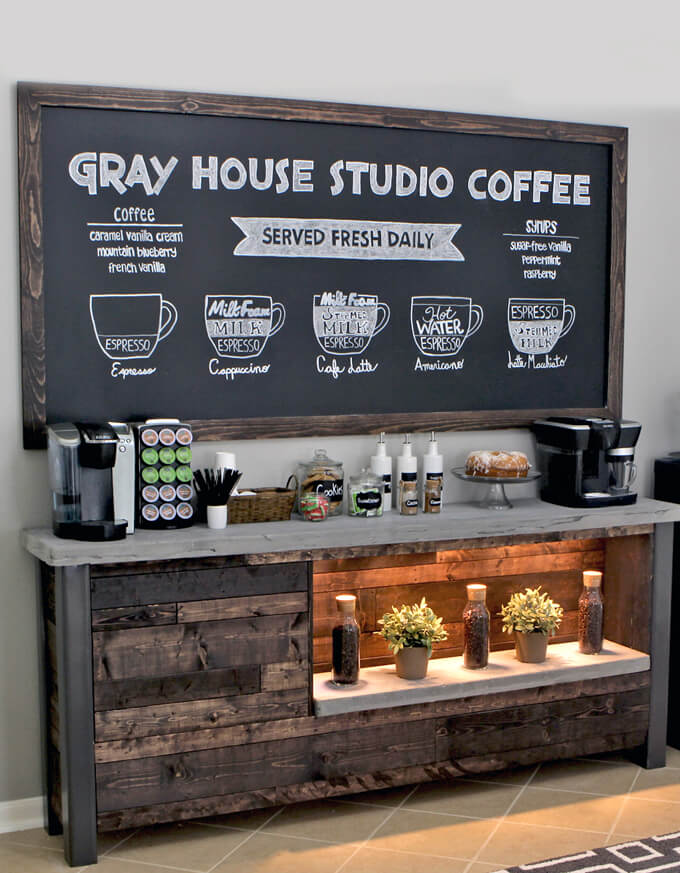
We had dreams, big dreams of transforming the breakfast nook into our own private coffee shop. This project was intense. We designed and built a 7-foot wide coffee bar from scratch and built the front of the bar to have the same weathered wood planks as our reading nook to tie the two rooms together. For the top we created concrete countertops and then built a custom framed chalkboard that was also 7-foot wide. We decorated the coffee bar with all sorts of fun jars and bottles. We kept our dining room table but added a rug underneath to define the space and spruced it up with a few little décor items.

Love Your Home
Love Your Home
Love Your Home

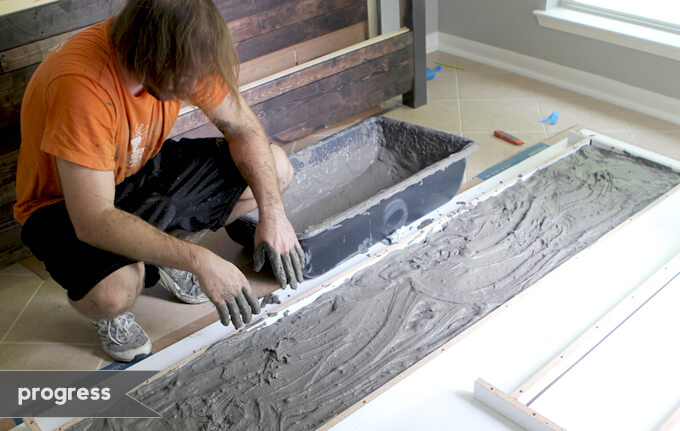
This project was one of our favorites because we will have a lot of crazy memories from building it. The whole process of mixing and setting the concrete was a crazy one that did not go perfectly but we are already looking back and laughing about it. The coffee bar really turned the space into a fun, eclectic area and now we find ourselves spending our mornings drinking coffee here together. And evenings eating dinner here are like we are having a date night every night in a private coffee shop!

Empty Breakfast Nook to Coffee Shop Inspired Dining Area

We have learned that decorating your first home when you are on a budget is not a sprint but a marathon and leaving rooms empty for a while to eventually create spaces that you absolutely love is okay. Because it is the journey to creating our perfect home together that is the fun part. What we love most about our home are the memories we are creating as we dream up ideas, design, and build out our favorite spaces together.
Love Your Home

DIY Coffee Bar

Coffee Bar Build

Inspired by the cozy feel of coffee shops, we designed and built our own large DIY coffee bar to bring the a calming coffee shop atmosphere to our breakfast nook. Below is an outline of how we built our coffee bar base.

DIY Coffee Bar

Our large coffee bar build turned out to be pretty intense. We designed, built, and decorated the entire massive piece of furniture in just a week. A week of 3AM building sessions, closing down hardware stores, and concrete mixing….well….more like fighting with concrete.

Brent’s DIY coffee bar design really did exceed my expectations. It filled up our long empty wall perfectly and completely transformed the boring space into a warm, eclectic and inviting area.

Interested in building your own DIY coffee bar? Below we outline how we built our coffee bar base.

How We Built Our DIY Coffee Bar Base

project plans

DIY Coffee Bar Woodworking Plans

Get our Coffee Bar Base Plans

When you purchase our coffee bar base plans you get a 17 page PDF with a detailed materials list, a cut list, dimensions for each piece, and building instructions. We appreciate your support of Gray House Studio!

steps

Building our DIY Coffee Bar

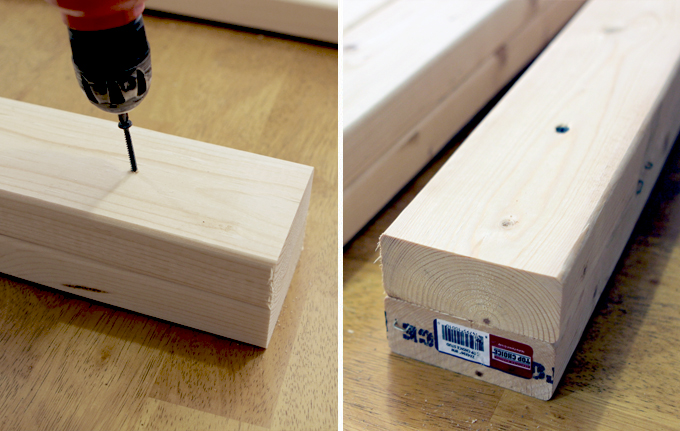
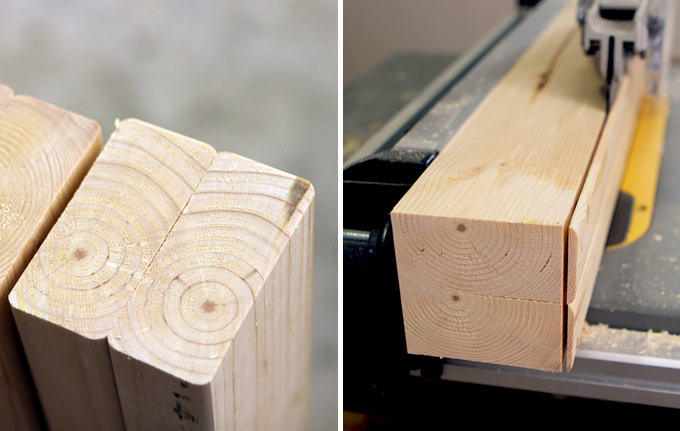
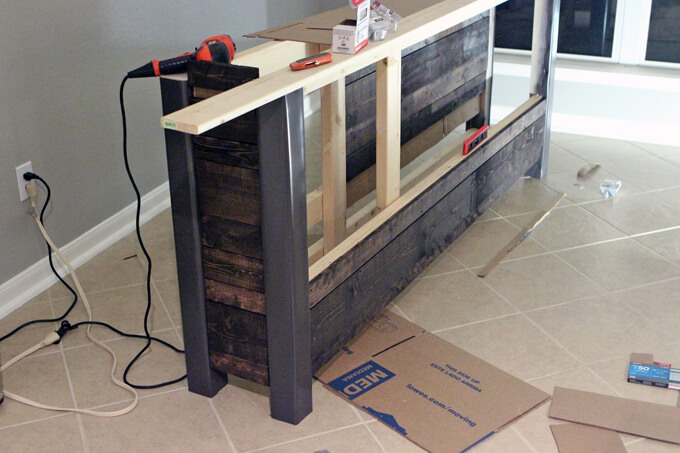
1. The legs of the coffee bar are actually made of wood! This trick saved us a lot of money. To make each leg we combined two 2″x4″ boards by screwing them together.

After we got them all assembled, we realized we could have just bought 4x4s. Duh! After we combined the boards together, we ran the boards through our table saw to square them up.

Building our DIY Coffee Bar

Building our DIY Coffee Bar

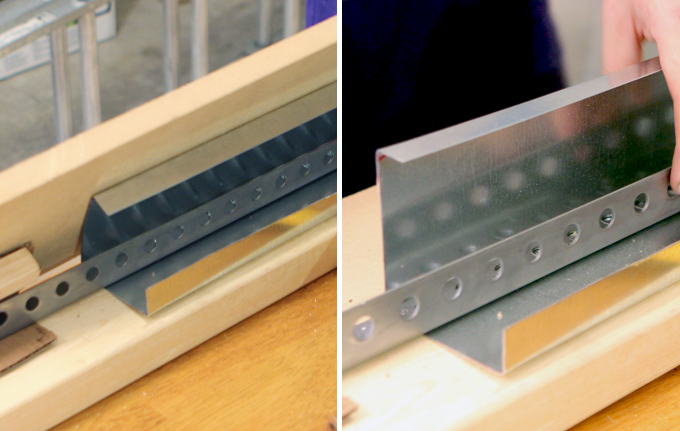
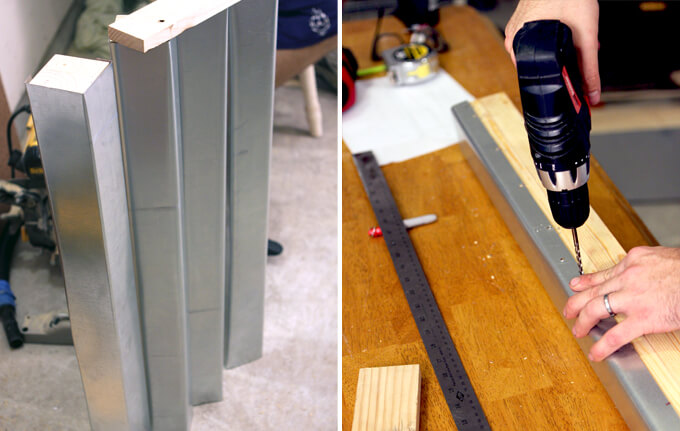
2. To make the legs appear as if they are steel we wrapped each wooden post in sheet metal.

We didn’t have access to the actual tool to bend sheet metal so it was pretty difficult to get it formed into the right shape to cover the wooden post.

We improvised and made our own version of a sheet metal brake out of some scrap wood and a piece of angle iron. By clamping the sheet metal in between the wood and the angle iron, we could bend it around the edge of the angle iron creating the shape we needed. After we wrapped each leg, we secured it to the wood with a drill and screws.

Building our DIY Coffee Bar

Building our DIY Coffee Bar

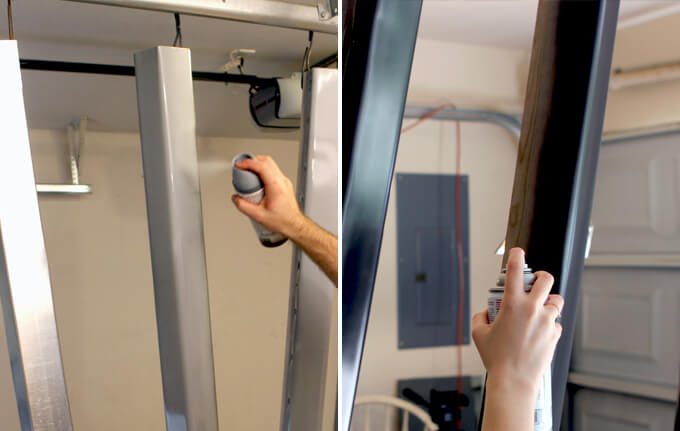
3. Next we prepped the legs for paint and then spray painted a primer on them.

We let the primer sit over night and then the next day we spray painted them with an oil rubbed bronze spray paint.

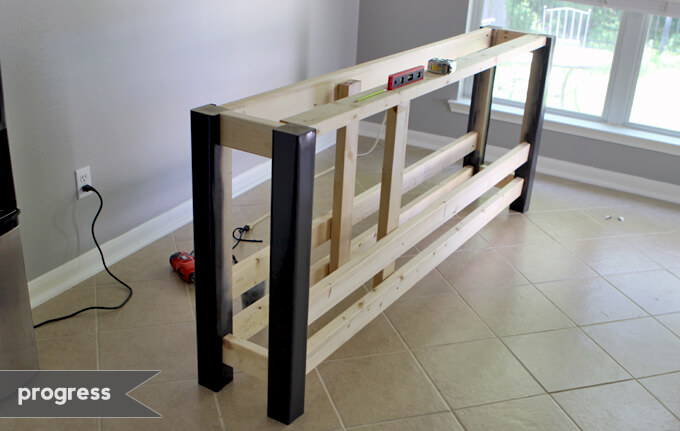
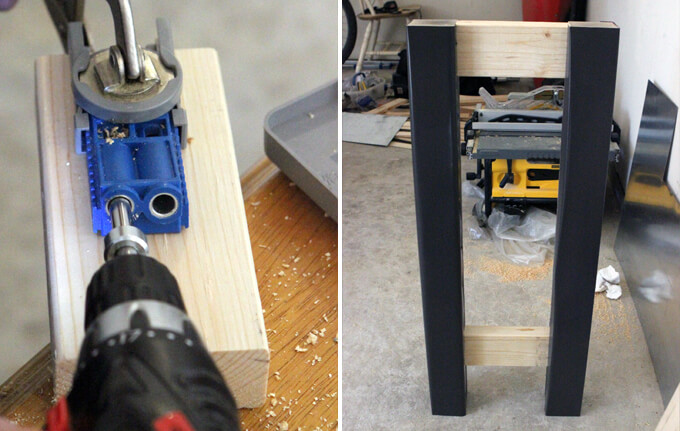
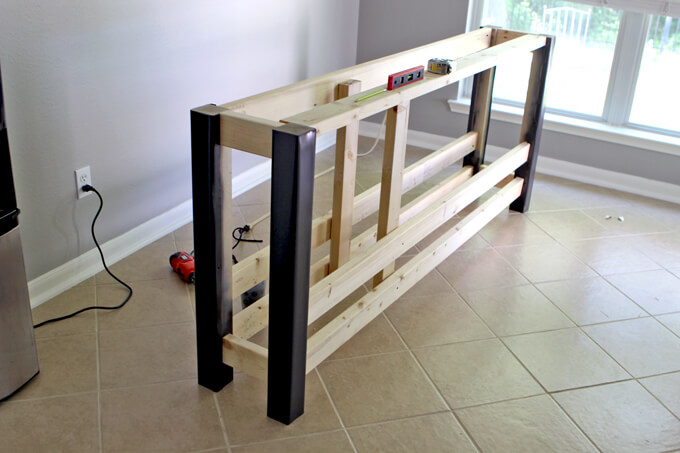
The legs are held together by two pieces of 2″x4″ lumber and they are secured together with pocket screws.

We used our Kreg Jig pocket hole kit to drill the pocket holes.

Building our DIY Coffee Bar

Building our DIY Coffee Bar

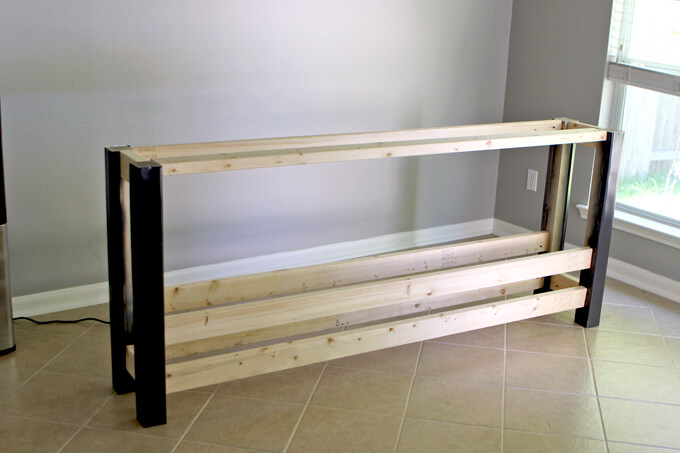
4. The support structure for the coffee bar base is made of up 2″x4″s. Most furniture does not use 2″x4″s because they would make the piece super heavy.

But for this project it helped us save money. Plus, I’m not sure if in any capacity you could make a 7 foot bar with a concrete countertop light, so the extra weight wasn’t a concern of ours. This thing is not going anywhere.

Building our DIY Coffee Bar

5. We thought ahead and knew this thing was going to be massive and impossible to move very far so we built the entire thing (concrete top and all) right in place in the breakfast nook.

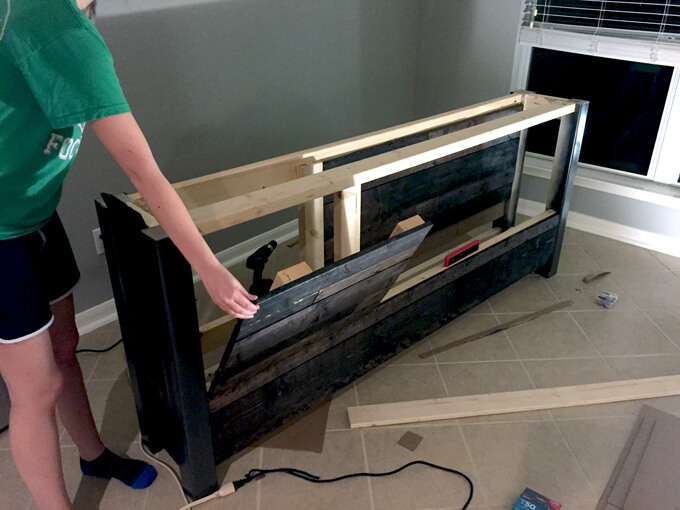
After we got the main structure put together, we added vertical supports to add strength for the braces that would support the concrete countertop and to frame out the recessed opening and shelf that would go in the front of the coffee bar.

Building our DIY Coffee Bar

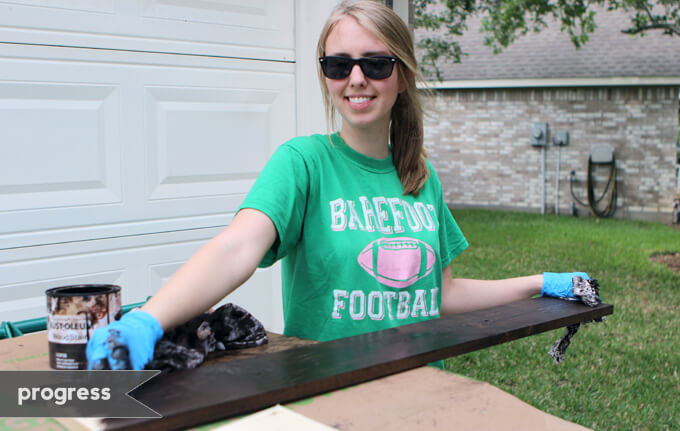
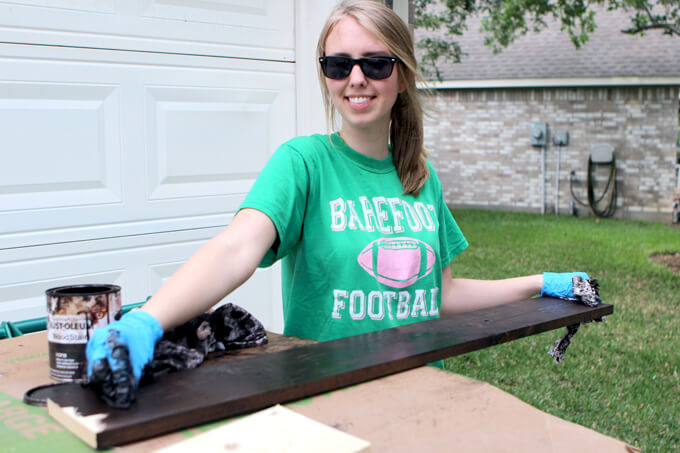
6. Next up was my favorite part, staining! We used our favorite stain, Rust-Oleum Ultimate Wood Stain in Kona.

We wanted to tie the breakfast nook area into the living room area since it is one big open space so we thought bringing in the weathered wood planks from the wall in the reading nook would be the perfect solution.

Building our DIY Coffee Bar

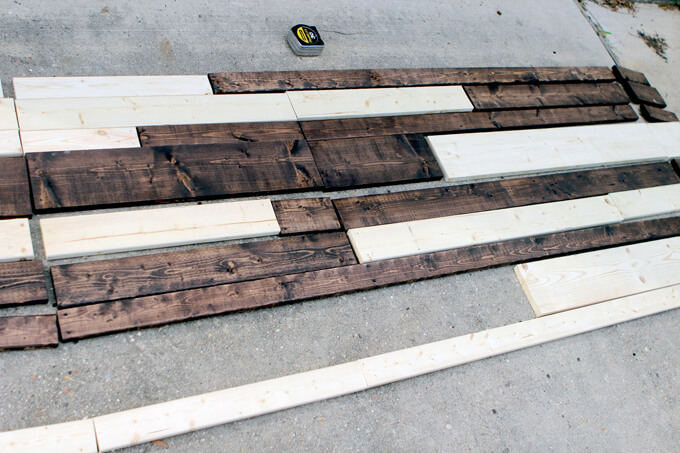
7. We ran through our whole process of creating weathered wood by varying the degree we would rough up the pieces to alternate shades and patterns. But this time we did it rapid speed.

We cut, roughed up and stained all the boards for the entire bar in a matter of maybe two hours. It was a whirlwind of staining and in the process I managed to get stain all over myself, including on my face and in my hair. I don’t know how that happens. We laid out all the boards on the ground this time so we could easily create a nice pattern of varying colors and lengths.

Building our DIY Coffee Bar

8. By the time we finished staining all the boards and they dried, it was already getting late. But we were so passionate about this project that we were in the zone!

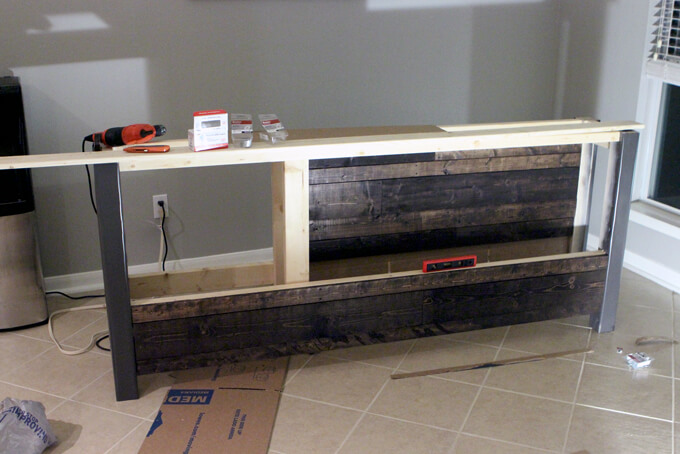
We pushed on and started attaching the wood planks to the coffee bar structure. To do this we screwed through the 2″x4″s into the wood slats.

Building our DIY Coffee Bar

9. We added the planks to the bottom, the back of the recessed area and even the sides between the legs to give the allusion that it was wrapping around the entire bar. I love how the sides turned out.

Building our DIY Coffee Bar

10. Finally Brent built the front of the hidden storage area that opens on a hinge to a shelf where we can store extra coffee supplies and mugs. We then covered that piece with the weathered wood planks as well.

Building our DIY Coffee Bar

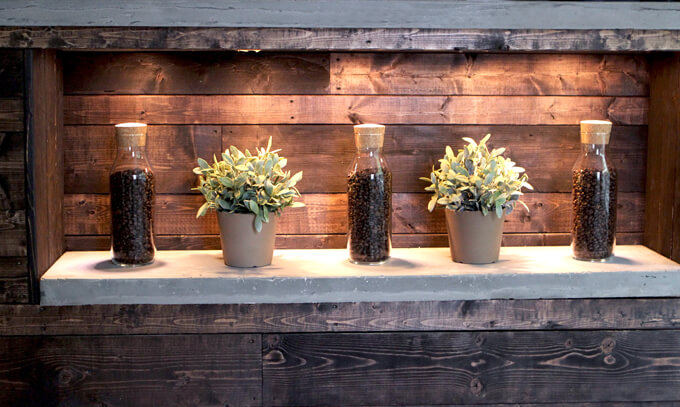
11. To finish the coffee bar base we added more wood planks to the sides of the recessed area to complete the look. Then we attached our concrete shelf.

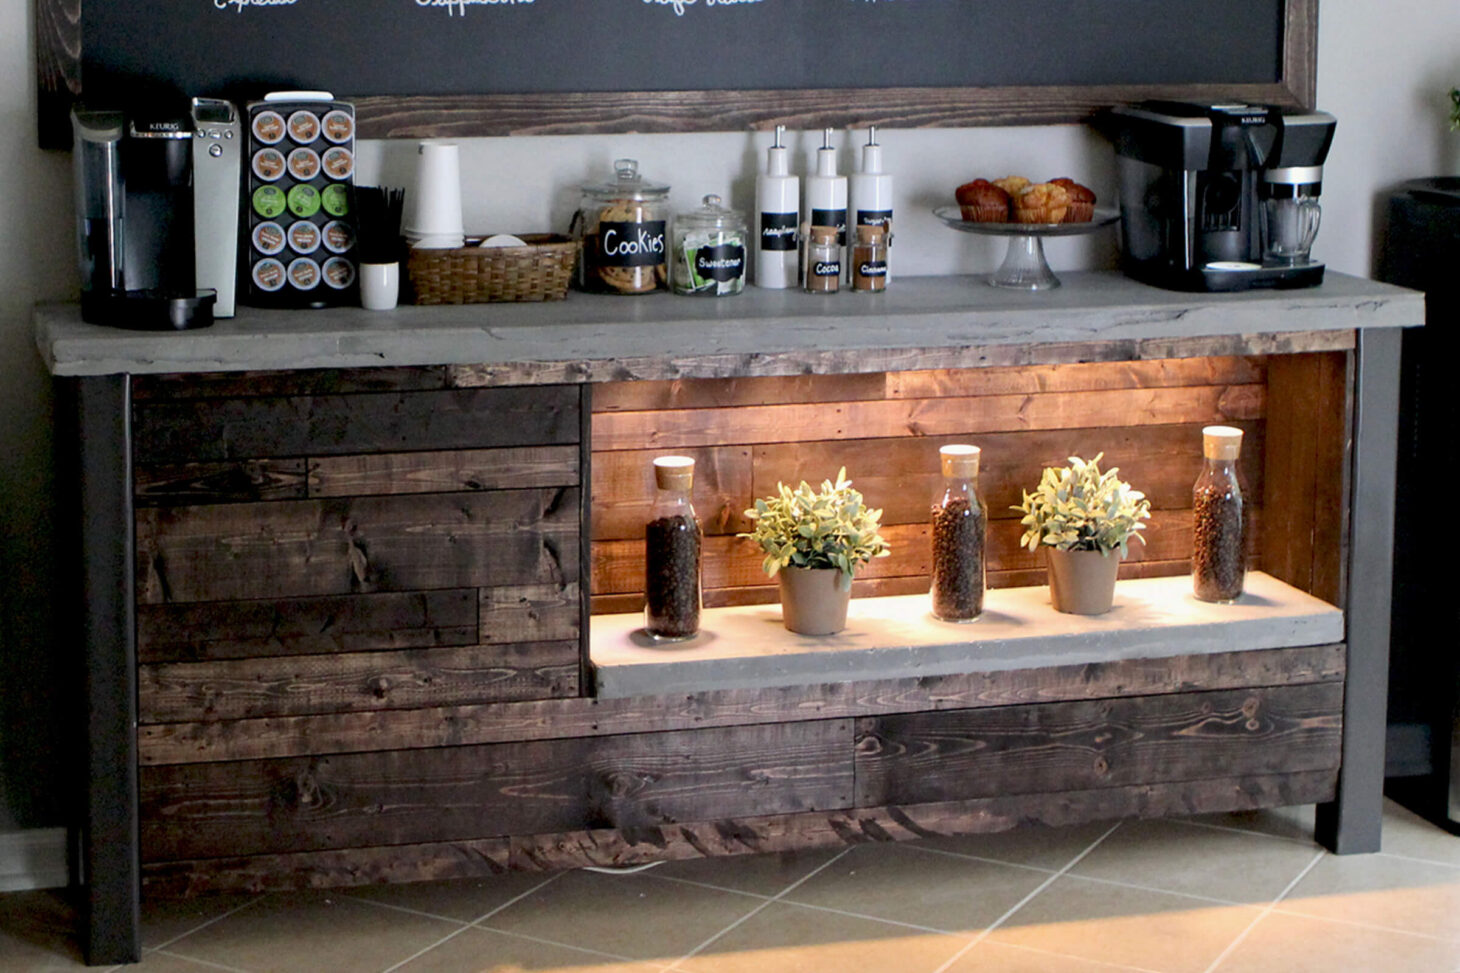
Brent installed lights below the counter top and I decorated with these cute bottles that I then filled with coffee beans.

The plants are also from Ikea and add a bit of color to a very neutral and industrial design. I think the shelf is my favorite part of the coffee bar. It adds so much depth and interest and we think it really makes the piece look unique.

To get detailed building instructions for our coffee bar, check out our DIY coffee bar plans.

Some of our projects we prepare for months in advance. We draw up plans ahead of time, we set budgets and save to put money aside for the project, we make a list of the supplies we need and then depending on the scope of the project we spend several weekends working on it since we both work during the day.

And then there are some projects, like this one, where we throw all that out the window and just jump in head first with the intention of finishing it in a week. We were so passionate and into this project that we just threw ourselves completely into it which led to some really late nights. But in the end it turned out perfectly, it is very solid and beautiful and is definitely one of our home’s statement pieces that is always a head turner.

Like this project? You might also be interested in how we made the concrete countertop for the DIY coffee bar and made the large DIY framed chalkboard hanging above it.