Breakfast Nook Makeover Mood Board

Planning Our Breakfast Nook Makeover

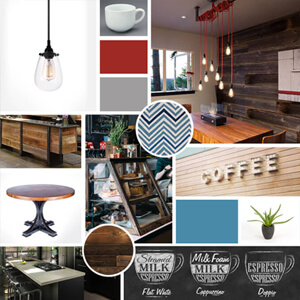
Have you ever had an idea and then that idea grew and grew in scale until all of a sudden you are planning on building a small coffee shop in your breakfast nook? No? Maybe that’s just us. There were two small problems we were facing in our kitchen/eating area that led us to start brainstorming a new and interesting idea for the space. We eventually came up with a solution that we are really exited about and can’t wait to get started working on, our cozy & eclectic café inspired breakfast nook makeover.
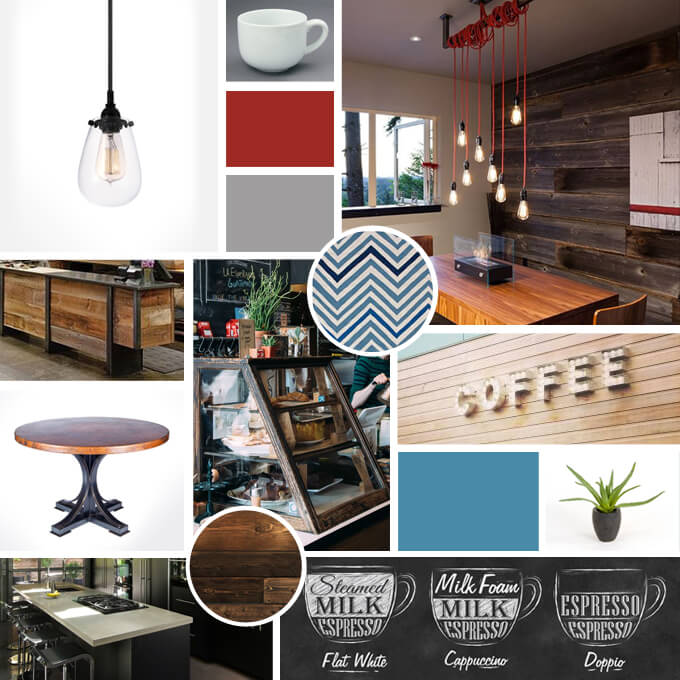
Planning our Breakfast Nook Makeover Mood Board

Problem #1: Unused Breakfast Nook
We really love to make unique choices when it comes to unused spaces in our home. And yes I am kind of embarrassed to admit that the breakfast nook is an unused area in our home and it’s not because we eat in our dining room because we turned that room into our library. No, it is because most nights we eat on the couch. (We don’t have kids yet to have to set an example of proper table manners at home.) The only time we ever sit in this area to eat is if we have company. The space is pretty empty at the moment and the seating is uncomfortable. It’s not a place we like to spend our time.

Problem #2: Not Enough Space for Coffee Supplies in Kitchen
We realized that the small area in the kitchen that we originally designated for our coffee machine and supplies was suddenly not big enough. We have slowly acquired a cappuccino machine, more mugs and our coffee syrup inventory is getting a little out of hand. (They just make so many delicious flavors!) There are a lot of coffee bar ideas floating around out there and they are beautifully styled. We thought a separate coffee bar could be a great plan.

But then we started thinking, instead of just building an extra cabinet for our coffee supplies, let’t go bigger! Why not transform the entire breakfast nook space into our very own small private cafe, one that is cozy and eclectic and a place where we would enjoy sitting and drinking our coffee weekend mornings or having dinner dates every night together.

After many hours spent on the internet looking at photos of the interior design elements featured in coffee shops (talk about eye candy) we finally narrowed down our ideas to ones that fit our style the best and would match the overall look we are going for in our home. We are even incorporating the same style of wood planks that are on the wall in our reading nook on the coffee bar. We created the mood board above to help set the tone, display our inspiration and collect some of the potential pieces we are interested into incorporating in the space.

I can’t even express in words how pumped I am about the future of this space. It seems to be our craziest idea yet but that is what I thought about the reading nook and the library shelves and now those are my favorite place and statement piece in our home. I can’t wait to decorate with all the bottles and jars I have already been collecting that will contribute to making this space “us”.

Be sure to check back often to follow along with our progress in this room. We have several projects we will be sharing that are part of the breakfast nook makeover over the next several weeks. This one is going to be a blast.

*We created our breakfast nook mood board with photos of coffee shops, as well as products we liked from ATGStores.com and home inspiration photos from Porch.com as part of the Maker Mood Board Contest with Porch & ATGStores.com. If you would like to participate and create your own Mood Board to enter, click here to learn more. Don’t forget to share yours on Instagram and Twitter with the #MMBC!

We nominate the following bloggers to submit their own mood board: Just Judy / Designer Trapped in a Lawyer’s Body / Modish & Main / Fifty Two Weekends of DIY / Fifty Two Weekends of DIY / NewlyWoodwards.com

Sources For Images Above:
PENDANT LIGHT | COFFEE MUG | DINING ROOM | WOOD PANEL COUNTER | WOOD DISPLAY CASE | BLUE RUG | DINING TABLE | COFFEE SIGN | SILK ALOE PLANT | ECLECTIC KITCHEN | COFFEE PRINT

UPDATE: We have completed our coffee bar in our breakfast nook based on this mood board. Check out the finished project: https://grayhousestudio.com/diy-coffee-bar/.

DIY Metal Hook Towel Rack

DIY Metal Hook Towel Rack

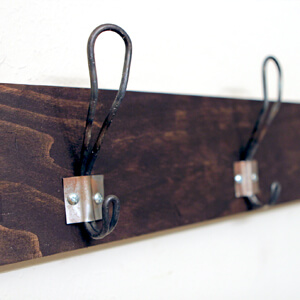
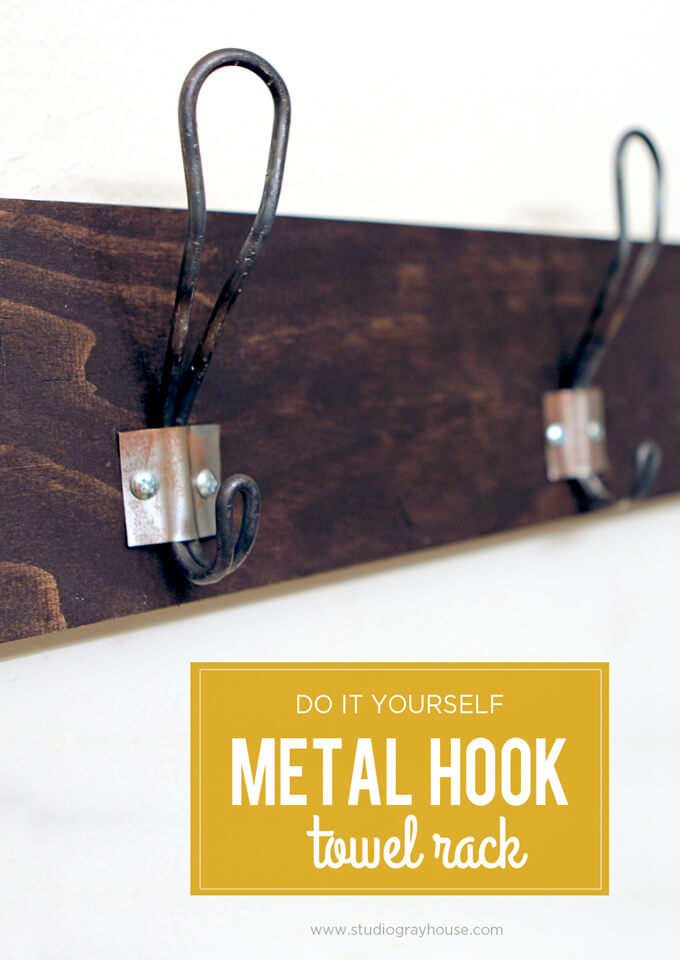
Our latest DIY project for our guest bathroom was to make a DIY metal hook towel rack by creating our own metal hooks.
DIY Metal Hook Towel Rack

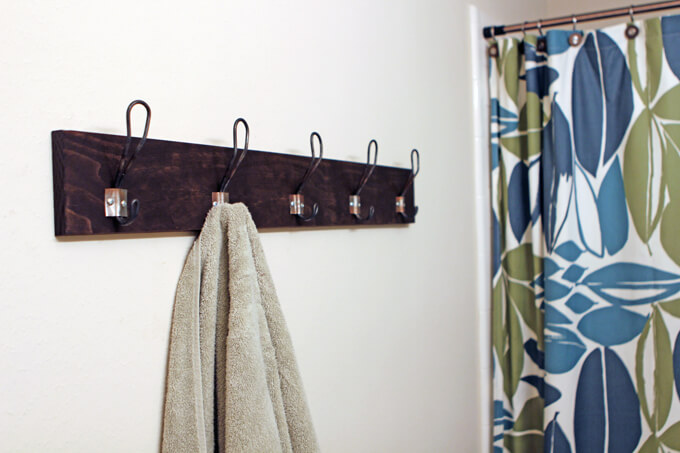
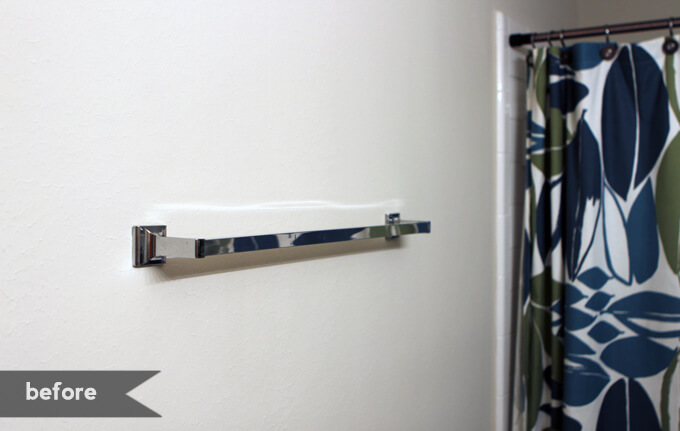
Saturday, Brent and I worked on building the last small project in our guest bathroom, a DIY metal hook towel rack. We wanted to replace the generic silver towel bar that was currently in the bathroom with one that has more character and charm and matches our new floating shelves we built and our mirror frames.

DIY Metal Hook Towel Rack

We went full DIY on this project down to creating the hooks ourselves by bending metal rods. This was our first time doing anything of the blacksmith nature but we really wanted to have complete control over the look of the hooks. It took a few trial runs before we figured out how to get it to look like we wanted. We finally got a consistent pattern down where we could make each hook look identical. It was a two person job.

Brent did the bending while I held the torch! The metal hooks were definitely the most time consuming part of the project so after we finished shaping the hooks, the rest of the project went super fast. We are really pleased with the finished result. Check out how we made our metal hook towel rack below.

How We Made Our DIY Metal Hook Towel Rack

DIY Metal Hook Towel Rack
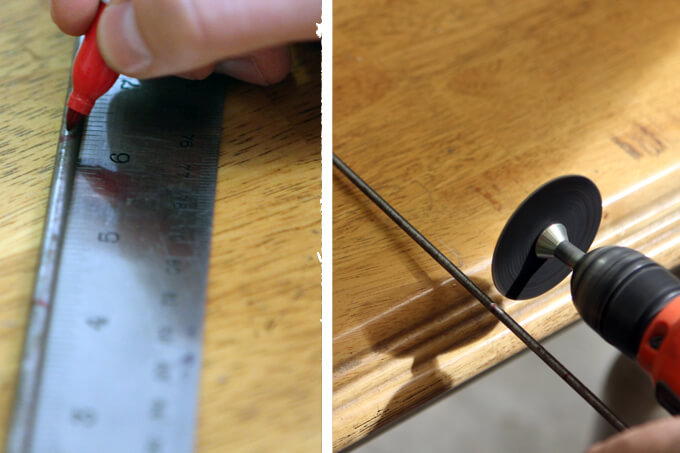
1. We started out by measuring the length of the piece of metal rod we needed for each hook. Then, Brent used a metal cutting attachment for his drill to cut the rod so we had five equal pieces.

DIY Metal Hook Towel Rack
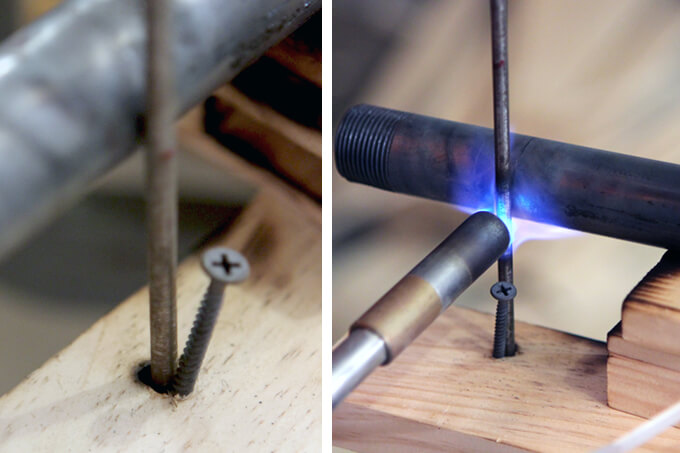
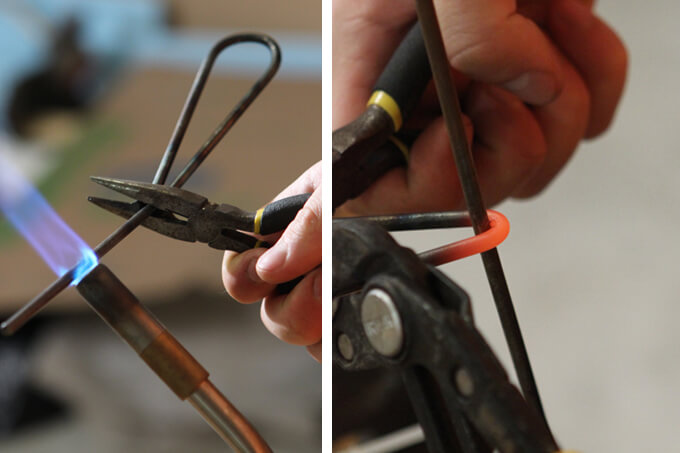
2. To secure the rod before we began bending it, Brent made a jig by drilling a hole in a block of wood and wedged a screw next to the rod to hold it in place. Once it was in place, we used a torch to heat the metal where we intended to bend the rod.

DIY Metal Hook Towel Rack
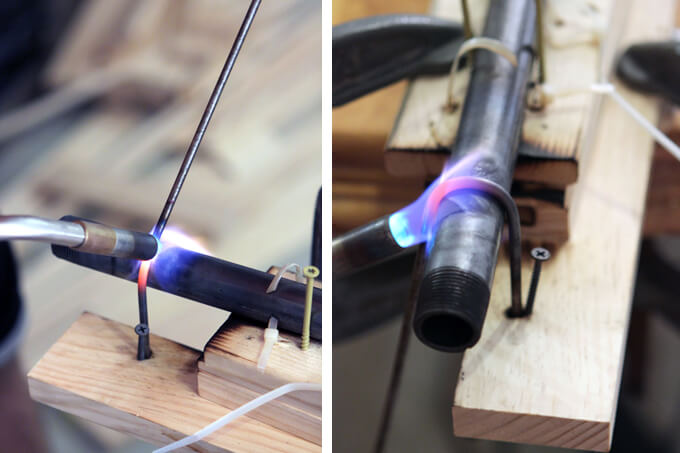
3. When the metal turned orange, we knew it was hot enough to bend. We kept moving the torch around on the rod until we were able to bend it completely around the pipe which formed the first loop.

DIY Metal Hook Towel Rack
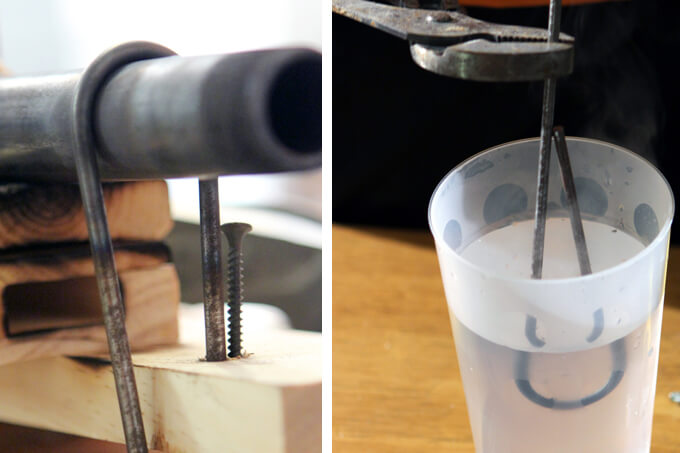
4. Once we got it to be the shape we wanted, we pulled it off the pipe and dunked it water to cool it off. We used pliers the entire time to handle the metal rod to ensure that no unexpected burns took place.

DIY Metal Hook Towel Rack
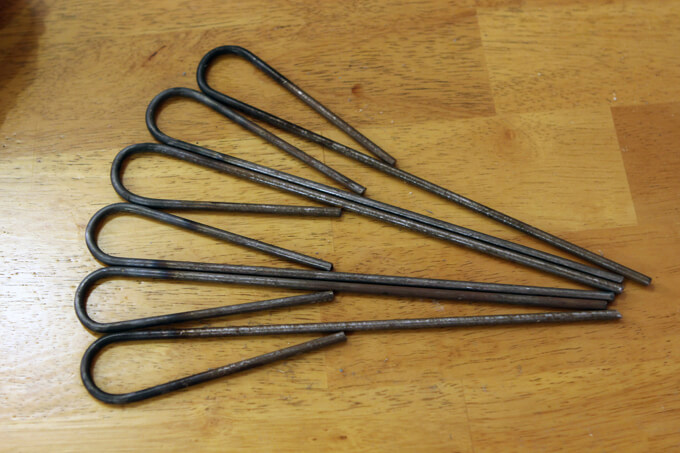
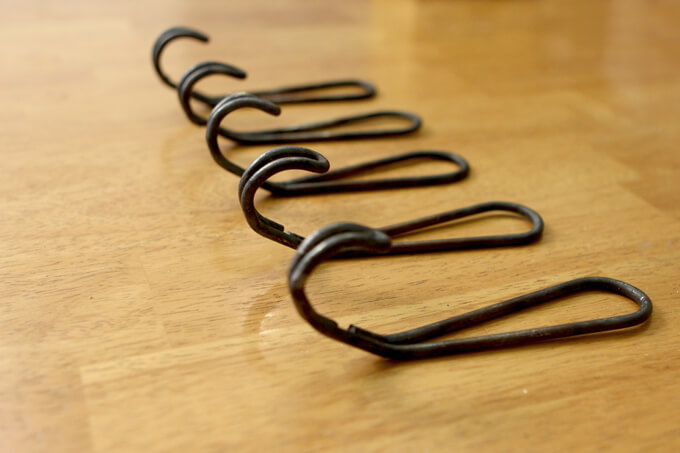
5. Here are what the five hooks looked like after we finished the first loop. We did each section on all five hooks at one time to keep the look consistent. We laid them all out to compare them and made sure they looked even before moving on to the next step.

DIY Metal Hook Towel Rack
6. We continued the process of heating the metal and bending it to form each loop of the hook.

DIY Metal Hook Towel Rack
7. For the final bend, where we turned the top and bottom loops into hooks, I held the torch on the metal as Brent used a hammer to bend it around the pipe. The metal sparked as he hammered it which made us feel like real blacksmiths!

DIY Metal Hook Towel Rack
The finished metal hooks.

DIY Metal Hook Towel Rack
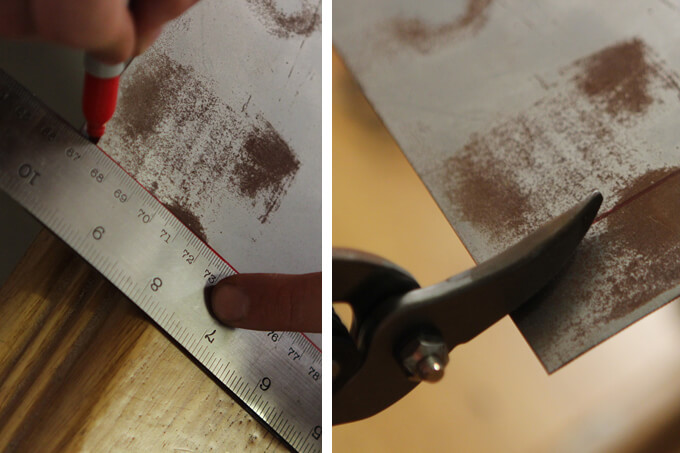
8. To create the bracket that attaches the hook to the board, Brent used offset snips to cut
thin gauge sheet metal into small squares.

DIY Metal Hook Towel Rack
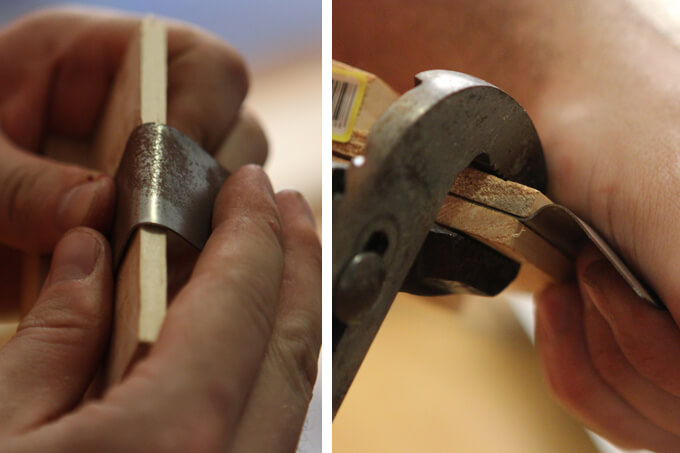
9. To shape the metal squares into the correct form for the bracket, we clamped them between two blocks of wood and bent them by hand.

DIY Metal Hook Towel Rack
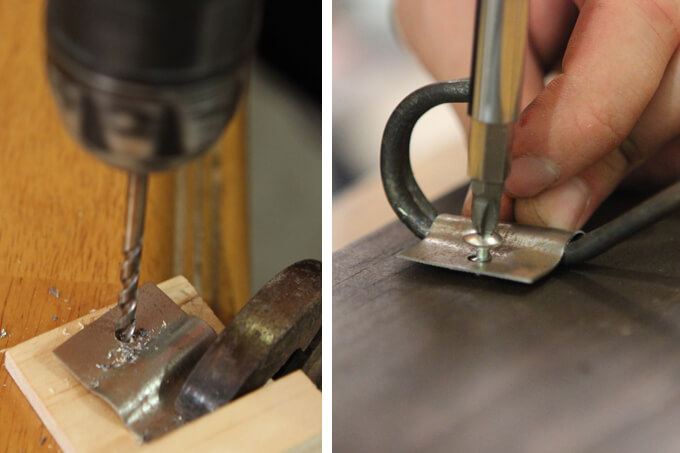
10. We drilled holes on both sides of the metal bracket and then placed the bracket over the metal hook and screwed it to the board.

DIY Metal Hook Towel Rack
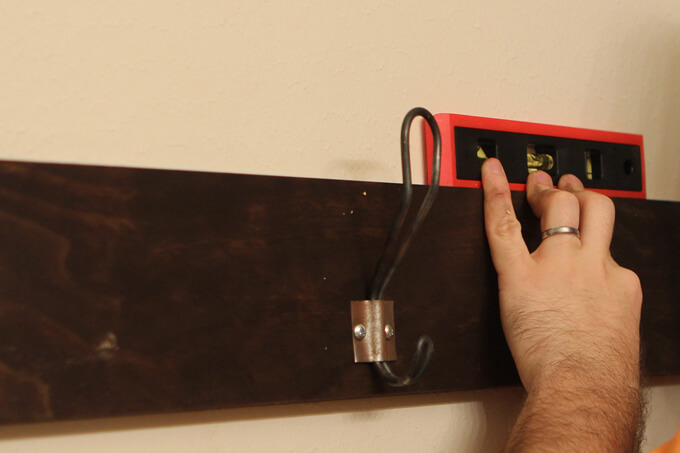
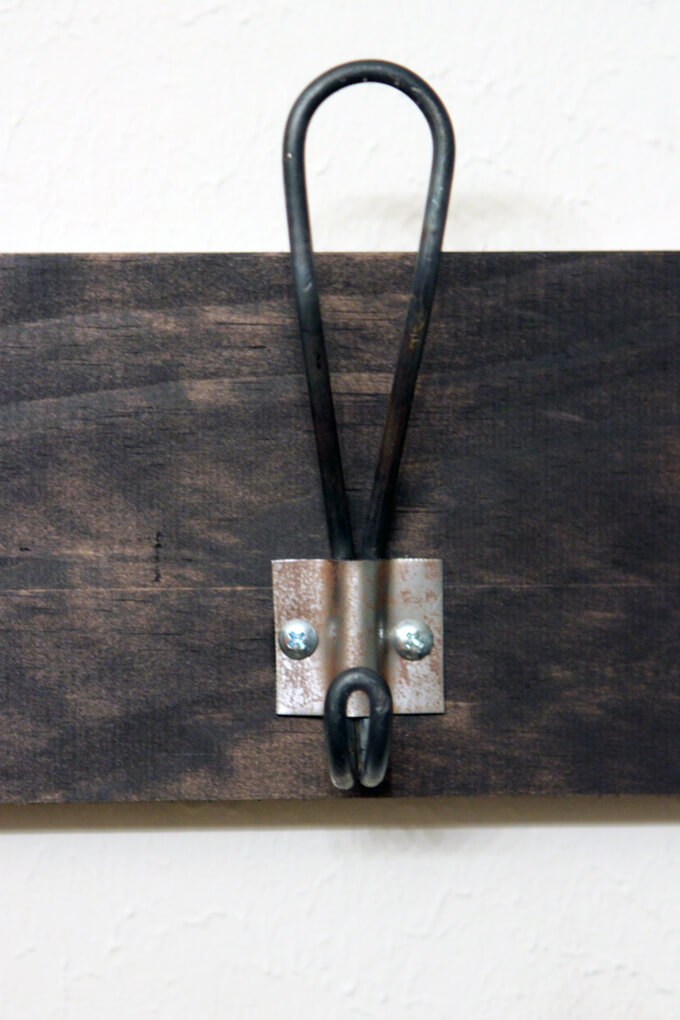
11. Finally, we screwed the board into the wall. To hide the wall anchors, Brent placed them behind the hook so they would be concealed once the bracket was placed over it. We also cleaned the metal hooks and brackets.

DIY Metal Hook Towel Rack
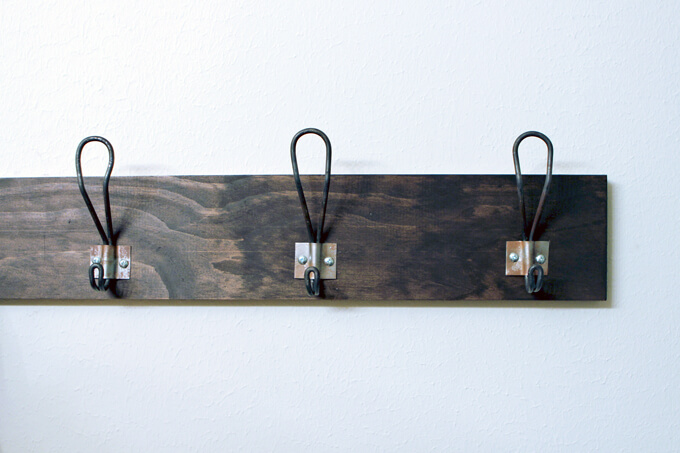
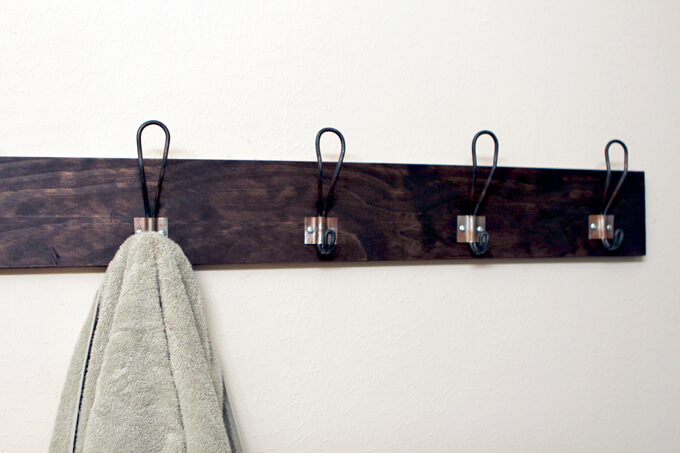
Our finished DIY metal hook towel rack.

DIY Metal Hook Towel Rack

DIY Metal Hook Towel Rack

DIY Metal Hook Towel Rack
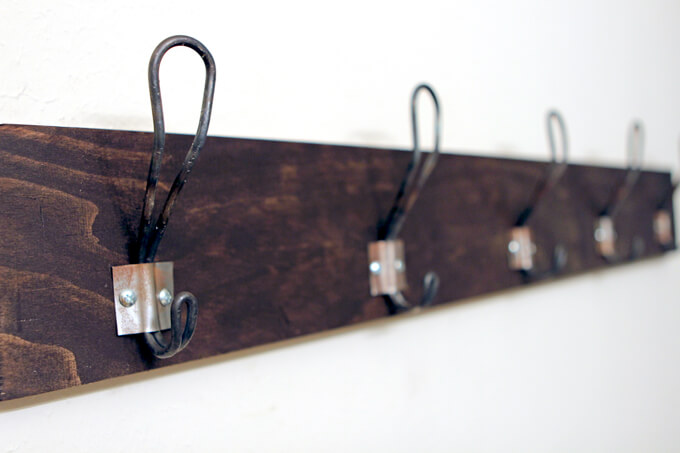
Now there are lots of hooks for our guests to hang their towels!

This was our last small project in the guest bathroom and it and the other projects have definitely helped transform this small bathroom into a much more inviting space. I love how all the elements match and flow together. I am really happy with how our guest bathroom is coming along.

PIN THIS PROJECT

DIY Metal Hook Towel Rack

[Linked up at Remodelaholic]

Framing Prints

Framing Prints (Plus, a free artwork download)

Our technique for easily and inexpensively framing prints printed from your home printer to make them look high quality. Plus, a free artwork download.

Framing Prints Gray House Studio

Hello! I hope you all had a fantastic Easter. Brent’s parents came to Houston and we had a great time visiting with them for the long weekend. But just because we had company, didn’t mean the home projects came to a halt, they got in on the action! Brent and his mom worked together on Saturday to build a towel rack for her bathroom. It turned our really nice. Here is the finished product.

We also managed to squeeze in a quick and simple art project yesterday afternoon. Today we are sharing that project as well as an inexpensive technique to frame prints straight from your home printer so you can get an expensive art look on a limited budget.

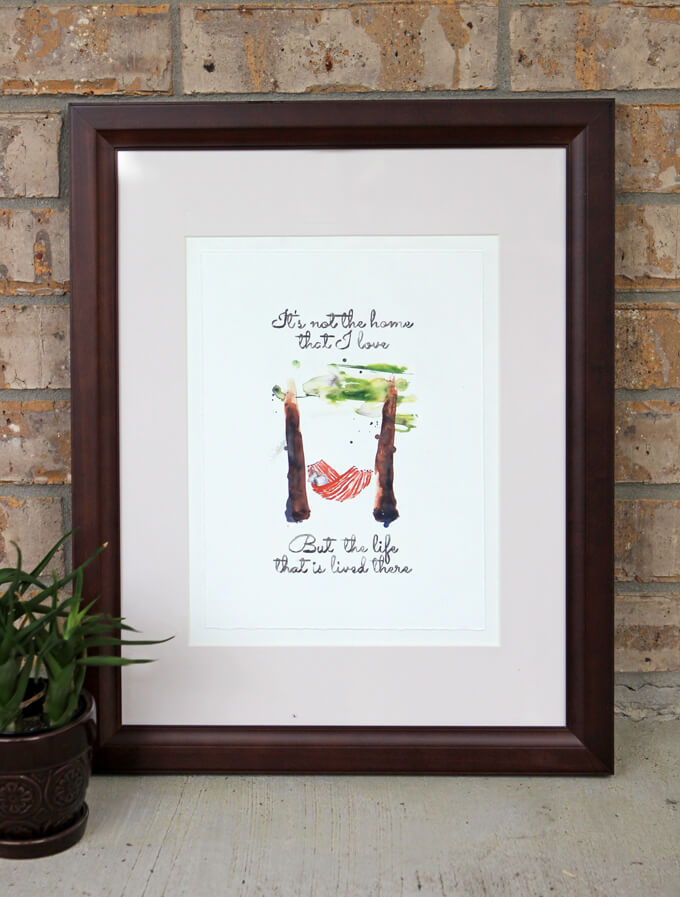
Brent’s undergraduate degree is in printmaking and when we were framing the print for our guest bathroom, he had a really cool idea to turn a $5 dollar digital print into a high end work of art. We replicated that process with an original watercolor painting that Brent made this weekend to frame in our guest bedroom.

Framing Prints Gray House Studio
Brent is a talented artist, I can’t draw to save my life. Which is funny because we were in the same art class together in 12th grade. I couldn’t pick up the skill but that may be because I spent most of my time trying to think of ways to “accidentally” kick Brent’s feet under the table to get his attention so he would talk to me.

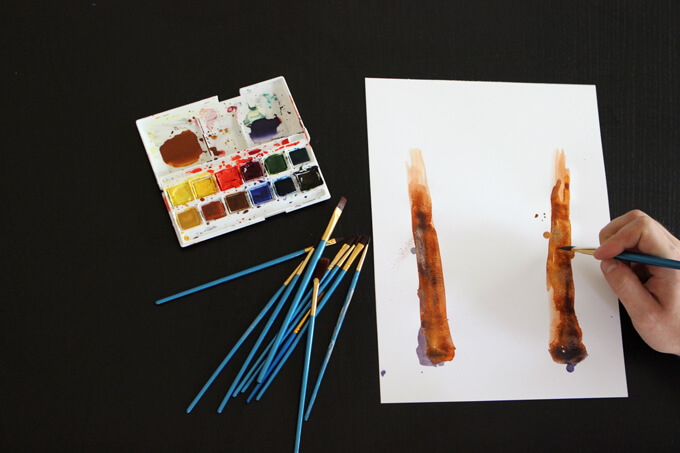
I threw out ideas of creating a minimal piece that captured our dreamy backyard and Brent made it come to life with watercolors. If you have the artistic ability to paint or draw then the first step would obviously be to create your work of art. If you are like me and not as skilled with watercolors as Brent, then there are lots of really cool prints that are fairly inexpensive on Etsy as digital downloads or you can download this watercolor print Brent made for free at the bottom of this post

Below Brent explains his technique for framing prints.

Framing Prints and Artwork

Framing Prints Gray House Studio
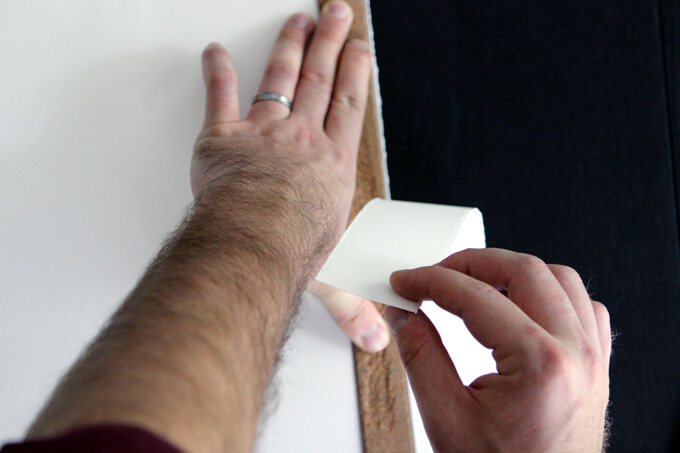
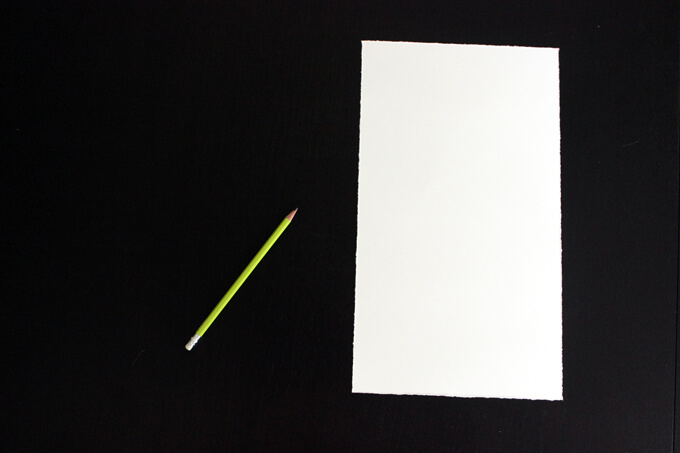
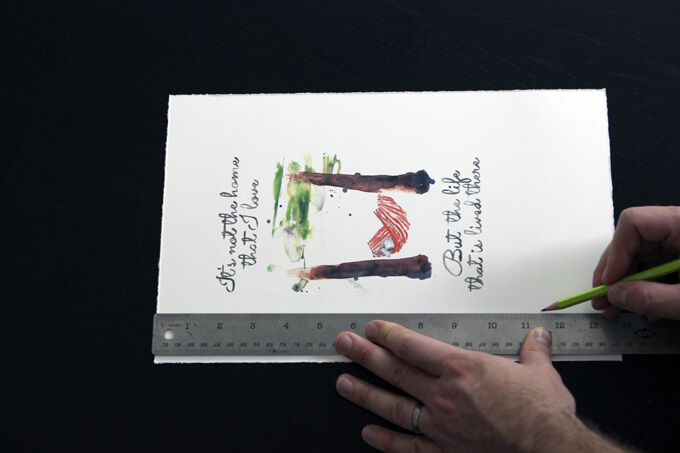
1. Traditionally, fine art prints are printed on thick 100% cotton paper with a torn edge. I replicated this effect with paper that we found at an arts and crafts store. The typical size of this paper is 19.5″ by 25.5″ so I had to tear it down to size. When tearing the paper down to the size, I measured at least 2 inches in from the edge so I had enough paper to hold on to.

Framing Prints Gray House Studio
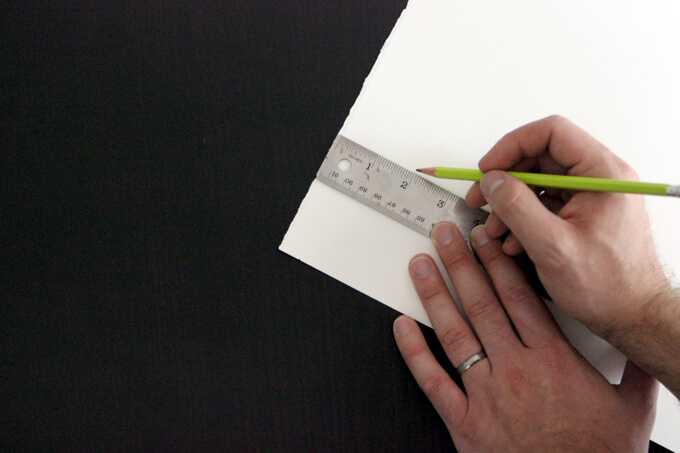
2. Before tearing the paper, I flipped my ruler over so it was upside-down with the metal edge flush against the paper. For a consistent edge all the way around the artwork, I always place the ruler on the paper I plan to use and pull the extra paper. Don’t worry, I know what you are thinking, but you don’t have to have hairy arms to be good at tearing paper it just takes practice.

Framing Prints Gray House Studio
3. For this project I tore my paper down to legal size 8.5″ x 14″.

Framing Prints Gray House Studio
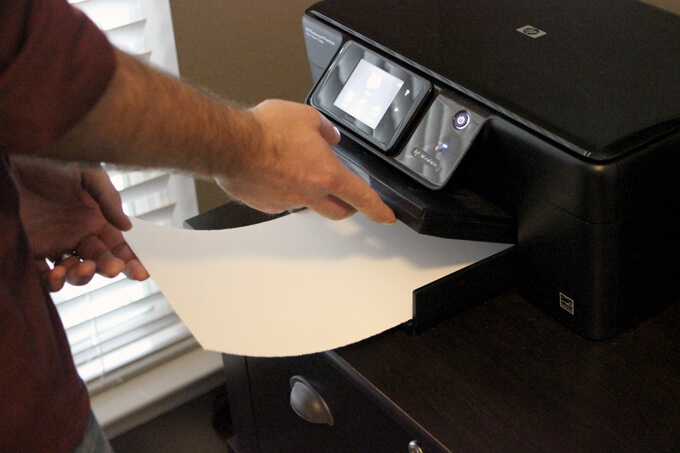
4. I scanned my watercolor piece into the computer for the purpose of this project so I could print it. I placed the paper in our home printer and made sure to select the same size paper I tore. I also made sure the paper setting was set to “best” or “photo” quality and “cardstock”.

Framing Prints Gray House Studio
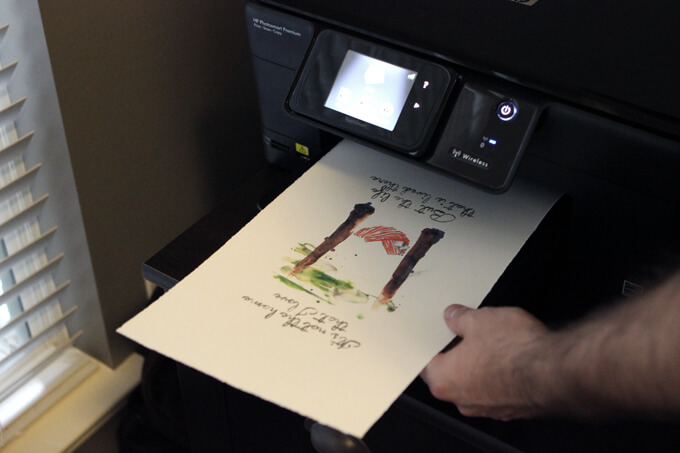
5. I’m a bit of a perfectionist when I make artwork. A crease in the paper of any fine art is highly frowned upon so I stand and wait to grab the print from the printer to avoid having the printer throw it on the floor when it is finished printing.

Framing Prints Gray House Studio
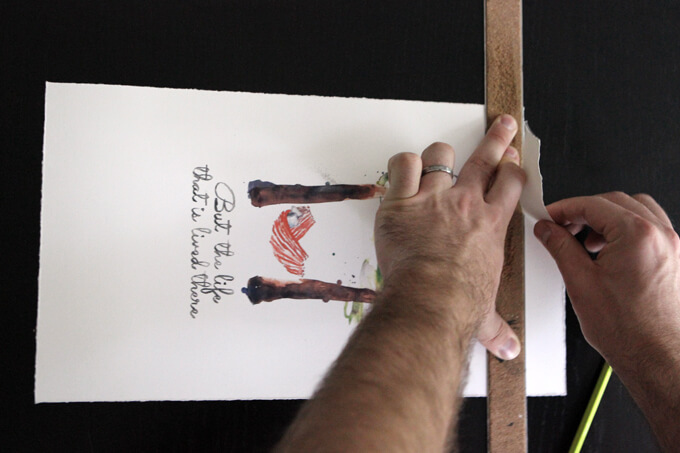
6. When printing on legal sized paper there is a lot of white space above and below the image. I never trust the printer to center the image on the paper exactly so this extra space allows me to tear off paper on the top and bottom of the page to center the image.

Framing Prints Gray House Studio
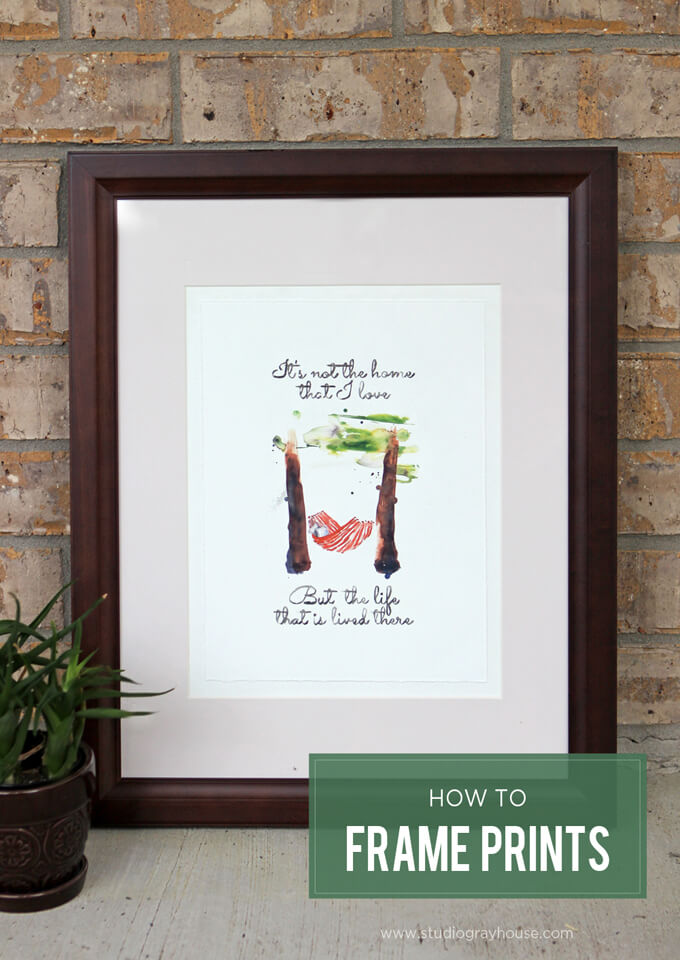
7. The final size I tore my paper down to is 8.5″ x 11.5″ because the mat opening in the frame is 10″ x 13″. This give some space all the way around the artwork to show off the print’s torn edges. I used an additional piece of the same paper I tore behind the torn piece with the image to fill in the gap between the artwork and the mat.

Framing Prints Gray House Studio
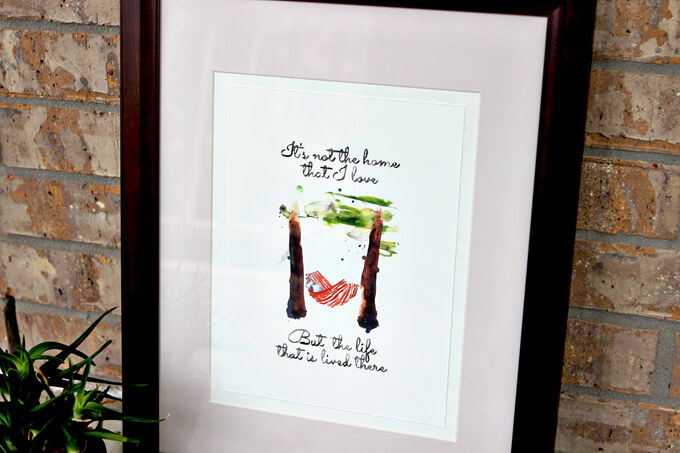
Here is the finished product. The torn edges and layering two pieces of paper gives the print depth and reflects a more traditional fine art piece. If you are interested in trying out this technique of framing prints and need a print, feel free to download Brent’s watercolor print for FREE!

PIN THIS TUTORIAL

Framing Prints Gray House Studio

DIY Distressed Mirror Table Top

DIY Distressed Mirror Table Top

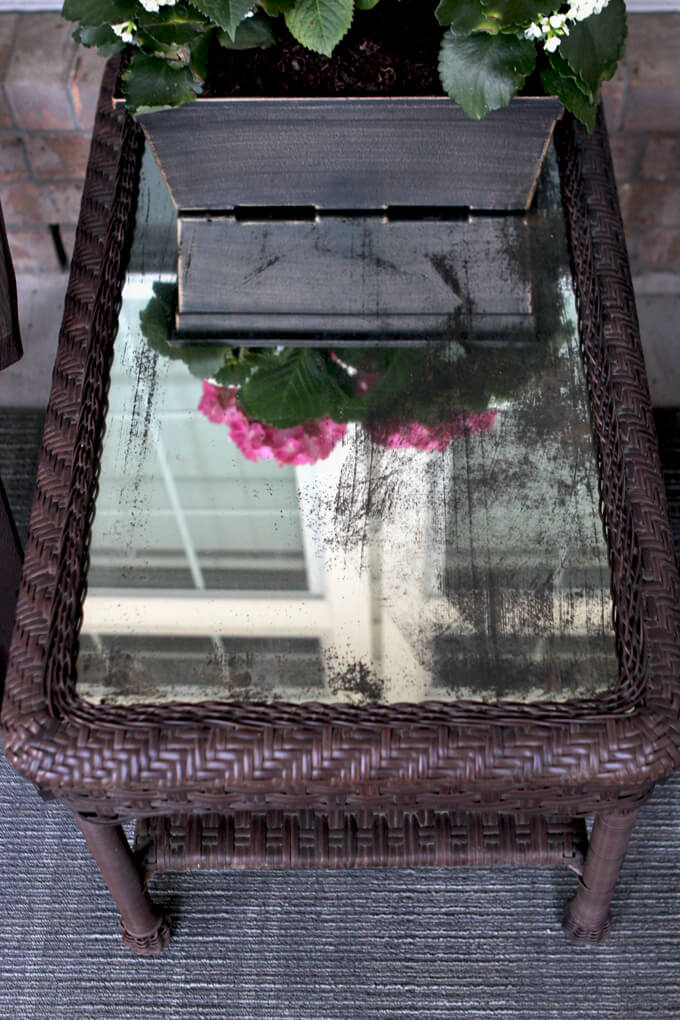
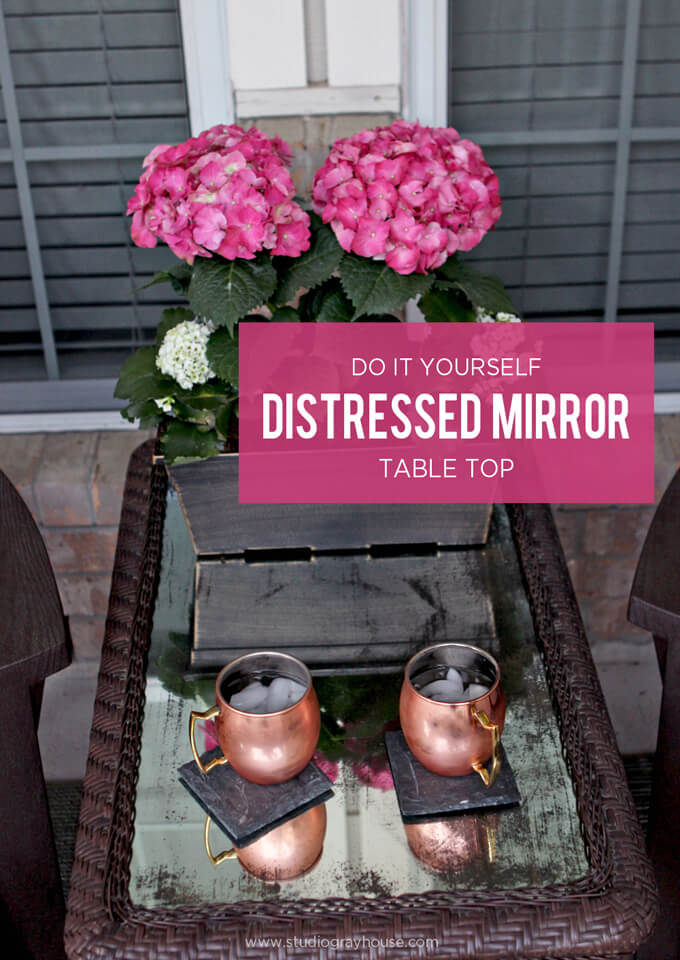
We created a DIY distressed mirror table top for an outdoor table that we got for free.

DIY Distressed Mirror Table Top

Based on our love of the outdoors, we have been inspired to create functional, comfortable and a tad bid whimsical/dreamy spaces outside on our back patio and our front porch where Brent and I can enjoy time outside together eating, reading or in Brent’s case, napping. We have a porch swing on one side of our front porch that is my absolute favorite to sit and swing during Houston rain storms.

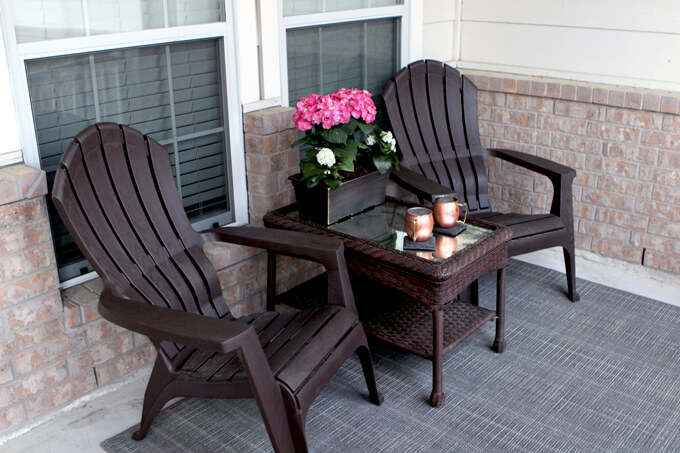
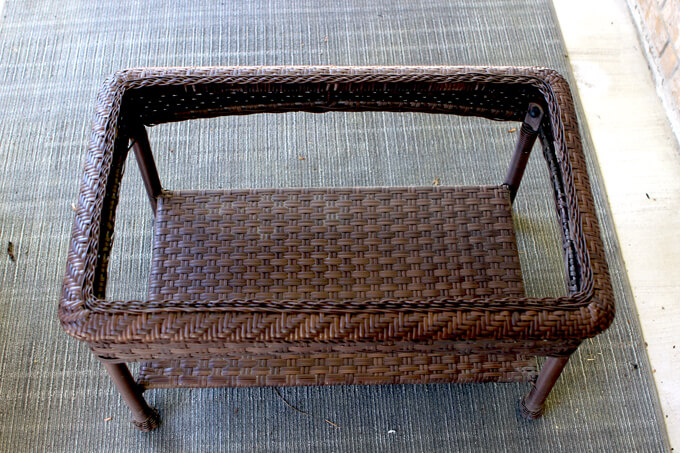
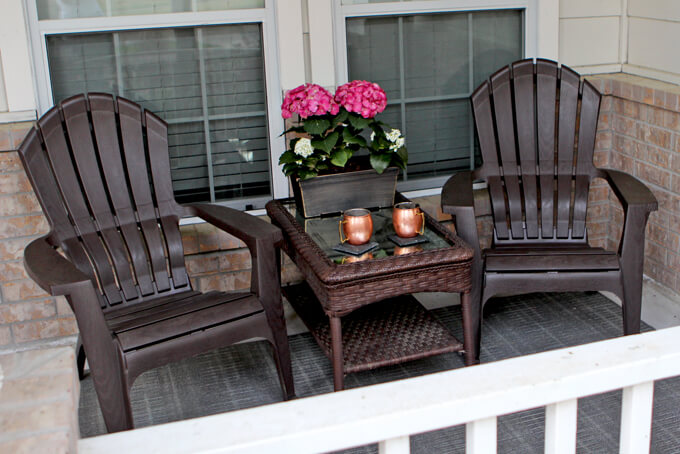
On the other side we purchased two adirondack chairs to go with an outdoor coffee table that was give to us. The chairs match the table perfectly and the table is really nice, the only problem was that the glass top had broken and been removed (hence why the table was given to us free of charge).

For almost a year now we have had this table with no top. And a table with no top is not very useful. Which brings us to today’s project, a DIY distressed mirror table top.

DIY Distressed Mirror Table Top Gray House Studio

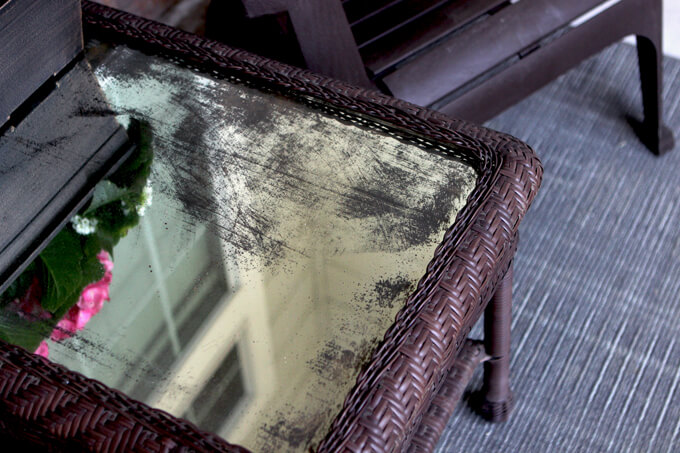
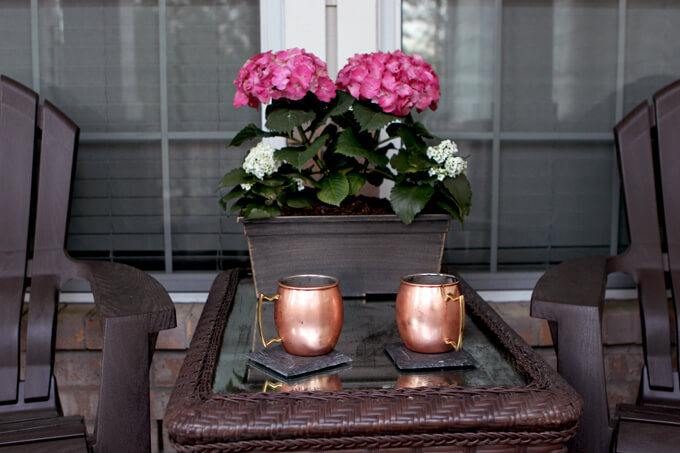
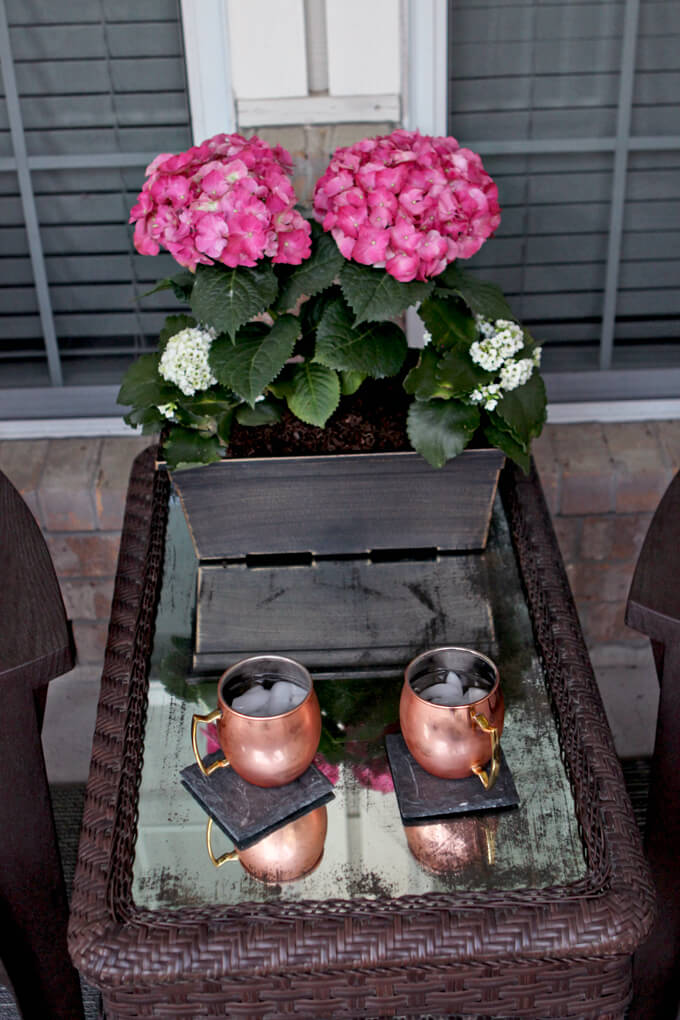
We used a piece of left over mirror from our bathroom mirror cutting project as the top (to replace the glass) for our porch table. Brent distressed it to make the mirror appear worn and dull and it turned out so cool!

DIY Distressed Mirror Table Top Gray House Studio

Here is how we received the table. It was in great condition and all it needed was a piece of glass. Score! That should be easy. Or so we thought. We could not find a piece of 1/4″ plate glass for less than a new table would cost.

Then, while Brent was working on framing the mirrors he had the genius idea to cut a piece of the left over mirror from the bathroom to use as the table top.

We decided to age the mirror because we thought a normal mirror might be a little too “glam” and not fit with the style of the frame of the table and distressing the mirror created a unique look that is be more unified with our other furniture on the porch.

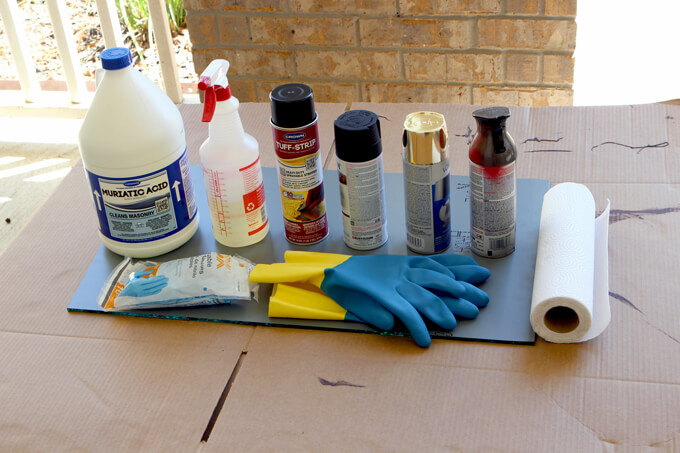
SUPPLIES

MATERIALS

  • Mirror
  • Paint Stripper (we used Tuff-Strip)
  • Chemical resistant rubber gloves (for the muriatic acid)
  • Muriatic Acid
  • Empty Spray Bottle
  • Paper Towels
  • Scrap Wood
  • Spray Paint (oil-rubbed bronze, gold, black)
  • Cardboard
TOOLS

DIY Distressed Mirror Table Top Gray House Studio

How We Created Our DIY Distressed Mirror Table Top

DIY Distressed Mirror Table Top Gray House Studio
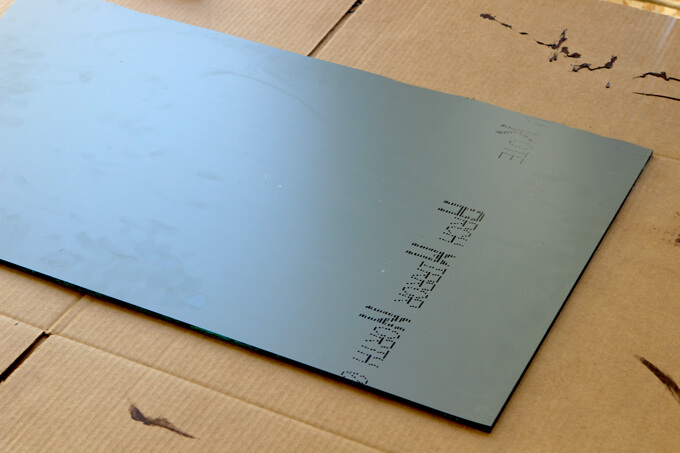
1. We decided to use some scrap cardboard (old moving box) as our work surface for this messy project. It is thick enough to stop spills from quickly penetrating through to the surface below and cheap enough to recycle/throw away after.

DIY Distressed Mirror Table Top Gray House Studio
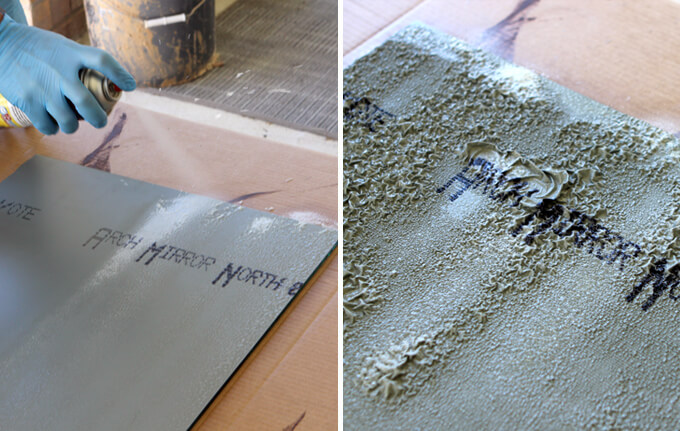
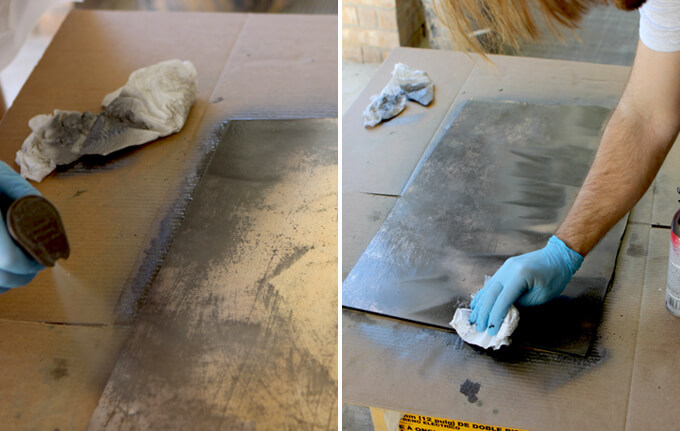
2. The back of mirrors are coated with a layer of paint that protects the mirror finish. To age the mirror we first removed this paint to expose the mirror coating. To do this we liberally coated the surface with paint thinner and let it sit until the paint started to loosen and bubble.

**Brent almost learned an important lesson the hard way when the wind started to pick up and blow the paint stripper. He started the project 3 feet from his relatively new car. The paint stripper we used is unforgiving so we quickly moved somewhere more remote protected from the wind.

DIY Distressed Mirror Table Top Gray House Studio
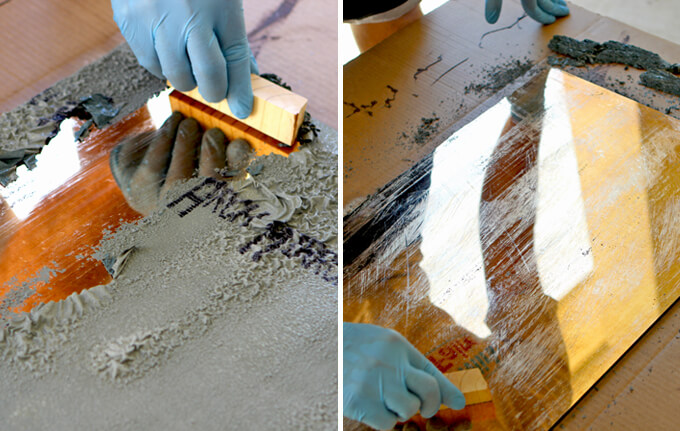
3. With gloves on, Brent was able to easily scrape off all the paint with a scrap piece of wood and expose the mirror finish. We learned why old mirrors turn shades of gold when they deteriorate. The back side of the mirror, hidden by paint, was reflective gold instead of silver.

DIY Distressed Mirror Table Top Gray House Studio
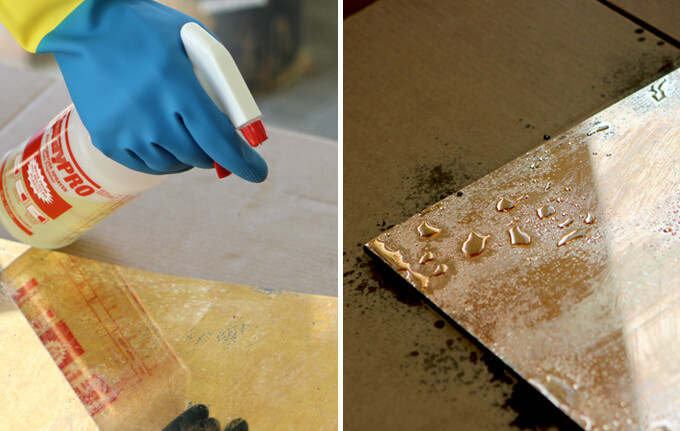
4. With the back side of the mirror clean and dry, Brent put on chemical resistant gloves and loaded the spray bottle with muriatic acid.

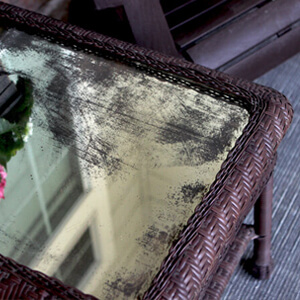
NOTE: Always use extreme caution when working with muriatic acid! It can burn you and corrode/destroy a lot of materials. After about 10-20 seconds of sitting on the surface, the areas we sprayed became totally see through. It is easier to spray some areas and then wipe them clean and keep going more until you reach the desired finish.

You can always remove more mirror finish but you can’t put it back.

DIY Distressed Mirror Table Top Gray House Studio
5. The mirror was now transparent where Brent sprayed the acid.

DIY Distressed Mirror Table Top Gray House Studio
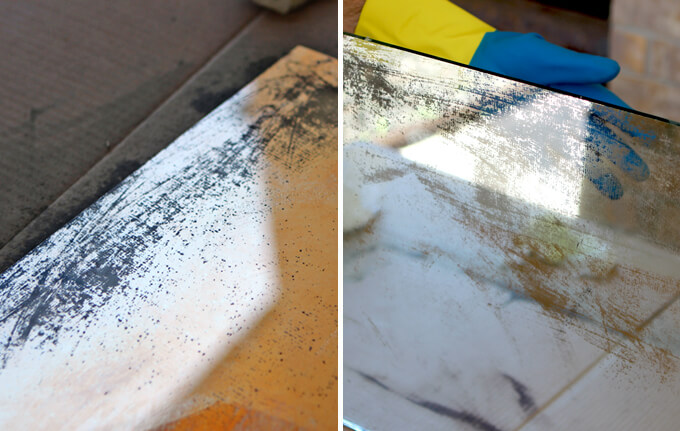
6. To create a more complex finish, Brent started coating the mirror with an oil-rubbed bronze spray paint and wiped some areas away. We didn’t want the mirror to be gold where it wasn’t silver.

Most antique mirrors we have come seen have had various shades of black, gray, gold and silver. So Brent started with the oil-rubbed bronze and wiped areas clean that helped it have a more authentic look.

DIY Distressed Mirror Table Top Gray House Studio
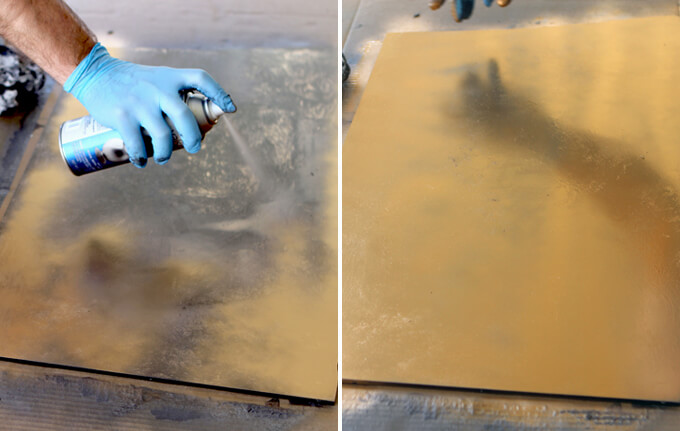
7. Once the oil-rubbed bronze had time to dry, Brent coated the entire mirror with gold spray paint. The gold paint is only visible in areas where he wiped away the oil-rubber bronze paint.

DIY Distressed Mirror Table Top Gray House Studio
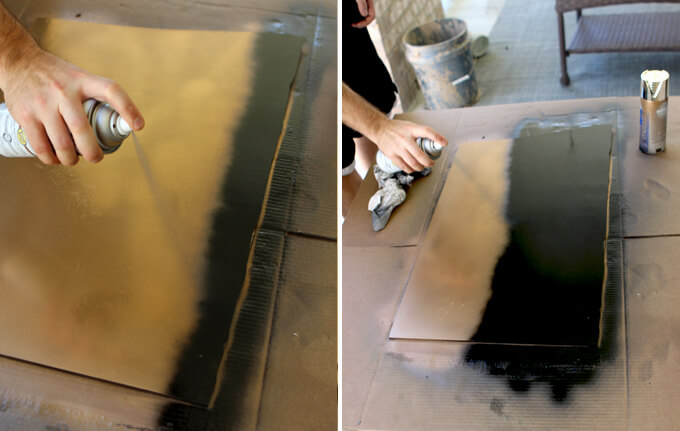
8. Finally, Brent coated the back of the mirror with black spray paint to protect the rear of the mirror like the original gray coating. After it dried, he used the existing clips to attach the mirror to the table.

DIY Distressed Mirror Table Top Gray House Studio

One of my favorite things about our home is our front porch. When we were house shopping and walked up to this house and I saw our front porch for the first time I was pretty much sold on buying the house and I hadn’t even seen the inside yet. I just fell in love with the porch and all the potential I could see it had. This table with a DIY distressed mirror table top is the perfect addition to it.

DIY Distressed Mirror Table Top Gray House Studio

I loved styling this little area of the patio by adding a rug and a new planter with hydrangeas, my favorite! I love how this space turned out. It makes for the best spot to sit and have long conversations analyzing the latest Survivor episode.

DIY Distressed Mirror Table Top Gray House Studio

We used this distressed mirror for our table top but we imagine there are tons of applications for this. Have you distressed a mirror? We would love to know how you decorated with it. Please share your ideas in the comments section.

PIN THIS PROJECT

DIY Distressed Mirror Table Top Gray House Studio

Floating Shelves in Bathroom

Floating Shelves in Guest Bathroom

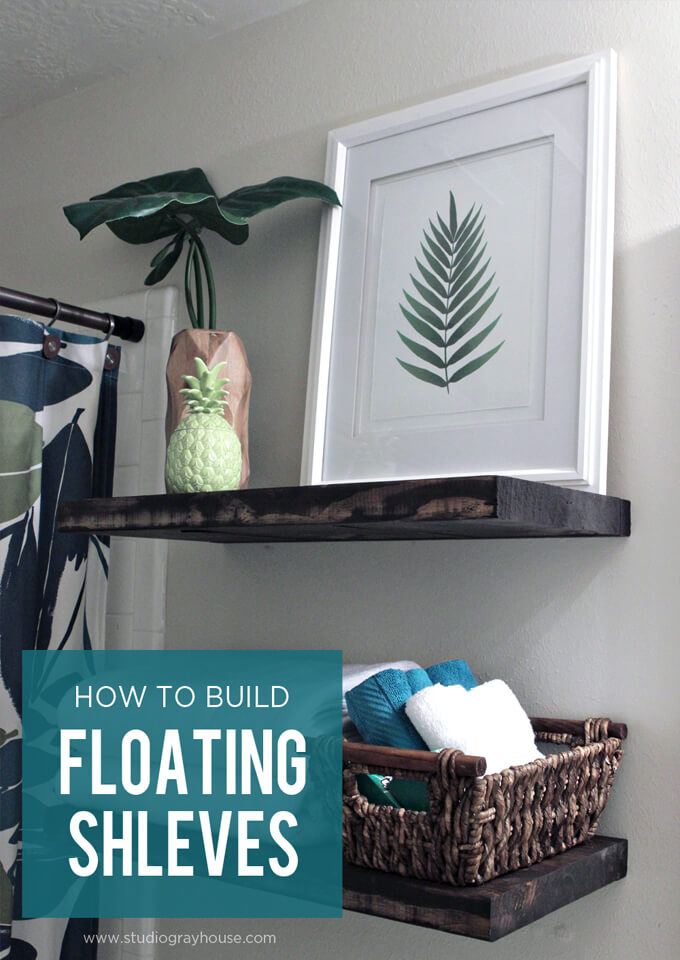
We built a pair of floating shelves to store towels and display decor in our guest bathroom.

Floating Shelves in Bathroom Gray House Studio

Brent and I both took off this past Friday and it made me wish every week could include a three day weekend. It is amazing how much more we are able to both accomplish and relax with an extra day off. We didn’t have anything planned so we worked on checking a few smaller home renovation projects off our list. We managed to get two projects completed, buy supplies for a third project that we will work on today and shopped for new plants for our front flower beds and it is only early Sunday afternoon.

It has been a busy weekend but we were also able to have plenty of down time for dinner and frozen yogurt by the lake with family and enjoying one too many Girl Scout cookies while we lounged on the couch and made our way through several episodes of Bloodline on Netflix. That is one perk of living in the suburbs, it is not difficult in the slightest to get your hands on a box (or two) of Caramel deLites. They basically just show up on your doorstep.

Floating Shelves in Bathroom Gray House Studio

We are excited to have Brent’s parents come visit next weekend and want to get as much of the guest bathroom spruced up as we can before they arrive. Our first project this weekend was to build floating shelves next to the shower. We are really happy with how they turned out and how quickly they came together. Today we are sharing how we built our shelves in a few easy steps.

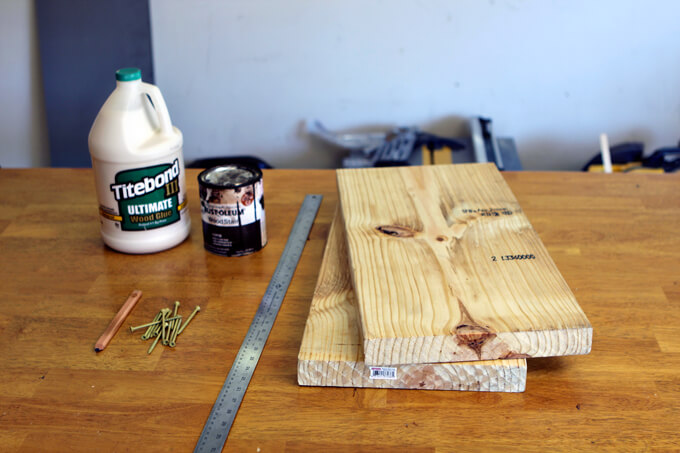
SUPPLIES

MATERIALS

  • (1) 2″ x 12″ Pine Board
  • Wood Glue
  • Wood Stain in Kona
  • 3″ Deck Screws
TOOLS

  • Table Saw
  • Ruler
  • Drill
  • Clamps
  • Router

Floating Shelves in Bathroom Gray House Studio

How We Built our Floating Shelves

Floating Shelves in Bathroom Gray House Studio
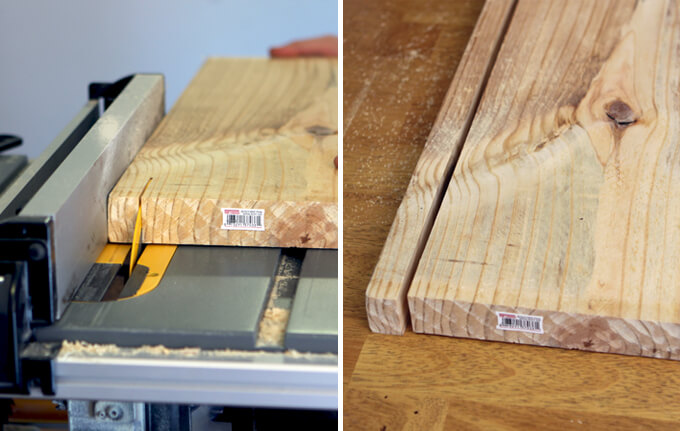
1. The first thing we did was to take our two pieces of pine (that we cut from the 2″ x 12″ to be the correct width for our space) and used a table saw cut off the back inch of the board. This created our bracket piece that we used to anchor the shelf into the wall. By cutting it off the back of the board it matched back up seamlessly with the front of the shelf.

Floating Shelves in Bathroom Gray House Studio
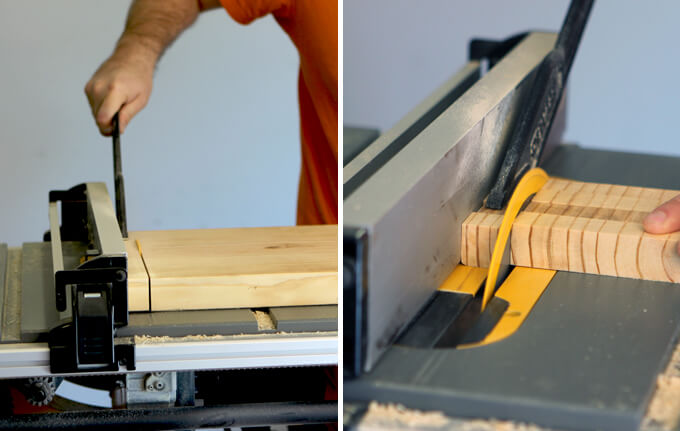
2. For the supports that connect to the bracket anchored into the wall, Brent cut 1″ x 1″ pieces from the left over piece of pine. These boards support the weight of the shelf.

Floating Shelves in Bathroom Gray House Studio
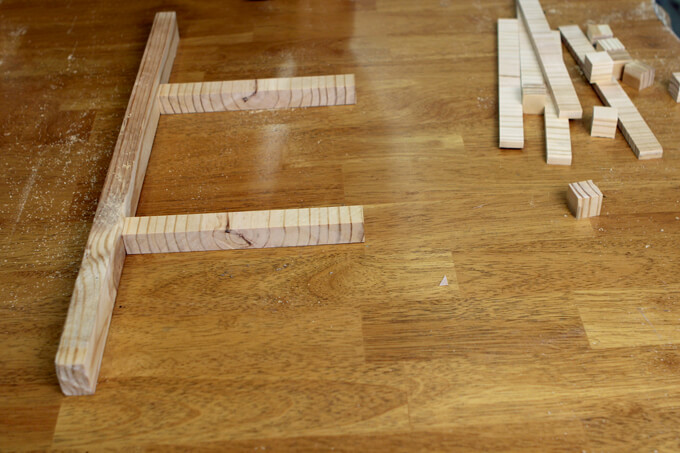
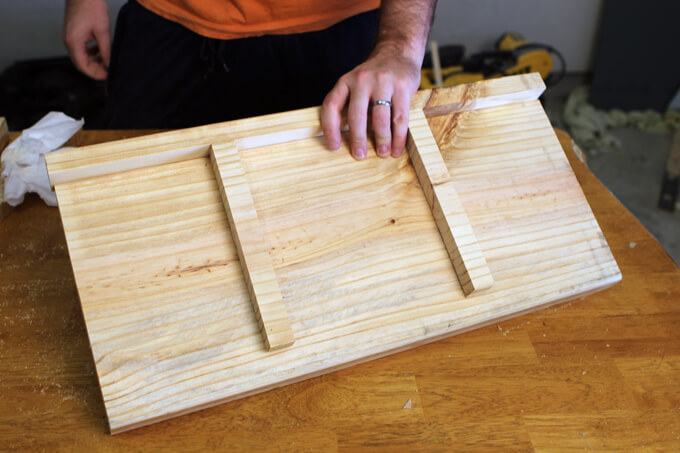
3. Then we laid out the three pieces of the bracket. This is how the completed bracket will look.

Floating Shelves in Bathroom Gray House Studio
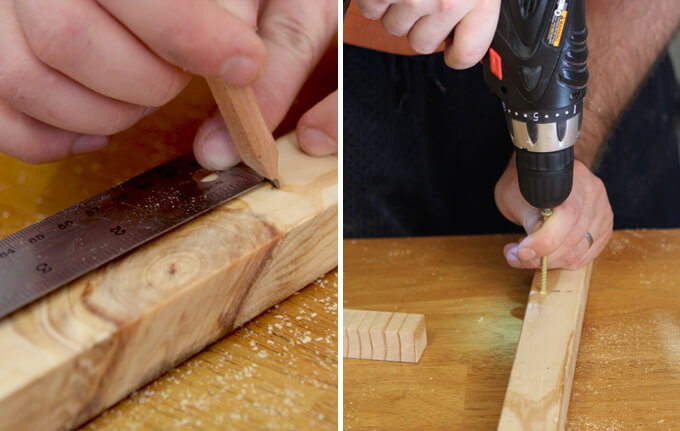
4. We used self tapping screws to connect the three pieces of the bracket together. Brent always tries to avoid screwing through any knots because when screwing into knots, that have a tendency to split. We know this from experience.

Floating Shelves in Bathroom Gray House Studio
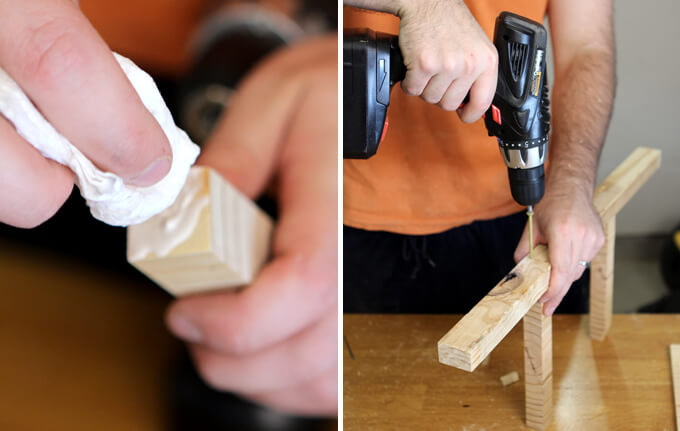
5. We dabbed some wood glue on the end of the two 1″ x 1″ boards that we then screwed into the back piece of the bracket to create strong joints so it would be nice and sturdy once it was assembled.

Floating Shelves in Bathroom Gray House Studio
6. Now that we had our bracket assembled, we needed to remove slots from the bottom of the shelf to created a recessed area where the bracket could fit into the shelf.

Floating Shelves in Bathroom Gray House Studio
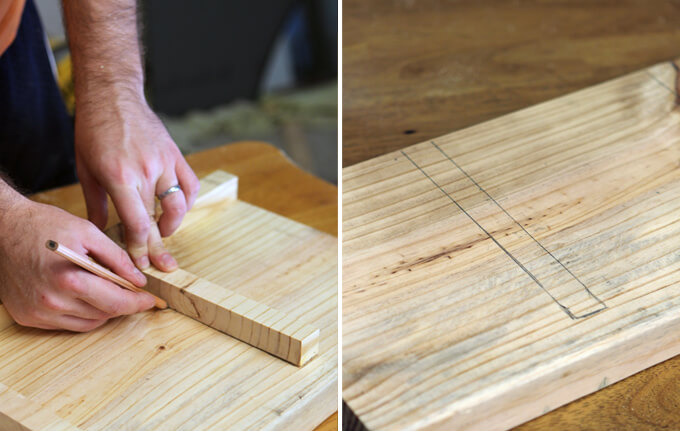
7. To determine the area of the shelf that needed to be removed for the brackets, we simply traced the outline of the bracket on the bottom of the shelf.

Floating Shelves in Bathroom Gray House Studio
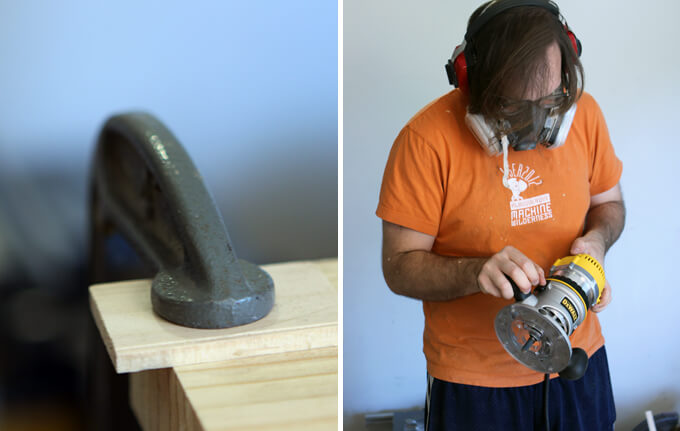
8. We then secured the board to our work space using clamps to make sure it would not move around once Brent started routing the slots. He set his router to be the correct depth and put on all his safety equipment to protect his face while working on this part.

Floating Shelves in Bathroom Gray House Studio
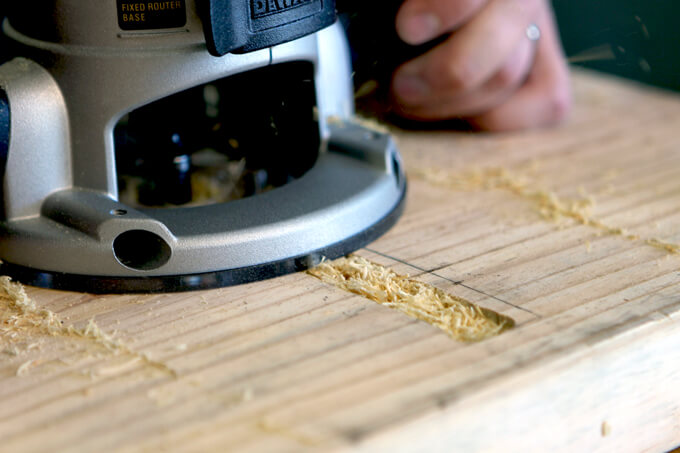
9. To route the slots, Brent used a half inch router bit. It took two passes to get enough of the material removed.

Floating Shelves in Bathroom Gray House Studio
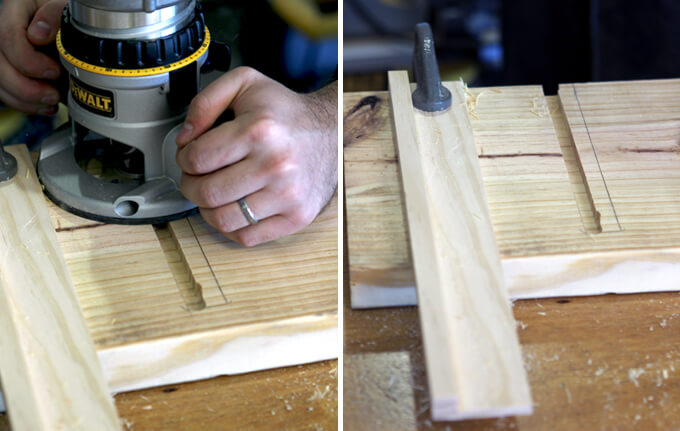
10. To route in a straight line, Brent used a piece of scrap board clamped to the shelf to guide the router. Once the first pass with the router was cut, he moved the scrap board over to guide the router again for the second cut.

Floating Shelves in Bathroom Gray House Studio
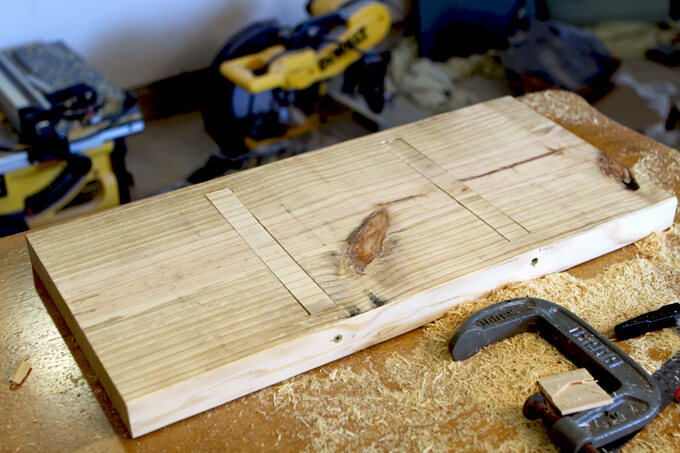
11. After Brent finished routing the slots from the bottom of the shelf, he test fit the bracket. It fit perfectly. We always do a happy dance when everything works and fits together correctly the first time. It is a very satisfying feeling.

Floating Shelves in Bathroom Gray House Studio
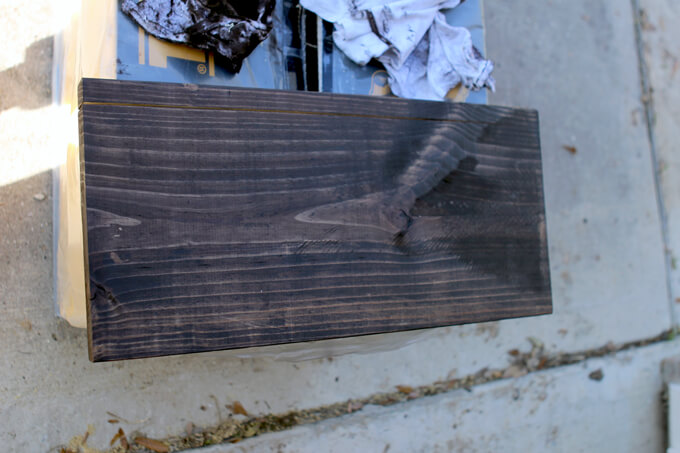
12. We used the same stain on the shelves as we used on the mirrors we framed in the previous project. The great thing about building your own furniture is you can stain everything to match.

Floating Shelves in Bathroom Gray House Studio
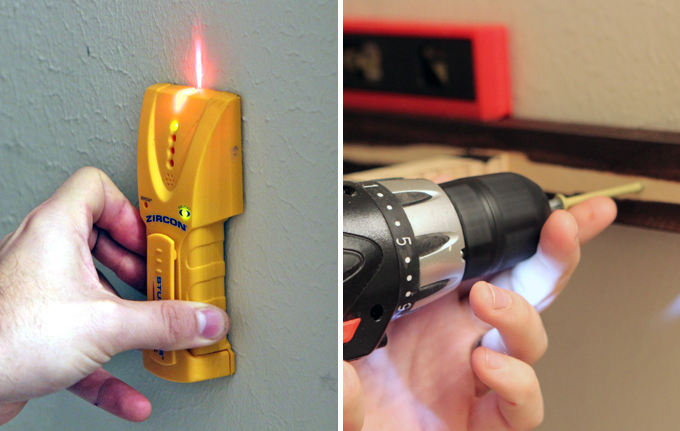
13. After marking the studs with a stud finder, we secured the bracket to the wall with 3″ deck screws.

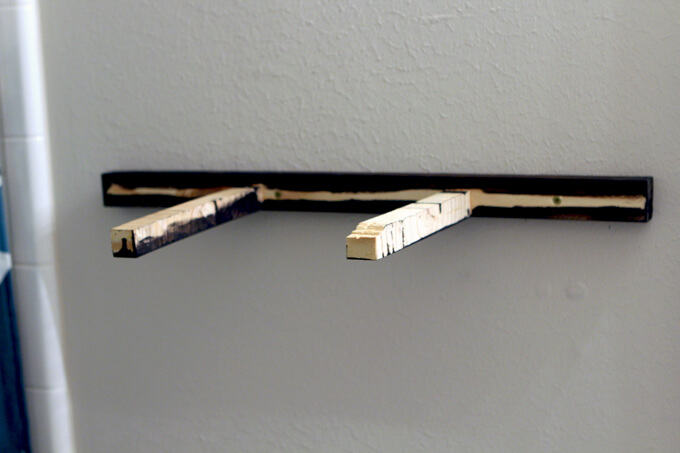
Floating Shelves in Bathroom Gray House Studio
14. The bracket isn’t much to look at by itself but it is secure and will support the shelf which is all that really matters.

Floating Shelves in Bathroom Gray House Studio
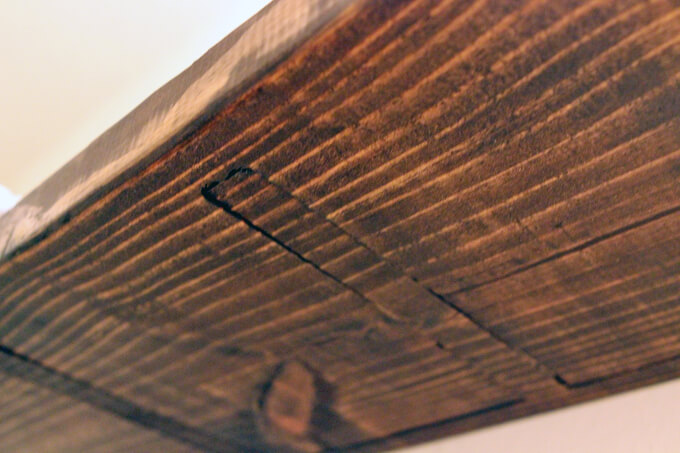
15. This is a view of what the bottom of the shelf looks like after it is attached to the bracket. We thought about trying to conceal the bracket but we like how it makes for a nice design element on the bottom of the shelf, if you happen to look under the bottom of the shelf.

Floating Shelves in Bathroom Gray House Studio
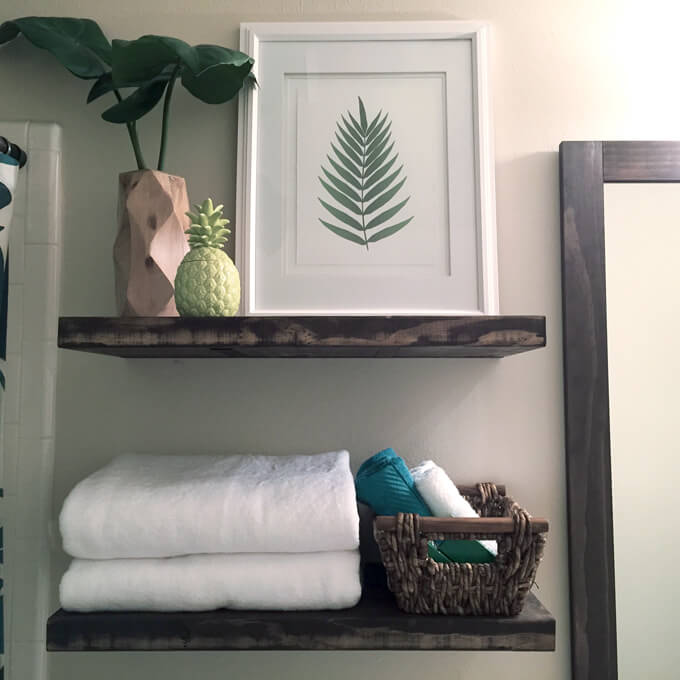
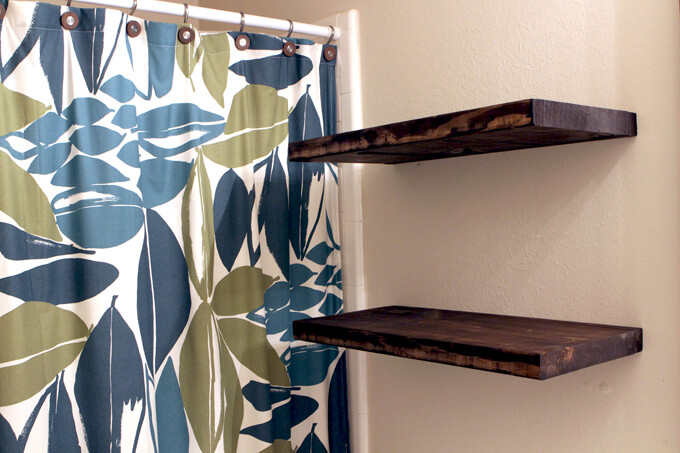
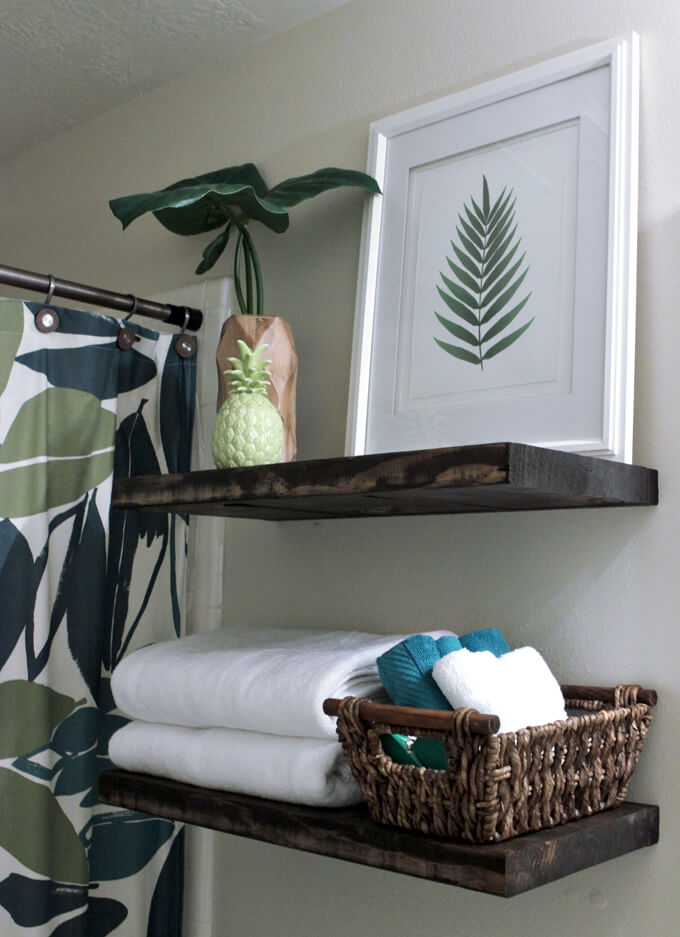
This is what the floating shelves looked like once they were both up on the wall.

Floating Shelves in Bathroom Gray House Studio
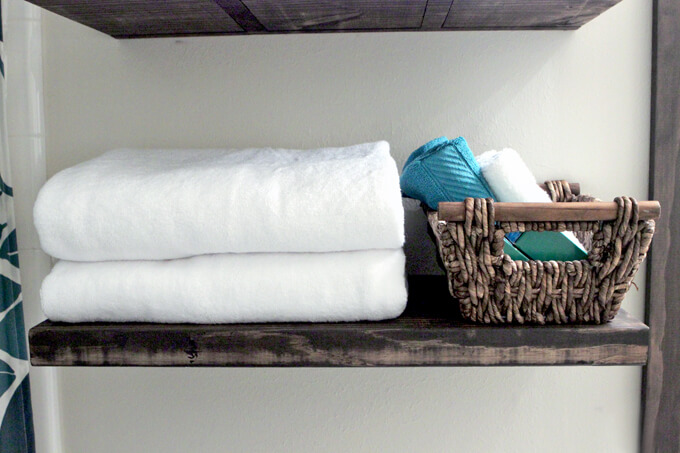
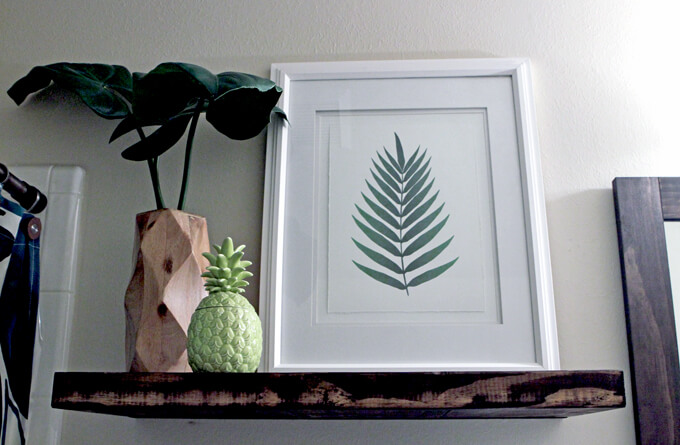
I styled the floating shelves with a few simple tropical elements to tie in with the shower curtain and some bathroom necessities so they are nice and handy for guests.

Floating Shelves in Bathroom Gray House Studio
I love how the framed print turned out on this shelf. We purchased the digital version of this leaf print and then Brent tapped into his past experience with printmaking to help take it up a level. He tore the edges of some nice paper he had left over from when he worked on letterpress prints and ran it through the ink jet printer.

Then he mounted that on another piece of his nice paper and we put a matte around it and framed it with this large white frame I had but could never find anything to put in it. The torn edges and three dimensional feel help give it more of a fine art print appearance and allowed us to scale it larger while still only using our home printer. Check out our tutorial on framing prints to see in more detail how we did this.

Floating Shelves in Bathroom Gray House Studio
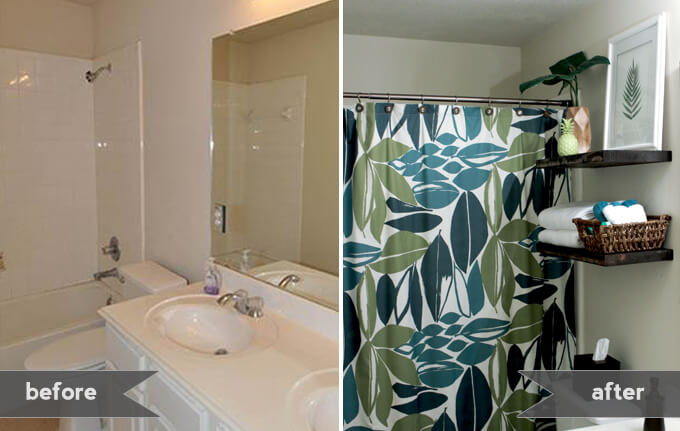
Here is the progress in this room. It is such a small and narrow room that it is very tricky to photograph the whole thing to show all the changes we have made so far. We will just share each section we work on until the entire room is complete.

Adding floating shelves, framing our mirrors and putting up a bronze shower curtain rod has already transformed this room into a much more welcoming space. Our next project is to build a new towel rack!

PIN THIS PROJECT

Floating Shelves in Bathroom Gray House Studio

Framing Bathroom Mirrors

How to Frame Bathroom Mirrors

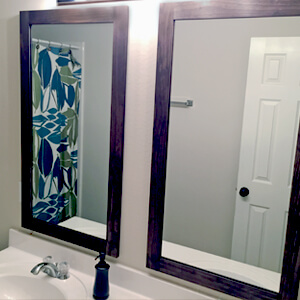
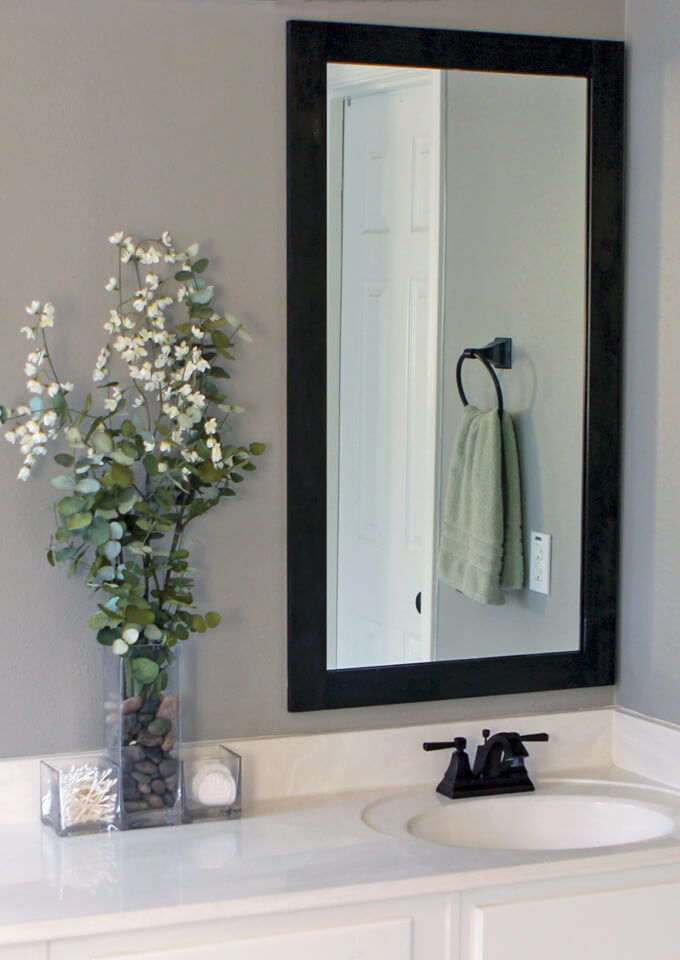
In this tutorial we are showing how to frame bathroom mirrors. We will also show how to build the frames and how to hang them on the wall.

How to Frame Bathroom Mirrors

Remember back in January when we showed how we cut our large bathroom mirror into two pieces? Today we are sharing the second half of the project which includes how to frame bathroom mirrors and hang them back up on the wall. We have found that a simple and inexpensive way to freshen up a bathroom’s appearance is to take down the large unframed mirror and replace it with two narrow mirrors over each sink.

In both our master bathroom and now our guest bathroom we cut the large builder grade mirror that came with the house into two pieces, built frames for each one out of wood and then stained the wood to match the bathroom. By cutting the mirrors and building the frames ourselves, we saved money and had complete control over the size and appearance of our mirrors.

We really like the look of tall narrow mirrors but finding that style without the high price tag was a difficult task. Building the frames ourselves was a great solution for us.

SUPPLIES

MATERIALS

  • (2) 1″ x 6″ boards of select pine (1 for each frame)
  • Wood Glue
  • Rust-Oleum Wood Stain, Kona
  • All Purpose Adhesive Caulk
  • Brown Acrylic Latex Sealant
  • D-Ring Hangers
TOOLS

  • Table Saw
  • Clamps
  • Screwdriver

*This post contains an affiliate link. You can read our disclosure policy here.

How to Frame Bathroom Mirrors

How to Frame Bathroom Mirrors
1. To save money we bought a 1″x6″ board that we cut down the middle to be the width of one side of the frame. Cutting the board in half gave us both the left and right side of the frame.

How to Frame Bathroom Mirrors
2. We cut all the boards to our desired width for the mirrors. Then we made two cuts using the table saw to create a recessed area in the board where the mirror would sit.

The first cut, which is shown in the photo above, determined how far the mirror will sit inside the frame. We chose to make the lip on the inside of the frame 1/4 of an inch.

How to Frame Bathroom Mirrors
3. Next we raised the blade to meet up with the line of the previous cut and ran the boards through the table saw.

How to Frame Bathroom Mirrors
The two cuts we made removed the piece of the wood on the left. The piece of wood on the right is what we used for the frame.

How to Frame Bathroom Mirrors
4. After measuring the length of each side of the frame so we could mark where the cut needed to be, we cut the left and right side pieces of the frame at the same time and the top and bottom pieces at the same time to guarantee that there would be no variations between the matching sides of the frame and that the four pieces would make a rectangle.

How to Frame Bathroom Mirrors
5. Finally, we made two cuts on each side of the top and bottom board of the frame. This cut removed a piece of the wood allowing the side boards of the frame to be glued on top of the top and bottom board. This type of joint is called a rabbet joint.

How to Frame Bathroom Mirrors
6. This is what the top and bottom boards of the frame looked like after the previous step once the pieces of wood on each side were removed.

Framing Bathroom Mirrors Gray House Studio
7. By cutting the pieces of wood out, each piece of the frame fit perfectly over the other piece of the frame. This process makes for a very strong joint and prevents the need to nail or screw the frame together.

Framing Bathroom Mirrors Gray House Studio
8. We then applied glue to each board and clamped the frame together. After several projects we finally remembered to put a scrap board between the wood and the clamp. When we forget to put a scrap piece in between the board and the clamp, a lot of times the surface of the project will get indentations from the clamp.

Framing Bathroom Mirrors Gray House Studio
9. To match all the other stain in our bathroom, we decided to stain the frame with a Kona stain. We learned from staining our first set of mirrors that it is important to stain the back as well as the front of the frame.

The mirror reflects the backside of the frame. If only the front side is stained, once the mirror is glued in place, you will be able to see the non stained wood in the reflection.

Framing Bathroom Mirrors Gray House Studio
10. We placed the mirror in the frame and lined it up so it was centered. Then we traced the mirror outline on the back of the frame so we would know where to apply the adhesive. To secure the mirror to the frame, we used an all purpose adhesive caulk.

We could only find it in white which caused a little bit of an issue because the mirror will reflect the underside of the frame and the white caulk would be very noticeable. Our solution was to run a bead of brown acrylic latex sealant on the side of the white caulk that is closer to the inside of the frame.

The brown sealant is not a great adhesive but it does a good job concealing the white caulk that is actually holding the mirror and frame together.

Framing Bathroom Mirrors Gray House Studio
11. After the adhesive dried, we screwed a D-Ring hanger in each side of the back of the frame for easy hanging.

Framing Bathroom Mirrors Gray House Studio
12. The final step was to put two picture hanger nails in the wall to hang the frames on.

Framing Bathroom Mirrors Gray House Studio
Now we have two (like) brand new mirrors for only the cost of the two boards since we already had most of the supplies left over from our previous framing project. It is nice to have mirrors back in the guest bathroom again and just in time for our guests coming in a few weeks.

Framing Bathroom Mirrors Gray House Studio
We have a few more projects we will be working on this weekend for the guest bathroom. It is fun seeing our ideas start to become a reality in this room. I did some preliminary decor shopping last week and picked up some guest bathroom items along with a few tropical elements that I can’t wait to incorporate into the room.

Framing Bathroom Mirrors Gray House Studio
Stay tuned for more guest bathroom posts and progress photos coming soon.

Check out how to cut a large bathroom mirror into two smaller pieces.

PIN THIS PROJECT

Frame Bathroom Mirrors