House

Vacation Memory Box

DIY Memory Box

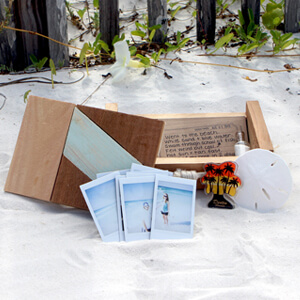
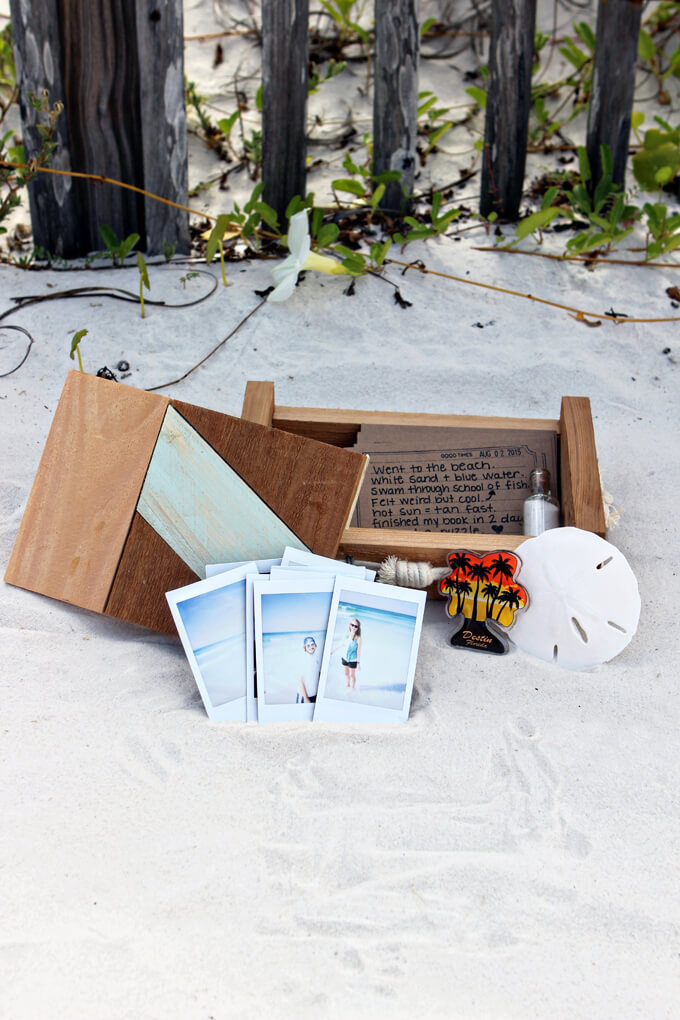
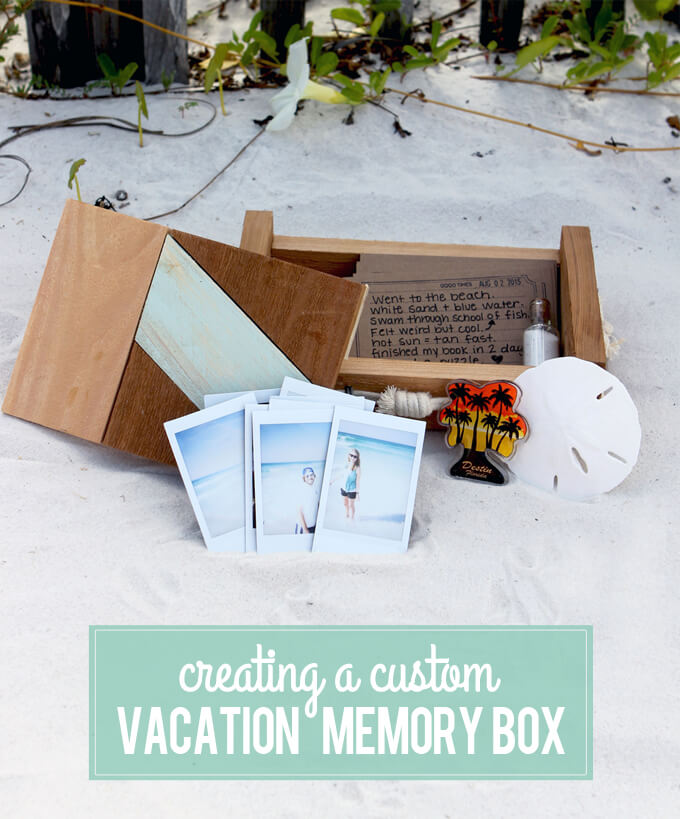
We built a custom DIY memory box to fill with photos and mementos from our vacation.
DIY Memory Box

Hello from Destin! We are bringing you this week’s Gray House Studio project from the beach in sunny Florida where we are currently on vacation. One of my favorite aspects of a vacation is preserving memories whether that is through photos or significant physical keepsakes. Today we are sharing how we created a custom vacation memory box and the items we have been adding to it this week.

I know there is that whole living in the moment movement but I am one who likes to live life through a lens. If you are anything like me when you come home from sight seeing you have hundreds of photos from your adventure. But hundreds of photos can get overwhelming to sort through so most of the times these photos tend to get lost in a folder on the desktop.

And if I am not careful, all of those items I collected that were so meaningful at the time will end up misplaced somewhere in the house (if they make if out of my suitcase).
DIY Memory Box

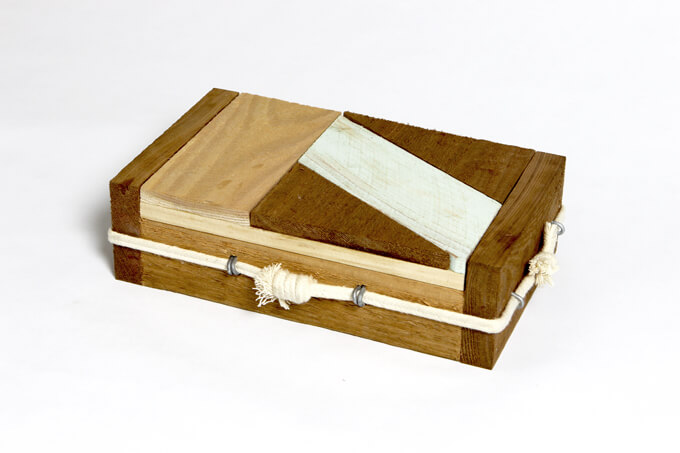
I wanted a unique way to preserve our trips so that our experience was paired down to a few notecards, photographs and mementos that symbolized our favorite moments.

So Brent and I came up with the idea of creating small boxes designed specifically so that we could take them on our adventures with us to store all of our keepsakes that would also look really nice sitting on a shelf once we got home.

DIY KNOCKOFF
DIY Memory Box
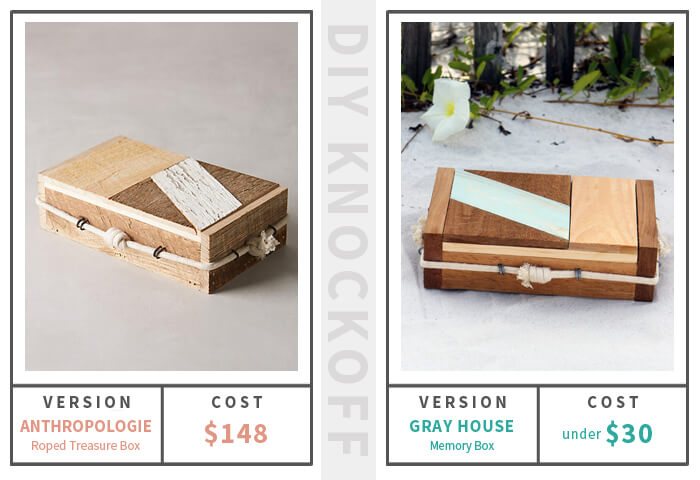
While I was browsing Anthropologie’s website, looking at all the things we can’t afford, I stumbled upon the Roped Treasure Box (on the left). I fell in love with the design of it but the price tag, which was $148.00, um not so much. I knew the style would fit perfectly with our vision for our beach DIY memory box so Brent and I put our heads together and made our own version for less than $30.00!

VIDEO TUTORIAL

To see new DIY videos on Thursdays, be sure to subscribe to our channel ⇾


How we Built Our DIY Memory Box
DIY Memory Box
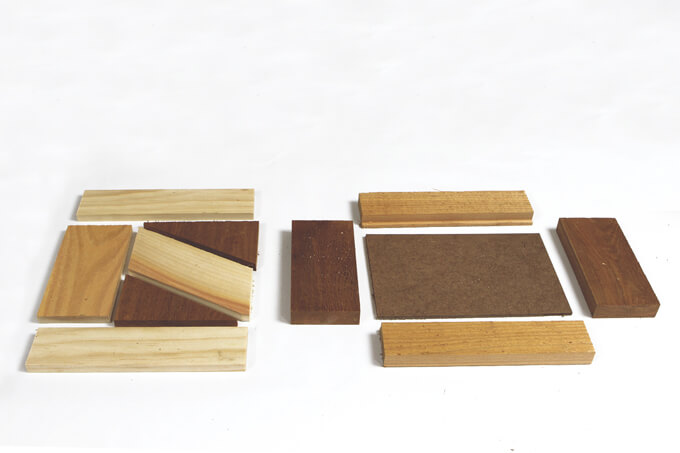
1. First, we constructed the box out of cedar planks typically used for privacy fences. We searched through the piles at the hardware store to find planks of three different shades: dark, medium and light.

For the bottom of the box we used a scrap piece of masonite. Brent was able to figure out what size each piece needed to be by using the dimensions of the roped treasure box. If you are interested in making your own memory box, stay tuned we will be sharing our plans for this box in another post soon.
DIY Memory Box
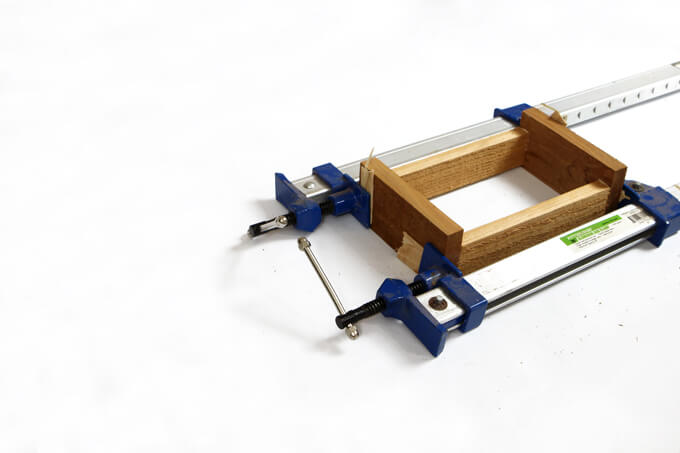
2. We used wood glue and finishing nails to assemble the box. Then used clamps to hold the box together while it dried.
DIY Memory Box
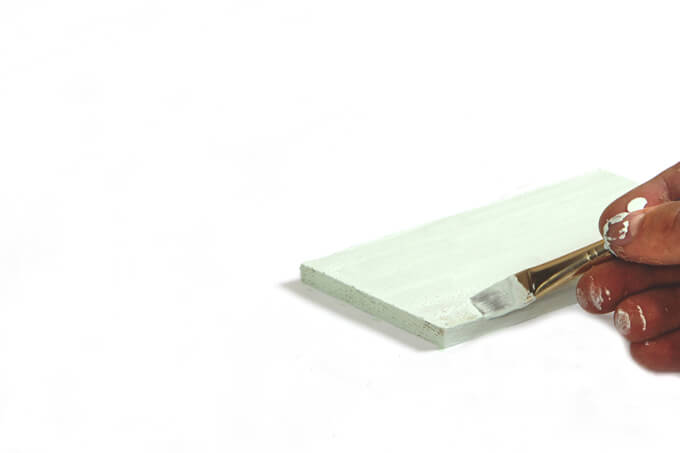
3. For the diagonal piece of wood in the top of the box we painted it with some leftover “Slow Green” paint from Sherwin Williams. Then we distressed it with sand paper.
DIY Memory Box
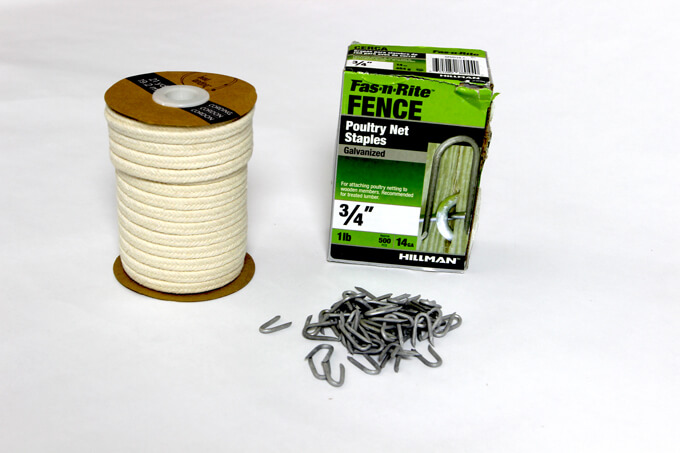
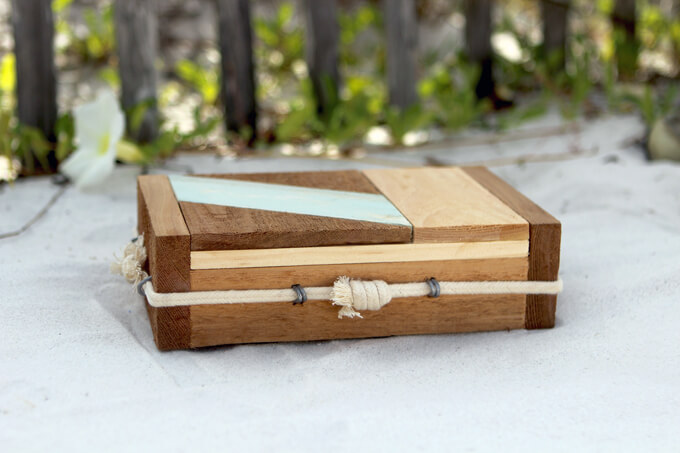
4. To accent the box we cut sections of cotton rope that we bought from a craft store and tied it together using knots. We attached the rope to the box using Poultry Net Staples.
DIY Memory Box
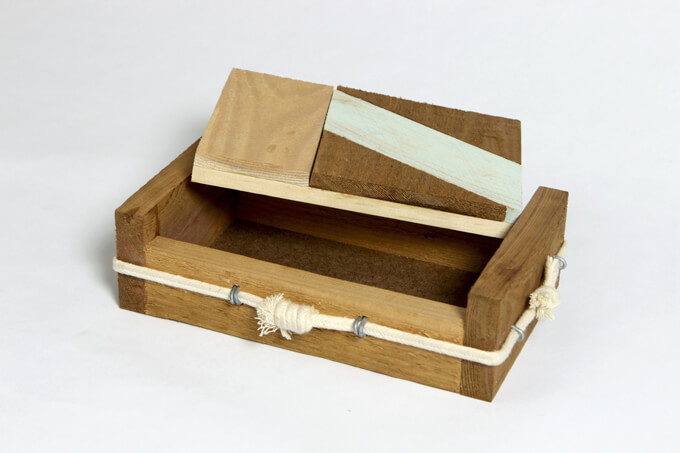
The box was fairly easy to make and certainly worth saving over $100. Plus, we got to customize the color and style to look exactly how we wanted. Once our box was finished it was ready to go to the beach and collect memories!
DIY Memory Box
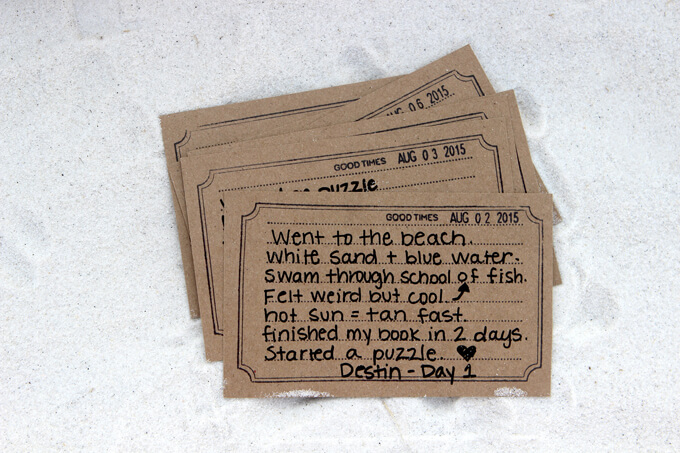
5. Before we left Brent and I made these notecards using Kraft paper tags that we cut the ends off to make into a rectangle, a stamp with lines and a date stamp. Each night before I go to bed I like to jot down an abbreviated list of the highlights of the day so when I grab the box off the shelf months from now it will jog my memory any of the experiences I may have forgotten.

Creating a Custom Vacation Memory Box
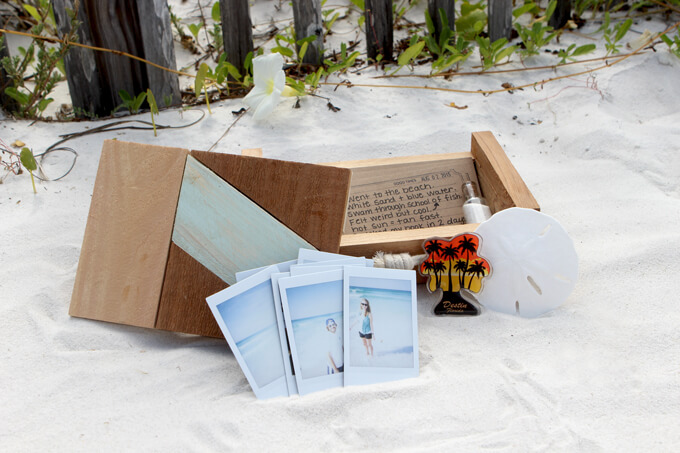
We used our new Instax Mini 8 camera to take a few instant photos reminiscent of the classic Polaroid photos to store in our box but we could also print out our favorite 15-20 photos from the vacation to store in the memory box. So when our friends or family ask about our trip, we can pull out our unique vacation memory box and they can get this big picture of our trip without having to sit through a hundred-photo narrated slide show.
DIY Memory Box
Our DIY memory box has forced us to be intentional with the souvenirs we collect because we can only fit so much “treasure” in our small box. We try and find things that best represent our favorite experiences. For example, on this trip while swimming in the ocean we stumbled upon a live sand dollar.
Creating a Custom Vacation Memory Box
Neither of us have never seen a live sand dollar before. It was brown and we could see it “breathing”. So we scooped it up with some sand and water in a bucket and observed it move along the sand and burry itself for a long time. We even named our pet sand dollar, George. We watched him for a few hours but we felt guilty about taking George from his natural habitat so we released him back into the ocean.

Since we couldn’t actually keep the live sand dollar in our box, we bought a souvenir sand dollar to help us remember our George.

We love how our DIY memory box turned out so much so that we will make one for each vacation we go on from now on. We would love to craft each one so the design specifically fits with the location of our trip and we can have a collection of interesting boxes displayed on our library shelves.

PIN THIS PROJECT
DIY Memory Box

DIY Custom Shape Doormat

DIY Doormat

Making your own DIY doormat is an easy and fun way to bring a little personality to your doorstep! The options are endless with what shapes you can create.

DIY Doormat in a Custom Shape

Today we sharing a quick, easy and inexpensive do it yourself project that will bring a punch of personality to your doorstep! We are walking through how we made a DIY doormat.

It is just me or does it seem as though doormats have a lot of pressure on them lately? Gone are the days where they only had two jobs, to give a friendly welcome and to subtly remind people to wipe their feet so they didn’t track dirt into your home.

Now doormats have the added expectation to be funny, clever, relevant or stylish. The more personality and quirkiness the better!

I’m not judging this trend. In fact I am all about jumping on the bandwagon. I saw a few doormats in stores that caught my eye because they were different shapes then the typical rectangle mat and thought that would be a fun touch for our front porch but the price tag was a little high for a mat that is going to get walked all over.

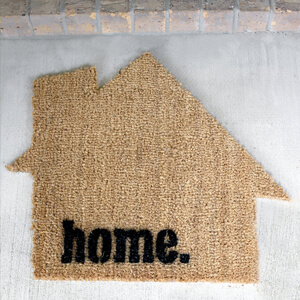
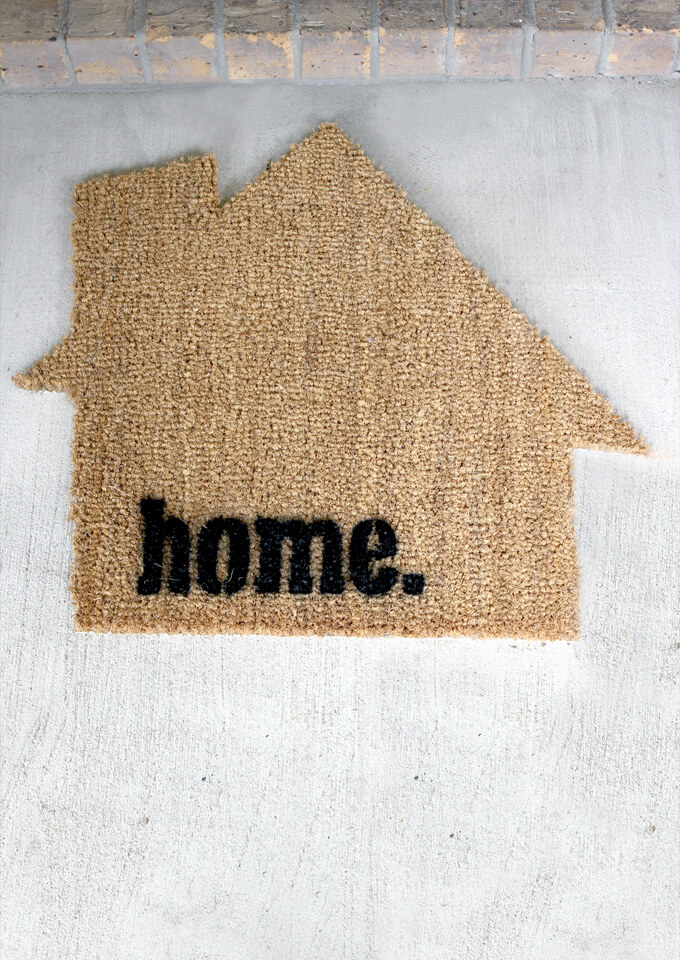
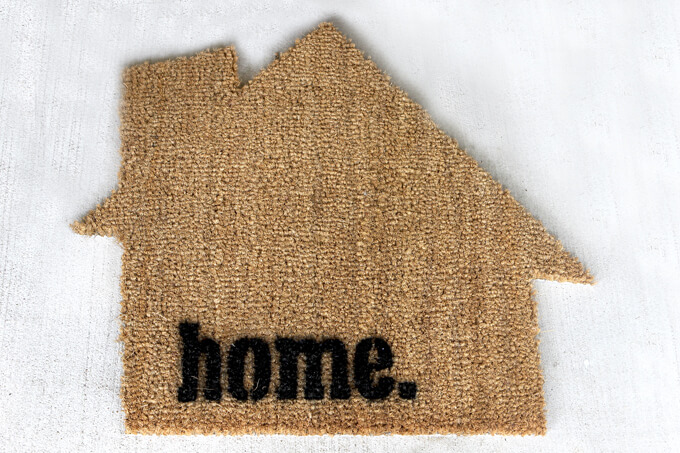
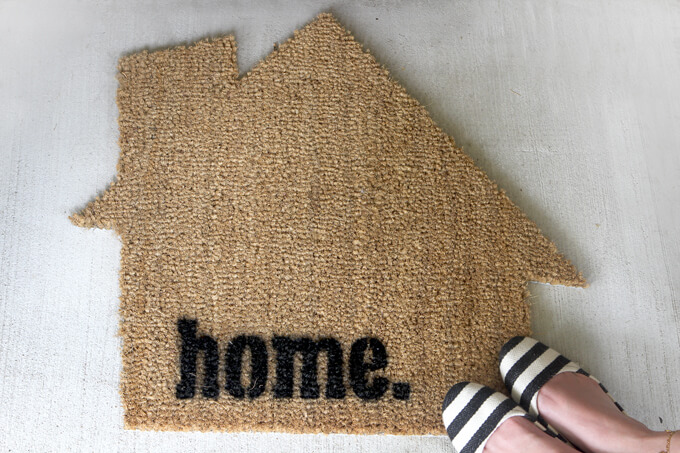
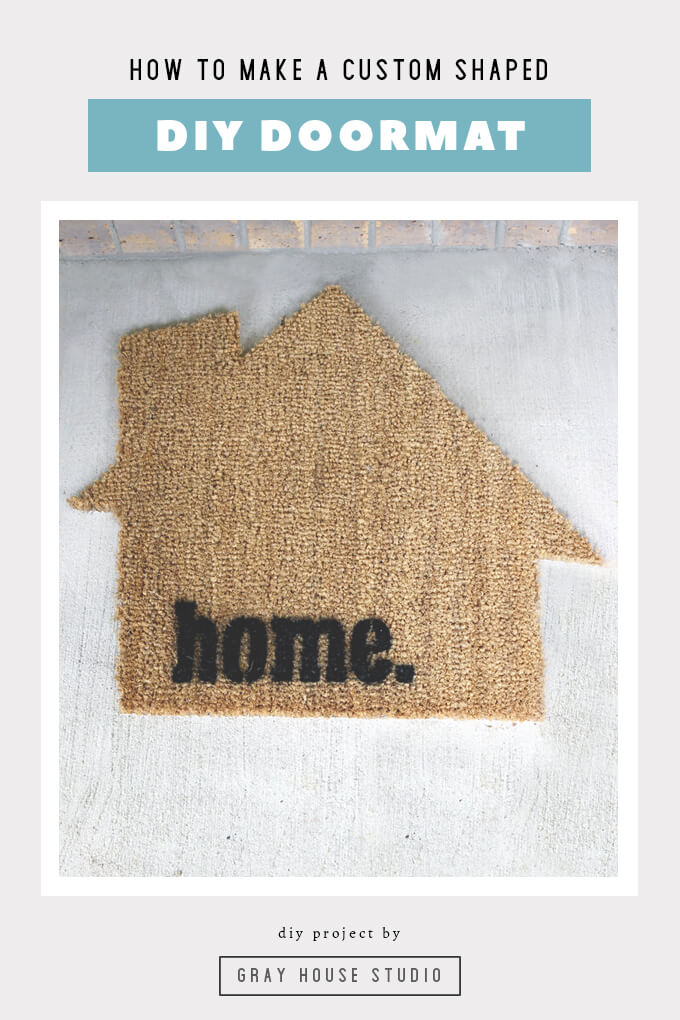
So we decided to make our own custom shaped doormat. We kept it simple and created a Gray House logo shaped welcome mat for our front porch.

Interested in creating your own DIY doormat? Watch the video or follow along with the steps below to see how easy they are to make.

How to Make a DIY Doormat in a Custom Shape

SUPPLIES

FYI: This post contains affiliate links to the supplies and tools we used to make our DIY ball pit. As an Amazon Associate Gray House Studio earns from qualifying purchases. This is at no extra cost to you. We appreciate you supporting this site. Read our privacy and disclosure policy.

TUTORIAL VIDEO

[yotuwp type=”videos” id=”aMSE6EL0jAg” title=”off” description=”off” player=”width=590&modestbranding=0&showinfo=0″]

Subscribe to our YouTube Channel

Like our video? Subscribe and help us reach our goal of 100k subscribers.

DIY Doormat

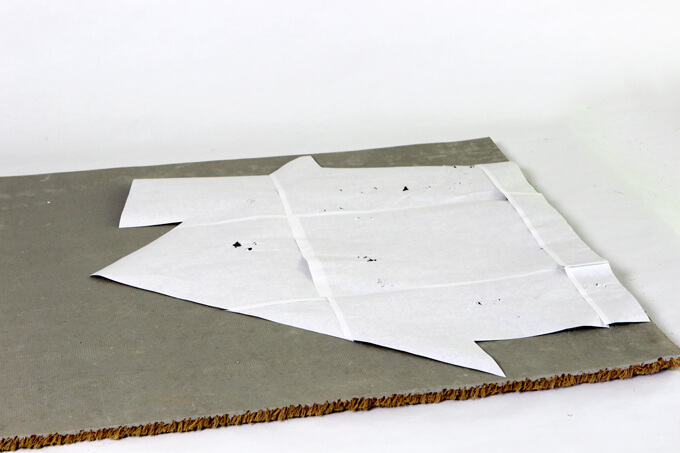
1. The first thing I did was to flip the doormat over so the rubber back was face up. Then I took our large template and also placed it face down on the back of the mat.

I made our custom template by printing off our Gray House logo onto multiple sheets of paper and cutting and taping the pieces together

DIY Doormat

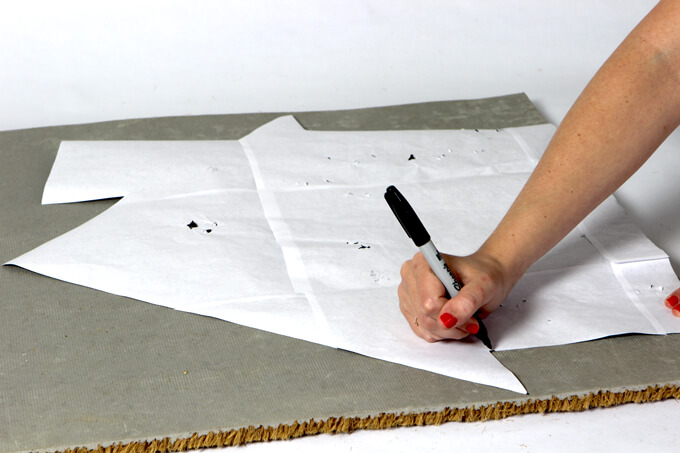
2. Next, I used a permanent marker to mark all the corners of my template. The trick was to trace my shape on the back of the mat in reverse so when I flip the mat back over the shape looks correct and none of the lines I traced are visible .

DIY Doormat

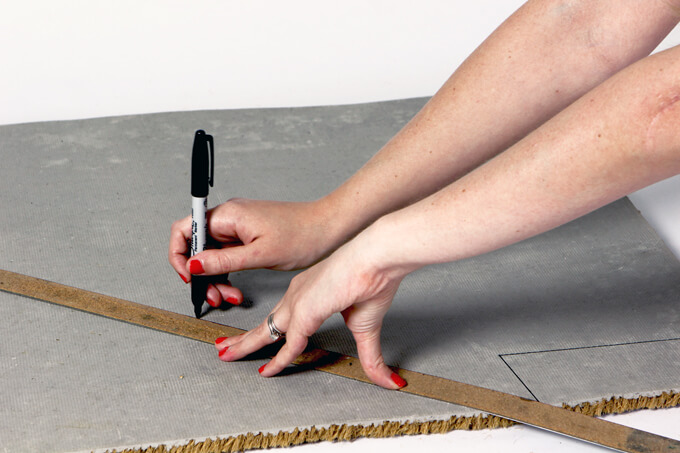
3. I used a large ruler to connect all the corners I marked so that the lines would be nice and straight.

DIY Doormat

4. Once I was finished tracing I had a reverse image of my shape. This particular mat worked really well because the latex back was a light gray and it made it easy to see the shape.

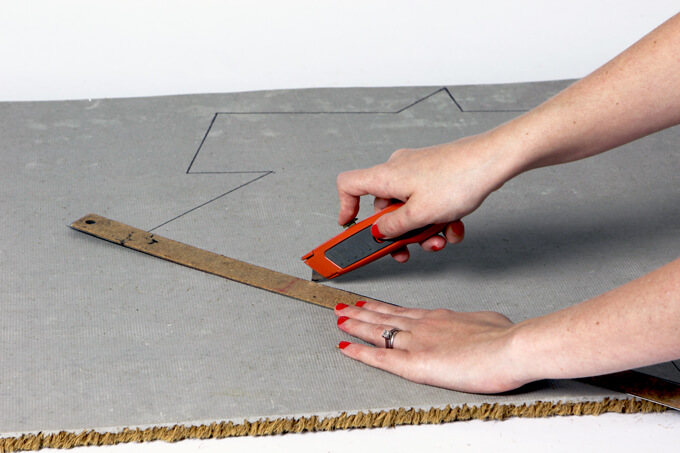
Next, I took a box cutter with a fresh blade and used a ruler to cut along the lines I traced.

The blade cut through the rubber easily and I was able to pull away all the excess pieces of the mat.

DIY Doormat

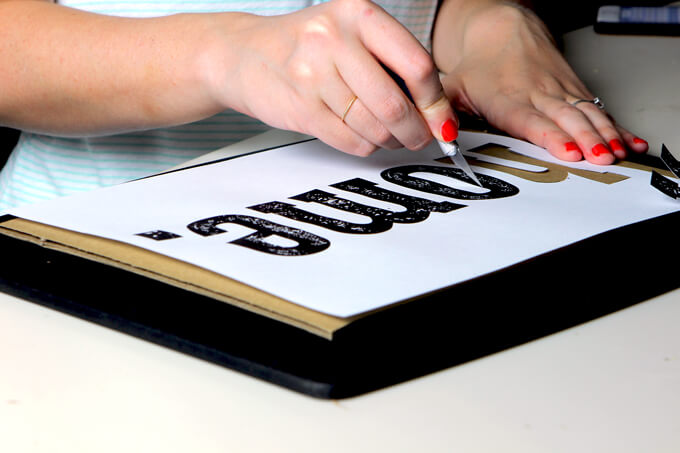
5. To add an extra touch, I created a stencil with the word “home” out of cardboard.

I printed out the word in the font I wanted and then used an X-Acto Precision Knife to cut through the paper template and cardboard.

DIY Doormat

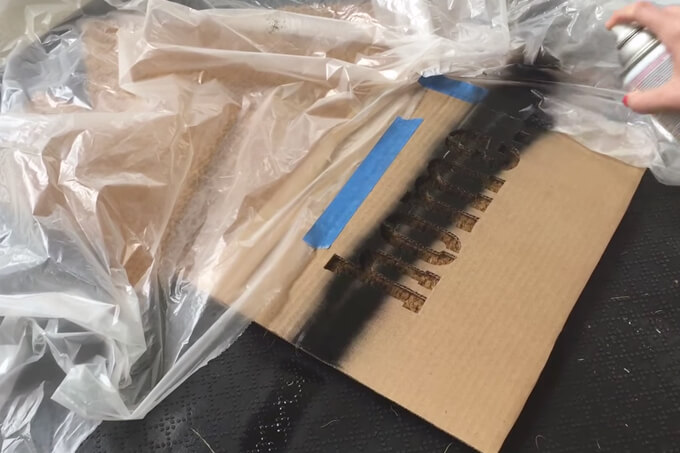
6. Finally, using a piece of plastic sheeting and painters tape I covered the entire mat except where I placed my stencil.

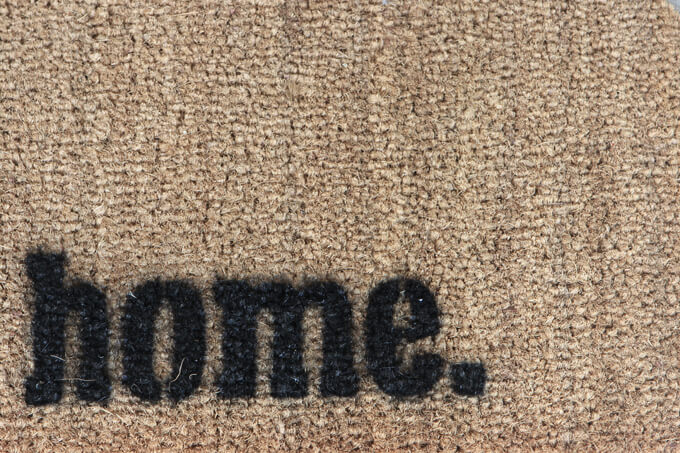
Then spray painted over the stencil with a can of black spray paint.


DIY Doormat

Our new custom Gray House shaped doormat!

DIY Doormat

DIY Doormat

We hope you find this quick and easy welcome mat project is a fun way to bring personality to your doorstep. This project was an enjoyable and affordable DIY project that I was able to complete in under an hour and for under $25. I like that the doormat is unique and we didn’t have to spend a lot of money on it.

I see us making more custom shaped mats in the future so we can change them in and out depending on season or even mood.

PIN FOR LATER

Making your own DIY doormat is an easy and fun way to bring a little personality to your doorstep! The options are endless with what shapes you can create.

Office Pegboard Wall Organization

Office Pegboard Organization

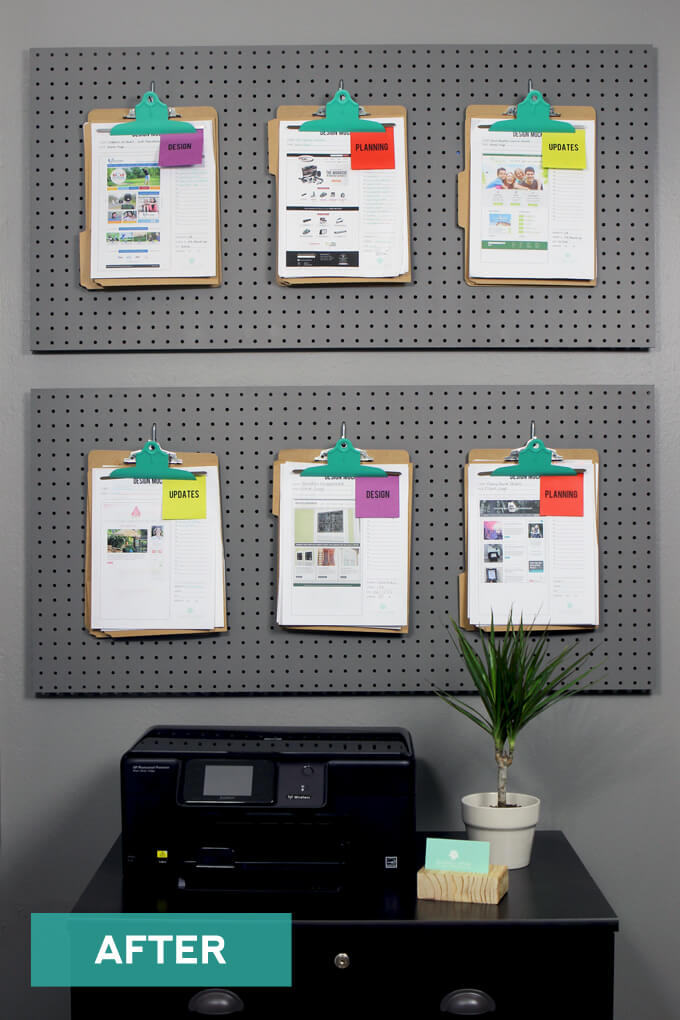
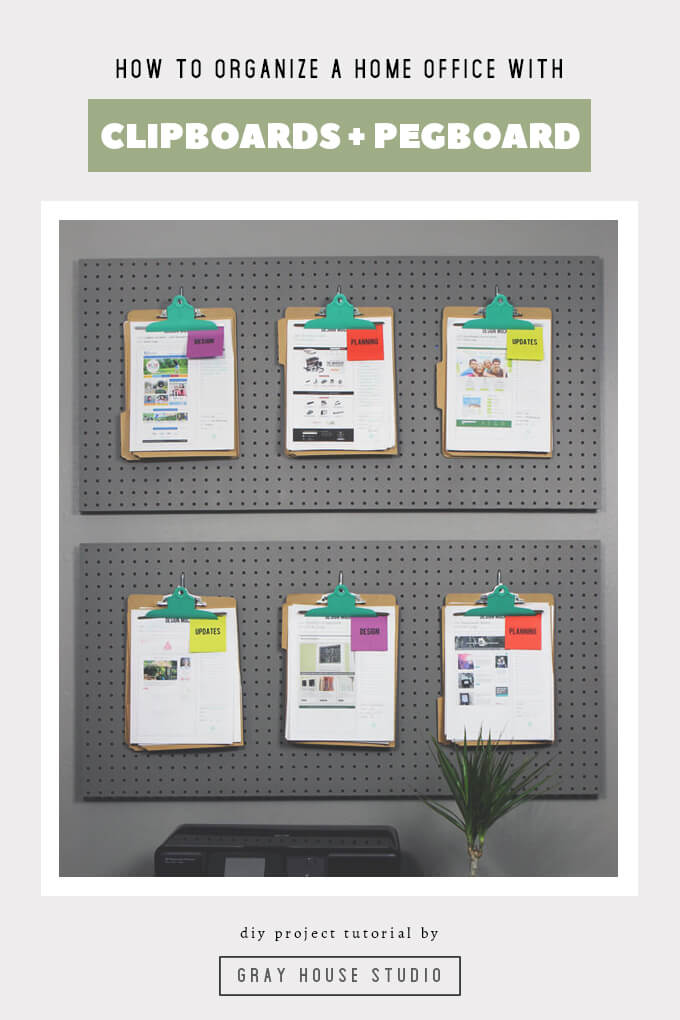
To create an office pegboard organization system, we painted and installed a pegboard on a wall in our office to add additional storage.

Office Pegboard Organization

When you are working out of your home, it is easy for personal mail to get lumped in with client invoices and before you know it you have a mountain of all different kinds of paperwork mixed together sitting on your desk.

I am the type of person who loves to be organized but can only stay organized if I have a designated place to put everything. If not, no matter how many times I straighten things up, the paper mountain returns or just moves to a different location.

I had been on the lookout for a solution to keeping all of the paperwork associated with my current projects organized as well as readily available to grab each morning when I sit down to work.

Office Pegboard Organization

I have tried several methods for organizing my current web design projects so I can easily keep all the associated mockups, invoices, client information, etc. in one location as well as visibly display the phase each project is in.

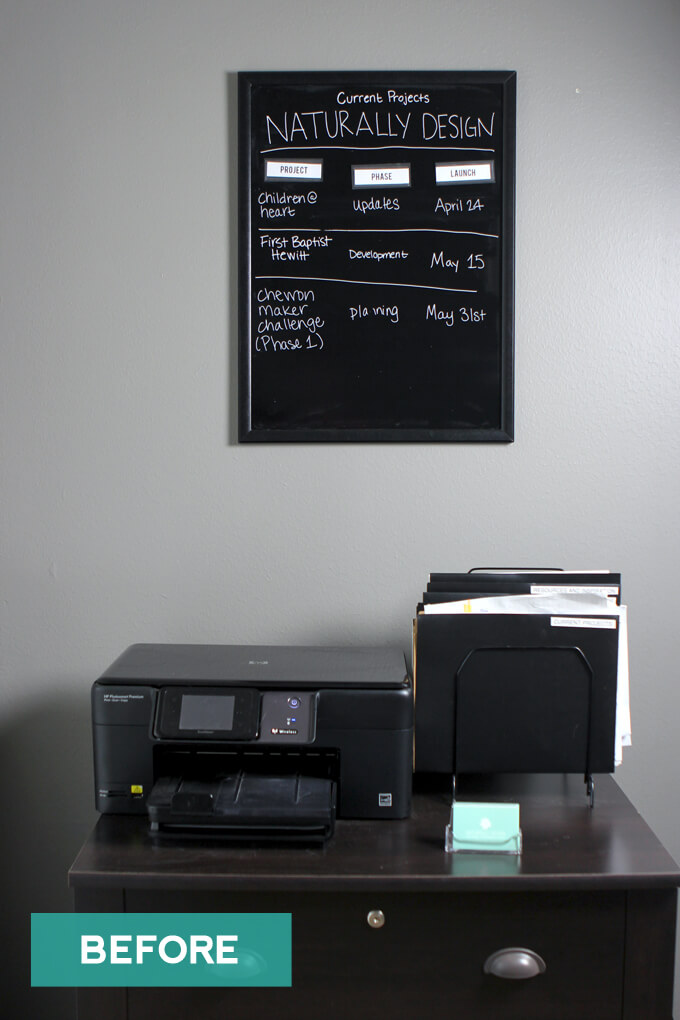
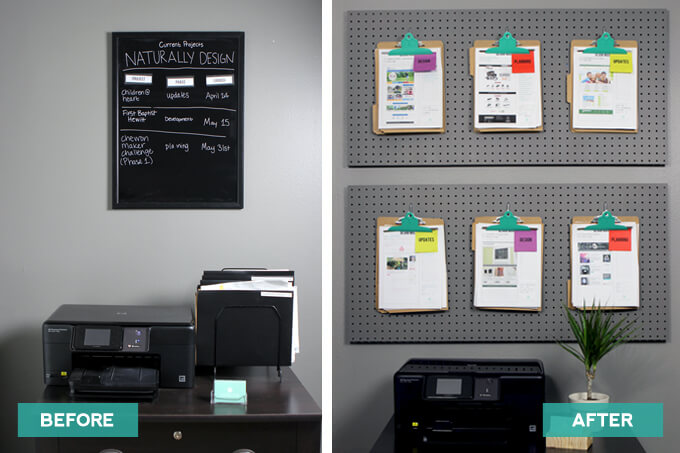
For awhile I had a dry erase board with my current schedule and kept all the in-progress client folders in a file rack. This situation was not ideal because visually the dry erase board did not fill up the wall and the top of the file cabinet felt cluttered.

Office Pegboard Organization

Office Pegboard Organization Wall

SUPPLIES

FYI: This post contains a few affiliate links to products we used to make this project. Gray House Studio does receive commissions for sales from these links but at no extra cost to you. We appreciate you supporting this site. Read our privacy and disclosure policy. You can also easily shop our recommended products here.

2022 Personalized Christmas Ornaments
*** Thanks so much for supporting our small shop – Moon Rock Prints – this holiday season! ***

STEP BY STEP GUIDE

1. First we sanded down our two pegboard pieces with 150 grit sandpaper.

2. Next, we painted the pegboards with SW Dovetail Paint.

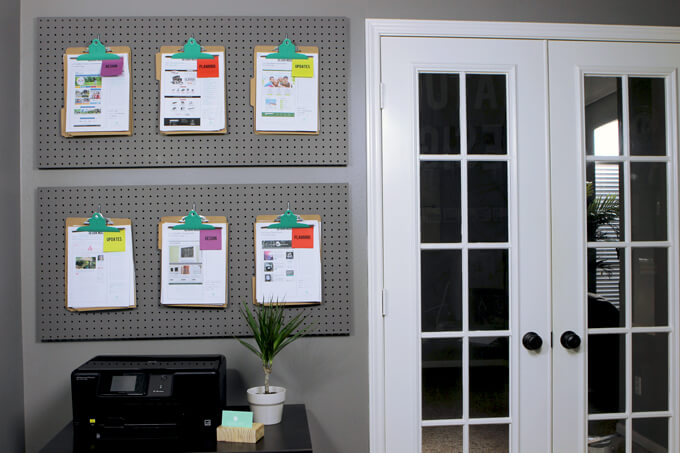
3. Then it was time to hang the pegboards up. It was our visual preference to leave a little bit of space between the two boards.

We put small blocks of wood behind the areas where we planned on hanging clipboards and used a drill to drill into the wall through the wood so that the pegboard would appear as if it was floating off the wall and we could put metal pegboard hooks in it to hang the clipboards.

Office Pegboard Organization

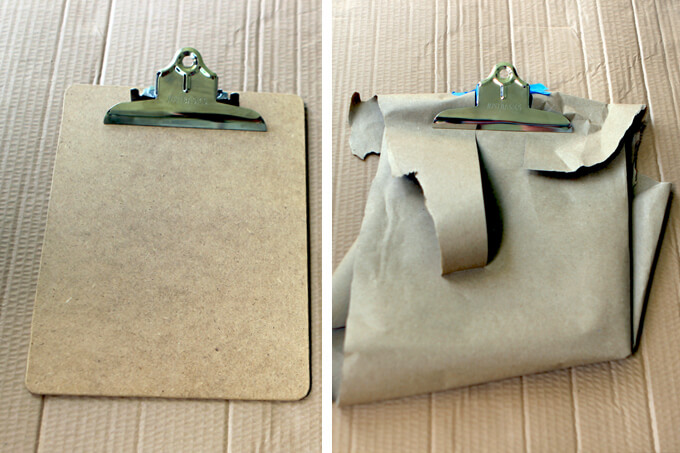
4. Another part of this project was to spruce up some clipboards we had lying around.

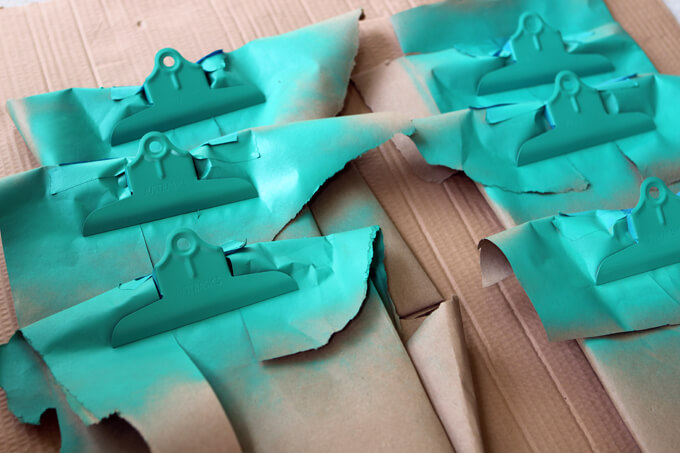
We wrapped all the areas we did not want to paint with brown kraft paper.

A roll of non-adhesive kraft paper is cheap and comes in handy for a lot of our projects.

Office Pegboard Organization

Office Pegboard Organization

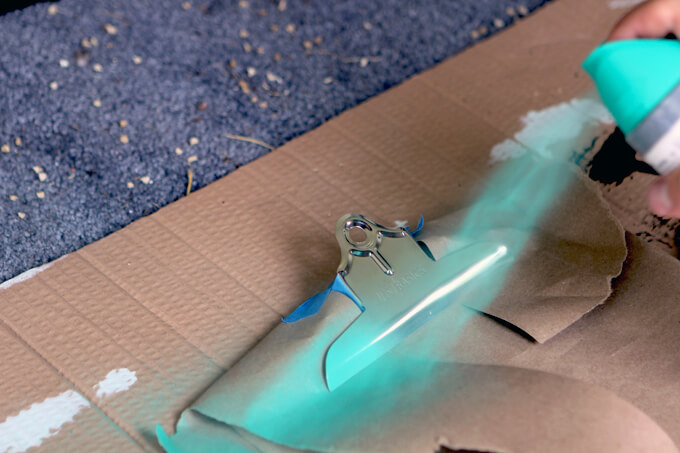
5. Finally, we spray painted just the front metal clip with teal spray paint to add a bit of color and to make the clipboards pop against the gray pegboard.

Office Pegboard Organization

Once the clipboards were dry, we hung them up on the metal hooks on our pegboard!

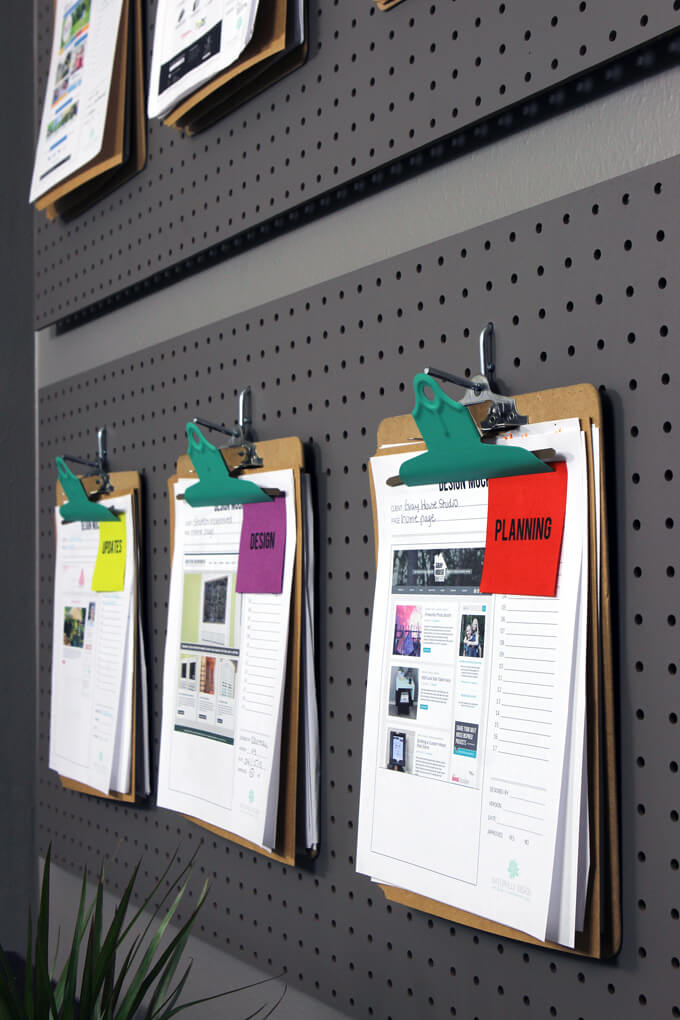
For each client I put all the associated paperwork in a folder and then attached it to a clipboard.

I ran several post-it notes through the printer with each phase of my design process.

The color represents the phase of the project and I can easily remove and stick a new note once the the project moves into the next phase.

Not only does the office pegboard organization make for a colorful display, I can easily see where each of my project stands and grab the one I need to work on that day off my project board.

I ordered them so the new projects are at the top and the ones with the closest launch date are on the bottom. Once a project is complete, I will file it away in my file cabinet below and a clipboard opens up for a new project to begin!

This DIY home office project was easy, quick to put together and actually only cost us one can of green spray paint since all the other supplies we used were left over from other projects.

I really like how visually the whole wall is filled up now and the space feels much more complete than it did before with this office pegboard organization solution.

I believe the office pegboard organization system will work really well for keeping all my projects organized. Now the paper mountain will be more of a paper hill while I move on to figuring out a good solution for sorting the mail more efficiently.

PIN IT FOR LATER
Office Pegboard Organization

Lack Side table Ikea Hack

Lack Side Table IKEA Hack

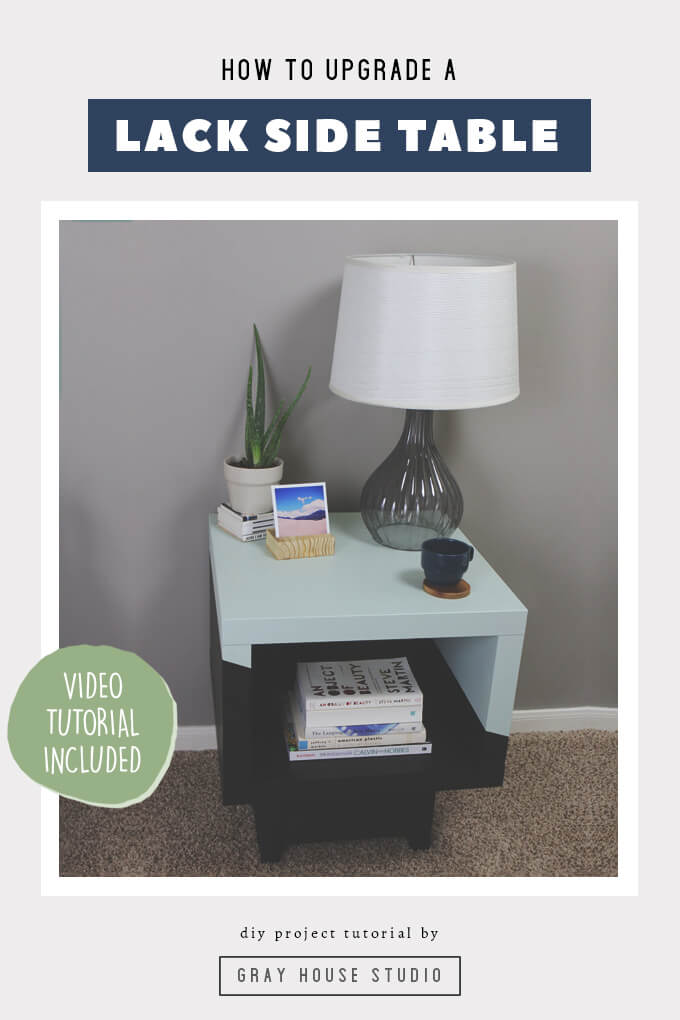
For this Lack Side Table IKEA Hack we transformed a basic LACK side table into a fun and colorful piece with character and charm.

Lack Side table Ikea Hack

Back during my single days when I was working in Dallas I practically lived right down the street from an IKEA. I went there every now and then but I had no idea how good I had it and definitely didn’t take advantage of it.

If I am being honest most of the time I only stopped by there on weekend mornings just to grab a cinnamon roll. Have you ever tried an IKEA cinnamon roll? They are so delicious. Now the closest IKEA is about 45 minutes away which is not bad, you just have to make a day of it. But really by the time you walk all the way through the place on a Saturday, it’s not hard to do.

Lack Side table Ikea Hack

The great thing about IKEA is you can get pretty inexpensive furniture there and because of that there is the growing trend of IKEA hack projects.

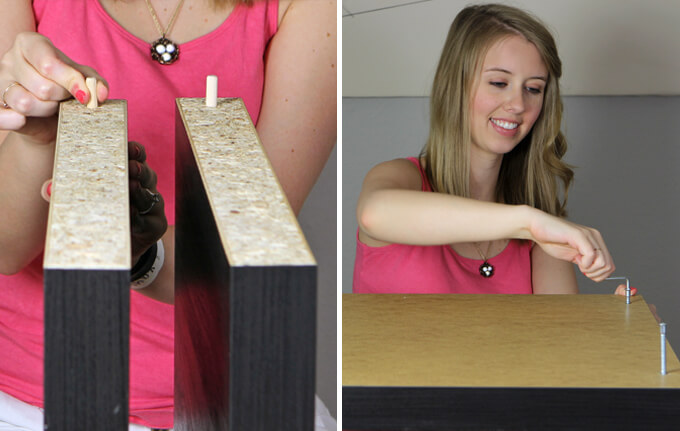
This past weekend Brent and I did our first IKEA hack using the Lack side table with casters. Lack IKEA hack – try saying that five times fast. We were looking to get an inexpensive table that we could paint to bring subtle color to our neutral master bedroom.

Lack Side Table IKEA Hack

All my furniture in my first apartment in college was from the Lack collection at IKEA. Now I remember why. That stuff is cheap. But man oh man is it plain and boring.

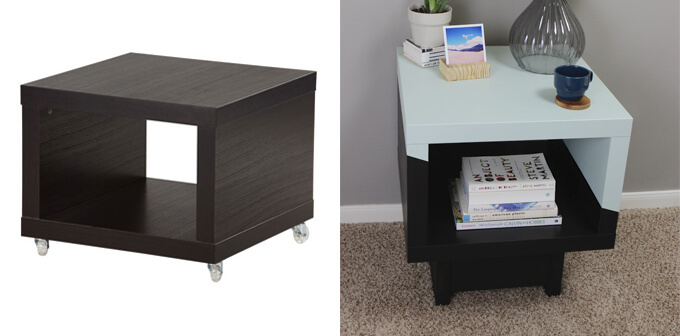
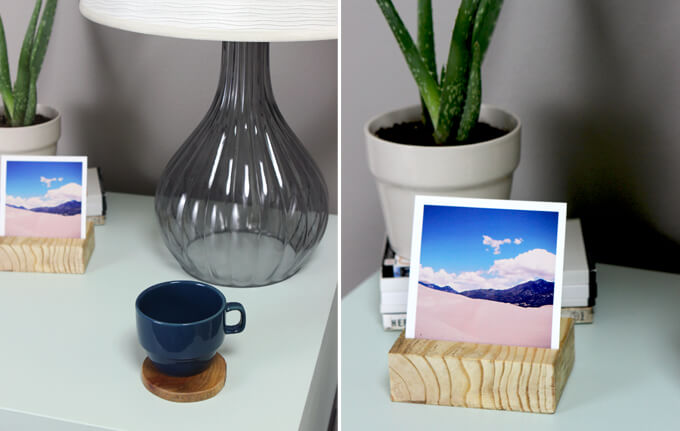
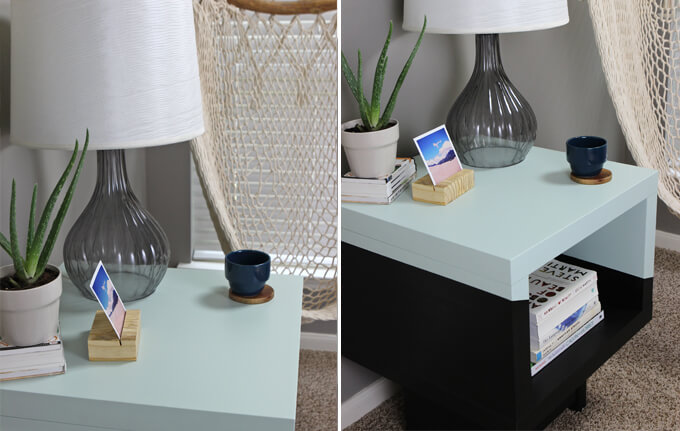
So in today’s post we are sharing how we transformed the basic side table from IKEA (on the left) into a piece of furniture with character and charm (on the right).

Lack Side Table IKEA Hack

Lack Side Table IKEA Hack

SUPPLIES

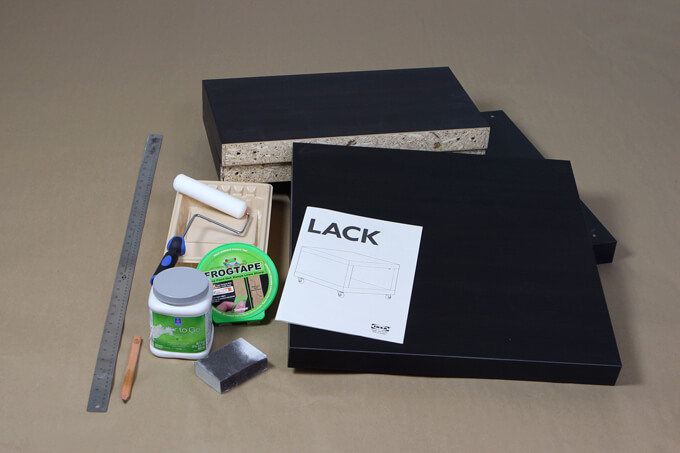
Shop the products we used for this project in one place.

FYI: This post contains a few affiliate links to products we used to make this project. Gray House Studio does receive commissions for sales from these links but at no extra cost to you. We appreciate you supporting this site. Read our privacy and disclosure policy. You can also easily shop our recommended products here.

TUTORIAL VIDEO

[yotuwp type=”videos” id=”1HKzfE6jHZc” title=”off” description=”off” player=”width=590&modestbranding=0&showinfo=0″]

Subscribe to our YouTube Channel

Like our video? Subscribe and help us reach our goal of 100k subscribers.

Lack Side Table IKEA Hack

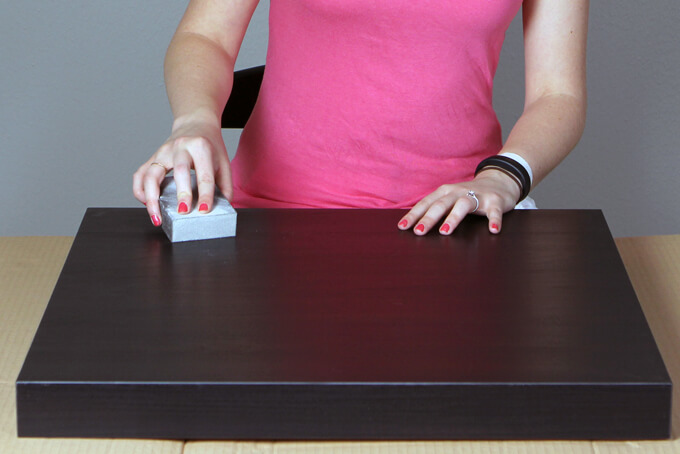
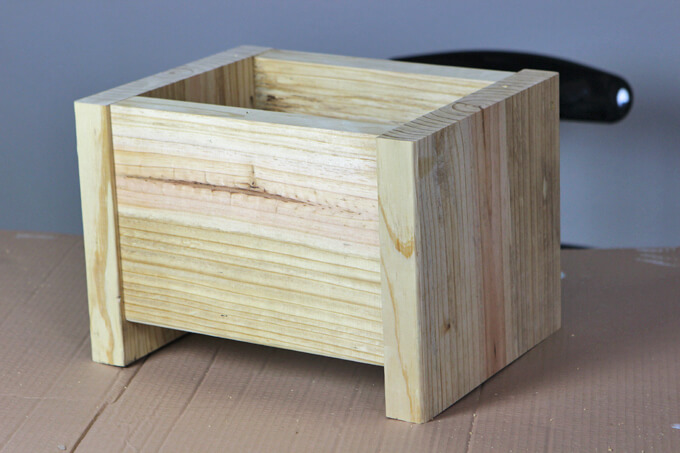
1. The first thing I did was to use a sanding sponge to sand all sides of the top piece of the side table.

Lack Side Table IKEA Hack

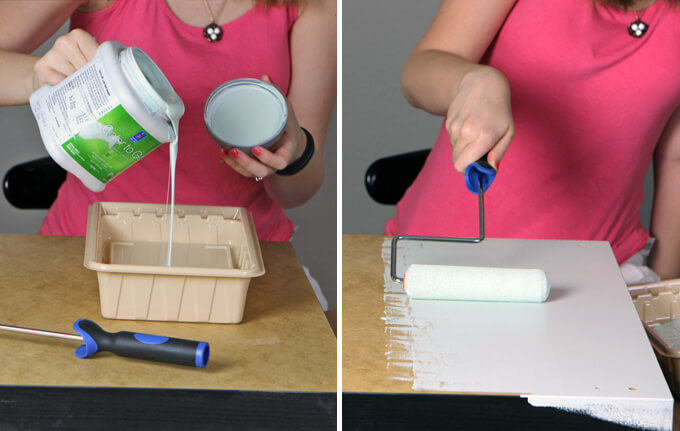
2. Next, I used a foam roller to apply paint to the top.

I used Slow Green from Sherwin Williams. I like the appearance of the light color contrasting with the dark wood.

Lack Side Table IKEA Hack

3. While the top was drying, I assembled the base of the side table.

Lack Side Table IKEA Hack

4. I used a yard stick to mark the shape I wanted to create with the paint.

Lack Side Table IKEA Hack

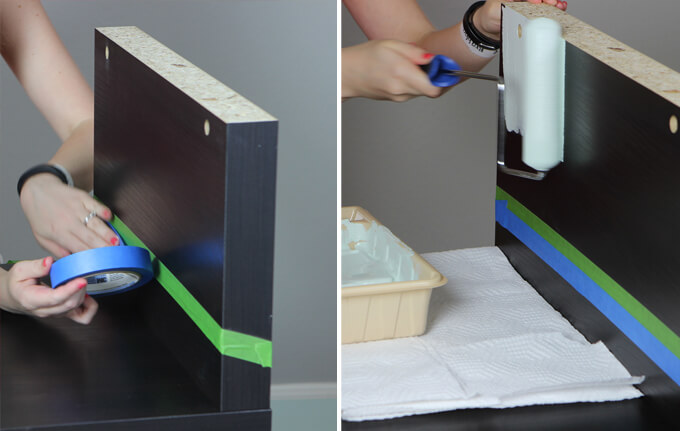
5. Next, I marked on the base with painter’s tape the areas I intended to paint.

I used two layers of tape to make sure I had plenty of space to catch any stray paint in case my hand got a little shaky.

I then sanded with the sanding sponge again and used a foam roller to paint all the areas above the tape. As soon as the paint was applied, I removed the tape.

Lack Side table Ikea Hack

6. We bought the Lack IKEA side table with casters but didn’t want to use to the casters because we wanted the side table to sit higher off the ground.

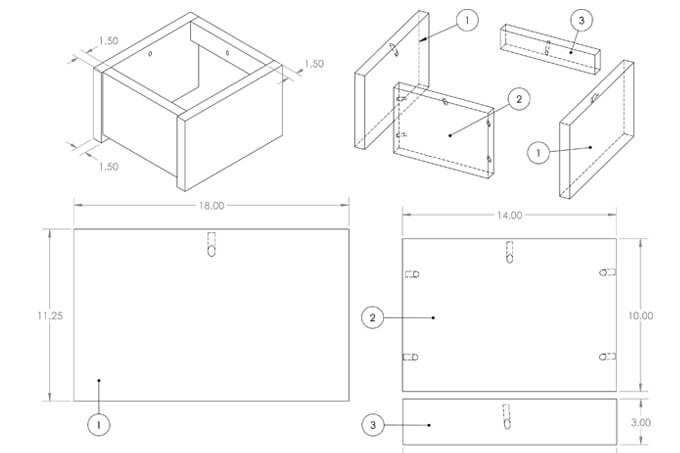
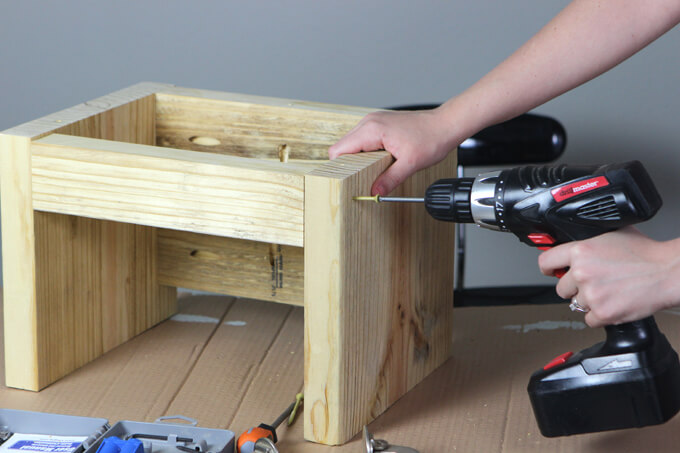
We built our own custom base that was very similar to the nightstand in our bedroom that Brent made.

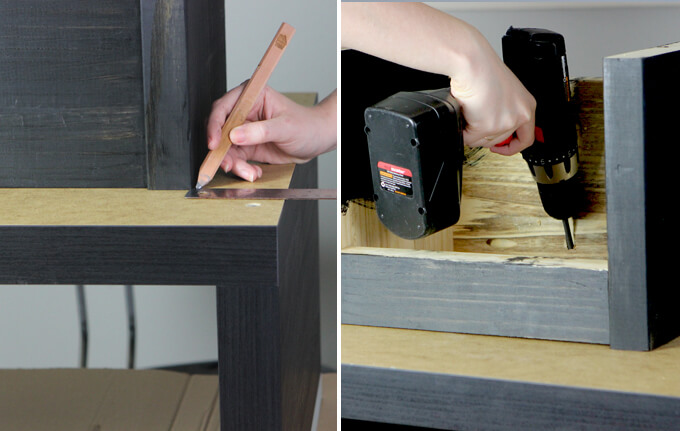
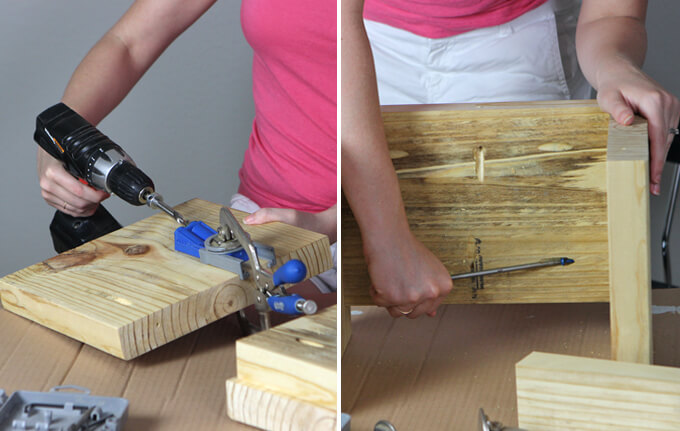
After Brent cut the pieces of wood to the right dimensions using a table saw, I used a pocket hole jig and a drill to make holes for the screws that hold the base together.

Lack Side table Ikea Hack

Lack Side table Ikea Hack

If you are interested in building the base we made, be sure to download the free plans above with all the dimensions and measurements you need.

Lack Side table Ikea Hack

7. The IKEA Lack side table with casters comes in three colors.

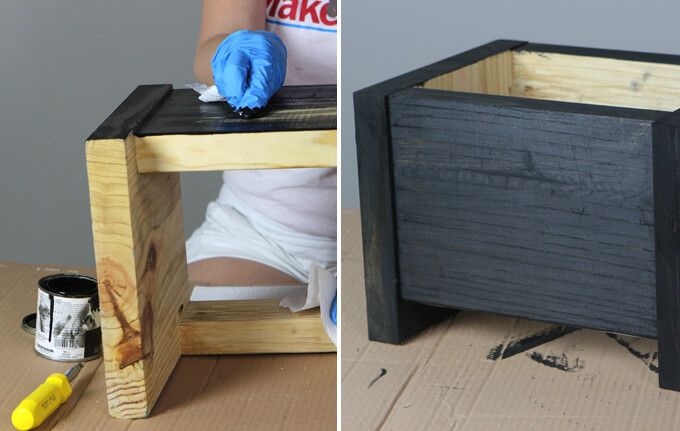
We choose the black/brown finish. We found that the Rust-Oleum ebony stain was a very close match to the color of the table.

I stained the outside of the base and the areas of the inside that would be visible.

Lack Side table Ikea Hack

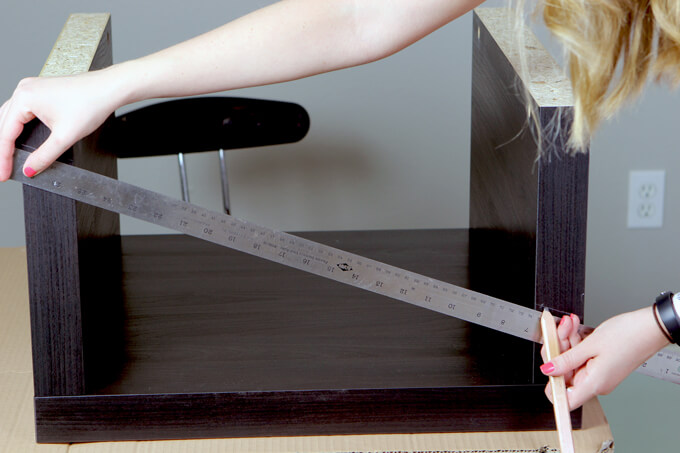
8. Once the stain was dry I flipped the table over and flipped the base over and set it on top of the table. Then I took a ruler and measured to make sure the base was centered on the table.

I used the pocket holes I drilled earlier to attach the base to the bottom of the table with screws.

Finally, I flipped the side table back over and attached the top of the table using the hardware that came with it. And just like that my new side table was complete!

Lack Side table Ikea Hack

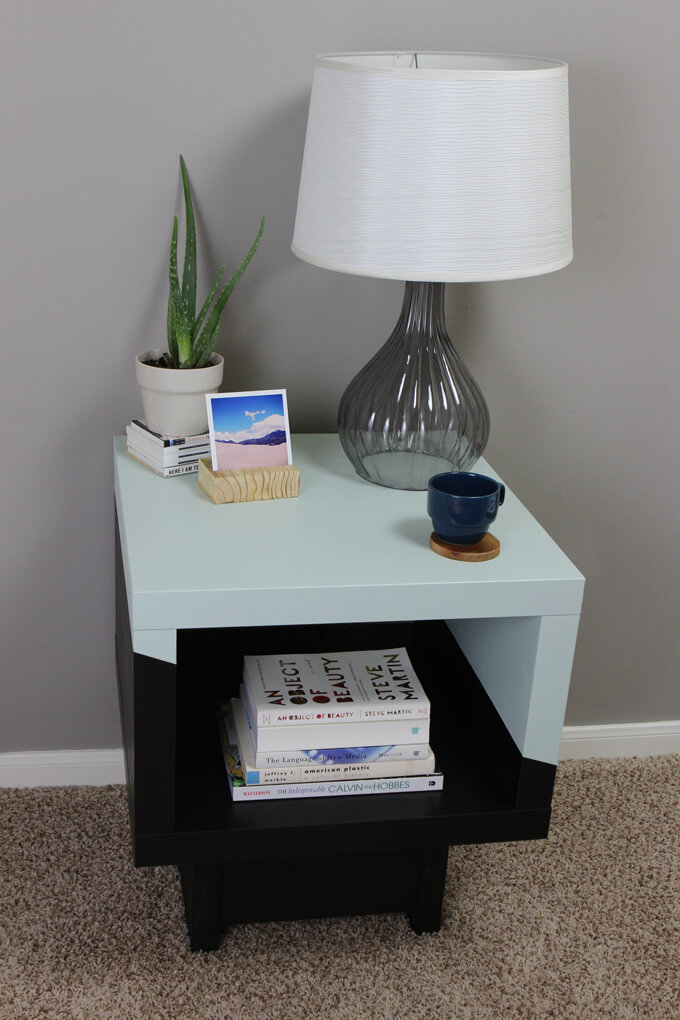
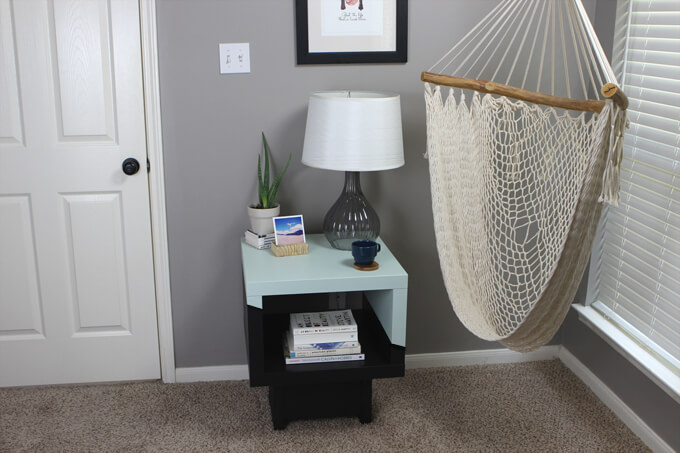
In just a few simple steps we turned the inexpensive and plain as it gets Lack side table with casters into a unique piece of furniture worthy of styling. Yay for a Lack Side Table IKEA Hack!

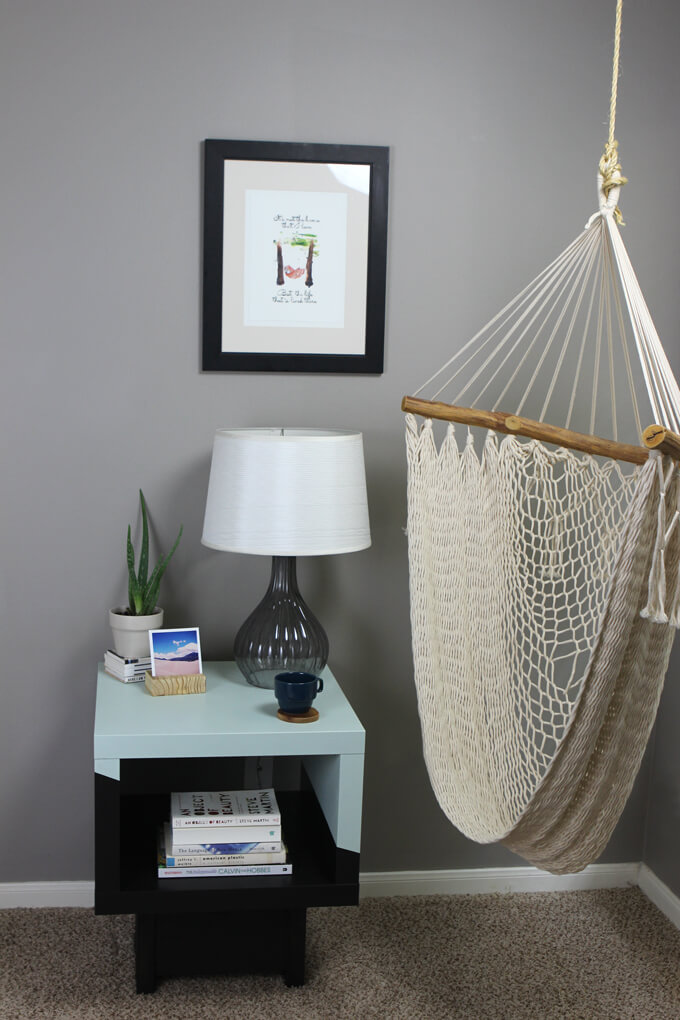
We put our new side table next to our hanging reading chair and it fits perfectly! We love how the asymmetrical shape on it brings just enough color and interest to our bedroom without overpowering any of our other furniture. I also love that now I have a place to set my coffee and a lamp to provide some light while I am reading in one of my favorite chairs in our house. It really completes this little corner.

Lack Side table Ikea Hack

Lack Side table Ikea Hack

My favorite part is always styling the projects. I love all the little details on this side table, sweet and simple.

This Lack Side Table IKEA Hack project is a fun one because the possibilities of shapes and colors you can paint are endless!

I hope this post has inspired you to head to IKEA and make your own or at very least go get a cinnamon roll.

PIN FOR LATER

A simple way to give the IKEA Lack side table an upgrade with a little paint and a new base. This DIY furniture makeover includes free plans for building the base of the table.

Custom Wood iPad Stand

Building a Custom Wood iPad Stand

Building a Custom Wood iPad Stand

This past year I received an iPad for Christmas. I was a little late to the iPad party which is funny considering a large part of my day job is to design websites to fit on tablets. Okay, first world problems here but I was having difficulty with using the iPad for work while it was laying flat on the desk. I have to consistently check the tablet and then look back at my computer to code the design and I thought if I could have the iPad propped up at eye level that would be a huge help and streamline the process. I mentioned the idea to Brent and thus building an iPad stand went onto our project to-do list.

Building a Custom Wood iPad Stand

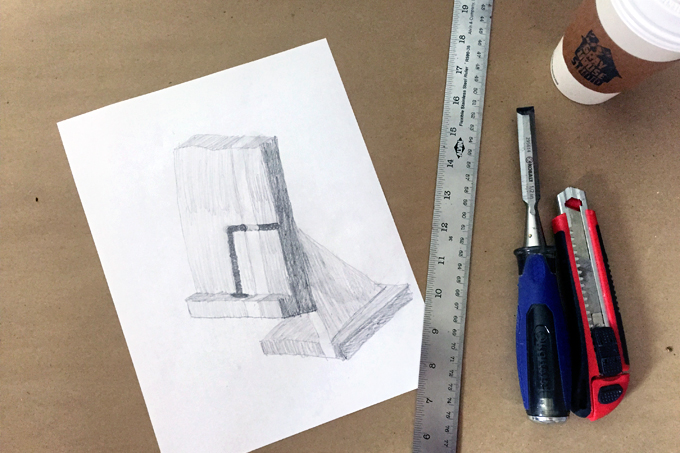
Brent and I’s design planning sessions are quickly becoming my favorite part of projects, mostly because they often take place when food is involved (we have had quite a few concept drawings start on paper napkins) but also because it is fun to bounce ideas back and forth and dream big for our projects.

I described to Brent the features that I thought would be really helpful to incorporate into the iPad stand. Brent sketched it up and added a few additional design elements that I thought were genius! We were really excited with the design we brainstormed and were looking forward to starting the project soon.

Building a Custom Wood iPad Stand

A few weeks ago we were near downtown shopping and on a whim decided to stop in New Living, a local green home furnishings store in Houston that sells a variety of eco-friendly products from organic mattresses to non-toxic finishes. We were really excited that Jeff, one of the co-founders, happened to be in the store that day and we got to meet with him, learn about the store’s vision and even got to tour their workshop. One of the really cool things about New Living is they work with local artisans to build custom home furnishings from locally sourced materials for the store.

We got to talking about our upcoming projects and when we mentioned we were looking forward to building a custom wood iPad stand he asked if we would be open to making one for the store. We quickly answered yes and were ecstatic to trade an iPad stand for the opportunity to work with some really cool wood and to try out the non-toxic finishes they offer.

Building a Custom Wood iPad Stand
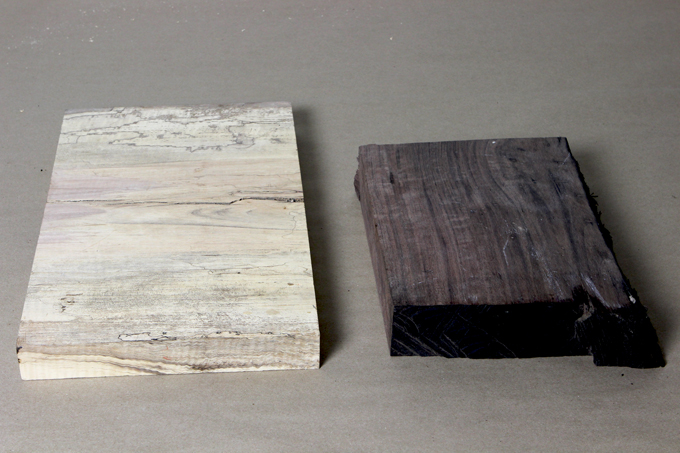
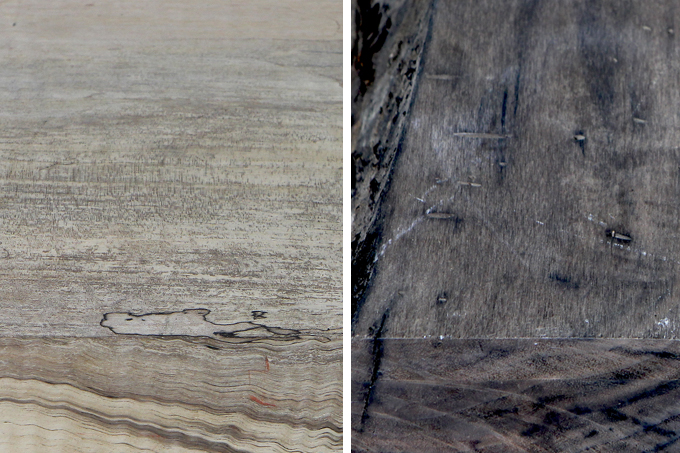
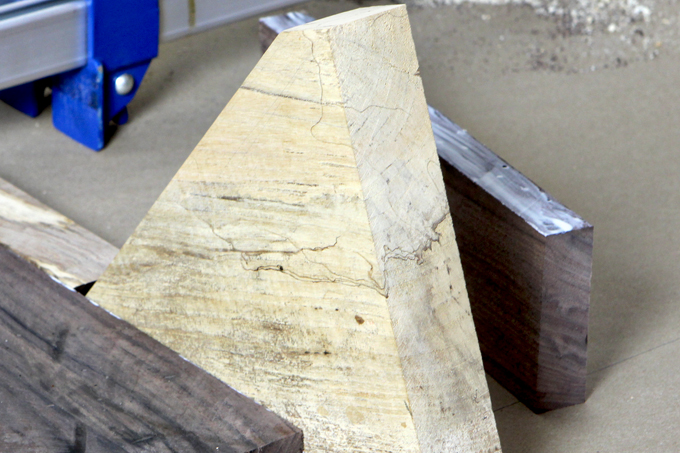
^^^ Left: Pecan // Right: Walnut

How to Build a Wood iPad Stand Video

To see more of our DIY project & tutorial videos, subscribe to our channel ⇾

How We Built Our Custom Wood iPad Stand

Building a Custom Wood iPad Stand
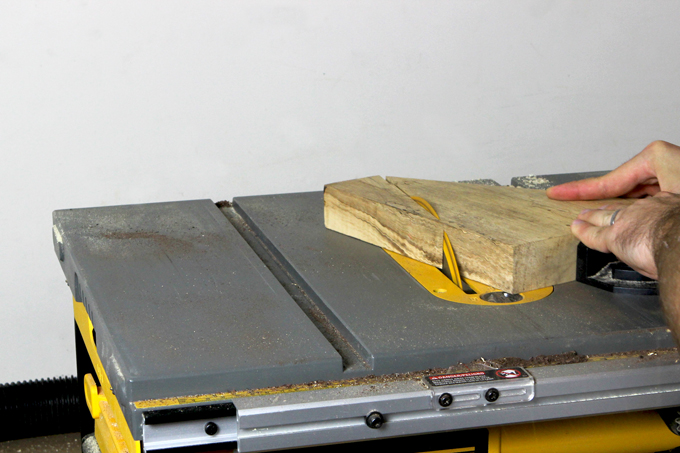
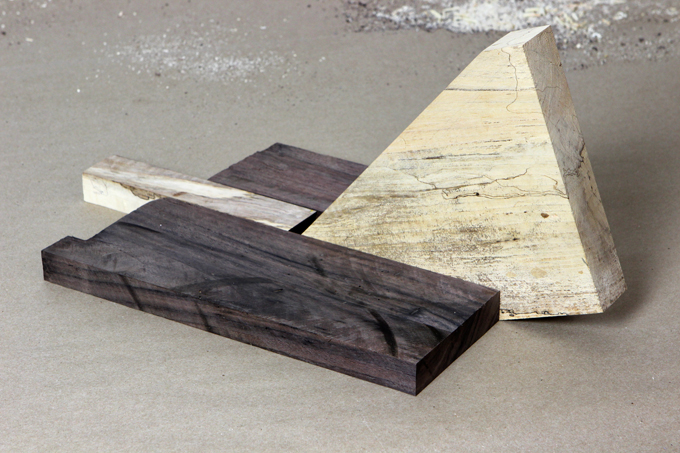
^^^ We started by cutting all the pieces we needed to build the iPad stand. In this picture we are cutting the vertical support. We designed it so the piece of pecan wood is sandwiched between the two pieces of walnut.

Building a Custom Wood iPad Stand
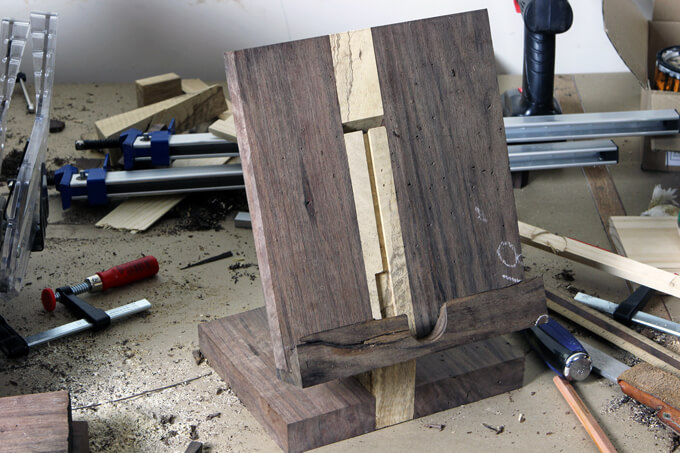
^^^ Before we glued the pieces together, we assembled it to make sure everything fit as we had planned. As you can see, the top of the stand is uneven. This was not a problem because we cut it with the table saw after it was glued together.

Building a Custom Wood iPad Stand
^^^ We cleaned the surface of the wood and the used a brush to apply wood glue that created a strong bond.

Building a Custom Wood iPad Stand
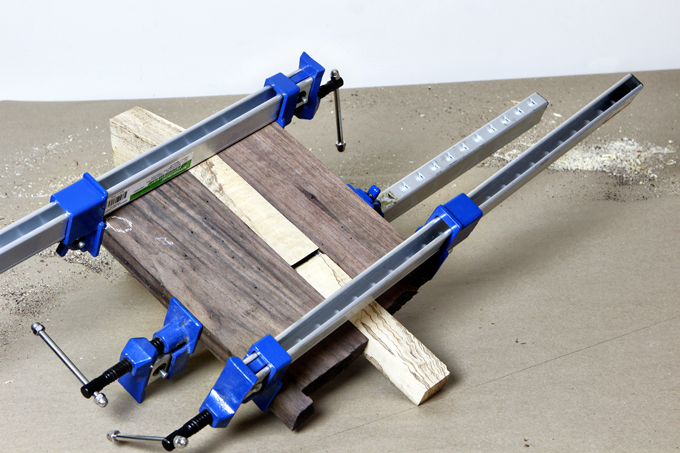
^^^ Once we had the glue applied, we immediately wiped off any excess with a damp paper towel to make sure none dried on the surface. That could cause discoloration once the finish was applied. Then, we clamped the boards together and let the glue set.

Building a Custom Wood iPad Stand
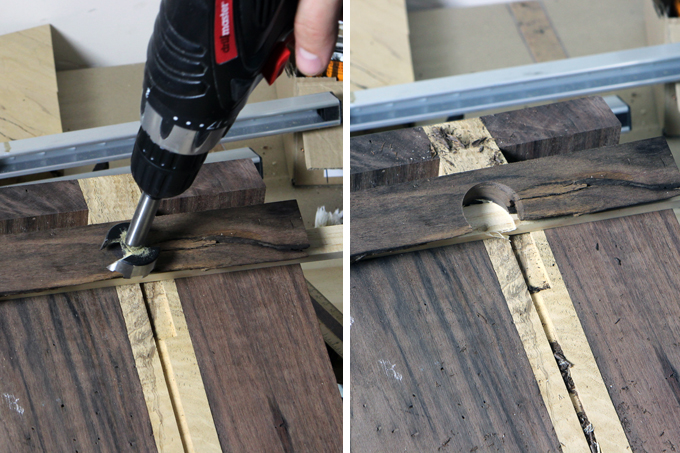
^^^ One feature we wanted to incorporate was to create a hole in the wood stand to access the home button on the iPad. To create this we drilled a 1″ hole through the live edge lip.

Building a Custom Wood iPad Stand
^^^ The next step was to sand the stand.

Building a Custom Wood iPad Stand
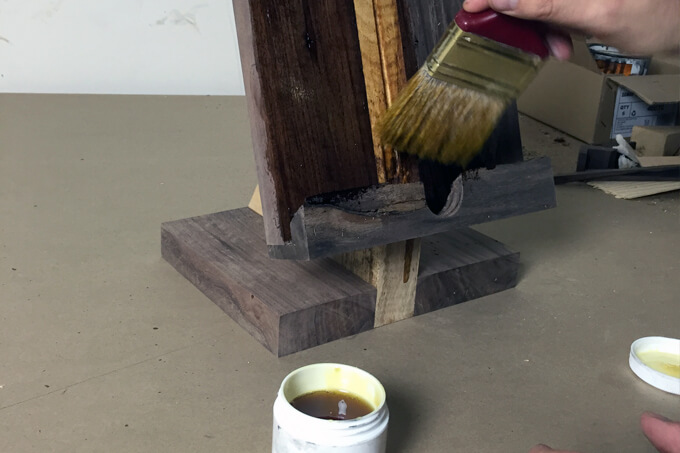
^^^ The beauty of using walnut is there is no need to stain the wood. We applied a single layer of non-toxic transparent finish.

Custom Wood iPad Stand Features

Building a Custom Wood iPad Stand
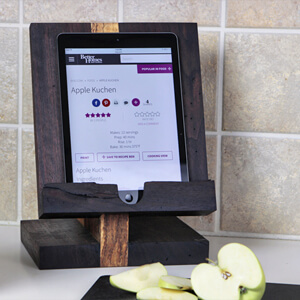
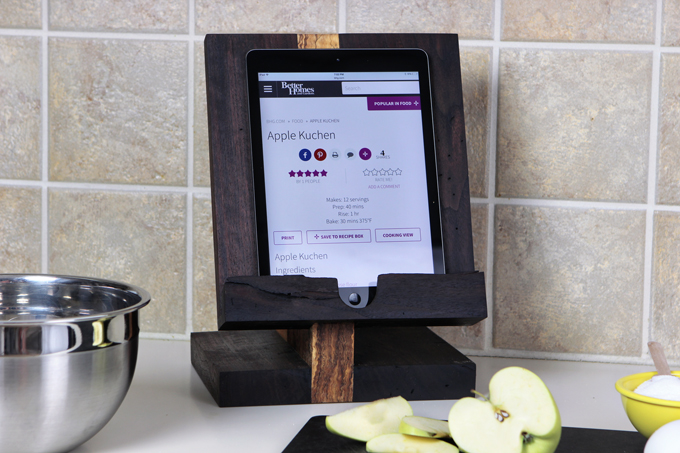
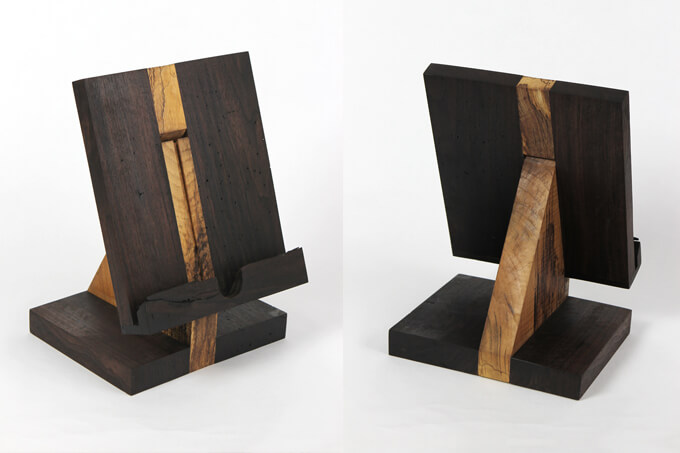
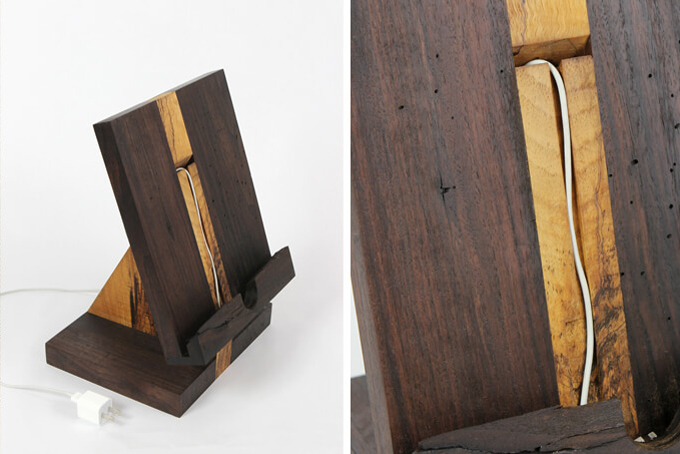
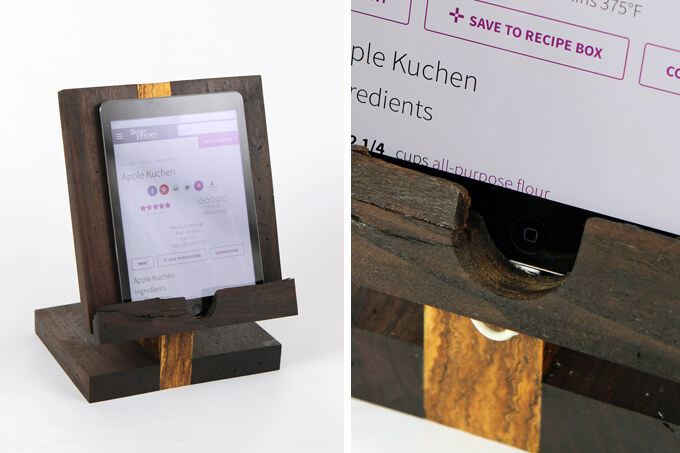
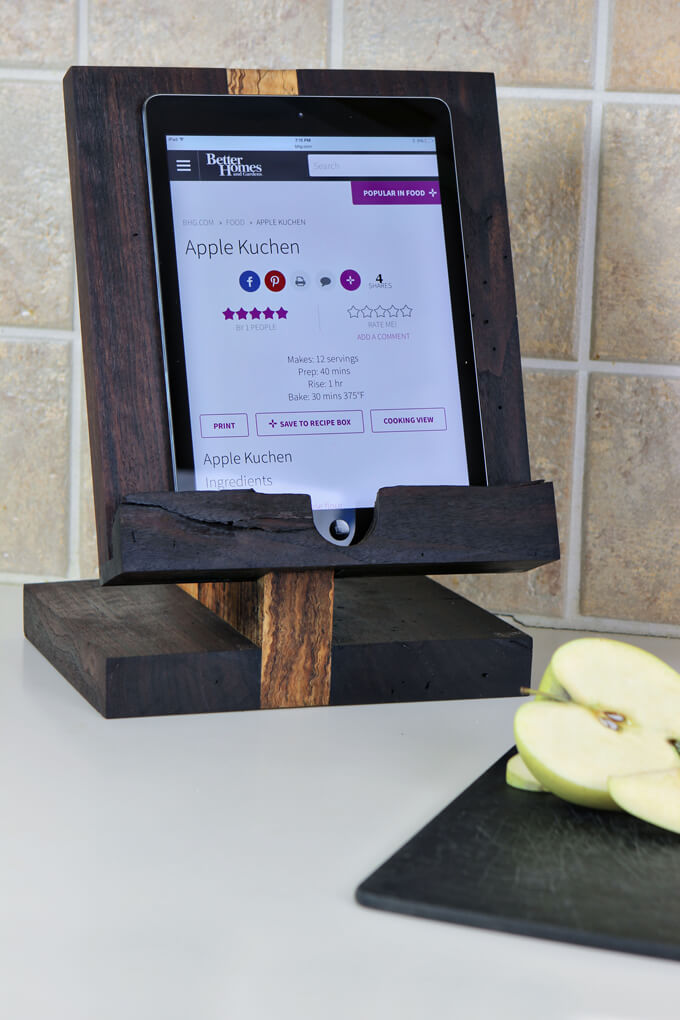
^^^ Here is our finished wood iPad stand. It is made of walnut and pecan wood and fits a normal sized iPad.
Building a Custom Wood iPad Stand
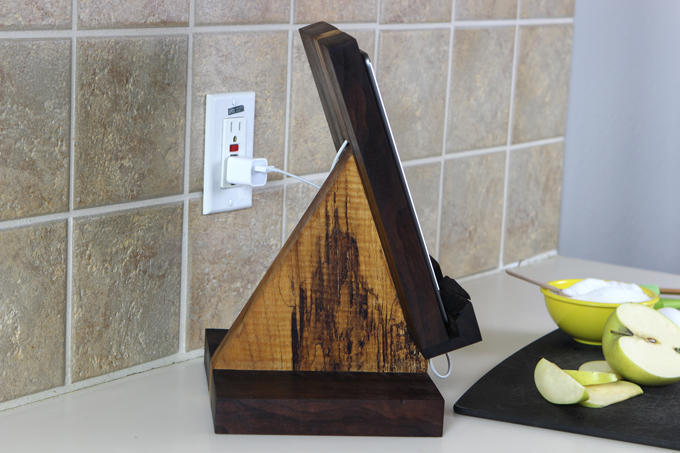
^^^ We made it so it has a cut out in the back and an inset in the front so the charging cord can run through the back, down the inset and come out through the bottom. Brent came up with this idea and I love it because the iPad lays flat against the stand whether it is plugged in charging or not.

Building a Custom Wood iPad Stand
^^^ We also created a cut out so the home button is easily accessible.

Building a Custom Wood iPad Stand

After we built it, I spent the next few nights testing it out (you know just to make sure it worked) and found that iPad stands are really useful in lots of rooms. I used it in my office for work, in the kitchen for displaying recipes and I put it on my nightstand in the bedroom as a safe place to store it while it charged. I am thinking I need one for every room now!

Building a Custom Wood iPad Stand

Last Friday we dropped it off at New Living and I must admit I was a little sad to see it go because I had grown kind of attached to it while testing it out. However, we are so excited that it has a fun new home at the New Living store. If you are in Houston and in The Heights area be sure to stop by the store and check out our iPad stand and all the impressive handmade furniture they offer.

Next up on the list is for us to create more iPad stands! We are pumped to build more stands to use throughout our house. I am excited to make a unique one for each room. If you are interested in making you own, stay tuned because we will be offering a how-to for this project and plans coming up soon!