House

How to Use a Biscuit Joiner

How to Use a Biscuit Joiner

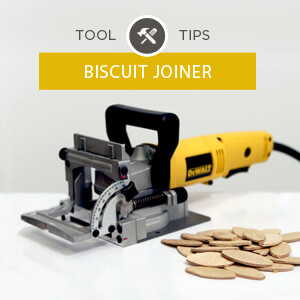
In this tool tip tutorial we are showing you how to use a biscuit joiner.
How to Use a Biscuit Joiner

Hey! Brent here. Today I am sharing how to use a biscuit joiner to join two pieces of wood together. This is a cool woodworking tool that comes in handy for projects like building a coffee table where you need to put multiple boards together to create the table’s surface which is exactly what I am working on right now.

A current trend is using multiple pieces of reclaimed wood for the tops of tables. I have found when I would just glue or nail the boards together, the joint was not as strong and the boards had the potential to come apart in places.
Gray House Studio How to Use a Biscuit Joiner

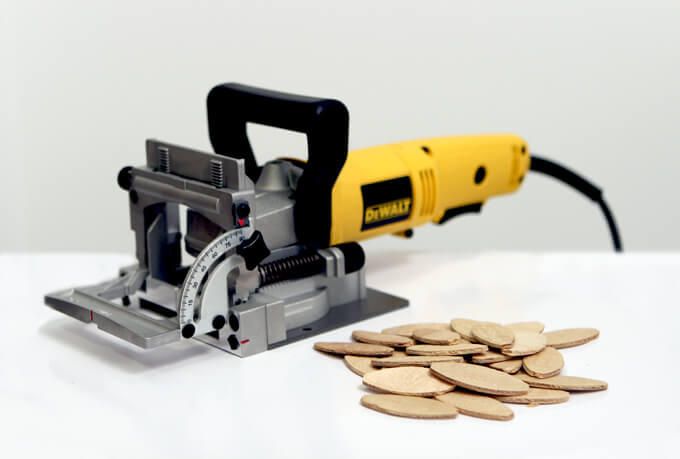
A biscuit joiner uses a circular saw blade to cut a hole in each piece of board. By applying glue to the hole, adding the wooden biscuit in the slot and clamping the two boards together, you get a much tighter bond and makes it the perfect solution for a nice and sturdy table.

As I build the top of our coffee table, I am going to walk through my process of using the biscuit joiner.

How to Use a Biscuit Joiner

First, I think it is important to highlight the tool settings I use. Most biscuit joiners have three settings you have to consider.

three settings to consider
How to Use a Biscuit Joiner

1. Select the Biscuit Size

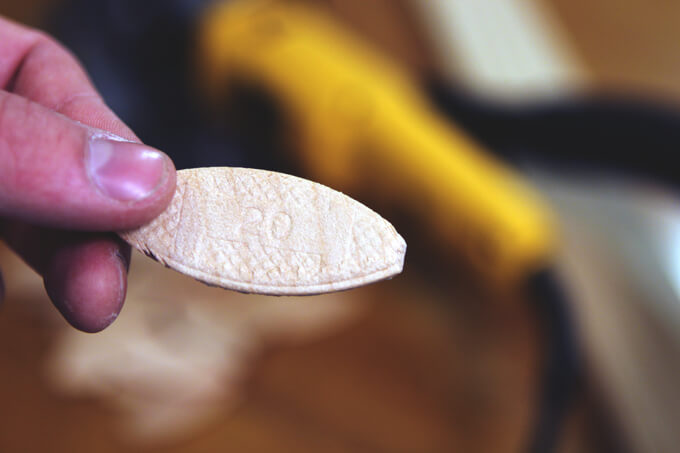
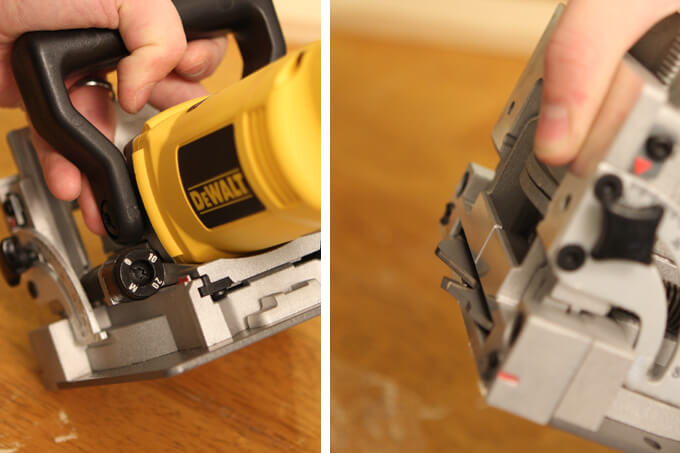
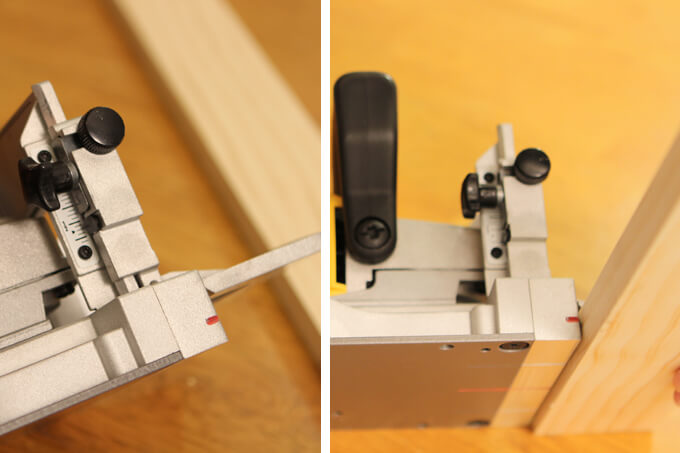
First, I need to set the dial on the biscuit joiner to match the size of the biscuit I intend to use. As you can see in the image on the left, for this project the size of biscuit I am using is 20.

So I made sure to set the dial to 20. The picture below shows a biscuit I am using which will have the size printed on it. The photo on the right above shows the circular blade that will make the cut.

The larger the number on the dial, the further the tool allows the blade to cut into the wood which creates a deeper slot for the biscuit.
How to Use a Biscuit Joiner

2. Adjust the Surface Angle

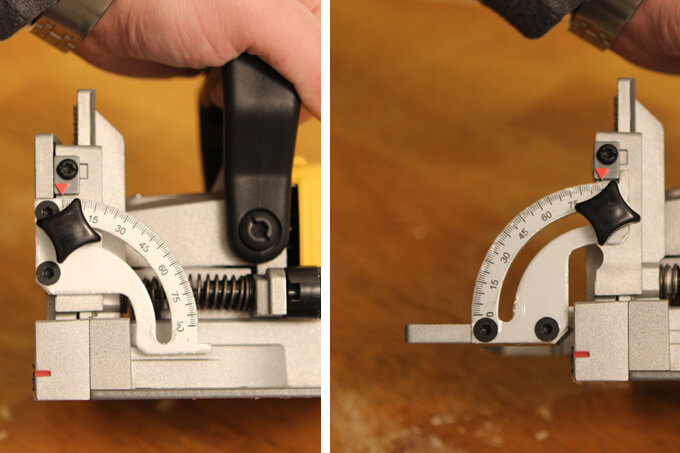
The next setting I need to set on the tool is to adjust the front guard to match the angle of the surface I want to join together. When cutting into the side of a board to join two boards side by side, use the 90 degree setting. This is what I used for this project.
How to Use a Biscuit Joiner

3. Center the Biscuit

On thin surfaces, like a table top, it is important to center the biscuit on the board to create the strongest joint. On the biscuit joiner you can adjust the front guard up and down with the knob on the side of the tool. In the above photo on the right, notice the red line. This line identifies where the cut will be made.

Using a Biscuit Joiner
How to Use a Biscuit Joiner
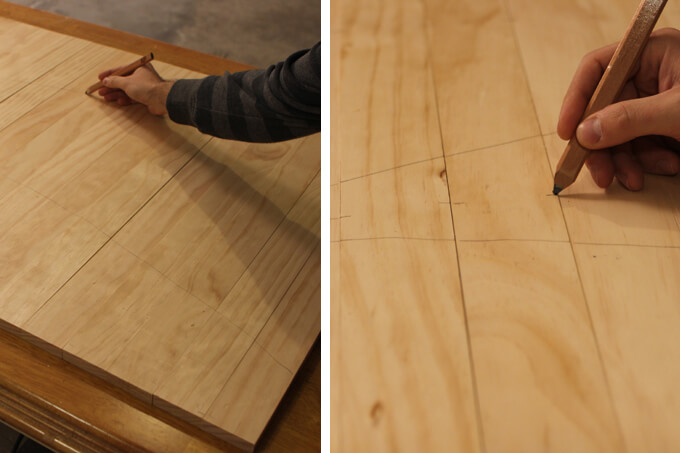
1. Now that we have the tool set up like we need it, it is time to prep the boards to be cut. First, I arranged the boards in the order I want to join them. An important step is to mark the boards in a way that will make it easy to reassemble them after you have taken them apart to cut the groves for the biscuits.

I have found that once you start gluing the boards together you don’t have a lot of time to sort through them and figure out the original order of the boards.

My favorite way to mark the boards is to draw a large “v” across the face of all the boards. This gives two points of reference on each board making it easier to assemble them in the correct position. After I draw a “v”, I add a dash everywhere I plan to join the boards with a biscuit.

Two to three biscuits per board is usually good enough. I am using three per board for this project.
How to Use a Biscuit Joiner
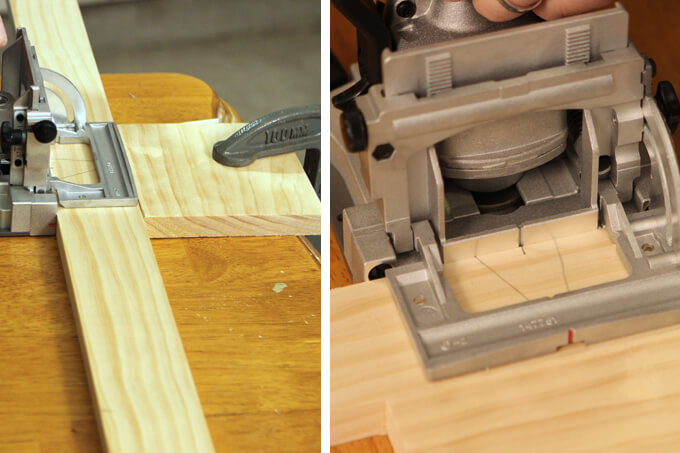
2. It can be hard to handle the biscuit joiner and hold the board you are cutting steady. So I have found that it is best to clamp a piece of scrap wood to my work space. I push the board I am cutting up against the scrap wood to keep it in place.

Before I begin cutting, I make sure to align the mark I made in the previous step with that red center line on the biscuit joiner.
How to Use a Biscuit Joiner
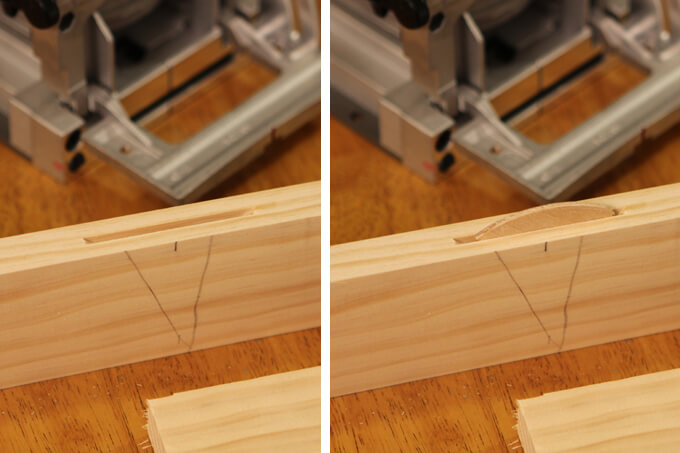
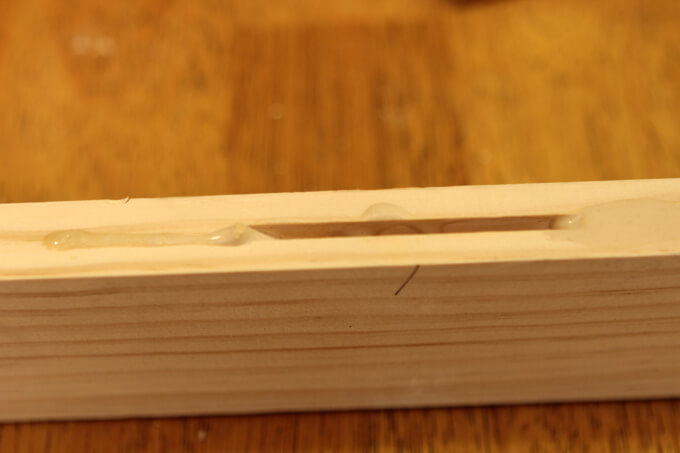
3. Then I make the cut. The photo above shows what the finished cut looks like in the side of the board. As you can see the biscuit fits perfectly in the slot that was cut out.
How to Use a Biscuit Joiner
4. With all the boards cut, it’s time to apply glue to each board. It is important to get glue in each biscuit slot. I don’t worry about being a perfectionist with the glue because when gluing five to ten boards together, time is of the essence.

Any excess glue can easily be cleaned up with a damp rag after the boards have been clamped together.
How to Use a Biscuit Joiner
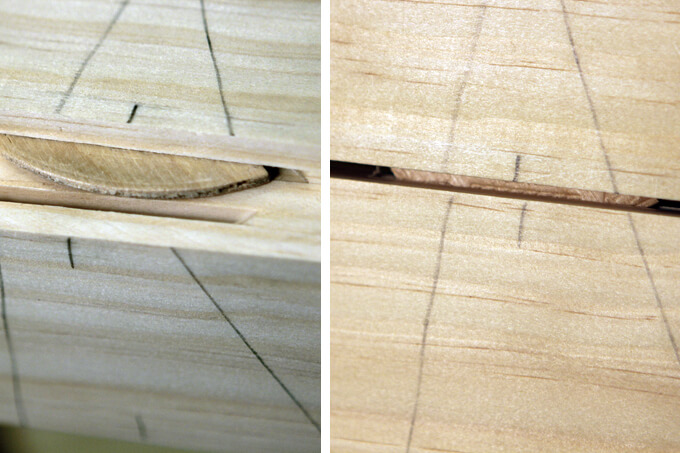
5. After the glue has been applied to each board, I insert a biscuit into each slot and line the boards up so the “v” I drew earlier lines up correctly. The biscuits help compensate for any slight warping the boards may have to create an even surface from one board to the next.
How to Use a Biscuit Joiner
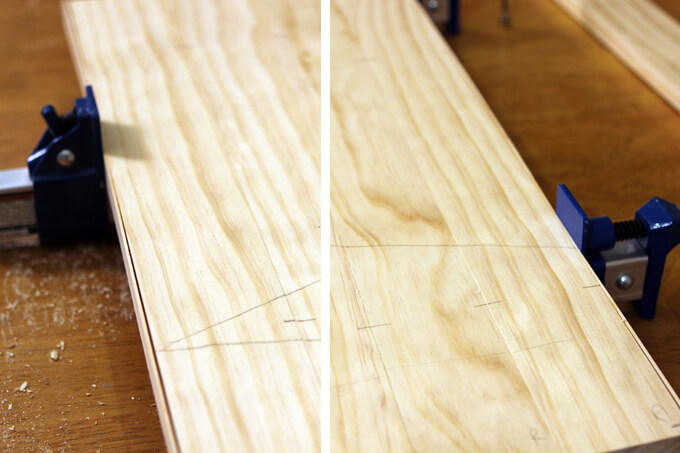
6. Once the boards are aligned, I place clamps around the boards and tighten the clamps until the gaps between the boards close and glue squeezes out of the seams.

The pressure of the clamps can sometimes create indentions in the boards. I have found a solution to this is to use a scrap piece of wood between the clamp and the board you are gluing together.
How to Use a Biscuit Joiner
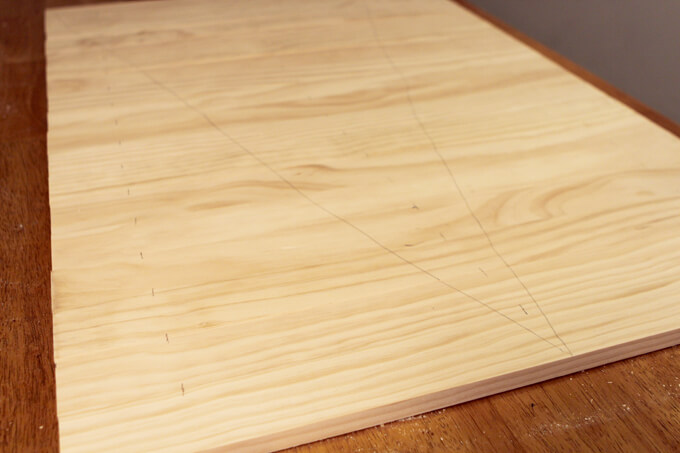
7. I always make sure to give the glue more than enough time to dry based on the wood glue guidelines. You can see how these multiple boards now look like one solid surface.

I will erase or sand off the pencil marks. Now all these boards should have a really strong bond and make for a great table top for our new coffee table.

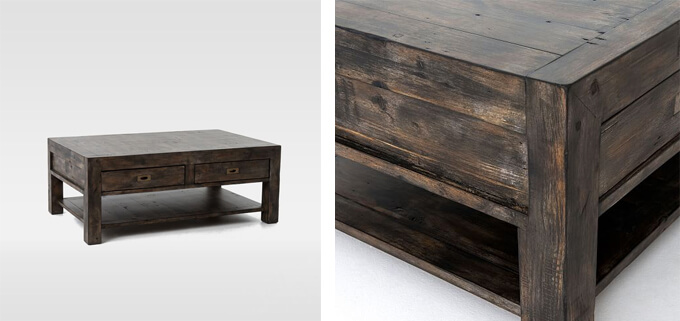
Step one of the coffee table is complete! As you can see I am using the coffee table below as inspiration for the one I am building for our library. Notice in the detail shot on the right that the top of the table has several individual boards next to each other, that is the look we are going for. I’ll be back soon to share the next step in the process of building our coffee table.
Gray House Studio How to Use a Biscuit Joiner

^ coffee table inspiration from West Elm

PIN THIS TUTORIAL

How to Use a Biscuit Joiner

DIY String Art on Canvas

DIY String Art

How to make DIY string art of a vintage plane schematic on a large canvas.

DIY String Art

Valentine’s Day is right around the corner so Brent and I were looking for a fun alternative to just buying each other presents this year. We wanted to do something that was affordable since we are currently in the process of putting together our library and getting ready to install a sprinkler system in our yard (I mean pay someone to put a sprinkler system in our yard).

Our solution was to make some DIY string art together! It was a fun way to spend some quality time collaborating and being creative. Plus, it would be something we could both enjoy for many years knowing that we created it with each other and it fills up the empty wall space we had. We knew we wanted to make a diy string art piece, we wanted it to be on canvas and we wanted it to be BIG. We are hanging it in our very front room (it will eventually be our photo studio) over the craft cabinet so we wanted to build the canvas to be the same width as the cabinet will be.

Since we created it with a lot of the supplies we already had in the garage we made the entire piece (canvas and all) for around $20 and I think it looks pretty awesome. But Brent did get his masters degree in art so I was pretty confident that he could pick up some (most) of the slack due to my lack of artistic abilities. I just loved being able to learn from him, spend time with him and watch him work his magic! I would definitely call this project a success.

TIME LAPSE

To see new DIY videos on Thursdays, be sure to subscribe to our channel ⇾


SUPPLIES

MATERIALS

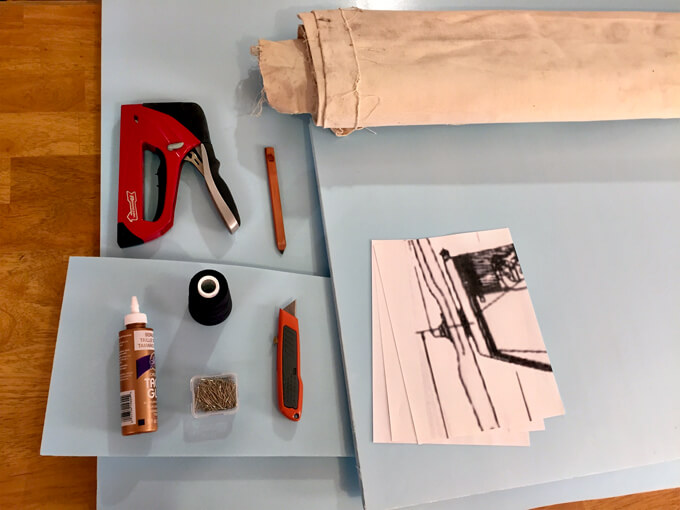
  • Large piece of foam board
  • Cotton Fabric
  • Tacky Glue
  • All Purpose Black Thread
  • Corsage Pins
  • Print out of an image (on several pieces of paper since it is large)
TOOLS

  • Box Cutter
  • Staple Gun
  • Ruler

DIY String Art

How we Created Our DIY String Art

DIY String Art
1. First we needed to build our canvas. We tried something different with this piece and built the frame or the stretcher of the canvas out of foam board. The reasoning behind this was we needed something for the pins we would be using to attach the string to stick into.

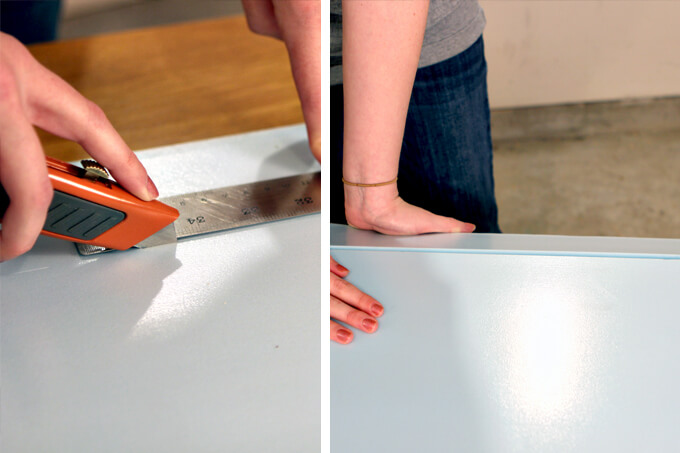
They needed more substance than just the canvas to stay in place. Plus, using the foam made this piece a lot lighter. I cut the foam to size using a box cutter and the cool thing about the foam board is you can easily break off the piece you cut. It pops right off and you have a straight edge.

DIY String Art
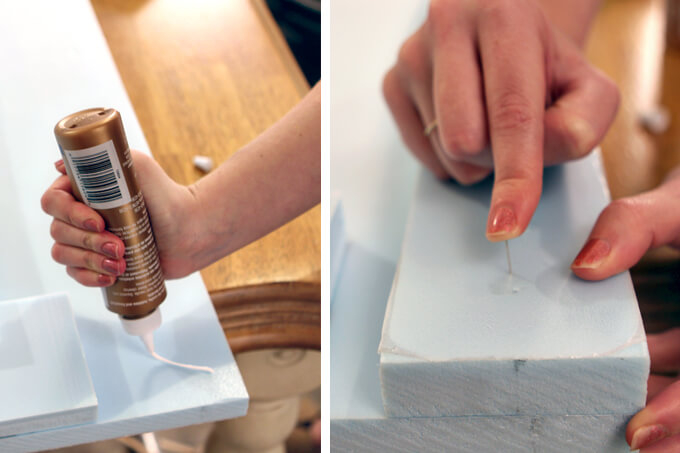
2. Next, I used the extra pieces I cut off and glued them on around the rim as a second layer to provide extra strength and stability. Because I am impatient and the glue I used didn’t dry very fast, I used a few corsage pins to hold the two layers together so these pieces didn’t fall off while I was handling it.

DIY String Art
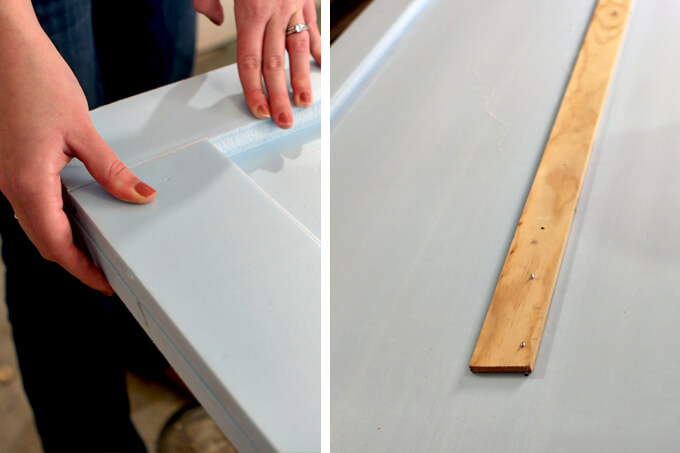
3. Now I had a nice thick layer around the rim to attach the canvas to and give more depth to the frame. I also attached a piece of board to the back of the foam board in the middle to help keep the foam from bending or warping too much. This also is where we attached the wire to hang it on the wall.

DIY String Art
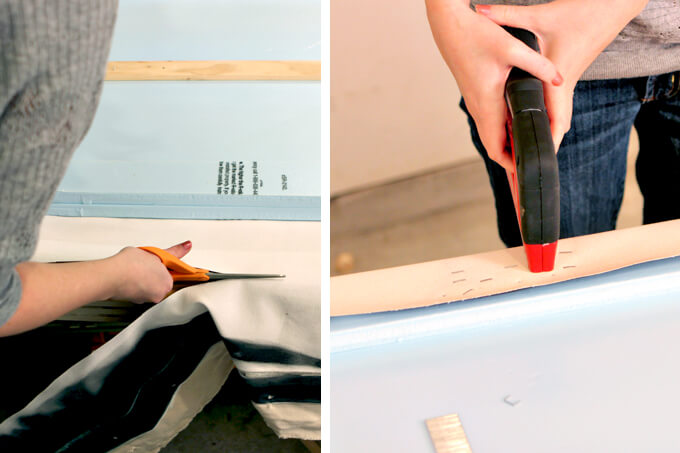
4. Brent had some canvas left over from his school days. This particular piece had some stuff on the back of it so I turned it over to use the opposite side and cut it to fit the stretcher and then stretched the canvas and stapled it to the foam rim of the frame.

DIY String Art
It looks like a canvas!

DIY String Art
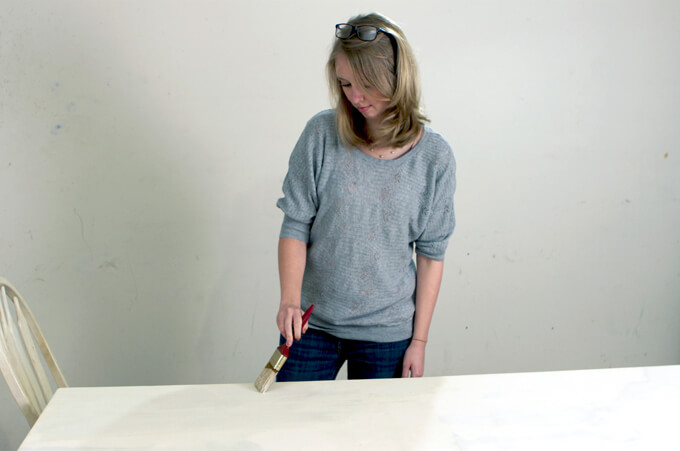
5. Finally, I needed to paint over whatever was already on the canvas. I just used some really old off white paint from a can that we found in the garage left from the previous owner. It was kind of gross and in a very liquid state but it covered the canvas and the color wasn’t too bad. It gave it a vintage feel (since it felt like I was using vintage paint, no telling how old that stuff was) but I guess you get what you pay for and I didn’t spend a dime on paint.

DIY String Art
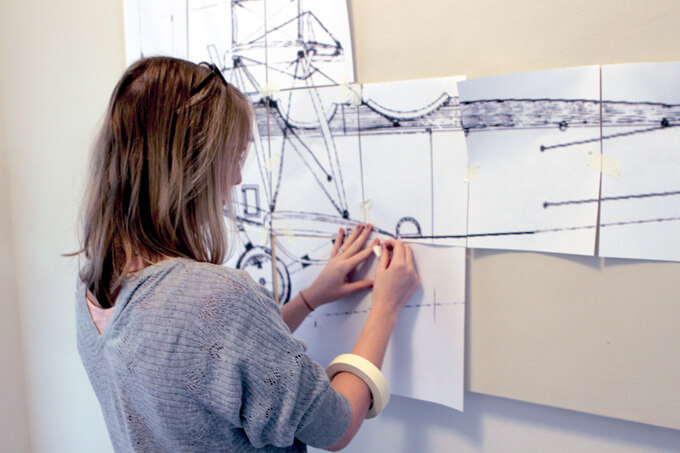
6. After the canvas dried, I brought it inside and taped our image to the canvas. We chose this cool vintage airplane schematic and printed it out on multiple pieces of paper so that it would be the correct scale. I then used masking tape to tape the pieces together and to the canvas.

DIY String Art
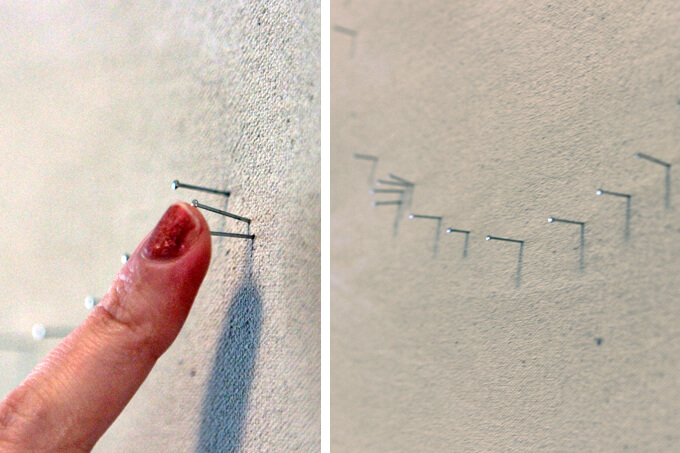
7. We took the corsage pins and poked holes all around the outside lines of the image. After that we pulled the paper back off the canvas and then stuck the pins back into the canvas where the holes were.

DIY String Art
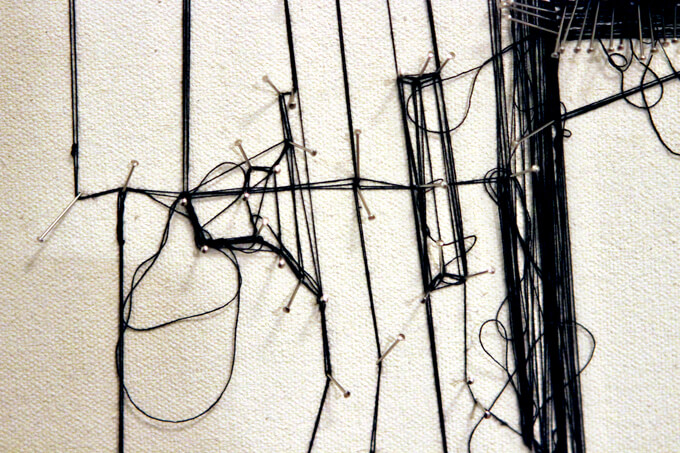
8. It was around this point that the actual creating of the art was ready to begin. It was a very detail oriented task and involved a lot of tedious work, a good eye for design and strong fingers. It really was a one man job and who better than the man with the art degree so I was happy to sit back and watch him create.

I was pretty impressed how Brent free handed the inside of the plane to match the image by just looking at the picture and placing the pins and string accordingly.

DIY String Art
9. He left the string loose in some areas creating knots and bunches of thread to add variation and visual interest. I thought it gave it a worn look like we inherited this artwork that was created years ago rather than it being brand new.

DIY String Art
The finished DIY string art piece! (the spool of thread will not be staying it is strictly there for documentation purposes)

PIN THIS PROJECT

DIY String Art

CHOOSING THE RIGHT DRILL BIT
Choosing the Right Drill Bit

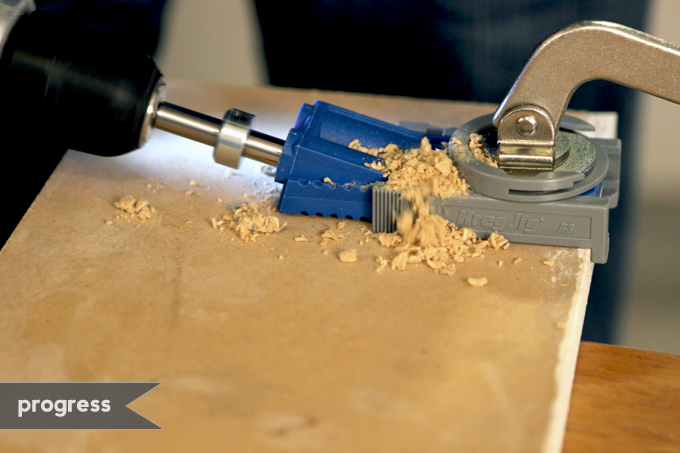
In this tool tip tutorial we are explaining why choosing the right drill bit for the project is important.

Choosing the Right Drill Bit for a DIY Project

FYI: This post contains affiliate links to drill bits we use. As an Amazon Associate Gray House Studio earns from qualifying purchases. This is at no extra cost to you. We appreciate you supporting this site. Read our privacy and disclosure policy.

One thing we have learned so far while working on home renovation projects is that having the right tools for the job is key to a successful outcome.

Today we are talking specifically about choosing the right drill bit. If you asked me a year ago I would have told you a drill bit is just a drill bit.

They are all the same, right? But the past few projects (and Brent) have taught me that is not true at all. Not all drill bits are the same and they do not all produce the same results.

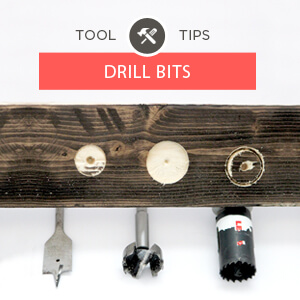
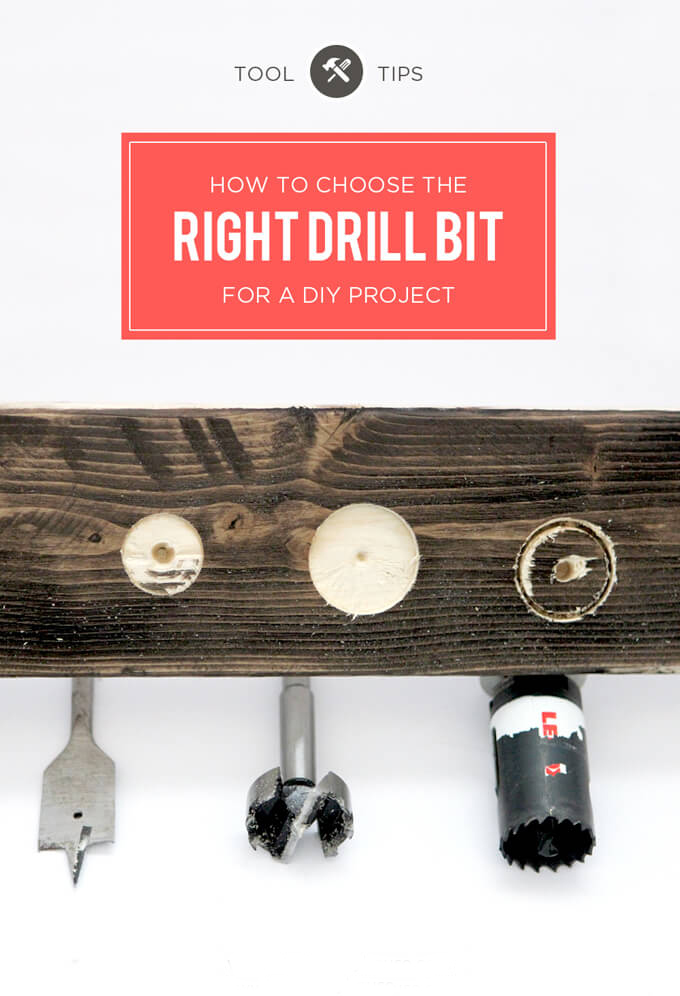
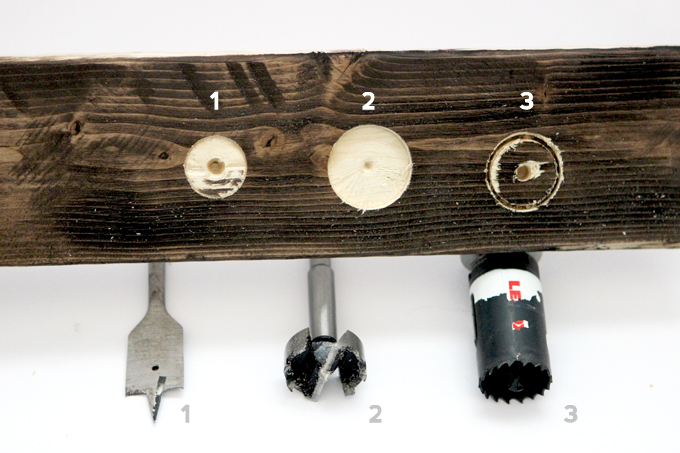
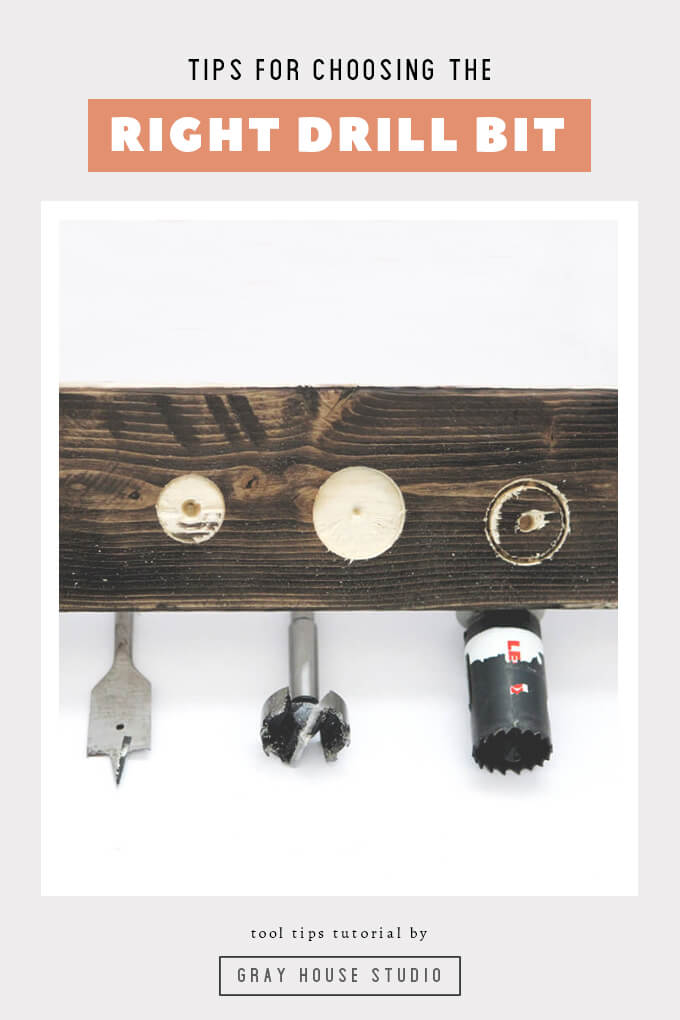
Below we are highlighting three drill bits that we have used for our latest projects.

Choosing the Right Drill Bit

Choosing the Right Drill Bit
Below we are highlighting three drill bits that we have used for our latest projects.

1. Paddle Bit/Spade Drill Bit

Choosing the Right Drill Bit - Paddle Bit

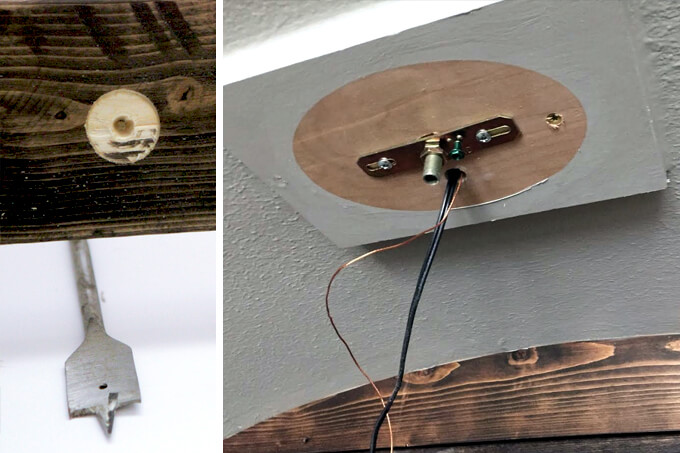
What it looks like: The paddle bit bit has a long point in the middle to keep the blade from walking as it spins. The flat parts next to the tip bore a hole the size labeled on the bit.

When to use this bit: This bit is great for drilling large holes all the way through a material especially if the hole needs to be deeper than one or two inches.

Pros: The main reason to use a paddle bit over other types of bits is the price point. You can get a set of these bits for the price of one of the other bits.

Cons: They are not great for boring holes partially through a board. Another downside with this type of drill bit has to do with safety. If the drill is not kept level while drilling a hole and the bit digs into the wood unevenly or hits a knot, it can catch the work piece and whip the drill from your hand.

Real Project Use: We used a paddle bit when drilling the hole in the ceiling to run the wire for the light fixture in the reading nook. It was the only bit that could make a 6 inch deep cut. Read more about how we built our reading nook.

> shop the paddle bit set we use

2. Forstner Bit

 Choosing the Right Drill Bit - Forstner Bit

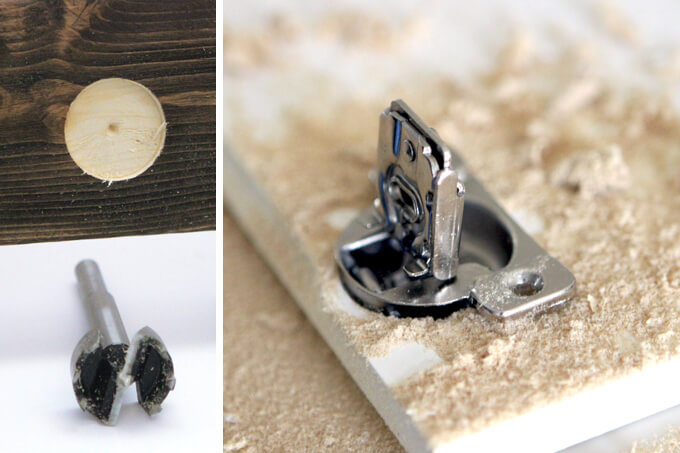
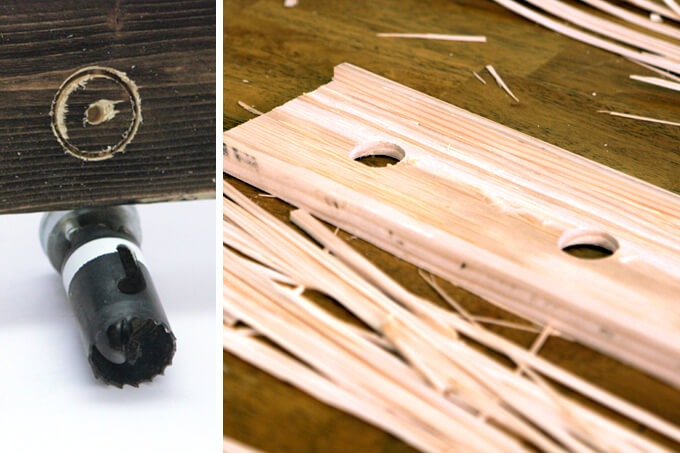
What it looks like: The forstner bit has a small point in the middle just long enough to help center the bit and two blades that span the radius. The outside of the bit has teeth to clean up the outside of the cut.

When to use this bit: This bit is great for drilling holes that need to be a specific depth.

Pros: With two blades running along the radius of the cutting surface, the bit shaves off small layers of wood at a time and allows for a very precise cut.

Cons: These bits are more on the expensive side.

Real Project Use: We used a forstner bit to drill out a hole for the hinge on our bathroom cabinet door. Read more about how we added shelves to our bathroom cabinets.

> shop the forstner bit set we use

3. Hole Cutter / Hole Saw

Choosing the Right Drill Bit - Hole Saw

What it looks like:The hole saw has a central drill bit that attaches to the drill and extends through the middle of a circular saw.

When to use this bit: The most common use for this bit is for cutting holes for door knobs. The quality of the cut does not usually matter because the plate behind the knob completely covers the hole.

Pros: The saw can be removed from the central bit allowing you to have multiple saw diameters with only one bit that connects to the drill.

Cons: There is a limit on the thickness of material that this bit can cut. The drill bit can only cut as deep as the cup of the saw.

Real Project Use: We used the hole cutter to make six holes for the wood light fixture in our master bathroom. Read more about how we built our wood light fixture.

> shop the hole saw set we use

We chose to highlight these three drill bits because they all do the same thing but with slightly different outcomes making each one better suited for certain tasks and certain projects.

If you have any questions about choosing the right drill bit for your next project, feel free to leave them below.

PIN IT FOR LATER

A helpful tool tutorial for beginners that explains why choosing the right drill bit for the project is important and how to choose the right drill bit for your project.

Adding Shelves to Bathroom Cabinet

Adding Shelves in Bathroom Cabinets

Check how this quick home DIY tutorial for adding shelves in bathroom cabinets. This simple update creates more storage space to organize all your bathroom essentials.

Adding Shelves in Bathroom Cabinets

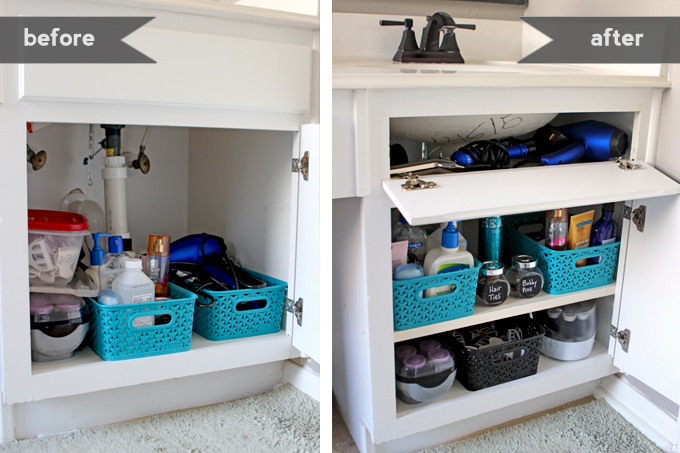
This morning Brent and I worked on a quick little organization project that really made me happy! Our project was adding shelves in the bathroom cabinets.

I don’t have a ton of beauty products but I do have the typical necessities and not a lot of places to store them. Don’t most bathroom cabinets seem to have so much wasted space at the top?

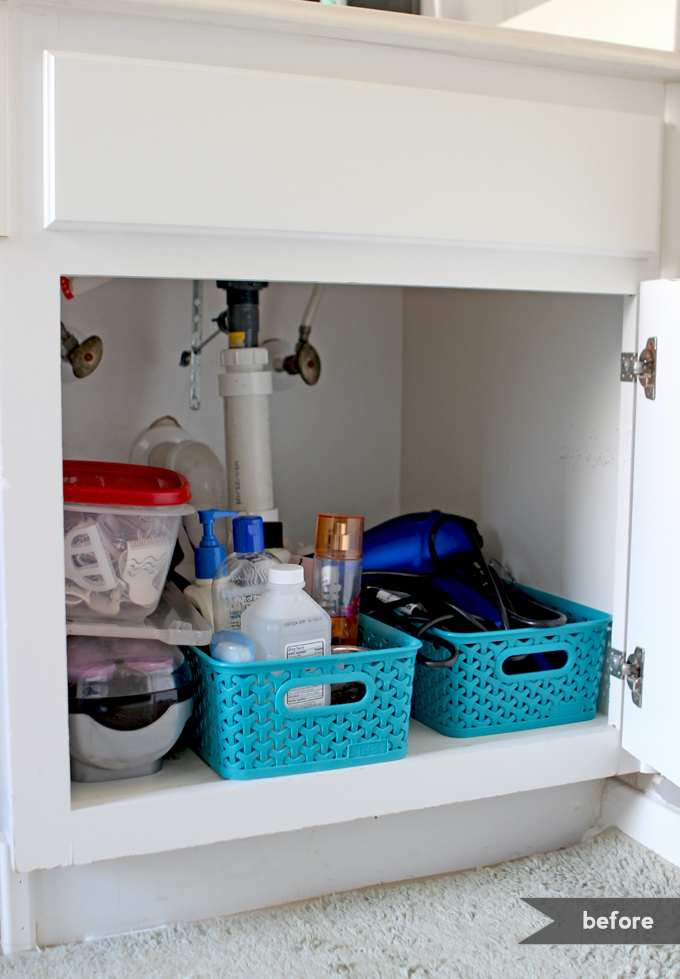
All of my stuff was just stacked on top of each other in one big pile on the bottom and if stuff got pushed to the back of the cabinet…well…it might as well have been lost forever as far as I was concerned.

I’ve tried to organize this area multiple times but I have found that without the proper set up, such as a designated space for each item, it doesn’t matter how many times you organize it, it quickly turns into a big messy pile again.

I am kind of embarrassed to be sharing this photo but for the sake of showing the drastic difference I feel like the shelves made, I’ll do it. Below is the disorganized mess it looked like before.

Adding Shelves in Bathroom Cabinets

Brent built me two shelves in my cabinet using stuff we already had in our garage. Score! He built me one on the bottom and one at the top.

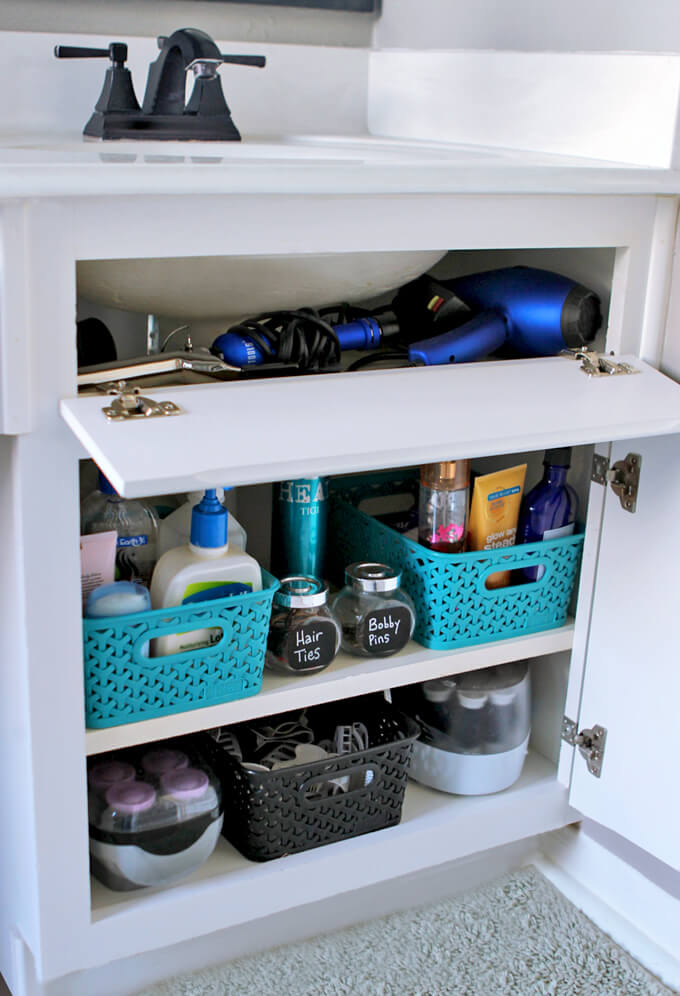
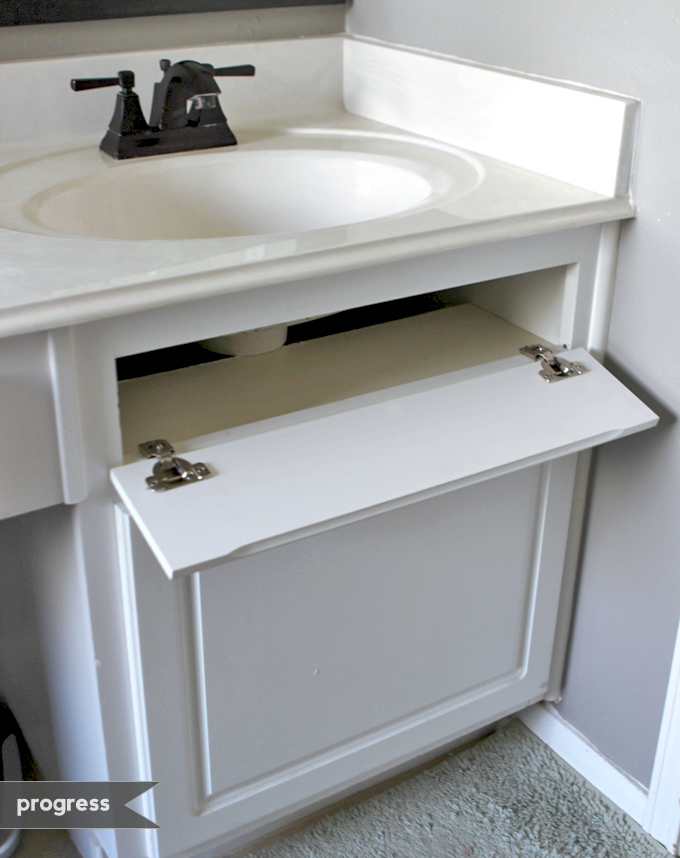
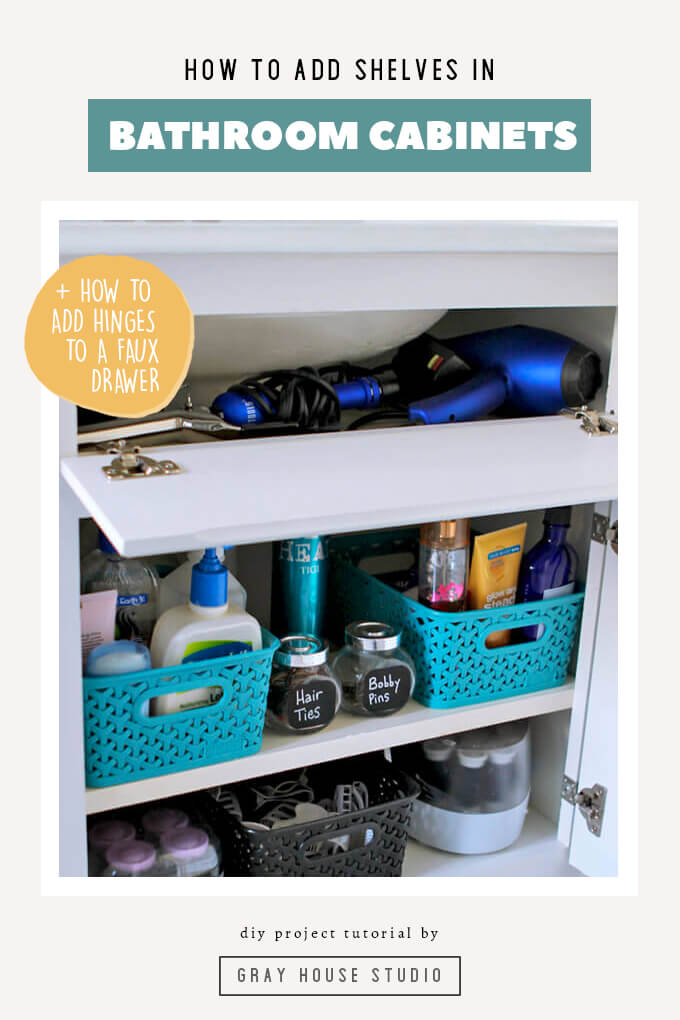
We decided to take the faux drawer above the cabinet door and add hinges to it so it could open up to a shelf we would install behind it where I could store my hair dryer and curling iron.

We have seen a few photos of this floating around on the internet but wanted to attempt to figure out our own Gray House style of making it happen.

2022 Personalized Christmas Ornaments
*** Thanks so much for supporting our small shop – Moon Rock Prints – this holiday season! ***

Adding Shelves in Bathroom Cabinets

SUPPLIES

FYI: This post contains a few affiliate links to products we used to make this project. Gray House Studio does receive commissions for sales from these links but at no extra cost to you. We appreciate you supporting this site. Read our privacy and disclosure policy. You can also easily shop our recommended products here.

STEP BY STEP GUIDE

Adding Shelves in Bathroom Cabinets

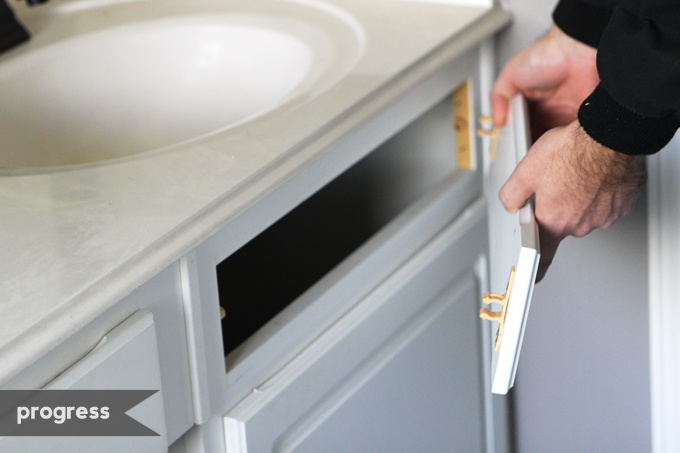
1. First we popped off the faux drawer. It came off really easy.

Adding Shelves in Bathroom Cabinets

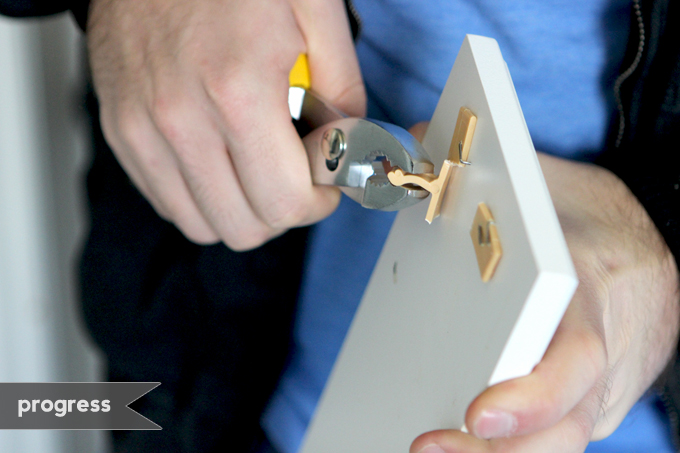
2. Then using pliers we removed the brackets and staples from the drawer face and the cabinet.

Adding Shelves in Bathroom Cabinets

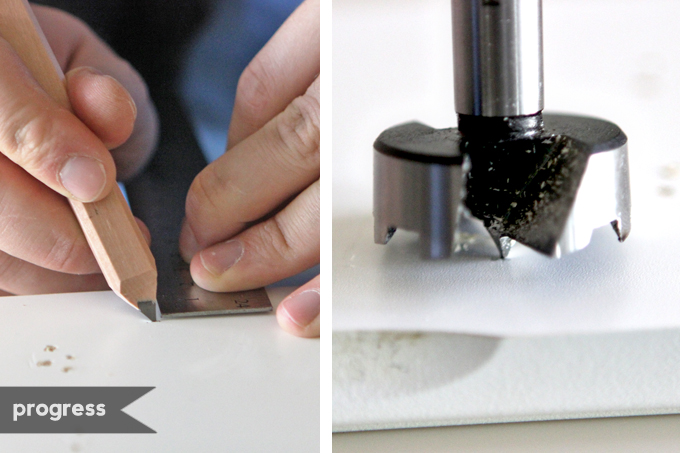
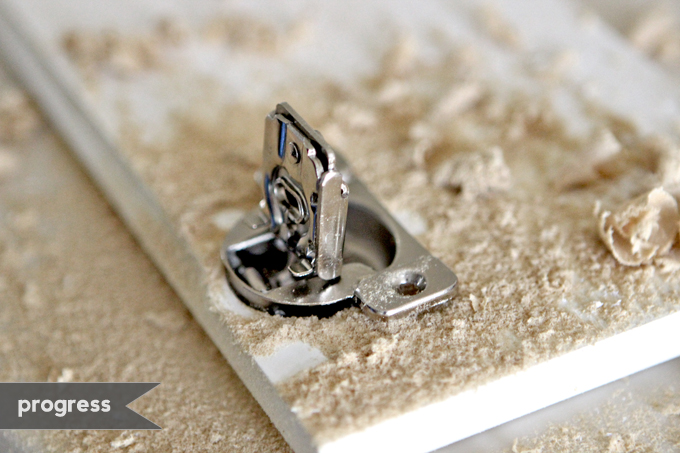
3. The 5/8″ cabinet hinges we bought came with instructions saying that the center of the hole should be 2 centimeters from the edge of the board and the diameter of the hole should be 35 millimeters.

So Brent measured where he needed to drill and then used this forstner bit and drill to drill the holes for the hinges.

Adding Shelves in Bathroom Cabinets

Adding Shelves in Bathroom Cabinets

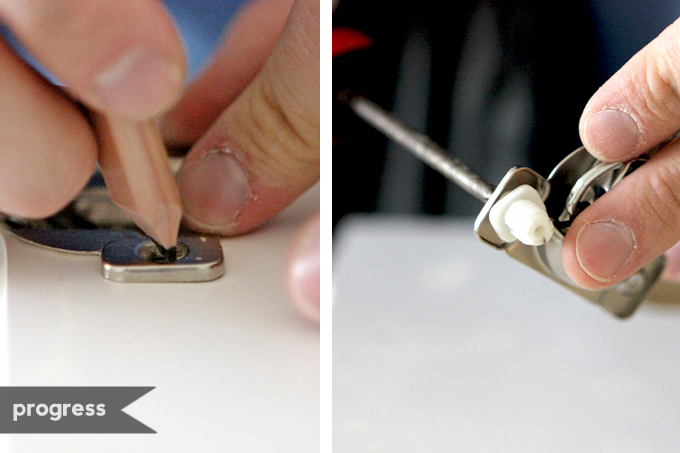
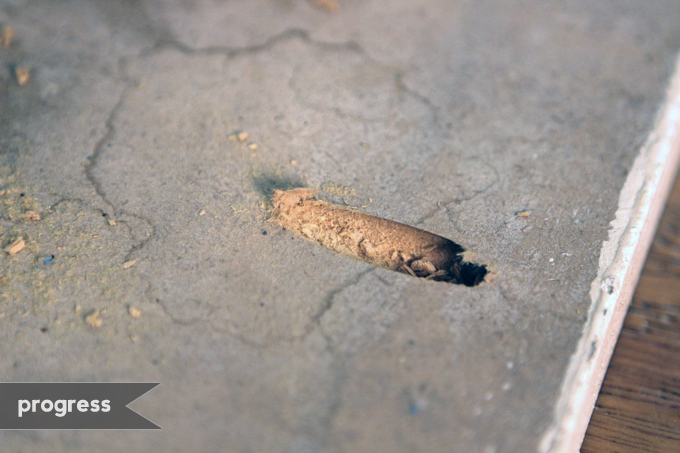
4. Brent marked a hole for the plastic screw anchor.

Adding Shelves in Bathroom Cabinets

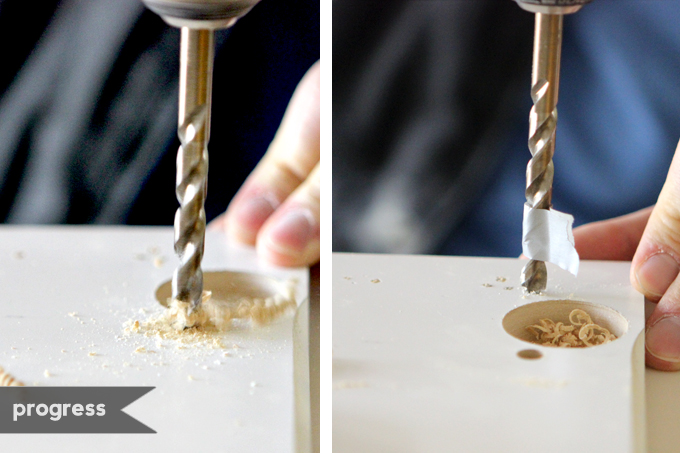
5. Then he used a piece of tape to mark the depth of the cut so he would know when to stop drilling.

This would prevent the drill bit from going all the way through the drawer face.

Adding Shelves in Bathroom Cabinets

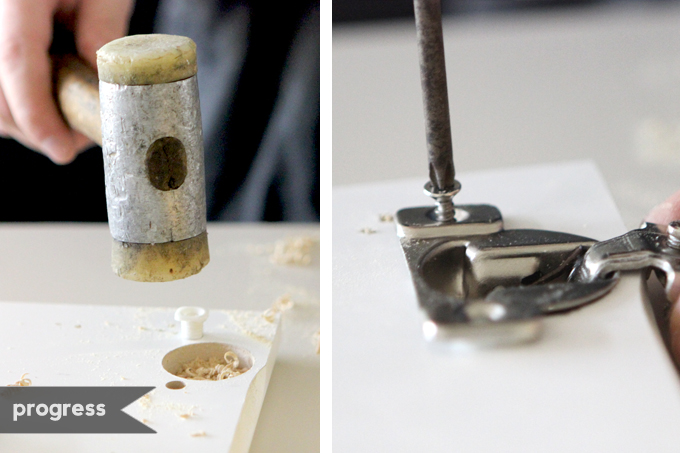
6. With a soft faced mallet, Brent hammered in the plastic screw anchors and then attached the hinge to the drawer face with the screws.

Adding Shelves in Bathroom Cabinets

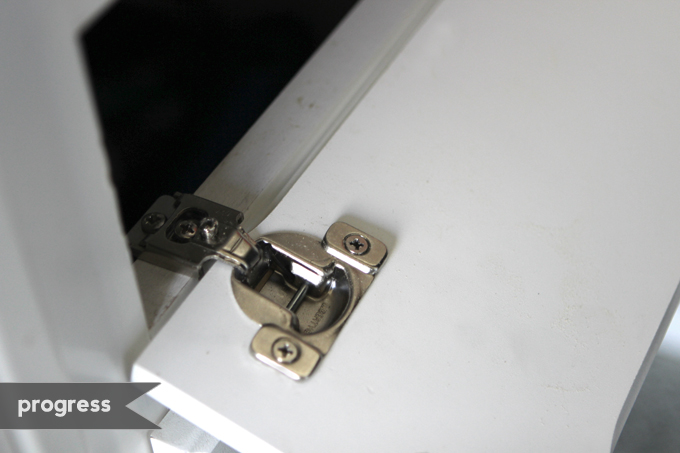
7. After centering the drawer face on the cabinet, he attached the other side of the hinge to the cabinet frame to make it a functioning door.

Adding Shelves in Bathroom Cabinets

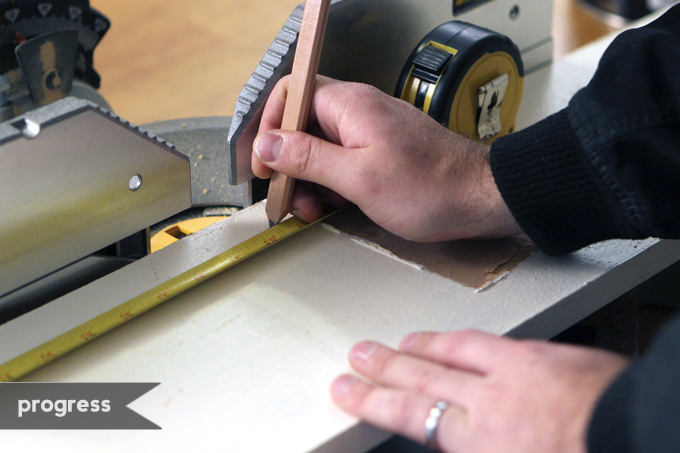
8. Then Brent started building the shallow shelf that would sit behind the hinged door.

He used a piece of scrap wood that came from a shelf we tore down in our garage. We found this white laminate shelf that you could use that is very similar.

Bonus: it was already painted white! That was a huge time saver. He measured the width the shelf needed to be to fit in the cabinet in front of the sink.

Adding Shelves in Bathroom Cabinets

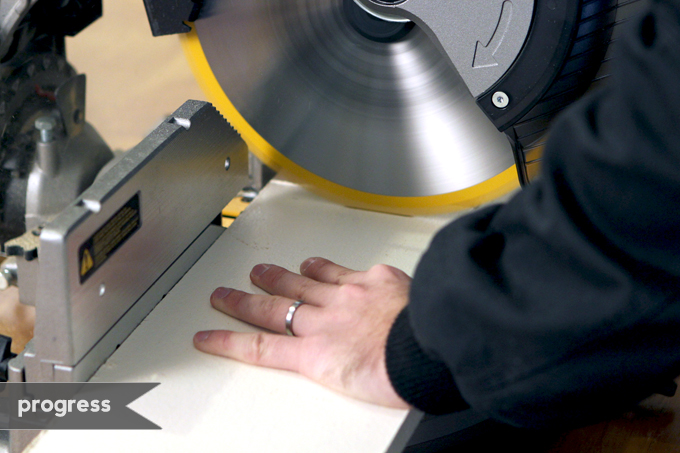
9. Next, he cut the shelf to size using a miter saw.

Adding Shelves in Bathroom Cabinets

10. He flipped the shelf over and clamped a Pocket-Hole Kreg Jig to the board and then used it to drill a pocket-hole on the bottom of the board.

Adding Shelves in Bathroom Cabinets

A close up of what the pocket-hole looks like.

Adding Shelves in Bathroom Cabinets

11. Finally, he installed the top shelf behind the hinged door. He used the same steps above for the bottom shelf as well.

Adding Shelves in Bathroom Cabinets

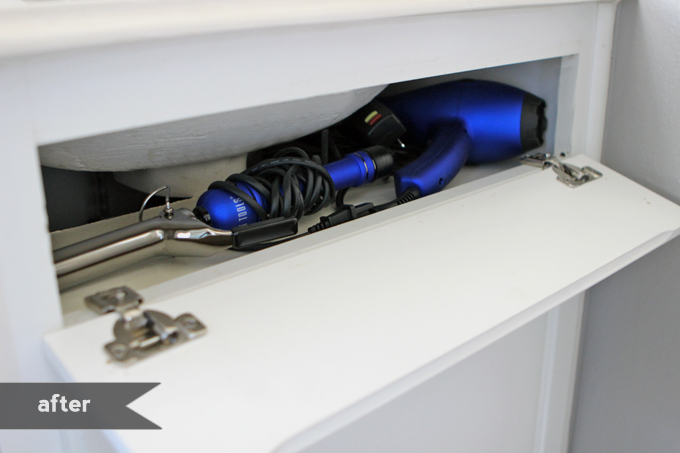
I am now storing my hair dryer and curling iron behind this secret little door. I like having these items up higher and within reach so they don’t fall towards the back of the cabinet.

Adding Shelves in Bathroom Cabinets

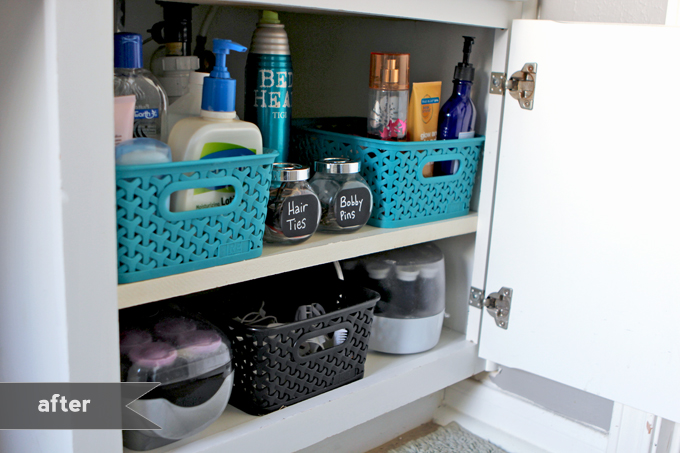
After Brent installed the bottom shelf, I finally got to organize this area like I have always wanted! I was able to add another inexpensive baskets now that I had two shelves.

As you may be able to see, I found another use for my chalkboard tape!

I found these little glass containers left over from our wedding and added some chalkboard tape labels to them and am now using them to store all my hair ties and bobby pins that were laying all over the place.

Hopefully by adding shelves in bathroom cabinets and having a place to store these things will keep them from getting lost and me having to buy new ones all the time.

Adding Shelves in Bathroom Cabinets

It was a small project with a transformation that has a huge impact on that space. I am so happy with the results of adding shelves in bathroom cabinets and grateful Brent took the time to work on this with me. I love that each item has a designated spot to be put back and that all the space in the cabinet is now being utilized to it’s max capacity.

If you have any questions about adding shelves in bathroom cabinets, feel free to leave them in the comment section below.

PIN IT FOR LATER

A home DIY Tutorial by Gray House Studio showing how to add shelves to your bathroom cabinets. If you have a faux drawer, this tutorial shows how to add hinges to the faux drawer so you can access an additional shelf perfect for storing hair dryers and curling irons. Adding shelving to bathroom cabinets is a great way to add more storage space to keep your bathroom essentials organized.

Organize a Pantry with Chalk Tape

Organizing a Pantry with Chalkboard Tape

How we went about organizing our prantry with chalkboard tape

Organizing a Pantry with Chalkboard Tape

One of my Christmas presents from my parents this year was a roll of chalkboard tape and a chalk marker. I was so pumped. My parents know and understand my love of office supplies so well. I’m not sure if this stuff is fairly new or I have just been oblivious to it in the stores but I am going to guess it is the former because I’m usually pretty on top of the latest tape craze. I’m not ashamed to admit I have bought decorative duck tape before for no real reason other than it had Super Mario on it (I ended up giving it to my brother) and impulsively buy washi tape just about every time I got to Target. Because you know, you can never have too much of that stuff for projects.

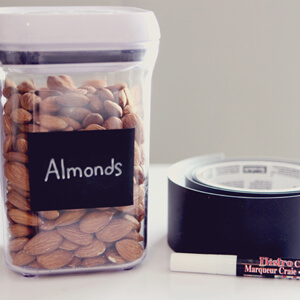
I immediately started to look for a place I could use my chalkboard tape in our home. I think I was scaring Brent with some of my suggestions. Then it hit me. I could use it for labels on my OXO food storage container set that Brent got me for Valentine’s Day last year. I was only kind of utilizing them but had not really taken the time to actually migrate all our food from packages to storage containers because I was still trying to figure out how to label them. Chalkboard tape was my answer.

Organizing a Pantry with Chalkboard Tape

How I Organized our Pantry with Chalkboard Tape

Organizing a Pantry with Chalkboard Tape

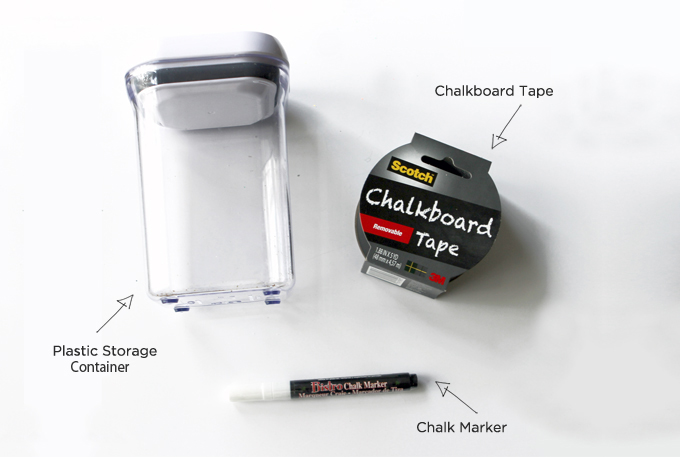
SUPPLIES

plastic storage container
chalkboard tape
chalk marker

*This post contains an affiliate link. You can read our disclosure policy here.

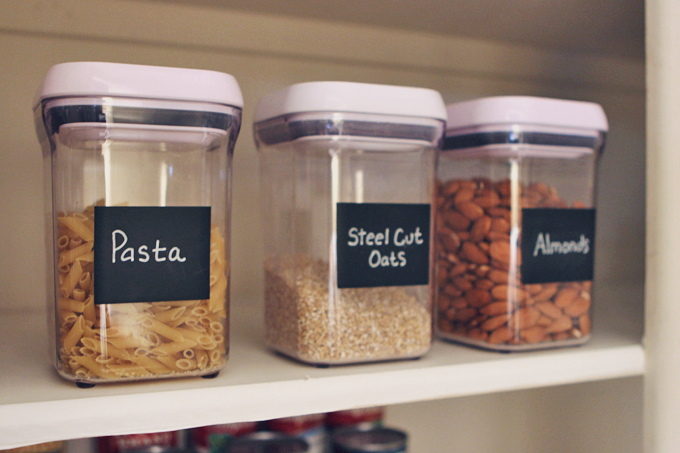
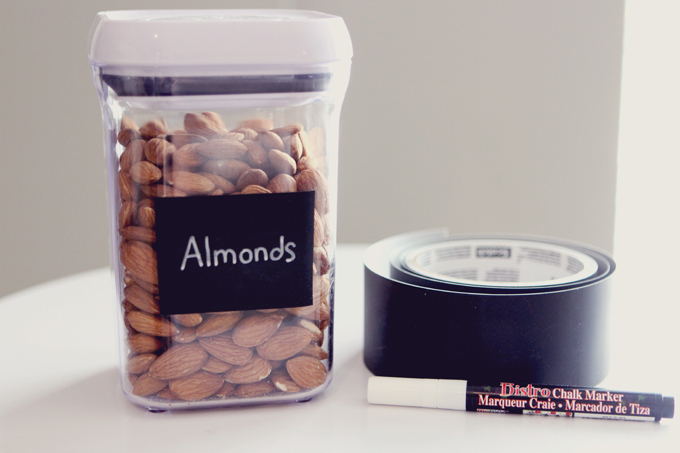
To organize our pantry I used: food storage containers, a roll of chalkboard tape and a chalk marker, that’s it! Well, besides all the other storage stuff I swiped from my mom when she was purging her own pantry. Score! I realize this concept of using food storage containers with chalkboard labels in the pantry is nothing new or even remotely unique. What really made the difference for me is using the chalkboard tape. There are a lot of chalkboard labels out there but they were so small and too decorative in appearance. I had a hard time writing on them and fitting in everything I needed to write. Plus they didn’t cover much of the container and I could never get them to erase very well.

Organizing a Pantry with Chalkboard Tape

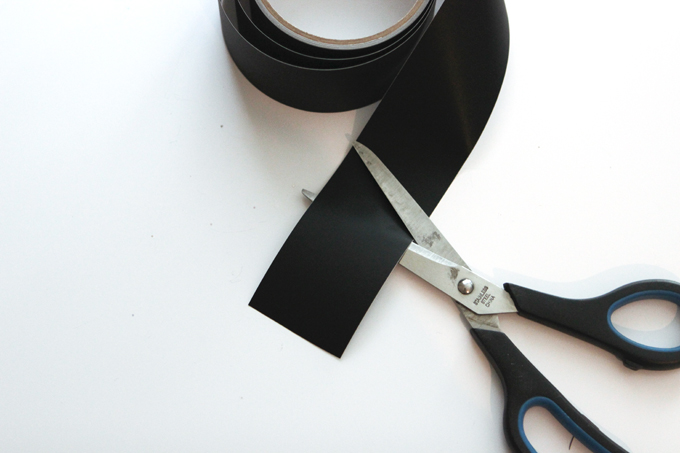
^^^ I loved that the chalkboard tape was already the perfect height. All I had to do was cut it to the width of the container. Plus, it offers a modern appearance and a realistic writing surface size. I also found that it wipes off really easy.

Organizing a Pantry with Chalkboard Tape

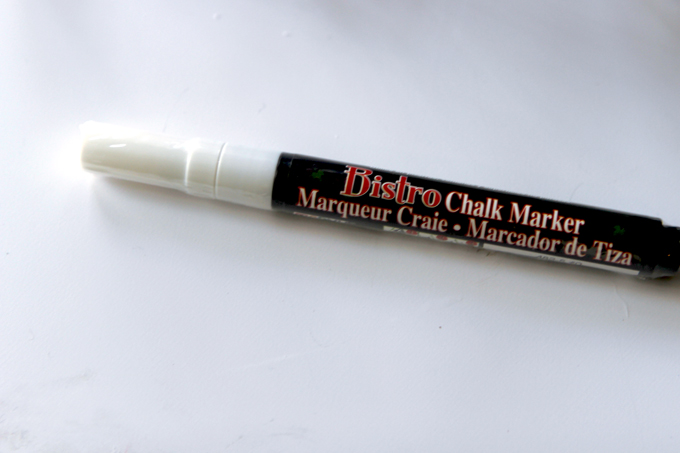
^^^ Let me just say using a chalk marker also makes the world of difference. Have you ever tried to write with chalk on a very tiny surface? It’s hard. There was almost no point in me even bothering writing with the chalk on those tiny chalkboard labels because half the time Brent couldn’t even read what I wrote anyway.

Organizing a Pantry with Chalkboard Tape

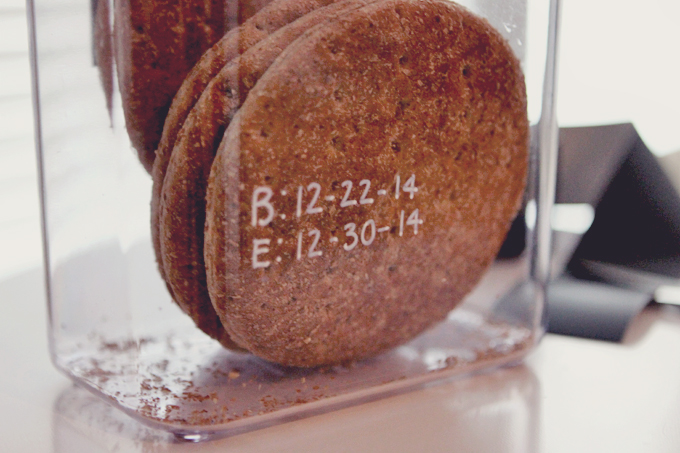
^^^ My mom gave me this idea, which I think is brilliant! Her suggestion was to use the chalk marker and write on the back of the storage container the date I bought the food and the date it expires. Which is a really good point because once you transfer the food to the storage container and throw away the package, you no longer have the reference. And I don’t know about you but I have enough to remember besides when I bought a package of rolls. I just made a little note on the back of the container with a B and the date I bought it and an E and the date it will expire. The chalk marker works really well for this because it writes on smoothly and wipes off really easily once you reload the container with new food. Note: I would like to mention that the photo above is from when I organized my pantry about a month ago. I promise we are not still eating rolls that are about a month past their expiration date.

We don’t have a lot of food in our pantry right now because there are just two of us and we usually only buy food for a week at a time. Plus, I am a little obsessive about throwing out expired food every week on trash day. So the whole organizing the pantry process only took a few hours one afternoon.

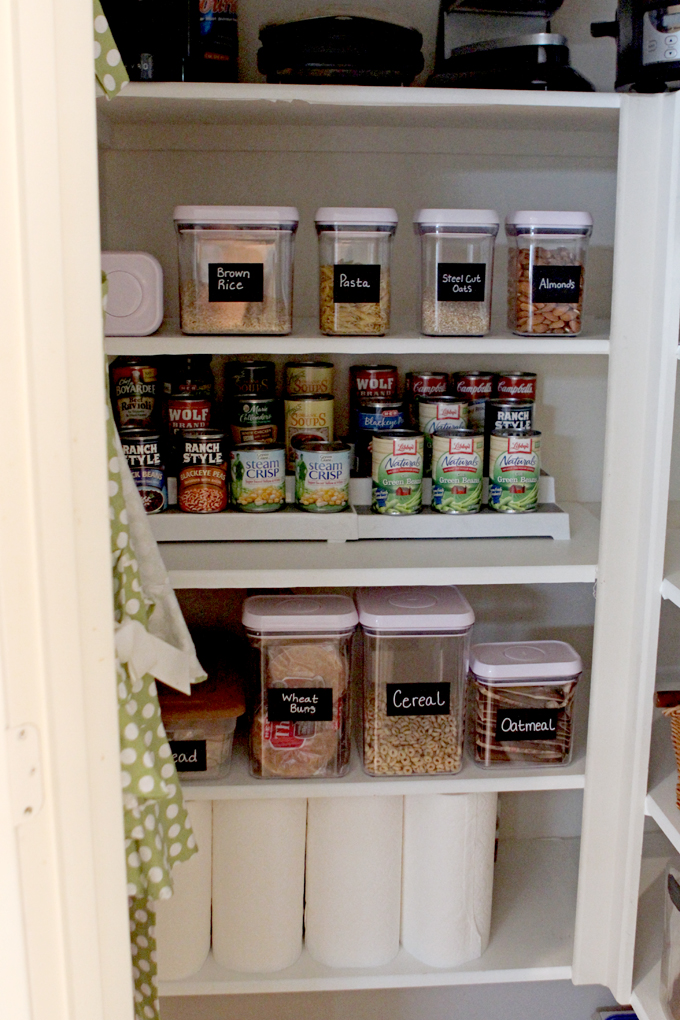
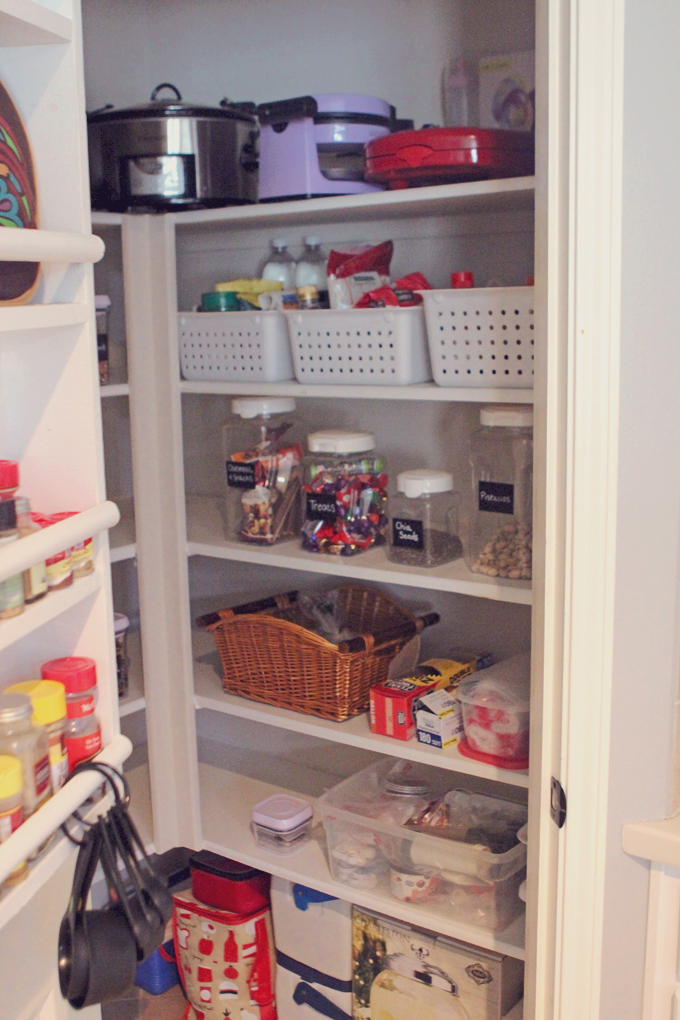
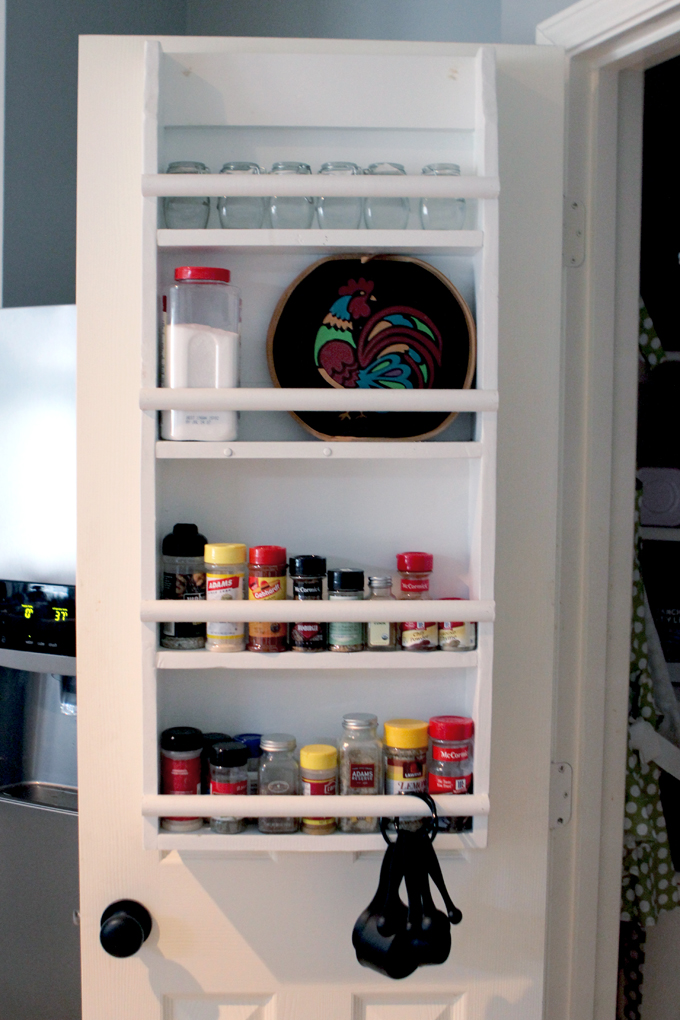
Both Brent and I agree it feels nice to have an organized pantry. Below is what it looks like now.

Organizing a Pantry with Chalkboard Tape

Organizing a Pantry with Chalkboard Tape

Organizing a Pantry with Chalkboard Tape

A Canopy of String Lights in Our Backyard

A Canopy of String Lights in our Backyard

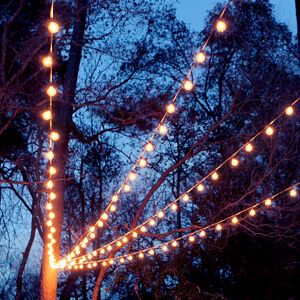
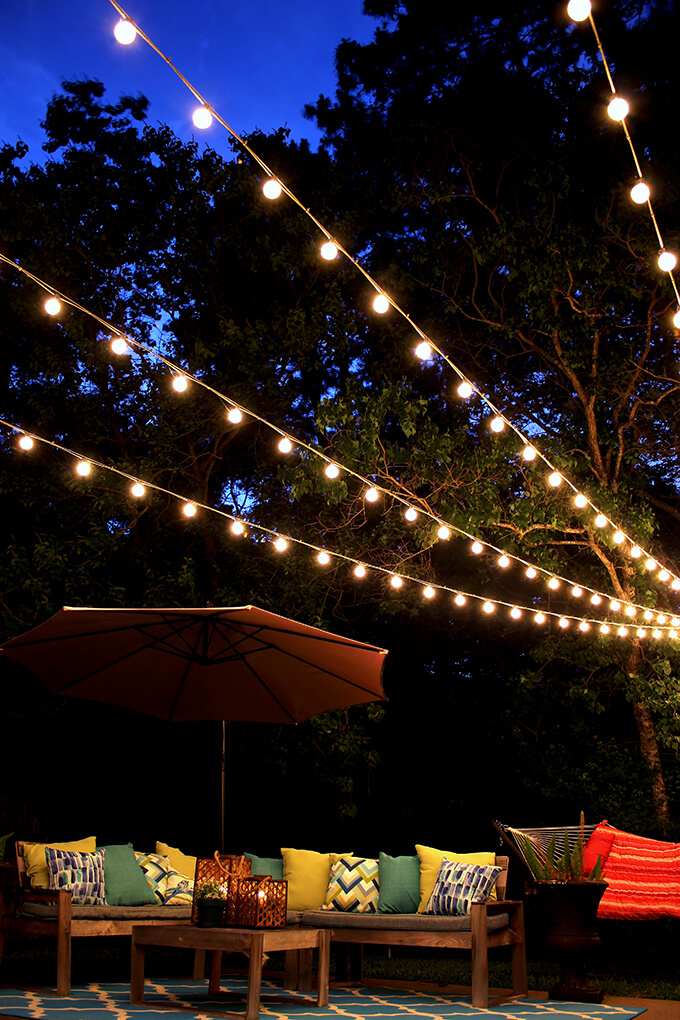
Our backyard is an ongoing project. But at least we have string lights! Check out how we created a canopy of string lights in our backyard.

A Canopy of String Lights in our Backyard

If you have ever seen the show Parenthood (I am obsessed) you may remember the part in the opening sequence or in the show itself where the family is gathered around the table eating dinner outside with these gorgeous string lights hanging above them. When I saw that scene I fell in love with those string lights.

I kept dropping subtle or maybe not so subtle hints to Brent about wanting lights strung up across our backyard. I wished for a canopy of lights. I believe my description to him was I want our backyard to be “dreamy”.

A Canopy of String Lights in our Backyard

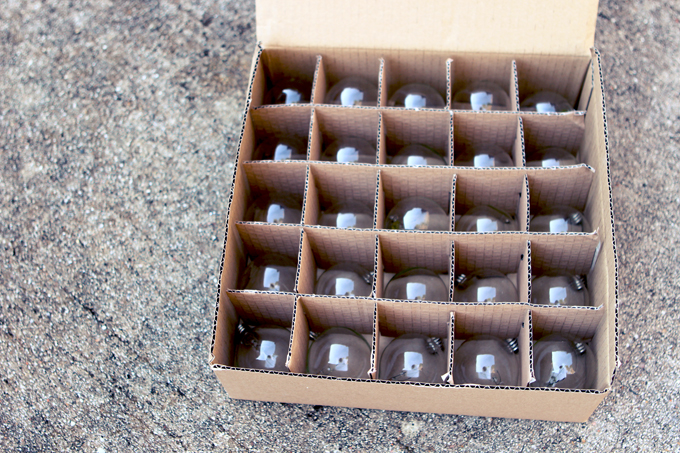
I have been talking about these lights for awhile now but was still completely caught off guard when Brent surprised me and for Christmas gave me this HUGE box filled with 200 feet of string lights and 200 round light bulbs.

He said he promised to make our backyard dreamy. He knows the way to my heart, I tell you.

A Canopy of String Lights in our Backyard

This weekend was the first weekend in Houston since Christmas that it hasn’t rained. Since it was in the high 60’s and sunny we decided it would be a great day to create the canopy of string lights in our backyard.

A Canopy of String Lights in our Backyard

It was a full day of work believe it or not to hang all those lights and Brent got them all wired up just minutes before dusk. It was down to the wire. There were a few mishaps throughout the day but as Brent always says “It’s not a Gray House Studio project if you don’t end up at some point frustrated and bleeding”. (More on that later in the post).

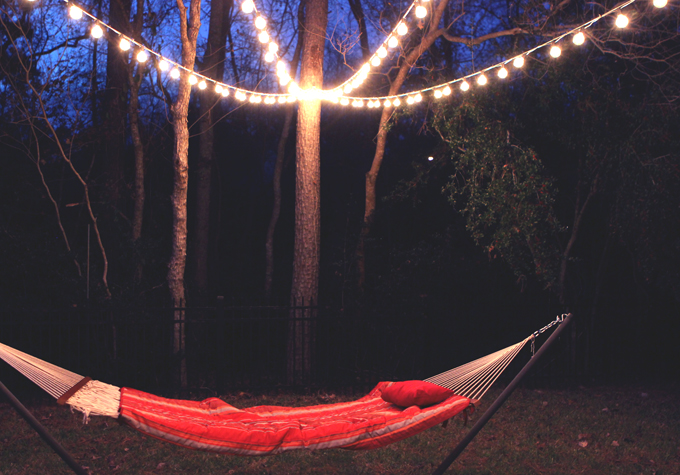
We obviously still have a ways to go to get out backyard completed, but for now I am one happy girl snuggling in my hammock under my canopy of lights.

How to Hang a Canopy of String Lights

SUPPLIES

FYI: This post contains a few affiliate links to products we used to make this project. Gray House Studio does receive commissions for sales from these links but at no extra cost to you. We appreciate you supporting this site. Read our privacy and disclosure policy. You can also easily shop our recommended products here.

A Canopy of String Lights in our Backyard

We used lots of light bulbs. We had eight boxes just like this one. And we didn’t even break one.

STEP BY STEP GUIDE

A Canopy of String Lights in our Backyard

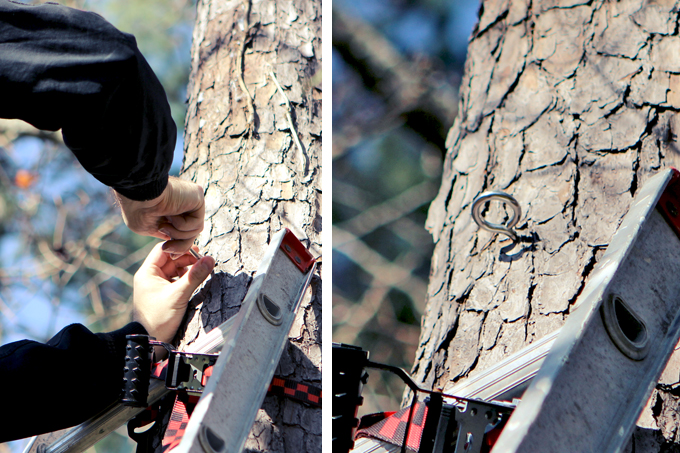
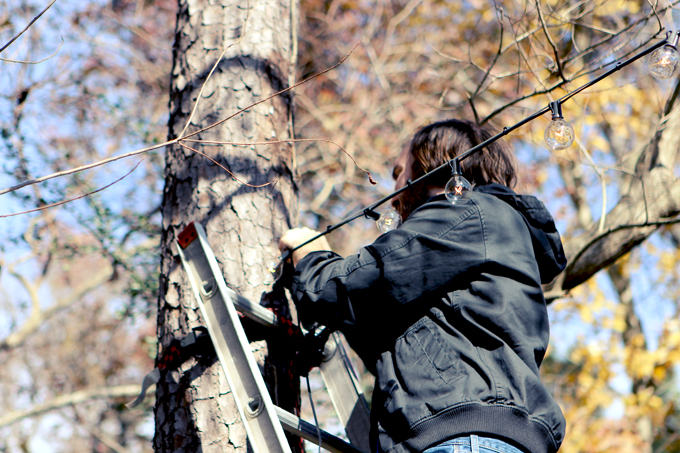
1. We utilized the large pine tree that sits right along our fence line as the support for one side of the lights. Brent used our drill to make a small hole in the tree and screwed a stainless steel eye hook into the tree.

A Canopy of String Lights in our Backyard

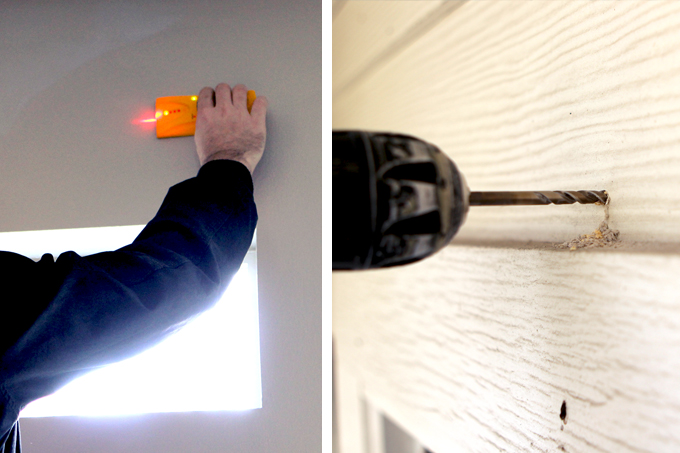
2. Even though Brent was sure there would be a wood header above the windows along the back of the house he double checked with a stud finder on the inside.

When drilling for the eye hook on the house you can see wood shavings came out indicating he was indeed drilling into wood.

A Canopy of String Lights in our Backyard

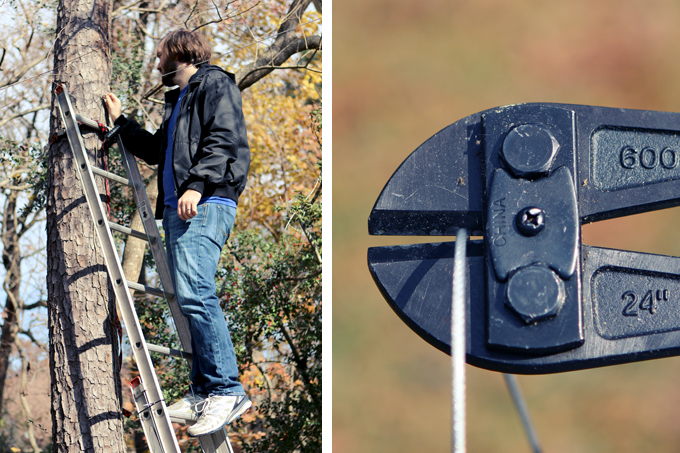
3. Brent measured how much of the galvanized steel rope we needed and then we cut off the excess with a wire rope cutter.

We chose to use galvanized steel rope to bare the load of the string lights.

This should extend the life of the string lights drastically because the cable won’t stretch or break.

A Canopy of String Lights in our Backyard

4. It is also easier to attach the steel cable to an eye hook than attaching the string lights to an anchor would be.

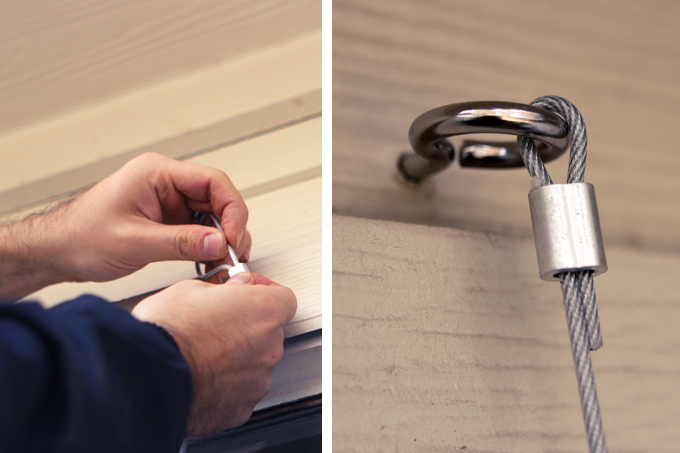
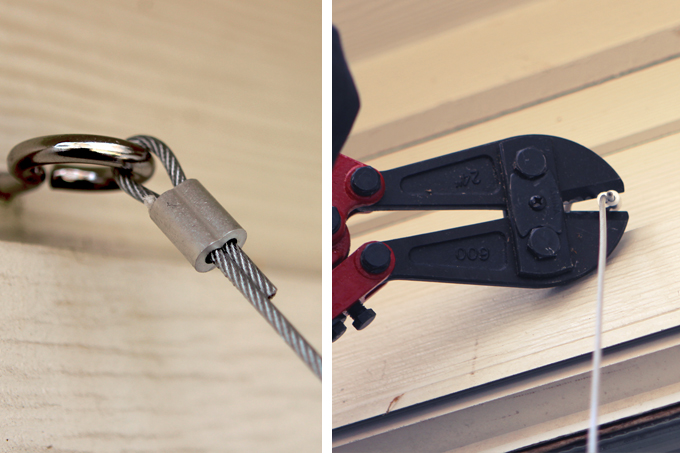
To attach the cable to the eye hook we threaded the galvanized steel rope through a ferrule.

A Canopy of String Lights in our Backyard

5. Once the wire was in place we took a wire rope cutter and crimped the ferrule to make the wire secure.

A Canopy of String Lights in our Backyard

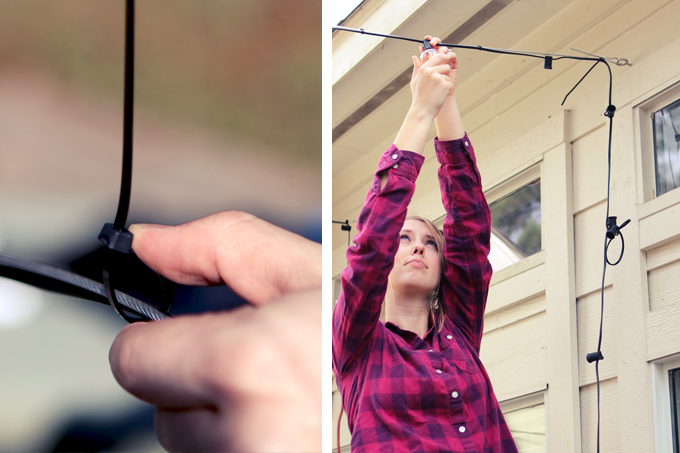
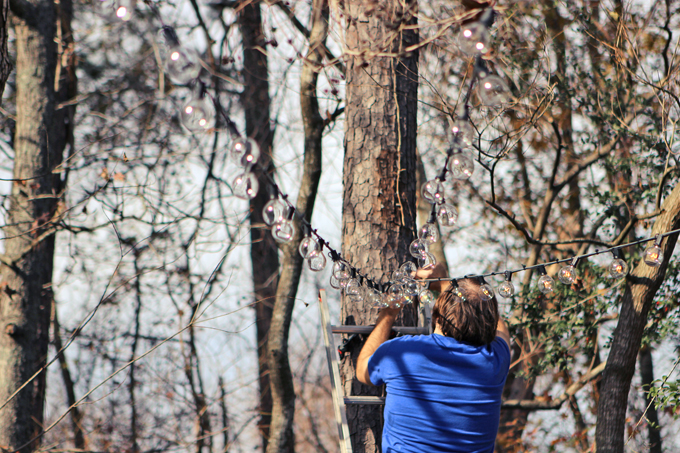
6. Next, we attached the string lights to the cable. Brent uses zip ties to tie the cable and string lights together and I followed behind him and screwed in the light bulbs.

A Canopy of String Lights in our Backyard

7. After we got all the lights zip tied and bulbs screwed in, Brent attached the other side of the cable to the eye hook suspending the string lights at the correct height.

A Canopy of String Lights in our Backyard

8. We initially planned to have five runs of string lights from the house to the tree but realized after completing two entire runs that the odd number of runs would leave one of the two plugs at the tree instead of the house.

That was a “Doh!” moment for us. Both strings needed to plug in at the house and we recognized that wasn’t going to happen the way we were doing it so panic set in until we calmed down and had to rethink our game plan.

The solution turned out not to be too difficult. We removed one of the eye hooks and relocated the two inner eye hooks so they were spaced evenly, giving us four runs instead of five.

The one challenging part was after cutting down the second cable we had no slack cable left making it really hard to handle getting it back wrapped around the eye hook through the ferrule.

The cut wire kept poking Brent in the hands and his arms got really tired as he tried to work with the cable above his head. But he was a trooper and made it happen.

A Canopy of String Lights in our Backyard

9. Because we ended up only making four runs instead of five, we had excess string light.

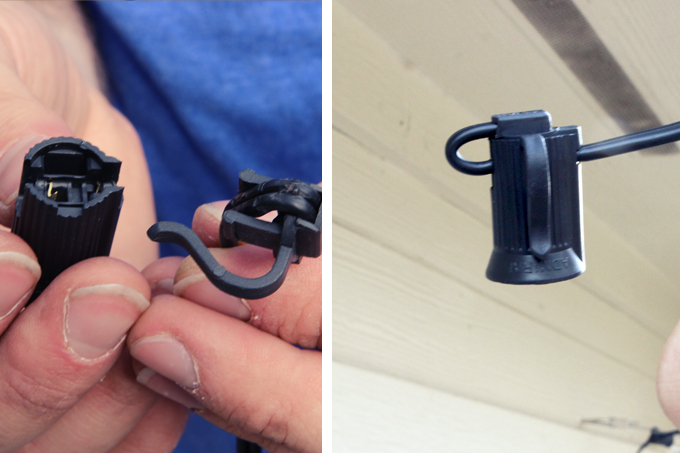
Brent was able to take the light on the end of the string, which caps the wires, and move it to the spot where we needed and then cut off the left over string lights.

A Canopy of String Lights in our Backyard

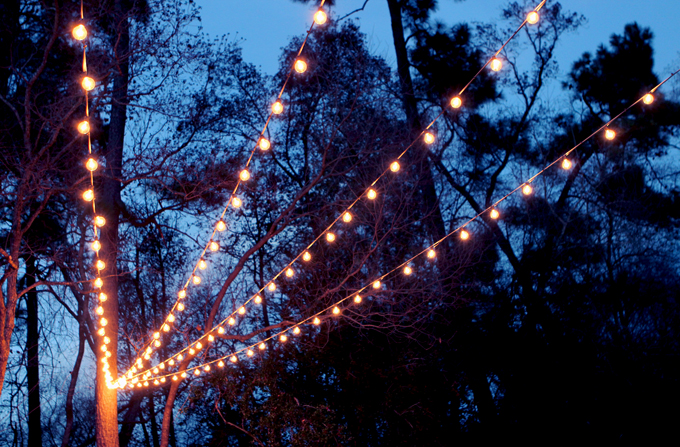
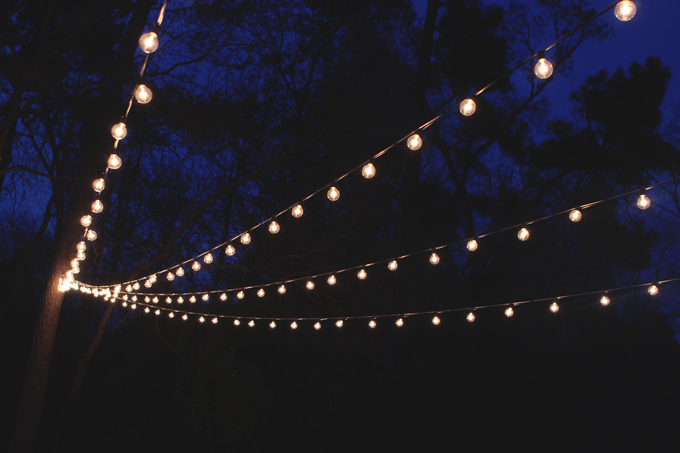
There you have it, our canopy of string lights in our backyard!

A Canopy of String Lights in our Backyard

Our backyard still has a ways to go until it is up to the Parenthood backyard standards but this is a great start and we are excited to tackle more projects for this space.

PIN IT FOR LATER

A Canopy of String Lights in our Backyard