Uncategorized

Garage Shop Plans: Check out the new floor plan

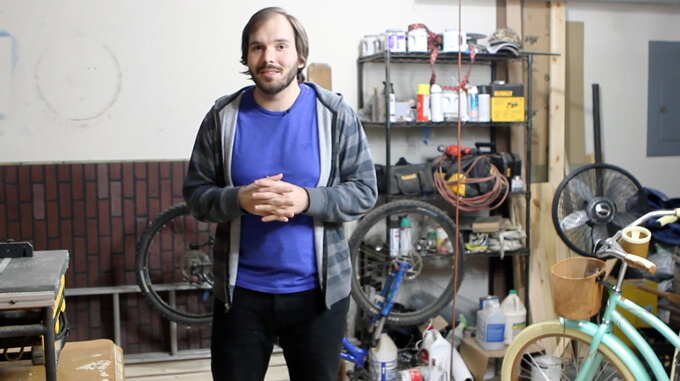
Our garage is a makeshift woodworking shop when we can wade through the junk. Here are our garage shop plans. We can’t wait to legitimize the workshop.

Garage Shop Plans

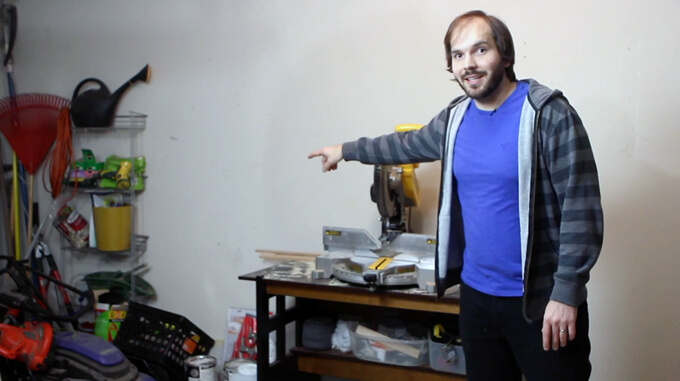
We have been using our two-car garage as our workshop for the past two years but it is also the black hole that absorbs anything we own without a home base. Since the garage has no real organization system it’s easier to leave the lights off and toss objects into the garage than try to keep it clean. Often times it might take us 30 minutes to an hour to shove things around enough to work on a project.

Garage Shop Plans
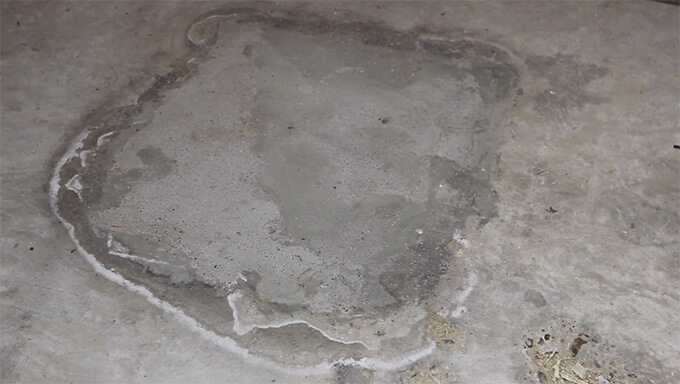
If the clutter isn’t dangerous enough for you there is also several holes and lumps in the concrete slab that will either have you tripping or twisting your ankle. Beware intruders, holes make for a great boobytrap once filled with sawdust.

Garage Shop Plans
In our defense, we have never actually seen our garage clean. We moved into an empty house with a trashed garage.

Garage Shop Plans
It was the shell of a man cave complete with a dart hole silhouette on the wall, cigarette butts in the corner, a dilapidated punching bag on the ground, and untouched supplies from a honey-do-list in a pile. It feels like for the past year every week we put one heavy item in the trashcan in a feeble attempt to whittle down the pile of items that were donated with the house.

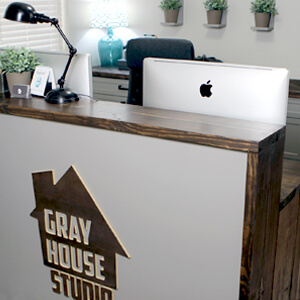
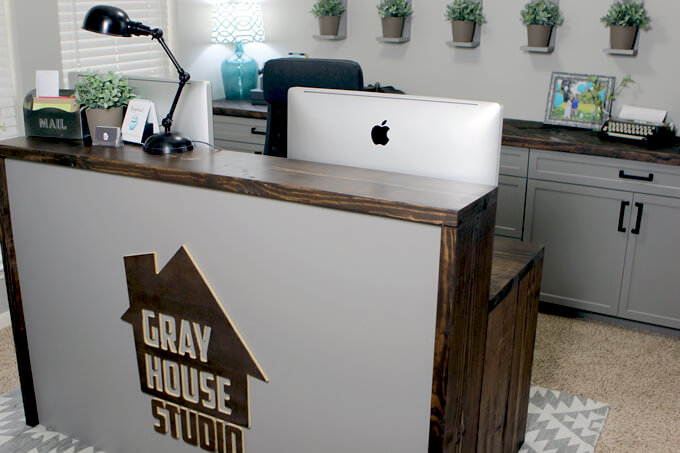
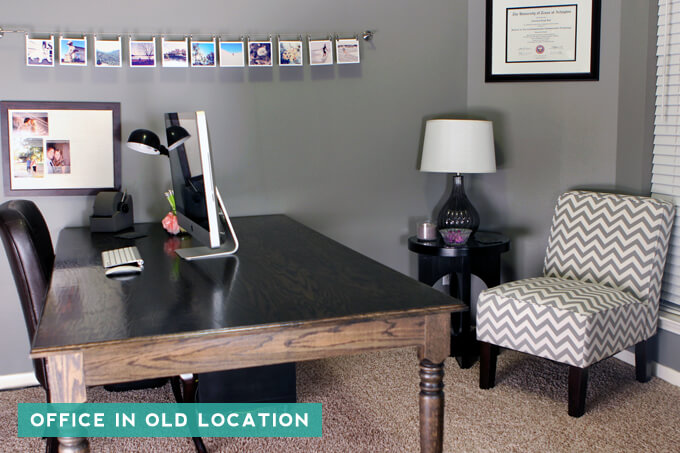
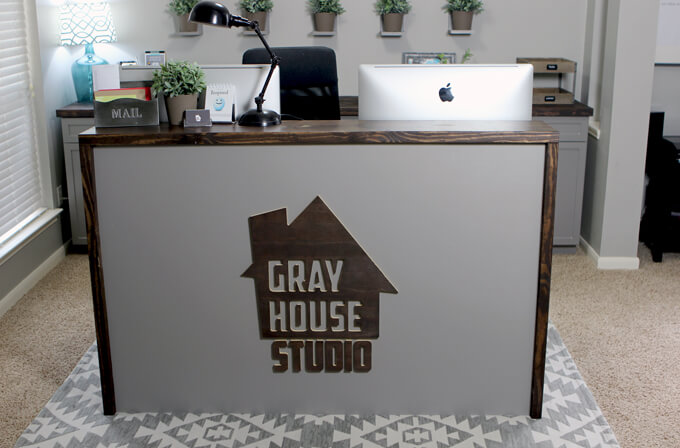
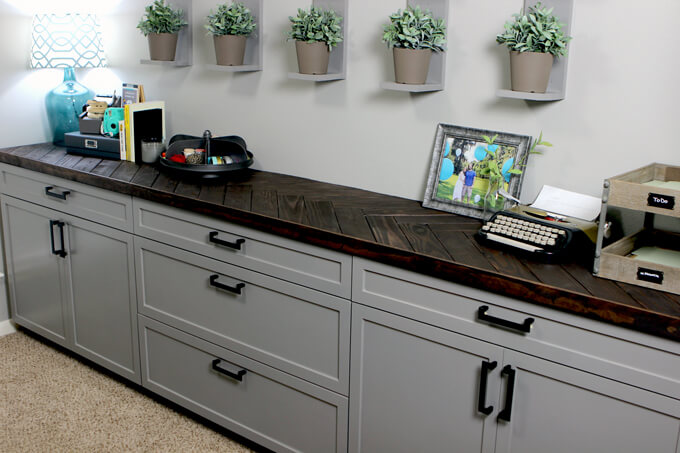
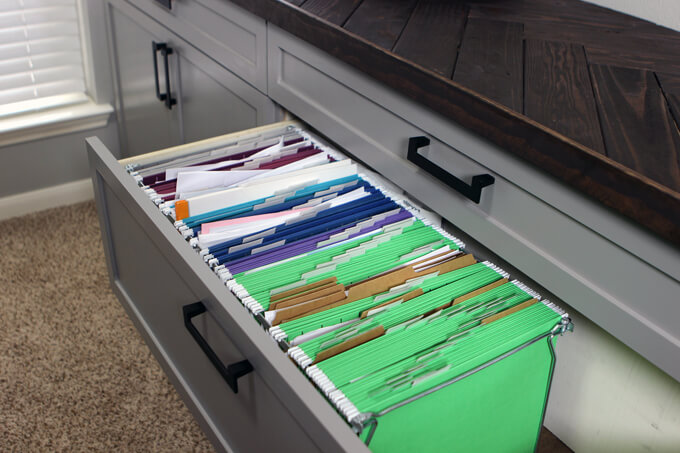
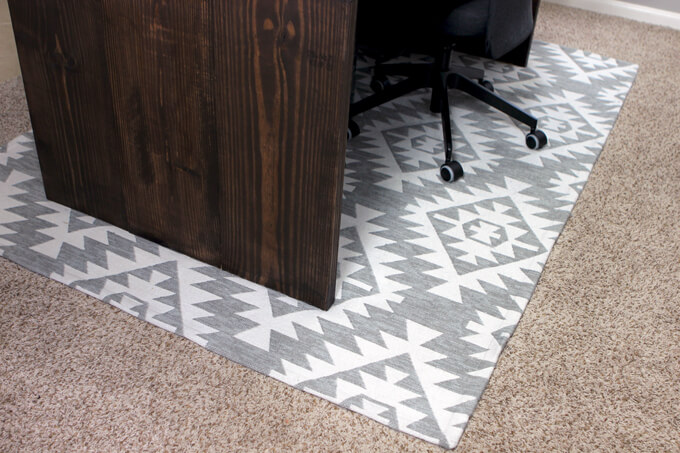
If there is one project we have been talking about the longest it would be the garage shop. When we make a list of projects the garage is always next on the list. But inevitably, something more pressing always comes up. First, we re-decorated the guest room so my parents would have somewhere nice to stay while she was in town for her cancer treatment. Then we found out Courtney was pregnant and needed to turn a room into a nursery. So, to free a room we moved Courtney’s office and built a desk, cabinet and wall art. Then, it was all hands on deck to prep the nursery before Connor was born. We even filmed about video back in March, the last time we thought we were starting the garage.

VLOG

To see new DIY videos on Sundays, be sure to subscribe to our channel ⇾


Garage Shop Plans

Now that the nursery is finished it’s finally garage renovation time. Here is the updated plan.
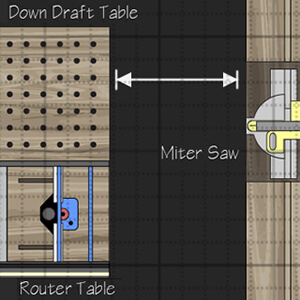
Floor Plan

Garage Shop Plans
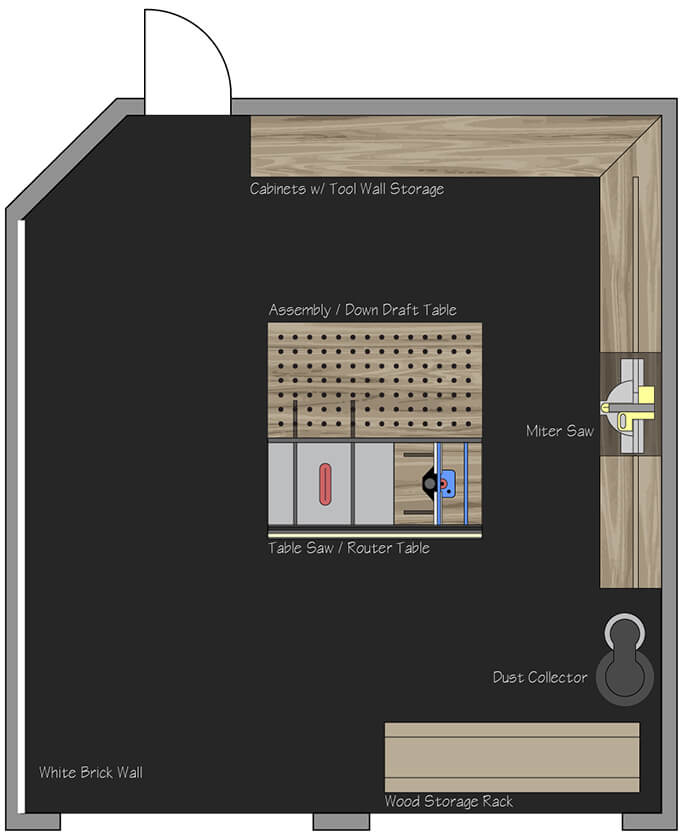
For the floors we are using Rust-Oleum’s ROCKSOLID Metallic Floor Coating in Gunmetal. One wall will be white brick and the other two walls will be painted gray with dark gray cabinets. One set of cabinets will be a miter saw station.

To help contain and organize leftover wood a lumber rack will be built in-front of the garage door we keep locked because it doesn’t have a motor. In the center of the room will be the table saw built into a large work surface with a built-in router table. The outfeed table attached to the back of the table saw will have holes in the top for easy clamp use. The holes will also allow the table to be used as a downdraft table when hooked up to a vacuum.

We can hardily contain our excitement to finally follow through with these garage shop plans, finally making it the workshop of our dreams. Of course, once the realization sets in that we have to empty the garage to get started I’m sure our level of excitement will drop a bit. At least for this post we can focus on the light at the end of the tunnel.

Gray House Studio Intern

Meet the Gray House Studio Intern

We are super excited to introduce our little Gray House Studio intern, our son, Connor Jack!

Gray House Studio Intern

We just wanted to give a little personal update because Gray House Studio and our little world has forever been changed for the better three weeks ago. We welcomed our son (and Gray House Studio intern) on October 1, 2016 at 5:12pm. He weighed a whopping 9 pounds and 6 ounces and was 20 inches long.

Gray House Studio Intern

My doctor told me at 37 weeks he could come any day. But Connor must have been nice and cozy where he was and had his own plans and it did not include showing his face on my due date which came and went on September 26th.

However, he was considerate enough to stay put long enough for us to finish every project in the nursery so it would be ready for him when he arrived. We even finished our reading nook tent which was the last project on our list.

On Saturday, October 1st my doctor decided it was time to induce me and he would have to make his way into the world whether he was ready or not. I had a relatively easy labor process that day and decided to go without the epidural or any pain medication, a decision I was content with up until they broke my water broke and then was in some seriously intense pain for about thirty minutes.

Luckily, Brent was amazing by my side and talked me through it and helped me mutter my go to phrase, “I will dominate these contractions” over and over again – ha. Thankfully Connor came fast because that last round of contractions were no joke and I was making the most cliche labor groans ever, sounds right out of a movie. So loud I might add that my family and Brent’s family sitting outside in the waiting room could hear every last grunt and moan. Awkward….

Gray House Studio Intern

Little did I know when I decided to turn down the epidural, this little due was going to be a BIG dude with a proportional size big head. All the nurses and even the doctor were a little surprised at his size. Now that it is over, I am happy with my decision again and kind of proud at my stubbornness, I mean determination.

Gray House Studio Intern

Connor did have a little trouble regulating his glucose and was taken to the NICU for about 24 hours to be hooked up to an IV. Which led to the LONGEST and most tiring night of our life having to get up and walk every three hours from my room on the third floor to the NICU on the second floor to feed him, only about 10 hours after giving birth.

Gray House Studio Intern

Thank goodness for Brent encouraging me and doing everything he could to help me push through it. I am really lucky to have him as my husband and partner in life. These types of situations really bond you for sure. He is seriously my rock and already the sweetest dad.

Gray House Studio Intern

Connor’s glucose levels came up and after four days in the hospital, it was time to bring him home to see his nursery! We immediately took him in the room and showed him around and I rocked him in his rocking chair that his dad built just for him.

Gray House Studio Intern

We are over the moon and so in love with our little guy. We worked so hard on his nursery and spent most nights imagining what he would look like sleeping in his crib or being rocked in his chair and now that it is a reality, it is so much fun.

I’m not going to lie, going from a couple to a family of three and trying to adapt to having a newborn in the home is tricky. The first few weeks are just a constant pattern of feeding him, rocking him to sleep (my favorite), changing diapers and just about zero sleep for this new mom and dad.

One nursery project we are really getting a lot of use out of is the changing table. We have already put it to some serious use as well as our nursery wall storage and both storage solutions make life so much easier and work perfectly.

Although, keeping this area looking like it did when we first took the photos (before baby) is a difficult task in itself. The baskets are usually empty now and half the burp cloths are dirty on the ground because that is real life with a newborn, wonderful but REALLY messy.

We still have a few more nursery projects to share, plus a full tour of the room but posts might be a little more sporadic than usual for a while as we try and figure this whole parenting thing out.

Brent made this sweet video of Connor’s first week of life. I love watching it over and over. It makes me so happy.

MEET CONNOR JACK

To see new DIY videos on Sundays, be sure to subscribe to our channel ⇾


DIY NURSERY CAMERA MONITOR MOBILE

DIY Nursery Camera Mobile

Check out how to make a felt woodland DIY nursery camera mobile and how our nursery camera integrates with our home security system app for easy monitoring. This post is sponsored by Reliant but as always all opinions and content are 100% our own.

DIY Nursery Camera Mobile

We have a fun DIY decor project to share with you today that combines crafting, sewing, power tools and technology.

Our latest project was to make a mobile for our baby’s modern outdoor nursery to hang above the crib.

We didn’t make just any mobile, we took it a step further and made a mobile with a camera built into it! Fun, right!?

Follow along as we show how we made our DIY nursery camera monitor mobile.

DIY Nursery Camera Mobile

We wanted to make a whimsical mobile with little felt mountains, trees and clouds to fit with our outdoor/adventure nursery and it turns out a wood slice is the perfect place to hide a camera!

DIY Nursery Camera Mobile

We recently upgraded the security system in our home to a Security by Reliant system and one of the products we got in our package was an indoor security camera.

We knew we wanted to use it as a nursery camera but we didn’t want to just mount the camera to the wall, we wanted to try and find a unique solution to incorporate it into the decor.

Brent came up with the idea to hide the camera into the mobile that we already planned on making.

DIY Nursery Camera Mobile

DIY Nursery Camera Mobile

What we love about using a camera that is tied into our security system is we can use the same Reliant Connect App to monitor our nursery as we use to monitor and control the rest of our home making it really convenient.

If you are interested in making a DIY nursery camera mobile or are just curious to see how we made ours, we have a video tutorial and step by step guide below for you to check out.

2022 Personalized Christmas Ornaments
*** Thanks so much for supporting our small shop – Moon Rock Prints – this holiday season! ***

HOW TO MAKE A DIY Nursery Camera Mobile

SUPPLIES

FYI: This post contains a few affiliate links to products we used to make this project. Gray House Studio does receive commissions for sales from these links but at no extra cost to you. We appreciate you supporting this site. Read our privacy and disclosure policy. You can also easily shop our recommended products here.

TUTORIAL VIDEO

STEPS

DIY Nursery Camera Mobile

1. To begin we put two pieces of felt together and cut a square out of the felt the same size as our shape template.

This made it easier to cut the shape out. Once we cut the shape out of our colored felt sheet, these pieces became the front and back of our object.

DIY Nursery Camera Mobile

2. For each object we cut out two layers of low loft batting in the same shape as each of our templates to go between the felt pieces.

To prevent the batting from sticking out of the felt pieces, we trimmed a small amount off the edge to make the batting pieces smaller than the felt pieces. We did this for all of our shapes.

DIY Nursery Camera Mobile

3. For the mountain shape we cut the top half of the template off and then cut that shape out of two pieces of white felt to create the snow on each side.

DIY Nursery Camera Mobile

4. We repeated the steps above for each of our mobile objects. We made mountains, clouds, trees, and a moon.

DIY Nursery Camera Mobile

5. To sew each felt object we used a blanket stitch.

To do this we used an embroidery needle and embroidery floss.

We pushed the needle through the back piece of felt because we were sewing two pieces of felt together, the knot needed to go between the two pieces of felt.

Finally, we brought the needle back down through the loop we made. We repeated this process all the way around the object.

DIY Nursery Camera Mobile

Here are what our mobile pieces looked like once they were all stitched up, so cute and whimsical. Now that I learned how to blanket stitch I want to make all sorts of cute little things for the nursery.

DIY Nursery Camera Mobile

6. Once all the objects were sewn, we connected the shapes together using clear string.

We used a needle to thread the string through each object and tied a knot securing the string to each object. We left about 5 inches of string at the top to attach everything together.

DIY Nursery Camera Mobile

We attached two objects to two of the strings and three objects to two of the strings.

DIY Nursery Camera Mobile

7. Before attaching anything to the wood slice, we needed to make a few holes in the wood. We used the camera mount that came with the camera to trace the size of the hole for the camera.

DIY Nursery Camera Mobile

8. Then used a router with a plunge mount and cutting bit to make the hole for the camera.

DIY Nursery Camera Mobile

We test fit the security camera and it fit perfectly inside the wood slice.

DIY Nursery Camera Mobile
We used a slice of wood the same thickness as the camera so that when the mobile is suspended you will not be able to see the camera from the side view.

We should also point out that on the piece of wood we purchased the bark was flaking off a little. To make sure nothing fell off the wood into the crib, we sealed the wood slice before putting in the camera for good.

DIY Nursery Camera Mobile

9. To make the holes for the clear string to suspend the objects, we used our drill to drill 1/16” holes spaced 1” from the edge.

DIY Nursery Camera Mobile

10. We used an equilateral triangle template to mark the holes where the ropes needed to go to hang the mobile and used a drill to drill ¼ inch holes for the rope.

DIY Nursery Camera Mobile

11. To prevent the cording from fraying we wrapped it in tape before cutting it to length.

Once cut to the length, we poked the cording through the large holes and tied a knot to keep it from pulling back through the hole.

DIY Nursery Camera Mobile

12. By holding the cording all at once we could level the wood so it would hang straight and then taped all the ropes together to temporarily keep everything in place.

DIY Nursery Camera Mobile

13. Using white embroidery floss, we wrapped the ropes up and tied a knot to permanently hold everything together.

DIY Nursery Camera Mobile

14. After putting the camera in the center hole and tying the camera’s power cable to the ropes, we were ready to suspend the objects from the wood slice to complete the mobile.

We did this by threading the clear line through the 1/16” holes and tying a knot in the top side of the wood to prevent the line from pulling through the hole.

Once our DIY nursery camera mobile was finished, we hung it over the crib from an eye hook in a ceiling joist.

DIY Nursery Camera Mobile

There is something really fun and satisfying about incorporating technology into things that you design and build. This DIY nursery camera mobile was not only enjoyable to make but I am sure we will get a lot of use out of what would otherwise have been just a decor piece.

PIN FOR LATER

A tutorial showing how to make a felt woodland mobile for a woodland nursery using a wood slice to hide a baby monitor camera. A video tutorial is included in the post.

Life Without A Smart Home Security System

Life Without a Smart Home Security System

As we are anxiously awaiting to have our new Security by Reliant smart home security system installed, we took some time to reflect on how life without a smart home security system made us act a bit ridiculous. This post is sponsored by Reliant but as always all opinions and content are 100% our own.

4 Ridiculous Things You Do When You Don’t Have a Smart Home Security System

These days we are pulled in a million different directions which means we are often scatter brained when it comes to making sure our home is locked up and protected. Sometimes just the simplest of tasks can be stressful due to not feeling safe or being inconvenient. Here is what life has looked like in the past for Brent and I without a smart home security system. At times it can make us act a bit ridiculous.

What We Do Now…

1. When a Pesky Solicitor Rings the Doorbell

Life Without a Smart Home Security System
“Maybe he can’t see me … or maybe I look crazy enough to make him leave.”

2. When We Try to Close the Garage Door Without a Remote

Life Without a Smart Home Security System
Before every bike ride Brent works in a garage door sprint workout.

3. When We Hear a Noise in the Backyard at Night

Life Without a Smart Home Security System
Be afraid, be very afraid of Brent and his Nerf gun.

4. When We Can’t Remember if We Shut the Garage Door

Life Without a Smart Home Security System
“I’m like 80%, maybe 40% sure we shut the…Brent, do you remember if we shut the garage door?”

Watch what our life was like without a smart security system:

The scenarios in this video are reenactments based on real life events.

To see new DIY videos on Thursdays, be sure to subscribe to our channel ⇾


Out With the Old Security System

When we bought our home it had a “this house is protected by…” sign in our front flower bed and some really intimidating stickers plastered on all the windows around the house warning intruders to beware because we have a security system. But the truth is the security system in our home was the one that was originally installed when the house was built making it around 15 years old.

Let’s face it, it was a dinosaur by today’s technology standards. It could technically do it’s job by putting off an ear piercing alarm and contacting the police in an emergency but I believe it is the equivalent of still using a Motorola Razr cell phone over a smartphone today. Sure, it works but you are seriously missing out on all the awesome and convenient technology that some genius worked hard to develop. And once you get a taste of all the cool features you wonder how you ever lived without it.

Life Without a Smart Home Security System

The Death of Our Old Security System

Oh, but when I say that our alarm could technically still do its job, I lied. We never used the alarm because the previous owner never gave us the code to disarm it and we didn’t feel like investing in getting it re-programed because it was so ancient. So we just ignored it.

That is until one night (I’m not pointing fingers, but…) Brent was messing around with the keypad and somehow pushed the instant button which meant that if any door opened, the alarm would immediately go off. A few hours later, Brent opened the back door and suddenly we both dropped to the ground at the deafening and unexpected sound of the panic alarm.

We tried everything to turn it off. Even just pounding on the keypad hoping aggression would scare it off. The cat was freaking out running around in circles. I was pretty much ready to just run out the door and let the security system win. It was not hooked up to call the police but it was so loud that we knew potentially the neighbors might call the cops if we left it going long enough. Finally, in a moment of desperation Brent cut the wire to the speaker. Then, unplugged it in the closet and the attic putting the final nail in the coffin of our antiquated security system.

In With a New Smart Home Security System

In all seriousness, as DIYers we invest not only our money but also time and energy into our home. It is our haven and our canvas so we knew we didn’t want to go too long without having a way to protect and monitor it. Plus, with a baby coming in September I really wanted the comfort of knowing our house is safe along with the convenience of controlling areas of our home with the push of a button so I can focus on the important things.

What We Are Looking for in a Home Security System Solution

When looking for a smart home security system solution we are looking for one that provides protection, peace of mind and convenience. We hope to also integrate a doorbell camera, smart bulbs, and additional cameras. To be really picky and take it a step further, we are looking for an easy solution to control everything with just one app rather than having a lot of different devices running independently.

When the Security by Reliant team reached out to us about partnering together to implement a unique smart home security solution in our home we were ecstatic and jumped at the chance when we learned that they offer a variety of options such as a smart home security system, a doorbell with a camera, wireless door locks, smart plugs, indoor and outdoor cameras and garage door openers. Plus, you can access all your connected devices from anywhere with the Reliant Connect app. Just one app, now that is what we are talking about!

Security by Reliant offered everything on our detailed wish list and then a few extra features that we didn’t even know existed but are excited to implement in our home like geofencing. The best part is they offer different packages based on your budget and needs.

Because this is 2016, we are looking for more than just protection when it comes to monitoring our home. Being able to set up our home to run according to our unique schedule is a dream come true for us tech nerds. And no more scratching our heads over if we locked the door or not sounds AMAZING! We are pumped to get our Security by Reliant products installed and bring our house into the 21st century. We will be back to share more details about installation day soon and what life is like with a smart home security system, so stay tuned!

Tell Us: What is the most ridiculous thing you have done or has happened to you when it comes to your home?

If you like this video and can relate to any of our crazy antics, we would love for you to pin and share!
↓ ↓ ↓ ↓ ↓ ↓

Life Without a Smart Home Security System

Planning a Boy Nursery

Planning a Boy Nursery

We are ready to start planning a boy nursery! Today we are sharing our ideas for a modern outdoor nursery.

Planning a Boy Nursery

The time has come to start thinking about designing our baby boy’s nursery! Just the process of cleaning out the room that will be our nursery involved a lot of projects but I got my awesome industrial office out of it so I am not complaining. Although, empty rooms in our home have a habit of collecting items that don’t belong in them so I am guarding this room and making a conscious effort that only items intended for the nursery make their way into that room.

With around 13 weeks to go, it’s probably about time we start shifting our focus to the nursery since we have quite a few DIY projects planned for this room. Brent and I were already on the same page when it came to how we envisioned the design of the room and we are really excited to start actually working on it now.

Before we knew the gender we knew we wanted to work in outdoor elements. When we found out we are having a boy, we both wanted to do a camping style nursery. After a lot of browsing on Pinterest I realized there are a lot of outdoor, camping, adventure styled nurseries out there. But in staying true to our Gray House Studio style, we want to keep it pretty simple. We already have the walls painted Dovetail Gray and really like the color so we wanted to keep it. So my challenge was how to put together an outdoor room with grays.

We finally nailed down our ideas which include a chalkboard wall, replacing the floors, a huge DIY shelving display with a seat and much more. I am so excited to start working on this room now that I have a clear direction, a modern outdoor boy nursery. It should be really fun! Below are some of the items that we would like to incorporate or we are using as inspiration for our nursery design.

CHAIR | Baxton Studio Rocking Chair from Wayfair
I was not aware of just how expensive nursery rocking chairs can be. Yikes! I have my mind set on a chair with an actual rocking base but I guess my taste far exceeds our actual budget so it took a lot of searching to find one that we like the design, is comfortable (which is probably the most important) and fits in our budget. Ultimately, we decided on this wingback rocking chair and I can’t wait to see it in the room.

RUG | Jungle Sheep Skin White Rug from Overstock
We are saying “see ya later” to the carpet in this room and replacing it with either wood or laminate flooring. A big, soft, fluffy rug is on my wish list for this space. I want a comfy spot to spread out and play or let’s be real, a great backdrop for a billion photo opportunities.

PILLOW | Adventure Awaits Throw Pillow Cover from Society6
I love this pillow cover! It is simple, yet fits the vision of the room perfectly.

ART | Woodland Nursery Animals Art from Etsy
The positive thing about woodland themed nurseries being popular is there are a lot of options to choose from when it comes to decor. This woodland art is my favorite. I like the neutral background and the animals are so dang cute.

CRIB | Babyletto Hudson Convertible Crib from Target
The crib was the first piece we decided on for the nursery. We like the modern appearance and the gray and white combination.

TABLE | Natural Tree Stump Side Table from West Elm
This stump table, this is one of those pieces I keep telling Brent that I HAVE TO HAVE. Like, it is not up for debate. I will have a tree stump side table and that is that. Due to the price tag being higher than we would like to spend, for this one we are going DIY over buy.

NIGHT LIGHT | Campsite Night Light from The Land of Nod
I’m a fan of this cute little nightlight.

STUFFED ANIMAL | Corduroy Fox from The Land of Nod
How cute is this little fox? I love that he is made of corduroy. We will incorporate woodland creatures here and there throughout the room and I like how the fox decor bring a pop of bright color to the room.

SHELF | Teepee Shelf from Etsy
We have built several shelving projects in the past so I am adding teepee shelf to our to build list. I would love to make a few of these to hang around the room to display a few odds and ends.

There you have it, our plans for a modern outdoor boy nursery. The ideas are flowing now and I can’t stop thinking about working on this space. It is especially hard to concentrate because as I sit in my office and work I directly face the empty nursery and I swear it is calling to me to come decorate. The force is strong due to the combination of me always getting excited to start a new room design and that nesting instinct kicking in.

Stay tuned for lots of boy nursery projects coming your way soon!

*To see more of our boy nursery ideas, follow along on our Nursery Board on Pinterest.

HOME OFFICE MAKEOVER

Home Office Makeover

Take a tour of our home office makeover.

Home Office Makeover

For the past three months now we have been working on moving our home office out of one room and into another all the while giving it a total revamp to fit with our industrial/vintage style. You can take a look back at our plans for our home office that we posted in March.

It is not a large room but some of the DIY projects we were working on for this space turned out to be large in scale (I’m looking at you cabinets) so it took us awhile to finish all the projects and get it exactly how we wanted it.

It has been a long time coming so today I am excited to finally be able to share our completed home office makeover and take you on a little tour of our newly refreshed and organized office. Since the room is a little small, we thought a video tour might make a little more sense so be sure to check that out below.

Side Note: If you haven’t already, we would love for you to subscribe to our YouTube channel and follow along to see our latest DIY videos. We have some fun ones in the works that you won’t want to miss! You can subscribe by clicking the red button under the video in the box below. Thanks!

Home Office Makeover Tour

In this video I will take you on a tour of our newly made over home office! For our home office we continued with the rustic/industrial/vintage vibe we have going throughout the rest of the house. I also share a few tips and storage solutions for keeping a home office organized.

To see a new DIY tutorial video every Thursday, subscribe to our channel ⇾


Home Office Makeover
Above is what the room looked like before. Well, way before. It is the front room in our home, probably intended to be the formal living room. We have used it to store Brent’s musical equipment and more recently our work table.

Home Office Makeover

Here is what the office looked like in our spare room. We had to move it to make room for a nursery but I was excited for the opportunity to give it a refresh that matched our style and had a cohesive appearance and create more storage space.

Home Office Makeover

My original office desk was the first thing Brent built for me when we got married and while the sentimental side of me was super sad to see it go (thank goodness it found a wonderful new home) we wanted to build one with a new style that has a front piece that hides the cords and storage pieces that are under my desk out of sight when you walk in the door.

We got the inspiration for our new desk from believe it or not a display piece at Restoration Hardware and based on that Brent designed and built this awesome two-level desk that I absolutely love. There is plenty of room for both of our computers and still extra space for me to spread out my calendar and client folders. Jake (the cat) loves to lay on the top level while I work which is nice for me because it keeps him close but out of the way of my keyboard.

Home Office Makeover

Home Office Makeover

Our first project in the room was to build cabinets on the back wall. Having a home office be the first room guests see when they walk in our door can feel a little intimidating since the office seems to be the place clutter collects the fastest, especially since my office is the room I spend the most time in working on projects. I knew lots of cabinet space for storage was a MUST and Brent really knocked it out of the park building these cabinets and the herringbone countertop.

I love the pattern on the countertop so much that I didn’t want to add too much to the top of it but a few additional key storage pieces such as a two-level tray and a lazy susan hardware bin are helpful to organize the paper and supplies I use on a daily basis.

Home Office Makeover

And let’s not forget about our plant wall. I am really pleased with the wall-mounted plant shelves we built to display artificial plants that bring a little greenery and color to the otherwise neutral room.

Home Office Makeover

I have tons of storage space now to keep everything not only hidden away but organized and all within arm’s reach and a chair spin. I can’t tell you how much having a place to put things back helps me keep a room clean. We didn’t have room for our filing cabinet so we added two large drawers to our cabinets that work well to hold all of our paperwork and make it easy to file it away so it doesn’t stack up on the desk or counter.

Home Office Makeover

I love this rug. The gray color matches the other gray colors in our room so well. Do you know how hard it can be to match grays? I like the fun pattern. The rug also is functional because we are running a power strip cord under it to a plug, which keeps the cord out of sight and we don’t have to worry about tripping over it any cords.

ROOM DETAILS

Walls: Mindful Gray from Sherwin Williams
Wall Shelves: See DIY Project
Artificial Plants: Ikea
Pots: Ikea
Desk: DIY Project (tutorial + plans coming soon)
Desk Chair: Ikea
Lamp on Desk: Pottery Barn
Mail Holder: World Market
Printer Stand: World Market
Cabinets: See DIY Project
Herringbone Countertop: See DIY Project
Lamp on Cabinets: Target
2-Level Tray: World Market
Hardware Bin Lazy Susan: World Market
Rug: Target

It feels like such an accomplishment to get another room completed (minus the floors) and checked off our list. I thought a new office would be way down the road so when this opportunity came up, I of course jumped all over the chance to give my workspace a much needed refresh. I work in this space eight hours a day so to have it just the way I like it, feels awesome and I swear increases my productivity by at least 85% (it would be 100% but I am rocking pregnancy brain right now).

I would have never thought the office would be the adjacent room to our home library and would be out in the open with no doors to hide behind, but the two rooms flow together nicely and makes it feel like I am working in a room double the size. I hope you enjoyed the tour of our home office makeover! If you have any questions about any of the projects or items in this room, feel free to leave them in the comments section below.