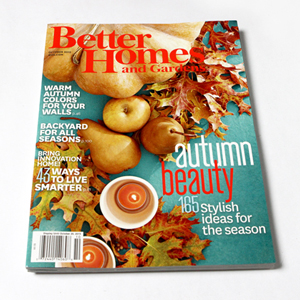
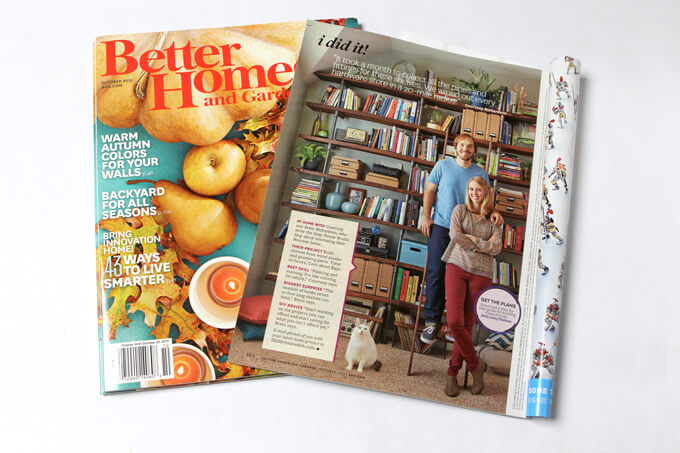
If you had asked me a year ago if I thought Brent and I would be standing in the checkout line of the grocery store looking at ourselves and one of our favorite Gray House Studio projects, our industrial shelves, in an issue of Better Homes and Gardens magazine I would have asked you, “What the heck is Gray House Studio?” Yes, it is true but hard to believe that this time last year our home renovation blog did not even exist.
But since we started in December we have poured so much of our energy and free time into our DIY projects and our blog so to see our hard work in such a well known and loved magazine this week has been incredibly surreal and overwhelming (in the best of ways).
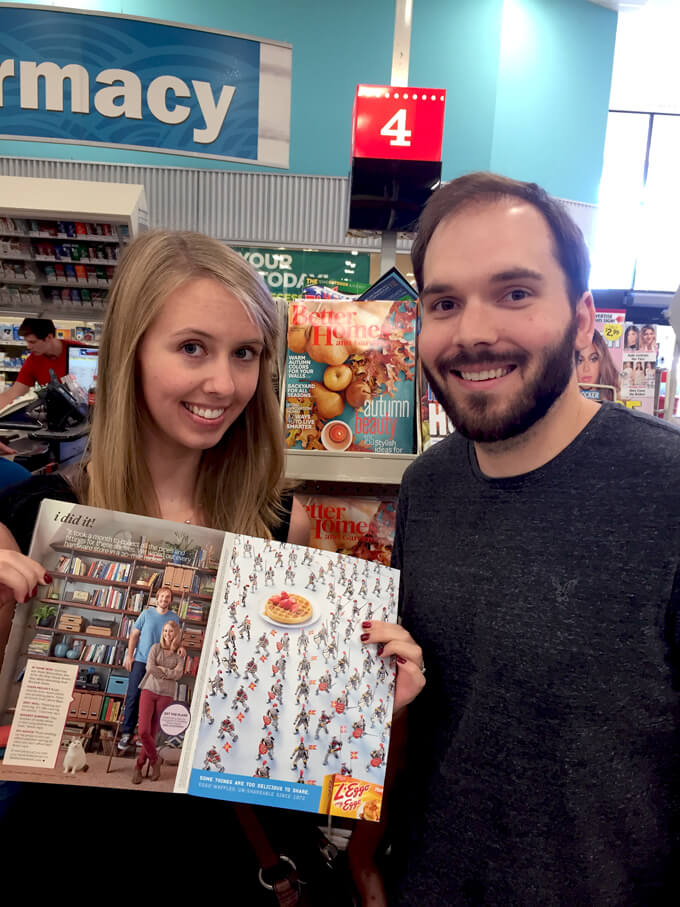
So much so that we totally played it uncool and when we heard the issue was out, we rushed to the grocery store and had my brother take lots of photos of us posing with it in front of the magazine rack while shoppers looked at us like we were total goofballs. But we were just so happy and excited to see our Better Homes and Gardens {I Did It} Feature! There was no way you could wipe the smiles off our faces that day.
Behind the Scenes of our Photo Shoot
It is crazy to believe but this awesome adventure started all the way back in February of this year. A few weeks after finishing and posting our industrial shelves we received an email from Kit Selzer saying she thought our industrial shelves looked amazing.
To hear that kind of encouraging feedback felt outstanding. I mean sure our parents tell us our projects look great all the time but they also said that about the macaroni art we did in Kindergarten so their biased positive response doesn’t hold quite the same weight as an unbiased opinion that comes from a senior editor at Better Homes and Gardens magazine. Sorry Mom and Dad. We are still appreciative you are our biggest fans.
That wasn’t even the best part. She wanted to feature the shelves in an upcoming issue of the magazine in the I Did It! section and send a team to our house to photograph them and us. After reading the e-mail I immediately called Brent at work and started talking in my “super excited, high pitch voice” that somehow only my easygoing husband and dogs can comprehend. He was equally as enthusiastic.
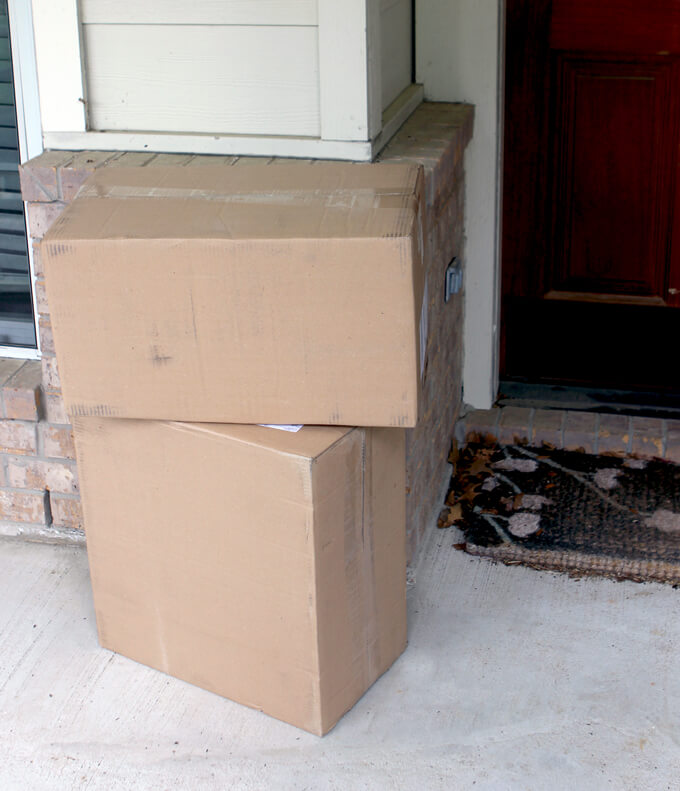
The photo shoot was scheduled for the last week of April and when two large boxes filled with the magazine files and stationery boxes ordered for the shoot were delivered two weeks prior, it started to sink in that this was really happening. And then panic set in that while our shelves might be ready for BHG, the rest of our house…umm not so much. I’m just going to keep it real and say we needed to do some MAJOR cleaning.
But what did we do first? Create an even bigger mess as we built our entire coffee bar in a week. It was an insane idea but how often do you have Better Homes & Gardens come to your house? We wanted to impress.
We managed to get our whole house looking cleaner than it has ever been since we moved in because of all our renovation projects just in time for Monday morning when Shelley, the art director and Janna, the photo stylist arrived to preview our space and our wardrobe for Thursday’s shoot.
Once we got talking about outfits and I admitted to having pretty much zero fashion sense outside of shorts and solid colored tank tops (my uniform of choice in Houston for spring, summer and fall) they asked to see our closet to get a sense of my style. While I was more than happy to show them my wardrobe, I cringed at the thought of them seeing our less than organized closet.
Because what do you do when visitors are on their way and you are in a hurry to clean up? You shove random junk you don’t know what to do with in the closet, right? Am I right? Anyone? Our closet is normally pretty straightened because Brent and I don’t have enough clothes to fill it up but at the last minute I stuck a bunch of random things in there to clean up some areas of our house. I was slightly embarrassed by the mess which we worked so hard to clean, get rid of and then at the last minute “hide”. But they were the sweetest ladies who were kind enough to focus on the clothes and not the environment where they were located.
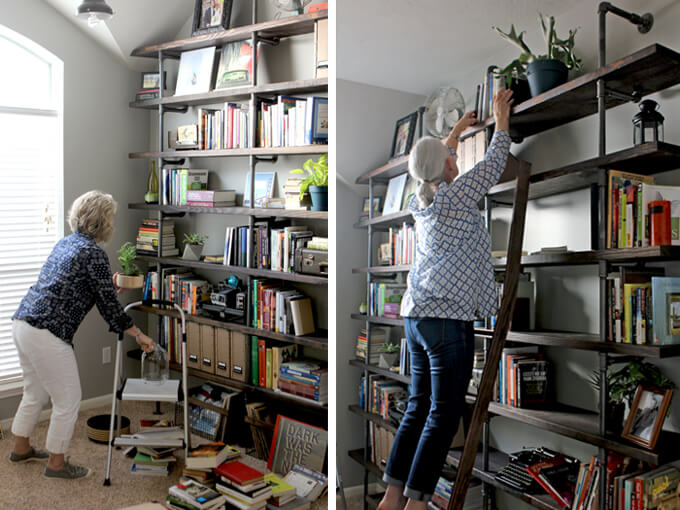
Then at the last minute there was talk of a ladder and how great a ladder would look in our library and Brent suggested he could build one in two days. We surprised them when they came back on the day of the shoot with a brand new custom built ladder that turned out to be essential to the day because they were able to use it to reach the top shelves to style and we could stand on it for the actual photo.
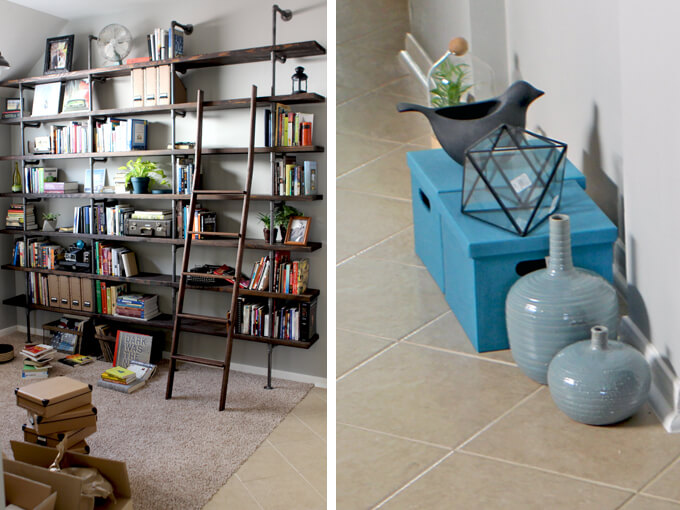
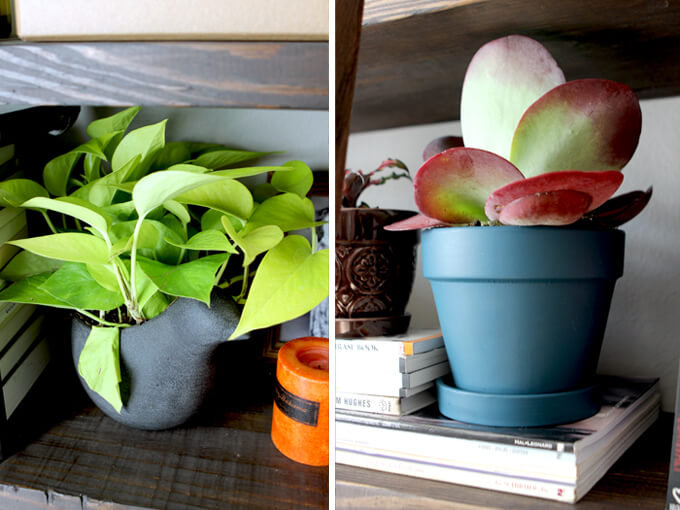
Thursday morning Shelley and Janna returned and brought lots of fun items for our shelves. They also brought some really cool plants that sadly are not still around because I can’t keep a plant alive to save my life. The first thing they did was to start pulling items off our shelves so they could rearrange things to look best for the camera.
It was so much fun to watch Janna and her assistant Becki style our shelves. She is an expert in this field and obviously has way more experience then me so while I probably should have been spending more time taming my hair, I couldn’t help but want to watch the entire time and take mental notes of how she arranged and styled items.
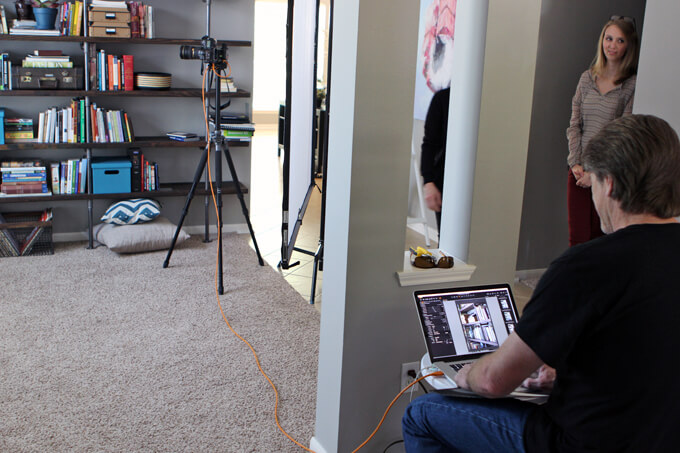
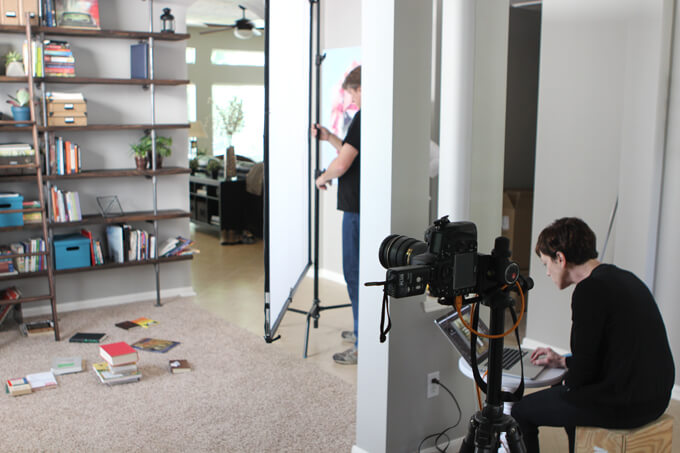
A little while later the photographer Brian McWeeney and his assistant/wife, Carolyn came and set up their equipment. They made the lighting in the room look incredible. They were a hilarious couple and always kept us laughing. Brian was kind enough to answer all of Brent’s photography questions and Carolyn was a lifesaver in helping me control my “super fine” baby hair that refused to lay down and became a running joke of the day.
Since we are used to being behind the camera, I found the process of how these magazine pages come together fascinating. Shelley definitely had the eye for noticing every little aspect that might look off in the photo or make it feel unbalanced. I really learned from her how to pay more attention to the tiny details when photographing our projects.
^^^ Thanks so much to Brian for taking this awesome group shot! ^^^
We couldn’t have asked for a better group of people to work with. We enjoyed getting to know each and every one of them. They were all so personable, encouraging and funny. We had a lot of laughs that day. I’m sure it was a lot of work on their part because those are some big shelves but they made the whole process feel effortless. We are so thankful for them for making this an amazing and unforgettable experience.
The best part of all is Jake (the cat) made it into the photo too! Which is pretty spectacular. I was planning on taking him over to my parents’ house for the day so he would be out of the way but when it was brought up that they might try and work him into the photo I wasn’t sure how it would go. On the first attempt he wouldn’t sit still and proceeded to very slowly walk out of frame. The key words here are very slowly. It was as if he was stalking prey or moving in slow motion. Everyone thought it was so humorous because they had never seen a cat move so slow before. The second time around he just plopped himself down and didn’t move one bit but just looked like a big ball of white fur laying on the ground. He eventually had to be removed from the scene because he refused to leave.
We are so appreciative of this opportunity because when you put yourself out there it can be a scary feeling but to have positive feedback like this gives us the drive to keep dreaming, keep making and keep creating. This just shows us that even our wildest dreams are possible. You never know what is around the corner when you take that leap and put yourself and your work out there.
Your kind e-mails, words of encouragement on social media and in our comment section mean the world to us as well, so thank you for supporting Gray House Studio.
The October 2015 issue of Better Homes and Gardens magazine is on stands now! Check out our I Did It! feature on the last page.
You can view our original Industrial Shelves Project post here.
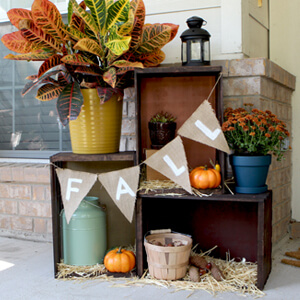
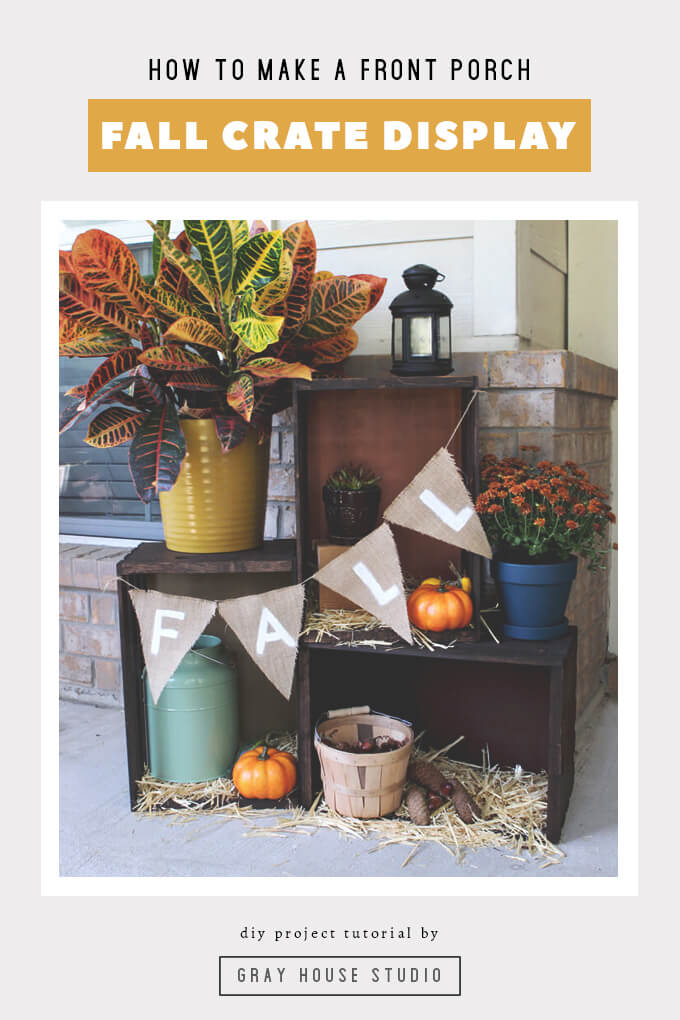
Create a fall crate display to decorate your front porch for the Fall season.
Even though you can’t tell by the weather here in Houston (Is it sad that when it gets to be about 96 degrees we say it feels good outside?) fall is fast approaching.
This year we decided to get a jump on the season and create a few DIY fall decor projects for our front porch. So when those cooler temperatures finally reach us way down here in Houston, we will be ready.
The first project we are going to share with you today is our Fall Crate Display. This is a really simple decor project to create and customize and can be set up anywhere from on your porch to in front of your fireplace.
Plus, it transitions well with the seasons so with just a little switching out it can become a winter crate display.
How to Create a Fall Crate Display
STEP BY STEP GUIDE
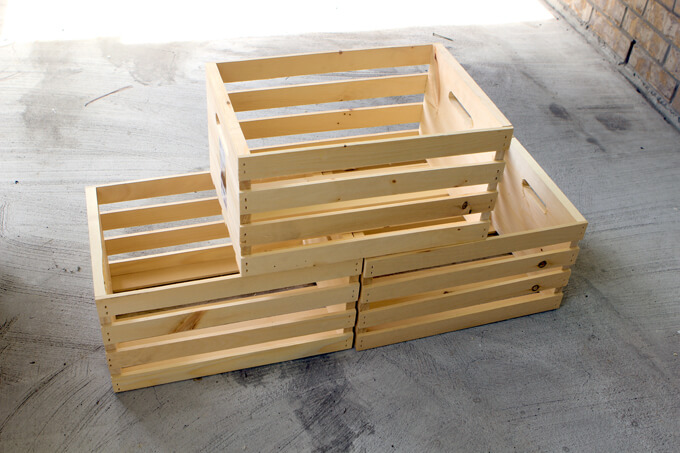
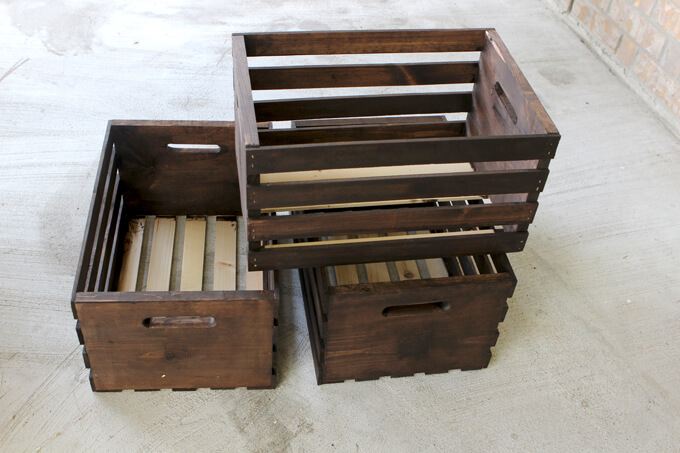
1. We bought three wooden crates. The ones we were made of unfinished pine.
You can have as many crates as you like in your display depending on the amount of decor pieces you intend to add. You can even incorporate different sizes of crate to create interesting shapes.
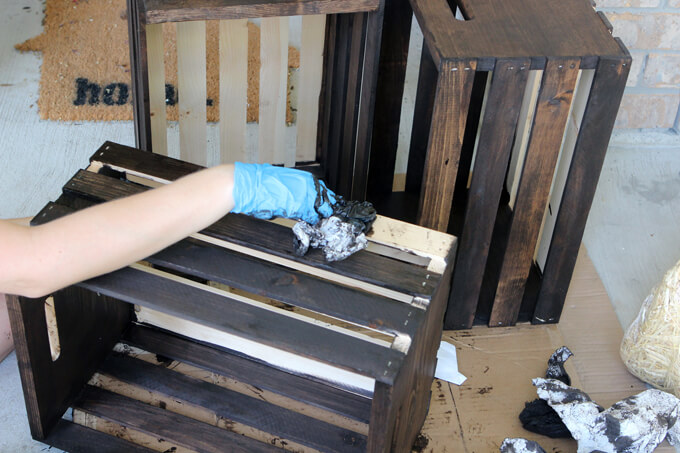
2. The next step was to stain the crates to give them a more high end feel. We used our favorite Kona color stain.
Staining these crates was kind of a pain and time consuming. It is not a hard task, just a tedious one.
3. Once I was done it was worth it. We didn’t bother to stain the bottom of the crates and I will explain why in the next step.
Depending on the look you are going for you can rough up and weather the wood or even add a graphic or text to make it look like a vintage crate.
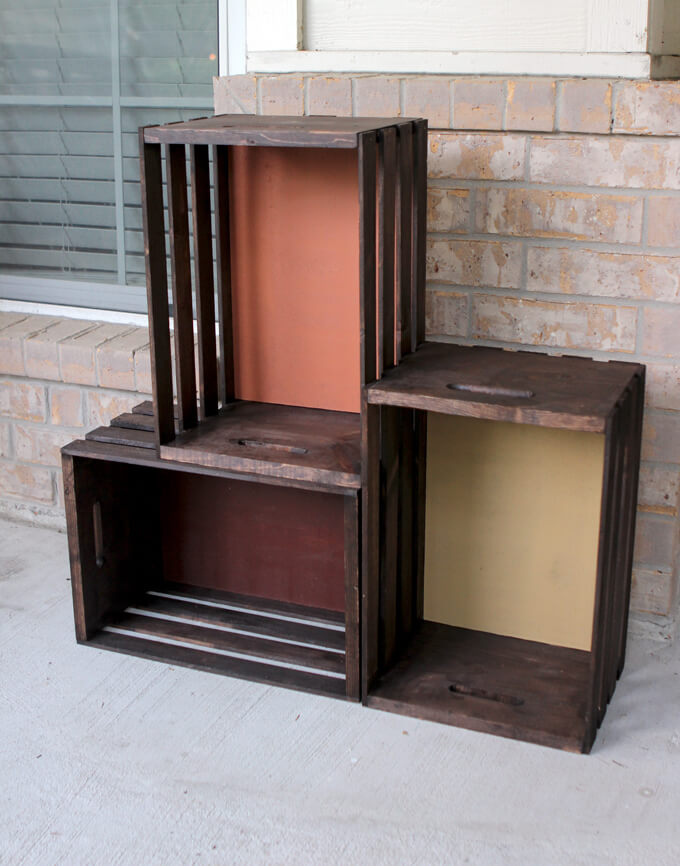
4. We decided to take it a step further. To transform the crates into a cohesive display and add in more color to this set up.
We used scrap pieces of wood but you could also use plywood to cover the bottom of the crates.
When we flipped the crates on their sides these boards would be the background. There are endless possibilities in what you can do to create cool backgrounds.
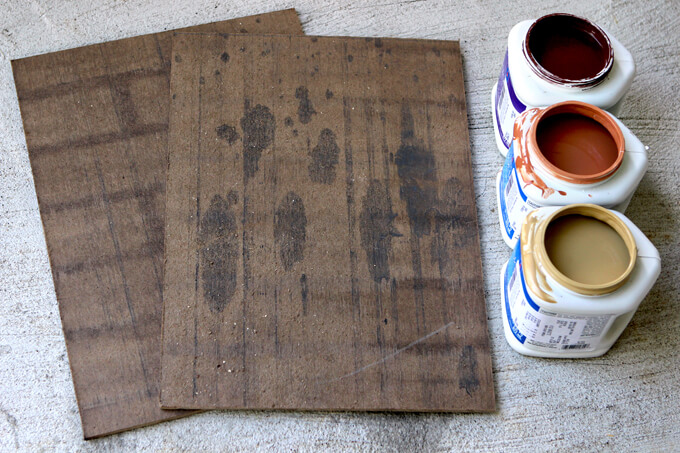
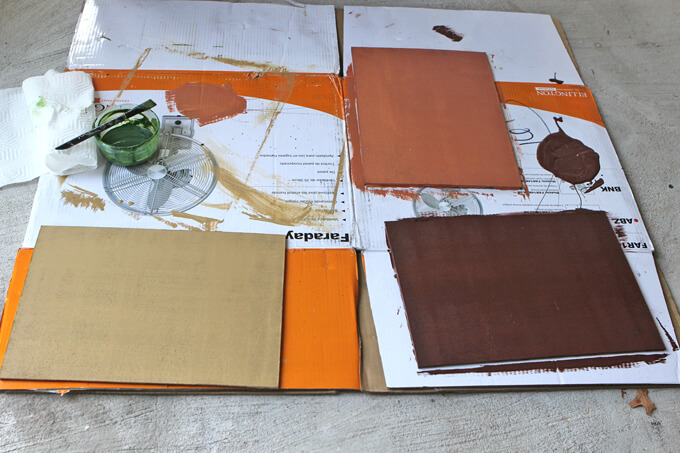
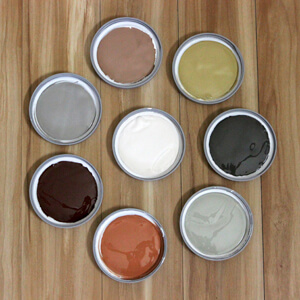
5. We decided to stick with simple backgrounds and paint them with mute fall colors. We used some sample paint colors we had left over from another project.
We used a high-density foam paint roller to paint the plywood boards Cavern Clay Sample Paint, Baguette Sample Paint, and Fiery Hue Sample Paint.
You won’t need much paint for these boards so inexpensive cans of sample paint are the way to go. I just poured some paint onto a piece of cardboard and rolled in onto my scrap pieces of wood that would become my crate back.
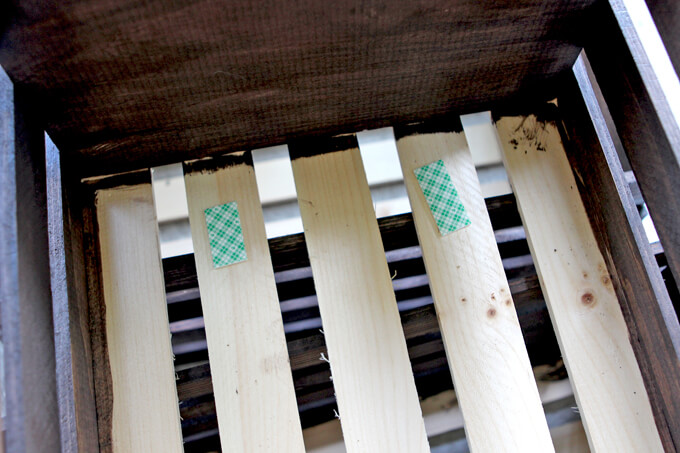
6. Once the painted pieces of wood dried, we secured them to the bottom of the crate with foam tape.
7. Next, we arranged and rearranged them until we found the best combination that would fit our decor pieces.
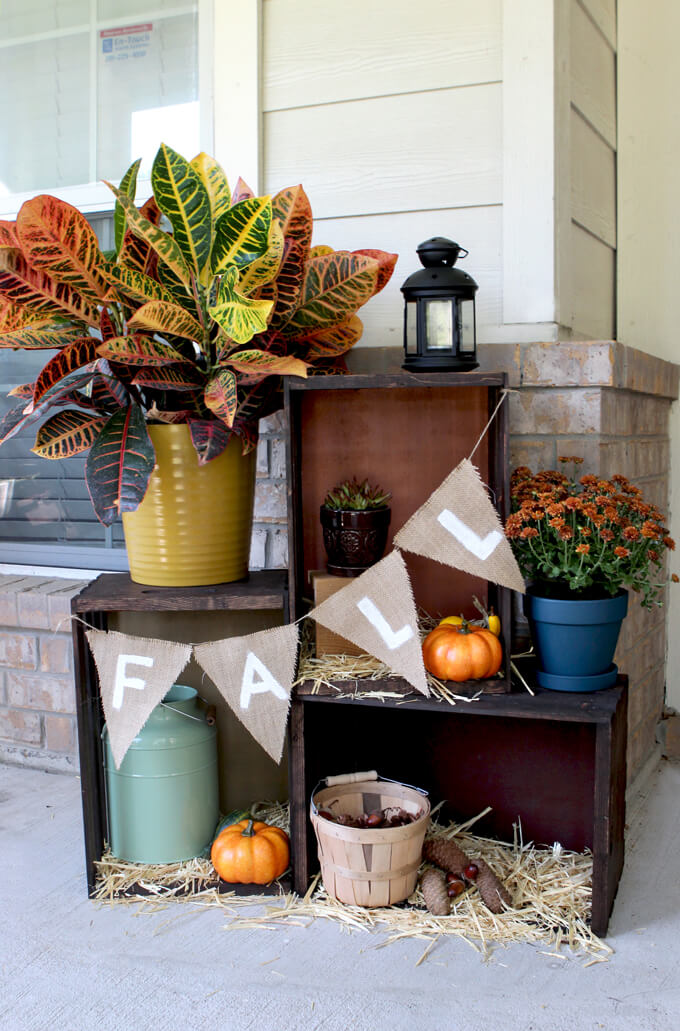
I tilted the crate that sits on top of the other crate at a slight angle to allow for more surface space so the items could spill out of the bottom of top crate onto the top of the bottom crate.
8. The last part is the fun part! To decorate our fall crate display we mixed traditional fall decor items such as pumpkins and a burlap banner with natural elements such as pine cones, acorns and leaves (which depending on your location you can find just laying around outside).
Adding flowers and plants to our front porch is always fun so we paired pretty colored mums with the more unique looking Croton plant.
Adding some hay to the bottom of the crates adds some texture, defines the bottom of the crate, breaks up the dark color of the crates and definitely gives it that authentic barn feel (and smell).
We have a lot of warm tones going on so we mixed in some contrasting color like shades of blue in the flower pot and tins to really make them pop. We have learned you don’t always have to buy a bunch of new pieces but can re-purpose things you may have sitting around somewhere else.
For this display we incorporated a lantern and tin we had sitting around inside to give it a rustic/barn feeling. When styling the crates we always try to pair taller items with shorter pieces to maximize space without making it look overcrowded.
What we love about this fall crate display is it creates a purposeful space for arranging and showcasing fall decor pieces on our front porch. The beauty of it is with just a switch of the back piece of wood and decor items it can effortlessly transition from a rustic fall look to a rustic winter look come December.
Looking for more fall inspiration? Check out these easy DIY fall porch decor projects or how to throw a fall party!
PIN IT FOR LATER
Before I get started with this post I would like to note that this is not a sponsored post, we just had a great experience using the Sherwin-Williams ColorSnap® App for one of our projects and thought we would share how using this app to pick paint colors came in handy when we were in a bit of a bind in case you ever find yourself in a similar predicament.
While working on our home gym makeover we decided we really wanted to do a brick accent wall. We felt like it would be a project that would take the room to the next level. In a dream world if money was no option we would have went with the thick brick veneers.
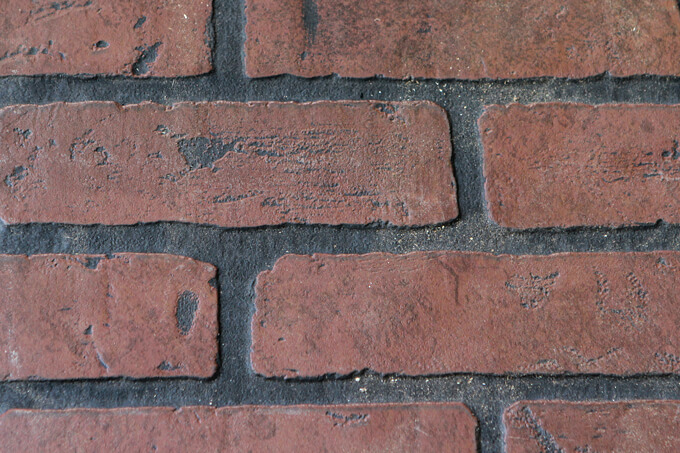
However, we have a limited budget for this room makeover so our best or only option for what we were willing to spend was to get three sheets of the embossed hardboard wall panel that looked like brick.
The downside to this was that it only came in the undesirable colors of dark red brick and black mortar. Yikes. But we are optimists and knew that with some hard work and the right paint colors we could transform this paneling to look like the authentic brick wall we were envisioning that would transform this space.
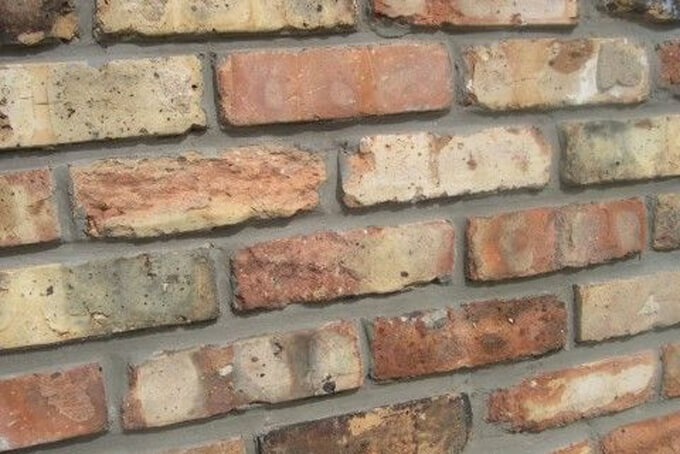
We had seen multiple tutorials of whitewashing over the red brick and black grout but we felt like that wasn’t the right direction for this wall. We wanted to paint the brick to have a better color palette. So we scoured the internet for examples and finally came across a brick wall that had nice shades of browns, grays and tans that would blend nicely with the paint color we already had on our other walls.
Using the ColorSnap® App to Pick Paint Colors
1. We wanted paint the brick on our wall to look like the brick in our inspiration photo. The only problem was figuring out how to get those colors from the screen to the wall. Figuring out the right colors probably would have taken HOURS at the store sifting through hundreds of paint cards trying to hold them up to the screen.
2. I remembered that I had downloaded the Sherwin-Williams ColorSnap® App on my iPad awhile back and opened it up to see if there was a feature that could help with our paint color dilemma.
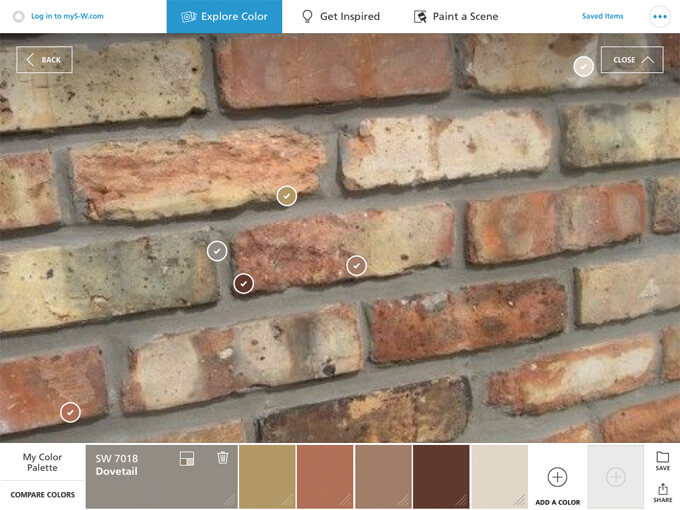
I clicked on the Explore Color tab at the top and was excited when I found the match a photo section. It was exactly the tool we were looking for to determine the colors in the brick.
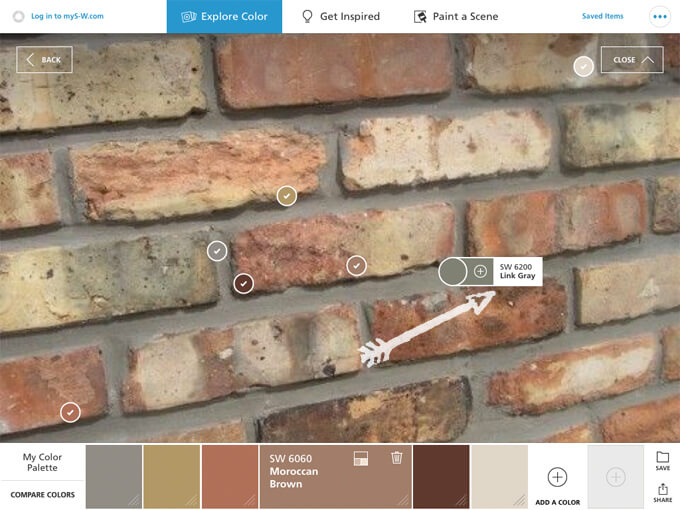
3. All we had to do was upload our inspiration photo of the brick and it populated little dots on the screen with paint colors names and numbers. We actually used a few that it pre-populated and then were able to drag the other dots around the screen to select the exact areas where we wanted to know the color.
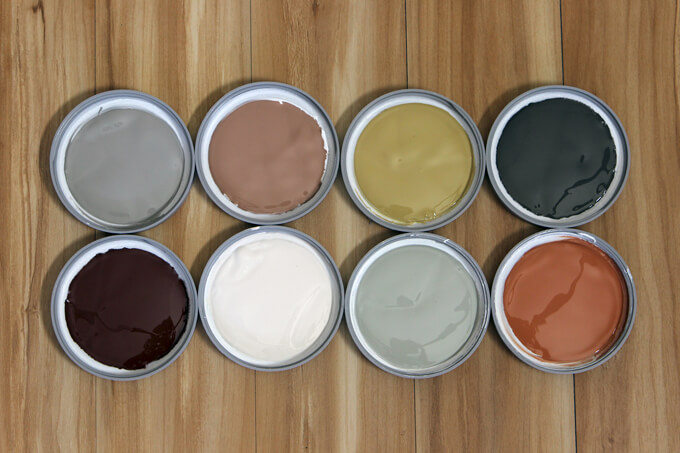
4. When we clicked on the dot it told us the SW number and name and then has a little plus that we could click on to save to our color palette. So we selected eight colors in the mortar and the brick and saved them to our color palette. Once we saved them it added a check mark on the dot on the photo.
5. Then we took our iPad where our colors were saved in the ColorSnap® app to the Sherwin-Williams store and used it to look at the names and numbers to find the corresponding paint cards. We just wanted to double check that the color on the screen looked like the color on the card and it was still a color we wanted.
6. All the colors were close enough to the ones on the screen and looked good so we bought sample sizes in those eight colors. It turned out to be a gorgeous paint palette and one I never would have imagined picking if we had to do it all on our own.
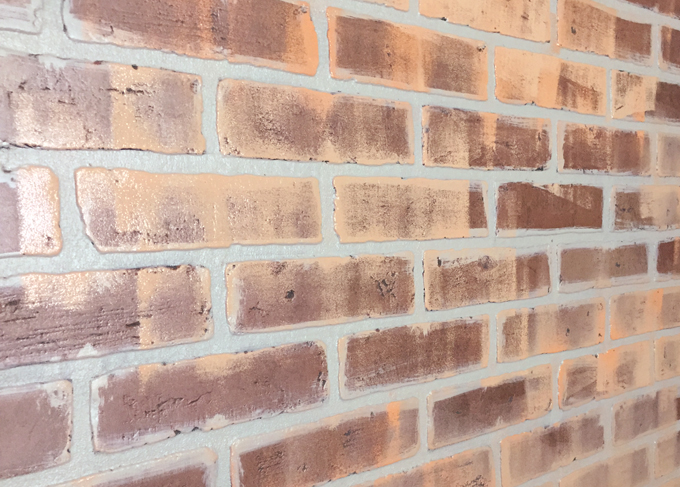
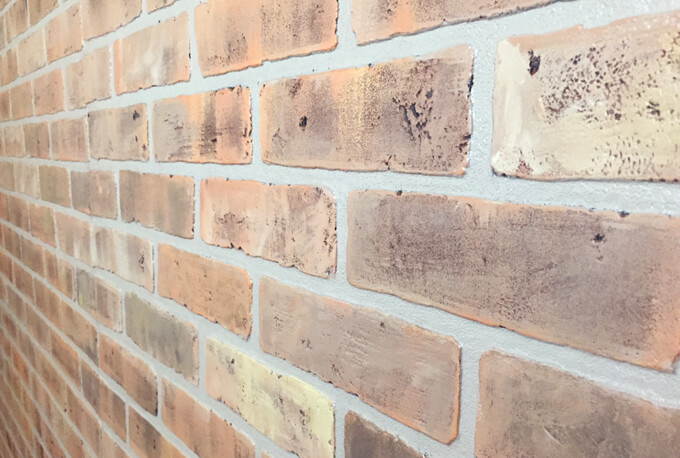
7. We got to work painting the brick. We painted the mortar the color the app suggested it was in the photo and painted the brick the same way.
The results were amazing! We were able to transform the ugly red brick and black mortar paneling into a realistic looking brick wall that matched the colors of our inspiration photo. Now our brick wall has much more dimension and character. It’s even hard to tell that it is not real brick but rather paneling.
The match a photo feature on the ColorSnap® app was a lifesaver for this project because it saved us a ton of time and took the guesswork out of having to choose what colors looked like the ones in the image. There are a million different paint color options out there and by using this app that literally translated a color on the screen into a color we could physically buy simplified the whole process for us.
We are very happy with the results of our wall and are so glad we found this neat little tool. If you ever are in need of figuring out how to bring a color from the screen in an inspiration photo to real life so you can transform your own project, you should definitely give it a try.
Check out our full tutorial on how to paint a faux brick wall!
PIN THIS TUTORIAL
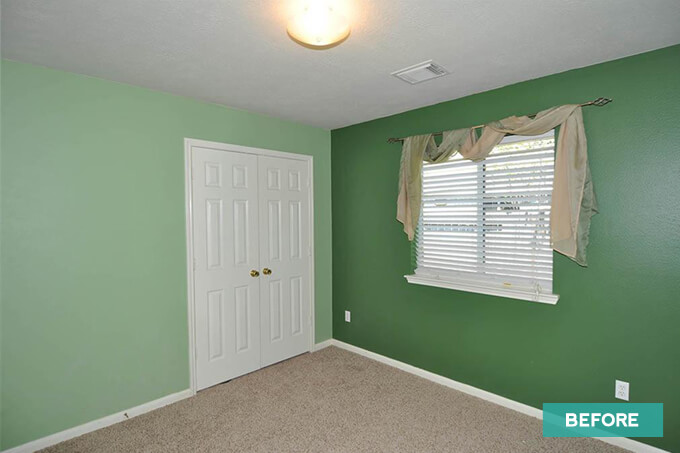
When we moved in every room in the house was painted a neutral off white color except one room. One of the bedrooms in the back of the house was the greenest room we have ever seen. We liked to imagine it was what walking into a Leprechaun’s house might feel like. Three walls were a darker green and there was an accent wall that was a pastel green. It was an interesting design choice.
Anyway, it was a little too bright for us so the first thing we did was paint over it with one of our favorite neutral “greige” colors, Utterly Beige. After that we pretty much ignored this room. On our floor plan page we have generously been calling it our home gym but the truth is the only thing that even remotely resembled anything work out related in that room was a few old Wii-Fit Discs (that were collecting dust) and a jump rope.
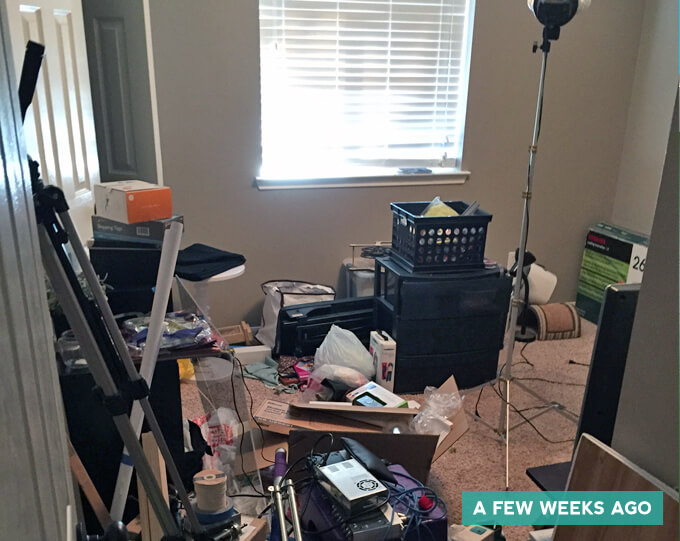
But it was inevitable, as we continued to work on other projects throughout the house, our empty back room somehow developed a gravitational pull and collected all the various left over supplies from other projects, tools we had been missing for months and an unusual amount of cardboard. Correct me if I am wrong, but I think its one of Newton’s lost laws that if a space sits empty, junk will move to fill it.
We finally had enough of the current situation and sat down two weeks ago and had our “dream big” talk about what we would like to do with this space to make it have a purpose. We both agreed a home gym would be the best use of the space for us during this time of our life.
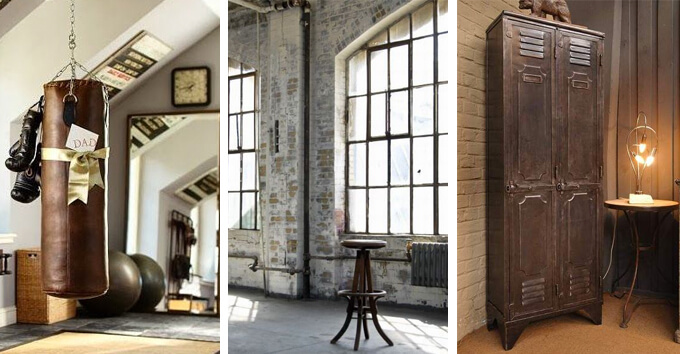
But if you have learned anything about Brent and I, we can’t just have a home gym; we have to completely transform the room so it feels like you are transported to another place entirely. If our breakfast nook takes us to a coffee shop, we want our home gym to take us, stay with me here, to an old warehouse. My inspiration is a boxing gym with worn leather equipment set in a warehouse.
Sources: 1 | 2 | 3
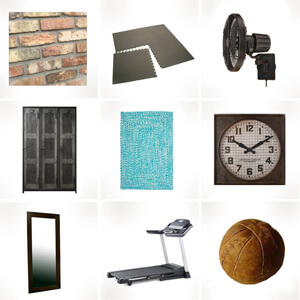
I want it to have a vintage and industrial feel but also incorporate a few modern elements. Before we begin sharing our projects for this room, we wanted to give you a look at what we are planning.
Brick Accent Wall | Brick Harboard Wall Panels from Lowe’s (which we will be painting to match the brick pictured above)
The largest project we are planning is to create a worn brick accent wall. This feature will be essential in creating the industrial loft/old warehouse look. We will be purchasing harboard wall panels that look like brick and then painting over them to create a more realistic old brick appearance. We have wanted to do a brick wall somewhere in the house and this room is perfect because it makes the most sense in terms of design.
Gym Flooring | Mats from Lowe’s
We had initially planned to use one type of mat and then changed our minds and decided to instead use these foam mats instead. We like the gray color, how easy they are to assemble, fit together nicely for a clean appearance and would be a snap to pull up in the future if we decide to go with different flooring down the road.
Wall Fan | Faraday 14-in Wall Fan from ATG Stores
How awesome is this wall fan? It fits perfectly with the style we are going for in this room. This room currently doesn’t have a ceiling fan so our first thought was to add one but the ceiling is pretty low and we didn’t want anything to hang down low enough where we could possibly hit it while working out. We will instead go with a unique lighting solution. But a work out room without a fan circulating air seems like a bad idea, so having this large wall fan is the perfect solution.
Lockers | Vintage Locker 3-Door Perforated Cabinet from Restoration Hardware
These lockers from Restoration Hardware have a great vintage vibe. I’ll be honest this is one area we won’t be splurging and will definitely be DIY-ing. We are going to be making our own lockers that fit inside the closet in the room so we can customize them. But these lockers provide great inspiration for the direction we want to go.
Rug | Catalina Area Rug from ATG Stores
The overall color palette of the room will be extremely neutral so we wanted to work in a bit of color in our designated yoga area where we plan to place this rug and have a few colorful yoga mats on a yoga mat holder we will be building. I like this blue color because it is different than what we typically use in our house and the material of the rug gives it a relaxed feel that makes it perfect for a gym.
Clock | Industrial Clock from Restoration Hardware
Another DIY project we have planned is to makeover a modern clock into one that looks like it belonged in a gymnasium in the 1940’s like this one from Restoration Hardware. I love the cage and metal that is on this clock. It screams vintage gym. We are hoping to incorporate these elements into our DIY clock project to give it a similar appearance.
Floor Mirror | Baxton Studio Daffodil Floor Mirror from Wayfair
Most gyms have mirrors hanging on the walls and while it was tempting to create a mirror wall, just kidding, we decided that having a large framed floor mirror leaning against the brick wall would be a stylish way to incorporate a mirror into the room without straying from our design concept.
Treadmill
What’s a gym without a treadmill? This will be the large piece of workout equipment in our gym.
Leather Medicine Ball | from eBay
One aspect of making over this room that I am looking forward to is decorating it with unique vintage pieces. We got this old leather medicine ball off eBay that I am excited about because it really completes my vision for this room. We will also have a few more DIY projects planned such as wall art made from old photographs that I am looking forward to working on to round out the room.
We were so excited to begin this room transformation that we actually started before we had time to post what we were planning on the blog. We are already making great progress on it. If you have been following along with us on Periscope you maybe have already seen a sneak peek or two. If you missed it you can catch it below.
Just a reminder we will be sharing our progress Thursday nights at 8PM CST on Periscope. You can find us @grayhousestudio as we share sneak peaks of the updates we are making to our room to transform it into our home gym. It is great fun to meet all of you and hear what you are up to as well so I hope you can join us!
If you miss any of our scopes, you can watch them on our Periscope playlist on our YouTube channel.
In our next post we will be sharing more about the flooring we chose for the room that will be in our home gym so be sure to come back and check that out!
I was feeling burnt out and overwhelmed. Overwhelmed with work, overwhelmed with Gray House projects, overwhelmed with the house being messy from lack of time to clean due to work and Gray House projects. It had been a long week. Brent has not been feeling well and my neck is still really sore from the snake “incident” on Monday.
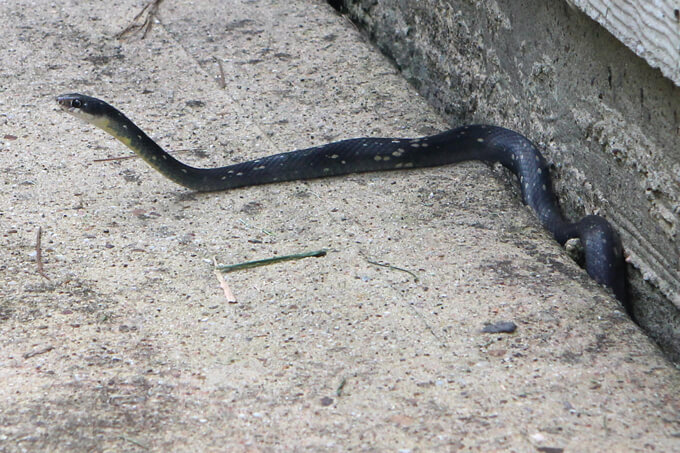
The snake incident, that is a long story. A decent size black snake tried to come in the house when I opened the back door Monday morning to shake out a rug. He got his head in before I realized what it was. I screamed so loud that I scared the snake and he jumped back. I also recoiled so hard that I jerked my neck out of place. I shook the rug in the process of trying to turn it into a shield and doused the snake with the excess cat litter inside the rug. The snake apparently didn’t like cat litter or the sound of my shriek and retreated to the hole between our house and the concrete patio. Then he popped back out and just stared at me. I have a sensitive neck so whenever I violently give myself whiplash, as in this case, I tend to be really sore for quite awhile. I plan on suing this snake for the emotional stress associated with my sore neck.
Okay, I guess it wasn’t that long of a story.
Needless to say it had been a long week and all I wanted to do was lay on the couch. I was in one of those frustrated moods where I didn’t want to say anything or do anything. Usually when either Brent or I are feeling overwhelmed we will go for a walk to our neighborhood park for a change of scenery and to have uninterrupted conversation. I was reluctant but he managed to pull me off the couch (literally) and we started our walk.
The neighborhood park is about eight houses down from our house and sits at the end of our street. It is a large, gorgeous park that has a playground and a beautiful lake view with a dock for fishing. There are a plethora of trees and small rolling green hills. It is never crowded. Every time we go to the park we maybe run into one or two people at most.
This is probably because it is gated. There are two entrances, one in our neighborhood and one in the neighborhood next to ours. When we moved in we had to show proof of our residence so we could get a key fob to open the magnetized gate. All of our neighbors warned us to not sneak in or lose your key fob because otherwise you would get stuck in there. Once you go in you can only get out using the key. We never had any problem getting in or out of the park, until last night.
Our favorite way to unwind is to walk down to this bench that faces the water where we sit and talk. Sometimes we vent our frustrations; sometimes we brainstorm ideas for projects. As we sat and talked I felt my mood starting to lighten. It felt good to talk through all of the things that were causing us stress this week. I guess the conversation was really helping because we lost track of time. It was just the two of us in this giant, beautiful park at dusk talking about life. The night was starting to turn around.
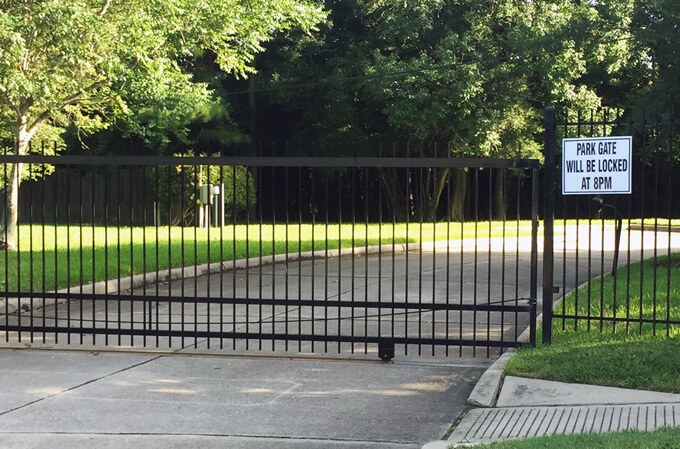
After we were pretty much all talked out, we walked back towards the gate to go home. It was still fairly light out so it didn’t even dawn on us to look and see what time it was. As we got to the gate Brent held the key up to it. It flashed red. He did it again. It flashed red again. He pushed on the gate but it wouldn’t budge. “Ut oh.” He said. We looked at each other in shock. The gate is magnetized but the force is stronger than we could push. Finally, I looked at my watch. It said 8:30. “It’s after 8.” I said. “That sign on the outside of the gate says the park gate will be locked at 8PM. You don’t think they actually meant that, do you?”
I have passed that sign numerous times but I always thought it was more of a suggestion. As in, “Hey, better not be in the park after dark it might not be safe”. I didn’t think it actually meant the gate would stop working at exactly 8PM, especially if you are trying to get OUT.
We walked up and down the fence trying to look for a place we could squeeze through or bend or climb over. Thanks HOA for charging us a ridiculous amount of money to build a sturdy gate that we can’t escape from. It was at this point that we were stumped. Hmmm…we were stuck in our own neighborhood park. Now I know how caged animals feel. We were just staring through the bars longing to be on the other side.
It didn’t matter if anyone else came along; the gate wasn’t going to open. It was starting to look like we were going to be doing some impromptu overnight camping in our neighborhood park. I guess we could have used the one cell phone we had to call my dad to come bring his ladder or something but we were using our last 3% of battery to Instagram in real time our crisis. We obviously have priorities.
Our options were limited so I started climbing the fence at the point where it opens for cars to enter because there was a place to put your feet. But even that part was pretty high with nowhere to put your feet back on the other side. We debated which one of us was going to go over first but jumping from that high onto concrete was starting to freak me out. I could foresee a sprained ankle in my future. Remember I am the girl who hurt her neck at the SIGHT of a snake.
Then I had an idea. We could jump the gate at the other neighborhood entrance and walk all the way back around to our street. That gate was much shorter. It was a more realistic gate jump. So we get to the gate and get over it no problem. By the time we get into this other neighborhood the sun is setting and it is getting dark out.
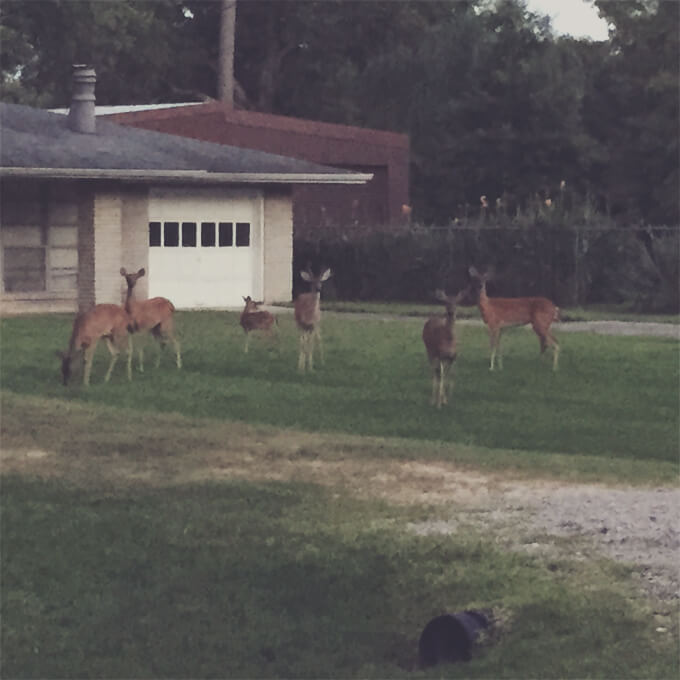
We start walking down the unfamiliar street and we saw a deer. Then another deer and another deer, they were just lounging in front yards. As we get further down the road we saw a herd of almost 30 deer. We walked right into the group. They were on all sides of us. It was bizarre. They just stood there starting at us until they got spooked when a tiny dachshund started chasing and barking at us. By this point all we could do was laugh. This night was turning into one for the books for sure. After walking in the dark for some time we finally came to the end of the street.
It was dark and I didn’t have my glasses on so I couldn’t see what was up ahead. “Ut oh.” Brent said with a laugh. “What now!?” I asked. There was another gate. As we got closer we could see that this in fact was a gated community and this gate was much higher then the first gate.
We saw headlights coming towards us signaling that a car was coming through the gate. “Run!” I yelled. And we took off sprinting down the middle of the road to see if we could make it through the gate which was now closing. Remember we were not feeling in top shape this week so if this were Jurassic World the dinosaur would have eaten us. It closed right as we were approaching it. We were still trapped.
Now I know why the deer had made themselves at home and didn’t seem in any big hurry. They entered this neighborhood and now they can never get out. I knew the feeling. We were being held captive in our own suburban community.
We contemplated on what to do. Should we walk all the way back and attempt jumping over our gate again? Nah, we are too tired for that. So we just waited by the gate of the entrance to this neighborhood in the dark hoping someone would be leaving or coming home late. By now it was about 9:00pm. We walked to the park around 7pm. I never thought I would be trapped in a gated community. I guess I never realized that you could only leave if you had a car.
Luckily, after about 15 minutes a car pulled up to the gate to leave and we snuck out behind it. Then we walked down the street until we found a back entrance to our neighborhood and walked all the way through it until we got back to our house.
That was the longest walk to our park ever. EVER. By the end of the night we were laughing and our moods had brightened considerably and we rewarded ourselves for our great escape with a chai tea latte.
I learned several important lessons last night.
1 – Pay more attention to signs. Apparently they actually mean what they say.
2 – Loosing track of time is romantic unless it means you might end up sleeping in a park.
3 – You don’t always have to travel far for an adventure.
4 – An unexpected adventure with your best friend will make any day better.
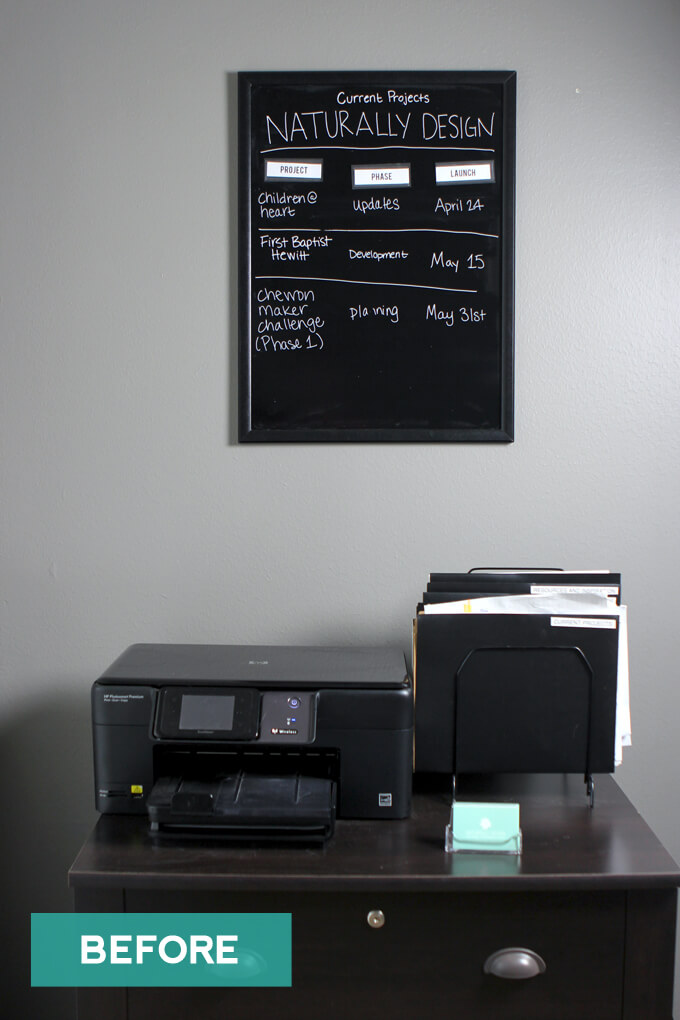
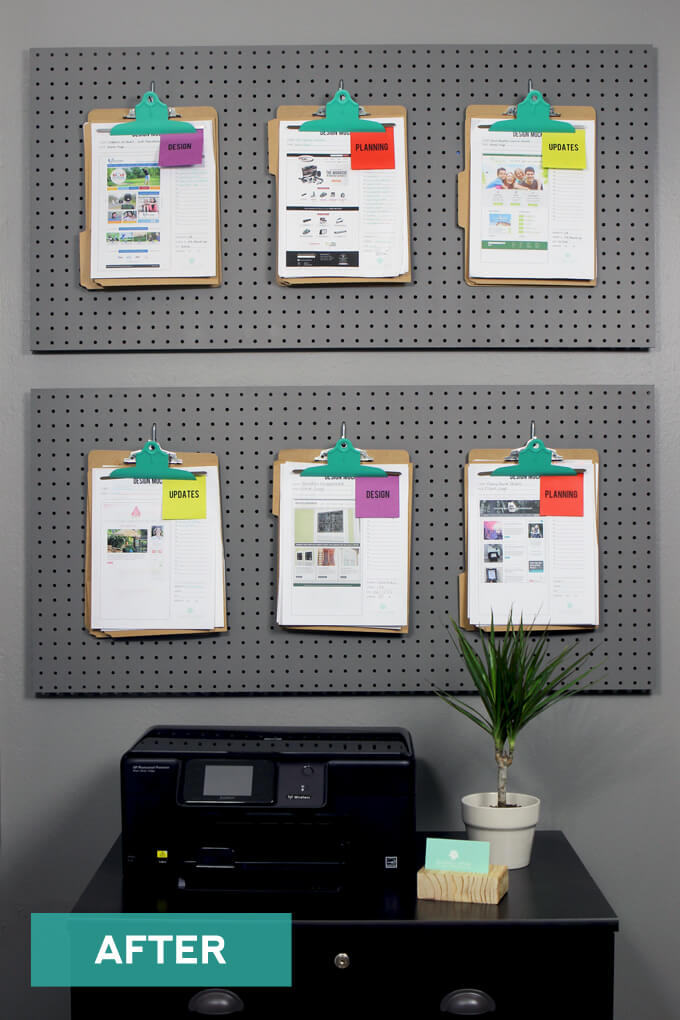
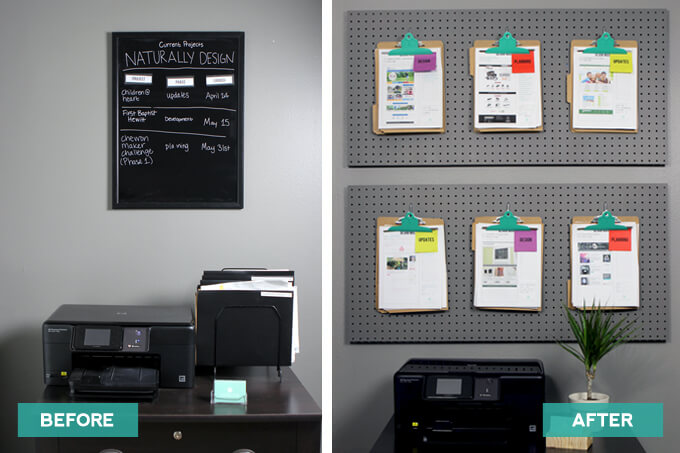
To create an office pegboard organization system, we painted and installed a pegboard on a wall in our office to add additional storage.
When you are working out of your home, it is easy for personal mail to get lumped in with client invoices and before you know it you have a mountain of all different kinds of paperwork mixed together sitting on your desk.
I am the type of person who loves to be organized but can only stay organized if I have a designated place to put everything. If not, no matter how many times I straighten things up, the paper mountain returns or just moves to a different location.
I had been on the lookout for a solution to keeping all of the paperwork associated with my current projects organized as well as readily available to grab each morning when I sit down to work.
I have tried several methods for organizing my current web design projects so I can easily keep all the associated mockups, invoices, client information, etc. in one location as well as visibly display the phase each project is in.
For awhile I had a dry erase board with my current schedule and kept all the in-progress client folders in a file rack. This situation was not ideal because visually the dry erase board did not fill up the wall and the top of the file cabinet felt cluttered.
Office Pegboard Organization Wall
STEP BY STEP GUIDE
1. First we sanded down our two pegboard pieces with 150 grit sandpaper.
2. Next, we painted the pegboards with SW Dovetail Paint.
3. Then it was time to hang the pegboards up. It was our visual preference to leave a little bit of space between the two boards.
We put small blocks of wood behind the areas where we planned on hanging clipboards and used a drill to drill into the wall through the wood so that the pegboard would appear as if it was floating off the wall and we could put metal pegboard hooks in it to hang the clipboards.
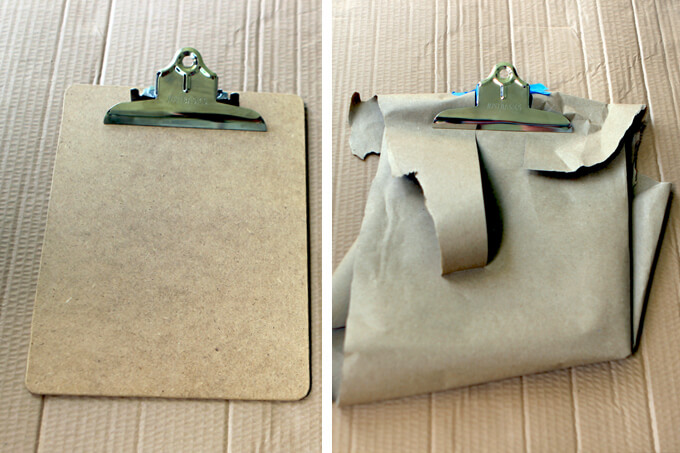
4. Another part of this project was to spruce up some clipboards we had lying around.
We wrapped all the areas we did not want to paint with brown kraft paper.
A roll of non-adhesive kraft paper is cheap and comes in handy for a lot of our projects.
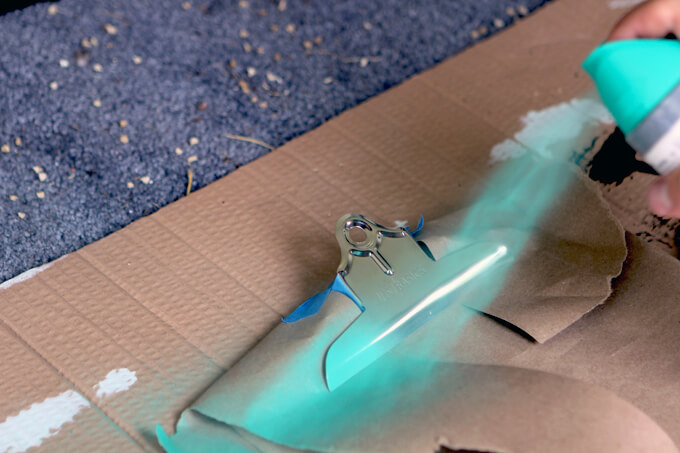
5. Finally, we spray painted just the front metal clip with teal spray paint to add a bit of color and to make the clipboards pop against the gray pegboard.
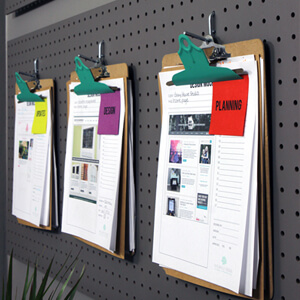
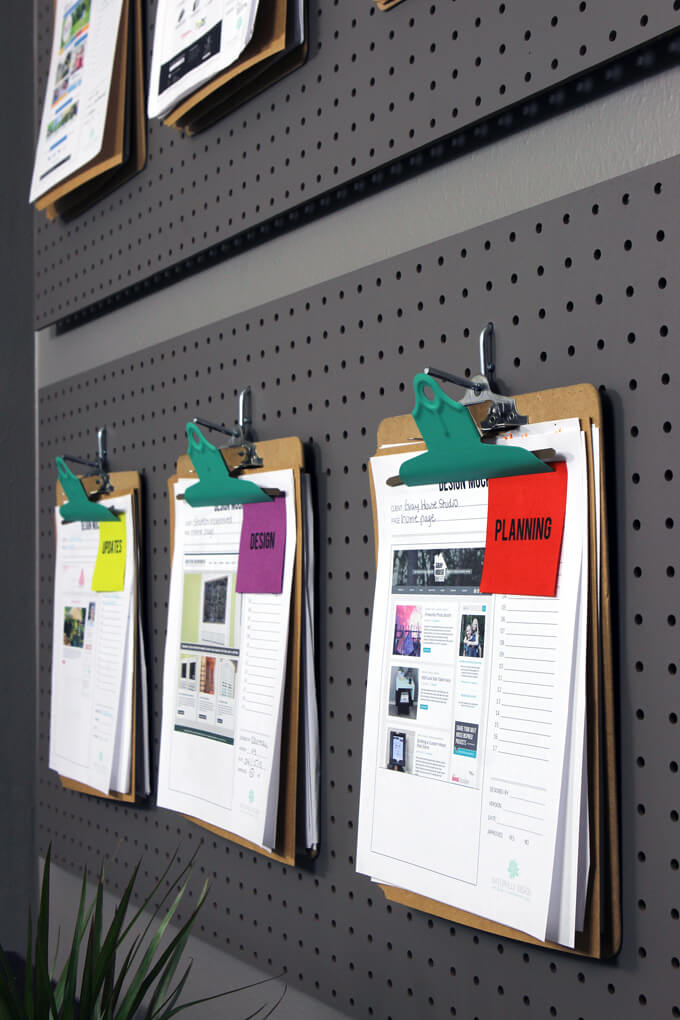
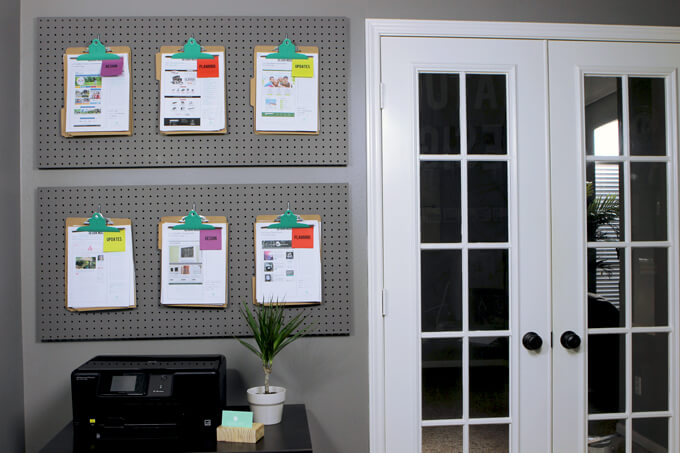
Once the clipboards were dry, we hung them up on the metal hooks on our pegboard!
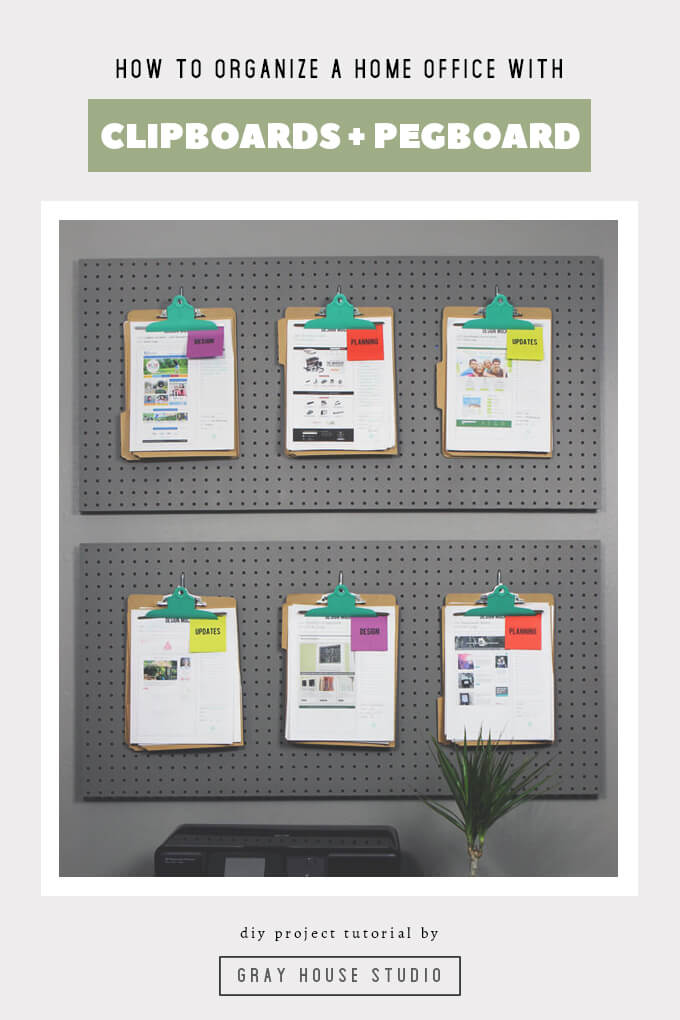
For each client I put all the associated paperwork in a folder and then attached it to a clipboard.
I ran several post-it notes through the printer with each phase of my design process.
The color represents the phase of the project and I can easily remove and stick a new note once the the project moves into the next phase.
Not only does the office pegboard organization make for a colorful display, I can easily see where each of my project stands and grab the one I need to work on that day off my project board.
I ordered them so the new projects are at the top and the ones with the closest launch date are on the bottom. Once a project is complete, I will file it away in my file cabinet below and a clipboard opens up for a new project to begin!
This DIY home office project was easy, quick to put together and actually only cost us one can of green spray paint since all the other supplies we used were left over from other projects.
I really like how visually the whole wall is filled up now and the space feels much more complete than it did before with this office pegboard organization solution.
I believe the office pegboard organization system will work really well for keeping all my projects organized. Now the paper mountain will be more of a paper hill while I move on to figuring out a good solution for sorting the mail more efficiently.
PIN IT FOR LATER