Planning a Boy Nursery

Planning a Boy Nursery

We are ready to start planning a boy nursery! Today we are sharing our ideas for a modern outdoor nursery.

Planning a Boy Nursery

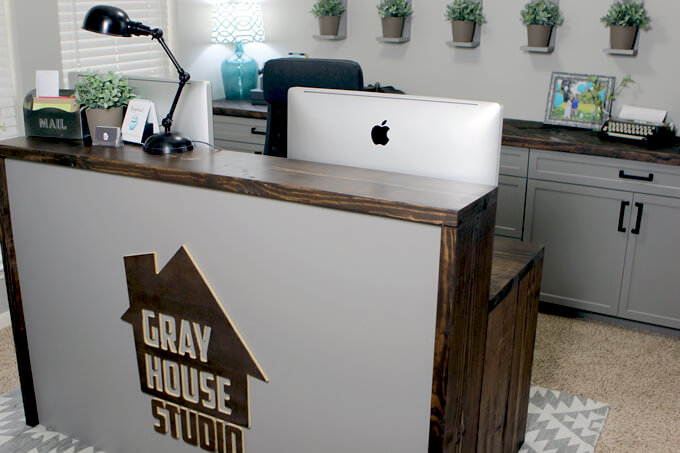
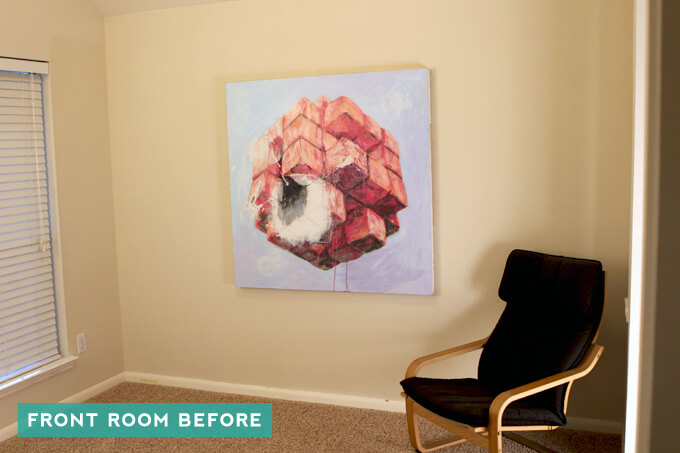
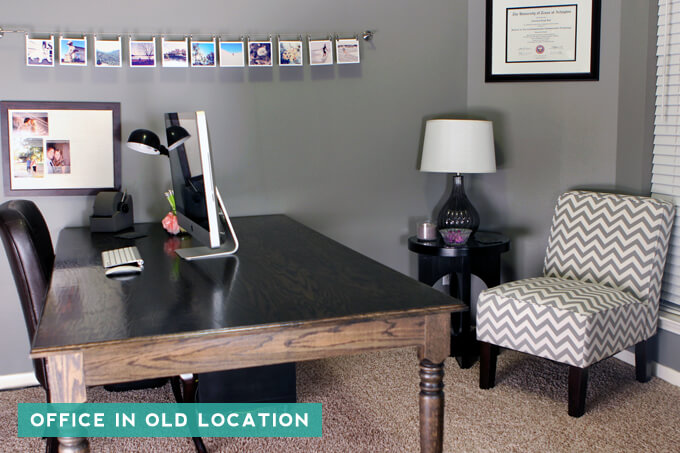
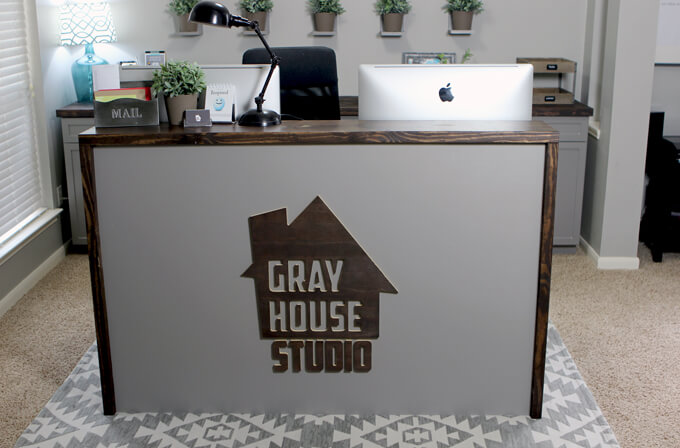
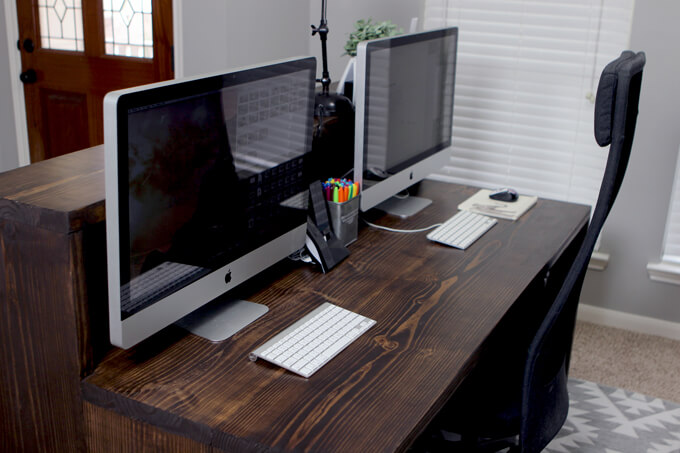
The time has come to start thinking about designing our baby boy’s nursery! Just the process of cleaning out the room that will be our nursery involved a lot of projects but I got my awesome industrial office out of it so I am not complaining. Although, empty rooms in our home have a habit of collecting items that don’t belong in them so I am guarding this room and making a conscious effort that only items intended for the nursery make their way into that room.

With around 13 weeks to go, it’s probably about time we start shifting our focus to the nursery since we have quite a few DIY projects planned for this room. Brent and I were already on the same page when it came to how we envisioned the design of the room and we are really excited to start actually working on it now.

Before we knew the gender we knew we wanted to work in outdoor elements. When we found out we are having a boy, we both wanted to do a camping style nursery. After a lot of browsing on Pinterest I realized there are a lot of outdoor, camping, adventure styled nurseries out there. But in staying true to our Gray House Studio style, we want to keep it pretty simple. We already have the walls painted Dovetail Gray and really like the color so we wanted to keep it. So my challenge was how to put together an outdoor room with grays.

We finally nailed down our ideas which include a chalkboard wall, replacing the floors, a huge DIY shelving display with a seat and much more. I am so excited to start working on this room now that I have a clear direction, a modern outdoor boy nursery. It should be really fun! Below are some of the items that we would like to incorporate or we are using as inspiration for our nursery design.

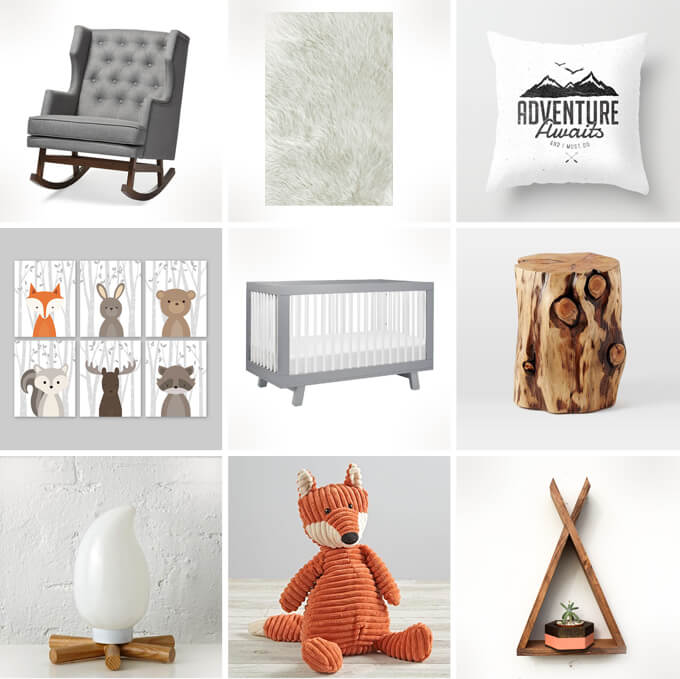
CHAIR | Baxton Studio Rocking Chair from Wayfair
I was not aware of just how expensive nursery rocking chairs can be. Yikes! I have my mind set on a chair with an actual rocking base but I guess my taste far exceeds our actual budget so it took a lot of searching to find one that we like the design, is comfortable (which is probably the most important) and fits in our budget. Ultimately, we decided on this wingback rocking chair and I can’t wait to see it in the room.

RUG | Jungle Sheep Skin White Rug from Overstock
We are saying “see ya later” to the carpet in this room and replacing it with either wood or laminate flooring. A big, soft, fluffy rug is on my wish list for this space. I want a comfy spot to spread out and play or let’s be real, a great backdrop for a billion photo opportunities.

PILLOW | Adventure Awaits Throw Pillow Cover from Society6
I love this pillow cover! It is simple, yet fits the vision of the room perfectly.

ART | Woodland Nursery Animals Art from Etsy
The positive thing about woodland themed nurseries being popular is there are a lot of options to choose from when it comes to decor. This woodland art is my favorite. I like the neutral background and the animals are so dang cute.

CRIB | Babyletto Hudson Convertible Crib from Target
The crib was the first piece we decided on for the nursery. We like the modern appearance and the gray and white combination.

TABLE | Natural Tree Stump Side Table from West Elm
This stump table, this is one of those pieces I keep telling Brent that I HAVE TO HAVE. Like, it is not up for debate. I will have a tree stump side table and that is that. Due to the price tag being higher than we would like to spend, for this one we are going DIY over buy.

NIGHT LIGHT | Campsite Night Light from The Land of Nod
I’m a fan of this cute little nightlight.

STUFFED ANIMAL | Corduroy Fox from The Land of Nod
How cute is this little fox? I love that he is made of corduroy. We will incorporate woodland creatures here and there throughout the room and I like how the fox decor bring a pop of bright color to the room.

SHELF | Teepee Shelf from Etsy
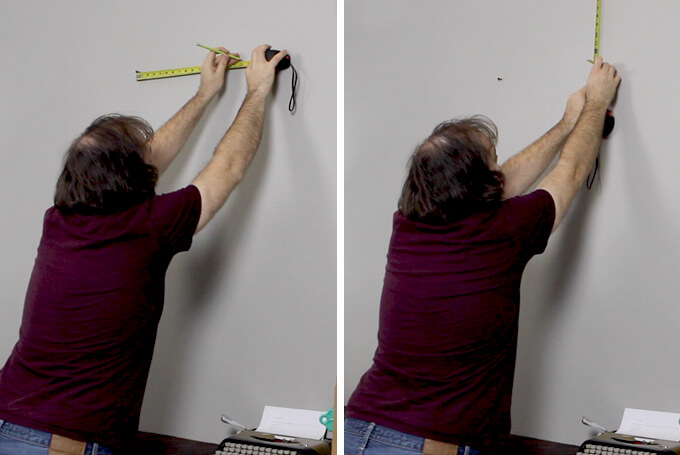
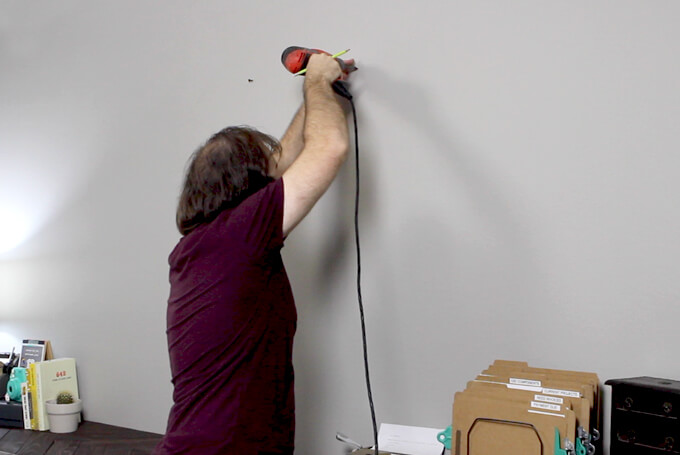
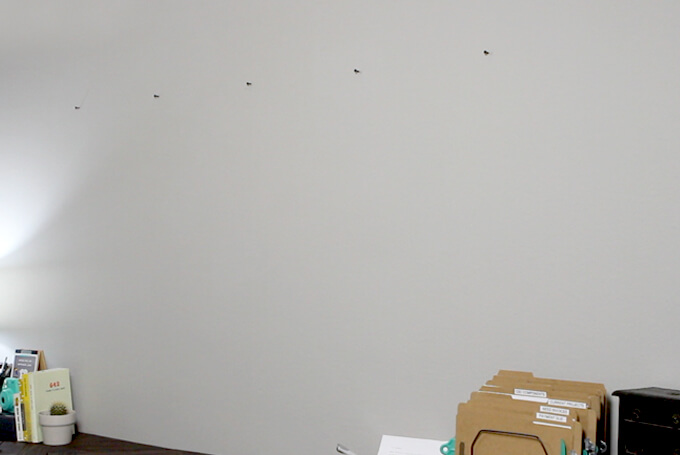
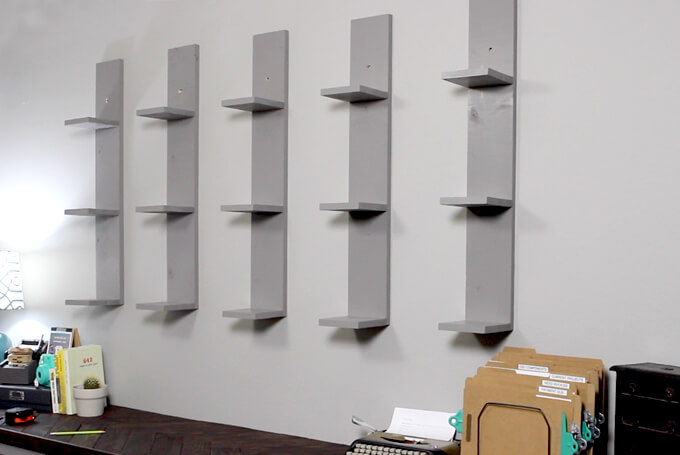
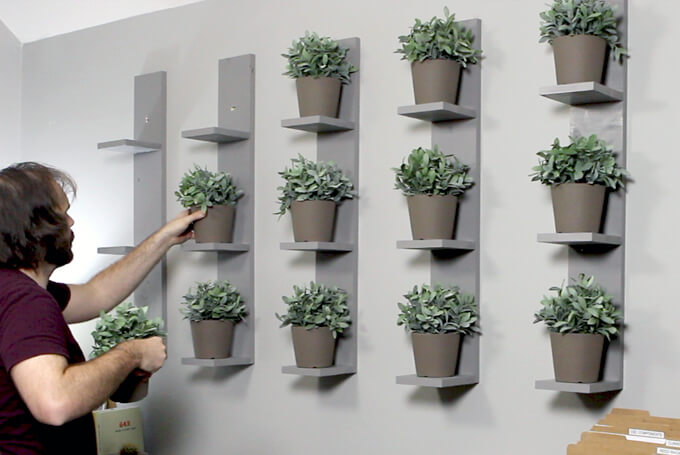
We have built several shelving projects in the past so I am adding teepee shelf to our to build list. I would love to make a few of these to hang around the room to display a few odds and ends.

There you have it, our plans for a modern outdoor boy nursery. The ideas are flowing now and I can’t stop thinking about working on this space. It is especially hard to concentrate because as I sit in my office and work I directly face the empty nursery and I swear it is calling to me to come decorate. The force is strong due to the combination of me always getting excited to start a new room design and that nesting instinct kicking in.

Stay tuned for lots of boy nursery projects coming your way soon!

*To see more of our boy nursery ideas, follow along on our Nursery Board on Pinterest.

HOME OFFICE MAKEOVER

Home Office Makeover

Take a tour of our home office makeover.

Home Office Makeover

For the past three months now we have been working on moving our home office out of one room and into another all the while giving it a total revamp to fit with our industrial/vintage style. You can take a look back at our plans for our home office that we posted in March.

It is not a large room but some of the DIY projects we were working on for this space turned out to be large in scale (I’m looking at you cabinets) so it took us awhile to finish all the projects and get it exactly how we wanted it.

It has been a long time coming so today I am excited to finally be able to share our completed home office makeover and take you on a little tour of our newly refreshed and organized office. Since the room is a little small, we thought a video tour might make a little more sense so be sure to check that out below.

Side Note: If you haven’t already, we would love for you to subscribe to our YouTube channel and follow along to see our latest DIY videos. We have some fun ones in the works that you won’t want to miss! You can subscribe by clicking the red button under the video in the box below. Thanks!

Home Office Makeover Tour

In this video I will take you on a tour of our newly made over home office! For our home office we continued with the rustic/industrial/vintage vibe we have going throughout the rest of the house. I also share a few tips and storage solutions for keeping a home office organized.

To see a new DIY tutorial video every Thursday, subscribe to our channel ⇾


Home Office Makeover
Above is what the room looked like before. Well, way before. It is the front room in our home, probably intended to be the formal living room. We have used it to store Brent’s musical equipment and more recently our work table.

Home Office Makeover

Here is what the office looked like in our spare room. We had to move it to make room for a nursery but I was excited for the opportunity to give it a refresh that matched our style and had a cohesive appearance and create more storage space.

Home Office Makeover

My original office desk was the first thing Brent built for me when we got married and while the sentimental side of me was super sad to see it go (thank goodness it found a wonderful new home) we wanted to build one with a new style that has a front piece that hides the cords and storage pieces that are under my desk out of sight when you walk in the door.

We got the inspiration for our new desk from believe it or not a display piece at Restoration Hardware and based on that Brent designed and built this awesome two-level desk that I absolutely love. There is plenty of room for both of our computers and still extra space for me to spread out my calendar and client folders. Jake (the cat) loves to lay on the top level while I work which is nice for me because it keeps him close but out of the way of my keyboard.

Home Office Makeover

Home Office Makeover

Our first project in the room was to build cabinets on the back wall. Having a home office be the first room guests see when they walk in our door can feel a little intimidating since the office seems to be the place clutter collects the fastest, especially since my office is the room I spend the most time in working on projects. I knew lots of cabinet space for storage was a MUST and Brent really knocked it out of the park building these cabinets and the herringbone countertop.

I love the pattern on the countertop so much that I didn’t want to add too much to the top of it but a few additional key storage pieces such as a two-level tray and a lazy susan hardware bin are helpful to organize the paper and supplies I use on a daily basis.

Home Office Makeover

And let’s not forget about our plant wall. I am really pleased with the wall-mounted plant shelves we built to display artificial plants that bring a little greenery and color to the otherwise neutral room.

Home Office Makeover

I have tons of storage space now to keep everything not only hidden away but organized and all within arm’s reach and a chair spin. I can’t tell you how much having a place to put things back helps me keep a room clean. We didn’t have room for our filing cabinet so we added two large drawers to our cabinets that work well to hold all of our paperwork and make it easy to file it away so it doesn’t stack up on the desk or counter.

Home Office Makeover

I love this rug. The gray color matches the other gray colors in our room so well. Do you know how hard it can be to match grays? I like the fun pattern. The rug also is functional because we are running a power strip cord under it to a plug, which keeps the cord out of sight and we don’t have to worry about tripping over it any cords.

ROOM DETAILS

Walls: Mindful Gray from Sherwin Williams
Wall Shelves: See DIY Project
Artificial Plants: Ikea
Pots: Ikea
Desk: DIY Project (tutorial + plans coming soon)
Desk Chair: Ikea
Lamp on Desk: Pottery Barn
Mail Holder: World Market
Printer Stand: World Market
Cabinets: See DIY Project
Herringbone Countertop: See DIY Project
Lamp on Cabinets: Target
2-Level Tray: World Market
Hardware Bin Lazy Susan: World Market
Rug: Target

It feels like such an accomplishment to get another room completed (minus the floors) and checked off our list. I thought a new office would be way down the road so when this opportunity came up, I of course jumped all over the chance to give my workspace a much needed refresh. I work in this space eight hours a day so to have it just the way I like it, feels awesome and I swear increases my productivity by at least 85% (it would be 100% but I am rocking pregnancy brain right now).

I would have never thought the office would be the adjacent room to our home library and would be out in the open with no doors to hide behind, but the two rooms flow together nicely and makes it feel like I am working in a room double the size. I hope you enjoyed the tour of our home office makeover! If you have any questions about any of the projects or items in this room, feel free to leave them in the comments section below.

How to Install a Barn Door

HOW TO INSTALL A BARN DOOR

In this DIY tutorial we will show you how to install a barn door using interior sliding door hardware. This post was sponsored by National Hardware but all opinions and content are 100% our own.

HOW TO INSTALL A BARN DOOR

The very first DIY Gray House Studio project we completed in our house over two years ago was to build and hang a wood barn door in our master bedroom. We built the barn door from scratch as well as pieced together the track system.

It was only two years ago but looking back on our barn door project it feels like we were such newbies when it came to deciding on our design style. As we have completed more projects in our home and really nailed down the aesthetic we want our house to have, we decided we needed to revisit this barn door and give it a revamp.

The first part of our barn door refresh was to update all of the hardware and add a door handle to make sliding the door easier. While we are really proud of how we built our barn door and how we were able to create our own sliding door track system, there were a few mirror issues we had with the appearance of the track.

First, the wood spacers had to go. Because they had to be in the studs, they were off center and not spaced evenly which was a bit distracting. Secondly, we wanted to say goodbye to stainless steel hardware and hello to oil-rubbed bronze that would better suits the industrial/rustic vibe we having going on in the rest of the house.

This time around we wanted this to be a quick and easy update that didn’t take all day so we choose to use a decorative interior sliding door hardware kit from National Hardware. We were happy to discover that the hardware is high quality and having all the pieces you need packaged together makes installing a barn door a breeze.

Today we are going to walk you through how to install a barn door using interior sliding door hardware. Note: If you need to build a barn door first, be sure to check out our barn door post and free barn door plans.

How to Install a Barn Door

SUPPLIES

FYI: This post contains a few affiliate links to products we used to make this project. Gray House Studio does receive commissions for sales from these links but at no extra cost to you. We appreciate you supporting this site. Read our privacy and disclosure policy. You can also easily shop our recommended products here.

STEPS

HOW TO INSTALL A BARN DOOR

1. INSTALL HEADER BOARD

1. It is advised NOT to install the track directly into the drywall so we first needed to install a header board above our door opening. The hardware kit does not come with the supplies you will need to install a header board so you will have to get the piece of wood and interior screws separately.

We had a 1×4 that was 8ft. long laying around in our garage so we decided to use that for our header board. The track is 72″ so we needed to make our header board the same length.

We used a tape measure and pencil to measure and mark 72″ on our board and then used our miter saw to cut the board down to 72″, it was as easy as that.

HOW TO INSTALL A BARN DOOR

2. As a design preference, we wanted our header board to blend in with the wall and to not be noticeable so we painted it the same color as our wall.

HOW TO INSTALL A BARN DOOR

3. To install the header board above the door we used a stud finder to mark where the studs were in the wall.

HOW TO INSTALL A BARN DOOR

4. We determined where we needed to place the header board above our door frame so it would appropriately cover the door opening and then using a level, to make sure the board stayed straight, we used our drill to drill interior screws into the wall studs to securely attach our header board to the wall.

HOW TO INSTALL A BARN DOOR

We like the fact that our header board blends seamlessly into the wall.

HOW TO INSTALL A BARN DOOR

2. INSTALL TRACK

FOR THIS STEP YOU WILL NEED: Track, Spacers, Track Fasteners from the sliding hardware door set, Level, Drill, Wrench + Socket Set

HOW TO INSTALL A BARN DOOR

HOW TO INSTALL A BARN DOOR

5. We held the track up to the header board and marked in the large hole at the end of the track where we needed to drill. Then we drilled a hole and installed the fasteners and spacer.

HOW TO INSTALL A BARN DOOR

HOW TO INSTALL A BARN DOOR

6. Next, we marked and drilled the hole at the other end of the track. We set a level on the track to make sure the track stayed straight while we installed the next spacer and fastener.

Finally, we marked, drilled and installed the spacers and fasteners in the center holes which secured the track to the header board.

HOW TO INSTALL A BARN DOOR

3. INSTALL HANGERS

FOR THIS STEP YOU WILL NEED: Hangers, Hanger Fasteners from the sliding hardware door set, Pin Punch, Drill, Soft Mallet

HOW TO INSTALL A BARN DOOR

7. We used the supplied template to determine where we needed the holes in the door for the hangers.

HOW TO INSTALL A BARN DOOR

8. Then we used a pin punch to mark the holes on both ends of the door and then drilled the holes.

HOW TO INSTALL A BARN DOOR

9. We removed the pre-installed fasteners from the hangers. Our door is thin so we used the shorter hanger fasteners to attach the hangers to the door.

HOW TO INSTALL A BARN DOOR

4. INSTALL BAR PULL

FOR THIS STEP YOU WILL NEED: Bar Pull, Pin Punch, Screwdriver, Soft Mallet

HOW TO INSTALL A BARN DOOR

10. To install the handle, we lined up the bar pull where we wanted it on the door and then used a pin punch to mark where the two holes in the handle are. Then we secured the handle to the door using the screws that came with the bar pull and a screwdriver.

HOW TO INSTALL A BARN DOOR

5. INSTALL ANTI-JUMP DISCS
FOR THIS STEP YOU WILL NEED: Anti-jump Discs from the sliding hardware door set, Screwdriver

HOW TO INSTALL A BARN DOOR

HOW TO INSTALL A BARN DOOR

11. To install the anti-jump discs we placed a disc on the top edge of the door on the inside edge of the hanger making sure the hole is facing the front of the door.

HOW TO INSTALL A BARN DOOR

6. PLACE DOOR ON TRACK

12. After we installed everything on the door, we placed the door on the track and tested to make sure it slid across the track smoothly.

HOW TO INSTALL A BARN DOOR

7. INSTALL DOOR STOPS

FOR THIS STEP YOU WILL NEED: Door Stops from the the sliding hardware door set

HOW TO INSTALL A BARN DOOR

13. Next, we installed the door stops on each side of the track and secured them by tightening the set screws.

HOW TO INSTALL A BARN DOOR

8. INSTALL HOLE CAPS

FOR THIS STEP YOU WILL NEED: Track Hole Caps from the sliding hardware door set

HOW TO INSTALL A BARN DOOR

14. Since we did not need to connect multiple tracks we inserted the hole caps into the small holes at both ends of the tracks.

HOW TO INSTALL A BARN DOOR

And that’s it! We hope you found this how to install a barn door tutorial helpful.

If you are looking for a simple and nice-looking hardware solution to hang you barn door, we are really pleased with how the oil-rubbed bronze hardware from National Hardware looks and functions.

[adinserter block=”6″]

Our master bedroom still has mostly black furniture which is why we initially stained the barn door black. Working on our master bedroom is at the bottom of our list when it comes to room makeovers but once we get around to it, I’m sure we will update our barn door to be stained Kona. For now, updating the hardware to oil-rubbed bronze has already made a huge difference.

Check out how we built our wood barn door and download free wood barn door plans to build your own.

PIN FOR LATER

A tutorial showing how to install a barn door. This tutorial shows what materials you will need to hang a barn door on a track in a bedroom. We will share the barn door hardware kit we used to hang a barn door.

Back Patio Makeover

Back Patio Makeover

Check out our back patio makeover and how we gave it a much needed refresh for spring.

Back Patio Makeover

The time has come to reveal our back patio refresh! Yay! We have had all our awesome finds from At Home just sitting in the empty room that is soon to be the nursery and I have been dying to get them out where they belong for almost a month now! So we are thrilled to finally have this space finished and be able to share what we did.

We had these grand plans to have the entire backyard completed (new flower beds, a fire pit, etc.) by this point but as I am sure you may know, life sometimes gets in the way. What can you do? There is only so many hours in a day and so many weekends in a month. You can’t control the weather and let’s face it, sometimes you are so tired you just don’t feel like doing anything but sitting on the couch, eating pizza and watching a marathon of a dumb reality show.

So we are just rolling the back patio overhaul out slowly one area at a time. But we have already made a huge leap forward with our back patio makeover by creating our lounge area.

BEFORE:

Back Patio Makeover
In all the excitement of decorating this space I forgot to take a before picture at an angle facing back towards the greenbelt but the one from when we first moved into the house is close. Before, the patio was hardly a patio, it was just an empty and ugly slab of concrete. So much work needed to be done in this space.

AFTER:

Back Patio Makeover
We are absolutely in love with our back patio makeover and the completed lounge area. The colors pop so nicely and every single item we picked out goes so well together and is an integral part of the space. It was well worth the time we took at the store to make sure everything coordinated and worked well together.

For so long we had to look out our back windows at just an unattractive concrete slab and now this bright cheerful area really makes us happy every time we look out the window. It is so welcoming and cozy that we can’t wait to spend spring and summer nights under the string lights lounging on our comfy cushions and host backyard BBQs now that we can seat lots of friends and family.

BACK PATIO MAKEOVER DETAILS

First things first we did some work on the concrete slab. We filled in the huge gap in between the two slabs as well as some of the really large cracks where grass and weeds would frequently grow through. The previous owners had foundation work done and it did a number on the concrete around our home including the back patio where we have huge ugly patches left behind as reminders so we needed to find ways to disguise the unattractive areas of the concrete. Next, we power washed, stained and sealed the concrete to get rid of all the gross mildew and make it easier to clean when it does come back.

After our concrete was in better shape we started decorating the space with the items we picked out from At Home. We have said it a couple of times before but At Home is really the one stop shop for outdoor decor because they have such a wide variety of items in just about every color you can imagine and you can easily stay on budget. In case you missed it, you can read more about our At Home shopping trip and all the outdoor decor we picked out in more detail.

Back Patio Makeover
We first picked out the Azure cushions we liked from At Home and then built our outdoor sectional based on the dimensions of the cushions so we would be 100% sure they would fit. The size of the cushions also helped us determine the number of pillows we needed. We will share more details about how we built this awesome sectional for under $100 in the coming weeks. The cushions and pillows make this seating area so comfy and cozy.

Back Patio Makeover
We built the coffee table to match our outdoor sectional and it was the perfect place to put these super cool lanterns that were our splurge items (they were not very expensive, they just were not on our initial list) during our shopping trip. They hold candles so they can add a little mood lighting at night.

Back Patio Makeover
Can we talk about how awesome this umbrella is? It is functional, covers almost the entire sectional providing much needed shade during the day, and really helps define the space. And it was only $80. Boom.

Back Patio Makeover
We love the color and pattern of this rug and how it contrasts with the new color of our concrete. It is so bright and cheerful and just invites you to kick off your shoes and stay awhile. Bonus, the large rug covers a huge nasty crack in the concrete slab easily helping to disguise the faults in the concrete.

Back Patio Makeover
These blue chairs will eventually go around our outdoor table that we plan on building but for now we added them to the lounge area to provide extra seating. They are really comfy and we like that the mesh fabric will allow them to dry out with all this rain we are getting here in Houston.

Back Patio Makeover
I love relaxing in our new lounge area. We are so happy with all of our choices and how everything came together to really give this space a much needed refresh.

Check out how we built our DIY outdoor sectional for under $100!

Back Patio Makeover
So what do you think? I know there isn’t much to compare it to since we literally started with a blank space but we are really proud of our back patio makeover and just the overall tone it sets in our backyard. Its funny, adding just a few bright outdoor decor pieces can make a huge difference in a space and make it much more enjoyable and welcoming.

If your backyard is in need of a little refresh, we hope this gives you a few ideas for your back patio makeover and the confidence that you don’t have to spend a ton of money to create your perfect outdoor oasis. For more awesome outdoor living inspiration, be sure to check out HGTV’s Spring House for lots more spring refresh ideas!

Tell Us: What is your favorite outdoor decor item to transform a space?

This is a sponsored conversation written by me on behalf of At Home. The opinions and text are all mine.

Wall-Mounted Plant Shelves

Wall-Mounted Plant Shelves DIY

We built wall-mounted plant shelves to hold faux plants to create a greenery accent wall.

Wall-Mounted Plant Shelves

Brent and I like creating accent walls. So far we have created a wood plank wall in our reading nook and a faux brick wall in our home gym.

When it came to the large wall in our home office above our new cabinets we wanted to incorporate plants as part of the focal wall.

I was really drawn to the idea of having identical plants in identical pots in neat and organized rows. While I would have LOVED to incorporate live plants, let’s just be real they would have all died slow painful deaths at different rates and it would have totally ruined the uniform look we are going for.

Luckily, IKEA has some pretty realistic and inexpensive plants that really made our vision come to life.

To display the plants, we built five super simple wall-mounted plant shelves and today we are going to show you how!

Make Wall-Mounted Plant Shelves

SUPPLIES

Shop the products we used for this project in one place.

FYI: This post contains a few affiliate links to products we used to make this project. Gray House Studio does receive commissions for sales from these links but at no extra cost to you. We appreciate you supporting this site. Read our privacy and disclosure policy. You can also easily shop our recommended products here.

TUTORIAL VIDEO

[yotuwp type=”videos” id=”Ev-w_yPxncQ” title=”off” description=”off” player=”width=590&modestbranding=0&showinfo=0″]

Subscribe to our YouTube Channel

Like our video? Subscribe and help us reach our goal of 100k subscribers.

STEPS

Wall-Mounted Plant Shelves

1. First, Brent measured the 1×6 inch board and using the miter saw cut the piece for the back of the shelves 36 inches long.

Wall-Mounted Plant Shelves

2. Next, on the miter saw he cut three smaller boards 5 1/2 inches long each.

These pieces would become the shelves so they needed to be long enough and wide enough for the pots we had to sit on.

Wall-Mounted Plant Shelves

Wall-Mounted Plant Shelves

3. Before attaching the three smaller boards to the long board, Brent measured and made straight marks 13 inches apart from the bottom with a framing square.

The bottom of each smaller board lined up with these lines he marked.

Wall-Mounted Plant Shelves

Wall-Mounted Plant Shelves

4. Brent applied wood glue to one side of one of the smaller boards and used clamps to attach it to the bottom of the long board.

Wall-Mounted Plant Shelves

5. Then he secured the smaller board to the larger board with a nail gun and 1 ½ inch finishing nails.

Wall-Mounted Plant Shelves

6. He repeated the previous two steps to attach the additional two smaller boards to the large board where he made the marks 13 inches apart.

In total we built five shelves.

Wall-Mounted Plant Shelves

Wall-Mounted Plant Shelves

7. Once the glue dried, we painted the shelves Dovetail Gray (from Sherwin-Williams) to match the cabinets and desk in the room.

We painted them two shades darker than the walls so that they would subtly stand out from the wall without being too overpowering and taking away from the plants.

Wall-Mounted Plant Shelves

8. Next, on the top of each shelf, Brent marked and used a drill to make 3/8 inch holes in the center of each shelf, 6 inches down from the top.

Wall-Mounted Plant Shelves

Wall-Mounted Plant Shelves

Wall-Mounted Plant Shelves

9. To attached the shelves to the wall, Brent started measuring from the center of the wall and screwed five drywall screws 16 inches apart the same distance from the ceiling.

Wall-Mounted Plant Shelves

10. Finally, we hung the wall-mounted plant shelves on the wall.

Wall-Mounted Plant Shelves

11. Then we added our ceramic pots and faux plants.

Wall-Mounted Plant Shelves

I love how this wall turned out. The muted colors, the uniformity, and the greenery goes perfectly in our new home office and while it is definitely the focal wall, doesn’t overwhelm the space.

PIN IT FOR LATER

In this simple DIY home decor tutorial we show how to make diy  wall-mounted shelves for your living room, bedroom, or office. These simple wood shelves are great for displaying plants. This step by step guide includes a video tutorial as well as a materials list!