Back Patio Details

Back Patio Details

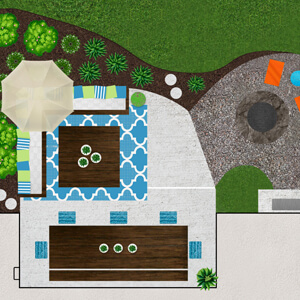
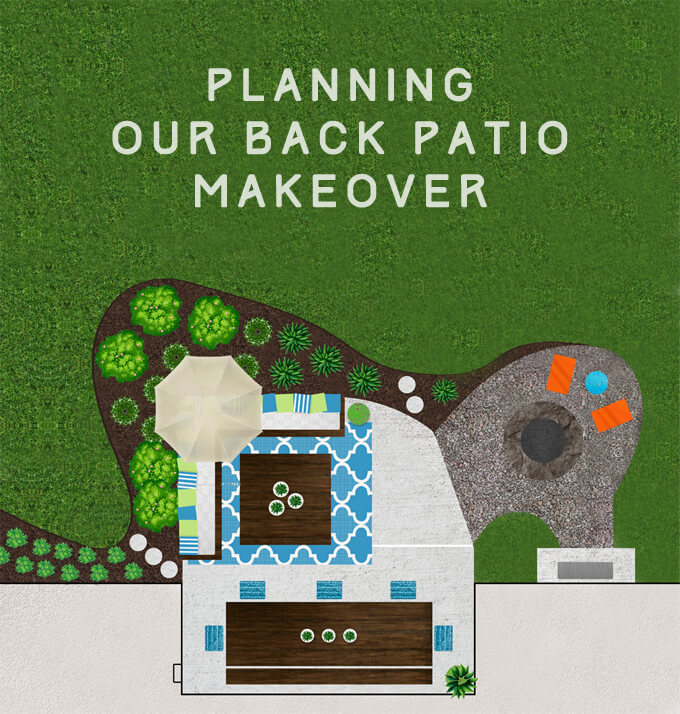
Here are the new items we picked out for our back patio makeover.

Back Patio Details

When it comes to home renovation projects there are a lot of different scenarios that can cause setbacks, including things out of your control like the weather. If you haven’t heard, it has been raining here in Houston quite a bit. While all this rain has really put a damper on our outdoor projects, we were extremely fortunate that our home was not one of the many that flooded. Another positive aspect of the rain is our grass is getting nice and green and we haven’t had to water yet.

We have been trying to start our back patio makeover this month but all this rain is totally cramping our style. It has inconveniently rained and/or stormed every weekend this past three weekends. We get it, this year the weather was really taking “April showers” literally.

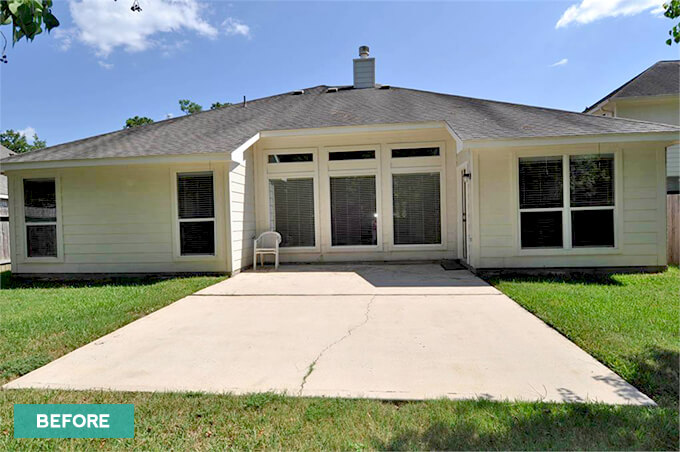
When (or if) it stops raining on the weekends, the first thing we would like to do is repair and stain our drab concrete slab that is getting less attractive by the day.

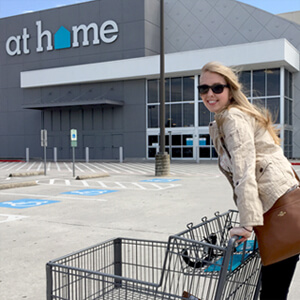
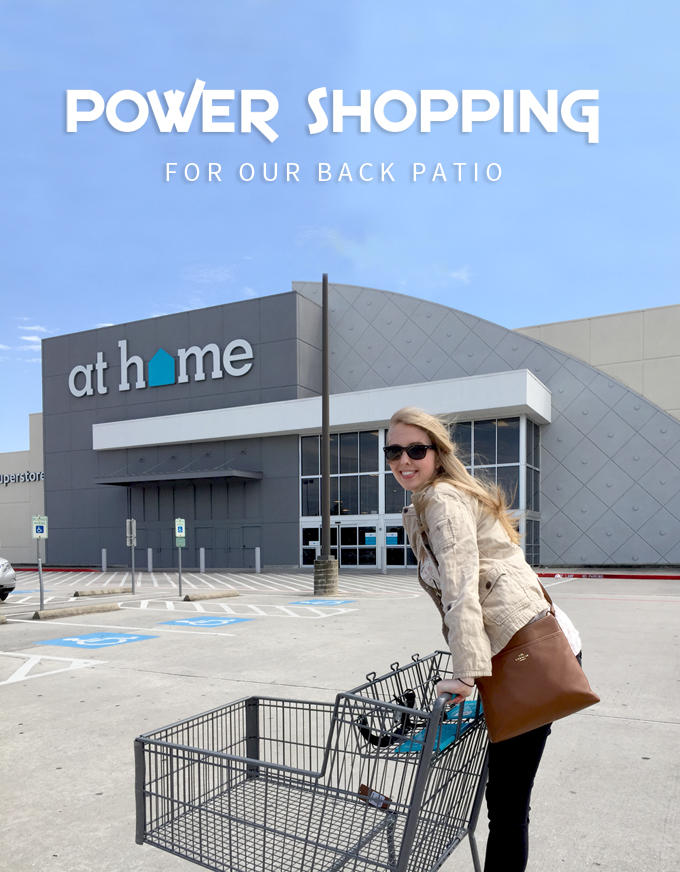
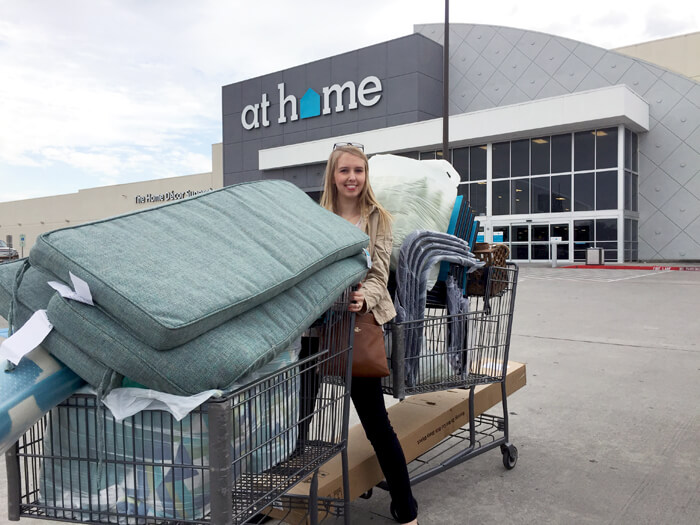
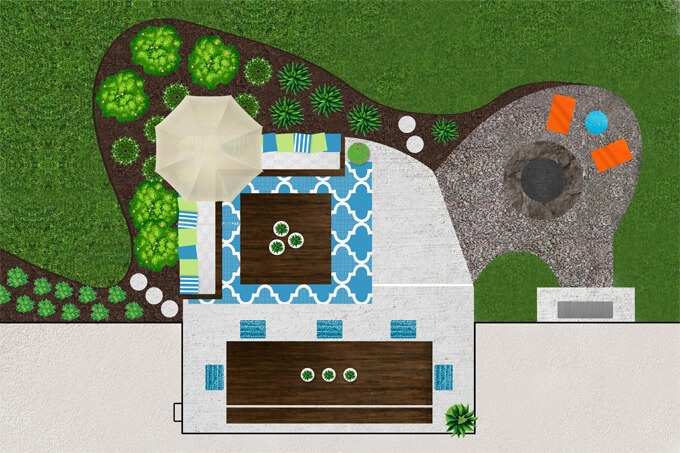
But for the time being we thought we would share with you the fun and bright colored furniture and decor pieces we picked out for our back patio during our At Home power shopping trip. If you remember from our last post, we managed to get quite a large loot of cool outdoor decor items. At Home is really a one stop shop when it comes to home decor because they have a huge selection, everything color coordinates and the prices will allow you to stay on budget.

Ideally, we would show you what each of these items looks like in the space but since we don’t want the brand new stuff to get waterlogged, we will just go with plan B for now.

OUR BACK PATIO HAUL

Back Patio Details

Rug

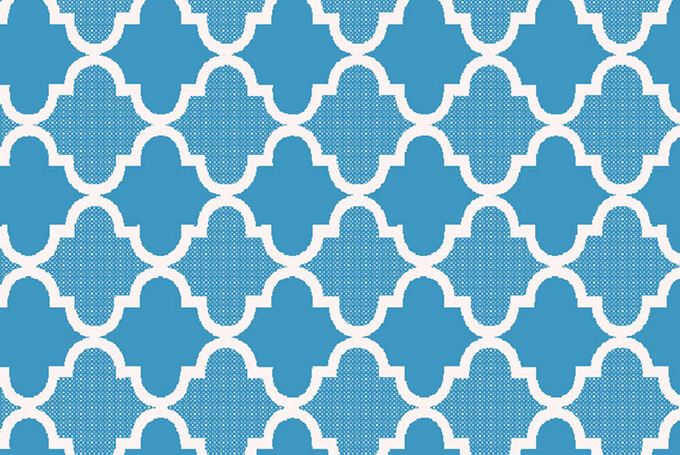
Rugs make a space feel so much more welcoming and cozy, especially when the area you are trying to make comfortable will sit on a concrete slab. We picked out the turquoise and snow cornwall tributary rug in 8×10 to define our seating area and bring some much needed color and comfort to this corner of our back patio.
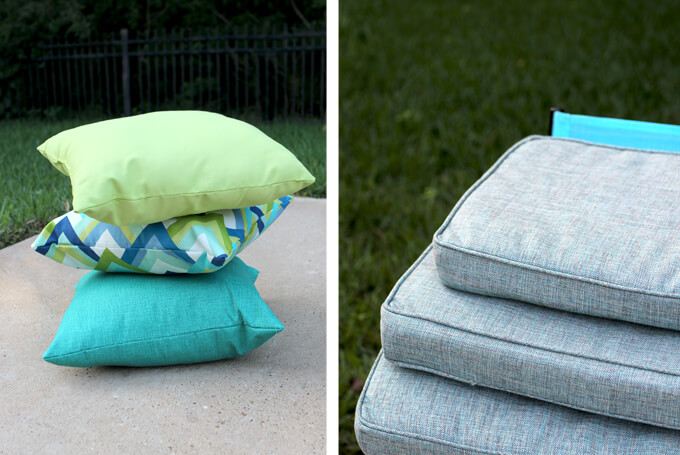
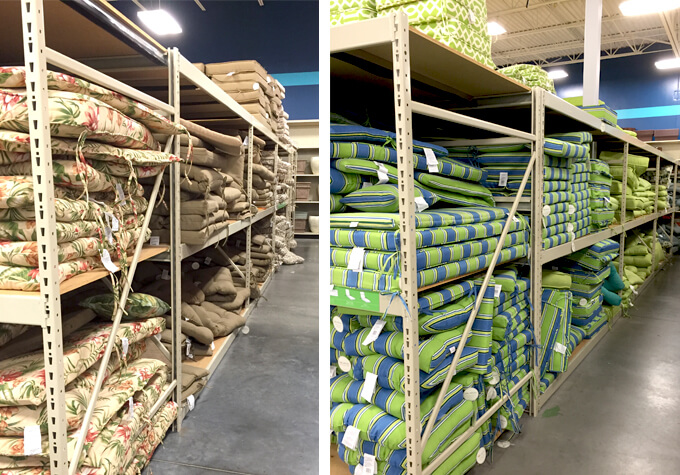
Back Patio Details

Pillows & Cushions

Speaking of comfort, nothing makes outdoor seating more relaxing than cushions and lots of pillows! And we needed plenty to fill up our outdoor sectional. Thankfully, At Home’s cushions and pillows didn’t cause us to break the budget.

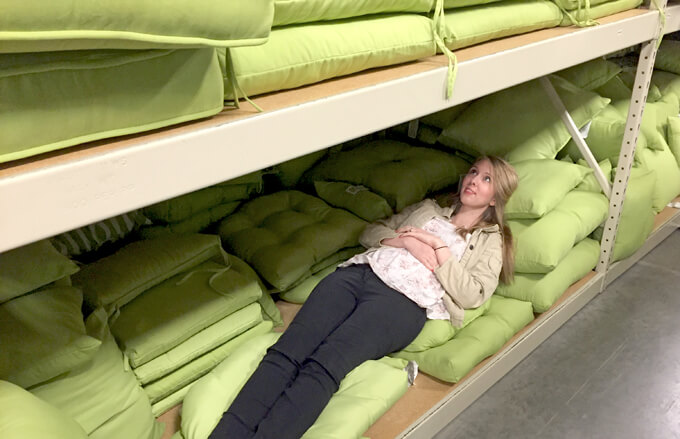
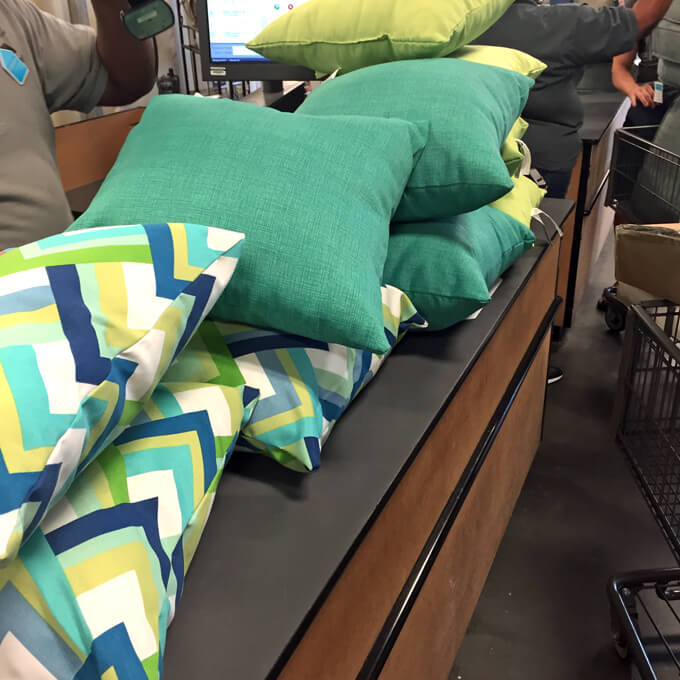
SHOPPING TIP: Don’t be afraid to do a mock set-up of your seating arrangement or any space you are trying to design at the store so you will not only know the right amount of items to get but also make sure they go well together. At Home has plenty of space to do this.

We initially picked out bright green cushions and then decided on dark tan cushions. Right before we left the store we were trying to decide how many pillows we needed so we set our cushions on one of the wicker sets and added our blue and green pillows. It turns out we did not like how the bright blue and green colors looked against the dark tan cushions so at the last minute we switched to a muted blue/green colored cushion and it looked so much better. I am so glad we took the time to plan that out in the store.

Back Patio Details

Chairs

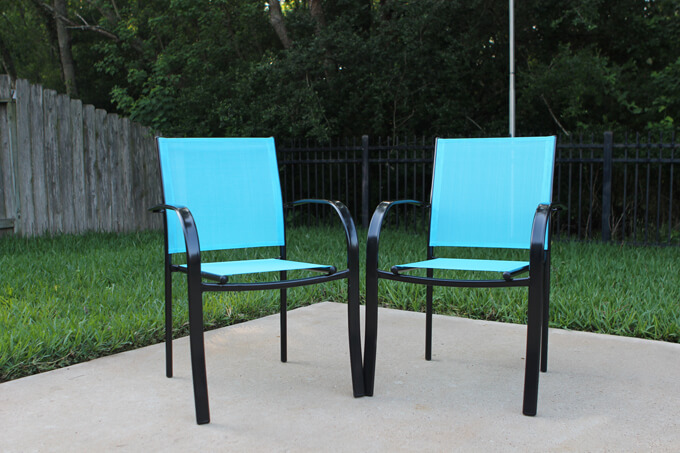
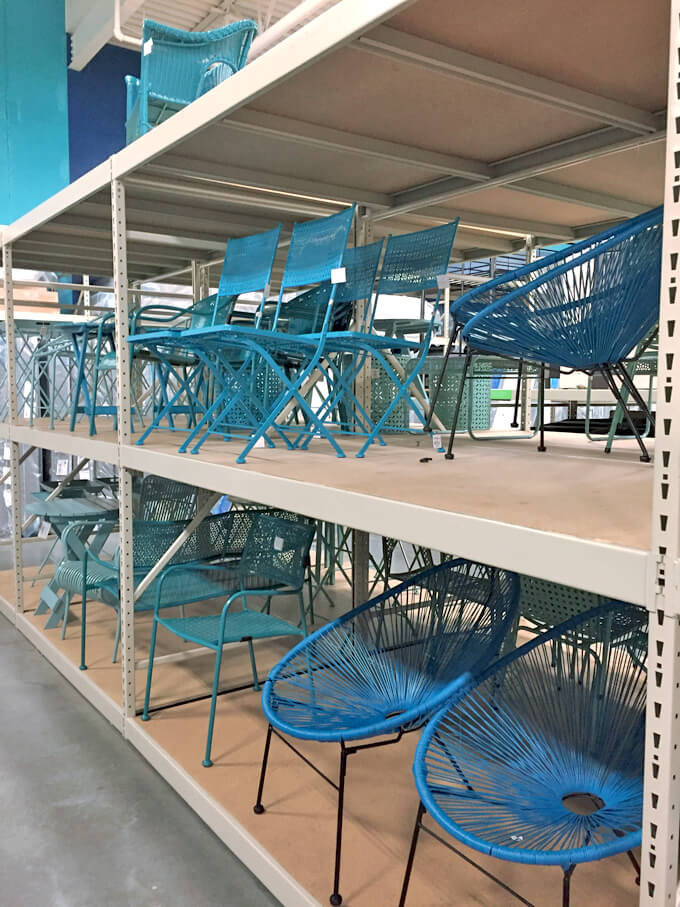
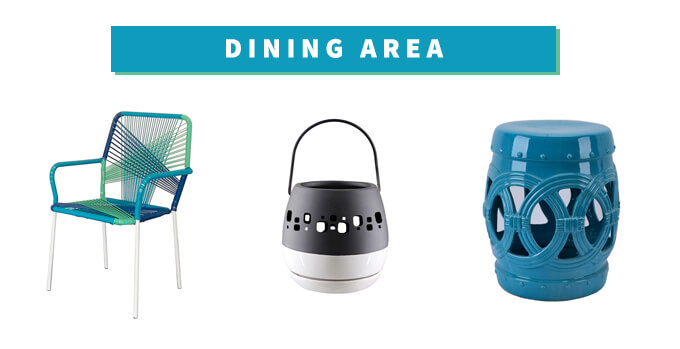
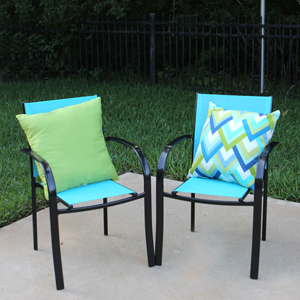
We need five chairs to go around our long rectangular outdoor table. It seemed like an impossible task to try and find five chairs and stay within the budget. So when we found these bright blue chairs for only $20 a piece we were like, “jackpot!”. There were others that we really liked the style of but they were triple the price. These chairs are practical, comfortable and are a bright blue color that will tie the dining area to the same color blues in our seating area giving the whole backyard a cohesive feel.

Back Patio Details

Lanterns

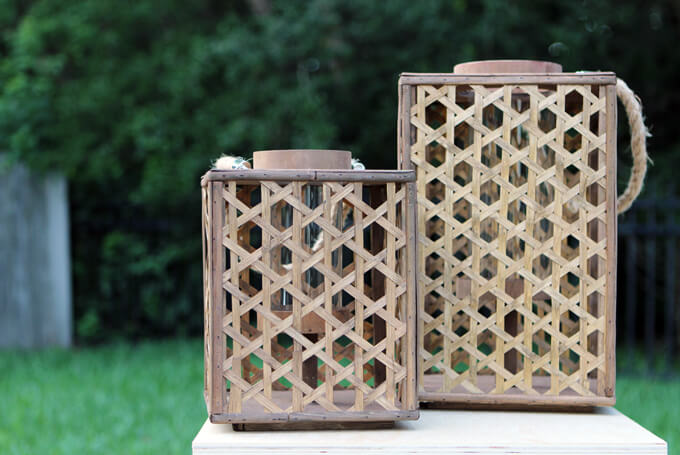
Remember how we always have one splurge item in our trip? Well, these lanterns were our splurge item(s). I walked past them several times because they were not on our list but I just kept going back to them over and over again because something about them was calling to me. I kind of have a thing for lanterns to begin with but I think these will be a really nice addition to our outdoor coffee table to add a little extra mood lighting.

Back Patio Details

Umbrella

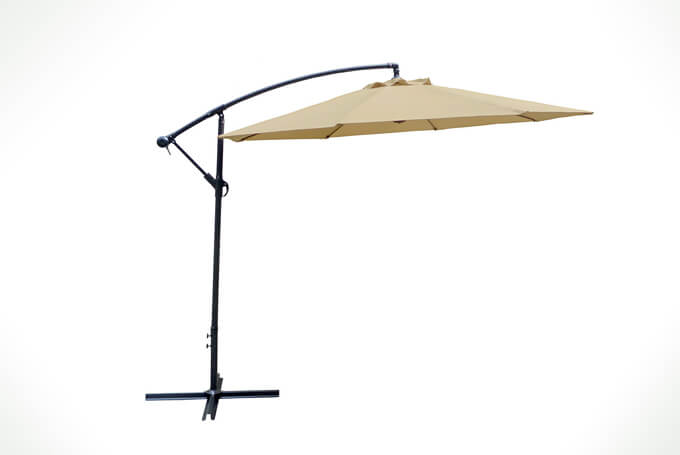
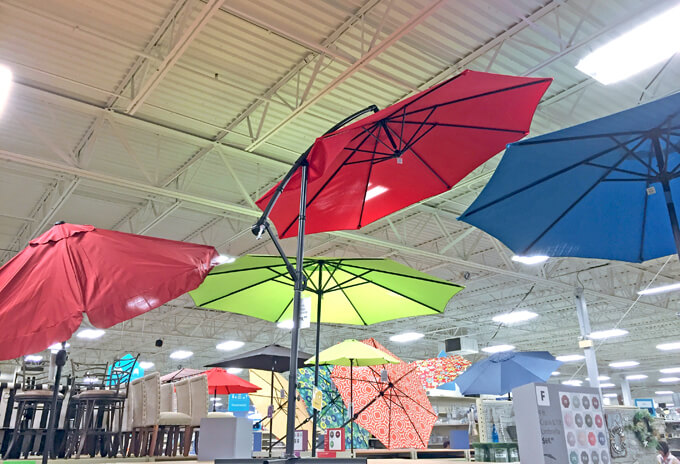
We don’t have a covered patio so one thing we will definitely need in our backyard is some shade. A large 10ft. offset umbrella seemed to be an easy and affordable ($80) solution to this problem. We might in the future consider building a larger structure for shade but our back yard is not huge, so a large umbrella over our seating area should do the trick for now.

*We haven’t snapped a photo of our umbrella yet because it is still in the box. I am dying to see it assembled but we don’t currently have anywhere to store a 10ft umbrella inside the house.

Some of these items were on our list from the beginning and some of the items we changed our minds and switched colors or styles once we were in the store but we are really happy with all the pieces we were able to get to refresh and bring some much needed life to our back patio. We can’t wait to start decorating the space with these pieces and spend more time outdoors.

Now if you will excuse me I will be humming the rain, rain go away song continuously in my head this week and drooling over HGTV’s Spring House while I patiently wait for my turn to decorate our outdoor space.

This is a sponsored conversation written by me on behalf of At Home. The opinions and text are all mine.

HERRINGBONE COUNTERTOP DIY

Herringbone Countertop DIY

How to build a wood herringbone countertop for our office cabinets.

Herringbone Countertop DIY

We are back with part two of our office cabinets project and today we are sharing how we made our herringbone countertop. After spending quite a bit of time on the base of the cabinets, we were looking for an affordable and relatively easy solution for the countertop. We wanted it to contrast the gray base but still be interesting so a wood herringbone countertop worked out perfectly.

We should mention that this wood countertop is more for decorative purposes. We wouldn’t recommend this type of countertop anywhere where food is involved or as a work surface that would get a lot of hard use but in an office it looks amazing and works great.

2022 Personalized Christmas Ornaments
*** Thanks so much for supporting our small shop – Moon Rock Prints – this holiday season! ***

How to Build a Herringbone Countertop

SUPPLIES

Shop the products we used for this project in one place.

FYI: This post contains a few affiliate links to products we used to make this project. Gray House Studio does receive commissions for sales from these links but at no extra cost to you. We appreciate you supporting this site. Read our privacy and disclosure policy. You can also easily shop our recommended products here.

In this video I will show the steps as well as the materials and tools necessary to make a wood herringbone countertop like we did for our office cabinets.

TUTORIAL VIDEO

[yotuwp type=”videos” id=”wQgzDwoQpRA” title=”off” description=”off” player=”width=590&modestbranding=0&showinfo=0″]

Subscribe to our YouTube Channel

Like our video? Subscribe and help us reach our goal of 100k subscribers.

STEPS

Herringbone Countertop DIY

To build our herringbone counter top we used 2×4 Premium Kiln-Dried Whitewood.

Herringbone Countertop DIY

We chose to go with a herringbone pattern for our counter top but we needed a game plan to determine all of our measurements for the pieces before we started cutting.

In order to figure out the lengths of the boards we first needed to figure out the length of the 45 degree angle and then divide that by two which gave us the length of the center of each board.

One side of each board needed to be cut at a 90 degree angle and the other side needed to be cut at a 45 degree angle.

All the boards needed to be the same length so to get the distance we just took the depth of our counter top and determined the hypotenuse (there are calculators online to do that) and then we cut all the boards the same length with the miter saw.

Herringbone Countertop DIY

We determined that the center of each board should be 13 ¾ inches so I took my measuring tape and marked that measurement on the center of the board. To double check that it is the center I measured the other way and made the mark.

I used the straightedge side of the board as my 90 degree angle. The 45 degree angle needed to intersect the center point I marked so I used a framing square and turned it until it showed 45 degrees and then slid it down the board until it met my mark.

Once it was on the mark I drew a line where I would cut the board on the miter saw.

Herringbone Countertop DIY

1. Once my first board was lined up for the cut on the miter saw, I used a scrap piece of wood and a clamp to make a stop so that all the following cuts would match and be exactly the same.

In between each 45 degree angle cut, I needed to cut another 90 degree angle cut so that I could turn the board and put the 90 degree angle cut against the stop to make the exact same 45 degree angle cut.

To do this I put a spacer board between my board so the actual 2×4 sat flush against the straight guard.

Then I changed the blade back to 90 degrees and I made the cut and then flipped the board around and continued making the 45 degree angle cut.

Herringbone Countertop DIY

2. After all the boards were cut, I started the process of attaching them together.

I used a drill press to drill a hole in the side of each of the boards to countersink the screws.

Herringbone Countertop DIY

3. I screwed pairs of boards together and then once they were all glued and screwed together I took all the “v” shapes that were created and screwed them together the same way all the way down until the counter top was completely joined together.

Normally, I would just butt the edges together and use wood glue. I would let the wood glue set up in a clamp and it would hold fine.

However, because these are cheap 2x4s I used and they had a bunch of knots in them, each of the boards might expand at different rates and it could make the seams come apart. The screws will make sure to keep all the pieces held together tight.

Herringbone Countertop DIY

4. I used a T-square to mark each side indicating on all the boards where to cut them for a straight edge.

Herringbone Countertop DIY

5. Once both sides of the counter top were cut to length square with the miter saw, I flipped all the boards over, lined them up, put wood glue in each of the seam and used large clamps to hold them together.

Herringbone Countertop DIY

6. Then I used a nail gun to drive finishing nails through the sides of the boards going from one board to the next on each side and then through the bottom going from one board to the next across the seams.

If the boards are bowed after being screwed together, you can straighten the bow by facing the highest point of the center up and then placing the clamp on the boards and tighten it until the boards straighten.

Herringbone Countertop DIY

7. I left the clamps on for a day or two while the glue dried and then used an orbital sander on the top surface of the countertop to remove any high points.

Herringbone Countertop DIY

8. Once the surface was flat, we stained the countertop being careful to get the stain in all the cracks. We used our favorite stain, Rust-Oleum Ultimate Wood Stain in Kona.

Herringbone Countertop DIY

9. Finally, before installing the countertop I used our table saw to cut sections of wood pine molding down to size to frame the countertop.

When the wood pine molding were cut to the correct size, I turned the boards on their sides and cut the edges straight.

Herringbone Countertop DIY

10. After staining the frame, we installed the sections of the countertop on our cabinet base and glued the frame to the edge of the countertop.

Herringbone Countertop DIY

11. We used painters tape to hold it in place while the glue dried.

Herringbone Countertop DIY

Check out our finished office cabinets or how to build a cabinet drawer.

After we installed the herringbone countertop, we secured the cabinets to the wall.

We are really happy with how our wood herringbone countertop turned out. It looks great on top of the gray cabinets. Our next DIY project will be building a desk with the same Kona stain and a gray front piece.

Our home office is coming together nicely and we can’t wait to share the final reveal.

PIN FOR LATER

A home renovation tutorial demonstrating how to build a wood herringbone countertop. If you are looking for a DIY countertop project check out this step by step guide that includes a DIY tutorial video.

Shopping for Our Back Patio

Power Shopping for our Back Patio

Details about our adventure power shopping for our back patio at At Home.

Power Shopping for our Back Patio

I am about to break a stereotype here. I am a woman and I do not like to shop. There I said it. I’ll wait a minute to let the gasps quiet down.

When it comes to shopping for our home I do it sparingly. I am very slow to pull the trigger on purchasing any decor or furniture pieces for our rooms. I used to get overwhelmed with the thought of decorating a space, wondering how I would know if all the pieces I picked out would work well together and if I actually liked what I was picking out or if I was just buying it because it was cute or on sale.

So I took a different approach that might be a slightly unconventional way of home decor shopping or an unconventional way of shopping for a female. I used this method on our past two room makeovers (the home gym and guest room) and it has worked well for me and allowed me to focus on the design of the space and the general style of our home ensuring that I choose pieces that we genuinely like.

My preferred method: power shopping.

Power Shopping for our Back Patio

Usually, our room makeover process goes a little something like this:

1. Brent and I plan out a room or space. We online window shop for ideas, create a vision board post, and we set a general budget for what we would like to spend on the room.

2. We list out all the DIY projects for the space that we want to tackle. Then we do all of our DIY projects first and make waaaaay too make trips to the hardware store.

3. I wait until all the DIY projects are done before buying anything for the room and then I stand in the room and make a list of all the new items I will need to purchase to make the room feel complete and make note of the amount left in the budget to spend on finishing touches.

4. I power shop for the items on my list all in one day, all in one shopping trip and I always bring along a shopping partner (usually Brent or my mom).

While this may not work for everyone, I have found my power shopping method works extremely well for me because my shopping trips are limited, I know my specific budget for the shopping trip, I don’t lose focus and I am tuned in to shopping for those specific styles and pieces. I always look for good deals and a fun splurge item as well.

I love coming home from a power shopping trip and immediately going to the room and arranging all the pieces in the space. It is so satisfying to me to buy just the right amount of items, that each items feels like it definitely fits the design of the space and that we genuinely like every single piece. It is almost like a challenge that I now enjoy. As long as it is only every now and then.

Power Shopping for our Back Patio

The next space we are making over is our back patio (you can see our plans here) so for my latest shopping trip, I brought Brent along with me and we power shopped for all the finishing touches we needed to complete our soon to be freshly made over and colorful outdoor space.

We were excited to do our shopping for our back patio at At Home because they have such a huge selection that it was almost a guarantee that we would be able to find everything we were looking for there and wouldn’t have to travel all over town like I normally do on my power shopping trips. So with a budget of $500, we set off on our shopping adventure.

Power Shopping for our Back Patio

The store is huge and the first thing you notice when you walk in the door is the large selection of indoor and outdoor decor and furniture they offer, especially cushions. If you are looking for cushions, this is the place to be. They don’t just have a wall of cushions to choose from they have aisles and aisles and aisles (I am not exaggerating) of every colored cushion imaginable and at prices that won’t make you cringe. Within each color are a variety of different shapes and sizes of cushions and matching pillows.

Power Shopping for our Back Patio

As I was testing out the cushions, I started daydreaming and it popped into my head that I am pretty sure you could build the largest cushion fort known to man in an At Home store. I am an adult so obviously I wouldn’t actually do that… but the possibility is there, just saying.

Power Shopping for our Back Patio

We brought our measuring tape to measure the different types of cushions to see what style would work best with our seating. Having all those options made us change our mind three times, but in the end we really did get the exact style and color cushions that we wanted. It was nice not to have to settle.

Power Shopping for our Back Patio

And remember, when the sign says “Ask for assistance when getting items off the top shelf.” It is there for a good reason. Brent learned this lesson. Ha. At least they were just cushions. I think Brent secretly wanted to have a cushion fight. And, the cushions won. I am telling you, there is just something about seeing all those cushions that brings out the kid in you.

Power Shopping for our Back Patio

If you are looking for outdoor pots, you definitely are going to have a hard time choosing your favorite from all of these. They cover a variety of styles so whether you are in to the big concrete planters or more of the colorful ceramic planters they have you covered for sure.

Just remember to be careful getting them off the shelves. Someone knocked three or four off the shelf a few aisles over from us and the kid in me yelled. “It wasn’t me. I am right here.”

Power Shopping for our Back Patio
After cushions, the next item on our list was an umbrella. I like that they put all the items they have on display so you can easily identify which color and style you want. We went with a 10ft. offset umbrella in a neutral color to balance all the color we are adding with our other pieces. The umbrella, stand and base were all $80. You can’t beat that price for that large of an umbrella. That one was a score.

Power Shopping for our Back Patio
The great thing about At Home is they not only have a lot of color options in just about every department but also a lot of styles within the colors and the colors all coordinate with each other throughout all the different pieces. If you want a blue chair you are not stuck with choosing the one blue chair offered but rather can choose whatever style blue chair that suits your taste.

We liked knowing that the blue chair would match our blue pillows because they all came from the same place. If you are a lazy shopper like me, then it takes all the guesswork out of running around to several stores to make sure your items coordinate perfectly. At Home already is set up in that way.

Power Shopping for our Back Patio
While they had some really cool blue chairs and it was hard to make a decision, we ended up going with the best bang for our buck and got five of these blue ones for $19.99 a piece because we needed several chairs to go around our outdoor table.

Power Shopping for our Back Patio
The best part of power shopping at one location is the look on the cashier’s face when we roll up with two carts full of stuff, half excitement, half dread. So. Many. Pillows.

Power Shopping for our Back Patio

It was a fun shopping for our back patio at At Home and as usual I was exhausted by the end but we have so much cool stuff for our outdoor space. We were able to get cushions, pillows, a rug, an umbrella and five chairs all for $500!

Power Shopping for our Back Patio

Then…we realized we had to fit it all in the back of my Jeep (the downside to power shopping). It took some strategy and patience to get an umbrella, 8×10 rug and five chairs in a small space but we did it and were super proud of ourselves and while in the parking lot we already got a compliment on our rug choice.

We can’t wait to show you exactly what we ended up picking out and how it all ties together with our back patio plans. Stay tuned to see how our back patio makeover turns out!

This is a sponsored conversation written by me on behalf of At Home. The opinions and text are all mine.

Building Office Cabinets

Building Office Cabinets

See how we built brand new office cabinets with a herringbone countertop for our home office makeover.

Building Office Cabinets

If you haven’t heard, we are expecting a baby in September! We are extremely excited about the new member of Gray House Studio and to begin all the fun nursery projects that are ahead of us. Speaking of the nursery, when we found out we were expecting one of the first things that popped into our head was, where are we going to put the nursery?

After some deliberating, we decided that as of now the best location for the nursery would be our extra room that is currently my office. That means my office is jumping across the hall to the front room next to our library. I am a little sad to leave this room but I am a glass half full kind of girl and am taking advantage of this move by convincing Brent to help me to create the office I always wanted in the new space.

Brent is is going above and beyond to help me transform this space, especially since I have been a little down for the count the past few months (so many naps). I literally fell asleep in a chair in the garage while he was working. Ha.

You can read all about our plans for the home office here.

Our first DIY project in our home office was to build office cabinets that spanned one entire wall of the room. Currently, if my office is a mess, I can just shut the door and visitors will never know it is there. But now that I will be working out of the front of our home, the office will be the first room guests see when they walk in our door and there are no doors to hide behind. I need all the help I can get to keep this new space nice and organized.

My dream was to have a wall of gray office cabinets in this space and the past month Brent has been working his butt off to make this a reality and the cabinets he built turned out AMAZING! From just a few sheets of plywood he made my organization dreams come true and he did it all for around $300.

This project was a big one and between me falling down on the photographing job (so many naps) and lots of late nights working to get the cabinets finished as fast as possible, we didn’t document as much as we intended so this isn’t as much a tutorial as a behind the scenes look at how these cabinets came together but we do have tutorials on how to build and install the drawers and how to create the herringbone countertop that you can check out.

2022 Personalized Christmas Ornaments
*** Thanks so much for supporting our small shop – Moon Rock Prints – this holiday season! ***

Our office cabinets came together in eight phases:

1. Building the base/frame.
2. Building and installing the drawers
3. Building the drawer faces and the doors
4. Painting the drawer faces and doors.
5. Painting the base/frame
6. Attaching the drawer faces and installing the doors
7. Building and attaching the wood herringbone countertop
8. Attaching the hardware

1: BUILDING THE BASE OF OUR OFFICE CABINETS

Building Office Cabinets
^^^ For the base of our cabinets we used one sheet of 3/4″ plywood.

Building Office Cabinets
^^^ Brent used the table saw to cut the sheet of plywood into to four pieces. These pieces are the sides of our cabinets so he cut them to the height and depth the cabinets needed to be to fit the space.

Building Office Cabinets
^^^ He used a framing square to mark where the toe kick would be on the bottom front of each of the four boards.

Building Office Cabinets
^^^ Then using the table saw he cut this square piece out each of the the boards.

Building Office Cabinets
^^^ Next, Brent cut the horizontal braces that would connect the sides of our base together.

Building Office Cabinets
^^^ After he made all of the cuts, we had the pieces ready to start building the base.

Building Office Cabinets
^^^ For the top back horizontal brace, he used a nail gun to secure two boards together in an L shape to make a stronger brace to support the countertop and allow us to anchor the cabinets to the wall.

Building Office Cabinets
^^^ Brent used wood glue, a nail gun, and finishing nails to build the base. It came together rather quickly and after he finished one side he had to build the second side of the base. Then he added the shelves in the middle of each base. Check out a little behind the scenes video of how this part of the cabinet building process came together here.

BuildingOffice Cabinets
^^^ Once both sides of the base were finished, we brought them into the room.

Building Office Cabinets
^^^ We attached the two pieces together with additional braces. The middle section would eventually become large drawers.

Building Office Cabinets
^^^ Next, Brent worked on creating the frame of the base. He use the miter saw to cut the pieces down to the correct length.

Building Office Cabinets
^^^ He used the table saw to cut the pieces down to the correct width.

Building Office Cabinets
^^^ To attach the frame to the base, he put wood glue on the back of the pieces and held them in place with painters tape while they dried.

Building Office Cabinets
^^^ Now that our base was built and our frame attached, we were ready to start building the drawers.

2: BUILDING & INSTALLING THE DRAWERS

Building Office Cabinets

We needed four doors and five drawers for our office cabinets. Brent was able to get his drawer building technique down to be as efficient and quick as possible which meant this part of the project went quickly. If you are interested in how we built and installed the drawers in our cabinets, check out our drawer building tutorial.

3: BUILDING THE DRAWER FACES AND DOORS

Building Office Cabinets
We used 1×2 select pine for our doors and drawer faces. To attach the rails and stiles together Brent used pocket hole screws. For the recessed piece in the center we used 1/2″ plywood that was glued to the backside of the frame.

4: PAINTING THE DRAWER FACES AND
DOORS

Building Office Cabinets
When it came time to paint the doors and drawer faces we went to my trusted paint guru, my dad, to help us pick out the right type of paint for our office cabinets. We used the ProClassic® interior waterbased paint from Sherwin-Williams.

I wanted the cabinets to be just slightly darker than the walls so we chose to go with Dovetail SW 7018 because it is on the same color swatch as our walls, Mindful Gray, just two shades darker and Dovetail is already on the walls in my current office so we knew we liked the color.

My dad has a spray gun and was kind enough to spray a few coats of paint on all of our of our doors and drawer faces for us. He even delivered them to our house when he was done. Thanks Dad! They turned out great!

5: PAINTING THE BASE

Building Office Cabinets
Next we took the same paint used on the doors and drawers and painted the base and frame of our cabinets. We put on one light coat on, let it dry, sanded it down, and then put a second coat on. We were just intending to paint the frame of the cabinets but then ended up painting the entire thing including the inside. I am glad we did because it makes it feel complete.

6: ATTACHING THE DRAWER FACES & INSTALLING THE DOORS

Building Office Cabinets
To attach the drawer faces to our drawers we used double sided tape to hold the piece to the drawer while we secured it with screws through the drawer from the back. We started with the three middle drawers then worked our way outwards.

Building Office Cabinets
We ran into a slight hiccup with our doors and the hinges we had purchased. They were too big and because our doors are so close together, when they would open they would rub against the drawers. We ended up using the smaller hinges from our IKEA bookshelf doors and they worked like a charm!

Building Office Cabinets
After all the doors and drawers faces were on, our base was finished!

7: BUILD WOOD HERRINGBONE COUNTERTOP

Building Office Cabinets
Then it was time to focus on the countertop for the cabinets. We kicked around several different ideas before deciding that since the countertop was more for decor purpose and wouldn’t get a lot of heavy use, it was a great time to try a herringbone pattern that we have been wanting to make. We plan on making the top of our coffee table in our library also with a herringbone pattern so it should all tie in nicely together.

I have to say, I am pretty impressed with how Brent made this herringbone countertop. I love the pattern and of course that is is stained in our favorite Kona colored stain. You can check out the full tutorial on making a DIY herringbone countertop here.

8: ATTACH HARDWARE

Building Office Cabinets
Finally, we added the hardware. I had my eye on these drawer pulls from Rejuvenation but at $55 a piece, we couldn’t afford them especially since we needed to buy nine of them so we took to Amazon and after lots of searching, wouldn’t you know we found some that were pretty dang similar for only $9.48 a piece. That was a happy day indeed.

Building Office Cabinets

OFFICE CABINET DETAILS

DRAWER PULLS: 5.7-Inch Drawer Pulls in black
PAINT: Sherwin-Williams ProClassic® Waterbased paint in Dovetail SW 7018
COUNTERTOP STAIN: Rust-Oleum Ultimate Wood Stain in Kona

*This post contains an affiliate link. You can read our disclosure policy here.

Building Office Cabinets

After the cabinets were finished, it took me about two days to move everything from my old office into my new cabinets and it felt so nice to purge things that were not needed and give the things I do need a place of their own to go back to. I have said it time and time again but I truly believe the key to organization is having specific places to put items back after use. Everything fit perfectly in the new cabinets and I even had a little extra space.

Check out how to build a herringbone countertop or how to build a cabinet drawer.

We are really happy with how our office cabinets turned out and are excited to continue working on our home office makeover. Our next project is build a brand new desk that will better fit in this space. I can’t wait!

Building Office Cabinets

back patio ideas

Back Patio Ideas

We are making over our backyard this spring! Here are our back patio ideas for redoing the outdoor space.

Back Patio Ideas

Spring has always been my favorite time of the year. Mostly because my birthday is during spring (yay for April birthdays) but also because it is the best time of the year to spend outside here in Houston before it gets miserably hot.

One of the features that sold us on our home was the backyard. It is small but it backs up to a greenbelt which means there is not a house directly behind us, just lots of tall trees. It is a gorgeous and peaceful view because we have a low iron-rod fence.

Current Back Patio

Back Patio Ideas

The back patio on the other hand leaves more to be desired. It is just two slabs of cracked concrete with two chairs on it. If you have been following along for awhile now you might remember that revamping our back patio was on our home renovation goals of 2015. Sadly, it didn’t make the cut in 2015 but this spring we are determined to make the space more inviting, comfortable and cozy so we can enjoy our beautiful view.

Currently, our concrete slabs are a mess, there is absolutely no landscaping, and minimal mismatched furniture is scattered on our bare patio so this outdoor space is in some serious need of TLC.

Back Patio Ideas

Back Patio Ideas

We will be giving our concrete a refresh with some stain and add a new fire pit area with crushed granite as well as lots of new flowerbeds and landscaping.

We plan on creating three defined spaces on our patio: a dining area, a lounging area and a conversational/fire pit area. We will also have a separate little grilling area. We feel like by creating these spaces our back patio will feel much more complete and as if the pieces we are adding are intentional. As well as just provide a more cohesive and cozy feel with plenty of space for entertaining. While browsing online, we found a nice selection of bright colored decor pieces on the At Home website that will help us capture our vision.

Dining Area

If you remember from our canopy of string lights, I am a big fan of the backyard in Parenthood. We have our string lights, so now I want an outdoor dining area to gather around and eat outside. We will build our table but the accent pieces in this area will really make the space complete.

Back Patio Ideas

chair  /  lantern  /  plant stand

We would love to put bright wicker chairs from At Home around the table to brighten up the space and add lanterns and a planter to the table. Then round out the space with a bright blue plant stand in the corner with a nice, big plant.

Lounge Area

I love reading and I find reading outside relaxing, so I am really excited to create a cozy lounge area in the far corner of our patio. To refresh this section, we plan on building a sectional and adding bright colored cushions on the seating as well as lots of vibrant, plush pillows. A large offset umbrella would be much needed to provide shade over the sectional.

Back Patio Ideas

umbrella  /  pillows  /  rug  / side table  /  cushion  /  planters

A bold blue rug would be perfect under the sectional and coffee table to define the lounging space and tie in the blue and green colors in the pillows and chairs around the outdoor table. I would love to include some side tables on the side of the sectional. A couple of interesting planters on the coffee table filled with succulents will complete the space.

Fire Pit Area

We will create a brand new space off the patio with a fire pit. We will build our fire pit in the center and put our orange zero gravity chairs around the fire pit with a side table between the chairs.

When it comes to an outdoor refresh for spring, bright colored decor and lots of greenery come to mind. Our house is fairly neutral so the back patio is our chance to incorporate our favorite colors and surround the patio with lots of plants.

We are really excited to start making our back patio ideas a reality and can’t wait to start our backyard projects and to go shopping for decor pieces at At Home to transform our sad outdoor space into a backyard oasis.

This is a sponsored conversation written by me on behalf of At Home. The opinions and text are all mine.

How to Replace a Thermostat

How to Replace a Thermostat

Learn how to replace a thermostat and test the air conditioner to make sure the thermostat is broken.

How to Replace a Thermostat

OUR SUPPLIES TO REPLACE A THERMOSTAT

screwdriver
wire strippers
18 gauge wire
wire nut
Honeywell RTH6580WF Wi-Fi Thermostat

*This post contains an affiliate link. You can read our disclosure policy here.

When you live somewhere for several years your home becomes the setting of many stories and memories. If you are like us, sometimes a house even gets a few stories of its own. There are many running jokes between Courtney and I referring to peculiar things about our home.

First there is Walter the friendly ghost who receives AARP magazines and is always leaving the garage door open and the toilet seat up. Then there was Henry, the friendly red bird that peacefully eats bird food outside while telepathically communicating with our cat Jake. And, we must not forget the monster that lives in our laundry room that eats socks. It is still up in the air if the sock monster prefers clean or dirty socks.

We are well aware that each of the previously mentioned stories are mostly fictional but one thing we are sure of is that inevitably the hamsters that turn the big wheel in the air-conditioner always go on strike when the weather turns hot.

Last year, the first week the weather got above 90 degrees we caved and called the repair man when the inside of our house finally reach 85 degrees. After spending a small fortune to replace all the A/C components in the attic, we slept easy all summer in our cool house. But, wouldn’t you know the first weekend it heated up this year the temperature slowly climbed in our house but our A/C would not kick on.

Determined to not spend a fortune again this year, I set out to figure out how to fix it myself. (spoiler alert) After a late night we were able to fix the A/C problem ourselves because luckily it was due to the thermostat and not the air conditioner itself. Below is how we tested our thermostat and compressor to determine which one was causing the air conditioning system to fail.

How to Replace a Thermostat Video

In the video below I will show how to test to see if it is in fact the thermostat that is not working and then the steps to replacing a thermostat.

To see a new DIY tutorial video every Thursday, subscribe to our channel ⇾

We chose to replace our thermostat with a Honeywell WiFi thermostat because this will allow us to control the thermostat from anywhere and eventually incorporate it into a smart home system. Plus, this is the least expensive smart thermostat costing only $87.99.

1. Test the Thermostat

How to Replace a Thermostat
The first thing we did was change the batteries to double check that the batteries weren’t the issue. After changing the batteries we turned the temperature down to see if the compressor would turn on but nothing happened.

Once we tried the cool mode, we flipped the switch on the thermostat to heat and turned the temperature up. Once on heat mode, the heat kicked on. Because the thermostat was able to turn on the heat, we couldn’t be confident that the thermostat was broken. There was a chance that something was wrong with the compressor.

The next step was to check if the A/C could be hardwired on, bypassing the thermostat. If hard-wiring the A/C on worked we would know the thermostat needs to be replaced.

2. Test the Compressor

How to Replace a Thermostat
Once the thermostat is removed from the wall there should be several colored wires exposed.

Red Wire: Power (24 volt)
White Wire: Heater
Yellow Wire: Compressor
Green Wire: Fan

How to Replace a Thermostat

By using a wire to connect the red wire to the yellow wire the compressor should turn on. If the compressor does not turn on than the problem is the compressor not the thermostat. In our case the compressor did turn on, indicating that the thermostat was not working.

(The red wire should only be 24 volts but it can still create a small shock)

3. Turn Off Breaker

How to Replace a Thermostat

Although the 24 volt power line doesn’t pose any huge safety concerns, it is good practice to always turn the breaker off before disconnecting any wires. The two breakers to turn off are labeled A/C and furnace in our house.

4. Check the Wires

How to Replace a Thermostat

After installing the new thermostat back plate we realized the new Honeywell WiFi thermostat needs a 5th wire, the “C” wire. In hindsight this is a good thing to check when purchasing a new thermostat although it is getting harder to find thermostats that don’t need a “C” wire.

How to Replace a Thermostat

Luckily, we were able to locate the 5th wire. It was snipped off because it was not needed for the old thermostat. We were able to pull the the wire out from inside the wall and strip the wire making it usable.

5. Hook Up the Thermostat

How to Replace a Thermostat

Each color wire connects to the screw terminal with the matching initial.
Green Wire to G
White wire to W
Red Wire to R
Yellow Wire to Y

With all the wires connected, we popped on the front of the thermostat and turned the breakers back on. The nice thing about replacing the thermostat with a “C” wire thermostat is there are no batteries required.

We have our fingers crossed that this is the extent of our Spring air conditioner problems. At least next year the troubleshooting will be easier because there is only one component left in our air conditioning system that has not been replaced.