
In this how-to woodworking tutorial we are sharing how to build a drawer and how to install a drawer.

How to Build a Drawer
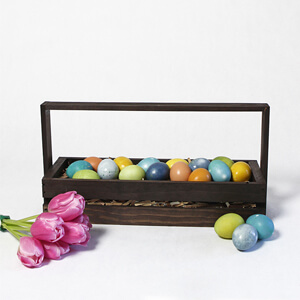
DIY Wooden Easter Basket Centerpiece
How to make a simple DIY wooden Easter basket centerpiece filled with naturally dyed eggs.
Planning Our Home Office
Today is all about new projects and a new room makeover as we start planning our home office.
For as long as I worked in a cubicle I dreamed of having my own office. And not just any office, an office I could design and decorate myself … and preferably at home. When we were looking for our house two years ago the number one item on my list was a room that could be our home office. When we found our house with the perfect room for my office that even had the french doors I wanted, I finally made the leap to starting my own web development business and working out of the office in our home.
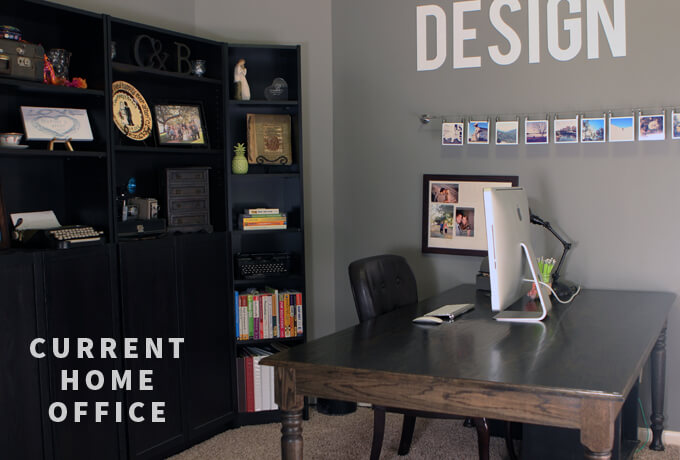
I have been really happy ever since. I still love this room, mostly because it is the room in our home that I spend the most time in during the day. For the most part I had it decorated close to what I wanted. I love the large desk which was the very first piece of furniture Brent ever made me.
But while it was close to what I wanted my office to be, it wasn’t quite there yet. I didn’t have that deep down gut feeling that this room was 100% finished. Obviously because it didn’t have the wood floors I wanted yet but also because of lack of organization. The large black shelves are from my first apartment and while they worked fine in that space and have been okay in this space, sometimes I feel like they are swallowing the room and making it feel smaller than it is.
My office was at the bottom of the list when it came to rooms to work on (our garage/shop is always at the top but consistently gets bumped, poor Brent) until suddenly we decided to shuffle some rooms around. Just like the guest room makeover, something comes up and the list goes out the window and suddenly we find ourselves knee deep planning a makeover in a room we weren’t expecting. And I couldn’t be happier.
We are now starting the process of moving my office across the hall to the open room that is now our “studio” aka empty room we shoot our videos in that is next to our library. I’m saying bye to my french doors even though I will be looking straight at them from my new desk view and I am even saying bye to my current desk. I am super sad about this because Brent built it for me. He is not sentimental in the slightest when it comes to furniture. I’m all, “But you made it for me!” His response, “I’ll make you a new one.” Luckily, I found it a good home where I know it will be appreciated and get a lot of use.
Our thinking was if we are going to spend the time to move everything, we might as well take the time to make it feel 100% right. So that means new desk, new storage solution (custom built cabinets, yay!) and some other really fun projects that we are really excited to tackle.
You may be wondering why I am moving my office out of the perfect office room. Well, that is because… it’s a surprise. Gray House Studio always seems to have exciting things on the horizon these days and we can’t wait to share what we have coming up next. But you will have to wait just a little bit longer to find out…
Planning Our Home Office
Now, sit back, relax and let me walk you through how we are planning our home office. If this were Fixer Upper I would have homemade cookies warm from the oven and freshly squeezed lemonade in mason jars garnished with lemon slices for you. Good thing you can’t see through the computer at what is really sitting on my table right now as I type this (a half eaten package of Twizzlers).
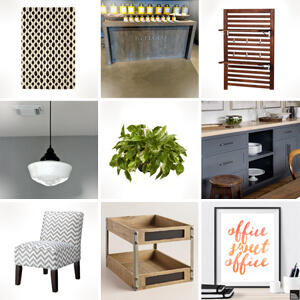
Here are our ideas and inspirations for how we want to transform this room into my perfect work environment.

Geometric Rug
It is not in the budget or time frame to do wood floors yet, sigh, but one improvement we can make right away is to add a large rug. I plan on having my desk float in the middle of the room. I am not very productive when I stare at a wall but that means cords will have to make their way to the wall somehow and a large rug is the perfect way to hide and keep me from tripping over the cords. I really like this rug, it is neutral but has a fun pattern to keep it interesting.
New Wood Desk inspired by display at Restoration Hardware
I still can’t believe I have to part with that huge desk Brent built me but one weekend when Brent and I were window display shopping, that is where we go around and act like weirdos by taking pictures of all the store displays to get ideas for our home, we came across this really cool wooden table at Restoration Hardware used to display teas. We both instantly knew it was the perfect inspiration for the new desk we would build for our home office. We are pretty excited about this project.
ÄPPLARÖ Wall Panels
These wall panels from IKEA really have me thinking about creating a large indoor plant wall display on the wall behind my desk. I am not sure if we would modify this exact piece or make our own wall trellis of sorts to pull off this look. My web development business is named Naturally Design so I really like the idea of incorporating a lot of natural elements and what is cooler than a plant wall display?
Schoolhouse Pendant Light
We are already ahead on this one. Last year we updated the lighting in the room by taking down the old, gross 90’s fixture and replacing it with our own DIY version of a Rejuvenation schoolhouse pendant light. We still really like how this looks in the room so it will be staying.
Plants, Lots of Plants
Like I mentioned before, I really want to incorporate a lot of greenery in this room especially on the accent wall. I am 50/50 on whether I want to really step up my game in trying to keep plants alive or just get realistic looking faux plants. Maybe I will do half and half.
Cabinets
The cabinets are the first project we will be building and I am really excited about this project. It is the first time we will build custom cabinets, dipping our toes in the water before we do the bathrooms or kitchen I suppose. I can’t wait to finally have a designated space to organize all my office supplies and files. The best part of DIY, being able to build pieces that exactly fit your needs. We plan on painting them a nice gray color and then adding a butcher block top.
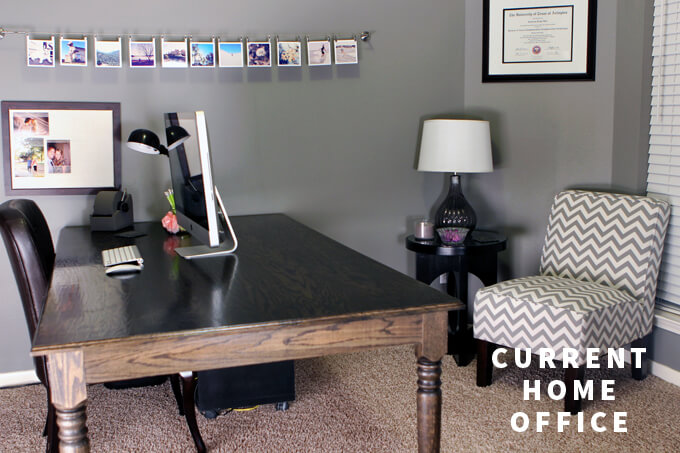
Gray Chevron Chair
As you can see in the picture above, I already have this chair in my office. I got it a year or two ago and love it. It is comfy for my clients to sit for long client meetings and it isnt’ too big so it fits well in the space and of course it is my signature neutral with a fun pattern. Because obviously I am slightly afraid of color, well except in the guest room. This chair makes the cut and will be moving across the hall.
Wood and Metal Desk Tray
I love organizing and I love paper so I really love this wood and metal desk tray. I am looking forward to tackling a few smaller DIY organization projects for my office with Brent like building a similar tray, a computer stand, business card holders, and maybe a new iPad stand.
Office Print
I am planning on having the pops of color in this room come in the form of some fun and motivational framed prints to display in the office. This one seems appropriate since I spend so much time here.
That is what we have planned for the next two months. I am pretty excited and thankful that Brent has graciously set aside his long overdue garage makeover to help me make this room feel 100% finished. Be sure to follow along as we post all of the projects we build for this room as well as stay tuned for our final reveal of our new home office.
Behind the Scenes: Cabinet Building Part 1
We have started a vlog! We thought it would be fun to share what really happens during our project building sessions, the good, the bad, the funny and maybe the mundane (Brent gives a short math lesson and then realizes he did the math wrong). In this vlog we are working on the first part of our cabinet building project and Brent gets a little sidetracked.
To see more of our behind the scenes videos, subscribe to our channel ⇾
DIY Headboard For Under $50
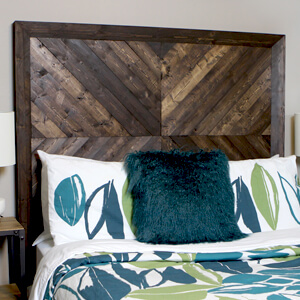
We built a DIY headboard inspired by the Alexa bed from West Elm for under $50 for our guest bedroom makeover.
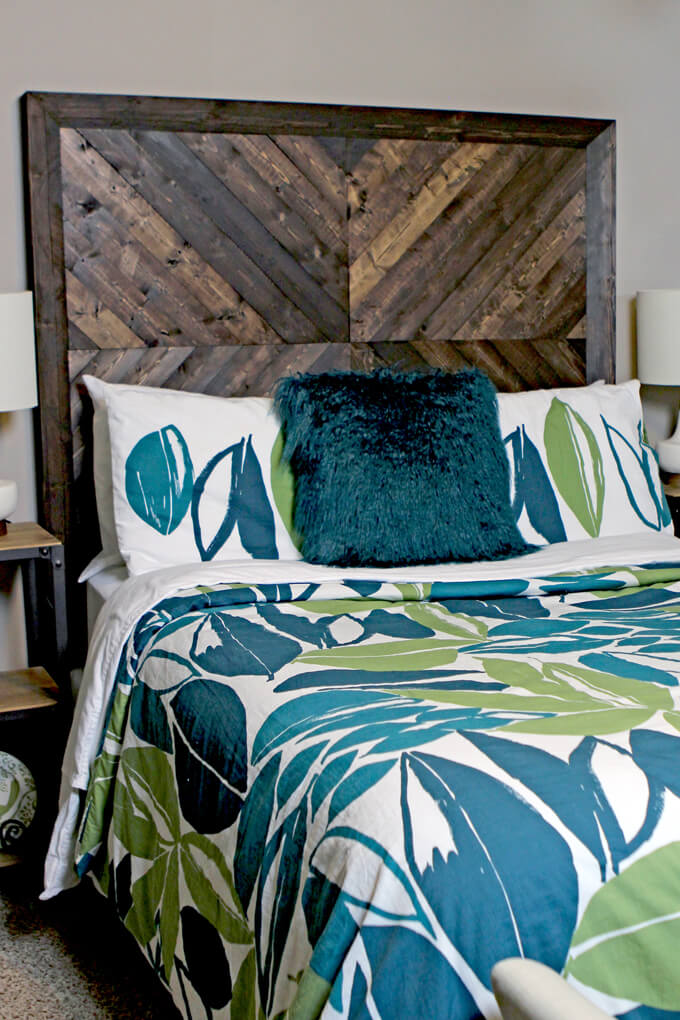
We are excited to share one of our latest DIY projects, the DIY headboard for under $50 we made for our guest room bed.
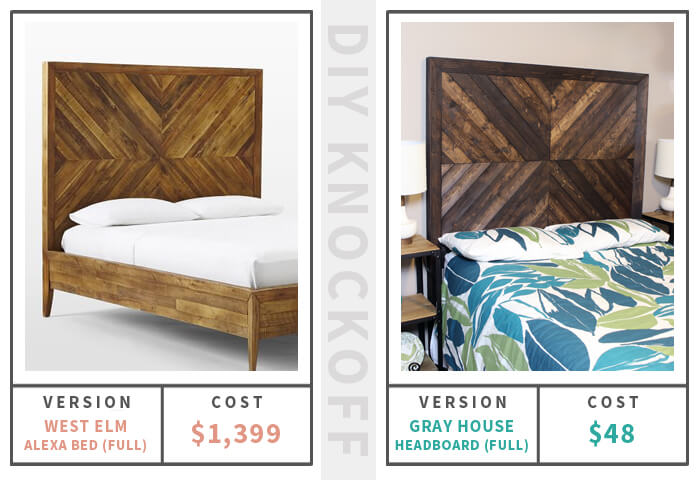
Courtney really liked the Alexa bed from West Elm but that bed was way over our budget for the entire room let alone just the bed. So in an effort to get the look we wanted without the price tag, we built our own version of the headboard on the Alexa bed for only $50.
Our comforter covers the bed frame so we didn’t find it necessary to build a new matching bed frame right away but the way we attached our new headboard to our existing frame leaves us open to building a new matching bed frame in the future.
Keep scrolling down to see the steps as well as the materials and tools necessary to make a DIY version of the headboard on the Alexa bed from West Elm for only $50.

How To Build A DIY Headboard
SUPPLIES
Shop the products we used for this project in one place.
- 2″ x 4″ Whitewood
- 1″×4″ Pine Furring Strip
- Wood Glue
- FClamps
- Miter Saw
- Table Saw
- Drill
- Kreg Jig R3 Pocket Hole Jig System
- Pegboard
- 1/2″ Panhead Screws
- Rust-Oleum Wood Stain, Kona
FYI: This post contains a few affiliate links to products we used to make this project. Gray House Studio does receive commissions for sales from these links but at no extra cost to you. We appreciate you supporting this site. Read our privacy and disclosure policy. You can also easily shop our recommended products here.
TUTORIAL VIDEO
[yotuwp type=”videos” id=”qg2sm5bIaLg” title=”off” description=”off” player=”width=590&modestbranding=0&showinfo=0″]
Subscribe to our YouTube Channel
Like our video? Subscribe and help us reach our goal of 100k subscribers.
STEPS
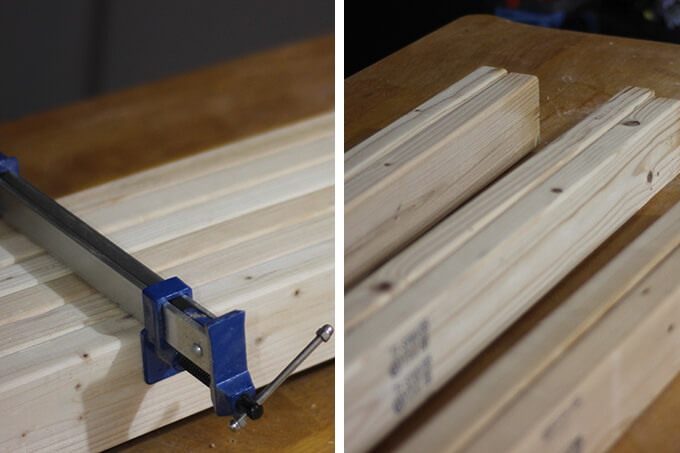
1. To save money we glued two 2x4s together for the legs and top board of the frame instead of buying 4x4s.
Once the wood glue dried we cut the boards down to length with the miter saw. Then cut them to three inches square with the table saw.
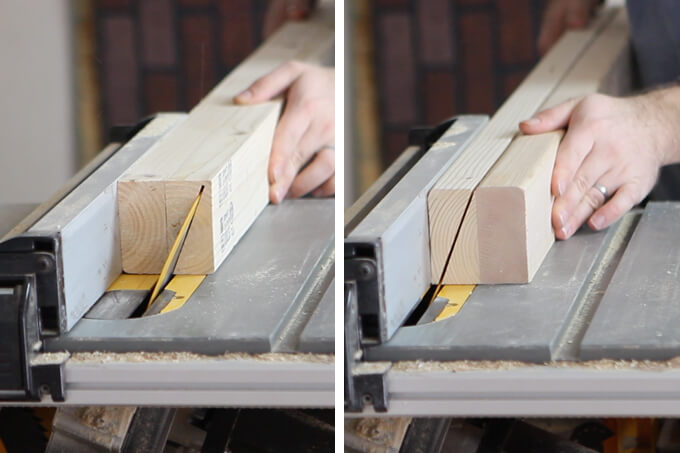
2. With all the boards cut to the correct size, we set the table saw up to cut at a 22.5 degree angle which was the angle used to cut the angle on the face of the frame.
Our blade was not long enough to cut all the way though the board so we turned the board over to finish the other side of the cut.
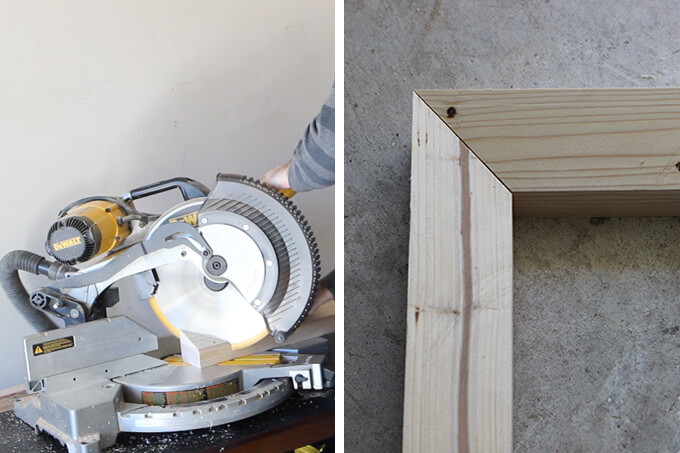
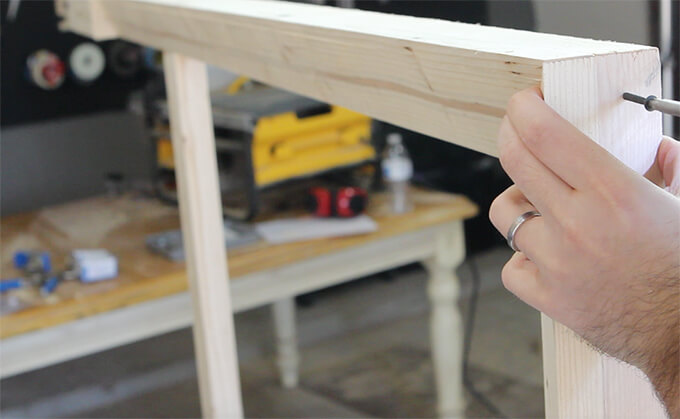
3. The top of each leg and both sides of the top board were cut at a 45 degree angle to form a miter joint.
4. Next, we cut the supports and bottom leg pieces to allow the frame to attach to the bed.
The bottom leg pieces are cut from the excess board from the 22 1/2 degree cut.
This will offset the angle previously cut on the bottom of the legs so they are square with the bed frame when attaching.
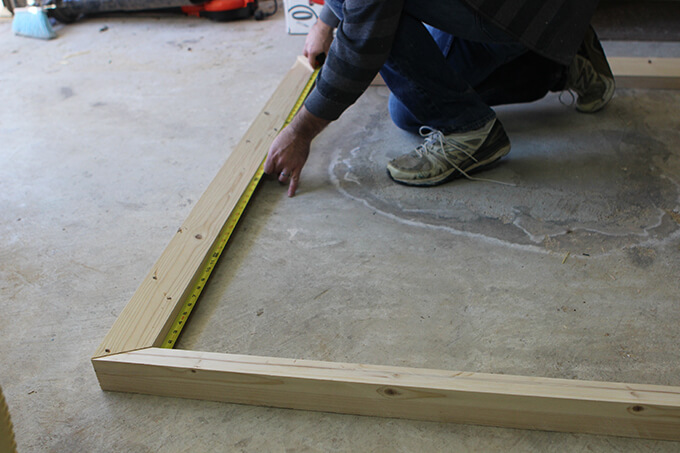
5. Before cutting the braces we measured the inside of the top of the frame so we would know how long to make the braces.
6. For the center brace and six small braces we used a 1×4 inch pine furring strip and for the bottom brace we used a 2×4.
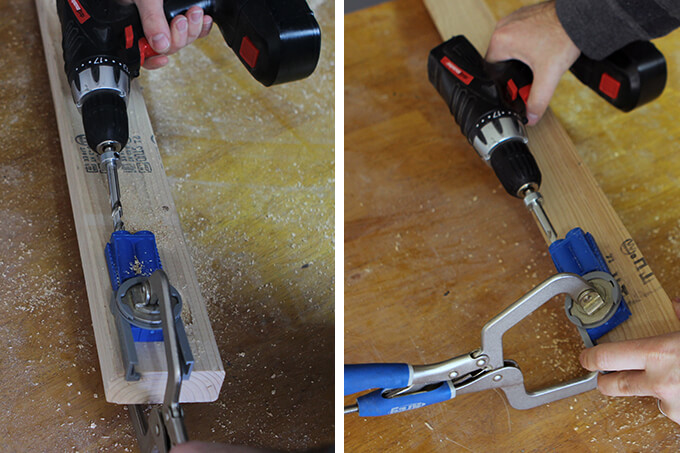
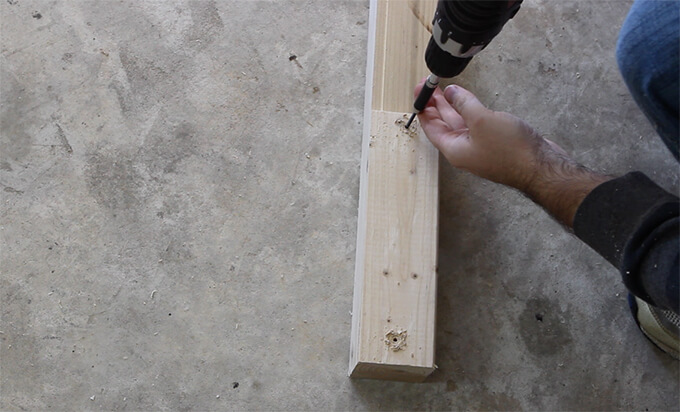
7. To attach all the boards together we used a drill and pocket hole screws and drilled pilot holes using a Kreg jig.
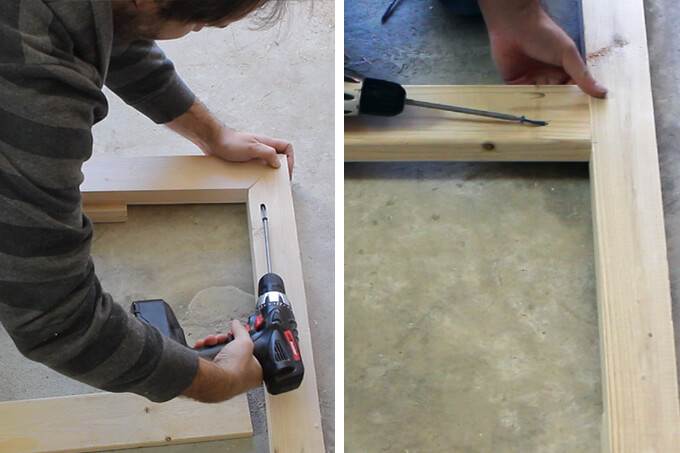
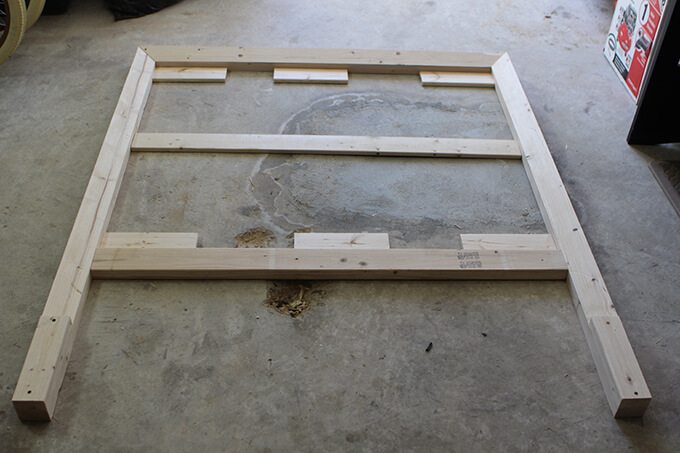
8. To start assembling the frame we secured the top corners of the frame with one pocket hole screw in the inside of each corner. Then added the bottom brace making sure all the pocket holes were on the back.
9. With the bottom brace attached, we stood the frame up and drilled pilot holes in the top of the headboard. Because the wood in the corner of each miter joint is thin, we couldn’t use pocket screws but since this headboard will be five and a half feet tall, these screws won’t be noticeable.
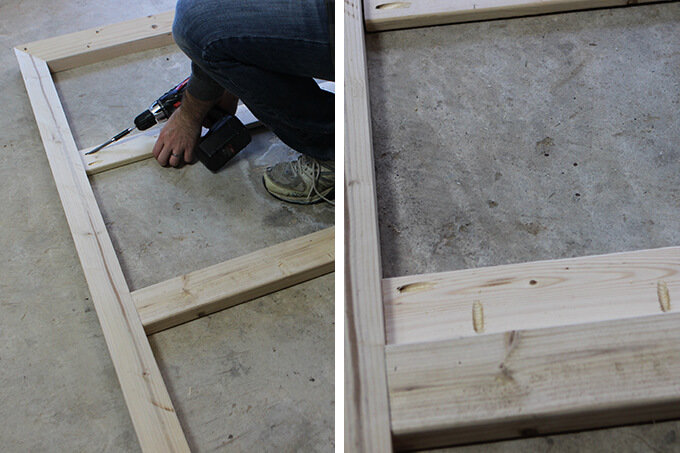
10. The 1×4 braces will be covered up so we were fine securing them to the frame with the pocket holes facing up. With the frame assembled we were ready to add the backing board to support the slats.
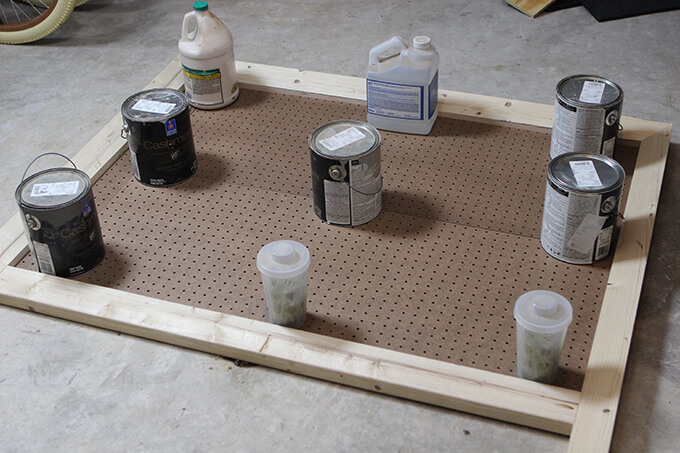
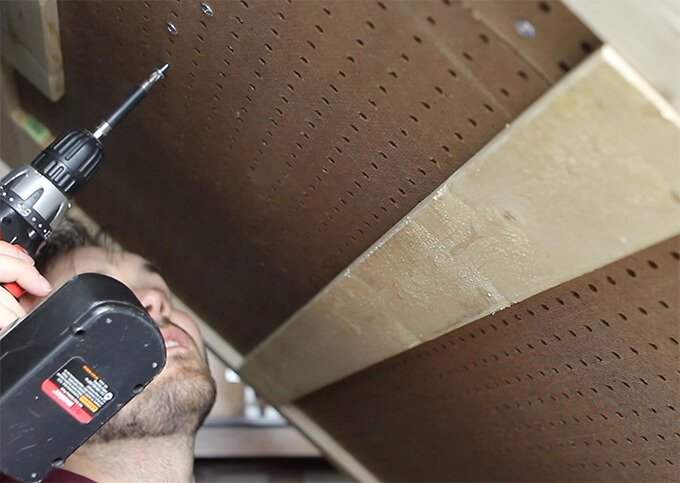
11. We chose to use pegboard as the backing board because it is cheap, durable and already has holes drilled in it.
We put wood glue on all the braces to attach the pegboard.
We used paint cans and various other heavy objects laying around the garage to hold the pegboard in place while the glue dried.
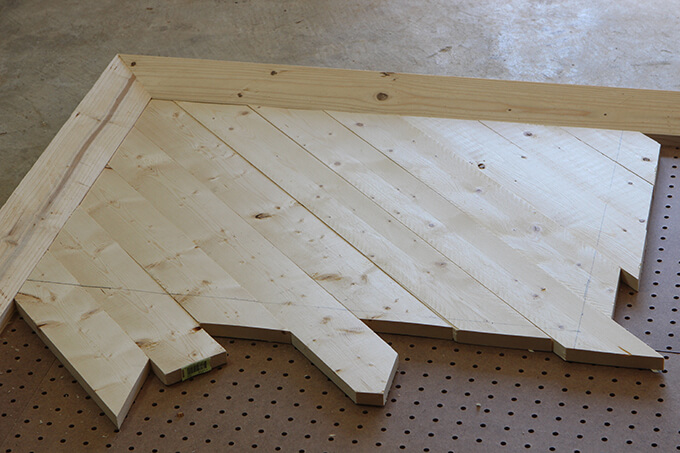
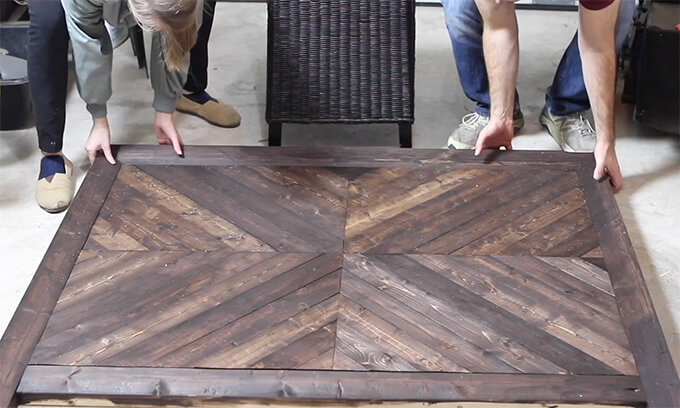
12. After the glue was dry we started laying out the 1×3 inch slats.
I worked on each quadrant separately and started by cutting the boards so they were slightly longer than needed and sat flush against the frame.
Then we used a measuring tape to mark the center of the headboard. We used a straight edge to draw a line where all the boards needed to be cut.
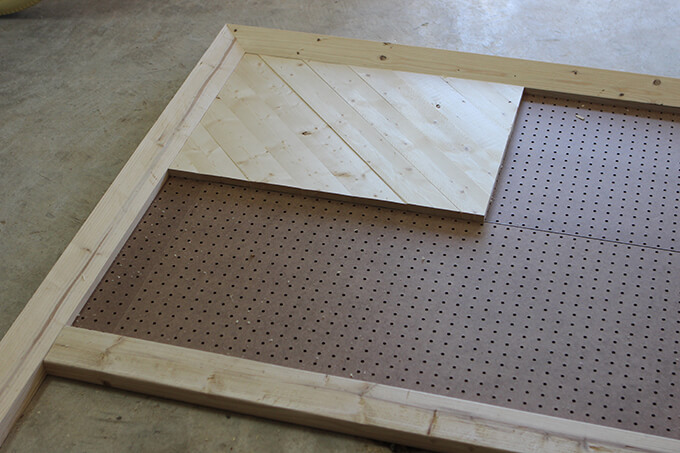
13. Then we did the same thing for the bottom of the boards. This made it very easy to make sure that all the boards were aligned perfect after being cut at a 45 degree angle on both sides.
14. While I worked on cutting all the boards Courtney was hard at work staining all the boards with our favorite stain and there were a ton of boards.
She has a great eye for varying the darkness of the stain so it looks balanced yet random.
15. After the stain dried we set the slats back on the pegboard and propped the headboard up on a chair to secure them through the back with 1/2 inch panhead screws.
This is where the pegboard came in handy because I could see the edge of each slat and make sure I put all the screws in the right place and didn’t miss a slat.
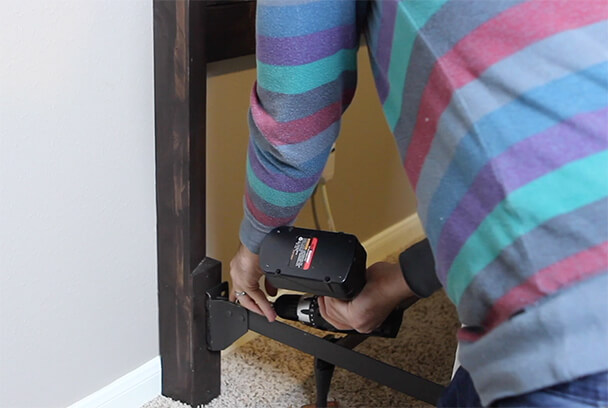
16 Finally, with everything attached, we carried the headboard into the guest room and attached it to the bed frame with two inch screws and large one inch washers.
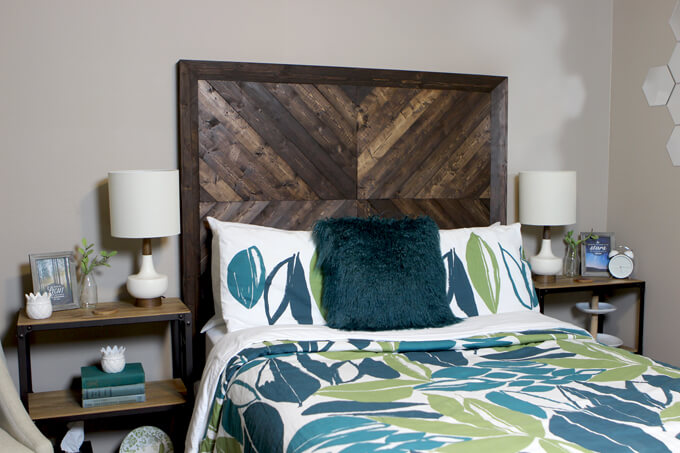
We are really happy with how this project turned out. Our DIY headboard knockoff looks very similar to its much more expensive counterpart but it didn’t blow the budget and we were able to customize it and use our favorite color stain so it matches the other projects in the room and house. Plus, it really upgrades our existing bed and was fun piece of furniture to build.
PIN FOR LATER
![]()
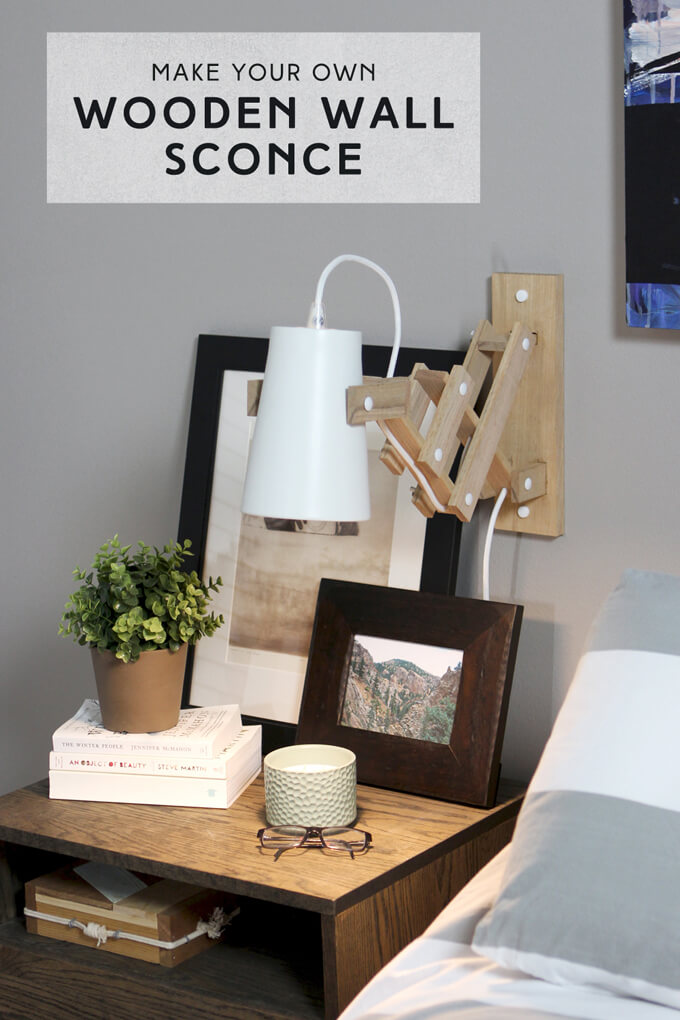
DIY Wooden Wall Sconce
If you are interested in making your own DIY wooden wall sconce like the one below, we would love for you to enroll in our Bob Vila Academy course.We appreciate your support!
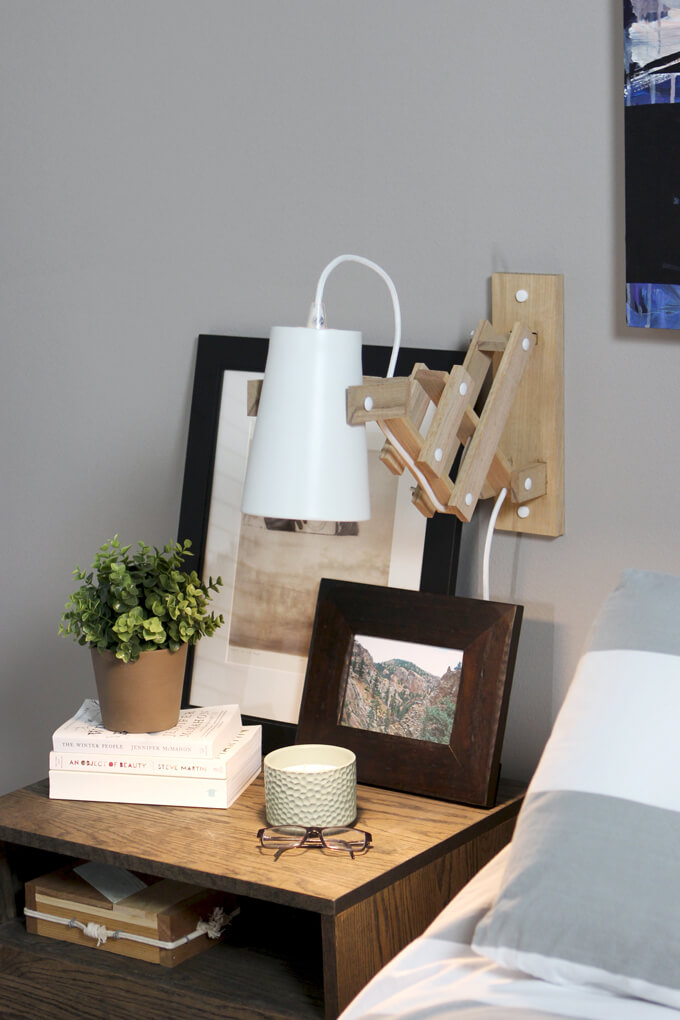
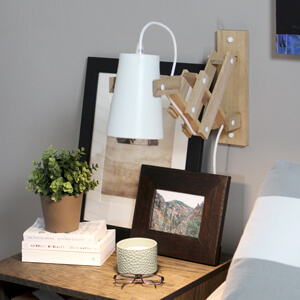
We have a cat. A cat that likes to knock over every last thing on my nightstand to try and wake me up when he is hungry at 5:00 in the morning. He knows no boundaries. Recently, he knocked my lamp off and then proceeded to fall off the nightstand with the lamp and land in the lamp shade. This resulted in a Jake’s paw sized hole in my lamp shade. He has no grace or balance either. I proceeded to scold him in my half asleep state, “This is why we can’t have nice things!” He meowed and walked away. He apologizes to no one.
The lamp and lamp shade were from my college days and while I hate to see anything get ruined, they were old and it was at least an excuse to finally begin a lighting project we have been wanting to work on in our master bedroom for awhile now, a DIY wooden wall sconce for each side of the bed.
I was really excited about this project, one because the DIY wooden wall sconce we were going to build for each side would look much nicer than the mismatched lamps and lamp shades we currently had and unless Jake possesses some cat hulk strength I don’t know about and could rip them from the wall, they were safe from being knocked over.
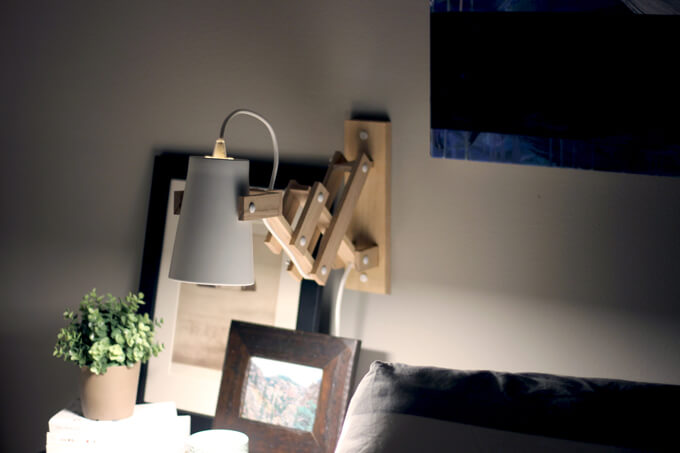
Building our DIY Wooden Wall Sconce
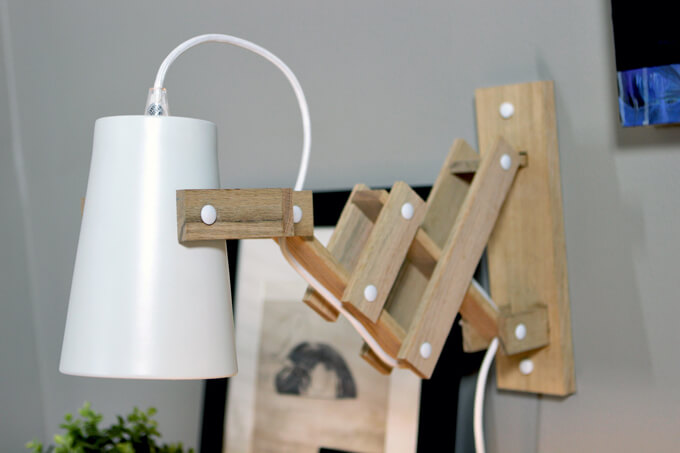
We made the modern accordion DIY wooden wall sconce base for each side of the bed out of oak. We were not sure what we were going to do for the lamp shade but then while browsing around IKEA for a cloth light cord set we stumbled upon these ceramic white plant pots and it was as if a lightbulb went off in my head (I am not sure if I intended that to be a pun or not) and it turned out to be the perfect choice. I love repurposing items for other uses. It is a fun challenge that Brent and I like to tackle together.
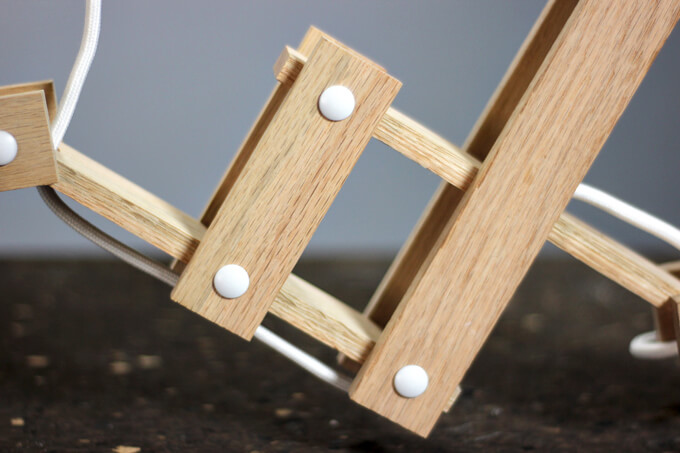
Brent worked really hard planning and drawing out the wood wall sconce base so that we knew the exact measurements we needed to cut so it would come together perfectly. He rocked it, I am so impressed. I love the added touch of painting the head of the carriage bolts white to match the lamp shade.
Having a DIY wooden wall sconce on each side of our bed makes our bedroom already feel more grown-up and less college mismatch. We are one step closer to our overall design goal for our master bedroom. I am also happy to say they are completely hungry cat resistant.
Project Featured in Bob Villa Academy

Brent and I are 90’s kids. And what was one of the staple family television shows for 90’s kids? Home Improvement. Brent aspired to be the host of his own tool show like Tim “The Toolman” Taylor and I, well, I dreamed of dating Randy Taylor (Jonathan Taylor Thomas). And didn’t we all wish we could just walk into our backyard and our neighbor would peek over and give us all the answers to life? That was the dream.
One of our favorite reoccurring story lines was Tim’s rivalry with Bob Vila. That hot rod race between the two is a classic. We are feeling all nostalgic just thinking about it.
Growing up Bob Vila was the real life go to guy for us when it came to home improvement. I think DIY home renovation was Brent and I’s destiny because we both grew up watching Bob Vila and helping our dads with home improvement projects, you know, typical kid stuff. So you can imagine our excitement when we got an email asking if we would be interested in being professors in the Bob Vila Academy. It is cool to see that the Bob Vila brand continues to grow and morph with the ways we approach DIY projects these days offering in-depth video e-courses to get hands-on experience.
Which brings us back to our DIY wooden wall sconce. The e-course we are teaching in the Bob Vila Academy is how to make a modern wooden wall sconce, just like ours. We will show you what tools and materials you need as well as break down all the steps and demonstrate how to make this affordable lighting solution.
The benefit of this e-course is instead of just one video, we break up the project into a series of videos so we can cover each and every step in great detail allowing you to follow along and build your very own wall sconce with us as we make it.
If you are interested in making your own DIY wooden wall sconce, we would love for you to enroll in our Bob Vila Academy course. As always, we appreciate your support!
PIN THIS PROJECT

The Couple That DIYs Together

The Couple That DIYs Together – “The Weekend Project”
What happens when you just can’t quite get on the same page when it comes to that weekend side table DIY project and when that perfect idea in your head doesn’t quite translate to the paper…
To see new videos in The Couple That DIYs Together series, subscribe here ⇾
A Little Bit of a Backstory
You may know by now that Brent and I met in high school. But what you may not know is long before (10 years ago) we were a married couple tackling home renovation projects together we were just a couple of teenagers working on website and video projects together in high school.

Brent and I went to the same high school for four years but didn’t actually cross paths until the last semester of our senior year of high school when our web design teacher selected each of us to be the school’s web interns. The first day I met him was the first day of the internship. I remember feeling nervous walking to the room where we would be working because I had no idea who Brent Richardson was and the idea of having to collaborate with someone you have never met is a bit intimidating.
However, the minute I walked into the room and was greeted by his smile, I was instantly won over. Brent is charming that way. For the next five months we worked together on making websites, videos, and logos but mostly we talked and looked at magazines, ran errands together and genuinely became friends. It is rare to find someone that you get along and work with so well, especially on creative projects but Brent and I always just meshed from the first day.
Inspiration for this Video Series
Fast forward eight years from when we turned in our intern badges, we were married and bought a house and about to embark on our largest creative collaboration yet, renovating our home (and documenting it here on the Gray House Studio blog). We worked so well together in high school so we thought this was going to be so easy. And in a way it was because we have a similar design style and were on the same page for how we want our house to look.

The complicated part was actually the execution. We found that when two people who make their living doing creative things try and come together and work on projects that they are both very passionate about, there is bound to be a battle of control and a difference of opinions. And let’s face it, we are much more invested in our projects now as 27 year olds than we were at 17.

We both have our areas of expertise, but neither of us wanted to be stuck in doing just “the part we were good at”. I desperately wanted to be the one that sketched up my furniture ideas and to be able to work with my hands building things since my full time job is working on the computer on websites. Let’s just say there were some disagreements about our process, collaboration roles and miscommunication. And also, no matter how hard I try, I am horrible at drawing. I just am.
Lessons Learned
When it comes to working on DIY home renovation projects now, Brent and I have really found our sweet spot. Our communication has improved greatly, we let each other shine where our strengths are but also teach and support each other when it comes to tackling the areas we didn’t feel as comfortable in before.
Brent has been showing me techniques for using the miter saw so the past couple projects I have been the one making the cuts on the miter saw and now I know why they are called power tools, they make you feel so powerful! I have been encouraging him to write more here on the blog so you can get to know his hilarious personality.

This past weekend we thought it would be fun to make a new video series poking fun and exaggerating what our early project process looked like that other couples might be able to relate to. Because let’s face it when couples DIY together, there is bound to be some passive aggressiveness, miscommunication, disagreements and mishaps and we look back and laugh at it now.

Believe me when I say we still have our mishaps, miscommunication and DIY fails but we tend to laugh a lot more about them these days and take it all in stride because when a couple DIYs together, you never know what is going to happen.
We hope you enjoy this little video as much as we enjoyed making it and if you can relate, feel free to share!
If you have had a funny mishap while working on a DIY project together, please share them in the comment section and we might incorporate them into our next The Couple That DIYs Together video.
To stay up to date on the videos in this series, subscribe to our YouTube channel.