Guest Room Makeover

Guest Room Makeover

Guest Room Makeover

I am so excited to share what Brent and I have been up to that past two weeks, a guest room makeover! First, because this is the first room we have completely finished in our house. Secondly, because we have been trying to keep it a secret so we could surprise our first guests who would be staying in the new room (Brent’s parents) when they came to Houston last week. Finally, because that means we get to share our first room tour!

The timing for this room makeover came about because this room was quickly starting to look like a storage unit that might be auctioned off on Storage Wars. All the random stuff we moved out of the room next door to work on our home gym was scattered all over the room and if there was ever an object that didn’t have a place in the house, it most likely wound up on the floor of the “guest room”.

Guest Room Makeover

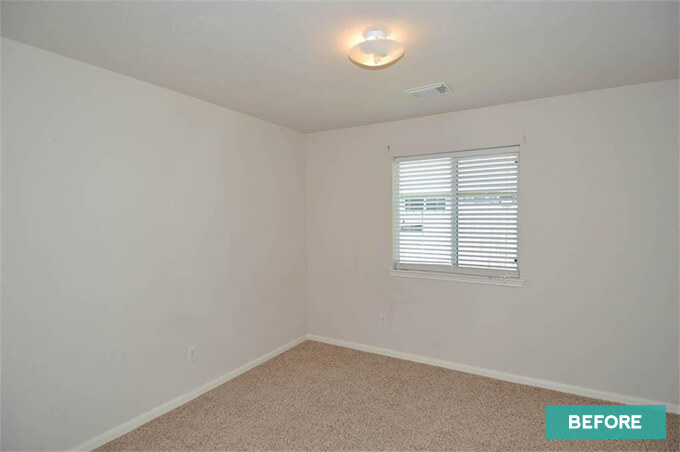
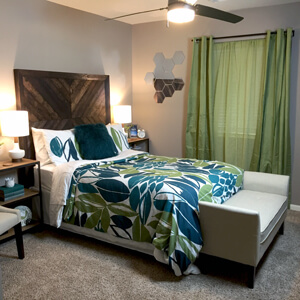
Above is a photo of what the room looked like before we moved in, really plain, outdated light fixture, old beige paint on the wall, etc. I just realized I never actually took of a photo of what the room looked like once we moved in but it wasn’t much to look at.

The guest room already had a mismatch of furniture from my apartment before we got married that didn’t have a place anywhere else in our home which didn’t make the space feel put together at all but slowly over time it got a bit out of control with what we were storing in there. We were really taking a risk that a guest wouldn’t just pop in at the last minute needing a place to stay because otherwise they might have been out of luck.

Time and time again I have learned in our home that if a space or room doesn’t have a purpose than it will create it’s own by holding a bunch of junk. And even though the guest room was supposed to have a purpose, the lack of organization in that room made it difficult to comprehend that purpose and thus, keep it neat and tidy.

Brent’s parents will be visiting us more often these next few months, so I got it in my head that I didn’t just want to clean the space up but I wanted to really take the time to transform it into a guest room that was charming, cohesive, cozy, and comfortable for our guests. So Brent and I got to work.

Tour Our Guest Room Makeover

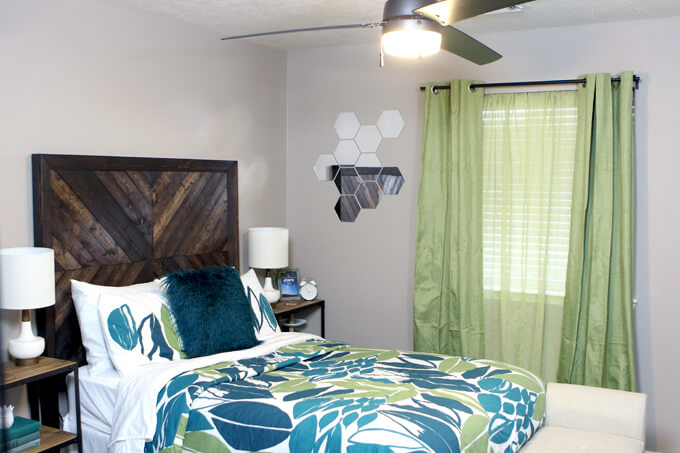
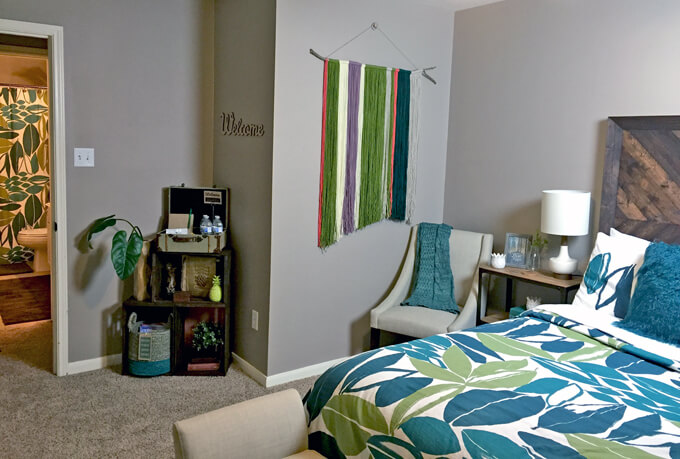
In this video we will take you on a tour of our newly made over guest bedroom! For our guest room makeover we were going for a subtle tropical theme. We used neutral colors on the walls and for the furniture and brought in bright pops of green in the accent pieces and decor.

To see a new DIY tutorial video every Thursday, subscribe to our channel ⇾


Our 5 Ways to Create a Comfortable Guest Room

1. Welcome Box/Basket for Guests

Guest Room Makeover

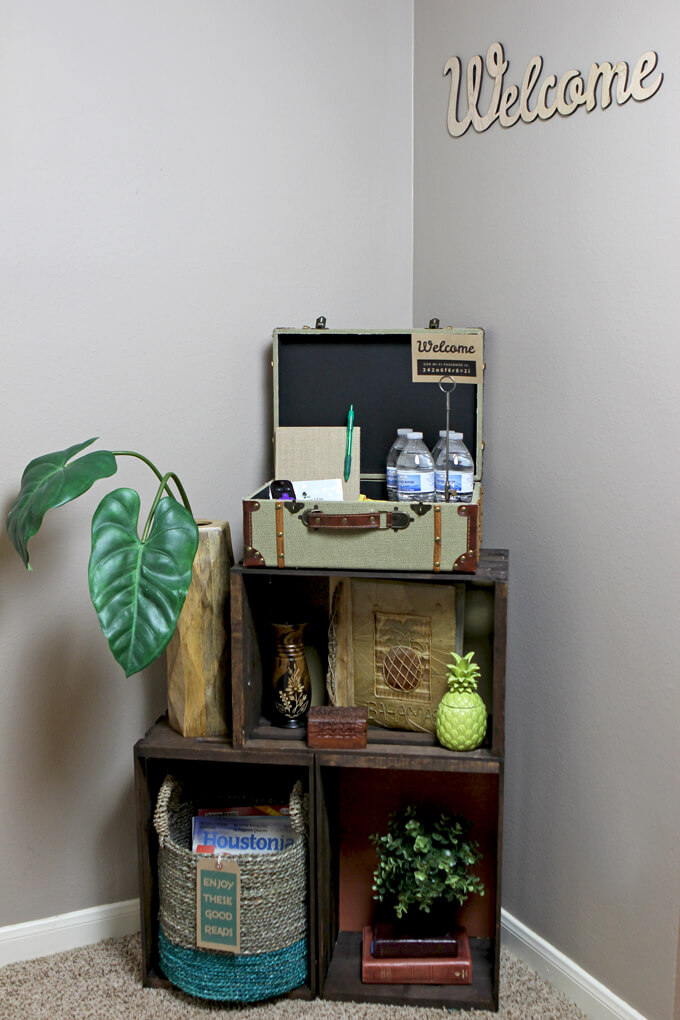
When guests first walk into the room we want them to feel welcomed! Brent created a custom welcome sign for us to hang above our crate display that turned our great. If these crates look familiar that is because they are the same ones I used for our fall crate display. They matched perfectly with the room and we didn’t have to spend money on a storage piece or shelving for this corner.

Because I wanted to have the guest room and guest bathroom flow together with the same style, I was super pumped when I was able to find a larger version of the same wood vase at Target that I already had in the guest bathroom. I also used the same faux plants so it would tie in together nicely.

Guest Room Makeover

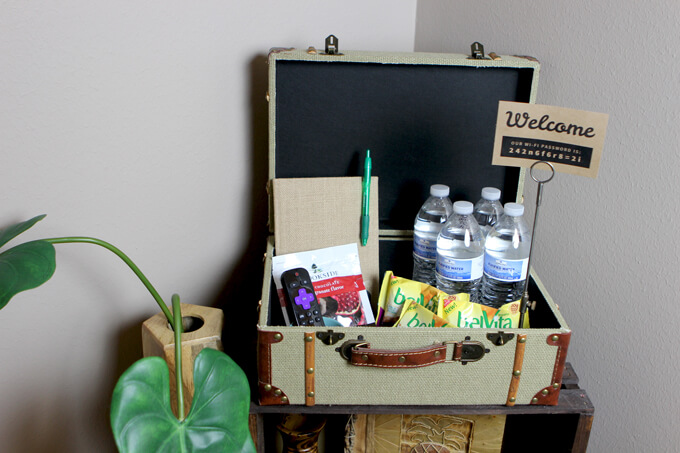
I found this vintage style suitcase at HomeGoods and immediately bought it before I knew what I was going to do with it because you know, I am obsessed with vintage suitcases. That is a rare occurrence for me because I usually never buy anything on a whim but as it turned out it works perfectly as a unique box to fill welcome items for our guests.

In the box we store water bottles, snacks, chocolates, a guest book, the remote for the TV so it is easy to find and the WI-FI password. I made the little WI-FI sign and then displayed it on the metal photo holder that we got at Magnolia Market a few weeks back.

Guest Room Makeover
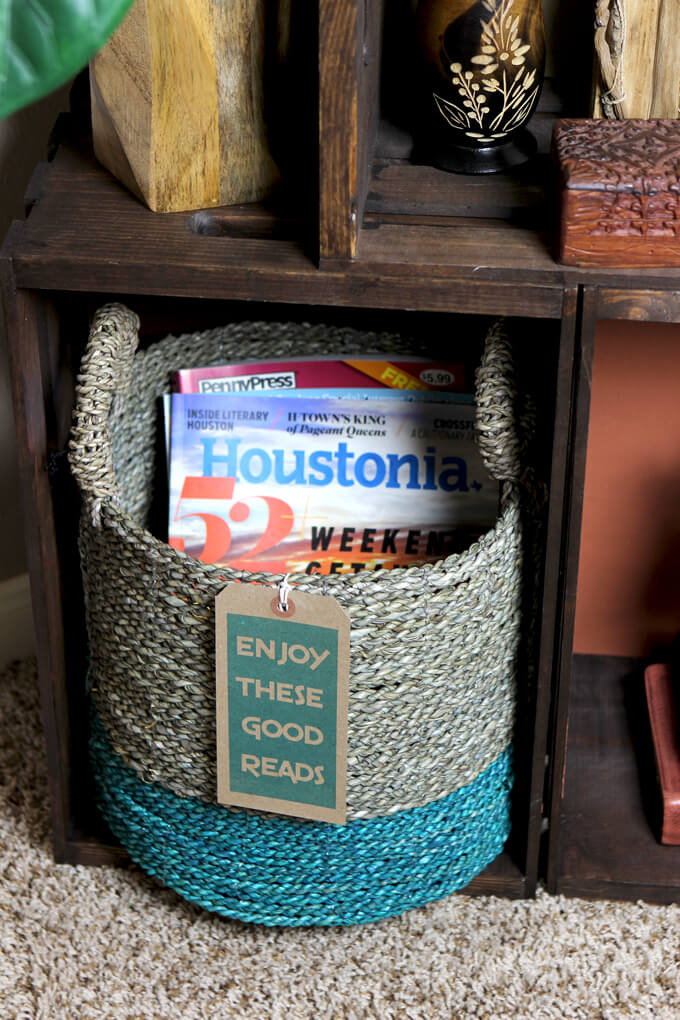
I also found this basket at HomeGoods and thought it made a great basket to store magazine and books for guests to read. I made and attached the little tag to the basket to draw guests attention to where they can find reading material.

2. Extra Seating

Guest Room Makeover

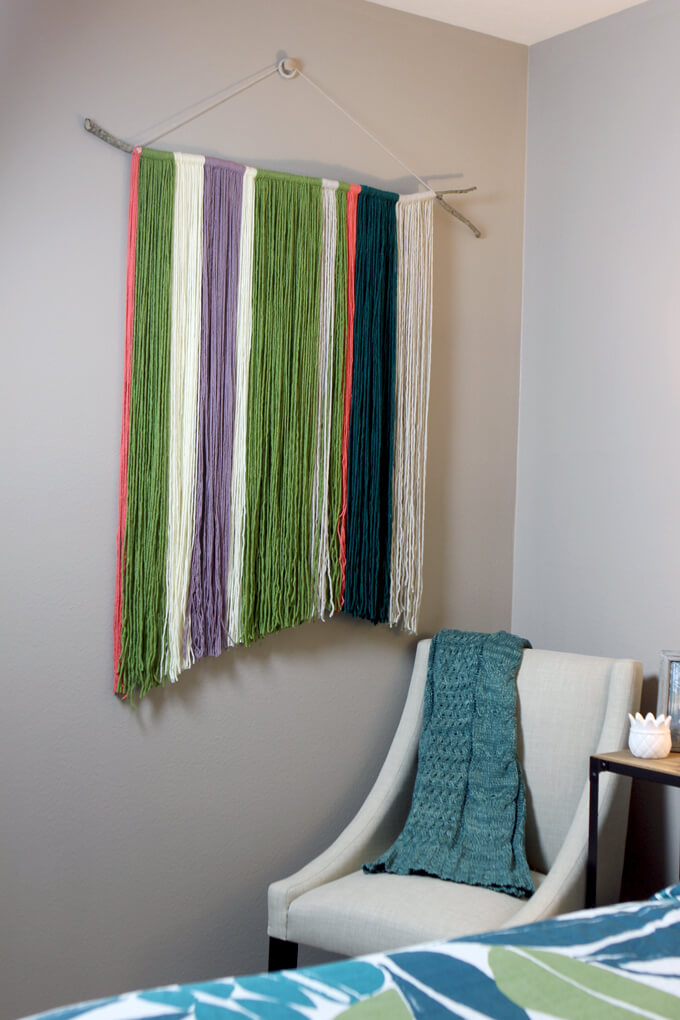
We didn’t really have any seating in the guest room before so I wanted to created a seating area where guests could sit down to put on their shoes or relax and read a magazine. So we created this cute little corner. We kept our yarn and branch hanging in this room, just moved it over to this corner. It works perfectly because the branch brings in the natural element and the colors pop against the neutral chair.

Guest Room Makeover

I also bought this really soft blanket (my weakness) at Target. I love the color and by draping it over the chair, it is easily accessible for guests to grab and cozy up in case they get cold.

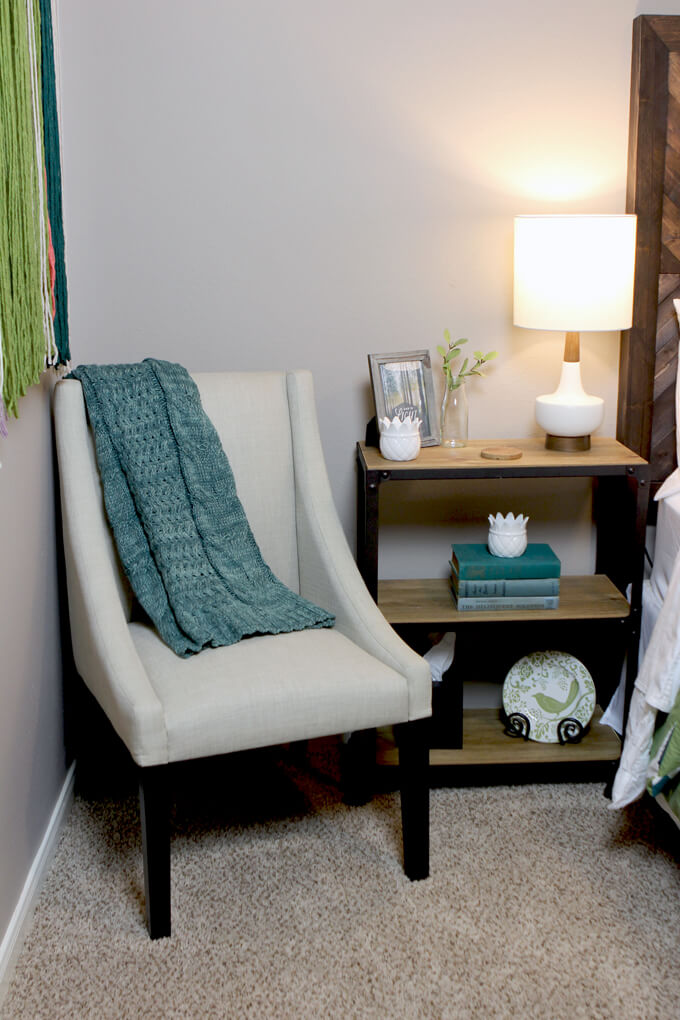
3. Open Shelving Nightstands

Guest Room Makeover

We really like the idea of showing guests everything they have available to them out in the open when it comes to our guest room and bathroom. That is why we chose to go with open shelving for the nightstands. Plus, they allow us to display more items. We got these stands second hand from my mom (thanks mom!) but they originally came from Kohls. I like them because guests don’t have to feel awkward about opening any drawers.

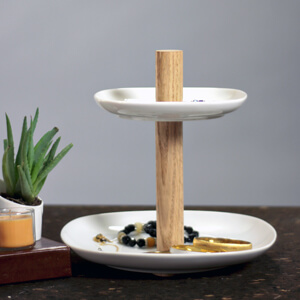
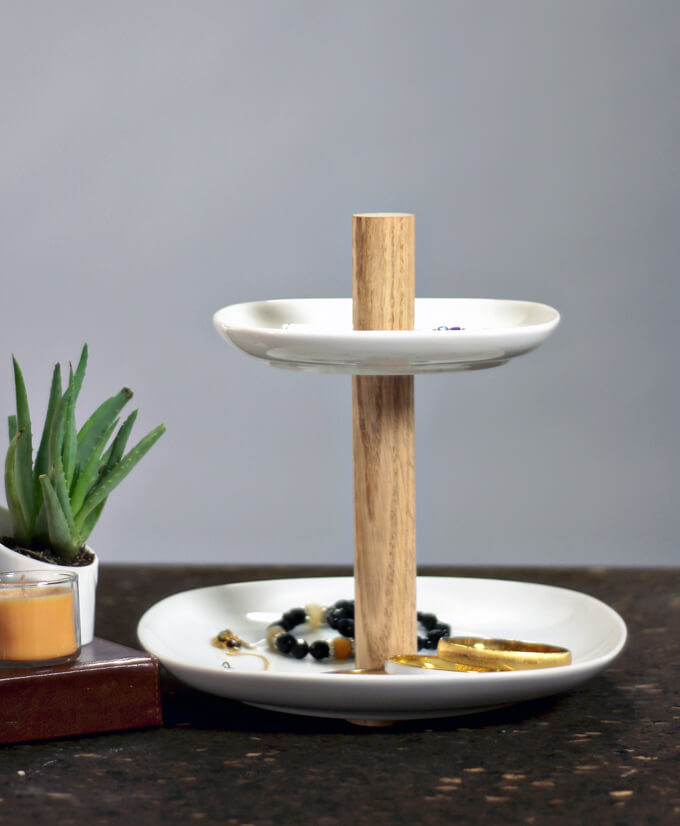
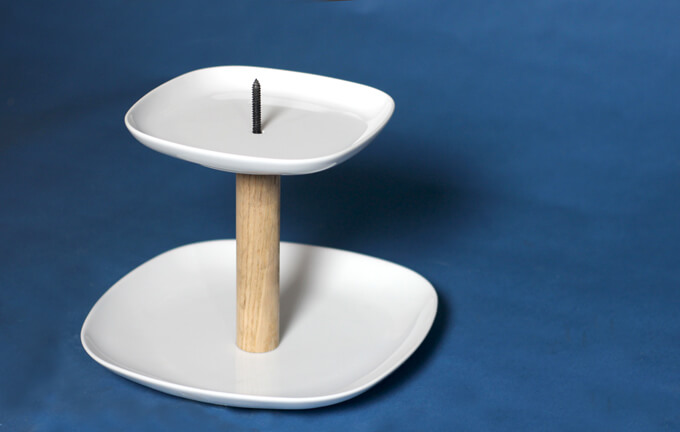
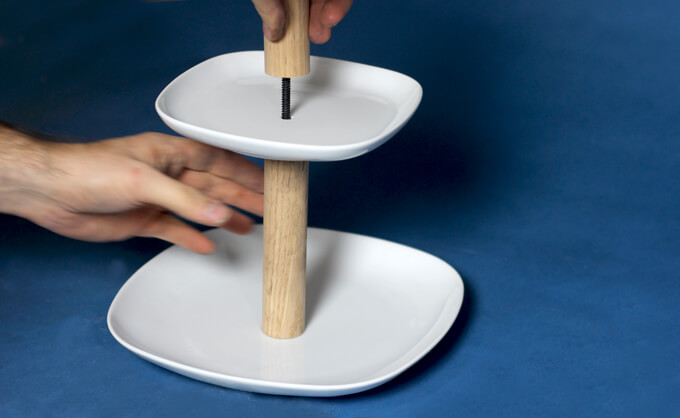
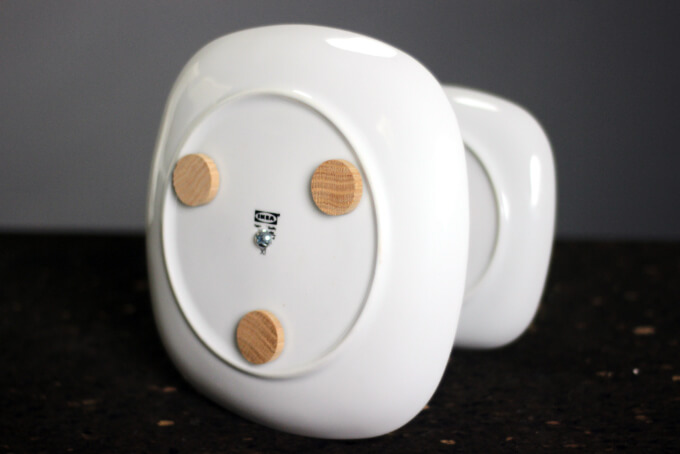
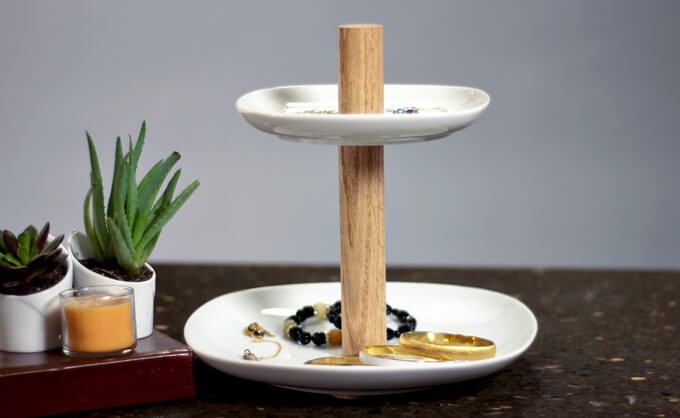
On one side we have tissues and these old library books my grandmother gave my mom and then my mom gave me that were overdue in 1978 (but in the perfect color palette I might add) that are now decor pieces and on the other side we have a USB port for guests to plug in all their electronic devices in one central spot so they don’t have to hunt and fight over plugs. We also have our DIY tiered stand for guests to store jewelry or smaller items so they won’t forget them when they leave.

Guest Room Makeover

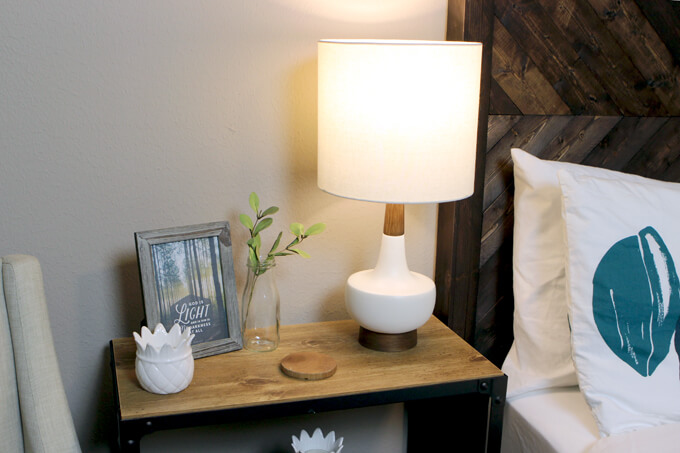
We really splurged in this room. We got two matching lamps! Ha. We have never had matching lamps in a room before so this really felt like this room was legit. I love these white and wood lamps I got from Target. Target is really stepping up their lamp game.

4. A Cozy Bed

Guest Room Makeover

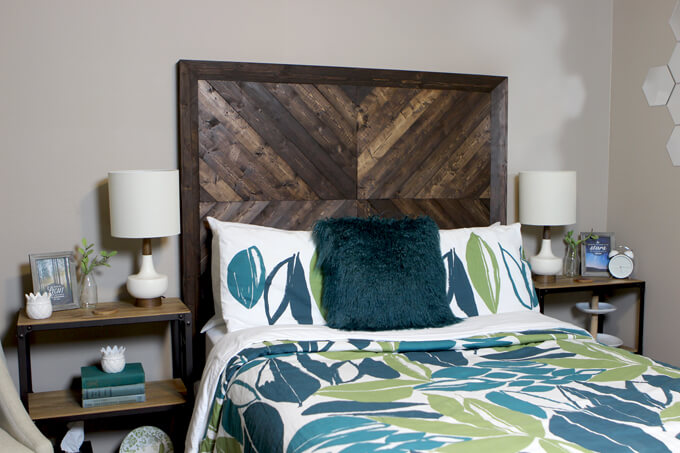
My inspiration for this guest room makeover was this duvet cover I purchased from West Elm two years ago before we even moved into this house. I love the green-blue colors since the majority of our house is neutral and I like that it has a subtle tropical vibe. You see, Brent is not big on themed rooms but I, I grew up in a jungle room. We are talking oversized stuffed animal tigers, leopard print comforter and fake vines and twinkle lights hanging from the ceiling. I was all about the themed room growing up.

Obviously, we had to give and take a little and I think this room turned out to be a good compromise of a tasteful room with tropical elements (see what I did there Brent, I didn’t say it had a theme).

Guest Room Makeover

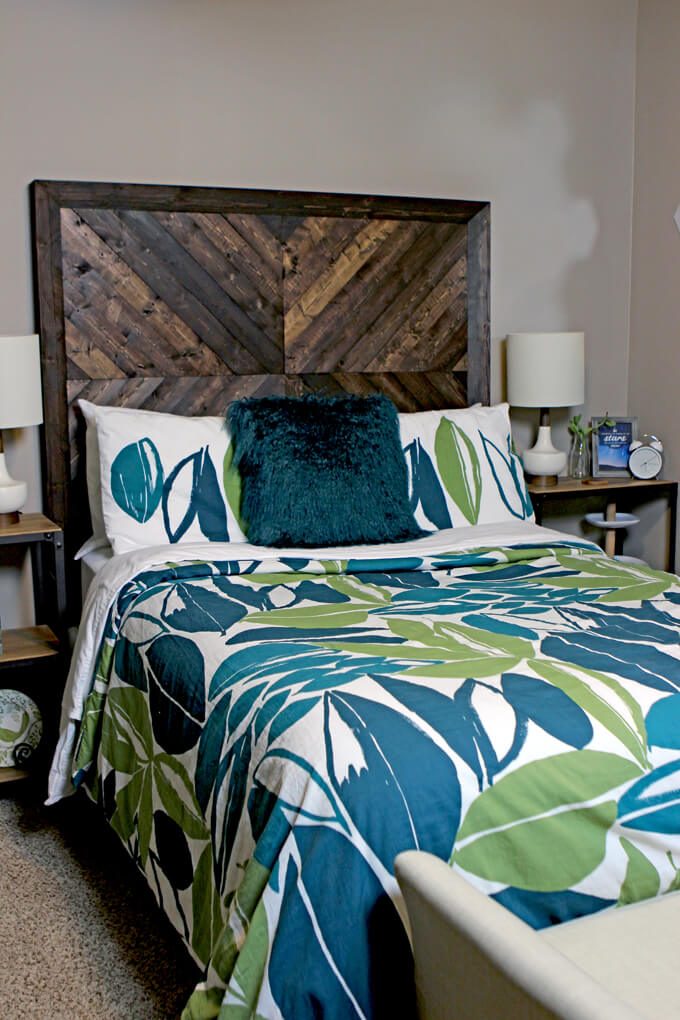
I really wanted a headboard in this room. A cozy bed just doesn’t feel complete without a nice looking headboard and Brent knocked it out of the park with this one he built based on one we liked from West Elm for a fraction of the cost. I would like to add I did contribute by staining the entire thing, which was a job for sure but this one was all Brent’s brilliant mind making it come together. Check out our full tutorial on how we built this headboard.

While out shopping I stumbled upon this fun furry pillow that was a great addition to the bed because the texture added a nice contrast against the headboard. It was the right color and I was so excited to show Brent but all he could say was it looked like it was made from the fur of Sully from Monster Inc. Oh… Brent. At least he didn’t say he hated it. So I am counting that as a win.

5. Mirrors

Guest Room Makeover

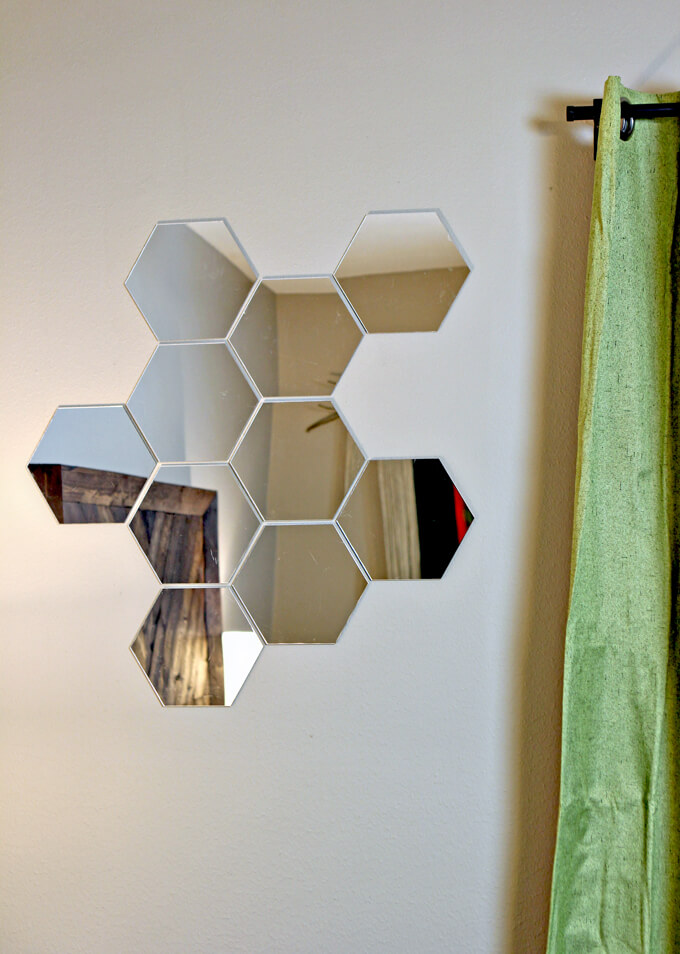
One thing I found I appreciated about other guest rooms I have stayed in is when there is a mirror in the room. That way if another guest is in the bathroom, you can still brush your hair, put on your make-up, etc.

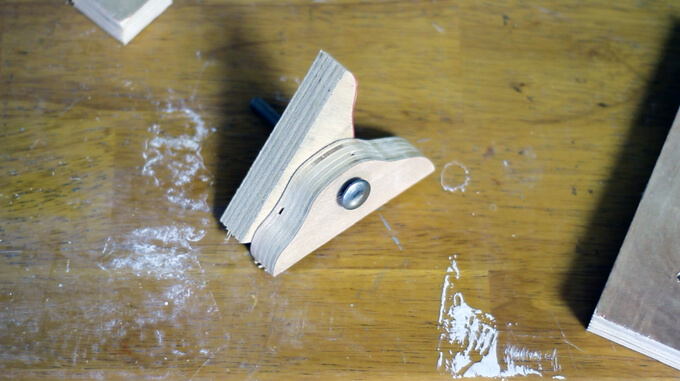
A last minute addition to the room were these geometric mirrors that Brent custom made. They are like a two for one because the room now has a mirror, well many mirrors, but with the shape and pattern they also act as wall art for what was an empty wall.

Guest Room Makeover

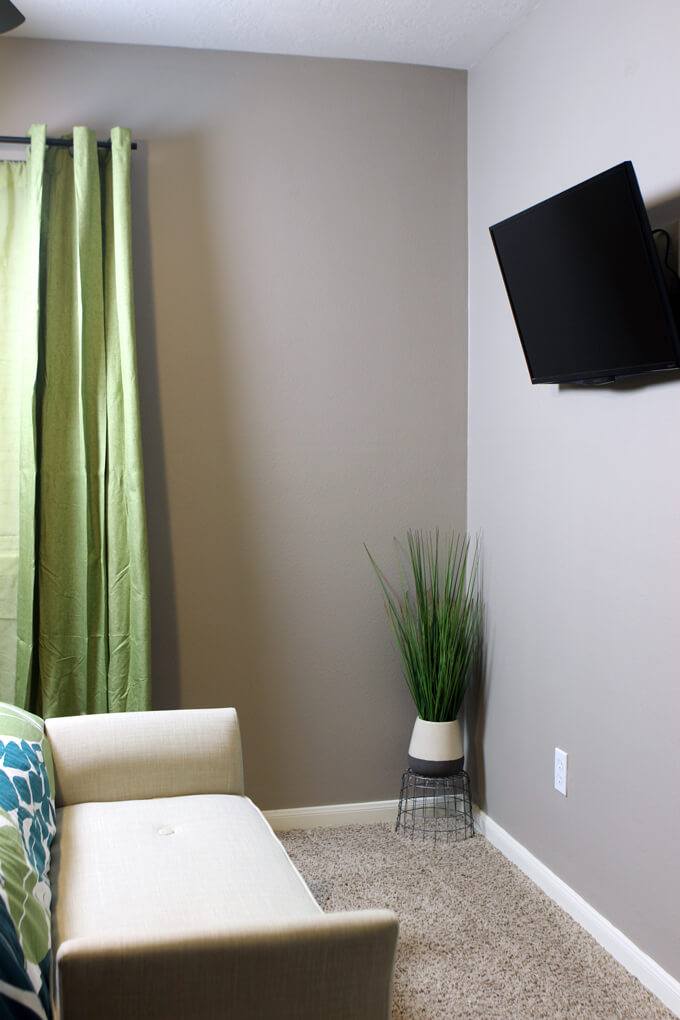
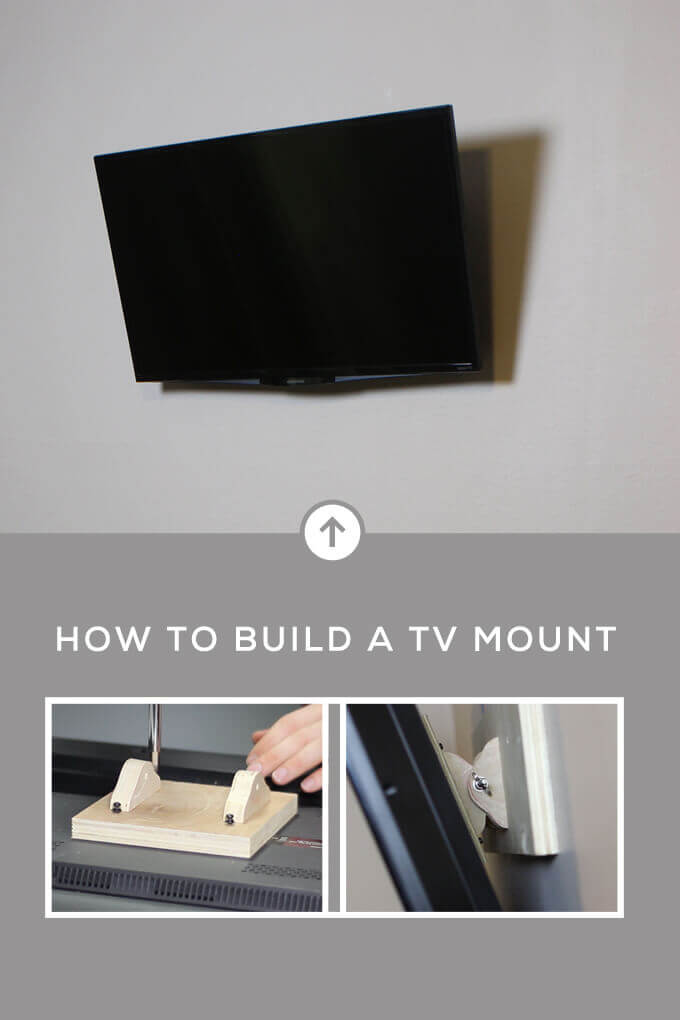
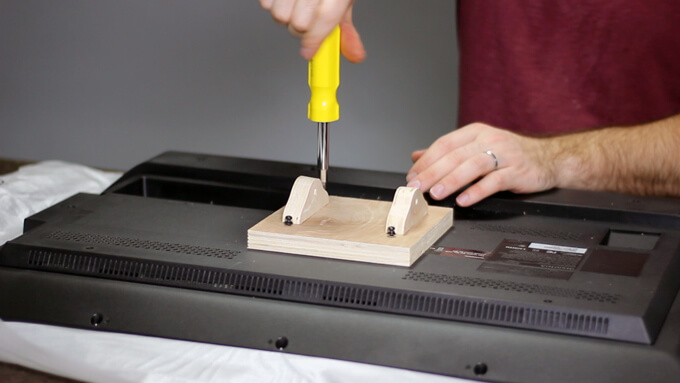
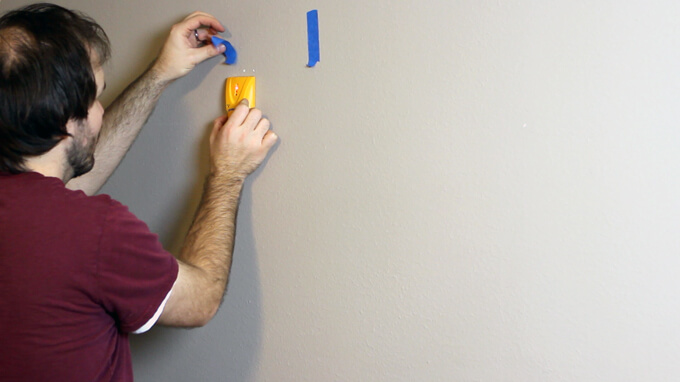
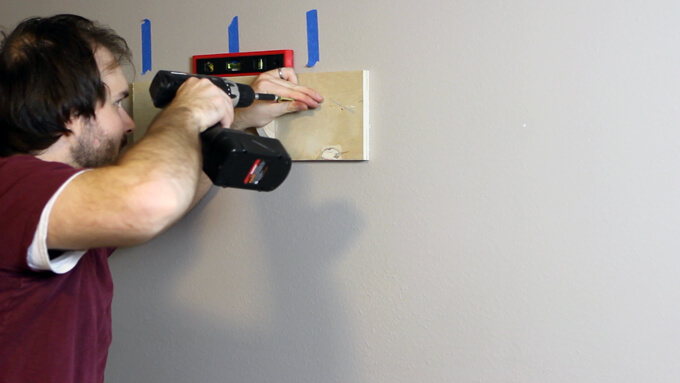
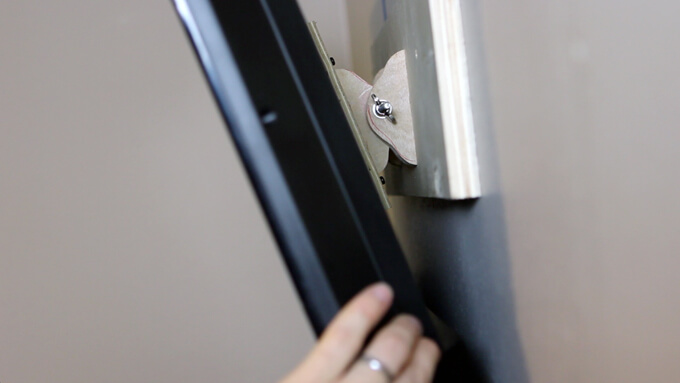
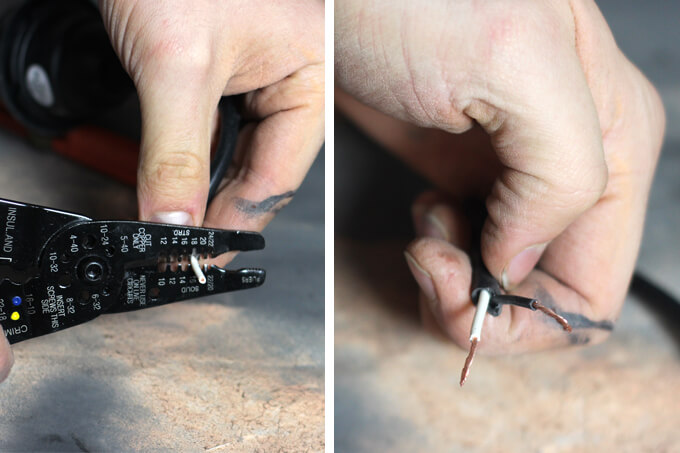
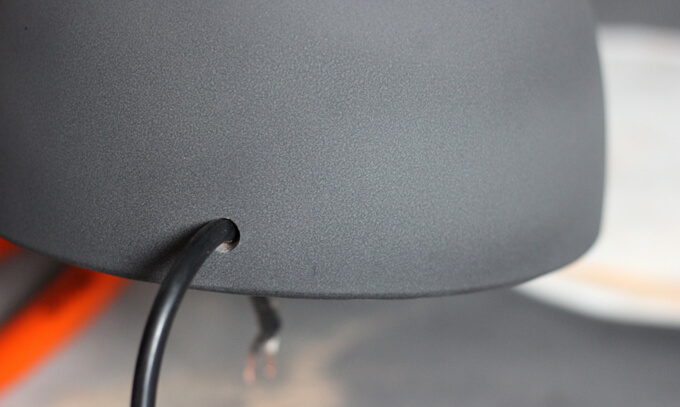
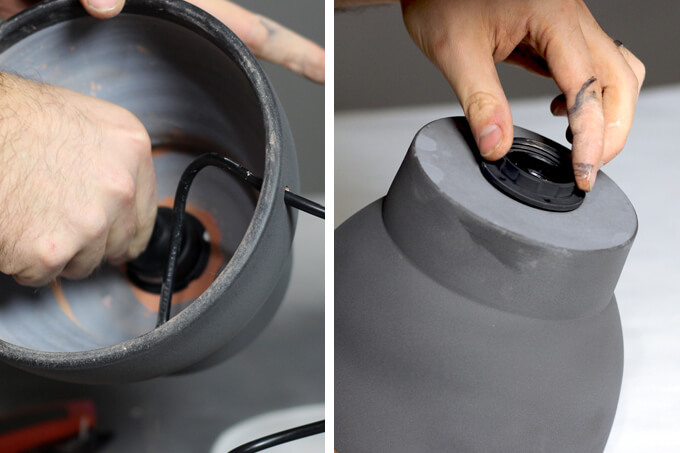
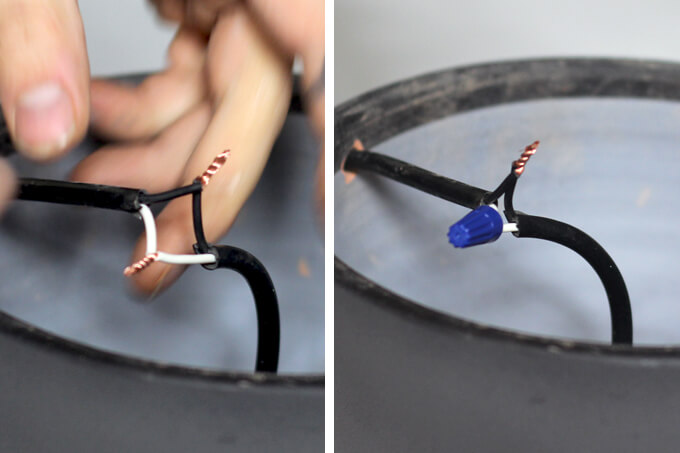
We also painted the walls, put a bench at the foot of the bed, hung new drapes, added a new TV on a wall mount we built, and replaced the old light fixture with a new ceiling fan.

Guest Room Makeover

Walls: Utterly Beige from Sherwin Williams
Headboard: DIY Project
Duvet Cover: West Elm
Chair: Target
Outside Curtains: Target
Inner Curtains: Target (old)
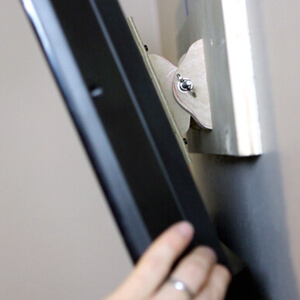
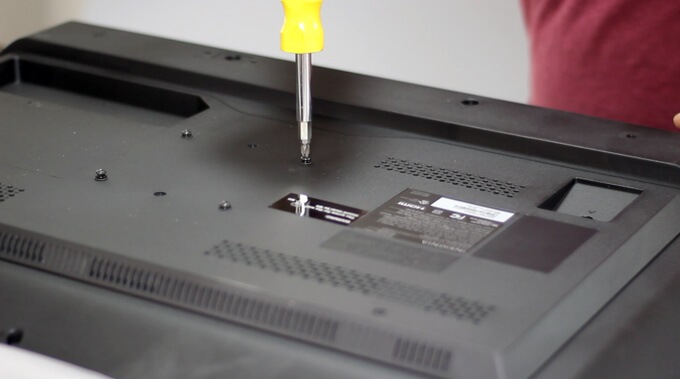
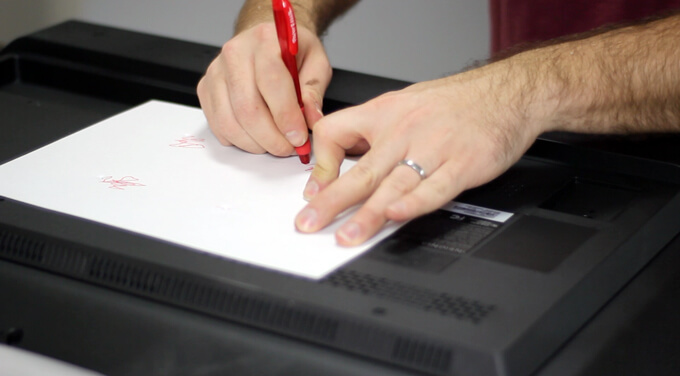
TV Wall Mount: DIY Project
Bench: Target
Nightstands: Donated by my mom
Table Lamps: Target
Blanket on Chair: Target
Suitcase: HomeGoods
Wooden Crates: DIY Project
Fuzzy Pillow: Target
Magazine Basket: HomeGoods
Wood Vase: Target
Welcome Sign: custom made by Brent
Geometric Mirrors: custom made by Brent
Plant in Concrete Planter HomeGoods
Branch & Yarn Hanging: DIY Project

Guest Room Makeover

We love how this room turned out and hope our guests find their stay here comfortable and cozy. My anxiety about this room being a disaster is gone and now I really wish this was my room. The guest room makeover was a really fun project to work on with Brent and forced us to fill up a car of unwanted stuff to take to donate because there is no where else we have left to move the junk to.

Brent’s parents arrived late Tuesday night last week and we just about missed their reaction to the surprise because we were in our bedroom when they arrived. I knew I should have had a large picture of what the room looked like before printed on canvas so I could hang it in front of the door to do a Fixer Upper style reveal. Dang. But they loved it and we are so glad we took the time to focus on this project and make it a nice space for our guests to enjoy.

How to Build a TV Wall Mount

How To Build A TV Wall Mount

Check out how to build a tv wall mount out of wood.

How to Build A TV Wall Mount

It seems as though every year TVs are getting lighter and less expensive so when we were working on our guest bedroom makeover we decided to say goodbye to my 10 year old monster of a 32″ silver TV from college that was sitting in that room and replace it with a new lighter model.

We didn’t have enough space for a TV console in the bedroom so we knew we were going to have to mount the TV on the wall and now that TVs are thinner and lighter, it actually makes it easier and less stressful to get them up on the wall.

We thought it would be fun to try our hand at building our own tv wall mount of wood. After thinking about it, what goes into a TV mount isn’t that complicated, so we decided to make our own out of wood for way cheaper and are sharing how to build a TV wall mount.

In this tutorial Brent shows how to make one for a 32″ TV since that is the size of the TV we were mounting. If you decide to build you own, you might have to adjust the sizes of the pieces you cut, accordingly.

How to Build a TV Wall Mount

SUPPLIES

Shop the products we used for this project in one place.

FYI: This post contains affiliate links to products we used and liked for our wood tv wall mount. As an Amazon Associate Gray House Studio earns from qualifying purchases. This is at no extra cost to you. We appreciate you supporting this site. Read our privacy and disclosure policy.

TUTORIAL VIDEO

[yotuwp type=”videos” id=”mY79RiZpo_I” title=”off” description=”off” player=”width=590&modestbranding=0&showinfo=0″]

Subscribe to our YouTube Channel

Like our video? Please subscribe and help us reach our goal of 100k subscribers.

STEPS

How to Build A TV Wall Mount

1. Our TV came with screws in the mounting holes so the first thing we did was to remove the screws with a screwdriver.

How to Build A TV Wall Mount

How to Build A TV Wall Mount

2. We used a piece of paper and pen to poke holes in the paper to make a template for transferring the mounting holes to a block of wood.

How to Build A TV Wall Mount

3. Once the holes were poked in the paper for each mounting hole, we marked the hole positions on a piece of plywood. We used a piece of 3/4 inch plywood.

How to Build A TV Wall Mount

4. The mounting bracket has two hinges comprised of four identical semicircular pieces with a hole in the center.

We made this template and then traced these pieces on another piece of plywood like the one we used in the previous step.

Our hinge template is available to download here.

How to Build A TV Wall Mount

5. Next, using a 1/8 inch drill bit on a drill press, we drilled four holes in the board that mounts to the TV.

This is the board we marked on in the third step.

How to Build A TV Wall Mount

How to Build A TV Wall Mount

6. Using a 1/4 inch drill bit we drilled holes in the center of the hinge mounting brackets. These are the pieces we traced in the fourth step.

How to Build A TV Wall Mount

7. To cut the four hinge pieces out we used a jigsaw with a scroll cut blade.

How to Build A TV Wall Mount

How to Build A TV Wall Mount

8. We used a 2 inch long carriage bolt to hold each of the two hinges together.

But as you can see in the second picture, the square neck prevents the head of the bolt from sitting flush with the surface of the hinge.

How to Build A TV Wall Mount

9. To fix that issue, we used a 1/4 inch chisel to square off each hole on the side of the hinge with the head of the bolt.

How to Build A TV Wall Mount

How to Build A TV Wall Mount

10. Next, we mounted the two hinge pieces located on the head side of the bolt to the mounting plate with the four holes in it. We added wood glue and clamps to hold both pieces centered between the holes.

How to Build A TV Wall Mount

11. First, we use our drill pilot holes for each screw.

How to Build A TV Wall Mount

12. Then we secured the hinge pieces with the screws.

How to Build A TV Wall Mount

13. To help align the other side of the hinges, we slid the other pieces over the carriage bolts and tightened them with wing nuts.

How to Build A TV Wall Mount

14. Then we marked the center point of each side of the hinges on the wide mounting board that we were going to screw into the wall.

How to Build A TV Wall Mount

15. We used those marks to drill pilot holes for the mounting screws.

How to Build A TV Wall Mount

How to Build A TV Wall Mount

16. We added wood glue to the hinges and clamped them to the large board.

How to Build A TV Wall Mount

17. Then we secured it with 1 1/2 inch screws.

How to Build A TV Wall Mount

18. We removed the two carriage bolts and separated the two sides of the mount.

We then attached the mount to the TV using 1 1/2 inch screws. Our TV uses M8 screws.

How to Build A TV Wall Mount

19. Before mounting the TV, we located the studs with a stud finder.

How to Build A TV Wall Mount

20. Then we anchored the mount to at least two studs with 2 1/2 inch screws.

We used a level to make sure our mount was straight.

How to Build A TV Wall Mount

21. Finally, we mounted the TV by lining up the holes in the hinge and securing them with the carriage bolts and wing nuts.

We are really happy with how our mount turned out and how it securely holds the TV to the wall. Plus, you can hardly tell the mount is even there. I love how little this project cost us so I could use the money on more important things for our guest bedroom makeover, like lamps and a new chair.

If you have any questions on how to build a TV wall mount, feel free to leave them in the comments section below.

PIN IT FOR LATER

A tutorial showing how to build your own tv wall mount out of wood.

DIY Industrial Table Lamp

DIY Industrial Table Lamp

We have another super easy IKEA hack for you today. In this post we will show you how to take a SINNERLIG pot and a cord set from IKEA and turn it into a DIY industrial table lamp.

DIY Industrial Table Lamp

When Courtney and I brainstorm projects we usually underestimate how long a project is going to take. No matter how simple we think a project is, when we are making something for the first time we almost always run into some sort of problem we have to solve. This is especially the case when we have a short amount of time to work on it.

We wanted to make a DIY industrial table lamp based on a lamp we saw at Urban Outfitters for our library and figured what better time to experiment on making something for the first time than the night before you have to present it on live TV.

On the plus side, we worked out all the kinks and can now share with you the best way to approach this project.

VIDEO TUTORIAL

In the video below we will walk you through how to make an industrial table lamp using an IKEA pot plant and a light cord set.

To see new DIY videos on Thursdays, be sure to subscribe to our channel ⇾


SUPPLIES

MATERIALS

  • (1) SINNERLIG Pot of from IKEA
  • (1) Cord set
  • (2) Wire nuts
  • (1) Light bulb (Edison)
TOOLS

  • Drill
  • 1-5/8″ Diamond coated hole saw
  • 1-3/4″ Wood hole saw
  • 5/8″ Glass and tile ceramic drill bit
  • Sander and 220 grit sand paper
  • Matte spray paint
  • Scrap wood
  • Wood clamps

*This post contains an affiliate link. You can read our disclosure policy here.

DIY Industrial Table Lamp

Here is an outline of our crazy day

    — 10:00 AM —

  • Feeling optimistic, Courtney emailed me a detailed shopping list complete with pictures of the lamp she wanted to recreate and all the supplies need.
    — 04:00 PM —

  • Off work and headed to Ikea before traffic gets bad.
    — 04:05 PM —

  • Made it to Ikea and should be in and out super fast because I know all the secret passageways. Proud of myself for not even stopping for a cinnamon roll on the way in.
    — 04:08 PM —

  • Oh no! They don’t have the cloth cord set we are looking for. Guess, I will try and find and employee in case I am missing them.
    — 04:20 PM —

  • Slight setback, they are out of cloth cord sets but after talking to employee, they helped me find an alternative one that will work.
    — 04:25 PM —

  • Okay, made it to the pots and plants section. I should be out of here in no time.
    — 04:35 PM —

  • Oh no, took two laps around the pot and plants section but can’t find the pot on my list.
    — 04:45 PM —

  • Spent five minutes trying to pronounce the name of the pot I am looking for to another employee because apparently, black pot isn’t descriptive enough. He asks me to type it into his computer to find the name.
    — 04:55 PM —

  • The employee informs me that they don’t carry that pot. Panic is now officially setting in since our entire project is based around this particular pot. Contemplate getting a $1 hot dog to cheer me up but instead head back to the pots section to do one final walkthrough.
    — 05:00 PM —

  • I can’t believe my eyes. Suddenly it as if a ray of light strikes those beautiful pots. I found the hidden stash behind the palm trees. Grateful that I don’t have to tell Courtney I couldn’t find them.
    — 05:05 PM —

  • Well, that was another IKEA trip that took too long. Oh, hello Houston evening traffic.
    — 07:00 PM —

  • Finally made it home after fighting rush hour traffic. On a positive note Courtney has dinner ready. On a negative note “It’s raining Ben” (The Bachelor) on TV starts tonight but we can’t watch because we need to knock this project out. I reassure Courtney we will be done in time for the “final rose”.

How We MADE a DIY Industrial Table Lamp

DIY Industrial Table Lamp
1. First we flipped over the pot and carefully removed the stickers and felt feet.

The fun thing about this project is we are using the SINNERLIG pot for the base which comes in a variety of shapes, giving us options when it came to the style of the light fixture. We purchased a few to test and chose the shape above for an industrial look.

DIY Industrial Table Lamp
2. To turn this pot into a lamp, we needed to drill a hole in the bottom of the pot with a 1-5/8″ diamond coated hole saw. To keep the hole saw centered as we drilled, we found it helpful to use a jig to hold the hole saw in place.

To make a jig, we drilled a hole with the 1-3/4″ hole saw in a board larger than the base of the pot. Then used clamps to hold pieces of scrap wood around the base of the pot to hold the top board with the hole in it center on the pot.

DIY Industrial Table Lamp
3. The diamond coated hole saw leaves a smooth finish but exposes the clay center which is why we needed to paint it. When we pulled off the sticker and felt feet from the bottom, it left three squares of exposed clay.

DIY Industrial Table Lamp
4. Through a frustrating and unsuccessful trial run, we found that the red clay absorbs the spray paint more leaving those areas a different color.

To make sure the entire bottom of the pot is a consistent texture, we found it necessary to sand the entire bottom of the pot before spray painting it. For this step we used a sander and 220 grit sand paper.

DIY Industrial Table Lamp
5. Before painting, we drilled a hole with a 5/8″ glass and tile drill bit in the side of the pot towards the bottom for the cord to go through. This step will also expose some of the red clay but it will also be covered up by the spray paint.

DIY Industrial Table Lamp
6. We wanted to give our industrial table lamp a matte finish so we spray painted the entire pot with black matte spray paint.

DIY Industrial Table Lamp
7. In order to thread the wire through the pot, we cut the cord six inches from the light fixture. Then we stripped the wires exposing half an inch of copper on both the white wires and both the black wires.

DIY Industrial Table Lamp
8. Then we threaded the stripped ends of the long side of the cord through the small hole in the pot.

DIY Industrial Table Lamp
9. We pushed the fixture through the large hole and screwed the threaded flange tight.

DIY Industrial Table Lamp
10. Finally, we twisted the copper parts of the black and white wires together and then screwed the wire nuts on each wire to hold them together. Our DIY industrial table lamp is finished!

    — 10:30 PM —

  • Now for the moment of truth, we plugged the light in, flipped the switch and we have light! It was the wonderful sign that our DIY industrial table lamp is complete and it’s bedtime! Oh wait, we still have to make our DIY tiered stand.

DIY Industrial Table Lamp

    — 01:30 AM —

  • After prepping that project, it is finally time for bed.
    — 05:30 AM —

  • Rise and Shine Courtney! Its time to get ready for Great Day Houston.
    — 07:30 AM —

  • As we are on our way to the studio we ponder why we procrastinate on these projects. Is it all really worth it? Sometimes they are so much work and stress.
    — 10:00 AM —

  • The show went great. At brunch Courtney and I discuss how much fun that was and how much we love how the projects turned out and look in the room. We agree we should do it again and start brainstorming our next project. Omelets really do wonders for morale.

DIY Industrial Table Lamp

Don’t let our crazy day deter you from making this DIY industrial table lamp. It is a great weekend project that turns out awesome. We are growing quite fond of these quick and easy (now that we have the process figured out) IKEA hacks.

PROJECT FEATURED ON GREAT DAY HOUSTON

Out DIY industrial table lamp was one of the repurposing ceramic projects we shared on the local live morning show, Great Day Houston. In case you missed it (or don’t live in Houston) you can watch our DIY segment here.

Brent and Courtney Richardson of Gray House Studio on Great day Houston

PIN THIS PROJECT

DIY Industrial Table Lamp

DIY Tiered Stand

DIY Tiered Stand

Make a DIY tiered stand from from two IKEA plates and a dowel rod to store jewelry or cupcakes.

DIY Tiered Stand

I am excited to share our latest DIY storage project, a DIY tiered stand. One of my favorite things to do is online window shop, find things I like and then Brent and I will come up with a way to make our own version (usually for quite a bit cheaper). Sure, we could just buy it. But where is the fun in that? We have had a lot of fun recently using a glass and tile drill bit and have been looking for ways to repurpose ceramic pieces just so we can put it to good use. Lately, it seems as though tools have been inspiring our projects.

One late night online shopping trip last week, I spotted a tiered stand that I really liked from Urban Outfitters. I knew instantly that it looked like the perfect project to use our glass and tile drill bit and drill through some plates! We are calling this an IKEA hack because we transformed two VÄRDERA plates into a tiered stand.

This DIY project turned out amazing, was so easy to make and required very few supplies. That’s the dream, right? So today we are going to show you how to make this DIY tiered stand to store jewelry, cupcakes, makeup or whatever you fancy.

VIDEO TUTORIAL

In this video below we will walk you through how to make and assemble a tiered stand from two ceramic plates and a dowel rod to store jewelry or cupcakes.

To see new DIY videos on Thursdays, be sure to subscribe to our channel ⇾


SUPPLIES

MATERIALS

TOOLS

  • Drill and/or Drill Press
  • Ruler & Pencil
  • Cup of Water
  • #6 Hex Bit
  • Miter Saw
  • 1/4″ Glass and Tile Drill Bit
  • 3/8″ Drill Bit
  • Centering Punch & Hammer

DIY Tiered Stand
DIY Tiered Stand

How to Make a DIY Tiered Stand

DIY Tiered Stand
1. We recommend putting a few pieces of scrap wood under the small plate before you begin to avoid drilling into the work surface once the bit goes through the plate. Then, using a ruler, measure and mark the center of the plate.

DIY Tiered Stand
2. Next, take a cup of water and pour a generous amount onto the surface of the plate. The water will help cool the drill bit.

DIY Tiered Stand
3. Now, using a 1/4″ glass and tile drill bit and a drill, line up the drill bit with the mark you made in step 1 and drill a hole through the plate.

DIY Tiered Stand
Once you have a hole in the small plate, wipe off the excess water and dirt and then repeat steps 1-3 for the larger plate.

DIY Tiered Stand
4. Using a miter saw, cut the dowel rod into two pieces. The small top piece will be 2 1/2 inches and the larger middle piece will be 6 inches.

DIY Tiered Stand
5. To hold the dowel rod vertical and make it easier to drill into it, clamp it between two scrap boards. We used 2x2s.

DIY Tiered Stand
6. Using a ruler, mark the center of the end of the dowel rod. Do this step for both sides of the longer dowel rod and one side of the short dowel rod.

DIY Tiered Stand
7. Now with a centering punch and a hammer, create a divot in the end of the dowel rod for the drill bit. You will need to do this step for both sides of the longer piece and one side of the short piece as well.

DIY Tiered Stand
8. Using a 3/8″ drill bit, drill a hole 1″ deep in both sides of the longer dowel rod and one side of the short dowel rod.

DIY Tiered Stand
9. Take a #6 hex bit and screw the insert nuts into both sides of the long dowel rod.

DIY Tiered Stand
10. To assemble the DIY tiered stand, take the crown bolt and feed it through the hole in the large plate.

DIY Tiered Stand
11. Now thread the crown bolt into the large dowel rod until it is nice and tight.

DIY Tiered Stand
12. Now screw the hanger bolt into the insert nut that is in the top of the large dowel rod.

DIY Tiered Stand
13. Run the hanger bolt through the hole in the small plate letting it sit on the large dowel rod.

DIY Tiered Stand
14. Finally thread the shorter dowel rod into the hanger bolt until it is flush with the plate.

DIY Tiered Stand
Your completed tiered stand should look like this once it is assembled.

DIY Tiered Stand
If you use a plate that doesn’t quite sit flat, you can add little wooden feet to the bottom like we did to make it balanced.

DIY Tiered Stand
I think Brent is pretty much a genius for figuring our how to make it screw together in two pieces with small holes in the plates. I pitched this idea to him and picked out the plates from IKEA and he worked up the game plan for making it happen. My mind was blown with his awesome solution.

I love, love how this repurposing ceramic dishes project / IKEA hack turned out. It looks exactly like the tiered stand I had my eye on at the store. The great thing about this DIY tiered stand is it is a very versatile storage piece. You can store jewelry in the bedroom or cupcakes in the kitchen or make two, one for each room!

We made ours modern and neutral to match the one I saw in the store because it fits with the style of our home but depending on the plates you choose and the color you paint/stain the dowel rods you make it look however you like.

PROJECT FEATURED ON GREAT DAY HOUSTON

Our DIY tiered stand was one of the repurposing ceramic projects we shared on the local live morning show, Great Day Houston. In case you missed it (or don’t live in Houston) you can watch our DIY segment here.

Brent and Courtney Richardson of Gray House Studio on Great day Houston

PIN THIS PROJECT

DIY Tiered Stand

How to Paint a Faux Brick Wall

How to Paint a Faux Brick Wall

In this week’s DIY tutorial we share our tips for painting faux brick embossed hardboard paneling. If you want a DIY painted brick wall the easy and cheap way, we’ll show how to get a brick interior wall aesthetic on a budget.

How to Paint a Faux Brick Wall

Today we are going to share how to paint a faux brick wall. We posted a teaser about our technique a few weeks back but now we are going to break it all down on how we made our industrial loft style brick accent wall for our home gym that we love.

An important lesson we have learned during our home renovation process is you don’t necessarily have to have a huge budget to pull off your dream room. You just need inspiration, creativity, perseverance, and in my case, trust.

Trust that when your husband says that he thinks we should use EIGHT different paint colors to paint the wall panels that you know to just let him do his thing because it will turn out great. I’ll admit I had no clue where he was going with it but he is the one with art degree and I should know by now that I always love what he comes up with.

But I am getting a little ahead of myself so let’s start at the beginning. As I’m sure you know by now we are in the process of transforming our spare bedroom into a home gym. We both liked the idea of having a brick accent wall somewhere in our home so when we decided to create an industrial loft styled home gym, we knew this was the perfect room for it.

When we are brainstorming projects for our home we always start out, “Well, if we were rich, we would do this…” in this case our “if money were no option” choice would have been to have someone else come and install brick or our second choice would have been to install these pretty brick veneers.

But we are of course renovating our home ourselves on a budget so our only option for what we were willing to spend was to buy three sheets of embossed hardboard wall panel that looked like brick. Well, kind of looked like brick.

Today we are going to show you how we transformed faux brick embossed hardboard paneling into a realistic looking brick accent wall by painting it with a new color palette. It turned out to be a lot easier than we anticipated and only cost us around $130 for the entire wall.

How to make a DIY Faux Brick Accent Wall on a Budget

SUPPLIES

FYI: This post contains a few affiliate links to products we used to make this project. Gray House Studio does receive commissions for sales from these links but at no extra cost to you. We appreciate you supporting this site. Read our privacy and disclosure policy. You can also easily shop our recommended products here.

Handmade Christmas 2021 Ornaments

2021 Christmas Ornaments
Thanks for supporting our small shop this holiday season!

TUTORIAL VIDEO

STEPS

How to Paint a Faux Brick Wall

1. First, we needed to find our brick embossed hardboard paneling. It turned out the only paneling we could find came in the unattractive combination of red brick and black mortar.

We knew we were going to have to put some work into it to get it to the style we wanted but Brent assured me that if we painted the wall with an entirely new color palette first rather than just painting all the paneling white, that is would drastically change the space into the old industrial loft look we desired.

How to Paint a Faux Brick Wall

How to Paint a Faux Brick Wall

2. Next, we installed our wall panels. We needed three hardboard panels to cover our wall.

We did this step first so we could paint across all three boards at one time making the paint job look cohesive.

We used a jigsaw to cut around the half bricks on all the panels on the inside sides so the panels fit together like a puzzle.

How to Paint a Faux Brick Wall

3. Our goal was to make the wall seamless so you could not tell it was three separate pieces of paneling.

We did our best to line up the bricks as close as possible and then used gray caulk to cover the lines where the boards came together. We used a color similar to the paint we got to paint the mortar.

How to Paint a Faux Brick Wall

4. After we had determined what we wanted our wall to look like, we needed to pick out the paint colors that would be in our new color palette.

To do this we used the Sherwin-Williams ColorSnap app to pull the colors from the screen in our inspiration photo and translate them into actual paint colors we could purchase to use to paint our brick wall.

How to Paint a Faux Brick Wall

5. Once we had the colors available to us on the app, we had to narrow them down to the ones that would form the best color combination for our faux brick.

There are a lot of options so our formula consisted of choosing two mid-tone colors, two highlight colors and two to three accent colors. We also selected a new lighter color for the mortar.

Our New Color Palette:

We bought sample sizes of the paint because we only needed to use a small amount of each color. It was plenty to get the job done and have some of each color left over for future projects.

How to Paint a Faux Brick Wall

6. We started with our two mid-tone colors, Cavern Clay and Moroccan Brown.

We poured the two paint colors on a large piece of cardboard. We chose to use a piece of cardboard because it allowed us plenty of space to roll the paint together and let it mix naturally.

We chose to use a foam roller because we liked the authentic texture it gave the paint when it was rolled across the embossed surface.

Painting a Faux Brick Accent Wall

7. We completely covered the wall with a light coat of both mid-tone colors and then moved on to our accent colors.

For the accent colors we did not cover the entire wall but instead concentrated them to certain areas. We chose to use a bright yellow (Baguette), dark brown (Fiery Brown) and dark gray (Urbane Bronze) for our accent colors.

For this step we got a new foam roller so the lighter color did not get muddied down and poured our paint on a clean-ish section of our cardboard.

Next, we applied our highlight color. We applied it to the wall liberally but if it looked too overpowering in areas, we went back and rolled in more of our mid-tones to tone it back down. We didn’t want any particular section to stand out.

For our highlight color, we used Rare Gray.

Painting a Faux Brick Accent Wall

8. We started the whole process by painting the black mortar a gray color, Dovetail.

But we didn’t mention this as the first step because this actually created double work for us because once we rolled in the other colors, stray paint got into this area.

So we had to come back and touch up the mortar again.

If we were to do this again we would wait until the very end to paint over the black mortar.

Then we could just take the paintbrush and cover this area once. But once we touched up the mortar color, it really changed and cleaned up the look of the brick paneling.

Painting a Faux Brick Accent Wall

9. You could stop there but we wanted to replicate an old industrial loft wall.

Our vision was to have it appear as if the entire wall was painted white but time has passed and now the paint is wearing off.

To achieve this look we whitewashed sections of our brick wall with various shades of white paint.

To begin this process we significantly watered down our Kestel White paint in a paint pail liner. We used a paintbrush to lightly brush on the paint in a pattern similar to our inspiration photo.

With the white paint being very light we could see our entire pattern and then come back with more opaque paint to fill it in. We left some areas untouched on purpose so that these areas would look like the really worn and exposed brick.

Painting a Faux Brick Accent Wall

10. Next, we used our paintbrush and less diluted white paint to cover the parts of the pattern that had more paint and less exposed brick showing through.

Painting a Faux Brick Accent Wall

We are extremely pleased with how easily we were able to transform our wall with our new color palette. The new colors made a huge difference. Check out this before and after of the same wall.

Painting a Faux Brick Accent Wall

Here is what our faux brick wall looks like once we finished the whitewashed pattern.

We are pretty much ecstatic we were able to pull off this brick accent wall for only $130. It is an essential feature in our industrial loft gym.

From a distance it passes for real brick much more easily then it did when we first hung the hardboard paneling on the wall.

It just makes me so happy every time I walk into the room to see this wall. For some reason it makes running on that treadmill so much more fun. And that is what I love about creating unique spaces in our home.

I feel encouraged and inspired with each new project that we complete to see our overall vision come to life. We pour our time, heart and creativity into these projects and it is definitely worth it when we get to enjoy spending time in these rooms.

PIN FOR LATER

A DIY tutorial sharing our tips for painting faux brick embossed hardboard paneling. If you want a DIY painted brick wall the easy and cheap way, we’ll show how to get a brick interior wall aesthetic on a budget.