Better Homes & Gardens {I Did it} Feature

Better Homes and Gardens {I Did It} Feature

Better Homes & Gardens {I Did it} Feature

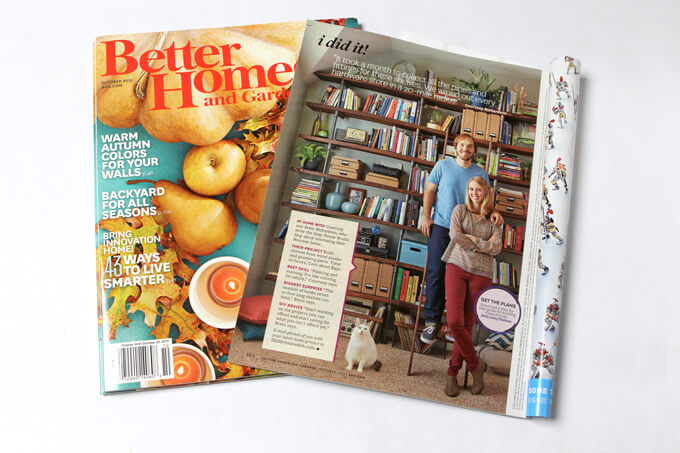
If you had asked me a year ago if I thought Brent and I would be standing in the checkout line of the grocery store looking at ourselves and one of our favorite Gray House Studio projects, our industrial shelves, in an issue of Better Homes and Gardens magazine I would have asked you, “What the heck is Gray House Studio?” Yes, it is true but hard to believe that this time last year our home renovation blog did not even exist.

But since we started in December we have poured so much of our energy and free time into our DIY projects and our blog so to see our hard work in such a well known and loved magazine this week has been incredibly surreal and overwhelming (in the best of ways).

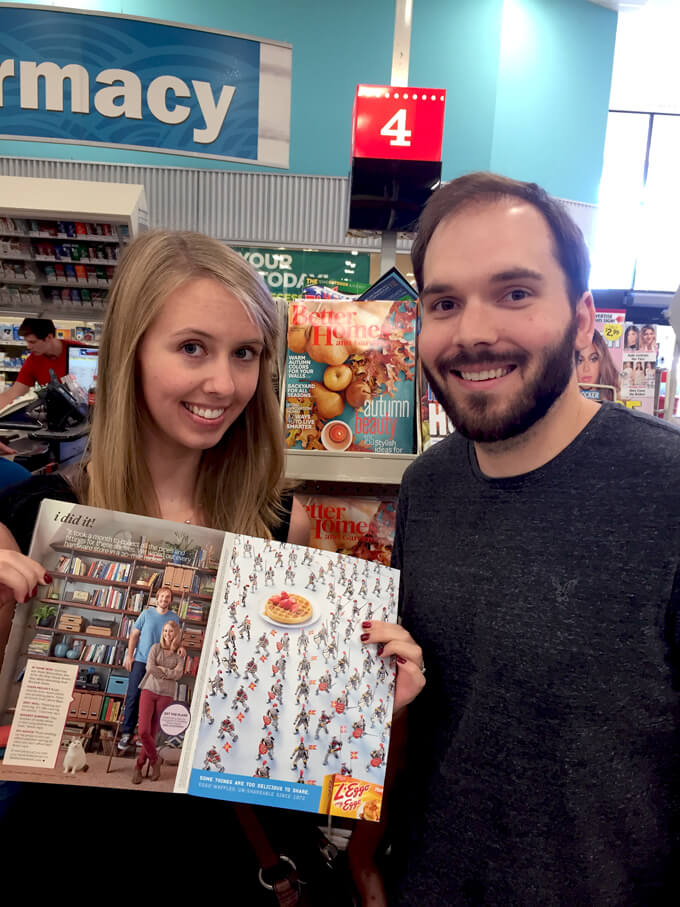
So much so that we totally played it uncool and when we heard the issue was out, we rushed to the grocery store and had my brother take lots of photos of us posing with it in front of the magazine rack while shoppers looked at us like we were total goofballs. But we were just so happy and excited to see our Better Homes and Gardens {I Did It} Feature! There was no way you could wipe the smiles off our faces that day.

Behind the Scenes of our Photo Shoot

It is crazy to believe but this awesome adventure started all the way back in February of this year. A few weeks after finishing and posting our industrial shelves we received an email from Kit Selzer saying she thought our industrial shelves looked amazing.

To hear that kind of encouraging feedback felt outstanding. I mean sure our parents tell us our projects look great all the time but they also said that about the macaroni art we did in Kindergarten so their biased positive response doesn’t hold quite the same weight as an unbiased opinion that comes from a senior editor at Better Homes and Gardens magazine. Sorry Mom and Dad. We are still appreciative you are our biggest fans.

That wasn’t even the best part. She wanted to feature the shelves in an upcoming issue of the magazine in the I Did It! section and send a team to our house to photograph them and us. After reading the e-mail I immediately called Brent at work and started talking in my “super excited, high pitch voice” that somehow only my easygoing husband and dogs can comprehend. He was equally as enthusiastic.

Better Homes & Gardens {I Did it} Feature
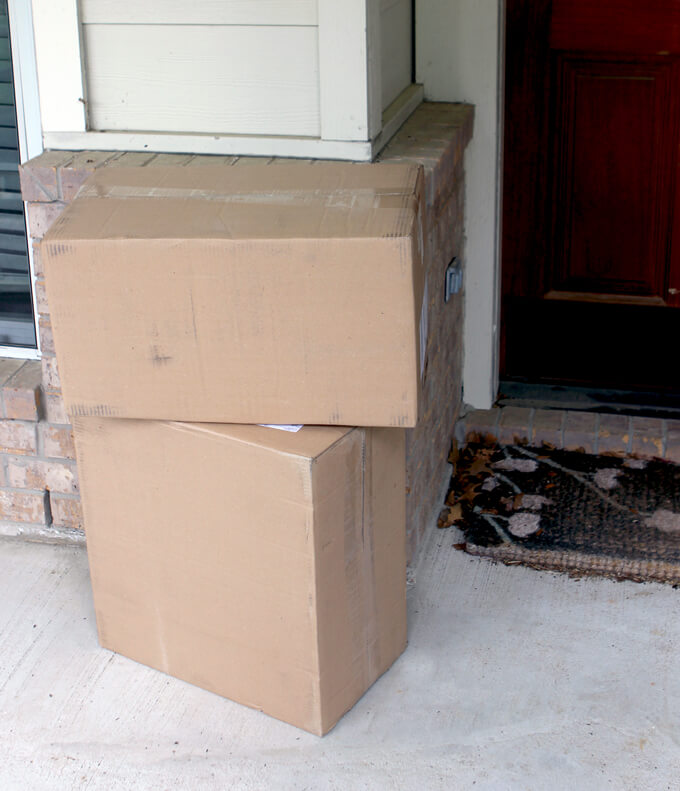
The photo shoot was scheduled for the last week of April and when two large boxes filled with the magazine files and stationery boxes ordered for the shoot were delivered two weeks prior, it started to sink in that this was really happening. And then panic set in that while our shelves might be ready for BHG, the rest of our house…umm not so much. I’m just going to keep it real and say we needed to do some MAJOR cleaning.

But what did we do first? Create an even bigger mess as we built our entire coffee bar in a week. It was an insane idea but how often do you have Better Homes & Gardens come to your house? We wanted to impress.

We managed to get our whole house looking cleaner than it has ever been since we moved in because of all our renovation projects just in time for Monday morning when Shelley, the art director and Janna, the photo stylist arrived to preview our space and our wardrobe for Thursday’s shoot.

Once we got talking about outfits and I admitted to having pretty much zero fashion sense outside of shorts and solid colored tank tops (my uniform of choice in Houston for spring, summer and fall) they asked to see our closet to get a sense of my style. While I was more than happy to show them my wardrobe, I cringed at the thought of them seeing our less than organized closet.

Because what do you do when visitors are on their way and you are in a hurry to clean up? You shove random junk you don’t know what to do with in the closet, right? Am I right? Anyone? Our closet is normally pretty straightened because Brent and I don’t have enough clothes to fill it up but at the last minute I stuck a bunch of random things in there to clean up some areas of our house. I was slightly embarrassed by the mess which we worked so hard to clean, get rid of and then at the last minute “hide”. But they were the sweetest ladies who were kind enough to focus on the clothes and not the environment where they were located.

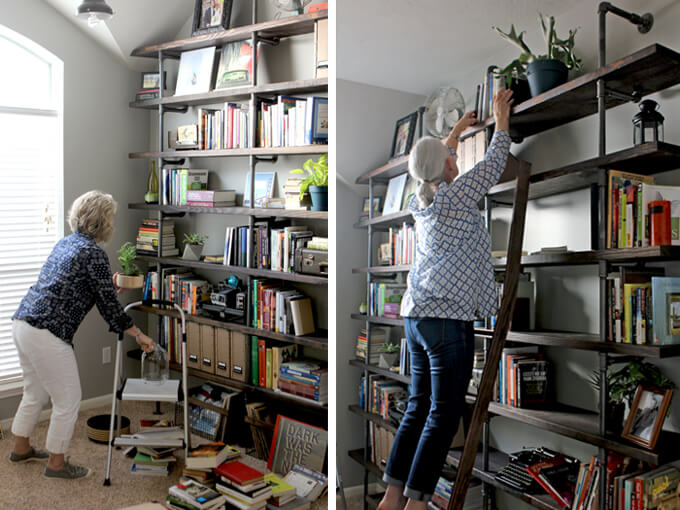
Then at the last minute there was talk of a ladder and how great a ladder would look in our library and Brent suggested he could build one in two days. We surprised them when they came back on the day of the shoot with a brand new custom built ladder that turned out to be essential to the day because they were able to use it to reach the top shelves to style and we could stand on it for the actual photo.

Better Homes & Gardens {I Did it} Feature
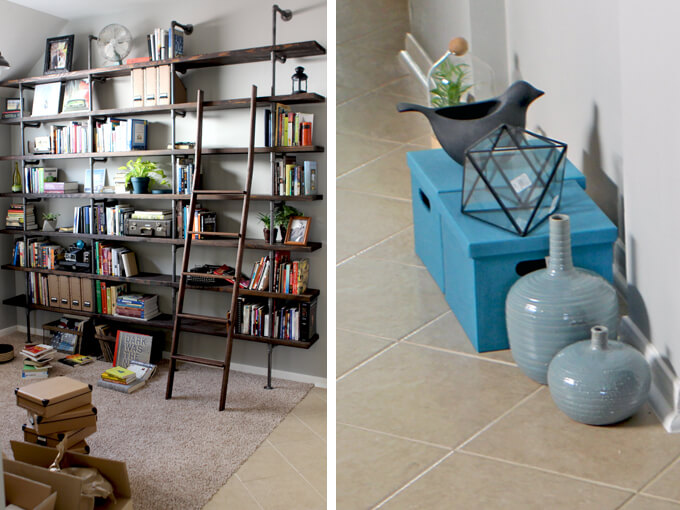
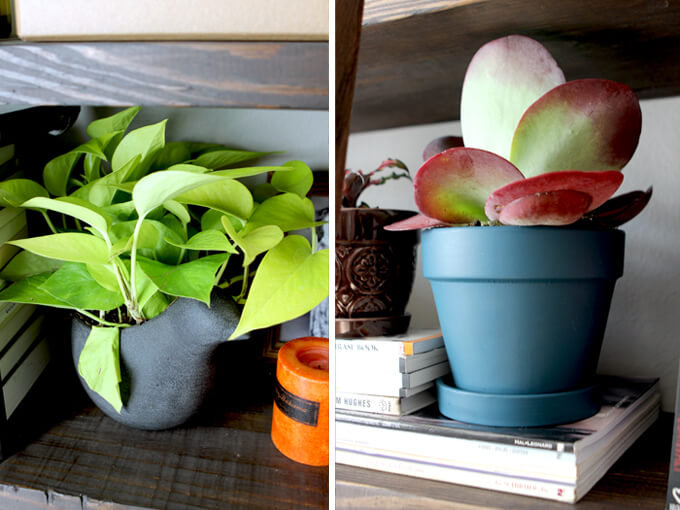
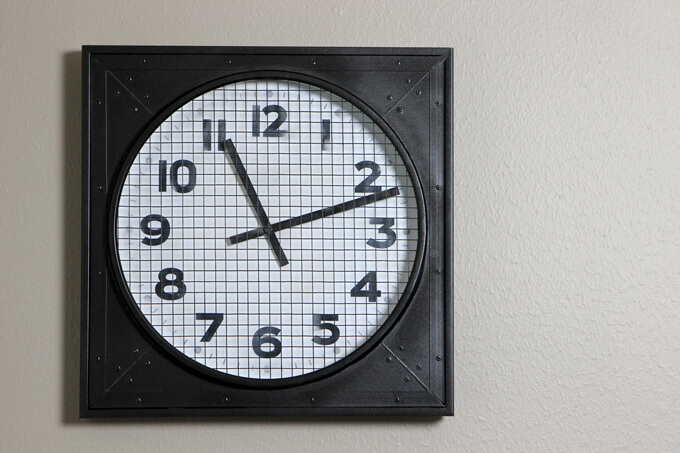
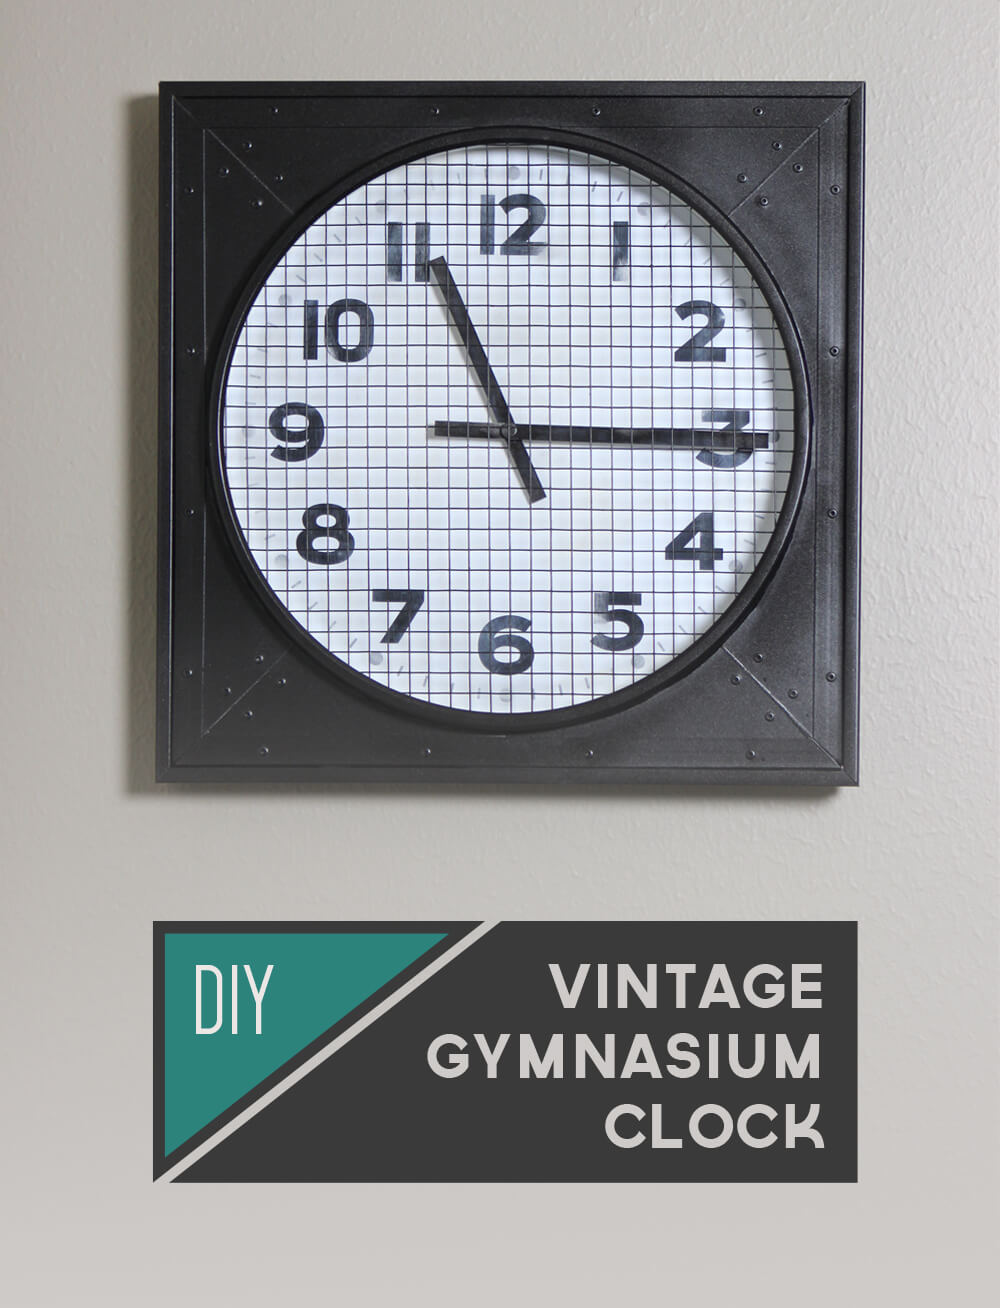
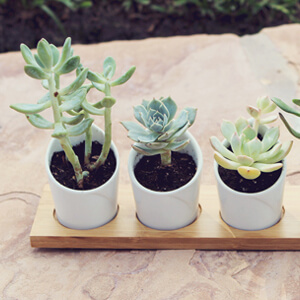
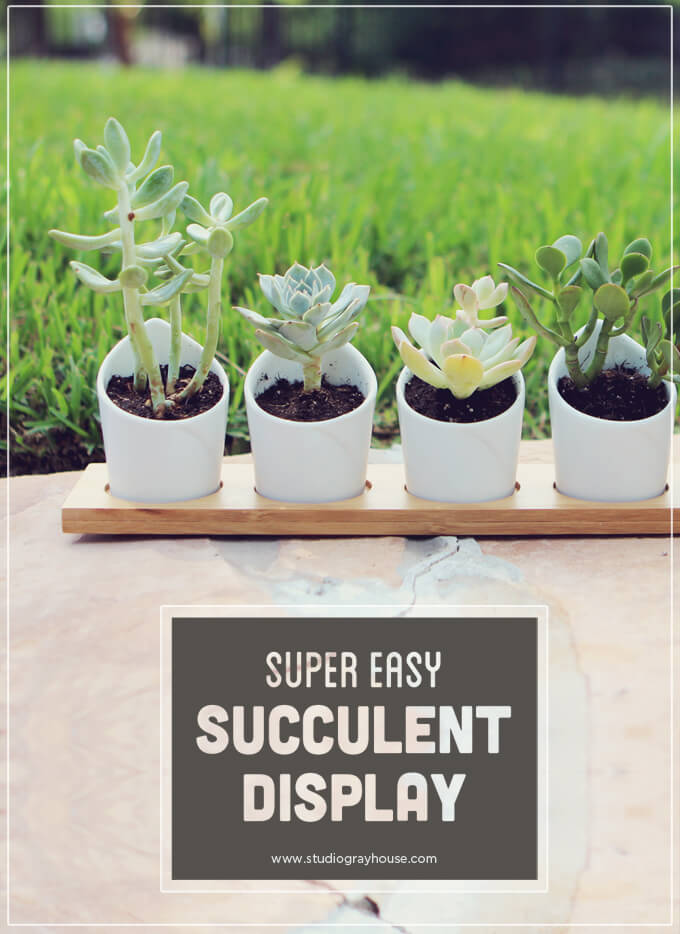
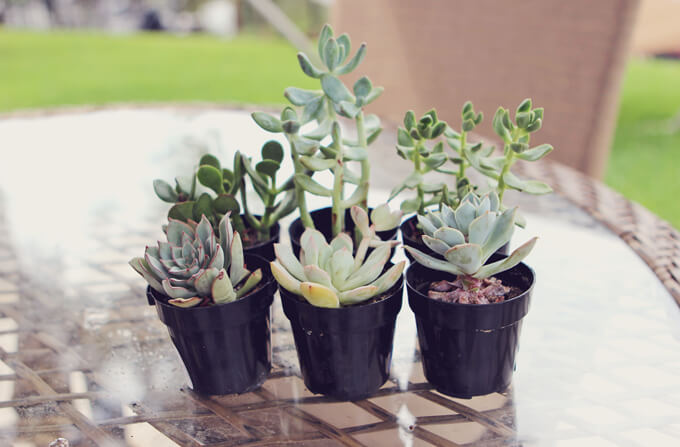
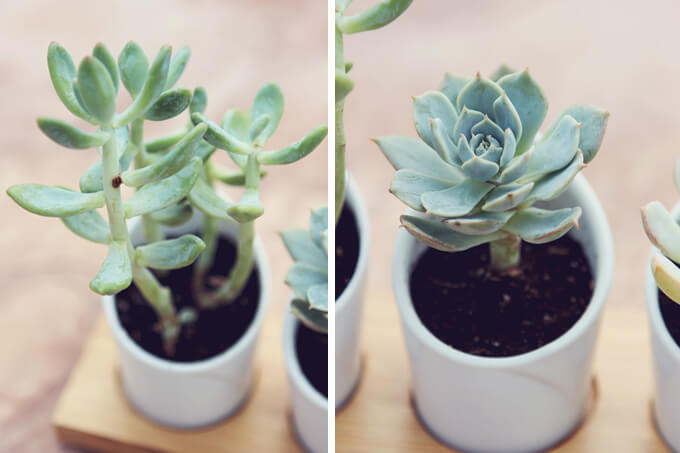
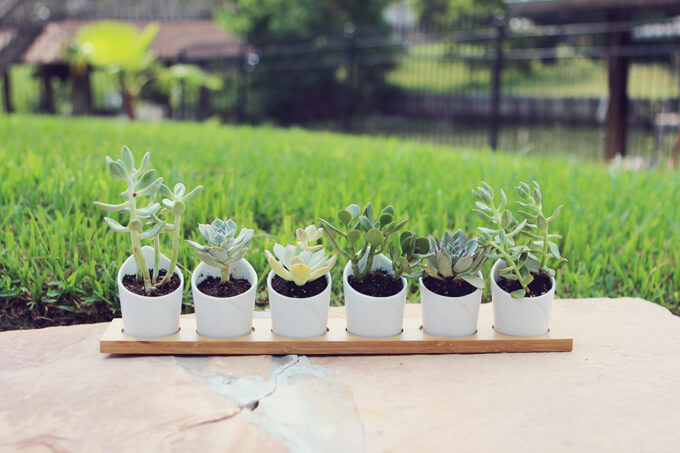
Thursday morning Shelley and Janna returned and brought lots of fun items for our shelves. They also brought some really cool plants that sadly are not still around because I can’t keep a plant alive to save my life. The first thing they did was to start pulling items off our shelves so they could rearrange things to look best for the camera.

Better Homes & Gardens {I Did it} Feature
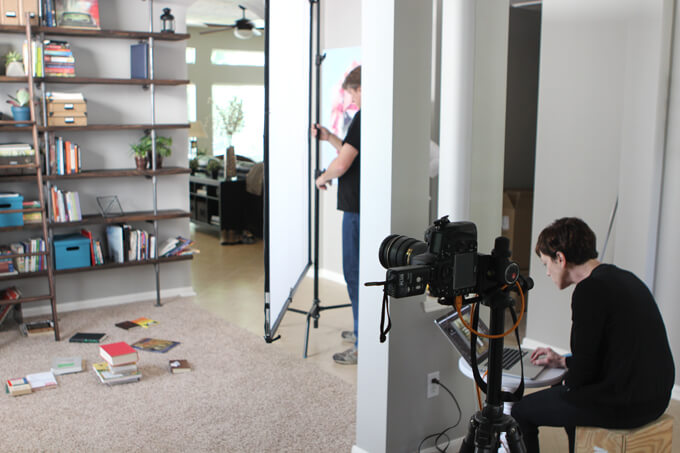
It was so much fun to watch Janna and her assistant Becki style our shelves. She is an expert in this field and obviously has way more experience then me so while I probably should have been spending more time taming my hair, I couldn’t help but want to watch the entire time and take mental notes of how she arranged and styled items.

Better Homes & Gardens {I Did it} Feature

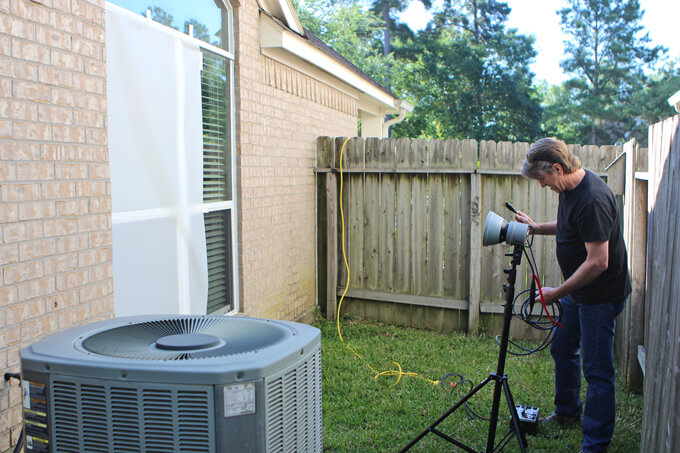
A little while later the photographer Brian McWeeney and his assistant/wife, Carolyn came and set up their equipment. They made the lighting in the room look incredible. They were a hilarious couple and always kept us laughing. Brian was kind enough to answer all of Brent’s photography questions and Carolyn was a lifesaver in helping me control my “super fine” baby hair that refused to lay down and became a running joke of the day.

Better Homes & Gardens {I Did it} Feature

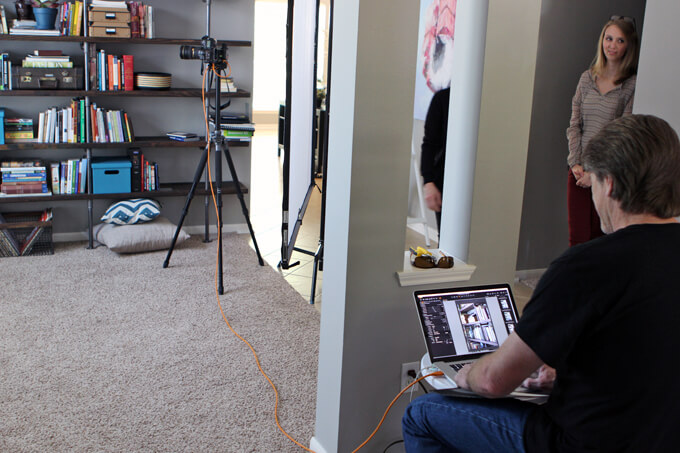
Since we are used to being behind the camera, I found the process of how these magazine pages come together fascinating. Shelley definitely had the eye for noticing every little aspect that might look off in the photo or make it feel unbalanced. I really learned from her how to pay more attention to the tiny details when photographing our projects.

Better Homes & Gardens {I Did it} Feature

^^^ Thanks so much to Brian for taking this awesome group shot! ^^^

We couldn’t have asked for a better group of people to work with. We enjoyed getting to know each and every one of them. They were all so personable, encouraging and funny. We had a lot of laughs that day. I’m sure it was a lot of work on their part because those are some big shelves but they made the whole process feel effortless. We are so thankful for them for making this an amazing and unforgettable experience.

Better Homes & Gardens {I Did it} Feature
The best part of all is Jake (the cat) made it into the photo too! Which is pretty spectacular. I was planning on taking him over to my parents’ house for the day so he would be out of the way but when it was brought up that they might try and work him into the photo I wasn’t sure how it would go. On the first attempt he wouldn’t sit still and proceeded to very slowly walk out of frame. The key words here are very slowly. It was as if he was stalking prey or moving in slow motion. Everyone thought it was so humorous because they had never seen a cat move so slow before. The second time around he just plopped himself down and didn’t move one bit but just looked like a big ball of white fur laying on the ground. He eventually had to be removed from the scene because he refused to leave.

We are so appreciative of this opportunity because when you put yourself out there it can be a scary feeling but to have positive feedback like this gives us the drive to keep dreaming, keep making and keep creating. This just shows us that even our wildest dreams are possible. You never know what is around the corner when you take that leap and put yourself and your work out there.

Your kind e-mails, words of encouragement on social media and in our comment section mean the world to us as well, so thank you for supporting Gray House Studio.

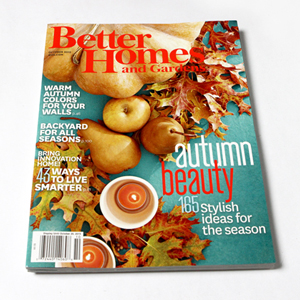
The October 2015 issue of Better Homes and Gardens magazine is on stands now! Check out our I Did It! feature on the last page.

You can view our original Industrial Shelves Project post here.

Fall Crate Display

Fall Crate Display

Create a fall crate display to decorate your front porch for the Fall season.

Fall Front Porch Decor

Even though you can’t tell by the weather here in Houston (Is it sad that when it gets to be about 96 degrees we say it feels good outside?) fall is fast approaching.

This year we decided to get a jump on the season and create a few DIY fall decor projects for our front porch. So when those cooler temperatures finally reach us way down here in Houston, we will be ready.

The first project we are going to share with you today is our Fall Crate Display. This is a really simple decor project to create and customize and can be set up anywhere from on your porch to in front of your fireplace.

Plus, it transitions well with the seasons so with just a little switching out it can become a winter crate display.

2022 Personalized Christmas Ornaments
*** Thanks so much for supporting our small shop – Moon Rock Prints – this holiday season! ***

How to Create a Fall Crate Display

SUPPLIES

FYI: This post contains a few affiliate links to products we used to make this project. Gray House Studio does receive commissions for sales from these links but at no extra cost to you. We appreciate you supporting this site. Read our privacy and disclosure policy. You can also easily shop our recommended products here.

STEP BY STEP GUIDE

Fall Crate Display

1. We bought three wooden crates. The ones we were made of unfinished pine.

You can have as many crates as you like in your display depending on the amount of decor pieces you intend to add. You can even incorporate different sizes of crate to create interesting shapes.

Fall Crate Display

2. The next step was to stain the crates to give them a more high end feel. We used our favorite Kona color stain.

Staining these crates was kind of a pain and time consuming. It is not a hard task, just a tedious one.

Fall Crate Display

3. Once I was done it was worth it. We didn’t bother to stain the bottom of the crates and I will explain why in the next step.

Depending on the look you are going for you can rough up and weather the wood or even add a graphic or text to make it look like a vintage crate.

Fall Crate Display

4. We decided to take it a step further. To transform the crates into a cohesive display and add in more color to this set up.

We used scrap pieces of wood but you could also use plywood to cover the bottom of the crates.

When we flipped the crates on their sides these boards would be the background. There are endless possibilities in what you can do to create cool backgrounds.

Fall Crate Display

5. We decided to stick with simple backgrounds and paint them with mute fall colors. We used some sample paint colors we had left over from another project.

We used a high-density foam paint roller to paint the plywood boards Cavern Clay Sample Paint, Baguette Sample Paint, and Fiery Hue Sample Paint.

You won’t need much paint for these boards so inexpensive cans of sample paint are the way to go. I just poured some paint onto a piece of cardboard and rolled in onto my scrap pieces of wood that would become my crate back.

Fall Crate Display

6. Once the painted pieces of wood dried, we secured them to the bottom of the crate with foam tape.

Fall Crate Display

7. Next, we arranged and rearranged them until we found the best combination that would fit our decor pieces.

I tilted the crate that sits on top of the other crate at a slight angle to allow for more surface space so the items could spill out of the bottom of top crate onto the top of the bottom crate.

Fall Crate Display

8. The last part is the fun part! To decorate our fall crate display we mixed traditional fall decor items such as pumpkins and a burlap banner with natural elements such as pine cones, acorns and leaves (which depending on your location you can find just laying around outside).

Adding flowers and plants to our front porch is always fun so we paired pretty colored mums with the more unique looking Croton plant.

Adding some hay to the bottom of the crates adds some texture, defines the bottom of the crate, breaks up the dark color of the crates and definitely gives it that authentic barn feel (and smell).

We have a lot of warm tones going on so we mixed in some contrasting color like shades of blue in the flower pot and tins to really make them pop. We have learned you don’t always have to buy a bunch of new pieces but can re-purpose things you may have sitting around somewhere else.

For this display we incorporated a lantern and tin we had sitting around inside to give it a rustic/barn feeling. When styling the crates we always try to pair taller items with shorter pieces to maximize space without making it look overcrowded.

What we love about this fall crate display is it creates a purposeful space for arranging and showcasing fall decor pieces on our front porch. The beauty of it is with just a switch of the back piece of wood and decor items it can effortlessly transition from a rustic fall look to a rustic winter look come December.

Looking for more fall inspiration? Check out these easy DIY fall porch decor projects or how to throw a fall party!

PIN IT FOR LATER

Create a fall crate display to decorate your front porch for the Fall season.

Home Gym Details

Home Gym Details

Okay, we have something awesome for you today! I can hardly contain my excitement but first an update on our home gym progress.

I wanted to share a few of the new items we have added to the gym over the last few weeks.

Home Gym Details

Ultimately, Brent and I decided that since we don’t have one room in our home entirely finished, it would be nice to pick out products that would round out our gym that were both functional and decorative.

That way once we are done with our last few DIY projects, the room will be complete and we will have our first room makeover done in our home.

Home Gym Details

Our first pick was this wall fan. It checked all the boxes we were looking for in a fan for this room: wall fan, industrial style, oil-rubbed bronze finish and three speeds. We mounted it right above our treadmill and I have already tested it out a few times. It works like a charm. That is one perk of having your own home gym; you can literally mount a nice looking fan right across from the treadmill and blast it directly on your face full speed while you are running. It is heavenly. Plus, we think it looks pretty awesome against our faux brick wall.

Home Gym Details

Another item we choose for the home gym was this wall clock. This particular clock didn’t match the style we were going for in our gym BUT we had big plans in store for it. What we liked about it was how simple it was, the large size, the block numbers and the beveled rim. It made for the perfect clock to use for our DIY vintage clock project.

Home Gym Details

I wanted to add a rug to the gym that had some color to break up the space and to designate as the yoga area. When I found the this blue rug I knew it was the one. We liked the braided texture that gave the rug a relaxed and casual feel. It fits the space and style perfectly and once I got it in the room and looked at it up close I liked it even more. It has a cool pattern that I hadn’t noticed online.

A few other items we picked out for this room included a TV mount to hang our TV on the wall as well as some hooks that we will be using on the lockers we will be building.

Home Gym Decor

FYI: This post contains a few affiliate links to products we used to make this project. Gray House Studio does receive commissions for sales from these links but at no extra cost to you. We appreciate you supporting this site. Read our privacy and disclosure policy. You can also easily shop our recommended products here.

Using an App to Pick Paint Colors

Using the ColorSnap® App to Pick Paint Colors

Before I get started with this post I would like to note that this is not a sponsored post, we just had a great experience using the Sherwin-Williams ColorSnap® App for one of our projects and thought we would share how using this app to pick paint colors came in handy when we were in a bit of a bind in case you ever find yourself in a similar predicament.

Using the ColorSnap® App to Pick Paint Colors

While working on our home gym makeover we decided we really wanted to do a brick accent wall. We felt like it would be a project that would take the room to the next level. In a dream world if money was no option we would have went with the thick brick veneers.

However, we have a limited budget for this room makeover so our best or only option for what we were willing to spend was to get three sheets of the embossed hardboard wall panel that looked like brick.

Using the ColorSnap® App to Pick Paint Colors

The downside to this was that it only came in the undesirable colors of dark red brick and black mortar. Yikes. But we are optimists and knew that with some hard work and the right paint colors we could transform this paneling to look like the authentic brick wall we were envisioning that would transform this space.

We had seen multiple tutorials of whitewashing over the red brick and black grout but we felt like that wasn’t the right direction for this wall. We wanted to paint the brick to have a better color palette. So we scoured the internet for examples and finally came across a brick wall that had nice shades of browns, grays and tans that would blend nicely with the paint color we already had on our other walls.

Using the ColorSnap® App to Pick Paint Colors

Using the ColorSnap® App to Pick Paint Colors
1. We wanted paint the brick on our wall to look like the brick in our inspiration photo. The only problem was figuring out how to get those colors from the screen to the wall. Figuring out the right colors probably would have taken HOURS at the store sifting through hundreds of paint cards trying to hold them up to the screen.

Using the ColorSnap® App to Pick Paint Colors
2. I remembered that I had downloaded the Sherwin-Williams ColorSnap® App on my iPad awhile back and opened it up to see if there was a feature that could help with our paint color dilemma.

I clicked on the Explore Color tab at the top and was excited when I found the match a photo section. It was exactly the tool we were looking for to determine the colors in the brick.

Using the ColorSnap® App to Pick Paint Colors
3. All we had to do was upload our inspiration photo of the brick and it populated little dots on the screen with paint colors names and numbers. We actually used a few that it pre-populated and then were able to drag the other dots around the screen to select the exact areas where we wanted to know the color.

Using the ColorSnap® App to Pick Paint Colors
4. When we clicked on the dot it told us the SW number and name and then has a little plus that we could click on to save to our color palette. So we selected eight colors in the mortar and the brick and saved them to our color palette. Once we saved them it added a check mark on the dot on the photo.

Using the ColorSnap® App to Pick Paint Colors
5. Then we took our iPad where our colors were saved in the ColorSnap® app to the Sherwin-Williams store and used it to look at the names and numbers to find the corresponding paint cards. We just wanted to double check that the color on the screen looked like the color on the card and it was still a color we wanted.

Using the ColorSnap® App to Pick Paint Colors
6. All the colors were close enough to the ones on the screen and looked good so we bought sample sizes in those eight colors. It turned out to be a gorgeous paint palette and one I never would have imagined picking if we had to do it all on our own.

Using the ColorSnap® App to Pick Paint Colors
7. We got to work painting the brick. We painted the mortar the color the app suggested it was in the photo and painted the brick the same way.

Using the ColorSnap® App to Pick Paint Colors
The results were amazing! We were able to transform the ugly red brick and black mortar paneling into a realistic looking brick wall that matched the colors of our inspiration photo. Now our brick wall has much more dimension and character. It’s even hard to tell that it is not real brick but rather paneling.

Using the ColorSnap® App to Pick Paint Colors
The match a photo feature on the ColorSnap® app was a lifesaver for this project because it saved us a ton of time and took the guesswork out of having to choose what colors looked like the ones in the image. There are a million different paint color options out there and by using this app that literally translated a color on the screen into a color we could physically buy simplified the whole process for us.

We are very happy with the results of our wall and are so glad we found this neat little tool. If you ever are in need of figuring out how to bring a color from the screen in an inspiration photo to real life so you can transform your own project, you should definitely give it a try.

Check out our full tutorial on how to paint a faux brick wall!

PIN THIS TUTORIAL

Using the ColorSnap® App to Pick Paint Colors

DIY Vintage Gymnasium Clock

DIY Vintage Gymnasium Clock

For this knockoff project we created our own DIY vintage gymnasium clock based on the Restoration Hardware 1940s Gymnasium Clock for our home gym.

DIY Vintage Gymnasium Clock

This weekend we completed another DIY project for our home gym makeover and it turned out awesome. We wanted to see if we could turn back time and if we could find a way… to make a brand new modern clock look like a vintage gymnasium clock. The style we are going for in our home gym is vintage & industrial so it just made sense to incorporate an old-fashioned gym clock with the metal grill.

DIY KNOCKOFF

DIY Vintage Gymnasium Clock
I found some great examples for inspiration but the Restoration Hardware 1940s Gymnasium Clock really hit both the vintage AND industrial look I was looking for perfectly. Brent took one look at it and was very confident we could make our own that looked just like it so I was extremely happy because we are on a budget with this room makeover and I couldn’t bare to hand over $200 for a clock, even if it is a really big, really cool clock.

So we made our own slightly smaller version of theirs using a basic clock. The whole project should have cost us around $80 but we actually got the clock with a gift card we won in a contest. Score! So our whole DIY vintage gymnasium clock project took about a day and cost us around $20. Ah, one less zero sounds so much nicer.

SUPPLIES

MATERIALS

  • A Plain Wall Clock
  • Metallic Satin Oil Rubbed Bronze Spray Paint
  • 1/8 x 32-in x 48-in Markerboard Hardboard
  • 3/4-in Sequentia Wall Panel Moulding
  • 1.125-in x 7-ft Baseboard Moulding
  • Silver Galvanized Steel Hardware Cloth
  • 1/8-in Aluminum Rivets
  • White paint
TOOLS

  • Table saw
  • Router
  • Drill
  • Box cutter
  • Snips
  • 220-Grit Sandpaper
  • #0 Steel Wool Pad
  • Nail gun and finishing nails

DIY Vintage Gymnasium Clock

How We Made Our DIY Vintage Gymnasium Clock

DIY Vintage Gymnasium Clock
1. The first thing we did was to disassemble the clock. We pulled off the outer rim and piece of glass so we could we remove the hands off the clock by pulling them straight up from where they were connected to the center of the clock. We started with the hand on the top and then moved down one hand at a time.

DIY Vintage Gymnasium Clock
2. We traced the outer rim of the clock onto a large piece of paper and cut it out to use as a template. We set it aside for when we were ready to use it.

DIY Vintage Gymnasium Clock
3. Next, we sanded the rim and the hands of the clock with a #0 steel wool pad to provide a rough texture for the spray paint to adhere to. We used steel wool because it leaves small enough scratches that the paint finish will still be smooth. The scratches left by sandpaper can be seen through the paint.

DIY Vintage Gymnasium Clock
4. We spray painted the pieces we removed from the clock (the outer rim and the hands) with metallic satin oil rubbed bronze spray paint and hung them to dry so they would be out of our way.

DIY Vintage Gymnasium Clock
5 Then we cut the piece of hardboard down to the size of the square we needed to fit our clock. The square we cut was an inch and a half wider than the diameter of the clock. That gave us a 3/4 inch border around the clock, which is the same size as the moulding we were going to use.

DIY Vintage Gymnasium Clock
6. We took our paper template of the clock and folded it in quarters to get the radius of the circle, which was the length we needed to set up our router jig.

DIY Vintage Gymnasium Clock
7. We cut a circle out of the square piece of hardboard with a router by attaching a scrap block of wood to the router base so it could rotate around a central point. We used the paper template to measure from the center point where we screwed into the board to the outside of the router bit.

DIY Vintage Gymnasium Clock
8. Once we had it set up, we turned the router on and plunged it into the board and rotated it until we completed our circle. We made sure we had a scrap board under the actual board we were cutting to protect our work surface and provide thicker material to secure the central screw.

DIY Vintage Gymnasium Clock
9. Once we were done with our circle we had a nice cutout where our clock would fit.

DIY Vintage Gymnasium Clock
10. After attaching the 3/4 inch wall panel moulding over the rim of the hardboard, we took a straight edge and a box cutter and scored the board and the moulding at a 45-degree angle. We did this for each corner.

DIY Vintage Gymnasium Clock
11. Once all the moulding was attached and each corner was scored, it looked like this.

DIY Vintage Gymnasium Clock
12. We drilled holes where all the rivets would go with a drill bit that matched the size of the rivets. We used 1/8th rivets so we used a 1/8-drill bit. Once we had the holes drilled, we added four rivets to each corner.

DIY Vintage Gymnasium Clock
13. Then we attached four rivets on each side through our top board into a thicker board behind it to support the outer frame.

DIY Vintage Gymnasium Clock
14. We cut the baseboard moulding to frame the outside of the square at 45-degree angles using our miter saw. Then we attached it to the clock frame using mounting tape to hold it in place making it easer to secure it with finishing nails.

DIY Vintage Gymnasium Clock
15. This is what the back of our clock frame looked like once we had all the pieces attached.

DIY Vintage Gymnasium Clock
16. We secured the clock rim that we painted to the new frame we built with finishing nails.

DIY Vintage Gymnasium Clock
17. After our frame was complete, we spray painted the entire thing with the metallic oil rubbed bronze spray paint. We were pleasantly surprised with how convincing the spray paint made the plastic look like metal.

DIY Vintage Gymnasium Clock
18. We took a piece of galvanized steel hardware cloth and traced an outline of our clock using our paper template and a permanent marker. We used tin snips to cut out the circle.

DIY Vintage Gymnasium Clock
19 We inserted the metal mesh into the clock and spray painted it to match the rest of the frame.

DIY Vintage Gymnasium Clock
20. We used 220-grit sandpaper to distress areas on the face of the new clock to give it a more vintage aesthetic to match our new frame.

DIY Vintage Gymnasium Clock
21. We also did a light wash with an off-white paint color to make it look less bright and white and more worn and aged.

DIY Vintage Gymnasium Clock
22. Then we reassembled the hands on the clock.

DIY Vintage Gymnasium Clock
23. Finally we snapped the clock back into the rim. We did not put back the glass because we replaced it with the hardware cloth. Then hung our DIY vintage gymnasium clock up in our gym!

DIY Vintage Gymnasium Clock
As I am sure you can tell we decided not to go full rust on the outer appearance of the frame of the DIY vintage gymnasium clock. We had intended on adding more colors to make it have a similar color but we ended up being happy with how the spray paint made the plastic look like metal and how it matched everything else in the room by being the darker oil rubbed bronze color.

DIY Vintage Gymnasium Clock
What a difference, right? It was so much fun to take this modern clock back in time. Pun intended.

I feel like every project we complete for this room transforms the space into an old warehouse just a little more. It is so much fun to work on this room because it is different. The DIY vintage gymnasium clock adds a special touch and has easily become one of my favorite decor projects we have done.

I know I have said it a million times but Brent really does rock at being able to figure out how to make things look exactly like I want just by looking at them AND he can figure out all the supplies we need in one trip to the hardware store just off the top of his head. We always end up with just the right amount of materials and stay on budget. He’s got skills.

PIN THIS PROJECT

DIY Vintage Gymnasium Clock

Super Easy Succulent Display

Super Easy Succulent Display

Super Easy Succulent Display

This project is actually not a new one. I did this one before we started the blog but it is sitting in my office and it caught my eye today and I realized I haven’t shared it yet and since I love it so much and it was super simple to put together I thought I would take the opportunity to show you this easy succulent display I made for our home office.

I’m sure I am in the majority when I say I am kind of obsessed with succulents. I love the colors, interesting shapes, uniqueness and simplicity. It is kind of impossible to have just one succulent. I wanted to create a display that highlighted how succulents come in a variety of shapes and sizes.

Super Easy Succulent Display

It was around this time last year I mentioned to my mom that I wanted to create a succulent display but I wasn’t sure what I wanted it to look like so we had a mother/daughter shopping day and brainstormed ideas along the way. We hit up the clearance section of Lowe’s and found they had all their cute little succulents half off. It was hard to pick my favorites but I finally narrowed it down to six that each had their own interesting appearance.

Super Easy Succulent Display

I still had no idea what I wanted to put them in or how to arrange them but our next stop was Pier 1. I figured they might have a cute bowl or mug fairly cheap that might make an interesting display. Then we found a tasting party set that had little unique shaped cups sitting on a bamboo tray that was perfect!

Super Easy Succulent Display

Even though we weren’t sure if they were going to fit, it was too good of an idea not to try and MAKE them fit. And when I went to check out, the set was on sale too! $11 for the cups, tray and as an added bonus, mini spoons! I obviously didn’t need the mini spoons for this project but I was pretty excited to have some mini spoons to eat with should the occasion arise. Who doesn’t love mini spoons?

Super Easy Succulent Display

They were just the right size! I planted each succulent in a cup and arranged them on the tray based on height.

Super Easy Succulent Display

This was extremely easy to put together but I just love the results. I have been enjoying it for a year now and it makes the perfect desk decor for our office. It’s such a simple and cute way to show off my succulents collection.