Choosing the Right Home Gym Floor mats

Choosing the Right Home Gym Floor Mats

Our process for choosing the right home gym floor mats was a bit of a bumpy road but in the end we found the right fit for our gym floor.

Home Gym Floor Mats

Hey, it’s Brent here today sharing how we chose our home gym floor mats. Have you ever stumbled across the perfect pin? You know the pin that gives you a fantastic idea guaranteeing to take your project to the next level. When the supplies are easy to source and the skills needed aren’t too advanced, Pinterest can inspire you to try something new.

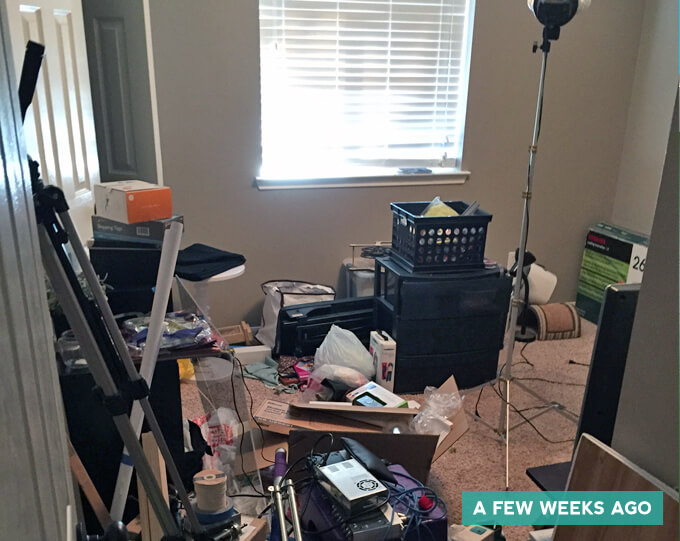
Sure, in the back of our heads we all know “Pinterest Fails” are a real thing but we try and be optimistic and never think it will happen to us. As we began work on our home gym room makeover, we experienced our own “Pinterest Fail”. It wasn’t the messy kind of disaster that leaves you feeling empty on the inside but rather the kind that forces you to decide if you are willing to settle for something almost right or start over.

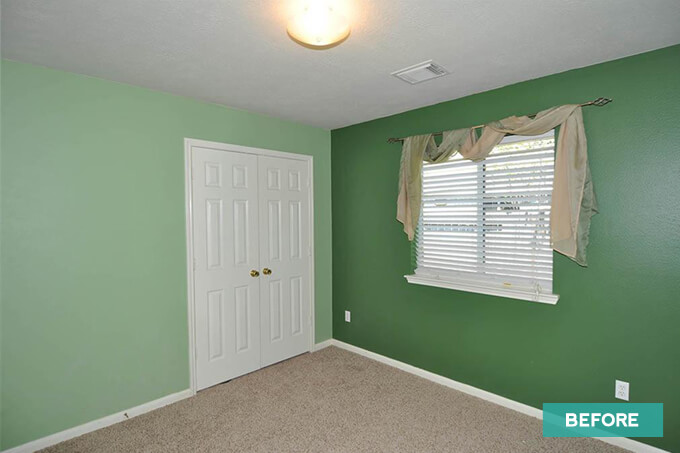
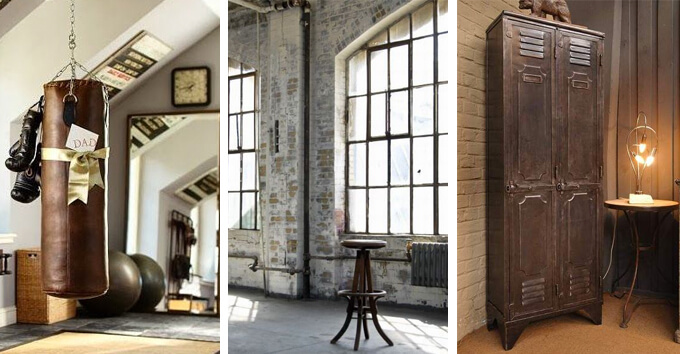
By now hopefully you have seen the plans for our home gym. This is our first total room makeover and at first it was hard to decide where to start. But after seeing a pin with the perfect solution for a gym floor we were exited to get to work.

How To Install Home Gym Floor Mats

SUPPLIES

FYI: This post contains a few affiliate links to products we used to make this project. Gray House Studio does receive commissions for sales from these links but at no extra cost to you. We appreciate you supporting this site. Read our privacy and disclosure policy. You can also easily shop our recommended products here.

2022 Personalized Christmas Ornaments
*** Thanks so much for supporting our small shop – Moon Rock Prints – this holiday season! ***

INSTALL GYM FLOOR MATS

Home Gym Floor Mats

Home Gym Floor Mats

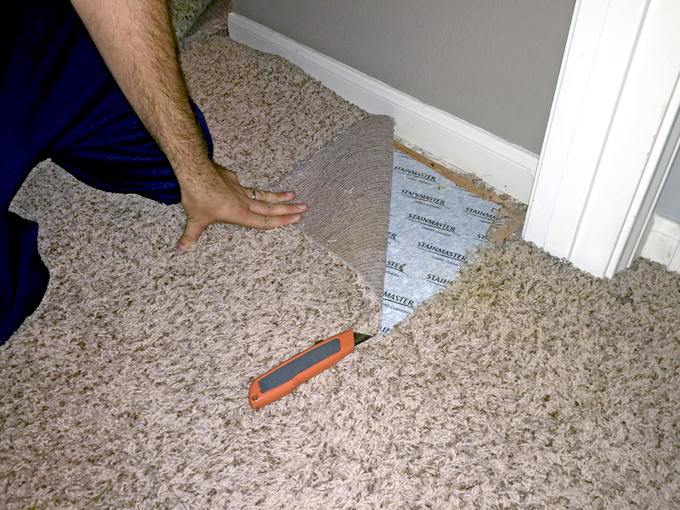
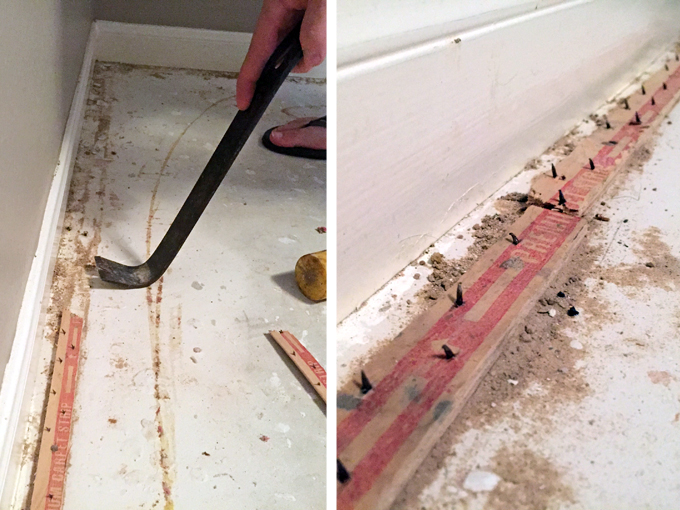
1. We woke up early to start tearing up the carpet. After the first rip of the carpet from the nail strips there was no turning back.

First Attempt at Installing Home Gym Floor Mats

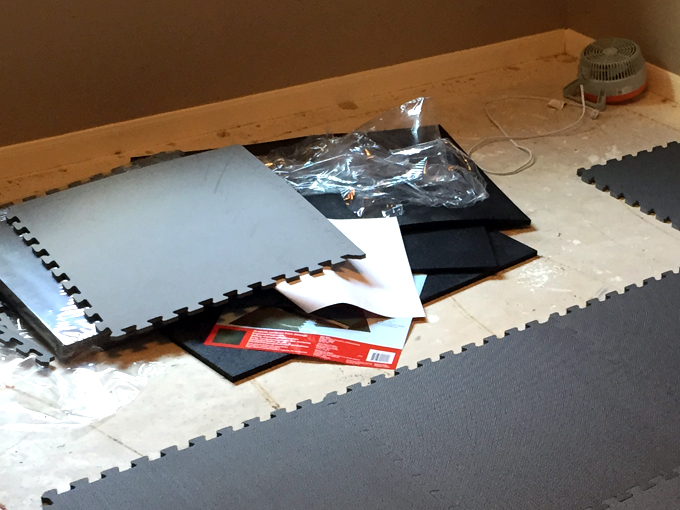
Once the carpet was out, we took the advice from what we thought was a reliable source based on a pin on Pinterest and went to purchase our new flooring.

We drove thirty miles to our nearest Tractor Supply store where we purchased brand new black rubber stall mats. Maybe you’re already seeing the red flags, but we thought the idea of stall mats in a home gym was just crazy enough to work.

Plus, it was going to save quite a bit of money.

Home Gym Floor Mats

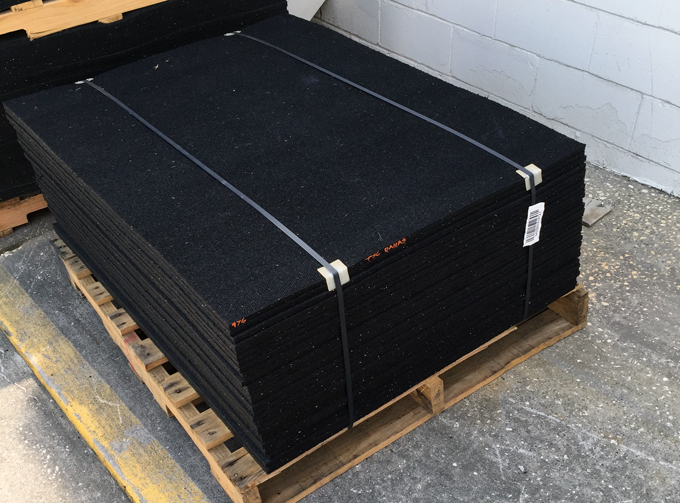
As we loaded them, a stranger in a cowboy hat asked us what we were doing with 15 stall mats but I’m sure what he actually meant was what is someone driving a Ford Focus doing trying to squeeze 15 large stall mats in the back.

We were excited to inform him of our genius idea. By the expression on his face he was not as convinced as we were.

Home Gym Floor Mats

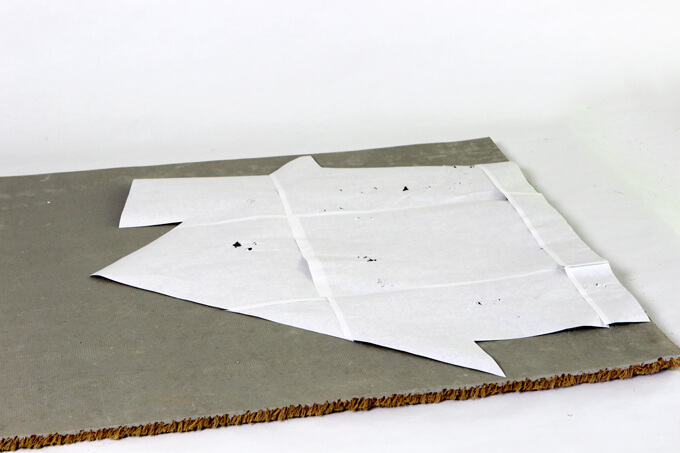
When we arrived home I started placing the mats on the floor and cutting them to size as Courtney unloaded the mats from the car.

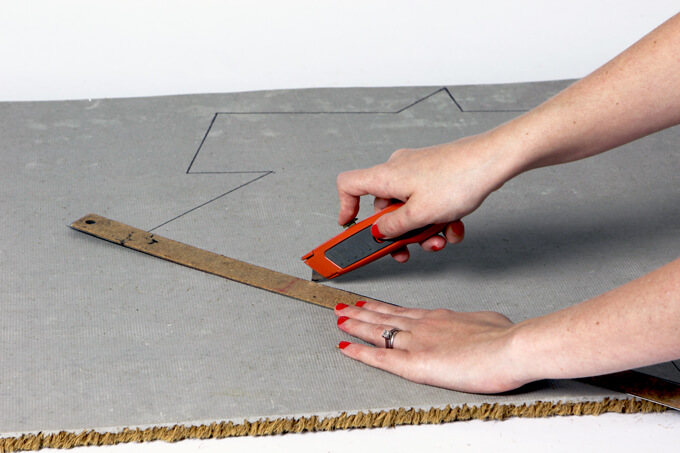
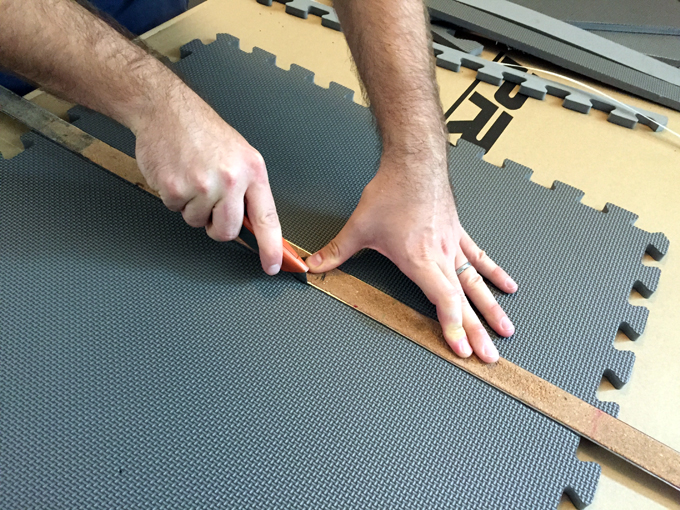
Our main concern was if we would be able to cut the mats but that part turned out to be easy.

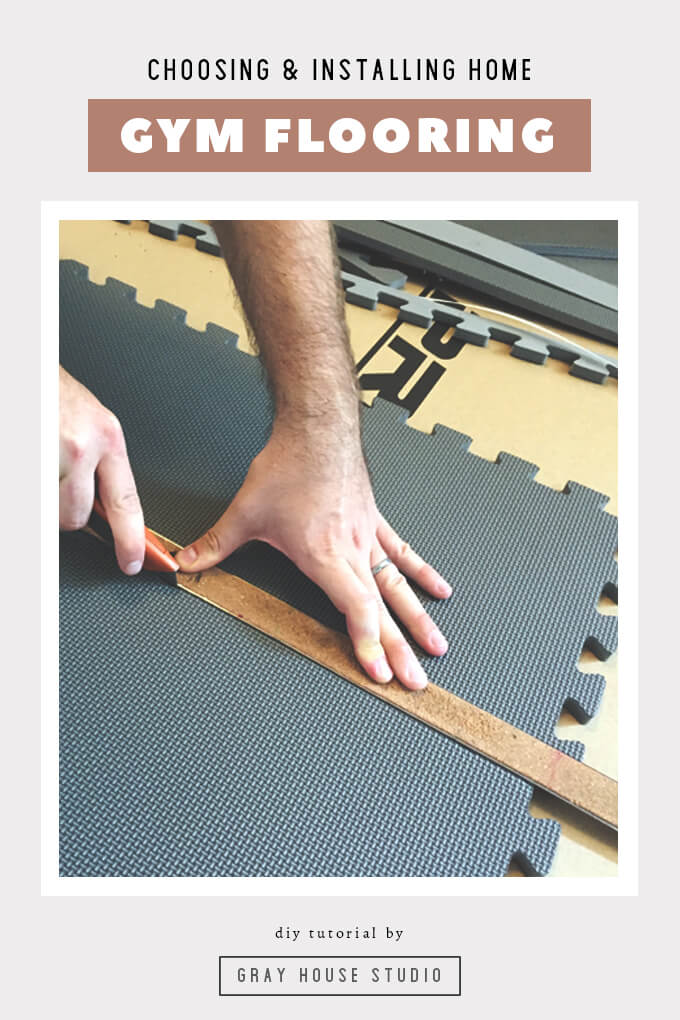
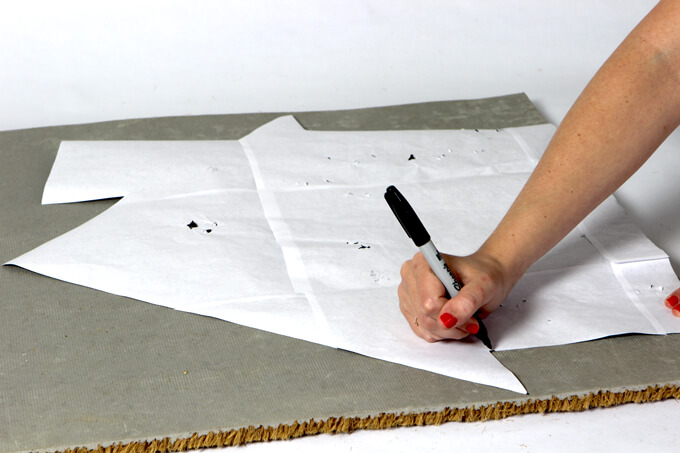
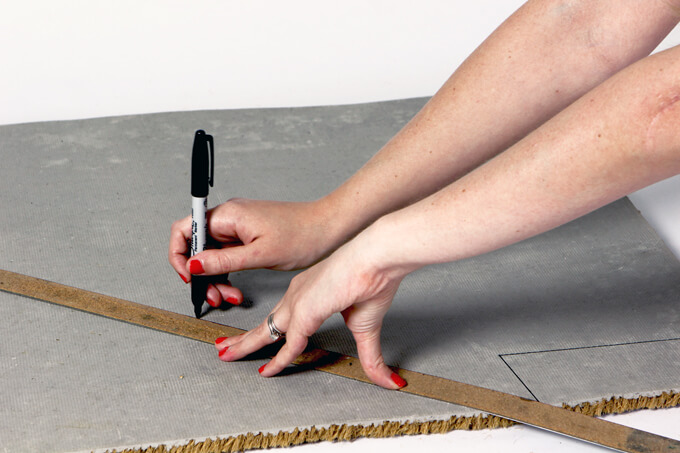
After scoring the mat with a straight edge, I simply folded the mat over and continued cutting along the previous mark with my box cutter until I cut all the way through the mat.

Home Gym Floor Mats

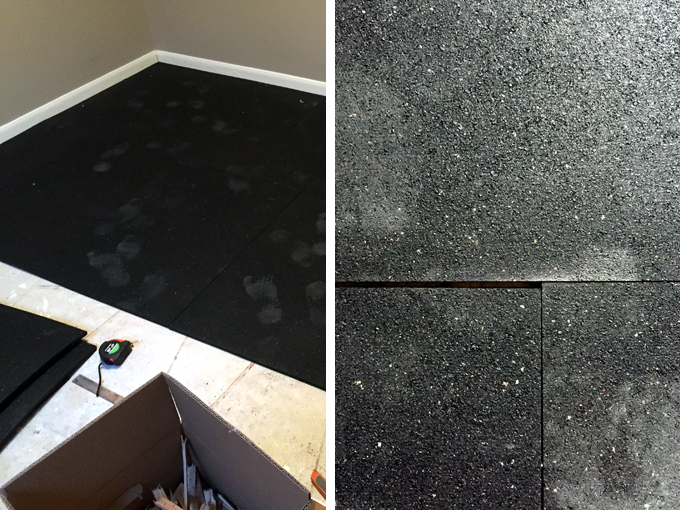
The first row went down great but once we started placing the second row we noticed a thickness and size variation from mat to mat.

This size variation resulted in gaps between the mats and ridges where a thicker mat lined up to a thinner mat.

We were really torn on what to do in this scenario. The black mats looked and felt great in the room but the small gaps just made it feel slightly off and not clean or professional.

After sleeping on it, reading the Tractor Supply return policy, and admitting we are in fact not smarter than a fifth grader we returned the uncut mats to the store.

Luckily we had only cut through three.

Second Attempt at Installing Home Gym Floor Mats

We decided to do a little more research and concluded that our original idea of gym foam tiles would look the best, be a breeze to install and actually cost a little less than the black stall mats.

Home Gym Floor Mats

One of the reasons we went with the black mats to begin with is because we thought it would be cheaper but we found we were able to get 10 packs of four of the gray foam mats on Amazon for less than we had spent on the others and these would work really well as our home gym floor mats.

Home Gym Floor Mats

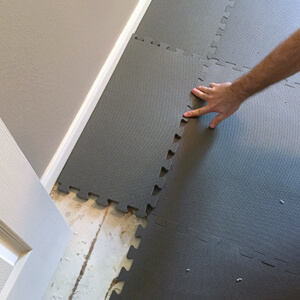
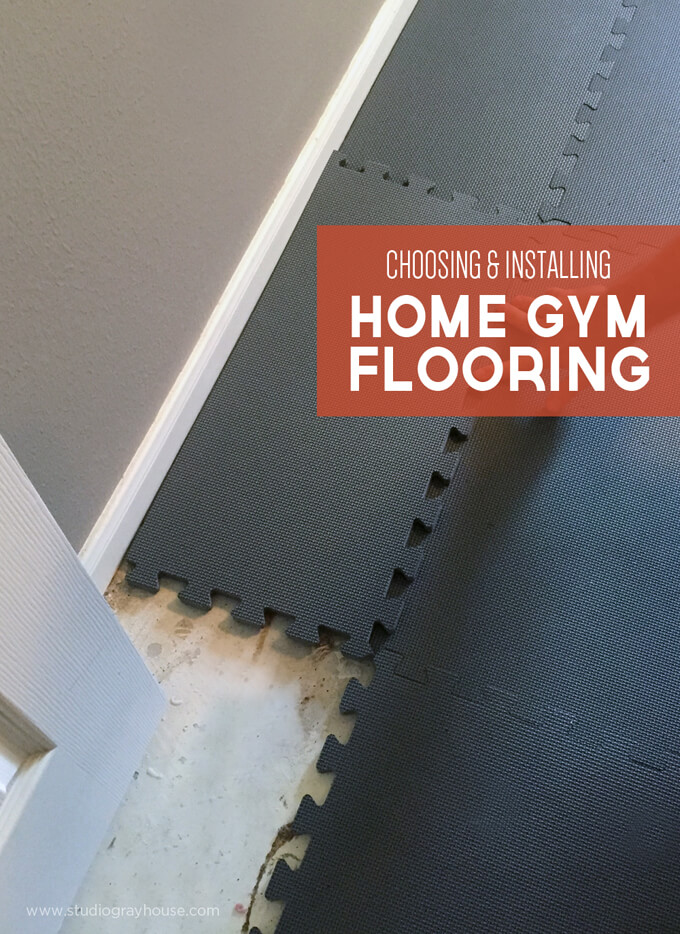
2. We installed the foam squares starting in one corner of the room and worked our way around the room cutting the last piece of each row to size with a straight edge and box cutter.

Home Gym Floor Mats

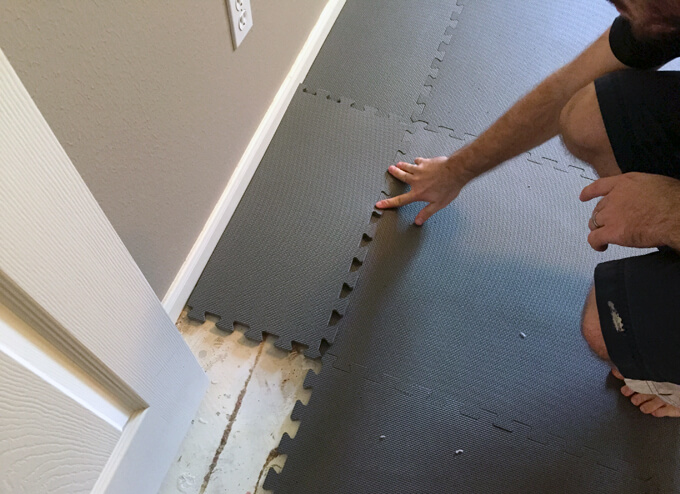
3. The tiles come in packs of four and we quickly noticed that each pack is a slightly different shade of gray.

Varying colors weren’t as noticeable or as big of a deal as varying thicknesses. We were able to mix the tiles all together to avoid large areas of the same shade of gray to make it look intentional and are happy with the results of our home gym floor mats.

Home Gym Floor Mats

It is exhausting to change gears mid-project and have to start over with a new idea and it may be a blow to your pride to admit defeat but we always try and keep the picture of what we want to the finished room to look like in mind to keep us from settling even when things get hard.

That way when you reach the intended final result, the sense of accomplishment is even more gratifying. It is said that comedy is tragedy plus time and we certainly like to laugh so I guess it is all worth it.

[adinserter block=”5″]

PIN IT FOR LATER

Our process for choosing the right home gym flooring and a tutorial for installing gym floor mats.

Planning Home Gym

Planning Our Home Gym

When we moved in every room in the house was painted a neutral off white color except one room. One of the bedrooms in the back of the house was the greenest room we have ever seen. We liked to imagine it was what walking into a Leprechaun’s house might feel like. Three walls were a darker green and there was an accent wall that was a pastel green. It was an interesting design choice.

Planning the Design of a Home Gym

Anyway, it was a little too bright for us so the first thing we did was paint over it with one of our favorite neutral “greige” colors, Utterly Beige. After that we pretty much ignored this room. On our floor plan page we have generously been calling it our home gym but the truth is the only thing that even remotely resembled anything work out related in that room was a few old Wii-Fit Discs (that were collecting dust) and a jump rope.

Planning the Design of a Home Gym

But it was inevitable, as we continued to work on other projects throughout the house, our empty back room somehow developed a gravitational pull and collected all the various left over supplies from other projects, tools we had been missing for months and an unusual amount of cardboard. Correct me if I am wrong, but I think its one of Newton’s lost laws that if a space sits empty, junk will move to fill it.

We finally had enough of the current situation and sat down two weeks ago and had our “dream big” talk about what we would like to do with this space to make it have a purpose. We both agreed a home gym would be the best use of the space for us during this time of our life.

But if you have learned anything about Brent and I, we can’t just have a home gym; we have to completely transform the room so it feels like you are transported to another place entirely. If our breakfast nook takes us to a coffee shop, we want our home gym to take us, stay with me here, to an old warehouse. My inspiration is a boxing gym with worn leather equipment set in a warehouse.

Planning the Design of a Home Gym
Sources: 1 | 2 | 3

I want it to have a vintage and industrial feel but also incorporate a few modern elements. Before we begin sharing our projects for this room, we wanted to give you a look at what we are planning.

Planning the Design of a Home Gym

Brick Accent Wall | Brick Harboard Wall Panels from Lowe’s (which we will be painting to match the brick pictured above)
The largest project we are planning is to create a worn brick accent wall. This feature will be essential in creating the industrial loft/old warehouse look. We will be purchasing harboard wall panels that look like brick and then painting over them to create a more realistic old brick appearance. We have wanted to do a brick wall somewhere in the house and this room is perfect because it makes the most sense in terms of design.

Gym Flooring | Mats from Lowe’s
We had initially planned to use one type of mat and then changed our minds and decided to instead use these foam mats instead. We like the gray color, how easy they are to assemble, fit together nicely for a clean appearance and would be a snap to pull up in the future if we decide to go with different flooring down the road.

Wall Fan | Faraday 14-in Wall Fan from ATG Stores
How awesome is this wall fan? It fits perfectly with the style we are going for in this room. This room currently doesn’t have a ceiling fan so our first thought was to add one but the ceiling is pretty low and we didn’t want anything to hang down low enough where we could possibly hit it while working out. We will instead go with a unique lighting solution. But a work out room without a fan circulating air seems like a bad idea, so having this large wall fan is the perfect solution.

Lockers | Vintage Locker 3-Door Perforated Cabinet from Restoration Hardware
These lockers from Restoration Hardware have a great vintage vibe. I’ll be honest this is one area we won’t be splurging and will definitely be DIY-ing. We are going to be making our own lockers that fit inside the closet in the room so we can customize them. But these lockers provide great inspiration for the direction we want to go.

Rug | Catalina Area Rug from ATG Stores
The overall color palette of the room will be extremely neutral so we wanted to work in a bit of color in our designated yoga area where we plan to place this rug and have a few colorful yoga mats on a yoga mat holder we will be building. I like this blue color because it is different than what we typically use in our house and the material of the rug gives it a relaxed feel that makes it perfect for a gym.

Clock | Industrial Clock from Restoration Hardware
Another DIY project we have planned is to makeover a modern clock into one that looks like it belonged in a gymnasium in the 1940’s like this one from Restoration Hardware. I love the cage and metal that is on this clock. It screams vintage gym. We are hoping to incorporate these elements into our DIY clock project to give it a similar appearance.

Floor Mirror | Baxton Studio Daffodil Floor Mirror from Wayfair
Most gyms have mirrors hanging on the walls and while it was tempting to create a mirror wall, just kidding, we decided that having a large framed floor mirror leaning against the brick wall would be a stylish way to incorporate a mirror into the room without straying from our design concept.

Treadmill
What’s a gym without a treadmill? This will be the large piece of workout equipment in our gym.

Leather Medicine Ball | from eBay
One aspect of making over this room that I am looking forward to is decorating it with unique vintage pieces. We got this old leather medicine ball off eBay that I am excited about because it really completes my vision for this room. We will also have a few more DIY projects planned such as wall art made from old photographs that I am looking forward to working on to round out the room.

We were so excited to begin this room transformation that we actually started before we had time to post what we were planning on the blog. We are already making great progress on it. If you have been following along with us on Periscope you maybe have already seen a sneak peek or two. If you missed it you can catch it below.


Just a reminder we will be sharing our progress Thursday nights at 8PM CST on Periscope. You can find us @grayhousestudio as we share sneak peaks of the updates we are making to our room to transform it into our home gym. It is great fun to meet all of you and hear what you are up to as well so I hope you can join us!

If you miss any of our scopes, you can watch them on our Periscope playlist on our YouTube channel.

In our next post we will be sharing more about the flooring we chose for the room that will be in our home gym so be sure to come back and check that out!

Vacation Memory Box

DIY Memory Box

We built a custom DIY memory box to fill with photos and mementos from our vacation.

DIY Memory Box

Hello from Destin! We are bringing you this week’s Gray House Studio project from the beach in sunny Florida where we are currently on vacation. One of my favorite aspects of a vacation is preserving memories whether that is through photos or significant physical keepsakes. Today we are sharing how we created a custom vacation memory box and the items we have been adding to it this week.

I know there is that whole living in the moment movement but I am one who likes to live life through a lens. If you are anything like me when you come home from sight seeing you have hundreds of photos from your adventure. But hundreds of photos can get overwhelming to sort through so most of the times these photos tend to get lost in a folder on the desktop.

And if I am not careful, all of those items I collected that were so meaningful at the time will end up misplaced somewhere in the house (if they make if out of my suitcase).

DIY Memory Box

I wanted a unique way to preserve our trips so that our experience was paired down to a few notecards, photographs and mementos that symbolized our favorite moments.

So Brent and I came up with the idea of creating small boxes designed specifically so that we could take them on our adventures with us to store all of our keepsakes that would also look really nice sitting on a shelf once we got home.

DIY KNOCKOFF

DIY Memory Box
While I was browsing Anthropologie’s website, looking at all the things we can’t afford, I stumbled upon the Roped Treasure Box (on the left). I fell in love with the design of it but the price tag, which was $148.00, um not so much. I knew the style would fit perfectly with our vision for our beach DIY memory box so Brent and I put our heads together and made our own version for less than $30.00!

VIDEO TUTORIAL

To see new DIY videos on Thursdays, be sure to subscribe to our channel ⇾


How we Built Our DIY Memory Box

DIY Memory Box
1. First, we constructed the box out of cedar planks typically used for privacy fences. We searched through the piles at the hardware store to find planks of three different shades: dark, medium and light.

For the bottom of the box we used a scrap piece of masonite. Brent was able to figure out what size each piece needed to be by using the dimensions of the roped treasure box. If you are interested in making your own memory box, stay tuned we will be sharing our plans for this box in another post soon.

DIY Memory Box
2. We used wood glue and finishing nails to assemble the box. Then used clamps to hold the box together while it dried.

DIY Memory Box
3. For the diagonal piece of wood in the top of the box we painted it with some leftover “Slow Green” paint from Sherwin Williams. Then we distressed it with sand paper.

DIY Memory Box
4. To accent the box we cut sections of cotton rope that we bought from a craft store and tied it together using knots. We attached the rope to the box using Poultry Net Staples.

DIY Memory Box
The box was fairly easy to make and certainly worth saving over $100. Plus, we got to customize the color and style to look exactly how we wanted. Once our box was finished it was ready to go to the beach and collect memories!

DIY Memory Box
5. Before we left Brent and I made these notecards using Kraft paper tags that we cut the ends off to make into a rectangle, a stamp with lines and a date stamp. Each night before I go to bed I like to jot down an abbreviated list of the highlights of the day so when I grab the box off the shelf months from now it will jog my memory any of the experiences I may have forgotten.

Creating a Custom Vacation Memory Box
We used our new Instax Mini 8 camera to take a few instant photos reminiscent of the classic Polaroid photos to store in our box but we could also print out our favorite 15-20 photos from the vacation to store in the memory box. So when our friends or family ask about our trip, we can pull out our unique vacation memory box and they can get this big picture of our trip without having to sit through a hundred-photo narrated slide show.

DIY Memory Box
Our DIY memory box has forced us to be intentional with the souvenirs we collect because we can only fit so much “treasure” in our small box. We try and find things that best represent our favorite experiences. For example, on this trip while swimming in the ocean we stumbled upon a live sand dollar.

Creating a Custom Vacation Memory Box
Neither of us have never seen a live sand dollar before. It was brown and we could see it “breathing”. So we scooped it up with some sand and water in a bucket and observed it move along the sand and burry itself for a long time. We even named our pet sand dollar, George. We watched him for a few hours but we felt guilty about taking George from his natural habitat so we released him back into the ocean.

Since we couldn’t actually keep the live sand dollar in our box, we bought a souvenir sand dollar to help us remember our George.

We love how our DIY memory box turned out so much so that we will make one for each vacation we go on from now on. We would love to craft each one so the design specifically fits with the location of our trip and we can have a collection of interesting boxes displayed on our library shelves.

PIN THIS PROJECT

DIY Memory Box

DIY Custom Shape Doormat

DIY Doormat

Making your own DIY doormat is an easy and fun way to bring a little personality to your doorstep! The options are endless with what shapes you can create.

DIY Doormat in a Custom Shape

Today we sharing a quick, easy and inexpensive do it yourself project that will bring a punch of personality to your doorstep! We are walking through how we made a DIY doormat.

It is just me or does it seem as though doormats have a lot of pressure on them lately? Gone are the days where they only had two jobs, to give a friendly welcome and to subtly remind people to wipe their feet so they didn’t track dirt into your home.

Now doormats have the added expectation to be funny, clever, relevant or stylish. The more personality and quirkiness the better!

I’m not judging this trend. In fact I am all about jumping on the bandwagon. I saw a few doormats in stores that caught my eye because they were different shapes then the typical rectangle mat and thought that would be a fun touch for our front porch but the price tag was a little high for a mat that is going to get walked all over.

So we decided to make our own custom shaped doormat. We kept it simple and created a Gray House logo shaped welcome mat for our front porch.

Interested in creating your own DIY doormat? Watch the video or follow along with the steps below to see how easy they are to make.

How to Make a DIY Doormat in a Custom Shape

SUPPLIES

FYI: This post contains affiliate links to the supplies and tools we used to make our DIY ball pit. As an Amazon Associate Gray House Studio earns from qualifying purchases. This is at no extra cost to you. We appreciate you supporting this site. Read our privacy and disclosure policy.

TUTORIAL VIDEO

[yotuwp type=”videos” id=”aMSE6EL0jAg” title=”off” description=”off” player=”width=590&modestbranding=0&showinfo=0″]

Subscribe to our YouTube Channel

Like our video? Subscribe and help us reach our goal of 100k subscribers.

DIY Doormat

1. The first thing I did was to flip the doormat over so the rubber back was face up. Then I took our large template and also placed it face down on the back of the mat.

I made our custom template by printing off our Gray House logo onto multiple sheets of paper and cutting and taping the pieces together

DIY Doormat

2. Next, I used a permanent marker to mark all the corners of my template. The trick was to trace my shape on the back of the mat in reverse so when I flip the mat back over the shape looks correct and none of the lines I traced are visible .

DIY Doormat

3. I used a large ruler to connect all the corners I marked so that the lines would be nice and straight.

DIY Doormat

4. Once I was finished tracing I had a reverse image of my shape. This particular mat worked really well because the latex back was a light gray and it made it easy to see the shape.

Next, I took a box cutter with a fresh blade and used a ruler to cut along the lines I traced.

The blade cut through the rubber easily and I was able to pull away all the excess pieces of the mat.

DIY Doormat

5. To add an extra touch, I created a stencil with the word “home” out of cardboard.

I printed out the word in the font I wanted and then used an X-Acto Precision Knife to cut through the paper template and cardboard.

DIY Doormat

6. Finally, using a piece of plastic sheeting and painters tape I covered the entire mat except where I placed my stencil.

Then spray painted over the stencil with a can of black spray paint.


DIY Doormat

Our new custom Gray House shaped doormat!

DIY Doormat

DIY Doormat

We hope you find this quick and easy welcome mat project is a fun way to bring personality to your doorstep. This project was an enjoyable and affordable DIY project that I was able to complete in under an hour and for under $25. I like that the doormat is unique and we didn’t have to spend a lot of money on it.

I see us making more custom shaped mats in the future so we can change them in and out depending on season or even mood.

PIN FOR LATER

Making your own DIY doormat is an easy and fun way to bring a little personality to your doorstep! The options are endless with what shapes you can create.

Locked in a Park // An Unexpected Adventure

Locked in a Park // An Unexpected Adventure

Locked in a Park // An Unexpected Adventure

I was feeling burnt out and overwhelmed. Overwhelmed with work, overwhelmed with Gray House projects, overwhelmed with the house being messy from lack of time to clean due to work and Gray House projects. It had been a long week. Brent has not been feeling well and my neck is still really sore from the snake “incident” on Monday.

Locked in a Park // An Unexpected Adventure

The snake incident, that is a long story. A decent size black snake tried to come in the house when I opened the back door Monday morning to shake out a rug. He got his head in before I realized what it was. I screamed so loud that I scared the snake and he jumped back. I also recoiled so hard that I jerked my neck out of place. I shook the rug in the process of trying to turn it into a shield and doused the snake with the excess cat litter inside the rug. The snake apparently didn’t like cat litter or the sound of my shriek and retreated to the hole between our house and the concrete patio. Then he popped back out and just stared at me. I have a sensitive neck so whenever I violently give myself whiplash, as in this case, I tend to be really sore for quite awhile. I plan on suing this snake for the emotional stress associated with my sore neck.

Okay, I guess it wasn’t that long of a story.

Needless to say it had been a long week and all I wanted to do was lay on the couch. I was in one of those frustrated moods where I didn’t want to say anything or do anything. Usually when either Brent or I are feeling overwhelmed we will go for a walk to our neighborhood park for a change of scenery and to have uninterrupted conversation. I was reluctant but he managed to pull me off the couch (literally) and we started our walk.

The neighborhood park is about eight houses down from our house and sits at the end of our street. It is a large, gorgeous park that has a playground and a beautiful lake view with a dock for fishing. There are a plethora of trees and small rolling green hills. It is never crowded. Every time we go to the park we maybe run into one or two people at most.

Locked in a Park // An Unexpected Adventure

This is probably because it is gated. There are two entrances, one in our neighborhood and one in the neighborhood next to ours. When we moved in we had to show proof of our residence so we could get a key fob to open the magnetized gate. All of our neighbors warned us to not sneak in or lose your key fob because otherwise you would get stuck in there. Once you go in you can only get out using the key. We never had any problem getting in or out of the park, until last night.

Locked in a Park // An Unexpected Adventure
Our favorite way to unwind is to walk down to this bench that faces the water where we sit and talk. Sometimes we vent our frustrations; sometimes we brainstorm ideas for projects. As we sat and talked I felt my mood starting to lighten. It felt good to talk through all of the things that were causing us stress this week. I guess the conversation was really helping because we lost track of time. It was just the two of us in this giant, beautiful park at dusk talking about life. The night was starting to turn around.

After we were pretty much all talked out, we walked back towards the gate to go home. It was still fairly light out so it didn’t even dawn on us to look and see what time it was. As we got to the gate Brent held the key up to it. It flashed red. He did it again. It flashed red again. He pushed on the gate but it wouldn’t budge. “Ut oh.” He said. We looked at each other in shock. The gate is magnetized but the force is stronger than we could push. Finally, I looked at my watch. It said 8:30. “It’s after 8.” I said. “That sign on the outside of the gate says the park gate will be locked at 8PM. You don’t think they actually meant that, do you?”

Locked in a Park // An Unexpected Adventure

I have passed that sign numerous times but I always thought it was more of a suggestion. As in, “Hey, better not be in the park after dark it might not be safe”. I didn’t think it actually meant the gate would stop working at exactly 8PM, especially if you are trying to get OUT.

We walked up and down the fence trying to look for a place we could squeeze through or bend or climb over. Thanks HOA for charging us a ridiculous amount of money to build a sturdy gate that we can’t escape from. It was at this point that we were stumped. Hmmm…we were stuck in our own neighborhood park. Now I know how caged animals feel. We were just staring through the bars longing to be on the other side.

It didn’t matter if anyone else came along; the gate wasn’t going to open. It was starting to look like we were going to be doing some impromptu overnight camping in our neighborhood park. I guess we could have used the one cell phone we had to call my dad to come bring his ladder or something but we were using our last 3% of battery to Instagram in real time our crisis. We obviously have priorities.

Locked in a Park // An Unexpected Adventure

Our options were limited so I started climbing the fence at the point where it opens for cars to enter because there was a place to put your feet. But even that part was pretty high with nowhere to put your feet back on the other side. We debated which one of us was going to go over first but jumping from that high onto concrete was starting to freak me out. I could foresee a sprained ankle in my future. Remember I am the girl who hurt her neck at the SIGHT of a snake.

Locked in a Park // An Unexpected Adventure

Then I had an idea. We could jump the gate at the other neighborhood entrance and walk all the way back around to our street. That gate was much shorter. It was a more realistic gate jump. So we get to the gate and get over it no problem. By the time we get into this other neighborhood the sun is setting and it is getting dark out.

Locked in a Park // An Unexpected Adventure

We start walking down the unfamiliar street and we saw a deer. Then another deer and another deer, they were just lounging in front yards. As we get further down the road we saw a herd of almost 30 deer. We walked right into the group. They were on all sides of us. It was bizarre. They just stood there starting at us until they got spooked when a tiny dachshund started chasing and barking at us. By this point all we could do was laugh. This night was turning into one for the books for sure. After walking in the dark for some time we finally came to the end of the street.

It was dark and I didn’t have my glasses on so I couldn’t see what was up ahead. “Ut oh.” Brent said with a laugh. “What now!?” I asked. There was another gate. As we got closer we could see that this in fact was a gated community and this gate was much higher then the first gate.

We saw headlights coming towards us signaling that a car was coming through the gate. “Run!” I yelled. And we took off sprinting down the middle of the road to see if we could make it through the gate which was now closing. Remember we were not feeling in top shape this week so if this were Jurassic World the dinosaur would have eaten us. It closed right as we were approaching it. We were still trapped.

Now I know why the deer had made themselves at home and didn’t seem in any big hurry. They entered this neighborhood and now they can never get out. I knew the feeling. We were being held captive in our own suburban community.

We contemplated on what to do. Should we walk all the way back and attempt jumping over our gate again? Nah, we are too tired for that. So we just waited by the gate of the entrance to this neighborhood in the dark hoping someone would be leaving or coming home late. By now it was about 9:00pm. We walked to the park around 7pm. I never thought I would be trapped in a gated community. I guess I never realized that you could only leave if you had a car.

Luckily, after about 15 minutes a car pulled up to the gate to leave and we snuck out behind it. Then we walked down the street until we found a back entrance to our neighborhood and walked all the way through it until we got back to our house.

That was the longest walk to our park ever. EVER. By the end of the night we were laughing and our moods had brightened considerably and we rewarded ourselves for our great escape with a chai tea latte.

I learned several important lessons last night.
1 – Pay more attention to signs. Apparently they actually mean what they say.
2 – Loosing track of time is romantic unless it means you might end up sleeping in a park.
3 – You don’t always have to travel far for an adventure.
4 – An unexpected adventure with your best friend will make any day better.