Office Pegboard Wall Organization

Office Pegboard Organization

To create an office pegboard organization system, we painted and installed a pegboard on a wall in our office to add additional storage.

Office Pegboard Organization

When you are working out of your home, it is easy for personal mail to get lumped in with client invoices and before you know it you have a mountain of all different kinds of paperwork mixed together sitting on your desk.

I am the type of person who loves to be organized but can only stay organized if I have a designated place to put everything. If not, no matter how many times I straighten things up, the paper mountain returns or just moves to a different location.

I had been on the lookout for a solution to keeping all of the paperwork associated with my current projects organized as well as readily available to grab each morning when I sit down to work.

Office Pegboard Organization

I have tried several methods for organizing my current web design projects so I can easily keep all the associated mockups, invoices, client information, etc. in one location as well as visibly display the phase each project is in.

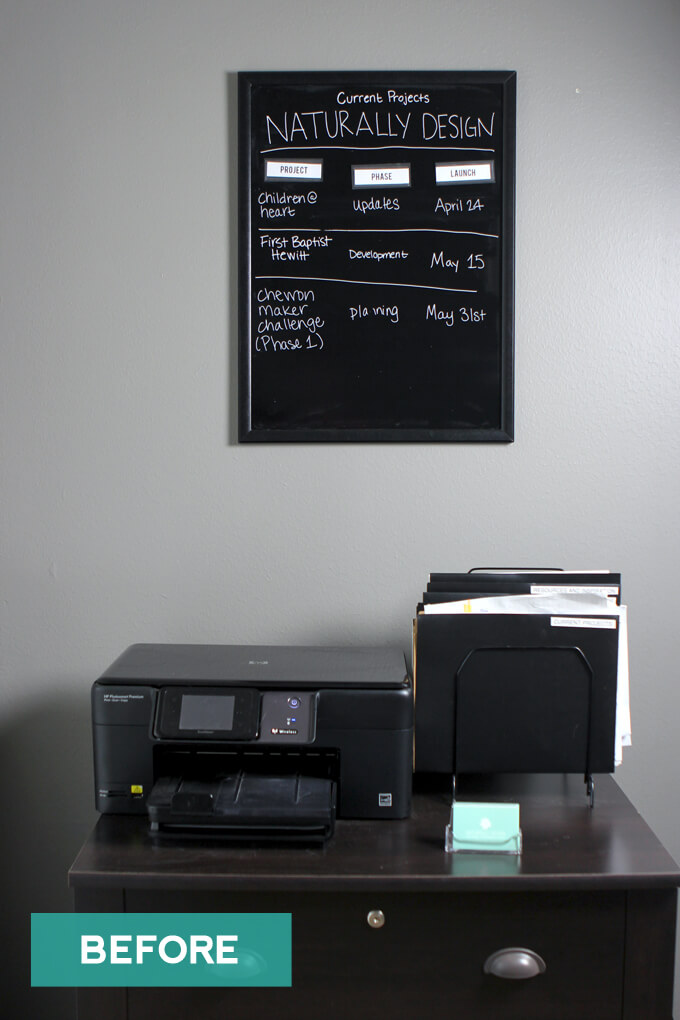
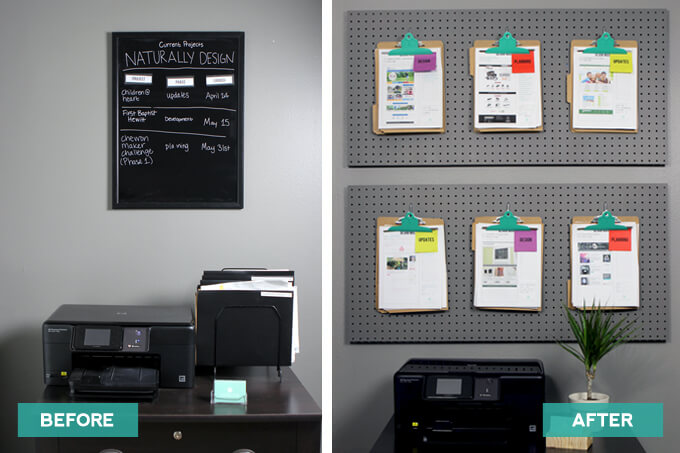
For awhile I had a dry erase board with my current schedule and kept all the in-progress client folders in a file rack. This situation was not ideal because visually the dry erase board did not fill up the wall and the top of the file cabinet felt cluttered.

Office Pegboard Organization

Office Pegboard Organization Wall

SUPPLIES

FYI: This post contains a few affiliate links to products we used to make this project. Gray House Studio does receive commissions for sales from these links but at no extra cost to you. We appreciate you supporting this site. Read our privacy and disclosure policy. You can also easily shop our recommended products here.

2022 Personalized Christmas Ornaments
*** Thanks so much for supporting our small shop – Moon Rock Prints – this holiday season! ***

STEP BY STEP GUIDE

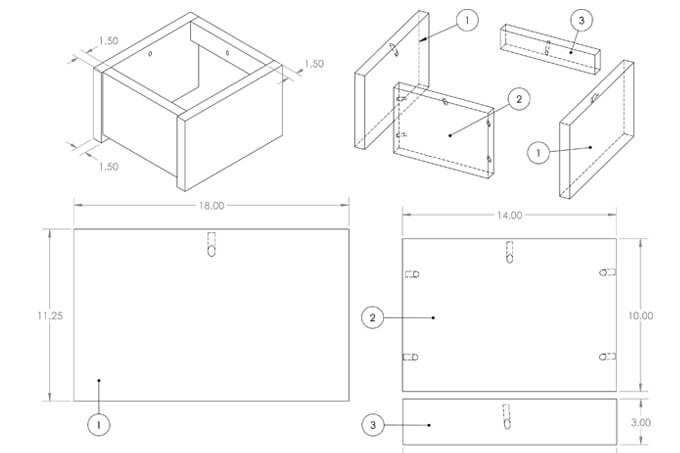
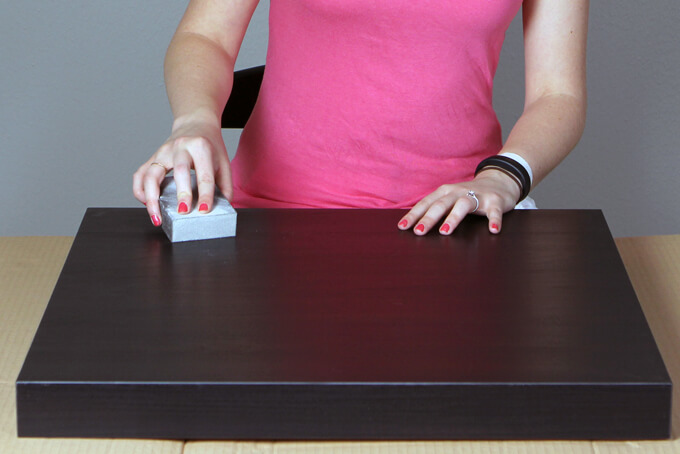
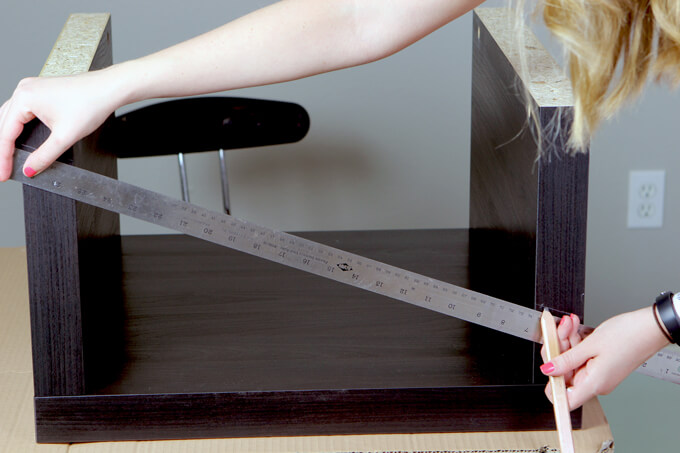
1. First we sanded down our two pegboard pieces with 150 grit sandpaper.

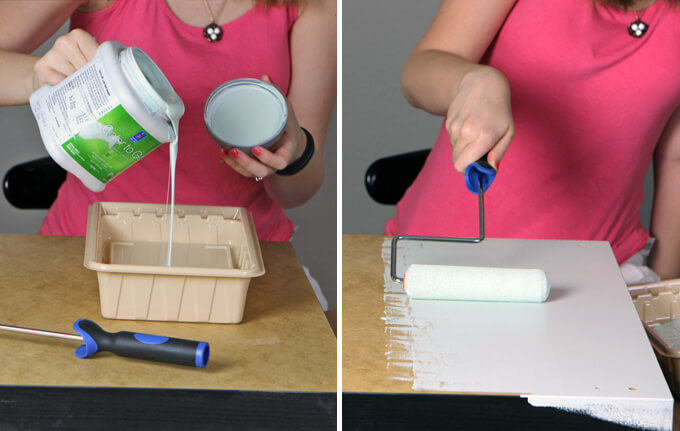
2. Next, we painted the pegboards with SW Dovetail Paint.

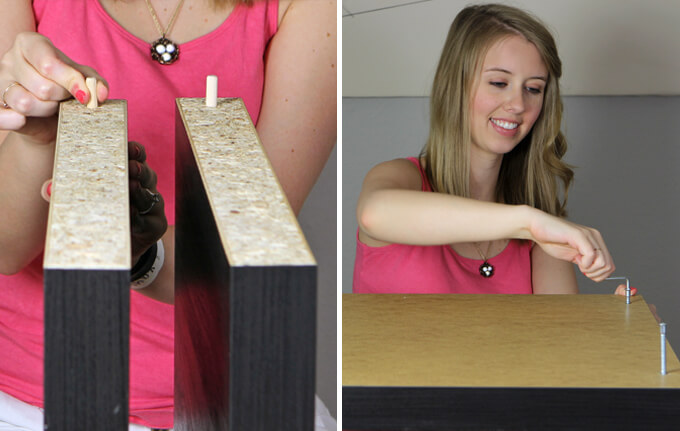
3. Then it was time to hang the pegboards up. It was our visual preference to leave a little bit of space between the two boards.

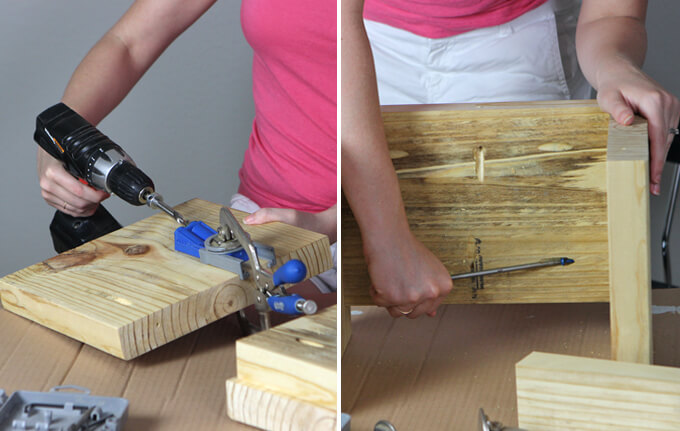
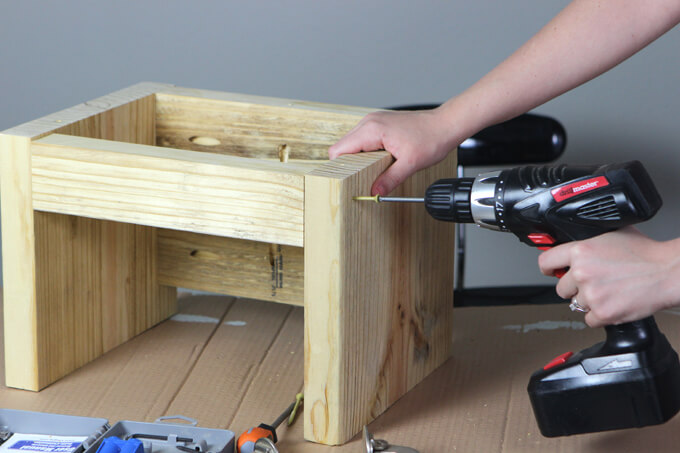
We put small blocks of wood behind the areas where we planned on hanging clipboards and used a drill to drill into the wall through the wood so that the pegboard would appear as if it was floating off the wall and we could put metal pegboard hooks in it to hang the clipboards.

Office Pegboard Organization

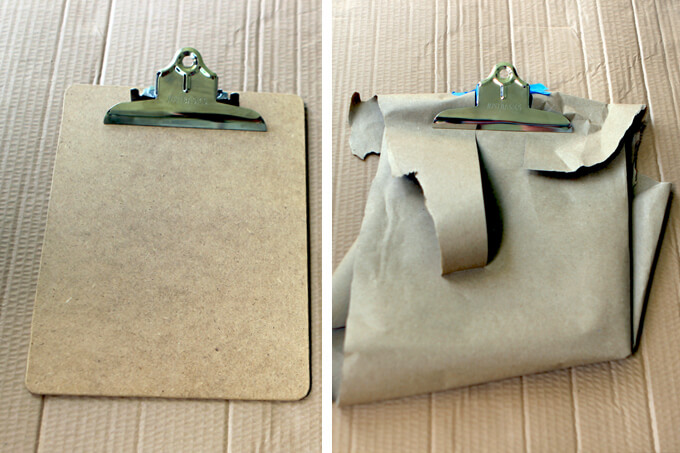
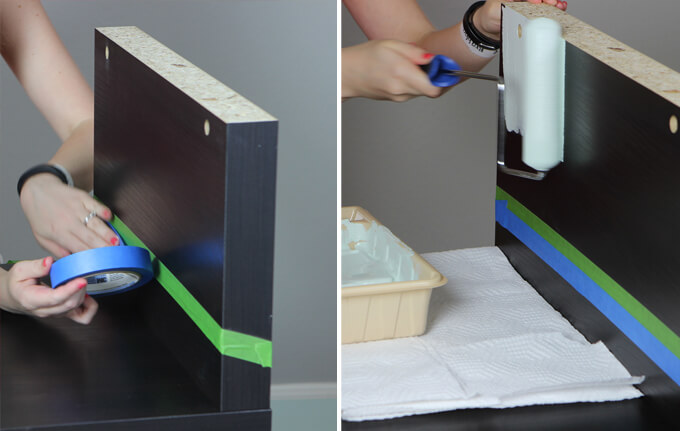
4. Another part of this project was to spruce up some clipboards we had lying around.

We wrapped all the areas we did not want to paint with brown kraft paper.

A roll of non-adhesive kraft paper is cheap and comes in handy for a lot of our projects.

Office Pegboard Organization

Office Pegboard Organization

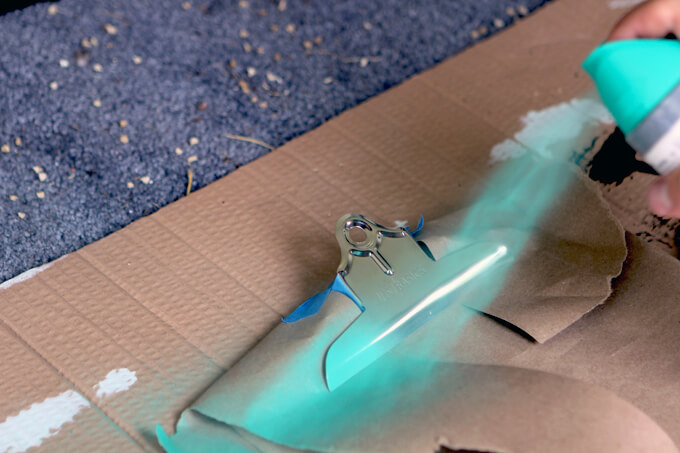
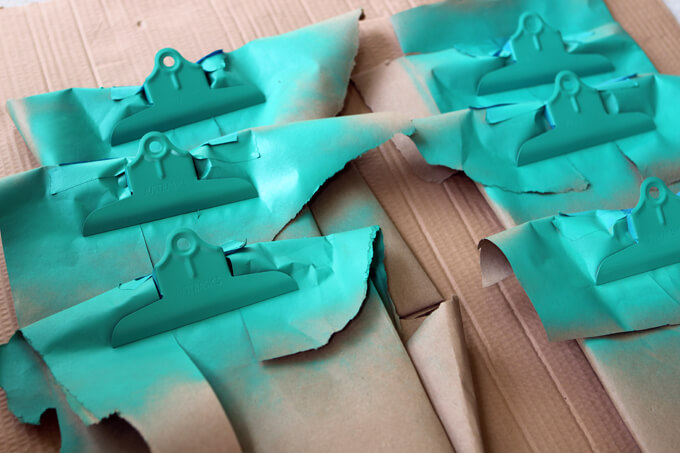
5. Finally, we spray painted just the front metal clip with teal spray paint to add a bit of color and to make the clipboards pop against the gray pegboard.

Office Pegboard Organization

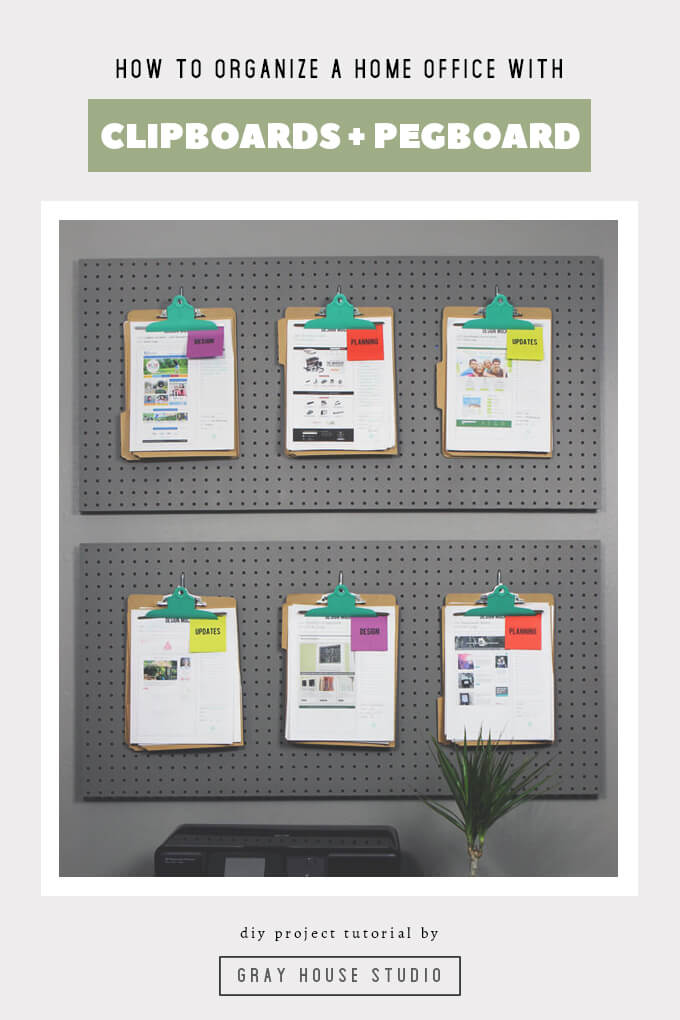
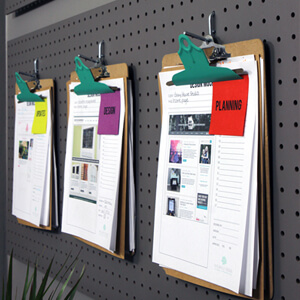
Once the clipboards were dry, we hung them up on the metal hooks on our pegboard!

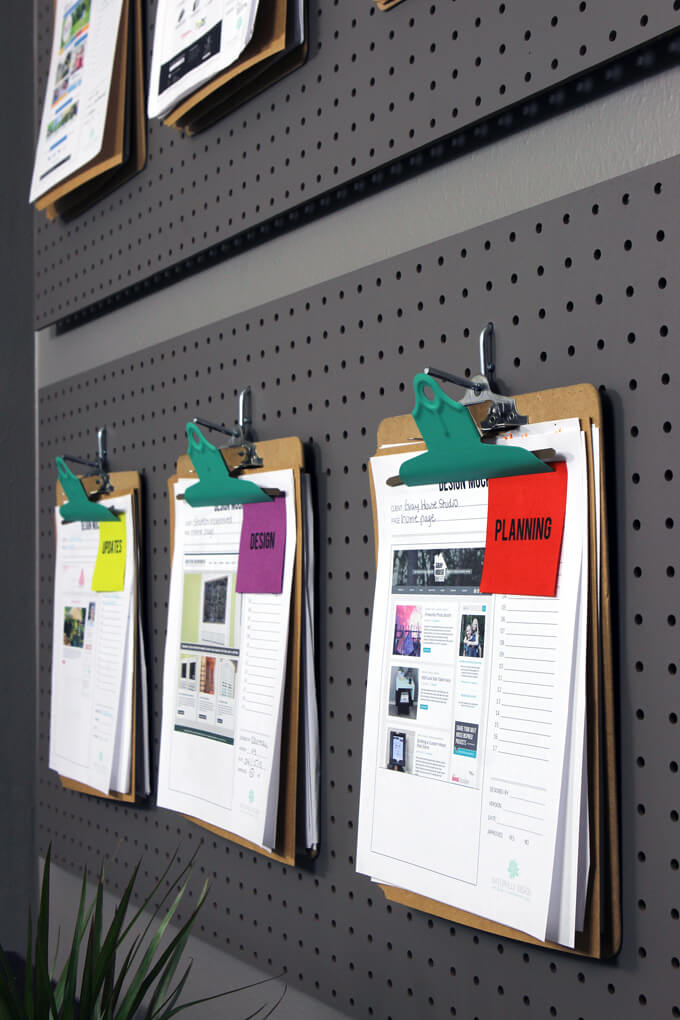
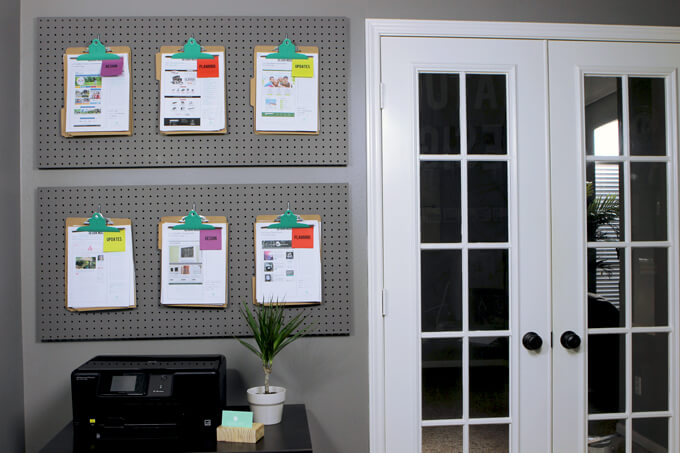
For each client I put all the associated paperwork in a folder and then attached it to a clipboard.

I ran several post-it notes through the printer with each phase of my design process.

The color represents the phase of the project and I can easily remove and stick a new note once the the project moves into the next phase.

Not only does the office pegboard organization make for a colorful display, I can easily see where each of my project stands and grab the one I need to work on that day off my project board.

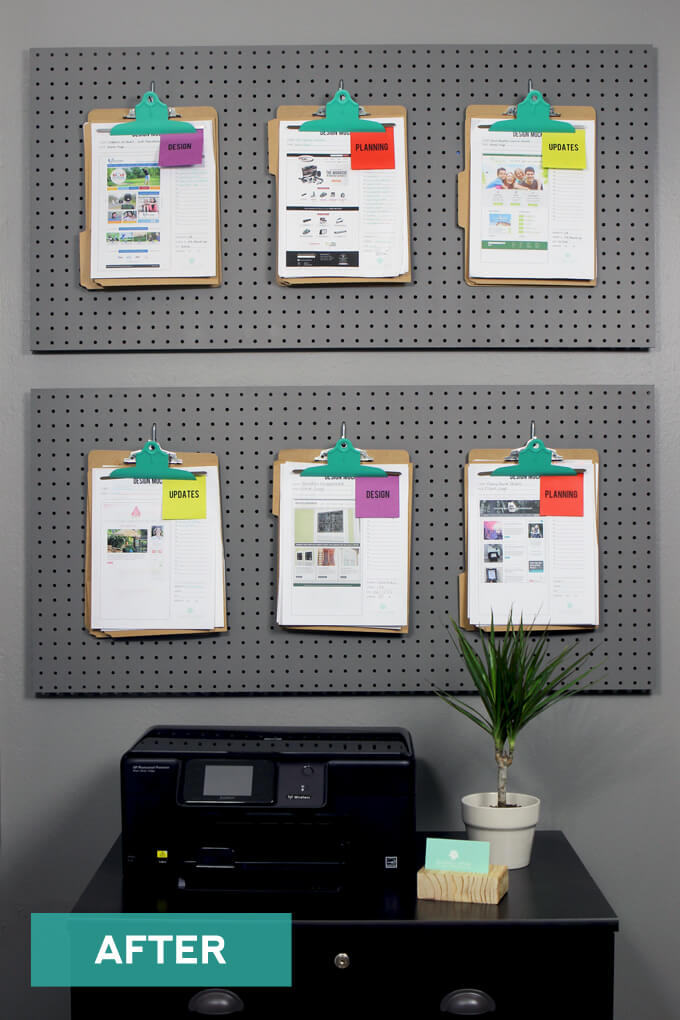
I ordered them so the new projects are at the top and the ones with the closest launch date are on the bottom. Once a project is complete, I will file it away in my file cabinet below and a clipboard opens up for a new project to begin!

This DIY home office project was easy, quick to put together and actually only cost us one can of green spray paint since all the other supplies we used were left over from other projects.

I really like how visually the whole wall is filled up now and the space feels much more complete than it did before with this office pegboard organization solution.

I believe the office pegboard organization system will work really well for keeping all my projects organized. Now the paper mountain will be more of a paper hill while I move on to figuring out a good solution for sorting the mail more efficiently.

PIN IT FOR LATER

Office Pegboard Organization

Fireworks Photo Booth

Fireworks Photo Booth

Fireworks Photo Booth

Happy 4th of July weekend! Who is ready to see some fireworks? Speaking of fireworks, have you ever found it difficult to time the perfect photo op in front of fireworks?

Brent and I had an entertaining and silly time tonight creating an excellent and easy solution, a fireworks video photo booth! This would be a great addition to any 4th of July party. It creates a patriotic atmosphere, you never have to worry about missing that perfect pose in front of the fireworks and you don’t even have to leave your backyard!

Fireworks Photo Booth

Instead of having a static photo backdrop we created a video backdrop. We used a laptop with a fireworks video playing, a projector and a white piece of fabric. Our backyard has these huge trees so we took advantage of them and strung the white fabric between two trees and then placed the projector playing the video behind the sheet so it rear projected the laptop screen onto the fabric. We had all these items on hand so this was a very inexpensive project but we think it is unique and will bring lots of enjoyment to a party.

The fun thing about the video backdrop is you can take static photos or quick little Instagram videos with the fireworks going off behind you and nobody would ever know the difference. At the end of the night if you are too tired to leave your house to go to a fireworks show, just pull your lawn chair up and oooh and ahhh over this prerecorded fireworks display. It all pretty much looks the same anyway.

Fireworks Photo Booth
^^^ Having patriotic props on hand is a must.

Fireworks Photo Booth
Here was our set up. In order to see the projection it must be dark out which can cause the subjects posing in front of the backdrop to be only silhouettes so our solution was to add two lights in front of the fabric. We covered the lights with colored plastic so they wouldn’t be too bright and wash out everything and would also add a nice color effect. We placed cardboard on the side of the light facing towards the projection so it would block the light from shining on the fabric.

Fireworks Photo Booth

*In the effort for full disclosure, this was our first attempt at creating a photo booth with a video backdrop (at night none the less) and we needed to practice getting the set-up right. So here we are, just the two of us, on the 2nd of July in our backyard at 10:00 at night posing in front of our fake fireworks and having way too much fun with it. I’m 99.9% positive our neighbors think we are crazy.

But we are super excited to use our fireworks photo booth for real at our 4th of July party this weekend!

Lack Side table Ikea Hack

Lack Side Table IKEA Hack

For this Lack Side Table IKEA Hack we transformed a basic LACK side table into a fun and colorful piece with character and charm.

Lack Side table Ikea Hack

Back during my single days when I was working in Dallas I practically lived right down the street from an IKEA. I went there every now and then but I had no idea how good I had it and definitely didn’t take advantage of it.

If I am being honest most of the time I only stopped by there on weekend mornings just to grab a cinnamon roll. Have you ever tried an IKEA cinnamon roll? They are so delicious. Now the closest IKEA is about 45 minutes away which is not bad, you just have to make a day of it. But really by the time you walk all the way through the place on a Saturday, it’s not hard to do.

Lack Side table Ikea Hack

The great thing about IKEA is you can get pretty inexpensive furniture there and because of that there is the growing trend of IKEA hack projects.

This past weekend Brent and I did our first IKEA hack using the Lack side table with casters. Lack IKEA hack – try saying that five times fast. We were looking to get an inexpensive table that we could paint to bring subtle color to our neutral master bedroom.

Lack Side Table IKEA Hack

All my furniture in my first apartment in college was from the Lack collection at IKEA. Now I remember why. That stuff is cheap. But man oh man is it plain and boring.

So in today’s post we are sharing how we transformed the basic side table from IKEA (on the left) into a piece of furniture with character and charm (on the right).

Lack Side Table IKEA Hack

Lack Side Table IKEA Hack

SUPPLIES

Shop the products we used for this project in one place.

FYI: This post contains a few affiliate links to products we used to make this project. Gray House Studio does receive commissions for sales from these links but at no extra cost to you. We appreciate you supporting this site. Read our privacy and disclosure policy. You can also easily shop our recommended products here.

TUTORIAL VIDEO

[yotuwp type=”videos” id=”1HKzfE6jHZc” title=”off” description=”off” player=”width=590&modestbranding=0&showinfo=0″]

Subscribe to our YouTube Channel

Like our video? Subscribe and help us reach our goal of 100k subscribers.

Lack Side Table IKEA Hack

1. The first thing I did was to use a sanding sponge to sand all sides of the top piece of the side table.

Lack Side Table IKEA Hack

2. Next, I used a foam roller to apply paint to the top.

I used Slow Green from Sherwin Williams. I like the appearance of the light color contrasting with the dark wood.

Lack Side Table IKEA Hack

3. While the top was drying, I assembled the base of the side table.

Lack Side Table IKEA Hack

4. I used a yard stick to mark the shape I wanted to create with the paint.

Lack Side Table IKEA Hack

5. Next, I marked on the base with painter’s tape the areas I intended to paint.

I used two layers of tape to make sure I had plenty of space to catch any stray paint in case my hand got a little shaky.

I then sanded with the sanding sponge again and used a foam roller to paint all the areas above the tape. As soon as the paint was applied, I removed the tape.

Lack Side table Ikea Hack

6. We bought the Lack IKEA side table with casters but didn’t want to use to the casters because we wanted the side table to sit higher off the ground.

We built our own custom base that was very similar to the nightstand in our bedroom that Brent made.

After Brent cut the pieces of wood to the right dimensions using a table saw, I used a pocket hole jig and a drill to make holes for the screws that hold the base together.

Lack Side table Ikea Hack

Lack Side table Ikea Hack

If you are interested in building the base we made, be sure to download the free plans above with all the dimensions and measurements you need.

Lack Side table Ikea Hack

7. The IKEA Lack side table with casters comes in three colors.

We choose the black/brown finish. We found that the Rust-Oleum ebony stain was a very close match to the color of the table.

I stained the outside of the base and the areas of the inside that would be visible.

Lack Side table Ikea Hack

8. Once the stain was dry I flipped the table over and flipped the base over and set it on top of the table. Then I took a ruler and measured to make sure the base was centered on the table.

I used the pocket holes I drilled earlier to attach the base to the bottom of the table with screws.

Finally, I flipped the side table back over and attached the top of the table using the hardware that came with it. And just like that my new side table was complete!

Lack Side table Ikea Hack

In just a few simple steps we turned the inexpensive and plain as it gets Lack side table with casters into a unique piece of furniture worthy of styling. Yay for a Lack Side Table IKEA Hack!

We put our new side table next to our hanging reading chair and it fits perfectly! We love how the asymmetrical shape on it brings just enough color and interest to our bedroom without overpowering any of our other furniture. I also love that now I have a place to set my coffee and a lamp to provide some light while I am reading in one of my favorite chairs in our house. It really completes this little corner.

Lack Side table Ikea Hack

Lack Side table Ikea Hack

My favorite part is always styling the projects. I love all the little details on this side table, sweet and simple.

This Lack Side Table IKEA Hack project is a fun one because the possibilities of shapes and colors you can paint are endless!

I hope this post has inspired you to head to IKEA and make your own or at very least go get a cinnamon roll.

PIN FOR LATER

A simple way to give the IKEA Lack side table an upgrade with a little paint and a new base. This DIY furniture makeover includes free plans for building the base of the table.

Custom Wood iPad Stand

Building a Custom Wood iPad Stand

Building a Custom Wood iPad Stand

This past year I received an iPad for Christmas. I was a little late to the iPad party which is funny considering a large part of my day job is to design websites to fit on tablets. Okay, first world problems here but I was having difficulty with using the iPad for work while it was laying flat on the desk. I have to consistently check the tablet and then look back at my computer to code the design and I thought if I could have the iPad propped up at eye level that would be a huge help and streamline the process. I mentioned the idea to Brent and thus building an iPad stand went onto our project to-do list.

Building a Custom Wood iPad Stand

Brent and I’s design planning sessions are quickly becoming my favorite part of projects, mostly because they often take place when food is involved (we have had quite a few concept drawings start on paper napkins) but also because it is fun to bounce ideas back and forth and dream big for our projects.

I described to Brent the features that I thought would be really helpful to incorporate into the iPad stand. Brent sketched it up and added a few additional design elements that I thought were genius! We were really excited with the design we brainstormed and were looking forward to starting the project soon.

Building a Custom Wood iPad Stand

A few weeks ago we were near downtown shopping and on a whim decided to stop in New Living, a local green home furnishings store in Houston that sells a variety of eco-friendly products from organic mattresses to non-toxic finishes. We were really excited that Jeff, one of the co-founders, happened to be in the store that day and we got to meet with him, learn about the store’s vision and even got to tour their workshop. One of the really cool things about New Living is they work with local artisans to build custom home furnishings from locally sourced materials for the store.

We got to talking about our upcoming projects and when we mentioned we were looking forward to building a custom wood iPad stand he asked if we would be open to making one for the store. We quickly answered yes and were ecstatic to trade an iPad stand for the opportunity to work with some really cool wood and to try out the non-toxic finishes they offer.

Building a Custom Wood iPad Stand
^^^ Left: Pecan // Right: Walnut

How to Build a Wood iPad Stand Video

To see more of our DIY project & tutorial videos, subscribe to our channel ⇾

How We Built Our Custom Wood iPad Stand

Building a Custom Wood iPad Stand
^^^ We started by cutting all the pieces we needed to build the iPad stand. In this picture we are cutting the vertical support. We designed it so the piece of pecan wood is sandwiched between the two pieces of walnut.

Building a Custom Wood iPad Stand
^^^ Before we glued the pieces together, we assembled it to make sure everything fit as we had planned. As you can see, the top of the stand is uneven. This was not a problem because we cut it with the table saw after it was glued together.

Building a Custom Wood iPad Stand
^^^ We cleaned the surface of the wood and the used a brush to apply wood glue that created a strong bond.

Building a Custom Wood iPad Stand
^^^ Once we had the glue applied, we immediately wiped off any excess with a damp paper towel to make sure none dried on the surface. That could cause discoloration once the finish was applied. Then, we clamped the boards together and let the glue set.

Building a Custom Wood iPad Stand
^^^ One feature we wanted to incorporate was to create a hole in the wood stand to access the home button on the iPad. To create this we drilled a 1″ hole through the live edge lip.

Building a Custom Wood iPad Stand
^^^ The next step was to sand the stand.

Building a Custom Wood iPad Stand
^^^ The beauty of using walnut is there is no need to stain the wood. We applied a single layer of non-toxic transparent finish.

Custom Wood iPad Stand Features

Building a Custom Wood iPad Stand
^^^ Here is our finished wood iPad stand. It is made of walnut and pecan wood and fits a normal sized iPad.
Building a Custom Wood iPad Stand
^^^ We made it so it has a cut out in the back and an inset in the front so the charging cord can run through the back, down the inset and come out through the bottom. Brent came up with this idea and I love it because the iPad lays flat against the stand whether it is plugged in charging or not.

Building a Custom Wood iPad Stand
^^^ We also created a cut out so the home button is easily accessible.

Building a Custom Wood iPad Stand

After we built it, I spent the next few nights testing it out (you know just to make sure it worked) and found that iPad stands are really useful in lots of rooms. I used it in my office for work, in the kitchen for displaying recipes and I put it on my nightstand in the bedroom as a safe place to store it while it charged. I am thinking I need one for every room now!

Building a Custom Wood iPad Stand

Last Friday we dropped it off at New Living and I must admit I was a little sad to see it go because I had grown kind of attached to it while testing it out. However, we are so excited that it has a fun new home at the New Living store. If you are in Houston and in The Heights area be sure to stop by the store and check out our iPad stand and all the impressive handmade furniture they offer.

Next up on the list is for us to create more iPad stands! We are pumped to build more stands to use throughout our house. I am excited to make a unique one for each room. If you are interested in making you own, stay tuned because we will be offering a how-to for this project and plans coming up soon!

Handmade Father's Day Gift

Handmade Grill Supplies Box

How we built a handmade grill supplies box for both of our dads for Father’s Day gifts to store and organize their grill tools and supplies.

Handmade Grill Supplies Box

Summer is right around the corner and that means pool parties, grilling, and Father’s Day are fast approaching! This year we crafted a handmade Father’s Day gift for the dads in our lives that love to cook out on the grill. We designed and built our own custom handmade grill supplies box.

Over the years I started to notice that my dad always had to take multiple trips in and out of the house to collect all of the supplies he needed for the grill. I saw this as a bit of a hassle because my dad loves hosting summer pool parties but he was spending a lot of his time running inside to grab a plate, seasonings or a spatula rather than enjoying the party with his guests.

We thought it would be really handy if there were a simple wood box to store grilling utensils, seasonings, foil, a pan and even a bottle opener in one easy to carry container. It was actually harder than we thought to find what we were envisioning this box would look like.

There are a plethora of tackle boxes for fishing gear out there and a wide variety of toolboxes for organizing and storing tools but it turns out storage containers for grill supplies are not really a thing. If they are, we could’t find them.

Handmade Grill Supplies Box

So we made our own. This was really fun because we could design it to look and function however we thought would best fit a griller’s needs. We modeled the exterior of our grill box after a vintage toolbox but needed to adapt the inside to fit the shape of the grill utensils and supplies.

VIDEO TUTORIAL

To see new DIY videos on Thursdays, be sure to subscribe to our channel ⇾


HANDMADE GRILL SUPPLIES BOX FEATURES

Handmade Grill Supplies Box

THE GRILL SUPPLIES BOX INCLUDES:

slots for tongs, spatula and grilling fork, plenty of space for a variety of seasonings, a bottle opener on the side of the box, roll of aluminum foil on a dowel rod and mounted metal tear strip for easy cutting, a special opening to store a meat thermometer and a pan attached to the bottom of the box.

Handmade Grill Supplies Box
My favorite part (which was Brent’s idea) is how we added hinges on the front and back of the box so a normal sized baking pan could attach to the bottom. This way they always have a plate to carry all their grilled items at their fingertips.

All they have to do is rip off a piece of foil from inside the box; line the pan with it and they are ready to go serve all the delicious items they cooked up!

Handmade Grill Supplies Box
We wanted to build a sturdy box for our dads that could be a practical spot for them to store all their grill supplies and an easy way to carry it all out to the grill. That way they can spend more time outside enjoying the party with friends and family rather than running around trying to gather all their grilling necessities.

Handmade Grill Supplies Box
A host should have a good time at their own party!

Handmade Grill Supplies Box
The cool thing about the grill supplies box is whether they are just walking to the grill in their own backyard or taking it on a camping trip, they can be sure their supplies will fit nice and neat and will be readily accessible.

Brent and I hope our handmade Father’s day gift makes our dads’ lives just a little bit easier because after all they have done for us, it is the least we can do.

PIN THIS PROJECT

Handmade Grill Supplies Box

PROJECT FEATURED ON DOMINO.COM

We were excited and honored to have our handmade grill supplies box and the story behind this Father’s Day gift featured on domino.com. Click the read story link below to learn more about this project.

a diy father’s day gift idea

A thoughtful gift for the Dad who loves to grill.

Read Story

DIY Yarn Wall Art

Branch & Yarn Wall Hanging

Check out how we made a colorful branch & yarn wall hanging for our guest bedroom.

Yarn Wall Hanging

One room that we haven’t shared yet on the blog is our guest room. If I am being honest that is because the design of that room is still all over the place. I found a new colorful duvet cover that I love but we just haven’t been able to give much time and attention to this room. There is a lot of mixing and matching of furniture going on and not in a good way, more of an any left over piece that didn’t have anywhere else to go kind of way.

A branch and yarn wall hanging was the perfect solution. This project was really easy and fun to make. We put it together in just a few hours and love the results. Today we are sharing how we made our branch and yarn wall hanging.

SUPPLIES

MATERIALS

  • Yarn in multiple colors
  • Branch
  • Metal loop
  • Cabinet pull knob
  • Double end threaded screw
TOOLS

  • Scrap Wood
  • Clamps
  • Scissors

HOW WE MADE OUR Yarn Wall Hanging

Yarn Wall Hanging
1. I loved picking out all the colors of yarn I wanted to incorporate into the wall hanging. I choose a few greens that matched the duvet cover in the room and then selected contrasting colors and neutral colors for balance.

Yarn Wall Hanging
2. We measured how high we wanted the yarn wall hanging to be on the wall and then doubled the height to determine the length the yarn needed to be cut. For ours we wanted it pretty large so we cut all our yarn into individual 8 1/2 ft. pieces.

To do this quickly we wrapped all the yarn around a ladder (set to 8 1/2 feet). Then we cut all the yarn at once at both ends. We did this for each color of yarn.

DYarn Wall Hanging
3. After we cut all the yarn, we went on the search for a branch. We got our branch off a tree in our front yard. Don’t worry, it needed to be trimmed anyway. Win, Win. Before we used it we cut it to the length we wanted and then cut off all the knots on the branch.

We wanted a consistent surface and it didn’t really matter what most of the middle of the branch looked like since we were going to cover it up with yarn anyway.

Yarn Wall Hanging
4. To attach the yarn to the branch, we folded a piece in half and then ran the folded end under the branch. After laying the fold over the top of the branch, we pulled the two loose ends through the loop.

This created a simple knot that is often called a Lark’s Head Knot. We repeated this step with each strand of yarn varying the colors to create our desired pattern.

Yarn Wall Hanging
5. To hang the branch we tied it to a metal loop that is often used to hang curtains. The color of the metal ring was too dark for the look we were going for so we wrapped it with an extra piece of yarn to make it blend in and be less noticeable.

DIY Yarn Wall Art
6. We hung the metal ring on a cabinet pull knob. Instead of using the screw that came with the knob that is intended go through the face of cabinets, we used a double end threaded screw.

This allowed us to screw into the knob and into the wall making it secure enough to hold the wall hanging.

Yarn Wall Hanging
7. After we hung the branch and yarn wall hanging, we straightened the yarn to make sure all the strands were in the right place.

Yarn Wall Hanging
8. To provide a straightedge to cut the yarn we clamped the yarn where we wanted to cut between two boards.

Yarn Wall Hanging
9. Finally, we cut the yarn against the board. This shaped the bottom of the yarn and made it look even.

Yarn Wall Hanging
The branch and yarn wall hanging brings cheer, color and whimsy to our guest room. I love how it brightens up a blank wall. You know what else I adore about this project? How low maintenance it was to make. I did the majority of it while sitting on the couch watching TV at night.

Yarn Wall Hanging
Yarn Wall Hanging
From picking out the colors of yarn, to drawing up a pattern, hunting for the perfect branch and hanging up the finished product, this project was extremely fun to create.

PIN THIS PROJECT

Yarn Wall Hanging