Floating Shelves in Bathroom

Floating Shelves in Guest Bathroom

We built a pair of floating shelves to store towels and display decor in our guest bathroom.

Floating Shelves in Bathroom Gray House Studio

Brent and I both took off this past Friday and it made me wish every week could include a three day weekend. It is amazing how much more we are able to both accomplish and relax with an extra day off. We didn’t have anything planned so we worked on checking a few smaller home renovation projects off our list. We managed to get two projects completed, buy supplies for a third project that we will work on today and shopped for new plants for our front flower beds and it is only early Sunday afternoon.

It has been a busy weekend but we were also able to have plenty of down time for dinner and frozen yogurt by the lake with family and enjoying one too many Girl Scout cookies while we lounged on the couch and made our way through several episodes of Bloodline on Netflix. That is one perk of living in the suburbs, it is not difficult in the slightest to get your hands on a box (or two) of Caramel deLites. They basically just show up on your doorstep.

Floating Shelves in Bathroom Gray House Studio

We are excited to have Brent’s parents come visit next weekend and want to get as much of the guest bathroom spruced up as we can before they arrive. Our first project this weekend was to build floating shelves next to the shower. We are really happy with how they turned out and how quickly they came together. Today we are sharing how we built our shelves in a few easy steps.
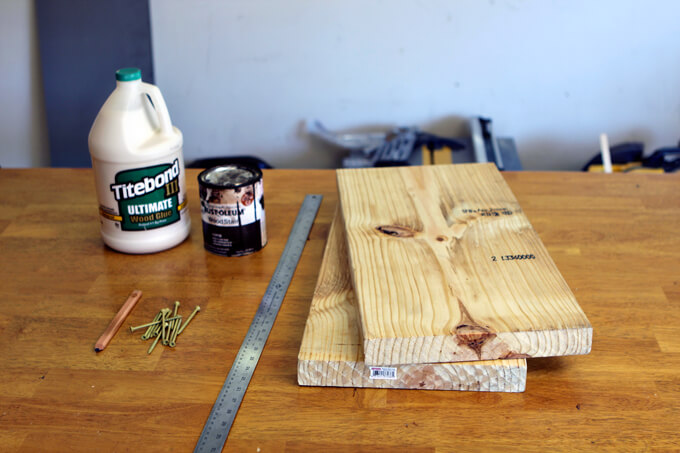
SUPPLIES

MATERIALS

  • (1) 2″ x 12″ Pine Board
  • Wood Glue
  • Wood Stain in Kona
  • 3″ Deck Screws
TOOLS

  • Table Saw
  • Ruler
  • Drill
  • Clamps
  • Router

Floating Shelves in Bathroom Gray House Studio

How We Built our Floating Shelves

Floating Shelves in Bathroom Gray House Studio
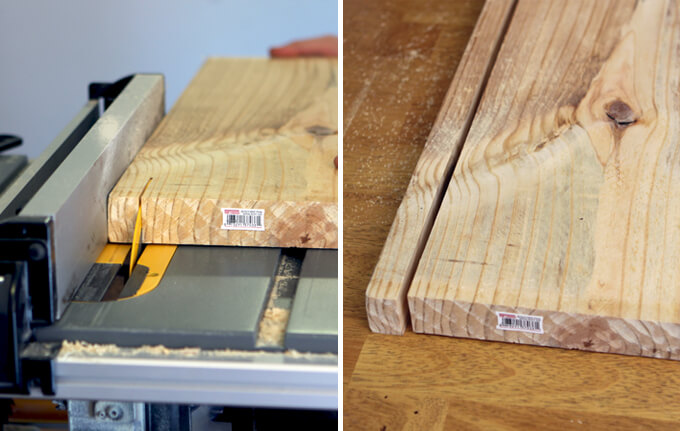
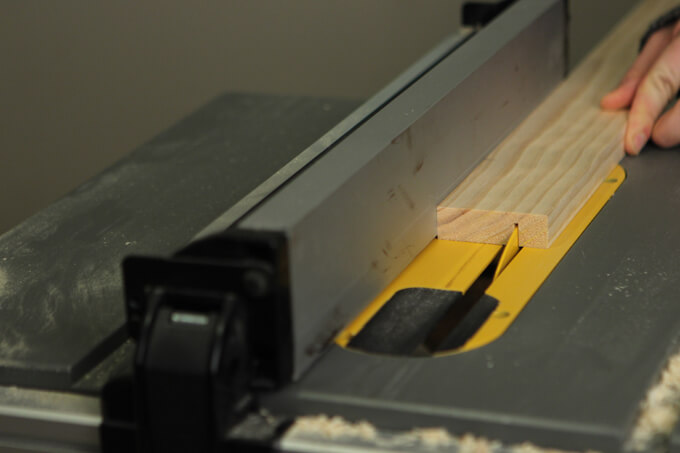
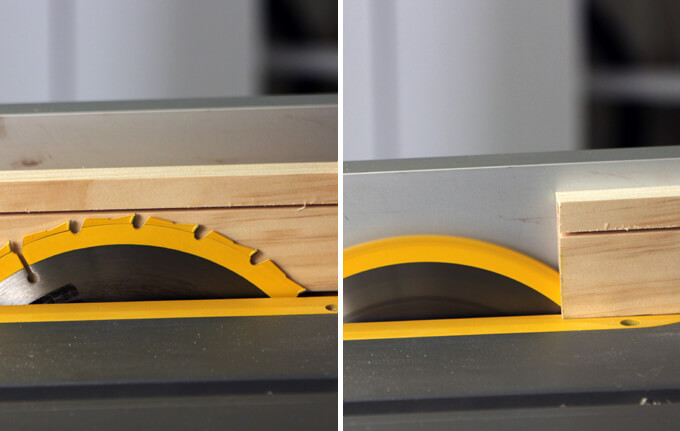
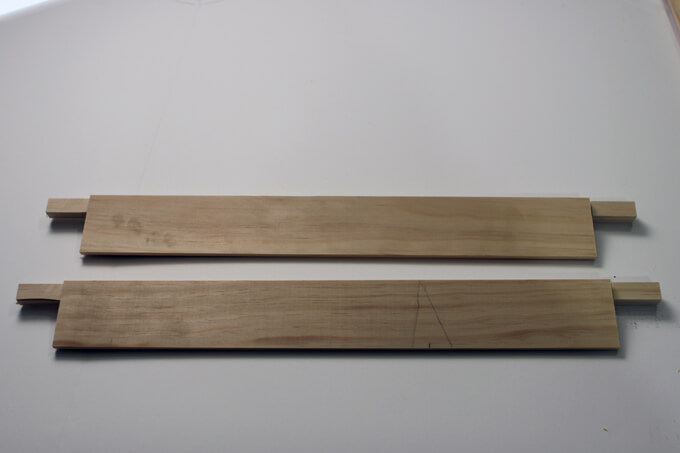
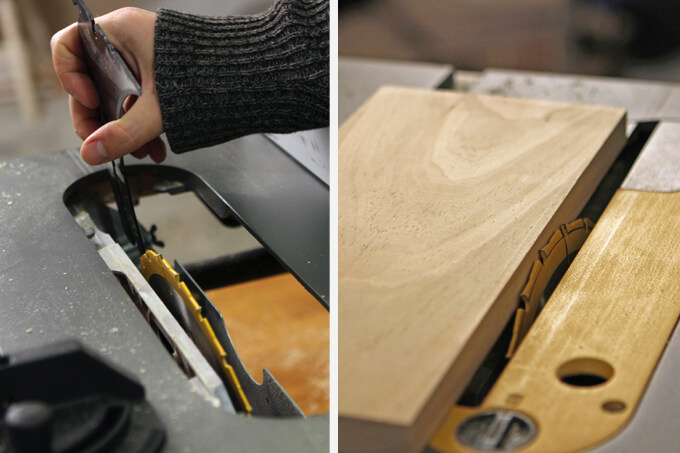
1. The first thing we did was to take our two pieces of pine (that we cut from the 2″ x 12″ to be the correct width for our space) and used a table saw cut off the back inch of the board. This created our bracket piece that we used to anchor the shelf into the wall. By cutting it off the back of the board it matched back up seamlessly with the front of the shelf.

Floating Shelves in Bathroom Gray House Studio
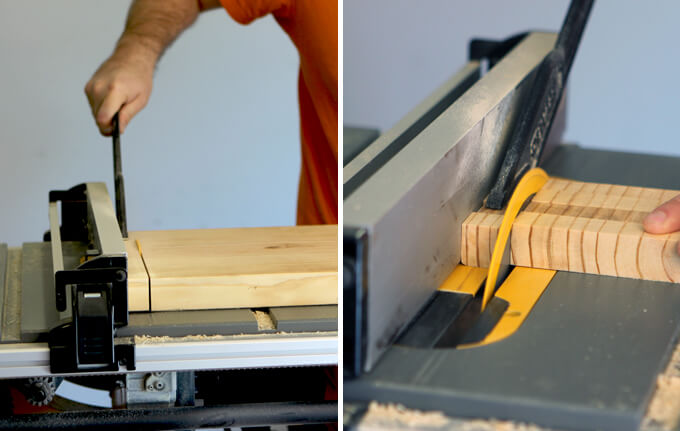
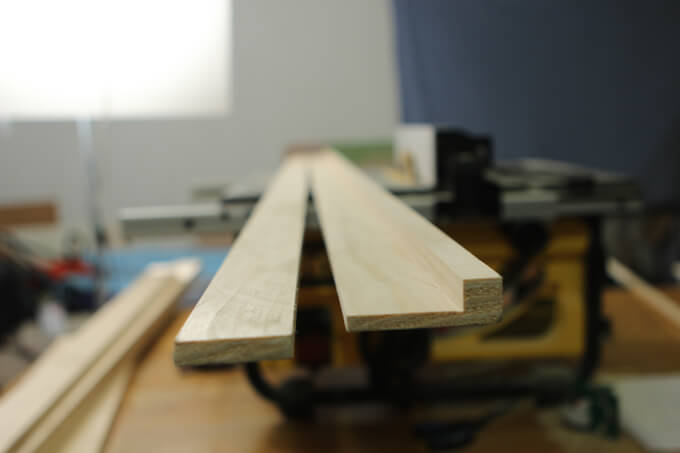
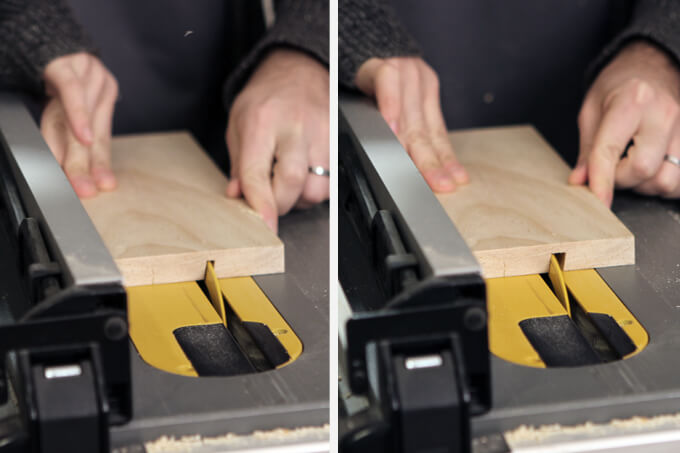
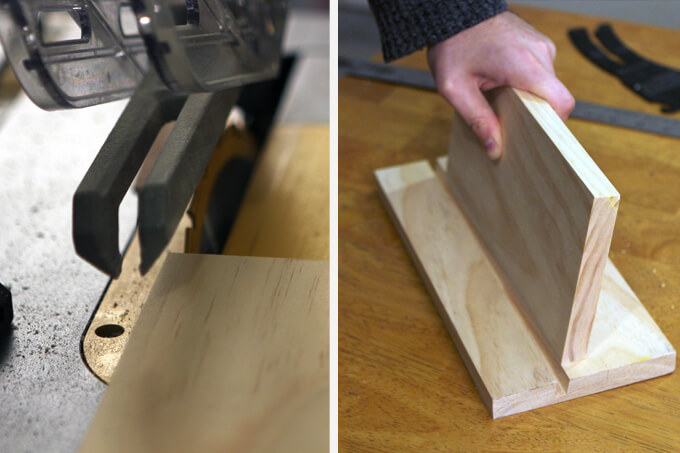
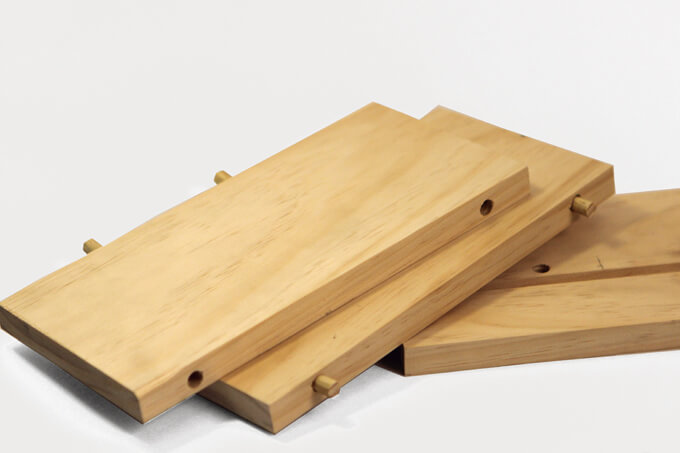
2. For the supports that connect to the bracket anchored into the wall, Brent cut 1″ x 1″ pieces from the left over piece of pine. These boards support the weight of the shelf.

Floating Shelves in Bathroom Gray House Studio
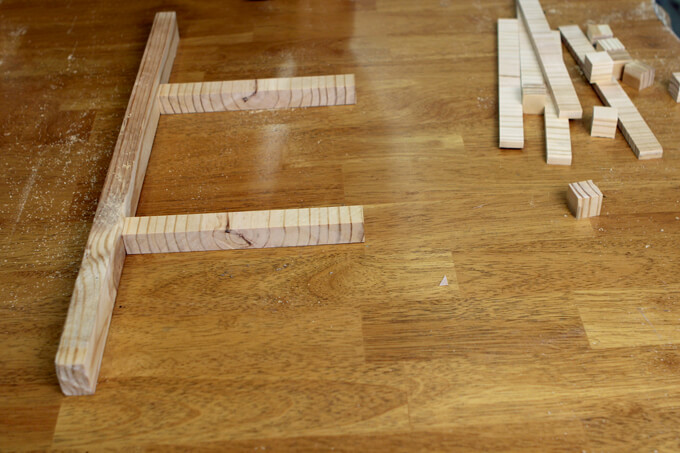
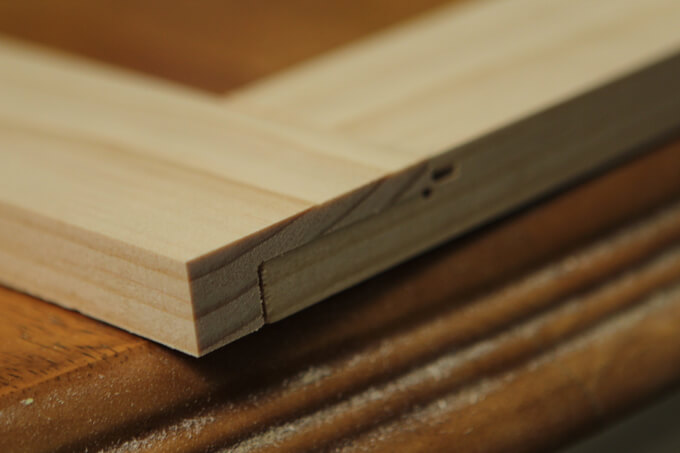
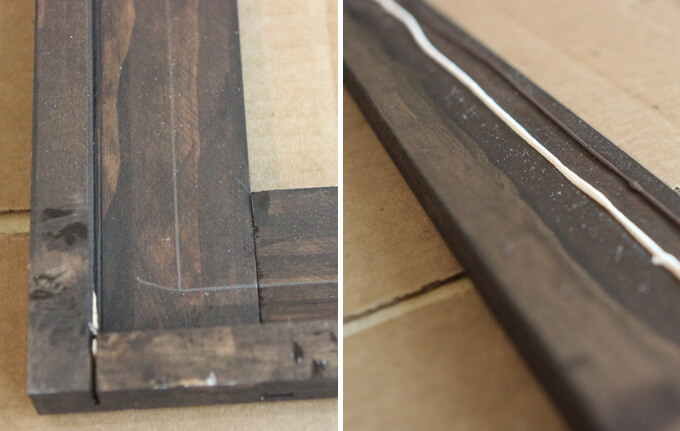
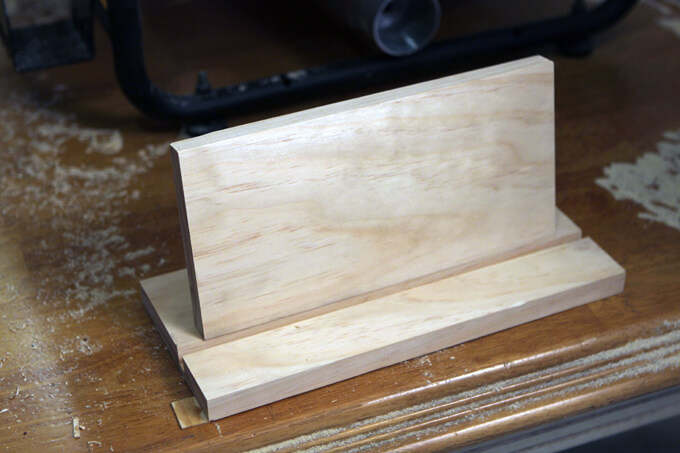
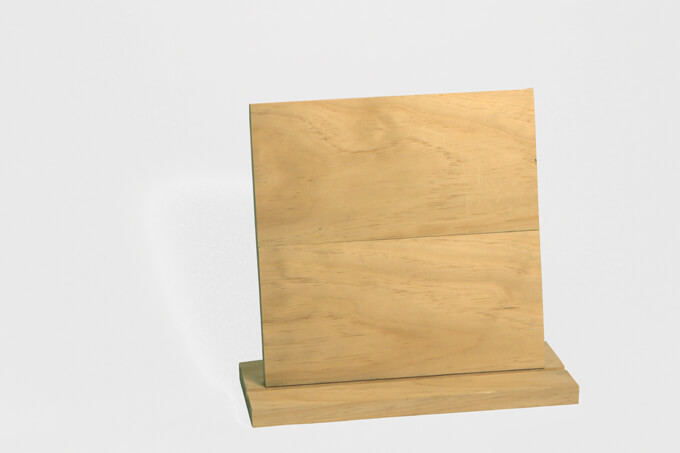
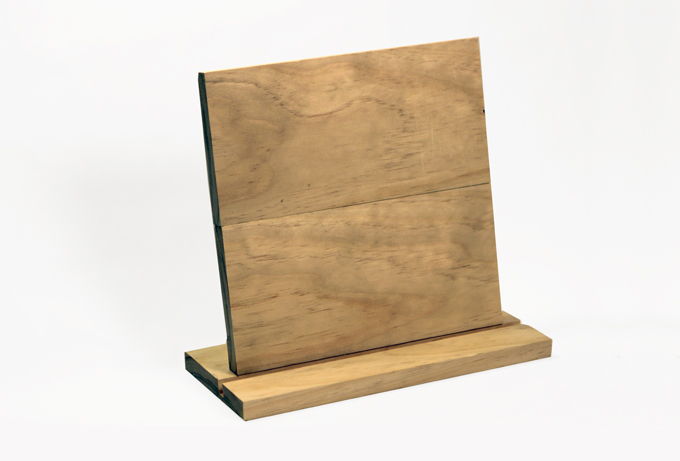
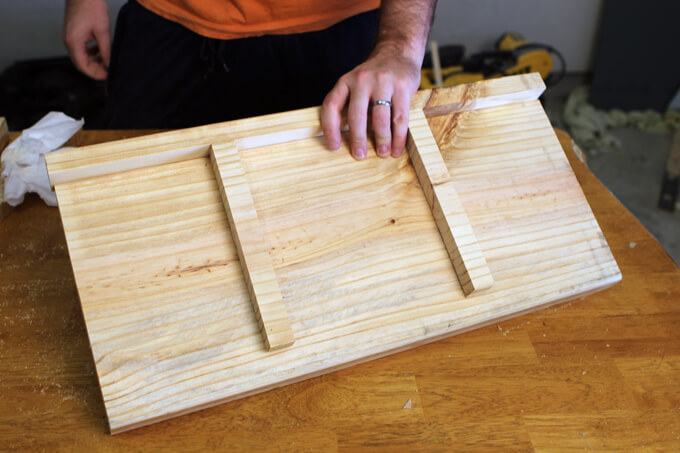
3. Then we laid out the three pieces of the bracket. This is how the completed bracket will look.

Floating Shelves in Bathroom Gray House Studio
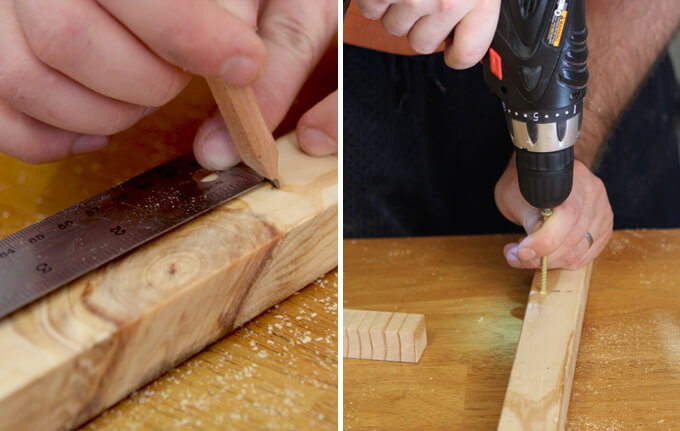
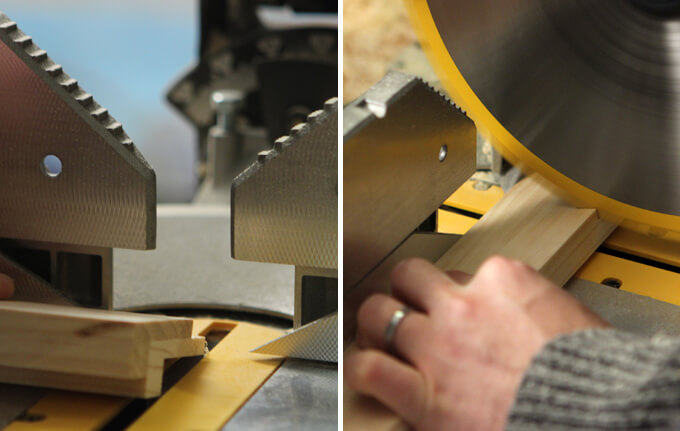
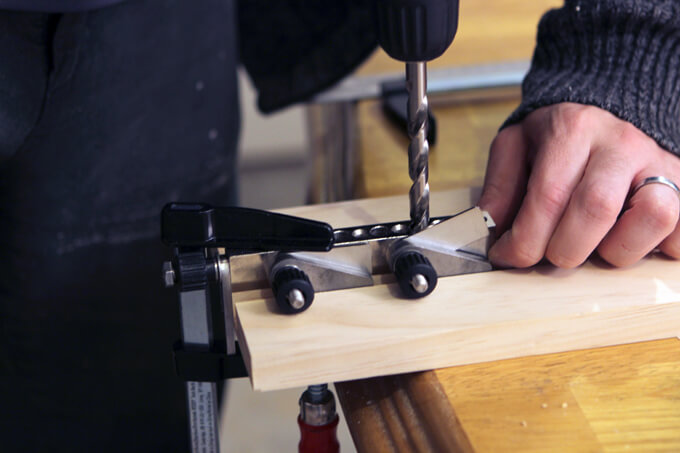
4. We used self tapping screws to connect the three pieces of the bracket together. Brent always tries to avoid screwing through any knots because when screwing into knots, that have a tendency to split. We know this from experience.

Floating Shelves in Bathroom Gray House Studio
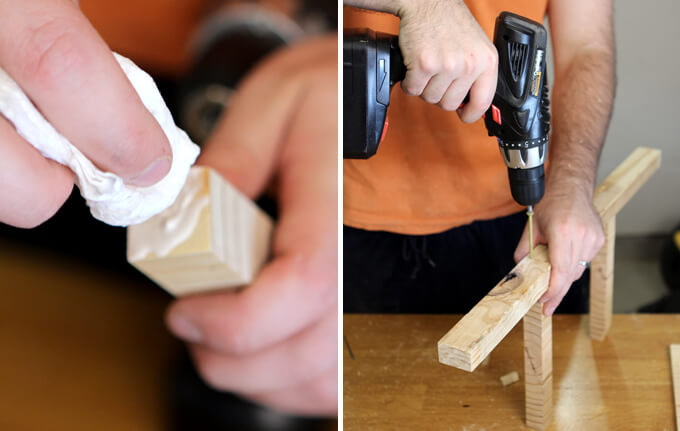
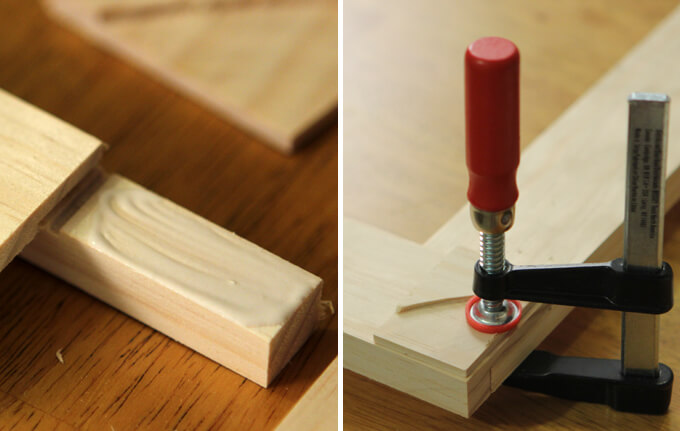
5. We dabbed some wood glue on the end of the two 1″ x 1″ boards that we then screwed into the back piece of the bracket to create strong joints so it would be nice and sturdy once it was assembled.

Floating Shelves in Bathroom Gray House Studio
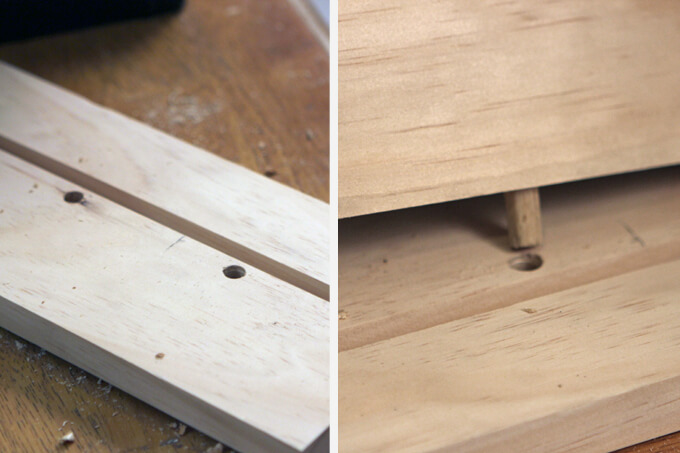
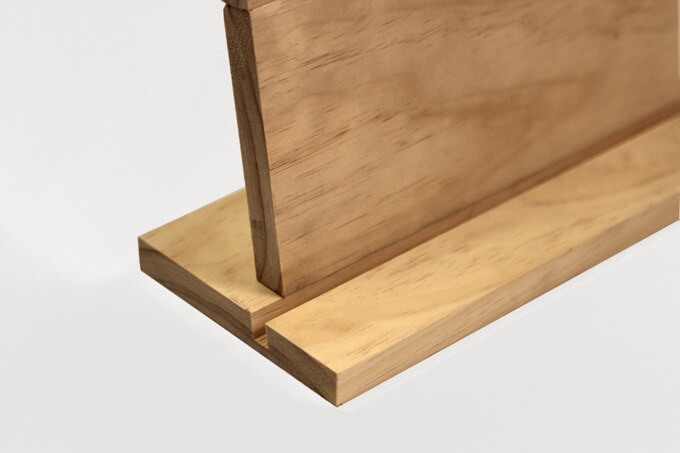
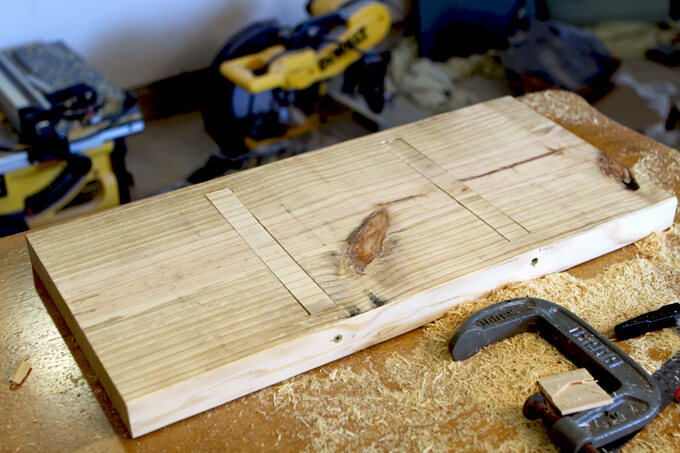
6. Now that we had our bracket assembled, we needed to remove slots from the bottom of the shelf to created a recessed area where the bracket could fit into the shelf.

Floating Shelves in Bathroom Gray House Studio
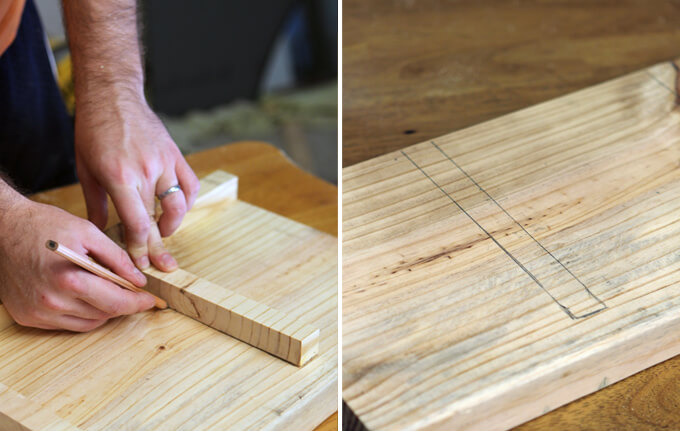
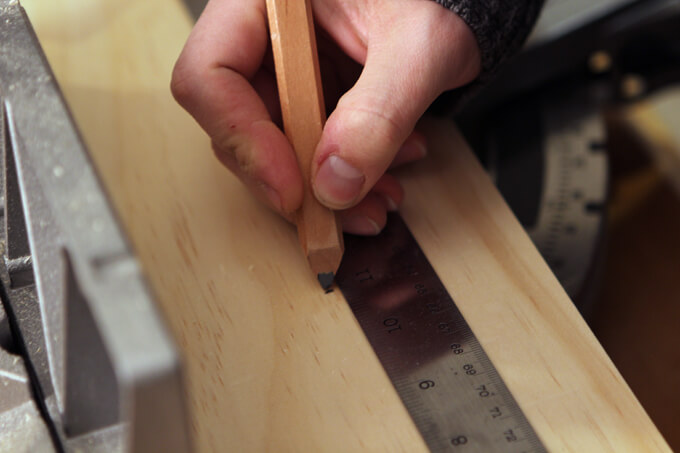
7. To determine the area of the shelf that needed to be removed for the brackets, we simply traced the outline of the bracket on the bottom of the shelf.

Floating Shelves in Bathroom Gray House Studio
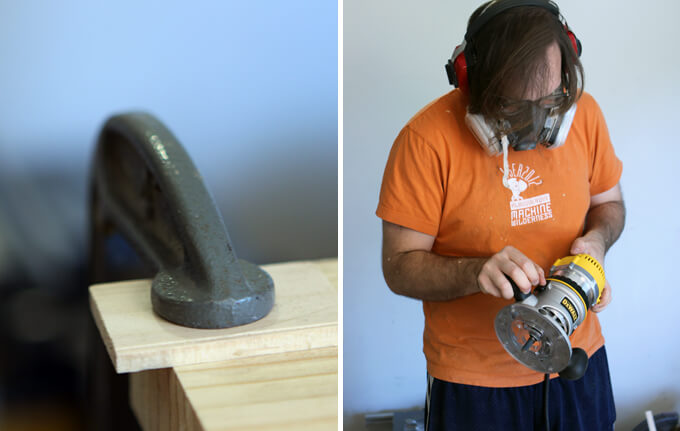
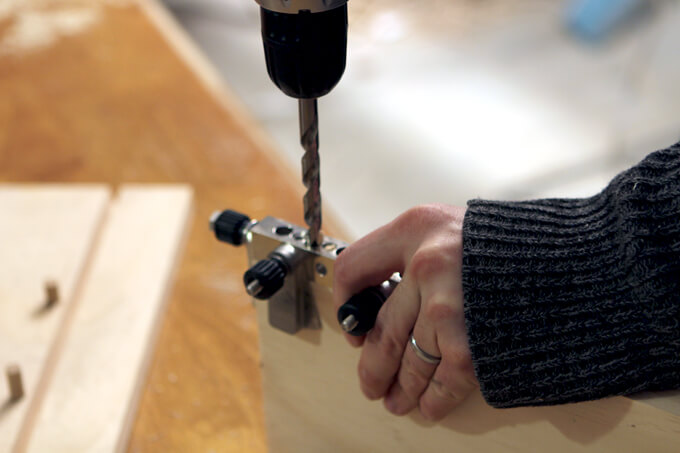
8. We then secured the board to our work space using clamps to make sure it would not move around once Brent started routing the slots. He set his router to be the correct depth and put on all his safety equipment to protect his face while working on this part.

Floating Shelves in Bathroom Gray House Studio
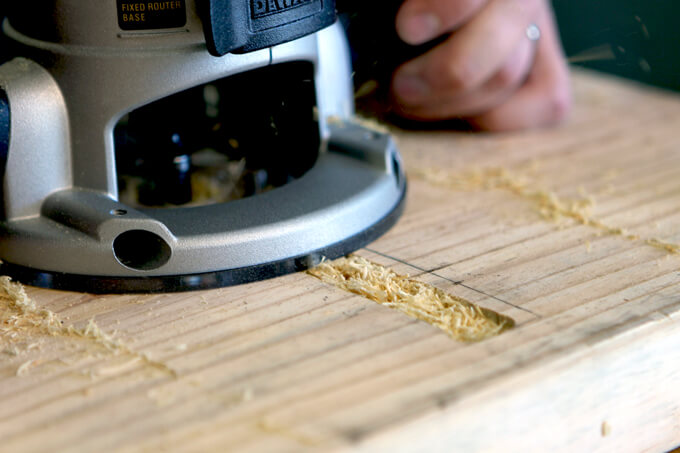
9. To route the slots, Brent used a half inch router bit. It took two passes to get enough of the material removed.

Floating Shelves in Bathroom Gray House Studio
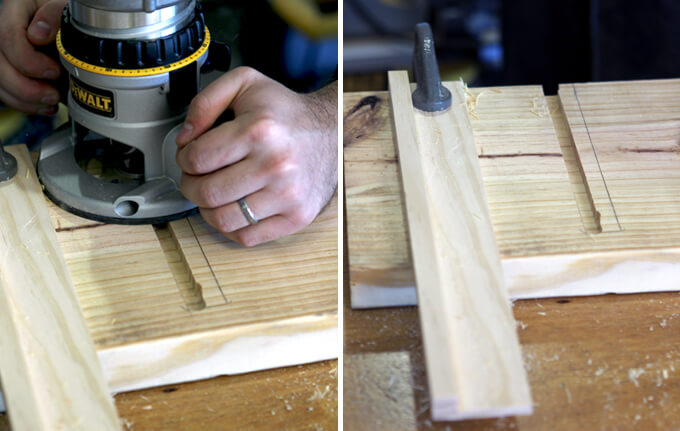
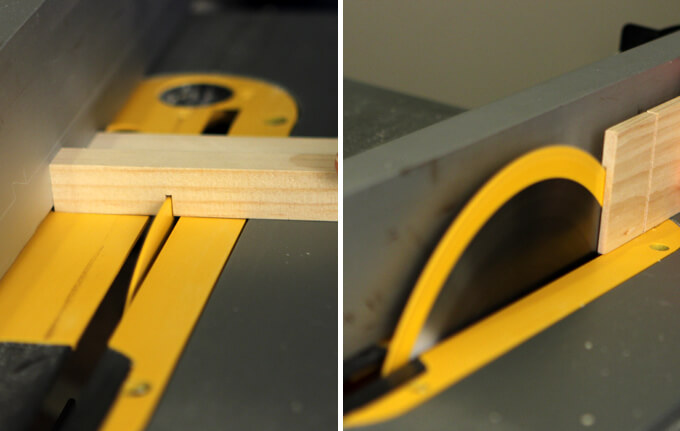
10. To route in a straight line, Brent used a piece of scrap board clamped to the shelf to guide the router. Once the first pass with the router was cut, he moved the scrap board over to guide the router again for the second cut.

Floating Shelves in Bathroom Gray House Studio
11. After Brent finished routing the slots from the bottom of the shelf, he test fit the bracket. It fit perfectly. We always do a happy dance when everything works and fits together correctly the first time. It is a very satisfying feeling.

Floating Shelves in Bathroom Gray House Studio
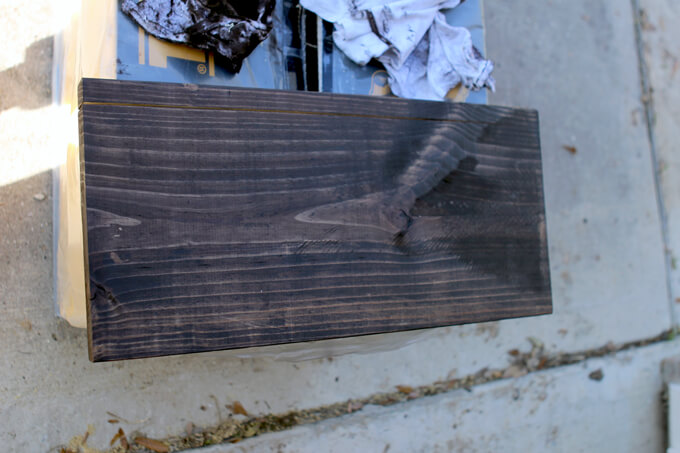
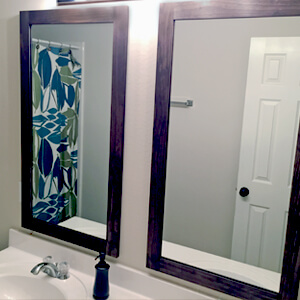
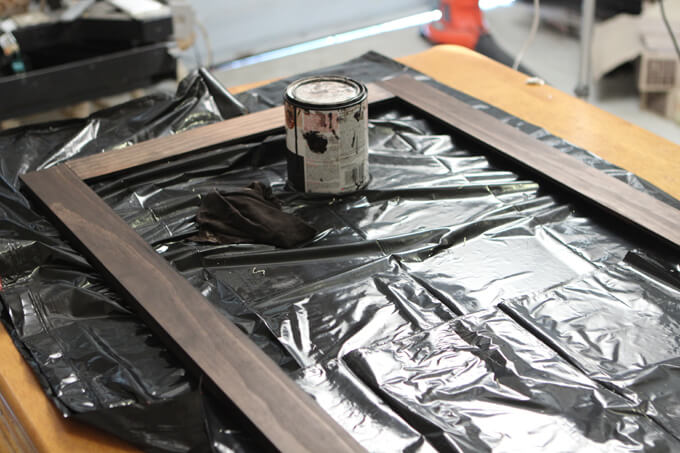
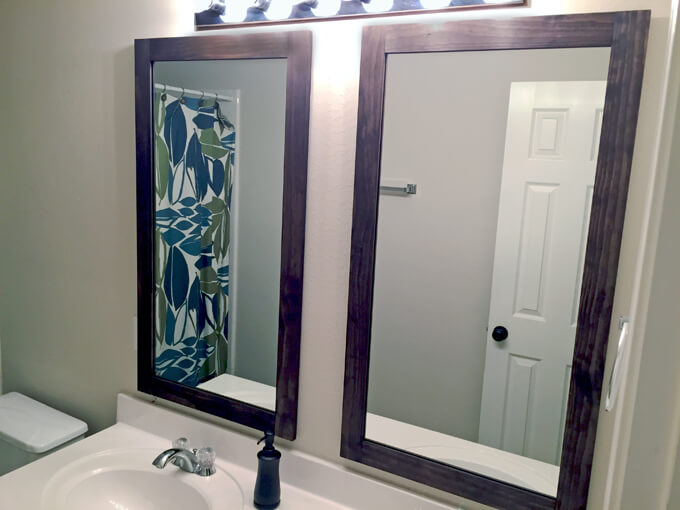
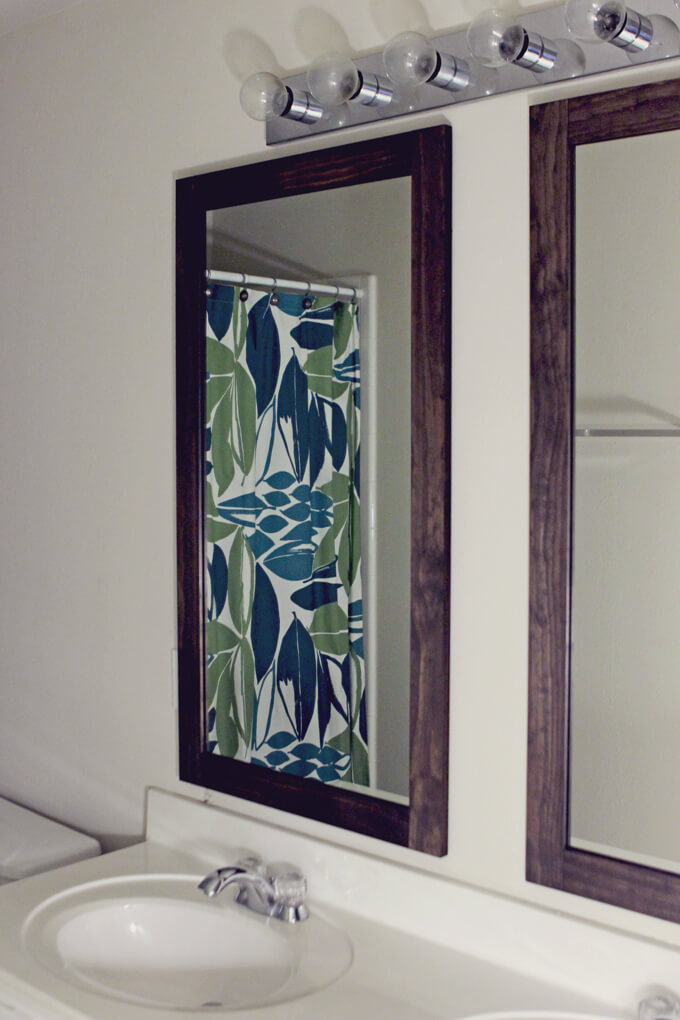
12. We used the same stain on the shelves as we used on the mirrors we framed in the previous project. The great thing about building your own furniture is you can stain everything to match.

Floating Shelves in Bathroom Gray House Studio
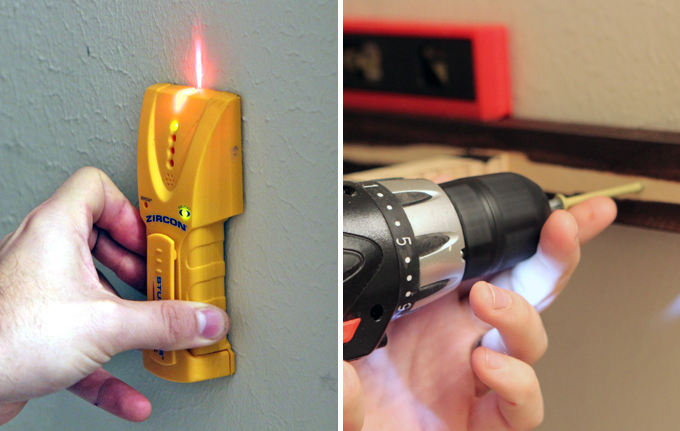
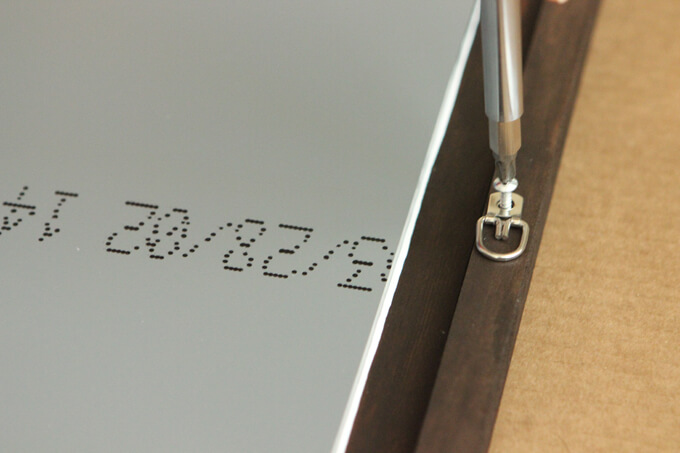
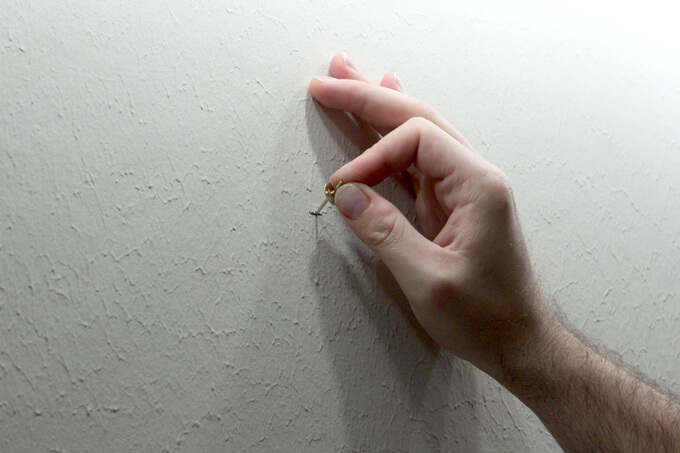
13. After marking the studs with a stud finder, we secured the bracket to the wall with 3″ deck screws.

Floating Shelves in Bathroom Gray House Studio
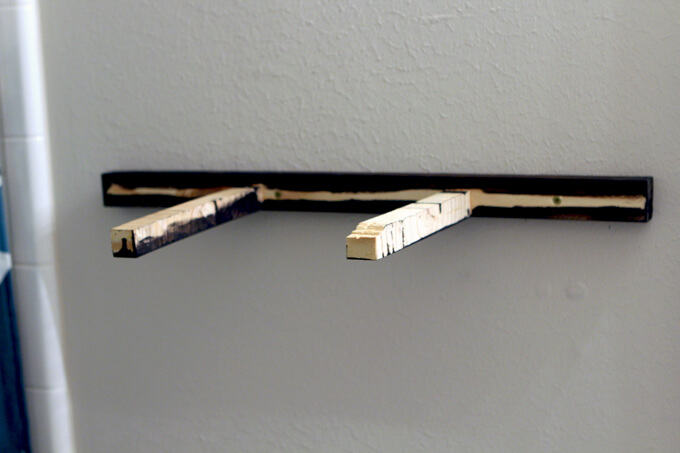
14. The bracket isn’t much to look at by itself but it is secure and will support the shelf which is all that really matters.

Floating Shelves in Bathroom Gray House Studio
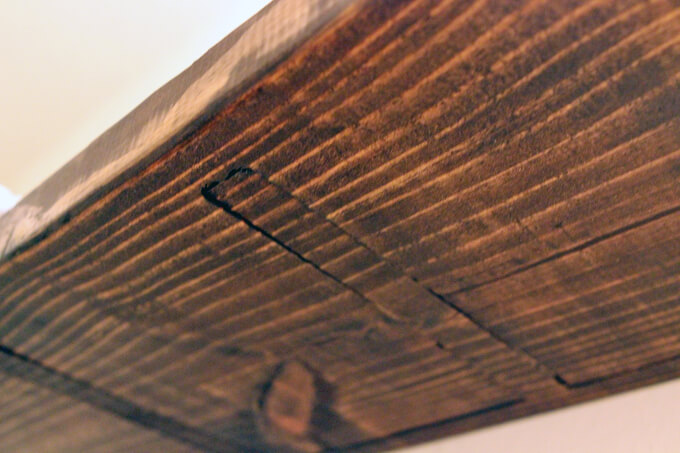
15. This is a view of what the bottom of the shelf looks like after it is attached to the bracket. We thought about trying to conceal the bracket but we like how it makes for a nice design element on the bottom of the shelf, if you happen to look under the bottom of the shelf.

Floating Shelves in Bathroom Gray House Studio
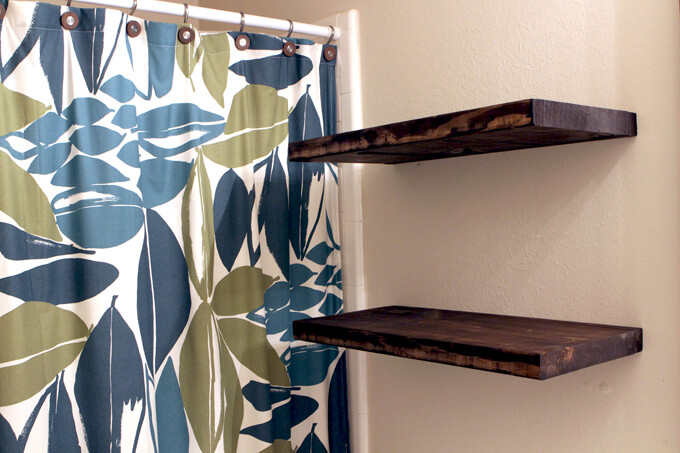
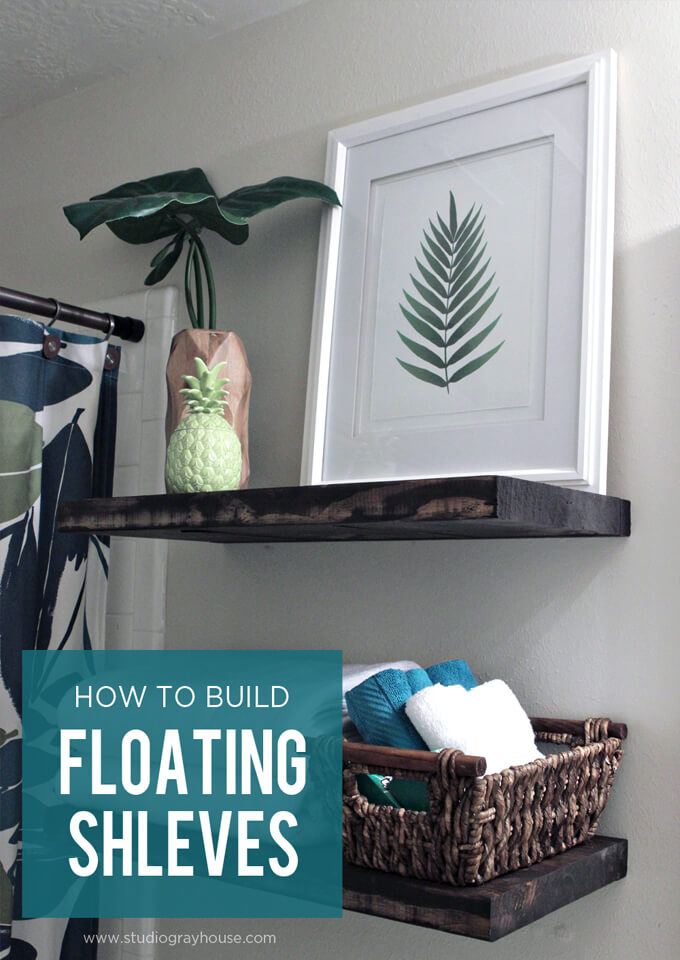
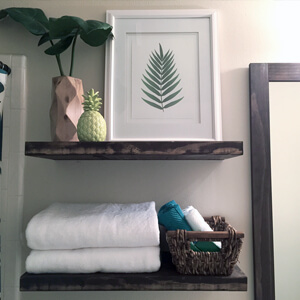
This is what the floating shelves looked like once they were both up on the wall.

Floating Shelves in Bathroom Gray House Studio
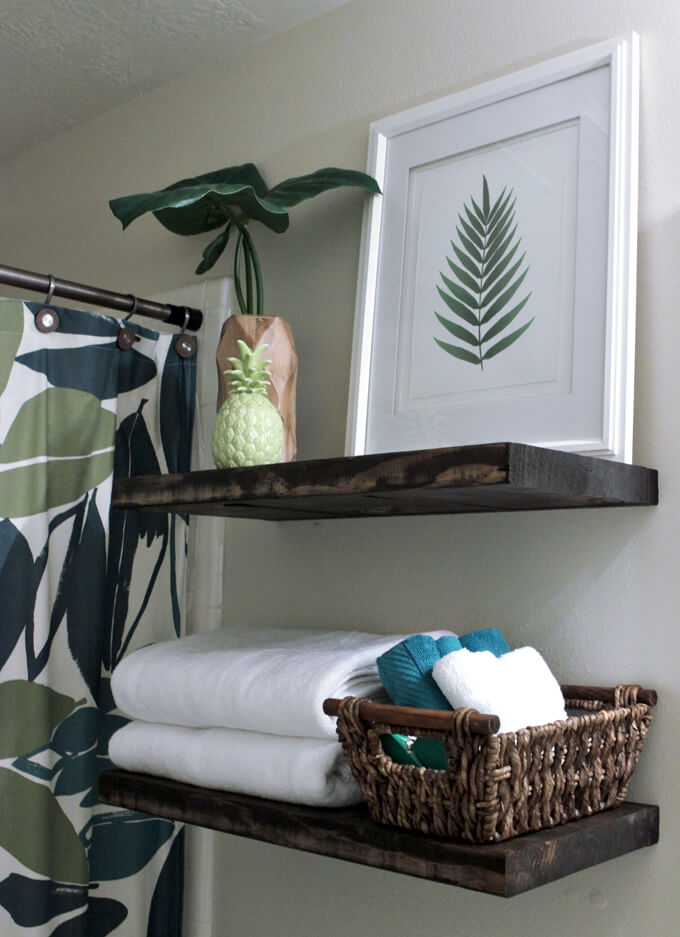
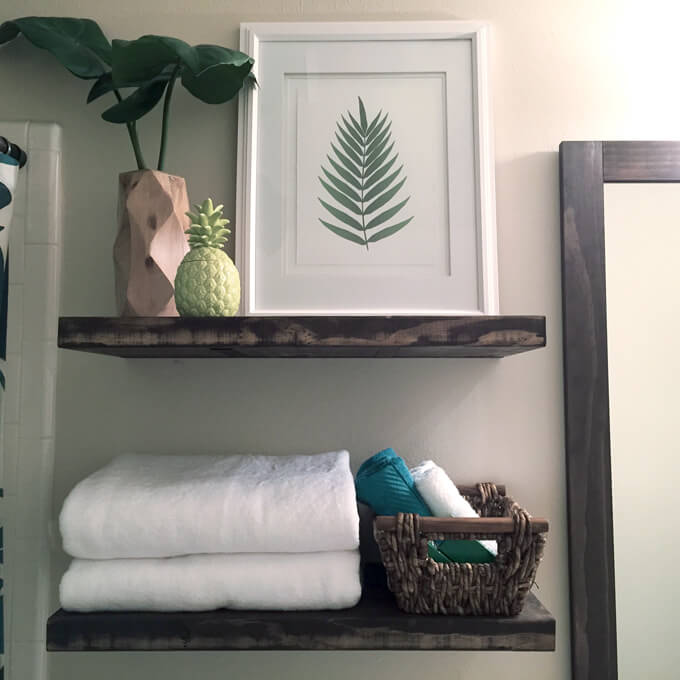
I styled the floating shelves with a few simple tropical elements to tie in with the shower curtain and some bathroom necessities so they are nice and handy for guests.

Floating Shelves in Bathroom Gray House Studio
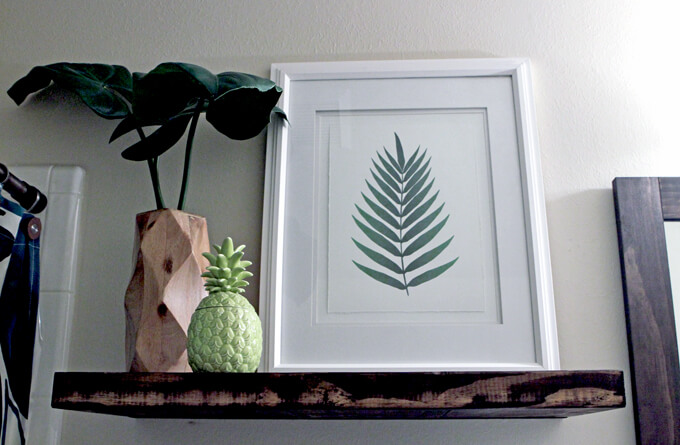
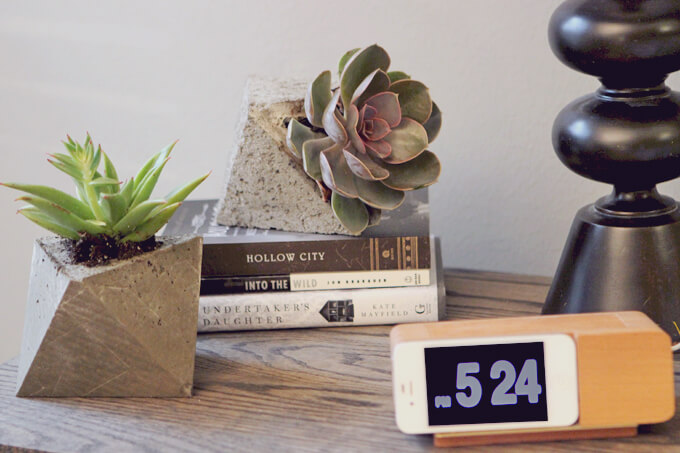
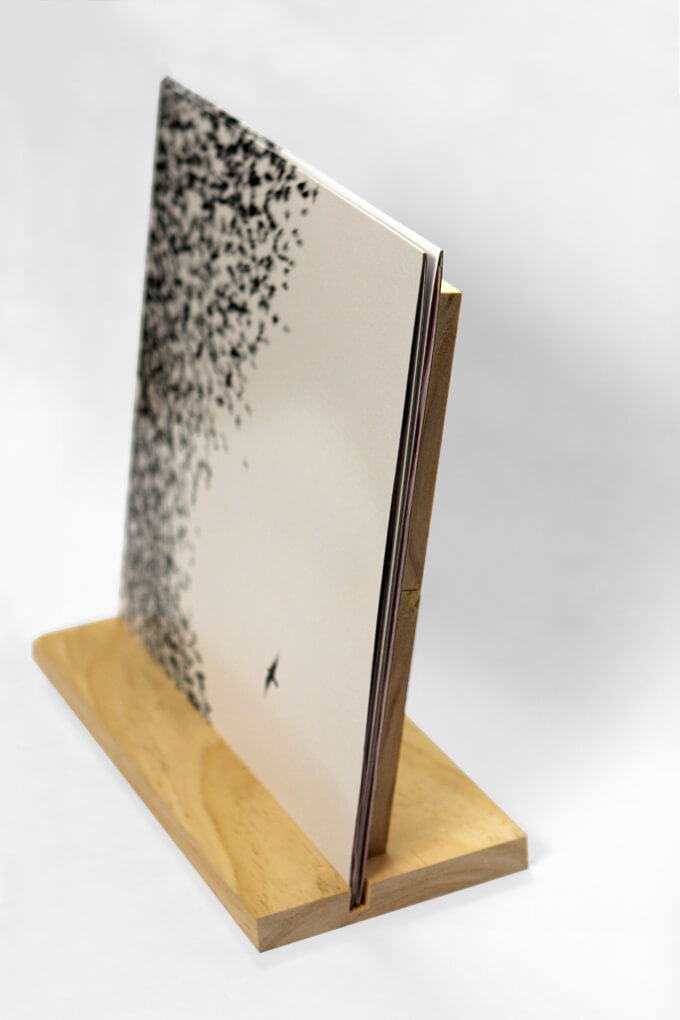
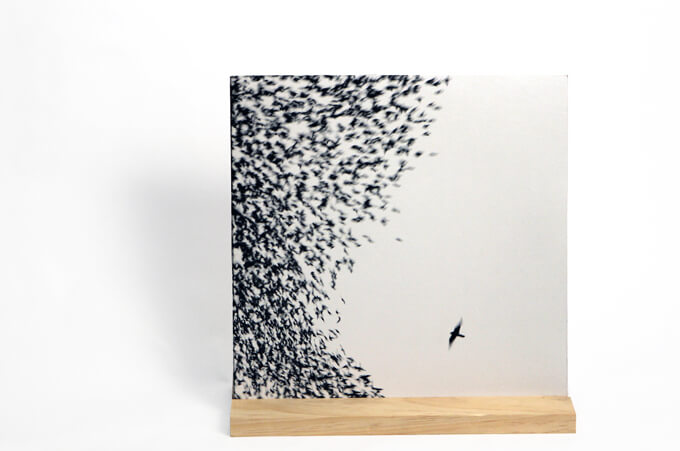
I love how the framed print turned out on this shelf. We purchased the digital version of this leaf print and then Brent tapped into his past experience with printmaking to help take it up a level. He tore the edges of some nice paper he had left over from when he worked on letterpress prints and ran it through the ink jet printer.

Then he mounted that on another piece of his nice paper and we put a matte around it and framed it with this large white frame I had but could never find anything to put in it. The torn edges and three dimensional feel help give it more of a fine art print appearance and allowed us to scale it larger while still only using our home printer. Check out our tutorial on framing prints to see in more detail how we did this.

Floating Shelves in Bathroom Gray House Studio
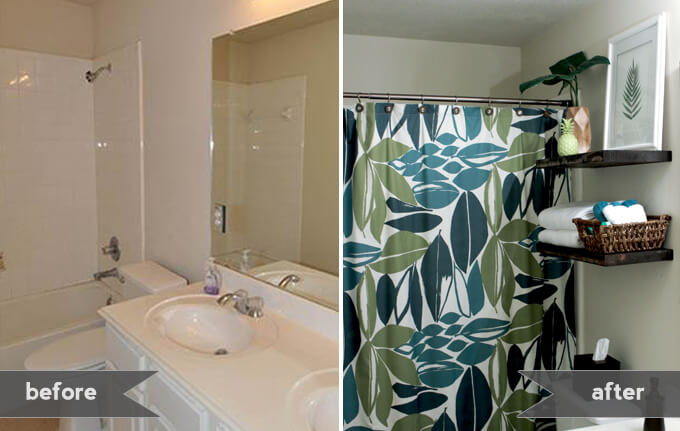
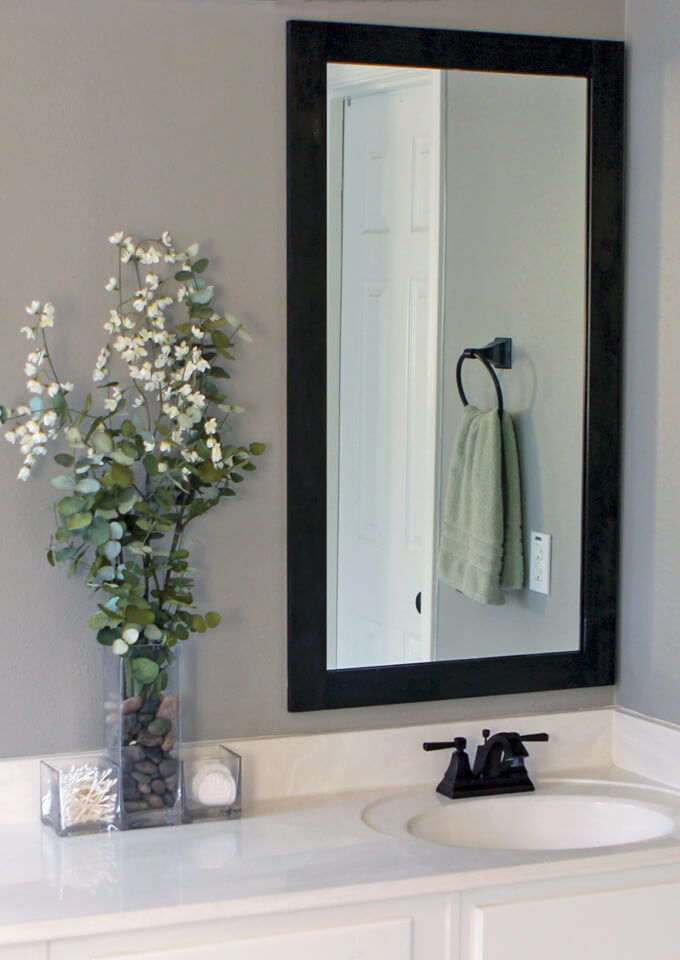
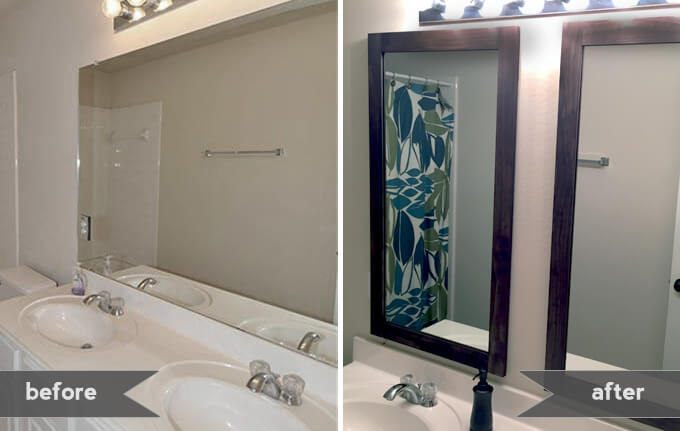
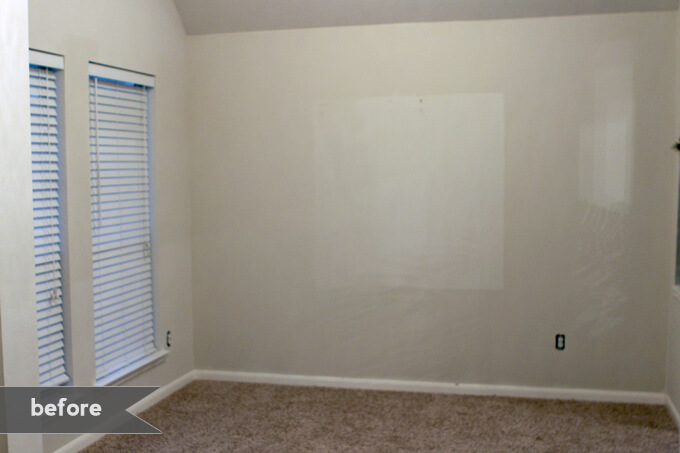
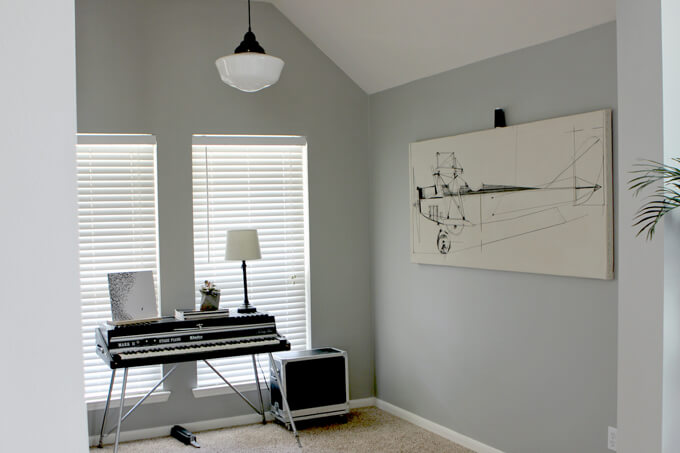
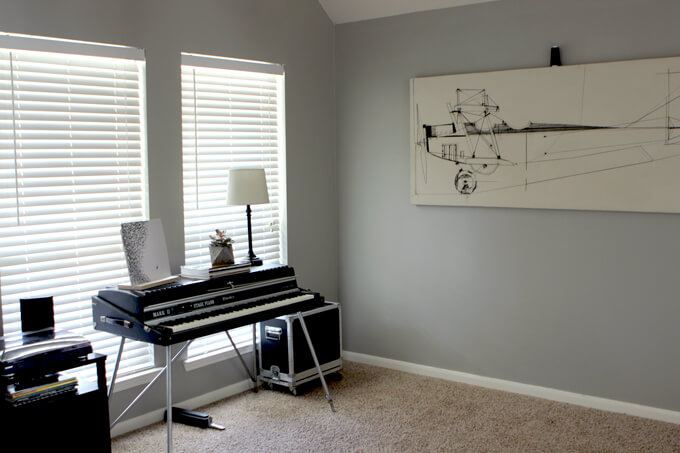
Here is the progress in this room. It is such a small and narrow room that it is very tricky to photograph the whole thing to show all the changes we have made so far. We will just share each section we work on until the entire room is complete.

Adding floating shelves, framing our mirrors and putting up a bronze shower curtain rod has already transformed this room into a much more welcoming space. Our next project is to build a new towel rack!

PIN THIS PROJECT

Floating Shelves in Bathroom Gray House Studio

Framing Bathroom Mirrors

How to Frame Bathroom Mirrors

In this tutorial we are showing how to frame bathroom mirrors. We will also show how to build the frames and how to hang them on the wall.

How to Frame Bathroom Mirrors

Remember back in January when we showed how we cut our large bathroom mirror into two pieces? Today we are sharing the second half of the project which includes how to frame bathroom mirrors and hang them back up on the wall. We have found that a simple and inexpensive way to freshen up a bathroom’s appearance is to take down the large unframed mirror and replace it with two narrow mirrors over each sink.

In both our master bathroom and now our guest bathroom we cut the large builder grade mirror that came with the house into two pieces, built frames for each one out of wood and then stained the wood to match the bathroom. By cutting the mirrors and building the frames ourselves, we saved money and had complete control over the size and appearance of our mirrors.

We really like the look of tall narrow mirrors but finding that style without the high price tag was a difficult task. Building the frames ourselves was a great solution for us.

SUPPLIES

MATERIALS

  • (2) 1″ x 6″ boards of select pine (1 for each frame)
  • Wood Glue
  • Rust-Oleum Wood Stain, Kona
  • All Purpose Adhesive Caulk
  • Brown Acrylic Latex Sealant
  • D-Ring Hangers
TOOLS

  • Table Saw
  • Clamps
  • Screwdriver

*This post contains an affiliate link. You can read our disclosure policy here.

How to Frame Bathroom Mirrors

How to Frame Bathroom Mirrors
1. To save money we bought a 1″x6″ board that we cut down the middle to be the width of one side of the frame. Cutting the board in half gave us both the left and right side of the frame.

How to Frame Bathroom Mirrors
2. We cut all the boards to our desired width for the mirrors. Then we made two cuts using the table saw to create a recessed area in the board where the mirror would sit.

The first cut, which is shown in the photo above, determined how far the mirror will sit inside the frame. We chose to make the lip on the inside of the frame 1/4 of an inch.

How to Frame Bathroom Mirrors
3. Next we raised the blade to meet up with the line of the previous cut and ran the boards through the table saw.

How to Frame Bathroom Mirrors
The two cuts we made removed the piece of the wood on the left. The piece of wood on the right is what we used for the frame.

How to Frame Bathroom Mirrors
4. After measuring the length of each side of the frame so we could mark where the cut needed to be, we cut the left and right side pieces of the frame at the same time and the top and bottom pieces at the same time to guarantee that there would be no variations between the matching sides of the frame and that the four pieces would make a rectangle.

How to Frame Bathroom Mirrors
5. Finally, we made two cuts on each side of the top and bottom board of the frame. This cut removed a piece of the wood allowing the side boards of the frame to be glued on top of the top and bottom board. This type of joint is called a rabbet joint.

How to Frame Bathroom Mirrors
6. This is what the top and bottom boards of the frame looked like after the previous step once the pieces of wood on each side were removed.

Framing Bathroom Mirrors Gray House Studio
7. By cutting the pieces of wood out, each piece of the frame fit perfectly over the other piece of the frame. This process makes for a very strong joint and prevents the need to nail or screw the frame together.

Framing Bathroom Mirrors Gray House Studio
8. We then applied glue to each board and clamped the frame together. After several projects we finally remembered to put a scrap board between the wood and the clamp. When we forget to put a scrap piece in between the board and the clamp, a lot of times the surface of the project will get indentations from the clamp.

Framing Bathroom Mirrors Gray House Studio
9. To match all the other stain in our bathroom, we decided to stain the frame with a Kona stain. We learned from staining our first set of mirrors that it is important to stain the back as well as the front of the frame.

The mirror reflects the backside of the frame. If only the front side is stained, once the mirror is glued in place, you will be able to see the non stained wood in the reflection.

Framing Bathroom Mirrors Gray House Studio
10. We placed the mirror in the frame and lined it up so it was centered. Then we traced the mirror outline on the back of the frame so we would know where to apply the adhesive. To secure the mirror to the frame, we used an all purpose adhesive caulk.

We could only find it in white which caused a little bit of an issue because the mirror will reflect the underside of the frame and the white caulk would be very noticeable. Our solution was to run a bead of brown acrylic latex sealant on the side of the white caulk that is closer to the inside of the frame.

The brown sealant is not a great adhesive but it does a good job concealing the white caulk that is actually holding the mirror and frame together.

Framing Bathroom Mirrors Gray House Studio
11. After the adhesive dried, we screwed a D-Ring hanger in each side of the back of the frame for easy hanging.

Framing Bathroom Mirrors Gray House Studio
12. The final step was to put two picture hanger nails in the wall to hang the frames on.

Framing Bathroom Mirrors Gray House Studio
Now we have two (like) brand new mirrors for only the cost of the two boards since we already had most of the supplies left over from our previous framing project. It is nice to have mirrors back in the guest bathroom again and just in time for our guests coming in a few weeks.

Framing Bathroom Mirrors Gray House Studio
We have a few more projects we will be working on this weekend for the guest bathroom. It is fun seeing our ideas start to become a reality in this room. I did some preliminary decor shopping last week and picked up some guest bathroom items along with a few tropical elements that I can’t wait to incorporate into the room.

Framing Bathroom Mirrors Gray House Studio
Stay tuned for more guest bathroom posts and progress photos coming soon.

Check out how to cut a large bathroom mirror into two smaller pieces.

PIN THIS PROJECT

Frame Bathroom Mirrors

Custom Made School House Pendant Light

Schoolhouse Pendant Light

For this knockoff lighting project we created much cheaper versions of our favorite schoolhouse pendant light from Rejuvenation.

Schoolhouse Pendant Light

You may remember in our library planning post last month that we had plans to switch out the lighting in our library. We wanted to replace the overly decorative light fixture with something that had clean lines and was simple.

DIY KNOCKOFF

Schoolhouse Pendant Light
We found the Rose City Classic Schoolhouse Pendant light fixture at Rejuvenation and thought the style was a perfect match. However, the price was not so perfect for our budget. Just buying one was going to be a stretch and we wanted two, one for each of the front rooms. We knew we definitely could not afford to buy two from the store any time soon so we got to thinking and decided to piece one together ourselves. We created the one above and are very happy with the results.

Today we are sharing our affordable solution for creating a classic schoolhouse pendant light that came in $137 cheaper than it’s Rejuvenation counterpart. The lower price allowed us to make two for less than the cost of purchasing one. It was a great solution for our budget.

Schoolhouse Pendant Light
Here is what we started with when we moved into the house. The light on the left was the light in the front room (formerly the formal living room). It was small, plain and lacked character.

The light on the right was in the library (formerly the formal dining room) and was the opposite. It was almost too ornate and long. It was a nice light fixture, it just didn’t fit with the style of our library or our house in general.

We wanted the two light fixtures to match to create a cohesive feel between the two rooms since the space between the rooms is open. So we set out to assemble matching schoolhouse pendant lights.

How We Put Together Our Schoolhouse Pendant Light

Schoolhouse Pendant 
Light
1. First, we purchased the three pieces of the light fixture we needed: the pendant, the glass holder and the vintage schoolhouse globe.

1. Light Oil Rubbed Bronze Adjustable Mini Pendant – $16.47
2. 6-in. White Glass Holder – $11.25
3. Antique Art Deco Schoolhouse Tiered Globe 14” Diameter – $49.99

*We bought the vintage schoolhouse globes off of E-bay where the seller had acquired schoolhouse globes and fixtures from an old church. They were in great shape!

Schoolhouse Pendant Light
1. Brent used a jigsaw with a sheet metal blade to cut a hole in the top of the glass holder large enough so the ceramic part of the pendant light fixture would fit through it.

Schoolhouse Pendant Light
2. In between cuts he would test the size of the hole to make sure it was the perfect fit.

Schoolhouse Pendant Light
3. Before painting the glass holders, Brent roughed up the smooth surface with medium grade steel wool. The scratches the steel wool makes give the surface of the glass holder a rough texture so the paint can adhere to the surface. Because the bronze pendant light fixture we bought was a different color bronze than the spray paint we already had to paint the white glass holders, we ended up spray painting the pendant light fixture as well so it would match. Brent roughed up the surface of these pieces also.

Schoolhouse Pendant Light
4. Next, we applied an even coat of spray paint to all the parts.

Schoolhouse Pendant Light
5. To paint parts of the light fixture, we wrapped the cords in plastic wrap and secured them down to the cardboard with tape.

Schoolhouse Pendant Light
6. After the paint was dry, Brent assembled all the pieces to create our schoolhouse pendant lights and then hung them in each room.

Yesterday not only did we hang up our new lights, we also painted the last few areas (the front room and hallway) in our house gray. That means there are only two rooms left to paint and then the inside of our house will all be painted. Two projects in one day, that is a productive Saturday! Our front room/music room/photography studio is coming along great. *Shout out to my Dad for all the help with the painting!

Here is what the room looked like yesterday morning:
Schoolhouse Pendant Light

Here are some progress shots of it now:
Schoolhouse Pendant Light
The gray paint color we used is Mindful Gray from Sherwin-Williams and is the same color we used in our library, kitchen and living room. It looks so nice to now have the front two rooms have the same wall color and light fixtures. It makes the front of the house flow really well. I would call this a successful weekend.

PIN THIS PROJECT

Schoolhouse Pendant Light

Busted Water Pipe

The Unexpected Trials of Home Ownership

Unexpected Project: Busted Water Pipe

Today we are sharing about one of our first unexpected trials of home ownership, a busted water pipe.

When you are a home owner there are two types of home projects, the projects you choose and the projects that choose you. The former, the home renovation projects you choose to do, are the ones you plan and save for and then tackle based on your own schedule. They are the fun projects or at least worthwhile ones where you can look at the finished project and feel good about spending the money on it and have something to show for all your hard work and dedication.

The latter, the ones that choose you, those are the pain in the butt projects that happen when you least expect it, when you can least afford it, and when you have the least amount of time to tackle them. They usually demand immediate attention because something is broken, busted or damaged and they most likely affect something that is a pretty important aspect of your dwelling. They most likely require a lot of hard work and/or money but you have nothing really to show for it. “Hey! I spent all this time/effort/money to fix what was already there and working fine yesterday. Yay!” And just to show you how much of a pain in the butt they are, these projects will probably choose you at the end of the longest workweek of your life where you just worked all 7 days of the week for 55+ hours at 9:00 at night.

Unexpected Project: Busted Water Pipe
↑ Money just going down the drain. Our water bill next month should be interesting.

Sunday night Brent walked in the door from work. He told me there was a lot of water coming down the driveway. I was surprised because I had been working out in the garage a few hours earlier and had the doors open and didn’t see anything but when I went outside to look, water was gushing down our whole driveway, rushing down the street and down the drain. Thanks goodness our house sits higher than the street and all the water was going away from the house.

Unexpected Project: Busted Water Pipe
↑ I think we found our leak!

Our yard was flooded and so was the valve box where we needed to turn the water off. It was deep and filled to the brim with water. So much so that Brent couldn’t find the valve to turn the water off in the dark. We initially called our utility company because at that point we weren’t sure where the water was coming from. We roamed around the squishy yard in the dark with our phone flashlights trying to look for the source. We finally found the source and the cause. We had a busted water pipe close to the house and we were pretty sure the crape myrtle right next to it was the culprit. There was not much we could do that night except let the nice man from the utility company who came late on Sunday night and scooped all the water out of the valve box turn our water off.

You know you never realize how much you use your water until you can no longer use your water. Luckily this just so happened to be a time that our water cooler actually had a full jug in it. We always forget to replace them but thank goodness we did this this week. We washed our faces and brushed our teeth with bowls of very clean drinking water that we filled up from our cooler and planned our trips to the bathroom sparingly. It would be another 24 hours before we would have our water turned back on again.

Unexpected Project: Busted Water Pipe
↑ We knew this tree was going to be trouble when we moved into the house.

Brent worked half a day on Monday and then came home to fix the problem. Everyone told us that hiring a plumber was a waste of money because it was an easy task and inexpensive if we did it ourselves. I am sure they are right. If they had to dig around all the stuff Brent had to dig around it probably would have cost us a fortune!

Obviously neither of us are plumbers but Brent is not afraid to get his hands dirty (literally he spent the majority of this project covered head to toe in mud) to figure out how to get the job done and with the help of our family and neighbors and a lot of humor we managed to get through this heck of a project and even got to accomplish a side project in the yard that we have been wanting to do since we moved into the house over a year ago.

This is not a typical project post but we thought we would share what we have been up to the past few days. This unfortunate and unexpected project took away time from our planned project that we were going to share this past weekend. Sadly, all of our projects can’t be exciting here at Gray House. Sometimes they just include being knee-deep digging in mud to fix a busted pipe.

Here are a few highlights of this dirty project:

Unexpected Project: Busted Water Pipe
↑ We called the city to have all of our providers come mark where all the lines were underground so we didn’t hit any while we were digging. After they all came, our yard resembled some sort of art piece with all the bright color little flags stuck everywhere and spray painted lines in the grass.

Unexpected Project: Busted Water Pipe
↑ After lots of digging, Brent found the pipe and the “root” of the problem. Pun totally intended because the root of the busted pipe problem was roots! We are guessing there was already a leak and then all those crazy roots from the crape myrtle wrapped all around the pipe causing enough pressure to make it burst.

Unexpected Project: Busted Water Pipe
↑ The majority of Brent’s time was spent digging and then scooping out the water that was still in the ground that would continually fill the hole back up. It was a slow and painful process. I had to resist every urge to jump and splash in the mud, just for fun. I had to keep reminding myself that would not be a productive use of my time on this project.

Unexpected Project: Busted Water Pipe
↑ Brent dug a moat around the crape myrtle to prepare it to be ripped from the ground.


↑ Our next door neighbor was so nice and used his truck to help us pull the tree out. We don’t have any vehicles capable of that kind of task but his truck made it look easy. We did a celebratory dance once it had been removed.

Unexpected Project: Busted Water Pipe
↑ Sorry crape myrtle, you know what they say about payback. It was a nice tree just planted in a not very nice spot. We are perplexed why the builder would plant a tree that close to the garage, another tree and where all the lines go into the house. It had to be removed from that spot so we didn’t have this issue again. We have been wanting to remove this tree for awhile now so at least something good came out of this whole mess.

Unexpected Project: Busted Water Pipe
↑ Brent came up with a great solution to get the water out of the hole. He started building dams to block off the areas he was working and then put one end of the hose in the hole and the other end in the street next to the drain. He used a Shop-Vac to start the process of siphoning the water out of the hole and down the yard into the drain.

Unexpected Project: Busted Water Pipe
↑ Yes, the mud hole got five times larger, but I promise this was progress. Finally, we got to the point where we could actually fix the pipe. My dad was nice enough to come over and bring some PVC pipe pieces so he and Brent could rebuild the portion that had the leak. They finished just in time before it got dark. We had to let it sit for a few hours but we did get to turn our water back on that night!

Unexpected Project: Busted Water Pipe
↑ The following night we went and got several bags of sand to fill in the hole. Brent worked well after dark scooping the sand and dirt back in the hole to make sure it was level. Several of our neighbors stopped to ask what he was doing. I guess it looks suspicious to be digging in the dark at 11:00 at night. We were in a time crunch to finish because the forecast called for rain the next couple of days and the last thing we wanted was for our mud sink hole to get any larger.

We still have to replace the grass in that area but the pipe is fixed, the hole is filled in and we have water so project completed. Please house, we’re begging you to let us choose the next project. I promise it will be more fun that way.

Stay tuned because this weekend we will be sharing the project we had planned to share earlier in the week, how we built frames for our bathroom mirrors.

Have you guys had any daunting or dirty home projects that chose you? We would love to hear them!

DIY Concrete Planters

DIY Concrete Planters

In this tutorial we are going to show how to make DIY concrete planters in geometric shapes using a cardboard mold.

DIY Concrete Planters

Hey, Brent here! Today I am sharing these geometric concrete planters I made this past weekend using cardboard molds.

I had fun experimenting and making these DIY concrete planters to display around the house.

How To Make DIY Concrete Planters

SUPPLIES

FYI: This post contains a few affiliate links to products we used to make this project. Gray House Studio does receive commissions for sales from these links but at no extra cost to you. We appreciate you supporting this site. Read our privacy and disclosure policy.

PROJECT TEMPLATE

DIY Concrete Planters Plans

Get our Concrete Planter Template

Our DIY concrete planter template includes the outer mold template and the inner mold template for $3. We appreciate your support!

STEP BY STEP GUIDE

How to Build the Outside Mold

DIY Concrete Planters

1. The first thing I did was use my ruler to measure and trace seven triangles on cardboard and then cut out each individual cardboard triangle with the box cutter.

The PDF of the pattern for our geometric concrete planters is available if you are interested in making your own.

DIY Concrete Planters

2. I cut out seven triangles of equal size and then arranged them into the pattern above.

DIY Concrete Planters

3. Next, I used clear packaging tape to connect the inside seams of the triangles together.

DIY Concrete Planters

4. Once the box was taped on the inside and assembled into the three dimensional form, I added tape to the outside to strengthen the mold.

How to Build the Inside Mold

DIY Concrete Planters

5. To create the inside mold, I cut out two more triangles and three squares.

DIY Concrete Planters

6. I assembled these pieces and covered all the seams in tape to create the three dimensional form.

How to Mix the Concrete

DIY Concrete Planters

7. First, I prepped my materials which included the bucket, water and the concrete mix I made sure to have twice as much water than needed on hand.

DIY Concrete Planters

8. Then I poured the water into the bucket and mixed in the concrete mix with the mixer attached to a drill.

I continue to add the dry concrete mix into the bucket until the mixture was thick and evenly mixed with the water.

To test for the right consistency, I dug a little hole in the mixture. When the mixture didn’t fill in the gap, I knew it was ready to use.

DIY Concrete Planters

9. Once the concrete mixture was ready, I filled the bottom of the outer mold. Then I placed the inner mold into the outer mold.

The inner mold acts as a plug and creates the hole in the planter for the plant.

DIY Concrete Planters

10. When you mix concrete it traps air bubbles inside of it so after I poured the concrete into the mold I used an electric sander to vibrate the concrete forcing the air bubbles out which gave me a smooth finish.

DIY Concrete Planters

11. I let the concrete sit in the mold for several hours and then I removed it from the cardboard.

I found that depending how long you leave the concrete in the mold, you get different textures on the concrete which I like because it makes each planter unique.

DIY Concrete Planters

12. You can see the difference in the photo above. For the planter on the left I let the concrete dry in the mold for approximately 18 hours which gave me a smoother texture.

The planter on the right was the first one I made and I only let it dry in the mold for around 3 hours which gave me a rough cinderblock like texture.

DIY Concrete Planters

I planted succulents in them and placed them on the nightstand in our bedroom. These were so easy, inexpensive and fun to make that I am sure I will be making many more to add throughout the house.

2022 Personalized Christmas Ornaments
*** Thanks so much for supporting our small shop – Moon Rock Prints – this holiday season! ***

PIN IT FOR LATER

A simple tutorial showing how to make geometric concrete planters using a cardboard mold. There is a template for the cardboard mold available.

DIY Record Stand

DIY Record Stand

For all our fellow record lovers out there, check out this quick and easy project, our DIY record stand, to show off your favorite albums in your home.

Gray House Studio DIY Record Stand

You may have noticed in our last post on our library shelves that we are displaying a few of our favorite records on the shelves.

They are sitting in custom built stands that Brent built out of wood. By displaying them on these stands we have easy access to grab our favorites.

If you have a few of your favorite records that you want to display but want to make sure they stay in good shape, this DIY record stand is a great solution.

Plus, it is completely customizable. After it is built you can stain it or paint it whatever color you want to match your decor.

How to Make a DIY Record Stand Out of Wood

SUPPLIES

FYI: This post contains affiliate links to products we used and liked for our DIY record stand. As an Amazon Associate Gray House Studio earns from qualifying purchases. This is at no extra cost to you. We appreciate you supporting this site. Read our privacy and disclosure policy.

STEPS

Gray House Studio DIY Record Stand

1. First, we measured the 1 in. x 6 in. select pine board to prepare to cut the base of the stand and the top braces. The base is 12 1/2 inches wide. The two top braces are 11 inches wide.

For more details on the exact dimensions, download our DIY record stand plans for accurate measurements.

Gray House Studio DIY Record Stand

2. Next, we used a miter saw to cut the boards to the sizes we measured.

Gray House Studio DIY Record Stand

3. To create a slot in the base for the record to sit in, the blade guard of the table saw needed to be removed.

This allows the blade to cut only partially through the board. By placing the board next the blade it is easy to see how deep the slot will be in the base.

Gray House Studio DIY Record Stand

4. After each pass over the table saw blade, we moved the table saw fence slightly to cut a wide slot.

Gray House Studio DIY Record Stand

The back of the stand needs to sit at an 80 degree angle so we had to cut the bottom of the bottom brace at a 10 degree angle.

Gray House Studio DIY Record Stand

5. We used the Joint Genie and a drill to make holes that would connect the pieces via dowel pins.

Gray House Studio DIY Record Stand

6. The Joint Genie makes it really easy to line up the holes with the dowel pins.

Gray House Studio DIY Record Stand

7. No matter how many times Brent drills holes to join two blocks of wood together with a dowel pins, he still gets excited about the final result every time.

Gray House Studio DIY Record Stand

8. Once the base was connected to the bottom vertical brace, we drilled holes into the two vertical braces so we could connect them with the dowel pins.

Gray House Studio DIY Record Stand

The great thing about building the stand this way is that no glue is needed so it can easily be disassembled and reassembled and consists of just three pieces.

Gray House Studio DIY Record Stand

Gray House Studio DIY Record Stand

Gray House Studio DIY Record Stand

Also, album cover artwork can make for an interesting alternative to traditional art. The six records we choose for our library were ones where we liked the design of the covers and thought had a visual appeal similar to the other art in our home.

We searched for record stands but most of the ones we found had no back or had a back that was half the height of the record. We have found that stands built these ways do not fully support the record and can eventually damage it by warping it over time.

We couldn’t find one out there that exactly fit our needs so we built our own that was all these things we were looking for: simple, sturdy and supportive.

Gray House Studio DIY Record Stand

PIN IT FOR LATER

How to build a DIY wood record stand to display album covers.