Wood Light Fixture for Master Bathroom

Wooden Light Fixture Over Bathroom Mirrors

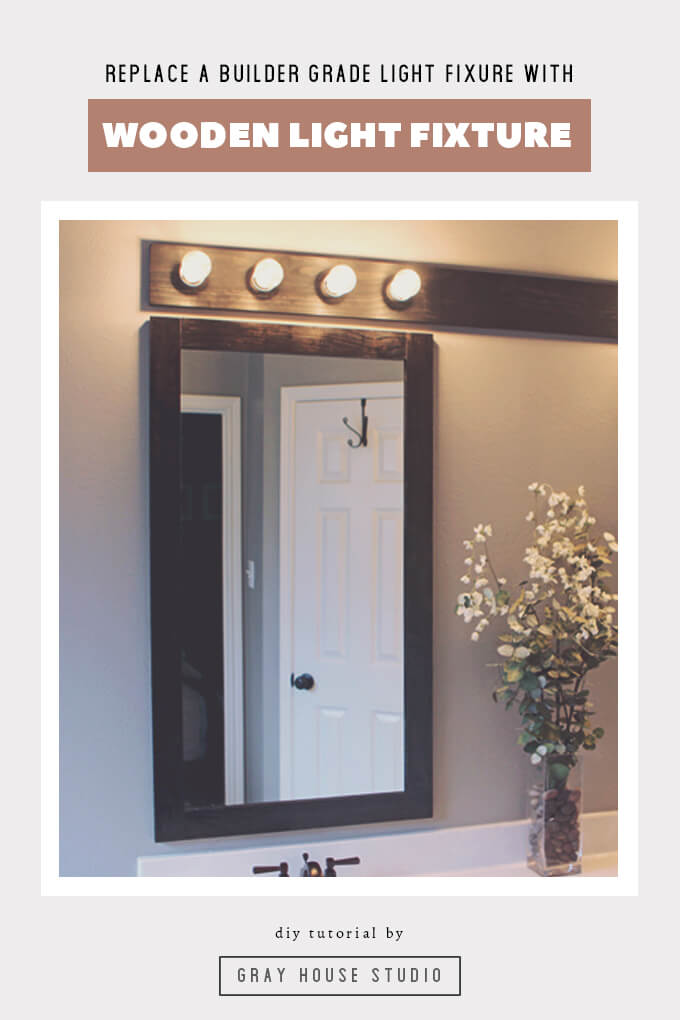
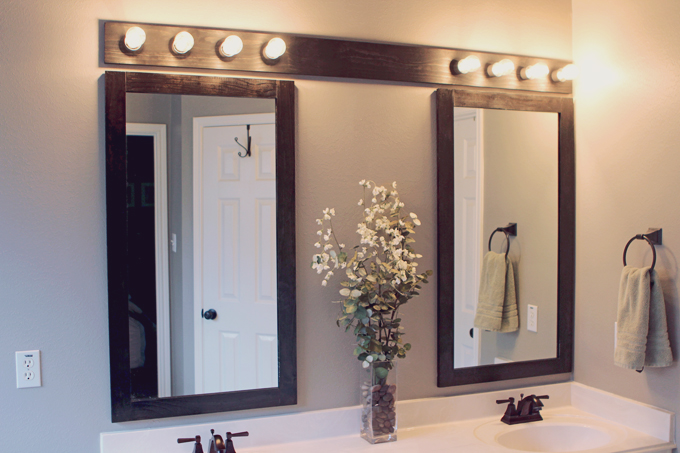
We faced a big hurdle when we tried to upgrade the standard silver bathroom light fixture in our master bathroom. We made a wooden light fixture with Edison bulbs as a solution to stay within the limits of our wiring situation but still bring personality to the space.

Wooden Light Fixture in Master Bathroom

Remodeling or replacing bathroom light fixtures can be tricky when a builder installs and wires one up specifically for the light fixture they installed.

We learned this the hard way when we recently attempted to remodel the light fixture in our master bathroom. We wanted to get rid of the small silver light fixture over our mirrors and replace it with two separate light fixtures, one over each mirror but we ran into a few set backs that eventually led us to creating one large wood light fixture.

Today we are sharing our process on how we created a custom wood light fixture for our master bathroom.

Wooden Light Fixture

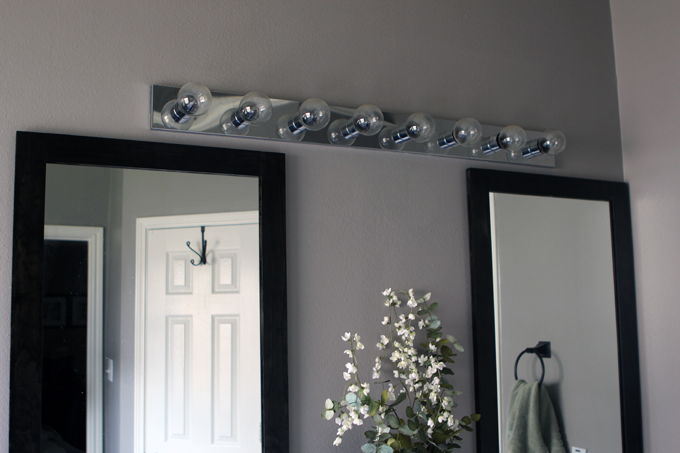
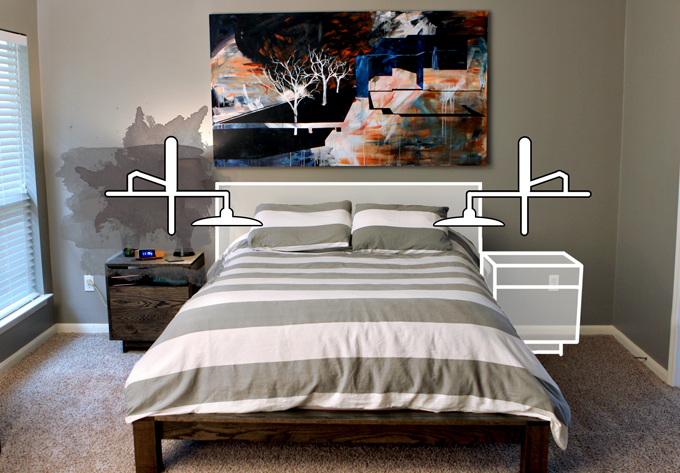
BEFORE – The above photo shows what the light fixture looked like when we moved in. Before we split the mirrors, we had one large mirror and the light fixture was centered above it. Since we cut the mirrors, the small light fixture looked a little weird above them. Plus, we have slowly been trying to de-silver our bathroom so the silver light fixture was the next thing to go. Instead we opted to go with a wooden light fixture in our master bathroom to match the mirrors.

How We Made Our Wooden Light Fixture for Our Master Bathroom

SUPPLIES

FYI: This post contains affiliate links to the supplies and tools we used to make our wooden light fixture. As an Amazon Associate Gray House Studio earns from qualifying purchases. This is at no extra cost to you. We appreciate you supporting this site. Read our privacy and disclosure policy.

STEPS

Wooden Light Fixture

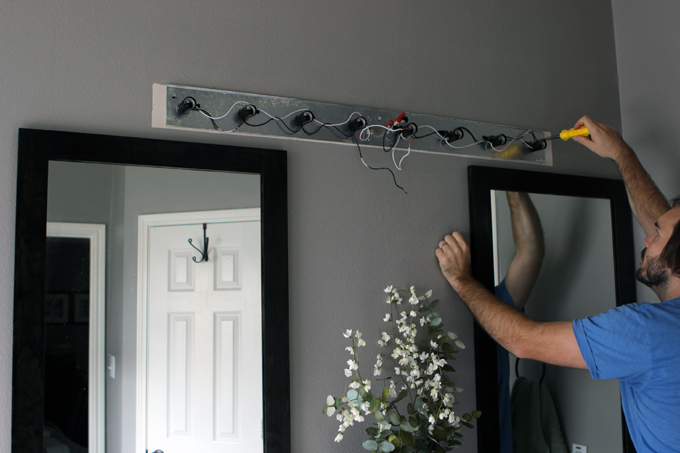
1. The first thing we did was to remove the old bulbs and to use a screwdriver to take off the front piece of the light fixture to expose how this thing was wired up and put together.

Wooden Light Fixture

Wooden Light Fixture

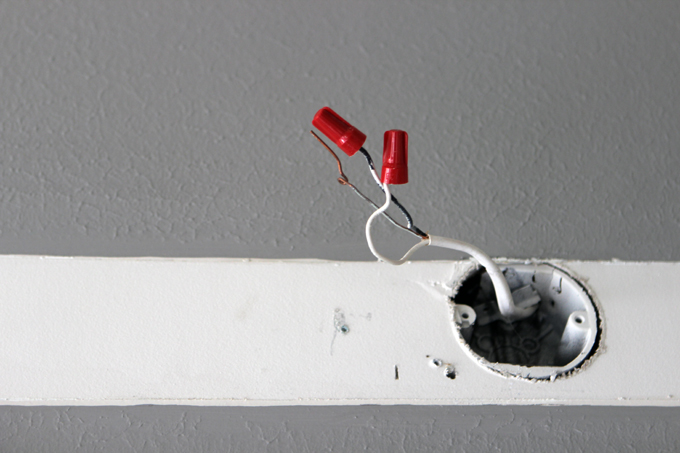
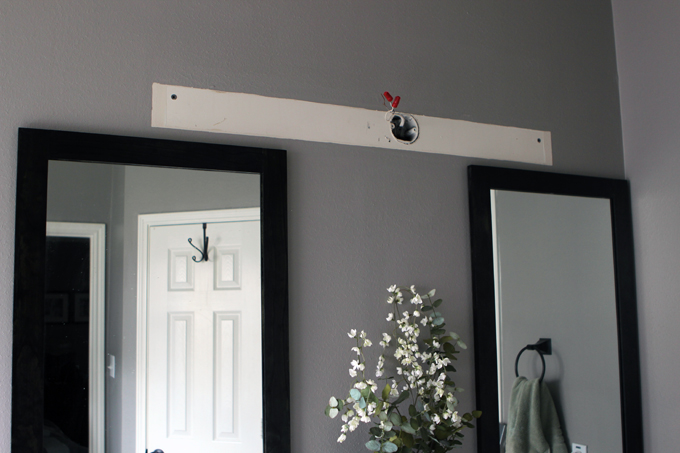
Unfortunately, after we took everything off the wall we found that the electrical box was between the two mirrors and off centered so there was no easy way to hang two light fixtures (one above each mirror).

Another problem we ran into was that the wall behind the light fixture was not textured and therefore did not match the rest of the walls in the bathroom.

It’s like the builder wasn’t even trying to care when they installed these lights. So we decided to make our own wooden light fixture front to span across the entire length of the two mirrors and fit in the space better.

Wooden Light Fixture

Wooden Light Fixture

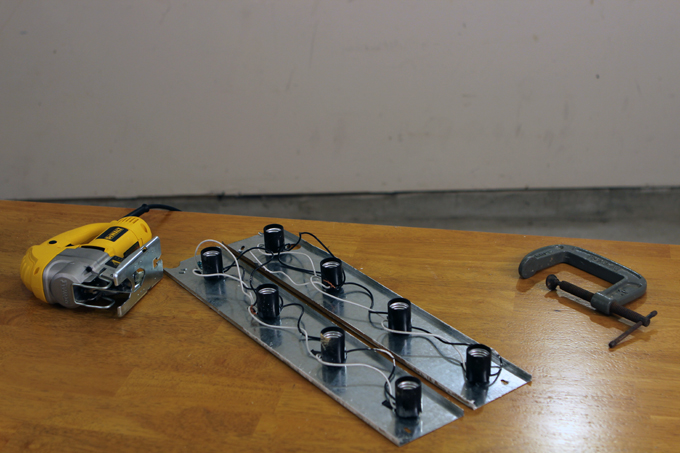
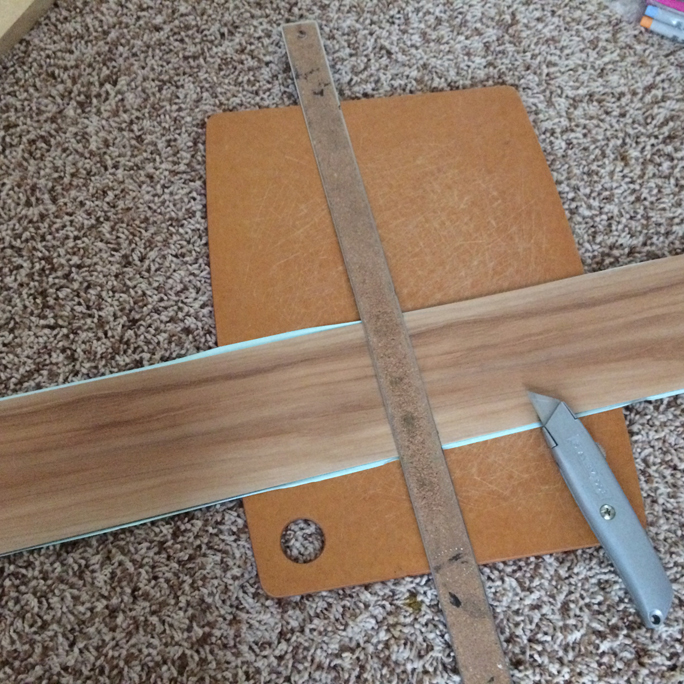
2. Using a jigsaw with a metal cutting blade, Brent cut the back of the silver light fixture into two pieces.

Wooden Light Fixture

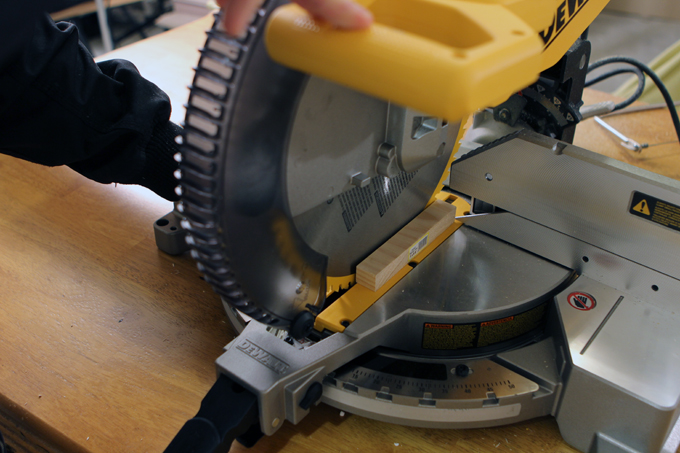
3. Next, Brent cut the piece of wood board to the appropriate length using his new miter saw. Even though he only needed to make one cut on this project, he was pretty excited to use his Christmas present.

Wooden Light Fixture

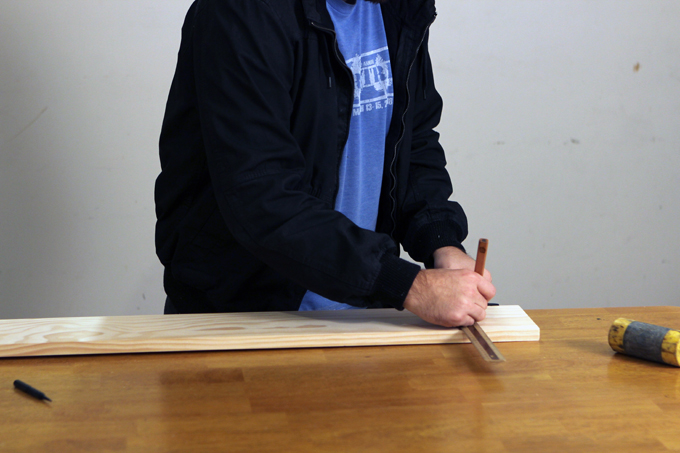
4. Brent measured and laid out where the holes would need to be drilled into the piece of wood so the light bulbs would fit into the new wood light fixture.

Wooden Light Fixture

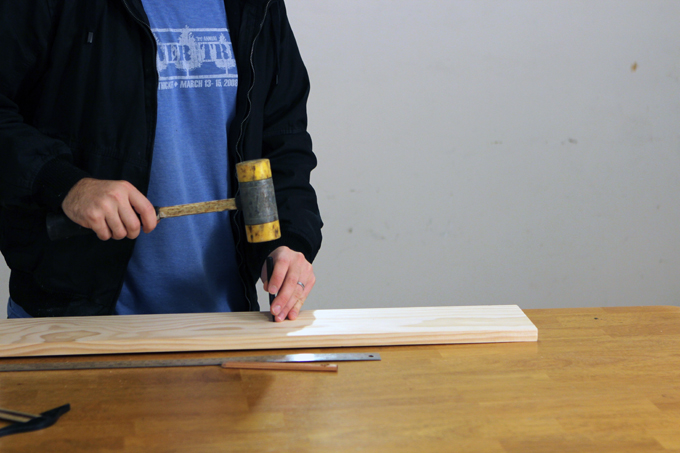
5. Brent used a mallet and a punch to create a small hole in the surface of the wood that would guide the drill bit.

Wooden Light Fixture

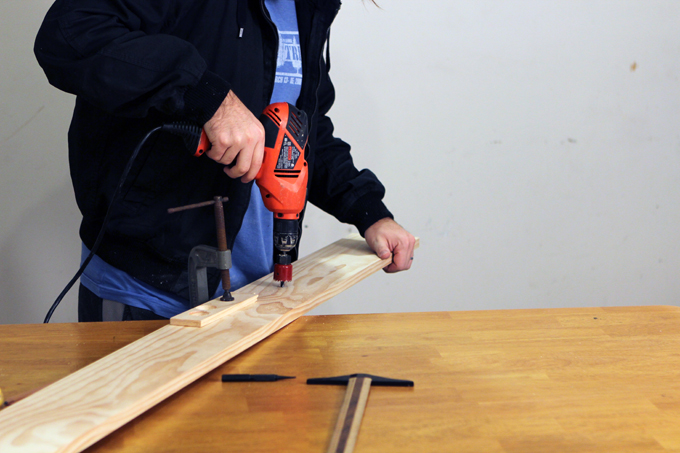
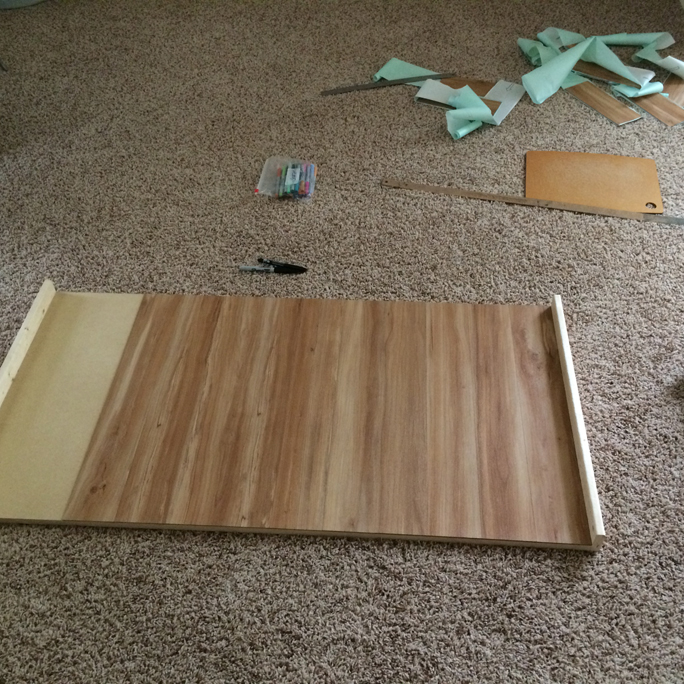
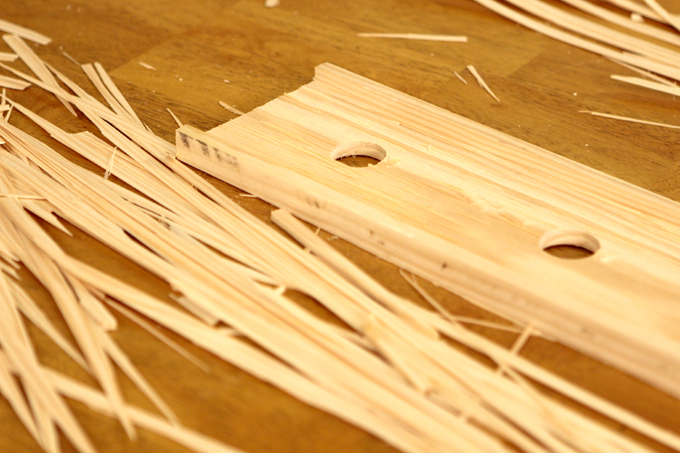
6. He attached the board to our table using a clamp to keep it from moving. Then, Brent used a hole saw attached to a drill to cut out the eight holes where the light bulbs would go.

Wooden Light Fixture

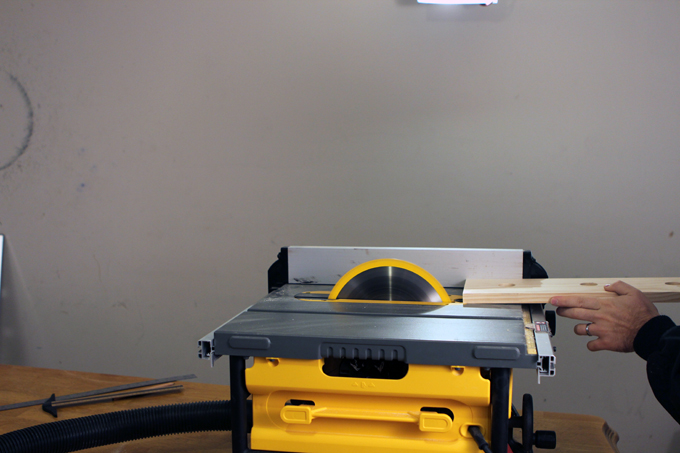
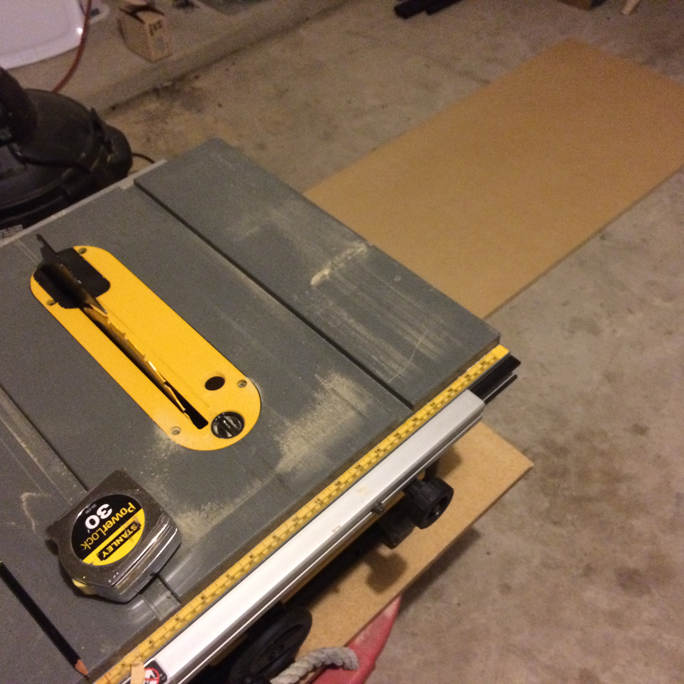
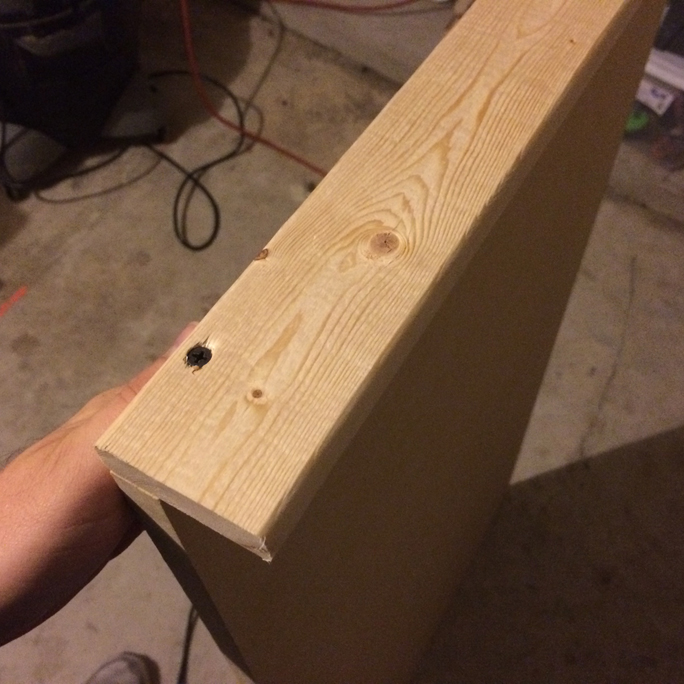
7. Using a table saw, Brent cut the board to the appropriate width so that the holes were centered on the board.

Wooden Light Fixture

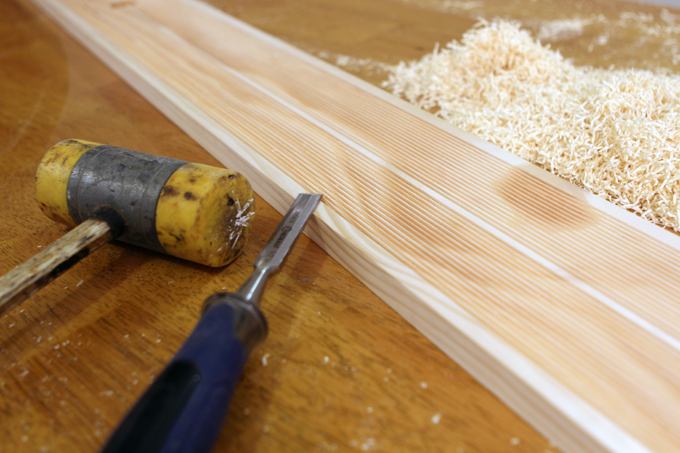
8. Then he lowered the blade and made multiple passes right next to each other to remove the wood to create an inset on the back of the new wooden light fixture so it would fit over the back half of the old fixture. He used a chisel to remove the excess wood.

Wooden Light Fixture

9. Once all the excess wood was removed from the back, it looked like the above.

Wooden Light Fixture

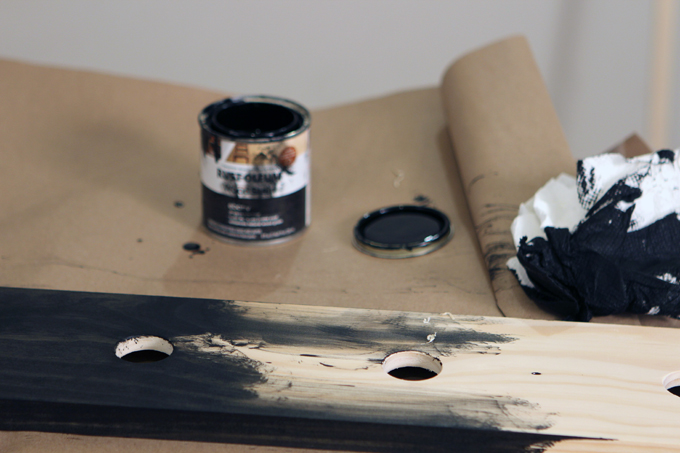
10. Finally, we stained the wood using the same ebony wood stain as the frames of the mirrors so everything would match.

Wooden Light Fixture

11. We replaced the old large round light bulbs with Edison light bulbs to give it a unique look.

Wooden Light Fixture

While we are happy with the results of how the wooden light fixture turned out and how it looks in this space more than the original silver light fixture, we have decided to revisit this project in the future to find a solution that better suits this wall as a whole and take advantage of the height in our bathroom.

Now that we know the obstacles we faced while attempting to remodel this light fixture, we are going to try something new in our guest bathroom. We have a few ideas on how we can improve on this project and if all goes well with our second attempt in the guest bathroom, we will try it again here in the master bathroom. Stay tuned.
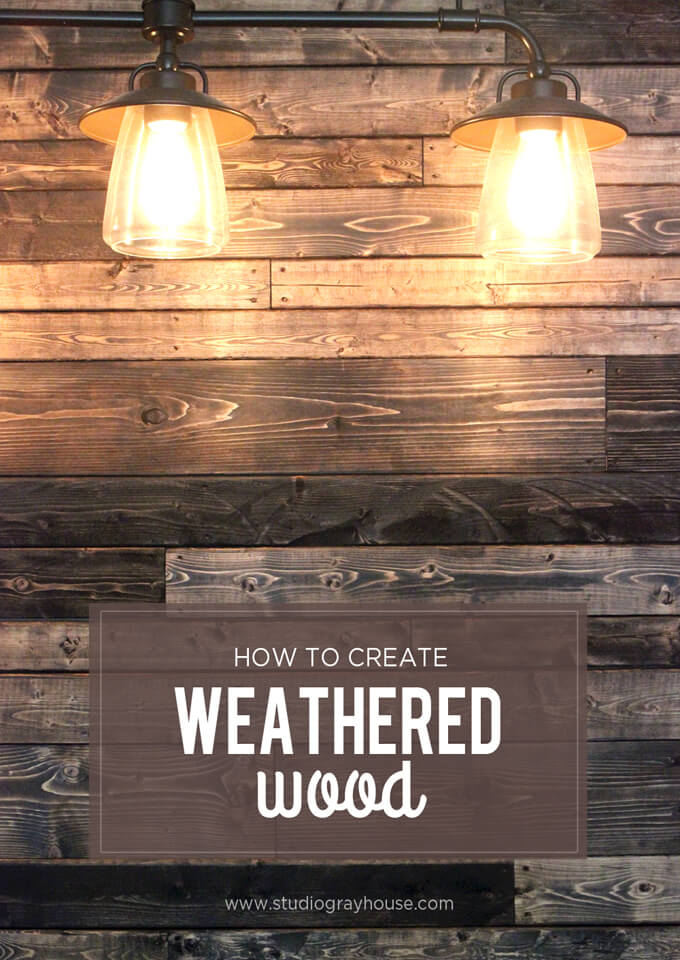
PIN FOR LATER

You want to give your  boring builder's grade silver light fixture in your master bathroom an upgrade but you quickly discover that your are stuck with how it is wired. Check out how to give your master bathroom an easy upgrade with a wooden light fixture with Edison light bulbs!

Home Renovation Blog - Goals for 2015

Home Renovation Goals for 2015

Home Renovation Goals for 2015

As 2014 comes to a close and 2015 begins, we thought we would put together a list of the home renovation projects we would like to tackle in the upcoming year. We finished quite a few cool home renovation projects in 2014 that really made our house start to feel like “our home”. 2015 marks the beginning of our second year in the home and we are hoping to take on a few larger home renovation projects and more woodworking and furniture building projects. It’s time to step up our game.

The Five Home Renovation Projects on our Project Wish List:

1. FINISH PAINTING THE INSIDE OF THE HOUSE – We are close to having all the rooms inside our house painted. It is our goal to finish the last few rooms in 2015. The front entry way and front rooms will be painted gray (of course). We also need to paint our front hall, guest bathroom laundry room and garage and then we will be done! If our house has no more off white walls by the time 2016 rolls around, we’ll call 2015 a success! Below are the paint colors we plan on using from Sherwin-Williams.
Home Renovation Goal #1 - Finish Painting the Inside of the House

2. FIX UP THE GARAGE – Speaking of the garage, 2015 will be the year the garage sees a little attention. Last year it was used more as a storage room (and not one of those organized kind). Since we plan on doing a lot more woodworking and furniture building projects this year, we will need the garage to be our workshop. We managed to get it cleaned out, now we just need to clean it up! Our plans include painting the walls, staining the floor, building a workbench and cabinets – we’re talking about a complete makeover here! Brent is especially excited to get this remodeling project started.
Home Renovation Goal #2 - Fix Up the Garage

3. PAINT THE OUTSIDE OF THE HOUSE – Another home renovation project we would like to get done this year is to paint the outside of our house. Currently, is an off white color that is boring and plain so we want to paint it a welcoming gray color (are you seeing a trend here?). The house is 12 years old so the original paint is chipping in places Adding a fresh paint of coat and replacing some of the trim will really bring the outside of the house back to life and add to the curb appeal. We had to submit our colors to our HOA to be approved and they finally gave us the okay! So now it is a matter of actually getting out there and painting. We are dragging our feet on this one because it will be a lot of work but the results will be awesome. We’ll take on this challenge in the spring or fall.
Home Renovation Goal #3 - Paint the Outside of the House

4. REMODEL THE BACK PATIO – Our backyard is such a cool spot and one of the reasons we like this house so much. It is small but backs up to a greenbelt with lots of trees. We have two slabs of concrete back there but not very many places to sit for entertaining. So we would love to make this space a more inviting. Our plan is to eventually remodel the back patio to have a wood deck with custom built seating. The front yard got all the love last year so we hope to give a little more attention to the backyard in 2015. We are looking forward to taking advantage of the great space outside.
Home Renovation Goal #4 - Remodel the Back Patio

5. FINISH UP THE MASTER SUITE – We would love to finish the last few renovation projects in our master bedroom and master bathroom so we can call those rooms good and have two rooms updated and under our belt. There are still quite a few big and small projects that we would like to work on in these rooms including building a headboard and second nightstand in the master bedroom and putting in a new slate title floor and cabinets in the master bathroom.
Home Renovation Goal #5 - Finish the Master Suite

So if things go according to plan, this time next year we should be able to report back on the blog that we were able to cross all these tasks off of our home renovation wish list. I’m sure several other projects will pop up that will be a blast to work on, like that awesome craft cabinet! But these are our five shoot for the moon home renovation and interior design projects that will pack a big punch on the look and feel of our home this year. We’re ready to get started right away if only the budget allowed it. After we re-coup a little from Christmas, we’ll get started right away!

Hope you have a Happy New Year 2015! What are your home renovation plans for the coming year? We would love to hear them!

How to create a weathered wood

Create Weathered Wood Video

A video tutorial to create weathered wood from brand new wood.

create weathered wood

Hey guys! Today we are going to show you how to create weathered wood using new wood that can be used in a wood wall liked we made for the back of our reading nook.

MATERIALS

Spruce-Pine-Fir Furring Strips (various widths)
Rust-Oleum Wood Stain, Kona

TOOLS

Hammer
Nails
Clamps
Drill
Wire Brush Drill Attachment
Table Saw

*This post contains an affiliate link. You can read our disclosure policy here.

How to Create Weathered Wood Video

To see more of our DIY project & tutorial videos, subscribe to our channel ⇾

When we started making our wood wall we tried to use old weathered wood from left over pallets but we quickly learned that wood pulled off pallets tended to be gross and broke apart really easy. So instead we bought new Spruce-Pine-Fir Furring Strip in various widths and decided to create the weathered look ourselves so that we could control the color and appearance of each board so that when we put the wood on the wall we could create a pattern that appears random yet balanced. That makes sense, right?

First we hammered two nails into the ends of the boards and then pulled the nails back out to give the appearance that the board had been ripped off of a pallet. After that we use a metal brush attached to a drill to remove the soft wood from in between the grain lines. This is the approach that we found give the most significant and realistic weathered appearance. This also evenly roughs up the surface so the stain soaks in more easily creating a darker more even finish.

The last thing we did was run the surface of the board along the edge of the table saw blade to give it the circular blade marks. When cheaper wood is milled, the surface is not finished smooth. The new wood we used was smooth so we needed to add these marks back on to give it an authentic appearance.

The final step is to stain the boards. We used an oil based stain. Even though it is messier than water based stain we have had better luck achieving a darker finish with the oil based stain. The boards that haven’t been roughed up will be lighter and the ones with the marks will be darker.

Once the stain is dry to the touch, you can start putting it up on the wall! Have any questions? Let us know in the comments below.

Check out how to install weathered wood boards on a wall like we did in our reading nook.

Simple Christmas Decorations

Simple Christmas Decorations

Simple White and Silver Rustic Christmas Tree 2014

This weekend we finally broke out the Christmas decorations and decorated our home for Christmas! When it comes to decorating for Christmas we tend to keep it pretty simple around here. The less you put up, the less you have to take down come January, right? Also, this is the first Christmas we have really decorated our home and what decorations filled up an apartment don’t quite fill up a house but we are okay with that. We plan on adding one or two new pieces that we really like each year.

Decorating a Christmas tree with white and silver ornaments
Last year we put up the Christmas tree in our living room where our nook is now so we decided to move it to our front room that currently has nothing in it. This location is nice because we can open up the windows and it can bee seen from outside. Bonus… we don’t have to worry about the cat knocking off the ornaments and them breaking on the tile.

2022 Personalized Christmas Ornaments
*** Thanks so much for supporting our small shop – Moon Rock Prints – this holiday season! ***

Planning a Craft Cabinet
There is something I love about a monochromatic tree. We opt for white lights, white and silver ornaments and a white tree skirt. It just feels so simple, cozy and warm. In the past I became quickly frustrated when I couldn’t get the lights exactly right, the ornaments perfectly spaced or the tree fluffed so there were no empty spaces but over the years I have relaxed and don’t worry so much about perfection but just enjoy the process of decorating the tree.

white snowflake ornament
^ My favorite ornament.

Rustic Christmas Tree Topper
^ I (Courtney) found our tree topper about four years ago. I love how it has a more natural look integrating the branches and berries. It ties perfectly into our rustic/winter decorating theme we have going.

Rustic tree topper
But I have to admit that tree topper is a beast to try and get on up there. I am so glad Brent now handles the struggle that is putting the topper on the tree. I may or may not have fallen into the tree in past years trying to get that thing wrapped around the top branches.

Wood Nativity Scene Family Heirloom
I love incorporating pieces that have special meaning into our decor like this Nativity Scene that was given to my parents as a gift the first Christmas after they were married. It has sentimental value and fits perfectly with our style.

Fireplace Mantle Christmas Decorations
For our mantle this year, we kept a lot of our every day pieces and mixed in some rustic winter decor such as evergreen garland, small led string lights, a burlap runner, mason jars with fresh evergreen, berries and baby’s breath and of course pinecones!

DIY Christmas Wine Bottle Vases
Our DIY Christmas project this year were these Christmas vases made from recycled wine bottles.

Paint Wine Bottles for vases
^ First, we painted three wine bottles white.

Use stickers or paint letters on bottles
^ My brother has a vinyl cutter plotter so I asked him to cut me the letters j,o,y and snowflakes stickers at the appropriate size. I have seen where you can paint the letters on but I don’t have a steady hand when it comes to painting and stickers were so much easier. I like the look of silver letters because they are subtle and match our tree.

Applied Stickers to Wine Bottles
^ Next, I just stuck the letters on the bottles. That part was super easy!

Add the winter plants
^ The final step was to add the evergreen, berries and baby’s breath.

Decorating the Christmas Tree
^ The decorating festivities would not be complete without hot chocolate!

Merry Christmas from Gray House Studio

We would love to hear how you decorate your home for Christmas and the holidays. Do you have a specific theme or color scheme when it comes to Christmas decorations? Do you have pieces that have sentimental value that you put up every year? Share with us in the comments.

DIY Tiki Bar Top

We made a DIY tiki bar top to put on a table for a summer tropical party.

Tiki Bar Top

A couple of weeks ago I decided I wanted to put on my party planner hat and throw my dad a surprise Margaritaville/Key West themed party for his 50th birthday. My parents have a gorgeous backyard that lends itself nicely as a setting for a tropical party so my mom took my dad out shopping while we set up for the day.

A Margaritaville party would be nothing without margaritas and a margarita is best served from a tiki bar, so I asked Brent if he could help build the centerpiece for the party.

Ideally I wanted something that was lightweight, easy to set up and portable. Brent came up with a great design using mostly things we had left over in our garage. That’s what I call a win-win. The best part of all it was a huge hit and really made the party.

I thought that living in Houston there would be a pretty good chance that the weather would be mild in the middle of November. However, as luck would NOT have it, the night of the party was the coldest night we have had in Houston all year.

So a group of us are outside drinking our frozen margaritas from our tiki bar in 40 degree weather all bundled up with jackets and scarves. I’m sure my parent’s neighbors thought we were a little bit crazy but it was a blast.

Brent built the tiki bar top so it could pretty much be set up on any type of surface. We set it up on a metal rolling cart for the party but the second time my dad used it he set it up on a folding table. The nice thing is it breaks down fairly easy so it can be stored and set up again next year!

How We Built Our DIY Tiki Bar Top

SUPPLIES

Shop the products we used for this project in one place.

FYI: This post contains affiliate links to products we used and liked for our DIY Tiki bar top. As an Amazon Associate Gray House Studio earns from qualifying purchases. This is at no extra cost to you. We appreciate you supporting this site. Read our privacy and disclosure policy.

STEPS

Tiki Bar Top

1. First, we cut the MDF board to the size we needed (we made it a few inches larger than the table we put it on) with our table saw.

We used a MDF board because it is heavy so the table would be sturdy and it has a consistent surface so the vinyl floor planks would stick really well.

Tiki Bar Top

2. After that we created a lip using the pine on either side of the base to add support for the canopy and to make a large surface to screw in the legs for the canopy.

Tiki Bar Top

Tiki Bar Top

3. Next we used a straight edge ruler and a box cutter to score the vinyl floor planks to the appropriate size of the MDF board. Then we stuck each piece onto the board.

Tiki Bar Top

4. We made the structure of the canopy by cutting the boards to the size of the table top and attached them together using the using angle brackets.

We needed the canopy to be light so we used thin wood but because the wood was thin, it didn’t give a large surface to screw the boards together so we had to use angle brackets.

Tiki Bar Top

5. The next step was to stretch the landscaping fabric over the canopy structure. We then stapled it to the top of the canopy. We cut off the excess fabric.

Tiki Bar Top

Tiki Bar Top

6. We took the roll of kraft paper and scored the bottom half of it to get a fringe look. After that we started with the front and stapled the paper to the side of the wood.

We placed the next layer of fringe paper so it overlapped the staple from the previous layer of paper. We continue doing this going up the top of the canopy.

Tiki Bar Top

7. The next thing we did was cut the legs for the canopy out of the same pine wood. The front legs were cut shorter than the back legs to create a pitched roof. We assembled the table by screwing the four legs into the table top lip and the canopy.

Tiki Bar Top

8. We added a grass table skirt around the bottom of the metal cart to hide it. And finalized the tiki bar by adding a few tropical decorations such as paper lanterns.

Tiki Bar Top

Over all this project cost us around $40 because we had most of the supplies laying around and it took about two or three hours to put together. Cheers to a successful one day project!

PIN IT FOR LATER

How to build a DIY tiki bar table top perfect to serve margaritas or drinks at pool parties or as tropical party decor at a summer Hawaiian Luau party.