Garage Shop Plans: Check out the new floor plan

Our garage is a makeshift woodworking shop when we can wade through the junk. Here are our garage shop plans. We can’t wait to legitimize the workshop.
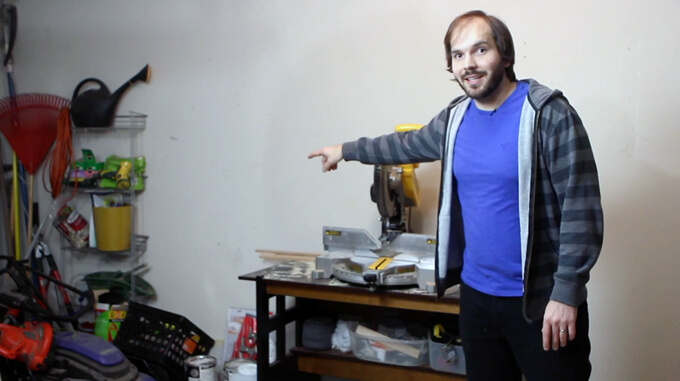
Garage Shop Plans

We have been using our two-car garage as our workshop for the past two years but it is also the black hole that absorbs anything we own without a home base. Since the garage has no real organization system it’s easier to leave the lights off and toss objects into the garage than try to keep it clean. Often times it might take us 30 minutes to an hour to shove things around enough to work on a project.
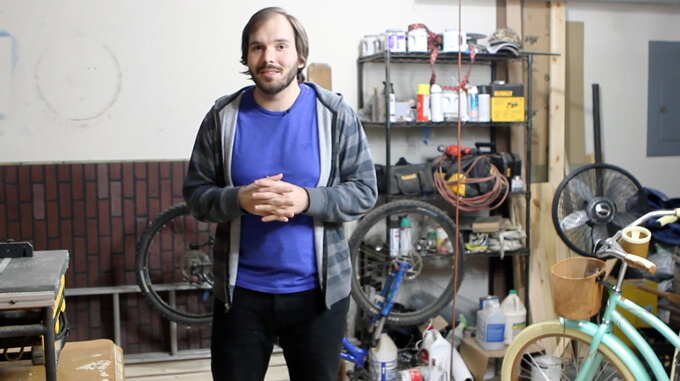
Garage Shop Plans
If the clutter isn’t dangerous enough for you there is also several holes and lumps in the concrete slab that will either have you tripping or twisting your ankle. Beware intruders, holes make for a great boobytrap once filled with sawdust.
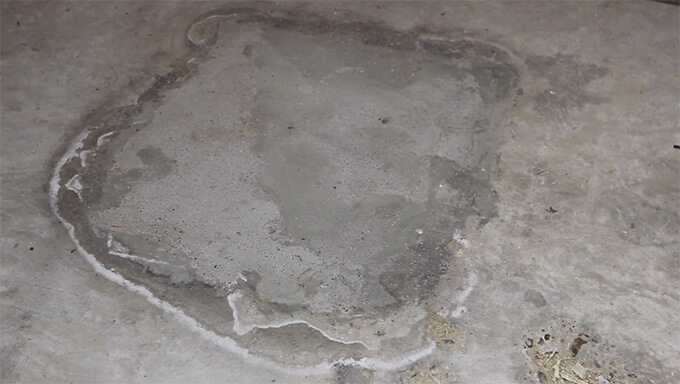
Garage Shop Plans
In our defense, we have never actually seen our garage clean. We moved into an empty house with a trashed garage.

Garage Shop Plans
It was the shell of a man cave complete with a dart hole silhouette on the wall, cigarette butts in the corner, a dilapidated punching bag on the ground, and untouched supplies from a honey-do-list in a pile. It feels like for the past year every week we put one heavy item in the trashcan in a feeble attempt to whittle down the pile of items that were donated with the house.

If there is one project we have been talking about the longest it would be the garage shop. When we make a list of projects the garage is always next on the list. But inevitably, something more pressing always comes up. First, we re-decorated the guest room so my parents would have somewhere nice to stay while she was in town for her cancer treatment. Then we found out Courtney was pregnant and needed to turn a room into a nursery. So, to free a room we moved Courtney’s office and built a desk, cabinet and wall art. Then, it was all hands on deck to prep the nursery before Connor was born. We even filmed about video back in March, the last time we thought we were starting the garage.

VLOG

To see new DIY videos on Sundays, be sure to subscribe to our channel ⇾


Garage Shop Plans

Now that the nursery is finished it’s finally garage renovation time. Here is the updated plan.

Floor Plan
Garage Shop Plans
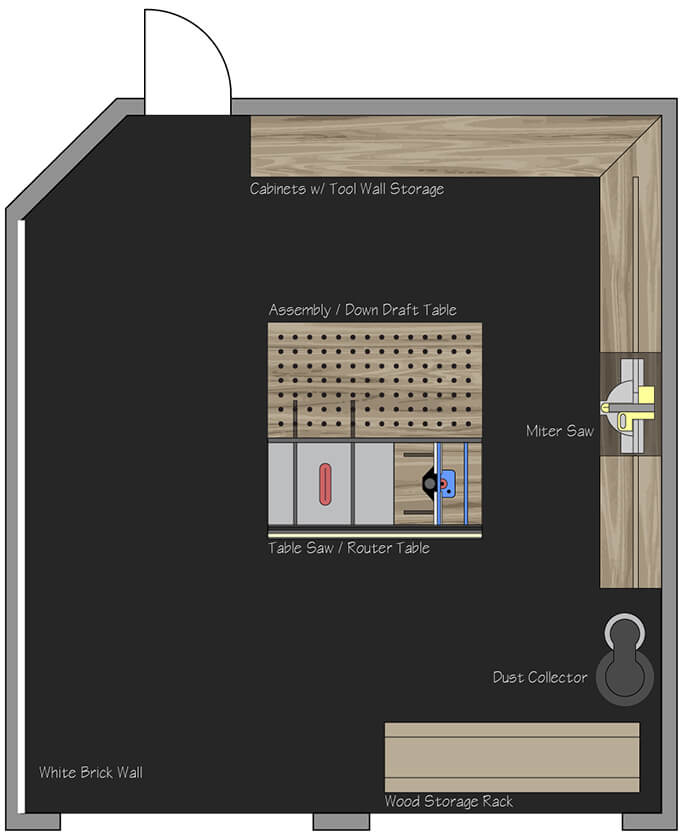
For the floors we are using Rust-Oleum’s ROCKSOLID Metallic Floor Coating in Gunmetal. One wall will be white brick and the other two walls will be painted gray with dark gray cabinets. One set of cabinets will be a miter saw station.

To help contain and organize leftover wood a lumber rack will be built in-front of the garage door we keep locked because it doesn’t have a motor. In the center of the room will be the table saw built into a large work surface with a built-in router table. The outfeed table attached to the back of the table saw will have holes in the top for easy clamp use. The holes will also allow the table to be used as a downdraft table when hooked up to a vacuum.

We can hardily contain our excitement to finally follow through with these garage shop plans, finally making it the workshop of our dreams. Of course, once the realization sets in that we have to empty the garage to get started I’m sure our level of excitement will drop a bit. At least for this post we can focus on the light at the end of the tunnel.

Gray House Studio Intern

Meet the Gray House Studio Intern

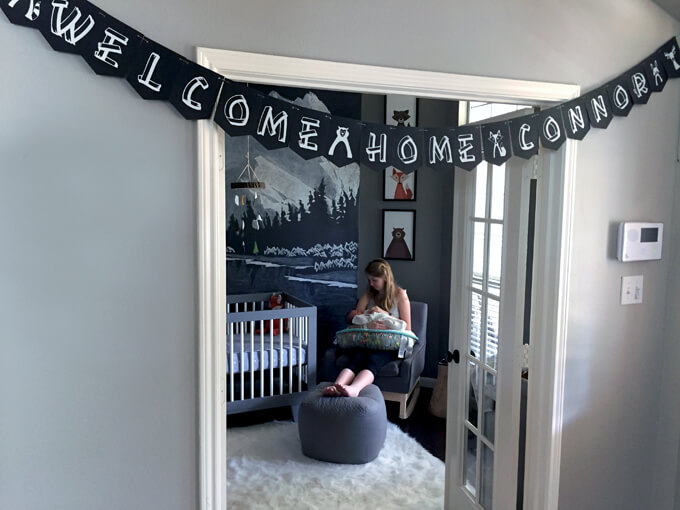
We are super excited to introduce our little Gray House Studio intern, our son, Connor Jack!

Gray House Studio Intern

We just wanted to give a little personal update because Gray House Studio and our little world has forever been changed for the better three weeks ago. We welcomed our son (and Gray House Studio intern) on October 1, 2016 at 5:12pm. He weighed a whopping 9 pounds and 6 ounces and was 20 inches long.

Gray House Studio Intern

My doctor told me at 37 weeks he could come any day. But Connor must have been nice and cozy where he was and had his own plans and it did not include showing his face on my due date which came and went on September 26th.

However, he was considerate enough to stay put long enough for us to finish every project in the nursery so it would be ready for him when he arrived. We even finished our reading nook tent which was the last project on our list.

On Saturday, October 1st my doctor decided it was time to induce me and he would have to make his way into the world whether he was ready or not. I had a relatively easy labor process that day and decided to go without the epidural or any pain medication, a decision I was content with up until they broke my water broke and then was in some seriously intense pain for about thirty minutes.

Luckily, Brent was amazing by my side and talked me through it and helped me mutter my go to phrase, “I will dominate these contractions” over and over again – ha. Thankfully Connor came fast because that last round of contractions were no joke and I was making the most cliche labor groans ever, sounds right out of a movie. So loud I might add that my family and Brent’s family sitting outside in the waiting room could hear every last grunt and moan. Awkward….

Gray House Studio Intern

Little did I know when I decided to turn down the epidural, this little due was going to be a BIG dude with a proportional size big head. All the nurses and even the doctor were a little surprised at his size. Now that it is over, I am happy with my decision again and kind of proud at my stubbornness, I mean determination.

Gray House Studio Intern

Connor did have a little trouble regulating his glucose and was taken to the NICU for about 24 hours to be hooked up to an IV. Which led to the LONGEST and most tiring night of our life having to get up and walk every three hours from my room on the third floor to the NICU on the second floor to feed him, only about 10 hours after giving birth.

Gray House Studio Intern

Thank goodness for Brent encouraging me and doing everything he could to help me push through it. I am really lucky to have him as my husband and partner in life. These types of situations really bond you for sure. He is seriously my rock and already the sweetest dad.

Gray House Studio Intern

Connor’s glucose levels came up and after four days in the hospital, it was time to bring him home to see his nursery! We immediately took him in the room and showed him around and I rocked him in his rocking chair that his dad built just for him.

Gray House Studio Intern

We are over the moon and so in love with our little guy. We worked so hard on his nursery and spent most nights imagining what he would look like sleeping in his crib or being rocked in his chair and now that it is a reality, it is so much fun.

I’m not going to lie, going from a couple to a family of three and trying to adapt to having a newborn in the home is tricky. The first few weeks are just a constant pattern of feeding him, rocking him to sleep (my favorite), changing diapers and just about zero sleep for this new mom and dad.

One nursery project we are really getting a lot of use out of is the changing table. We have already put it to some serious use as well as our nursery wall storage and both storage solutions make life so much easier and work perfectly.

Although, keeping this area looking like it did when we first took the photos (before baby) is a difficult task in itself. The baskets are usually empty now and half the burp cloths are dirty on the ground because that is real life with a newborn, wonderful but REALLY messy.

We still have a few more nursery projects to share, plus a full tour of the room but posts might be a little more sporadic than usual for a while as we try and figure this whole parenting thing out.

Brent made this sweet video of Connor’s first week of life. I love watching it over and over. It makes me so happy.

MEET CONNOR JACK

To see new DIY videos on Sundays, be sure to subscribe to our channel ⇾


Kid’s Reading Nook Tent

Kid’s Reading Nook Tent Made out of Wood

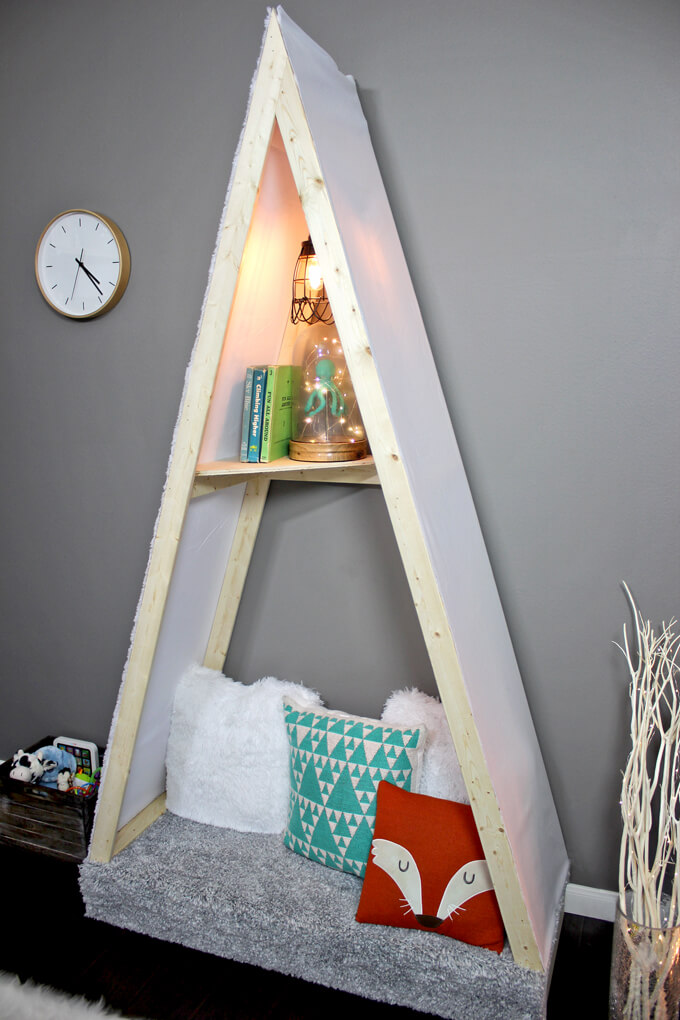
Check out how we we built our son a kid’s reading nook tent made out of wood and canvas for his modern outdoor nursery.

Kid’s Reading Nook Tent

We have been hard at work making an outdoor modern nursery over the last few months for our baby boy. We wanted to transform the room so that when he gets older he feels like he is being transported to a space of whimsy and adventure that will encourage his imagination to run wild.

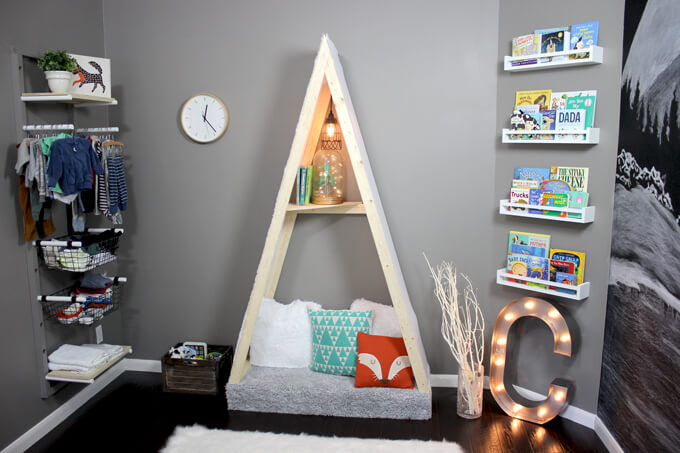
One project that Brent and I were really excited about creating was a kid’s reading nook tent that would be a centerpiece in the room.

Even though he is just a newborn and the tent is more of a decor piece right now, we wanted the room to be able to grow with him and create a fun spot he could curl up in and we can read together and play pretend. Because you can’t go on an outdoor adventure without a tent!

Update: This piece turned out to be more special than we had hoped. When our son was one and first learning to walk he pulled himself up onto the base of his wood tent, sat down on it and then stood up and start walking!

2022 Personalized Christmas Ornaments
*** Thanks so much for supporting our small shop – Moon Rock Prints – this holiday season! ***

How We Built A Kid’s Reading Nook Tent Out of Wood

SUPPLIES

Shop the products we used for this project in one place.

TUTORIAL VIDEO

[yotuwp type=”videos” id=”44681fFjToU” title=”off” description=”off” player=”width=590&modestbranding=0&showinfo=0″]

Subscribe to our YouTube Channel

Like our video? Please subscribe and help us reach our goal of 100k subscribers.

Kid’s Reading Nook Tent

Follow along below to see how we built a kid sized tent out of wood.

STEPS

Kid’s Reading Nook Tent

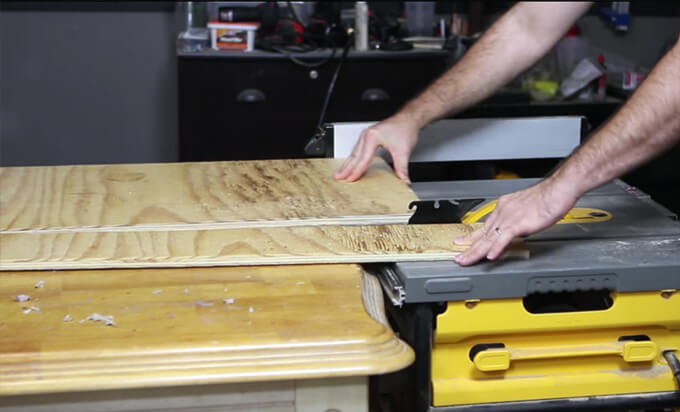
1. Brent started the build by constructing the platform. We used a table saw to cut plywood into 6” tall pieces for the sides and braces.

Kid’s Reading Nook Tent

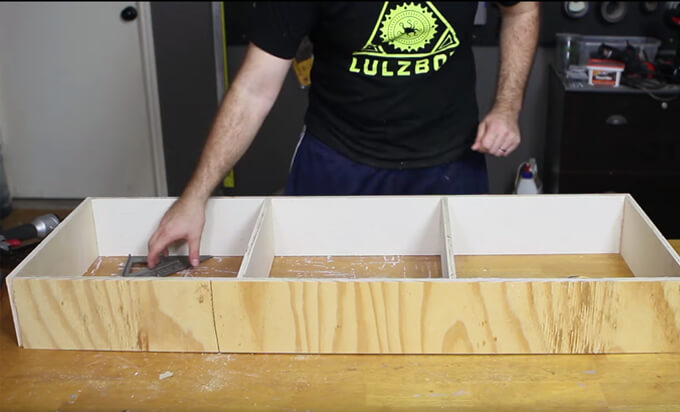
2. He used a square to make sure all the sides were straight before we attached them together.

Kid’s Reading Nook Tent

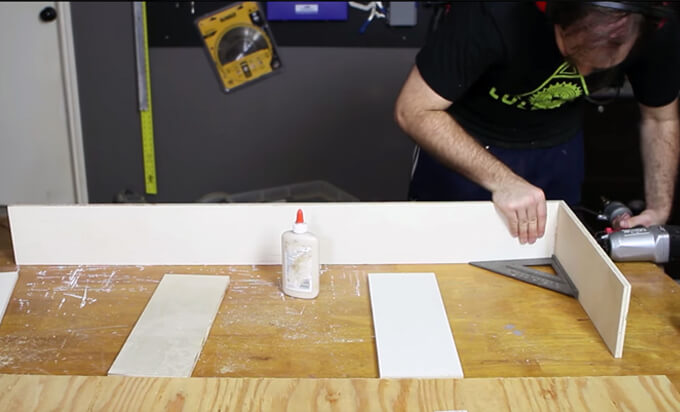
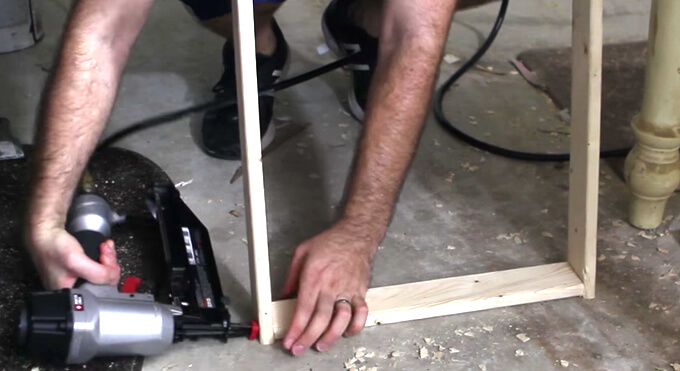
3. These boards were secured together using wood glue and a nail gun with 1 1/2 inch brad nails.

Kid’s Reading Nook Tent

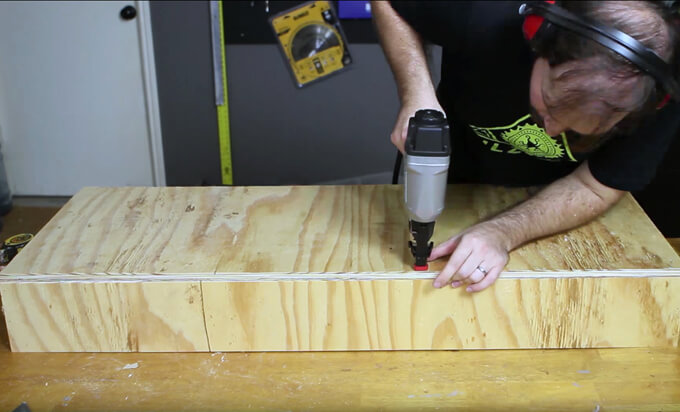
4. Then he attached the top plywood board measuring 48” wide and 30” deep with wood glue and a nail gun with 1 1/2 inch brad nails.

Kid’s Reading Nook Tent

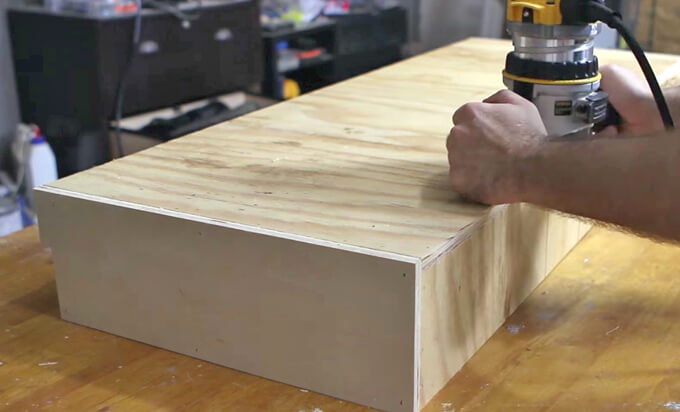
5. Next, he used a 1/2” round over bit on a router to remove the sharp edges from the corner of the platform.

Kid’s Reading Nook Tent

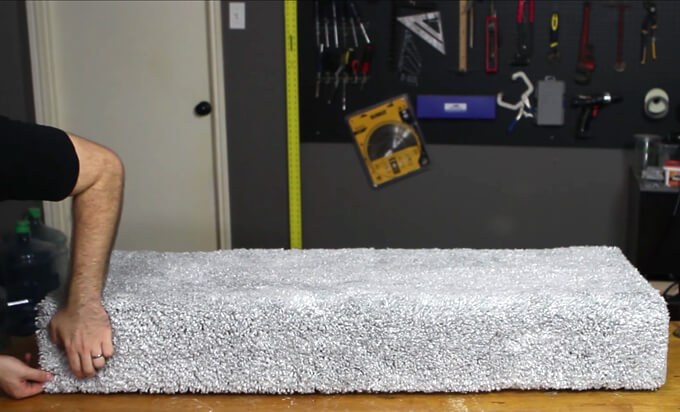
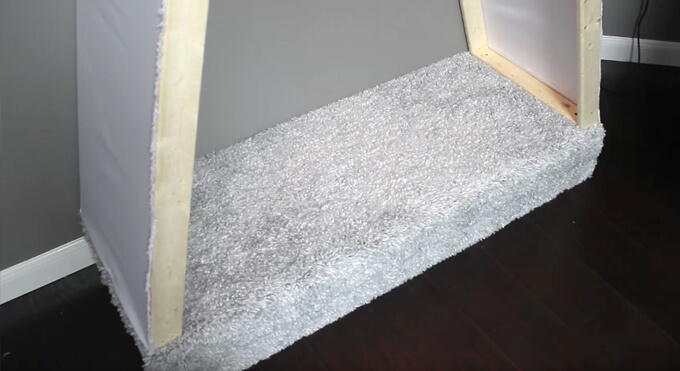
We found a shag rug (here is a similar one) at Target that was 48” wide which made it perfect for this project. We didn’t even have to cut it.

Kid’s Reading Nook Tent

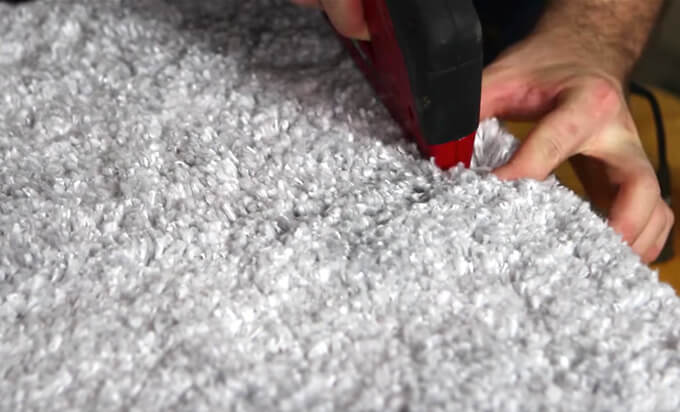
6. To attach the carpet he parted the bristles and stapled in between them with a staple gun.

Kid’s Reading Nook Tent

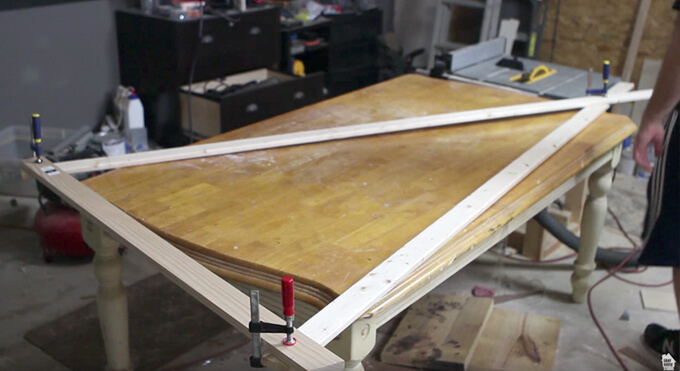
7. To find the correct angles of the frame Brent used clamps to attach a 48” piece to the uprights and marked where to cut the boards.

Be sure to measure both upright boards if one is longer than the other then the peak of the tent will be off center. Both of the uprights should be the exact same length.

Kid’s Reading Nook Tent

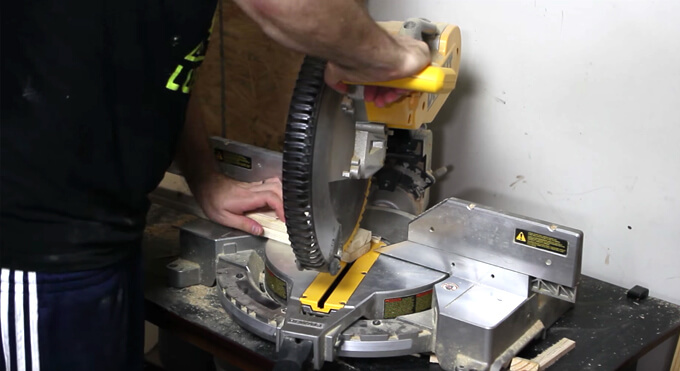
8. He used a miter saw to cut our boards to be 7ft. tall.

Kid’s Reading Nook Tent

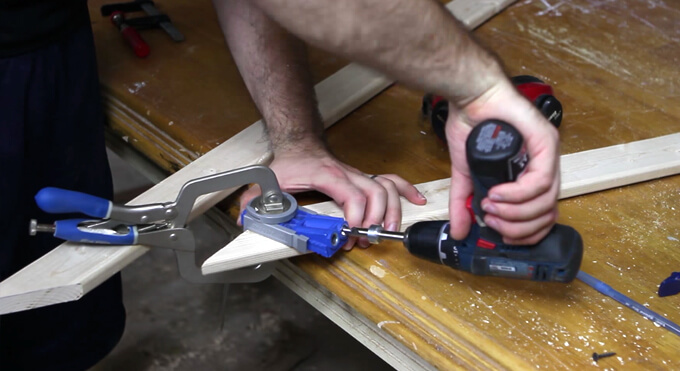
9. To attach the peaks of the frame together Brent used the Kreg Jig Pocket Hole System to make two pocket holes.

Kid’s Reading Nook Tent

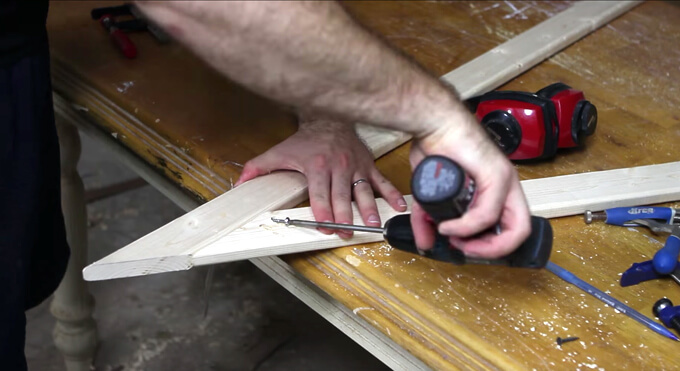
10. Then, he drilled in two screws into the pocket holes.

Kid’s Reading Nook Tent

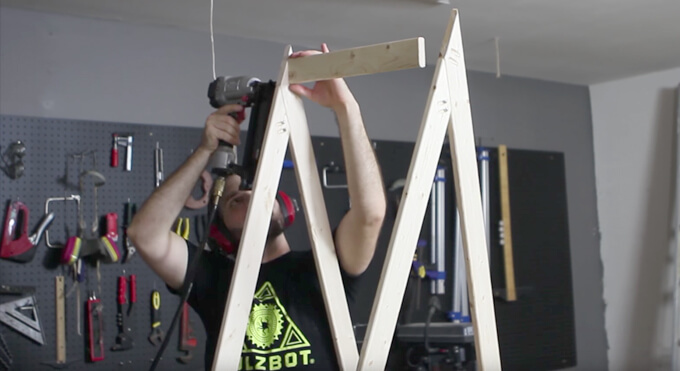
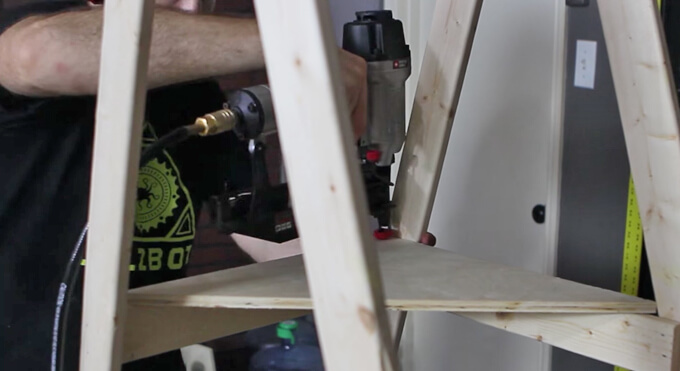
11. After turning both of the frames so the pocket holes faced backwards, he connected them with a 1×3 board using my nail gun.

The frames should be the same depth as the platform. Ours was 20” deep so the top frame measured 20” deep once they were connected with the top board.

Kid’s Reading Nook Tent

12. Brent used the nail gun to attach two additional 1×3 boards at the bottom of each side of the frame.

Kid’s Reading Nook Tent

13. To add some interest to the tent we decided to add a triangle shelf midway up.

To build the shelf Brent attached a back brace and a side brace. Then attached a triangle shelf to the top of the braces with a href=”https://amzn.to/2Je7qwY” target=”_blank”>wood glue and a nail gun.

Kid’s Reading Nook Tent

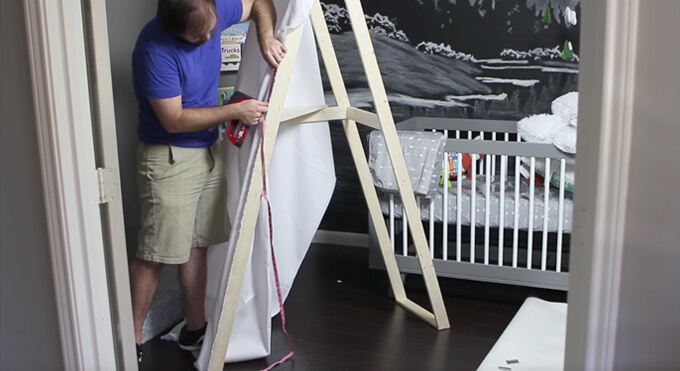
14. After moving the frame into the room, Brent attached the canvas fabric to the sides.

He used the factory edge of the canvas on the front side of the frame and used a staple gun to attach it to the frame in 6” intervals.

Kid’s Reading Nook Tent

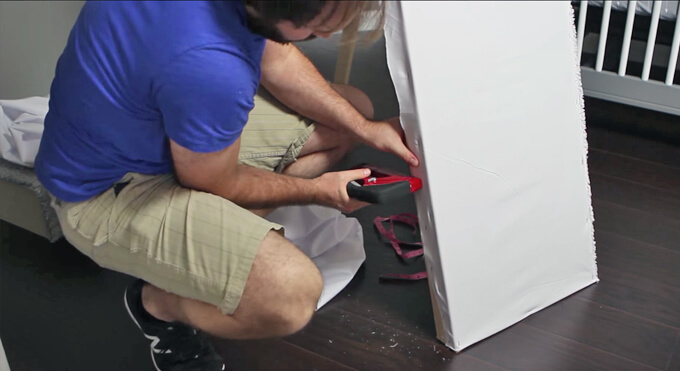
15. Then Brent attached and concealed the not so great looking side on the back.

Kid’s Reading Nook Tent

16. The entire frame was attached to the base using a drill and 2” drywall screws.

Kid’s Reading Nook Tent

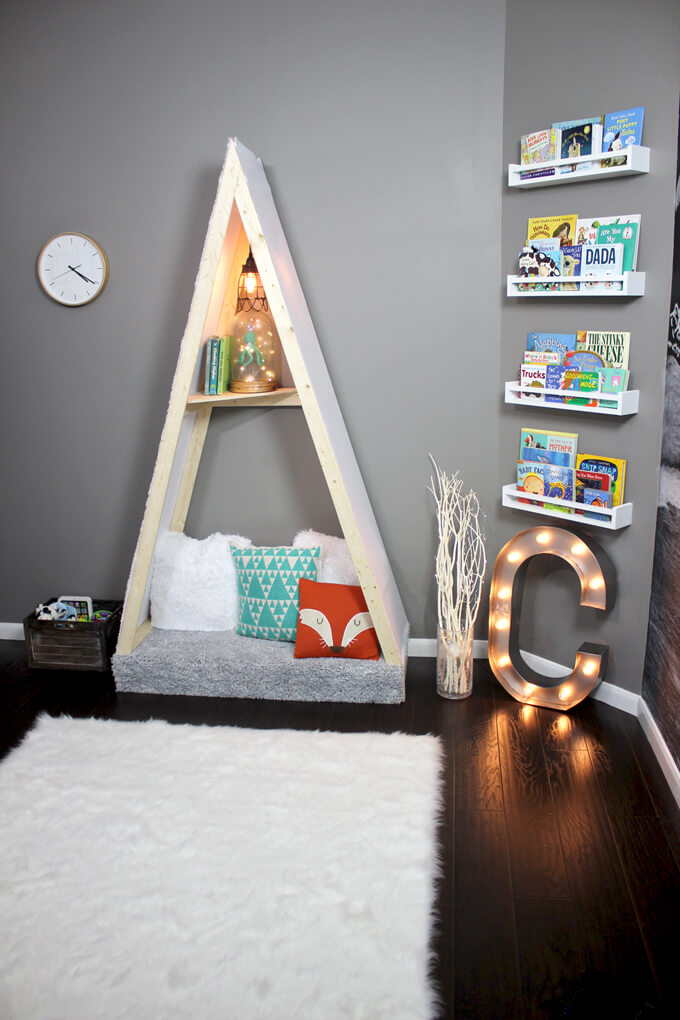
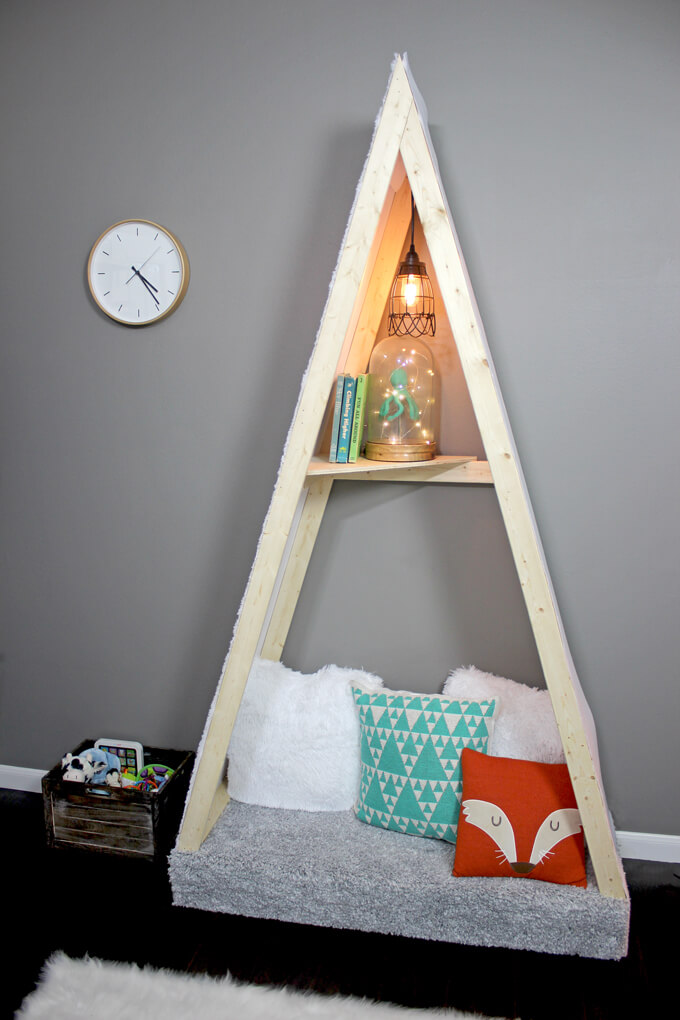
We picked some quirky elements to decorate the kid’s tent.

Kid’s Reading Nook Tent

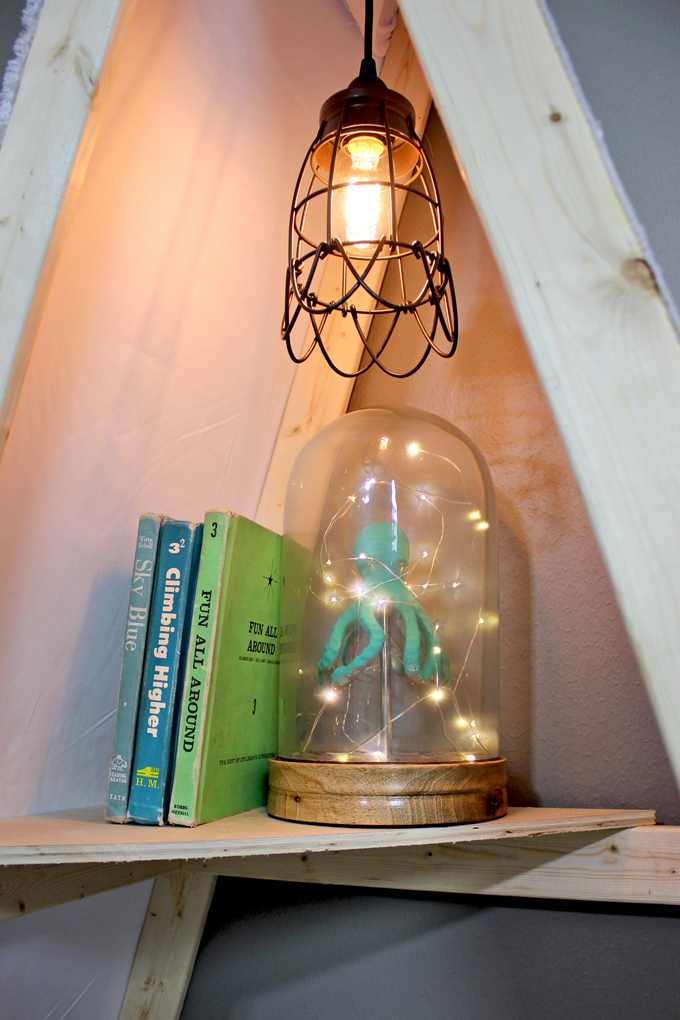
We picked out this octopus sculpture in a glass dome and spray painted it turquoise and added string lights to up the whimsy factor.

Kid’s Reading Nook Tent

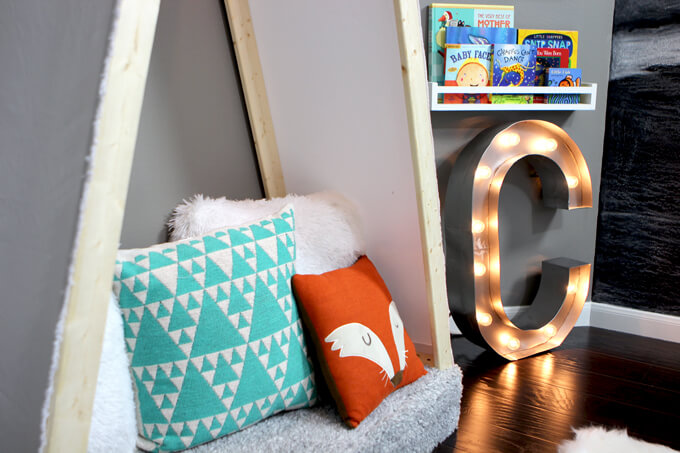
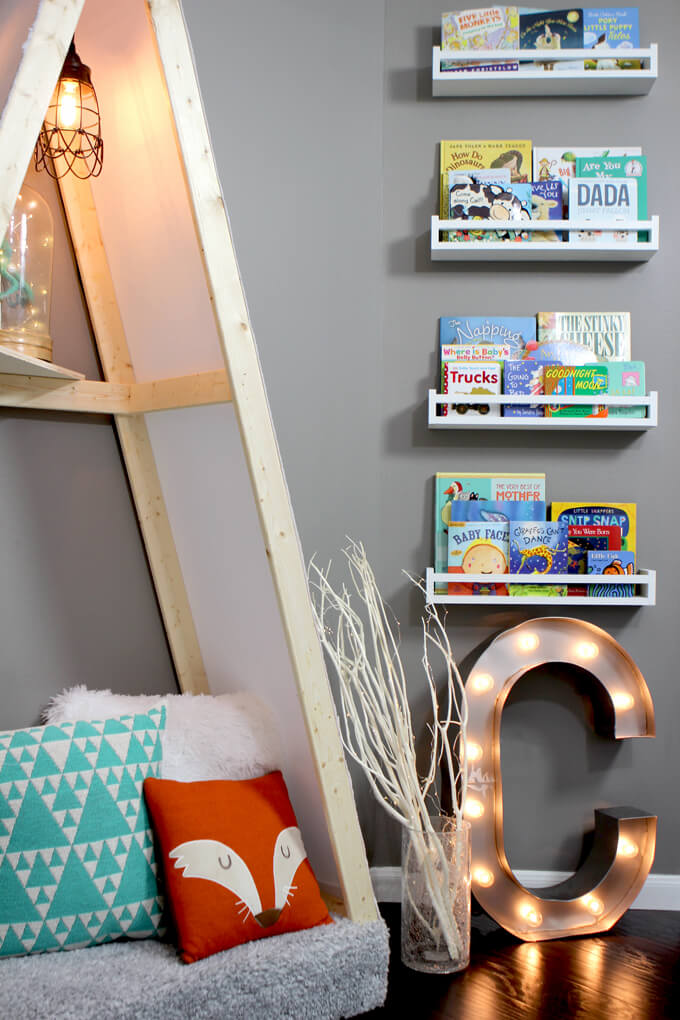
To make it cozy we picked up several pillows to add variety in color and texture to our kid’s reading nook tent. The fox pillow is my favorite.

Kid’s Reading Nook Tent

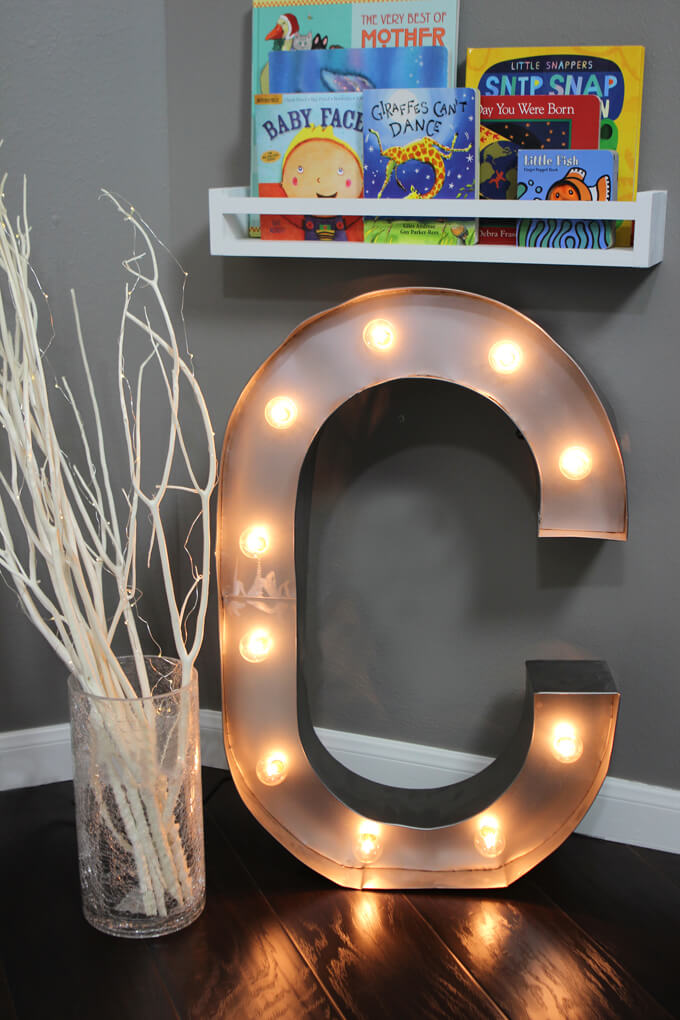
How fun is this marquee letter? This huge “C” is for Connor. We wrapped the white branches with more of the LED string lights to add a little magical touch to the reading nook area.

Once Connor is able to start being mobile, we will have to move these items to higher ground, but for now they fill up this space next to the tent nicely and add a playful touch.

Kid’s Reading Nook Tent

Kid’s Reading Nook Tent

While our son might not be able to read for awhile, Brent and I are ourselves are looking forward to sitting in the space, holding him and reading to him.

Kid’s Reading Nook Tent

PIN IT FOR LATER

A tutorial showing how to make this adorable wood tent for a child's room. It is the perfect piece for a woodland themed nursery or kid's room. There is a video tutorial included in the post showing how to build a kid's reading tent out of wood.

nursery bookshelves

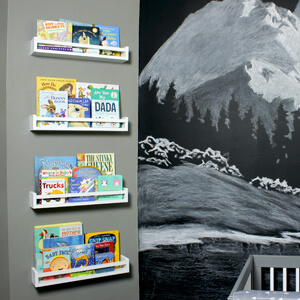
Nursery Bookshelves DIY

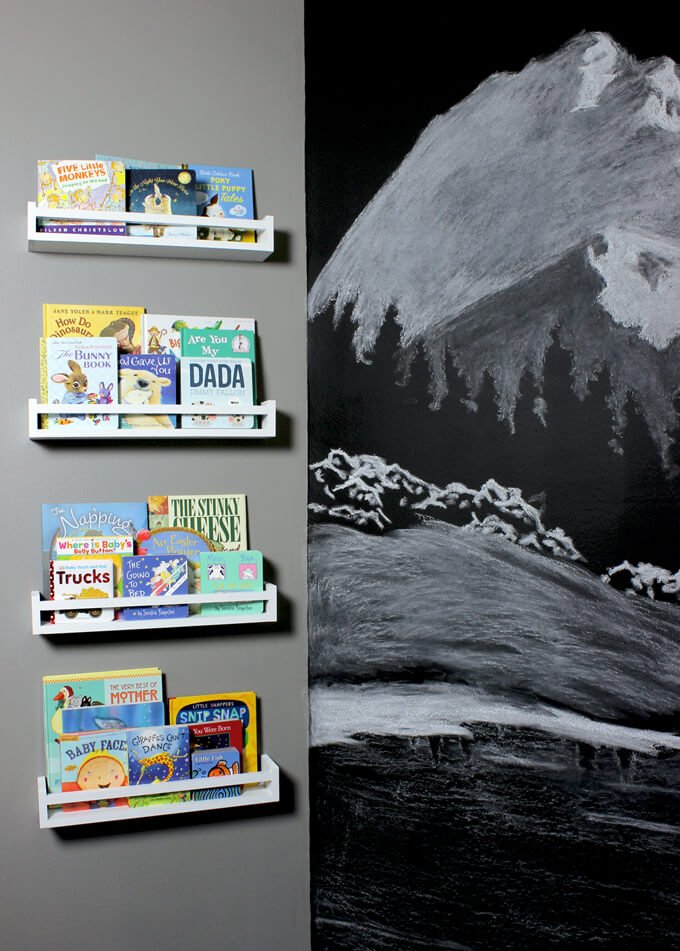
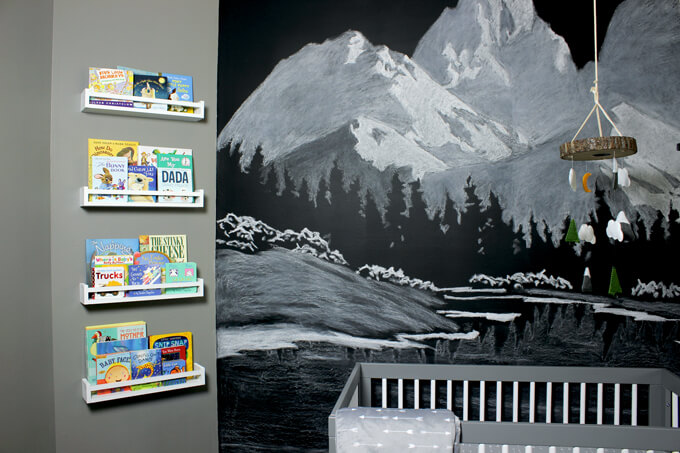
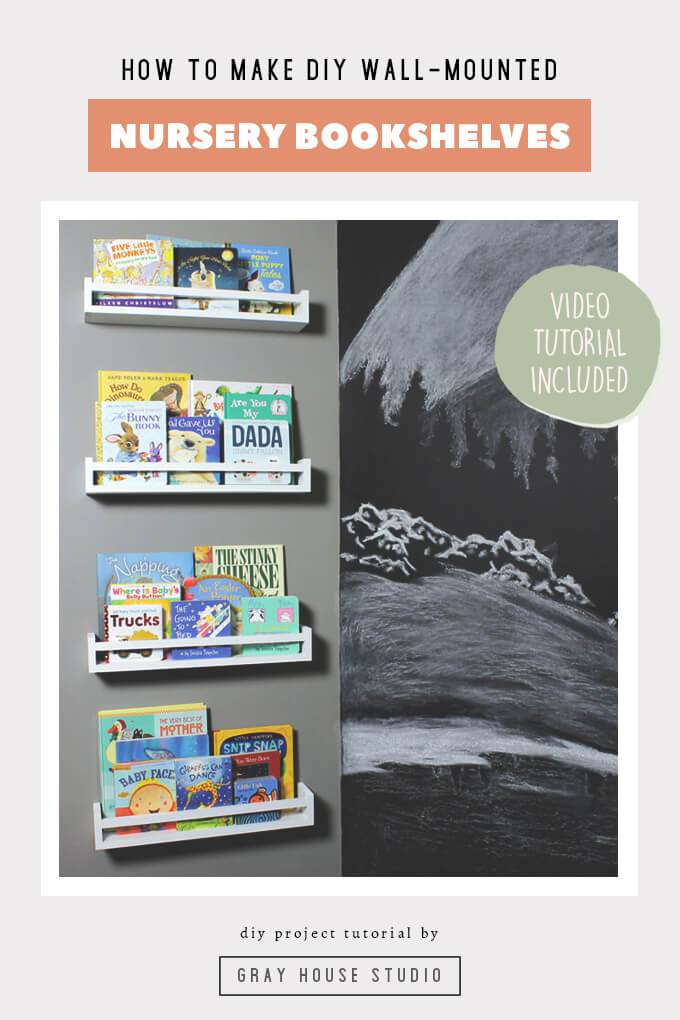
We made a set of nursery bookshelves to store, organize and display baby books.

Nursery Bookshelves DIY

Well, it looks like we are actually going to finish this nursery before baby makes his arrival! It didn’t seem like we were going to make it but he decided to stay put for a little longer and is now four days past his due date which has given us plenty of time to finish all of our last minute projects including the nursery wall storage, baby clothing rack and now our nursery bookshelves. (Plus, we have one more project on the way to share that is AWESOME.)

If you couldn’t already tell by the massive shelves we built in our library, we like to read, a lot. Both Brent and I are looking forward to reading to our son right away, even if he doesn’t understand what we are reading just yet. It was a given we would incorporate bookshelves into the nursery.

The nursery has two small walls that are at an angle so we thought that making bookshelves that ran vertically up the wall would be a good use of space.

Nursery Bookshelves DIY

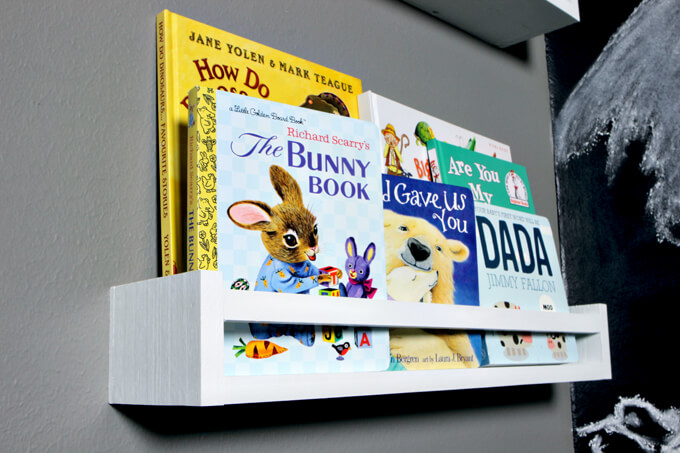
A popular trend right now is using the IKEA spice racks for baby books so we took that idea and built our own larger, beefier version so we could fit more books on them and fill up the wall.

To see how we built our nursery bookshelves, check out the video or follow along with the steps below.

How to Make DIY Nursery Bookshelves

SUPPLIES

Shop the products we used for this project in one place.

FYI: This post contains a few affiliate links to products we used to make this project. Gray House Studio does receive commissions for sales from these links but at no extra cost to you. We appreciate you supporting this site. Read our privacy and disclosure policy. You can also easily shop our recommended products here.

Handmade Christmas 2021 Ornaments

2021 Christmas Ornaments
Thanks for supporting our small shop this holiday season!

TUTORIAL VIDEO

STEPS

Nursery Bookshelves DIY

CUT THE PIECES FOR THE SHELVES

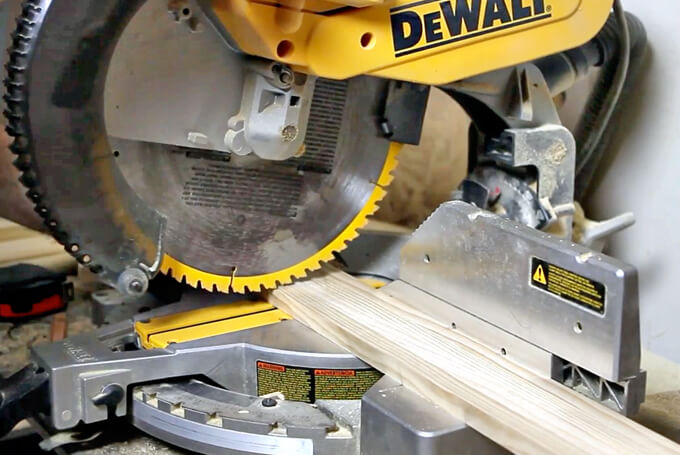
1. To begin making the nursery bookshelves, first we made all of our cuts using our miter saw. We made the following cuts:

The bottom piece of the shelf: 1”x6” cut 20” long
The two side pieces of the shelf: 1”x6” cut 4” long
The mounting plate on the back of the shelf: 1”x2” cut 10” long
The front rail of the shelf: 1”x1” cut 20” long

Because we were making four shelves we cut multiple of the same pieces at one time to make sure they were all the exact same length. We used a clamp to hold a board to the fence of the saw to make the sure all our cuts were the same.

ASSEMBLE THE SHELVES

Nursery Bookshelves DIY

Nursery Bookshelves DIY

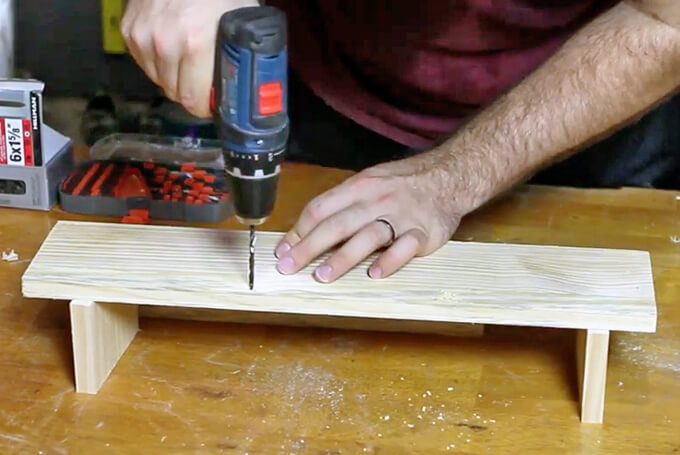
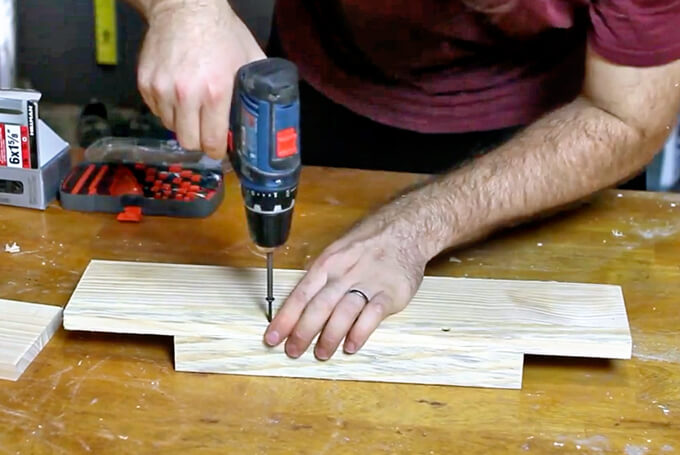
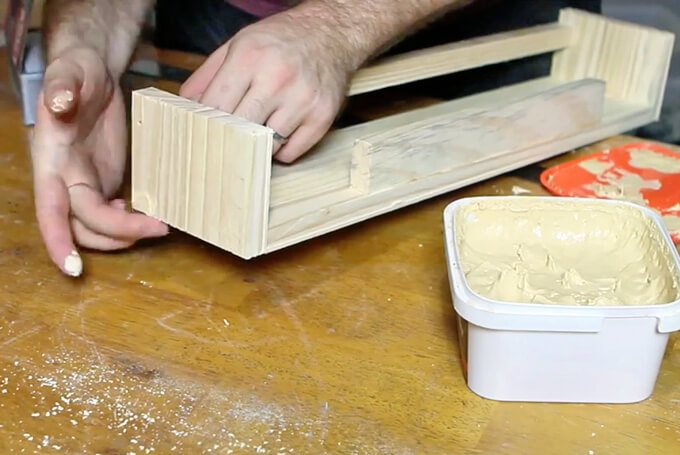
2. To assemble the nursery bookshelves, first we used our drill to drill two pilot holes into the back of the bottom piece of the shelf and attached the mounting plate piece with wood glue and 1 ⅝” wood screws to the bottom piece of the shelf.

Nursery Bookshelves DIY

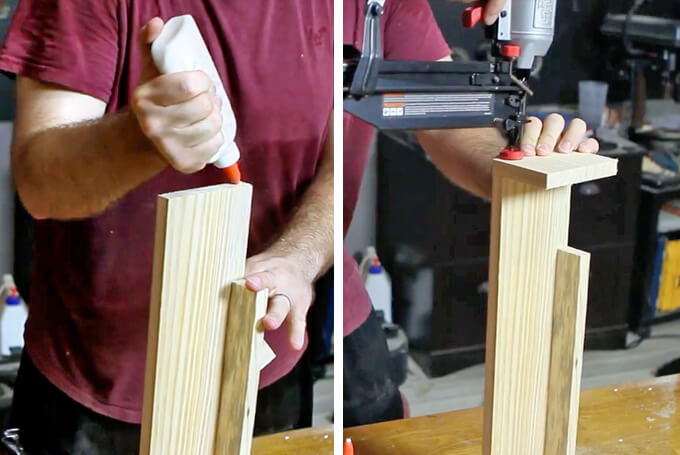
3. Next, we attached each of the side pieces to the bottom piece with wood glue and 1 ½” finishing nails.

Nursery Bookshelves DIY

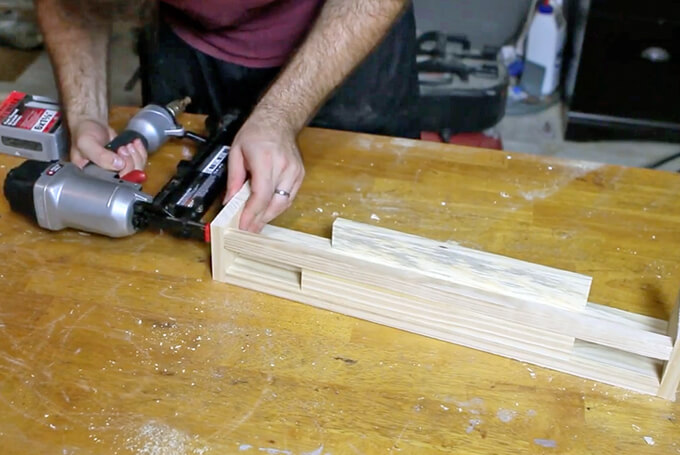
4. Finally, we attached the front rail to the side pieces with wood glue and 1 ½” finishing nails.

We used a scrap 1”x2” to rest the rail on while we nailed it from the side boards with our nail gun.

PAINT THE SHELVES

Nursery Bookshelves DIY

Nursery Bookshelves DIY

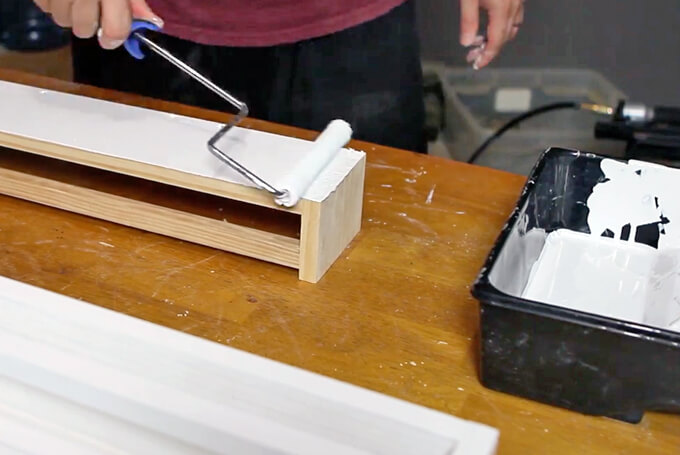
5. Once all of our nursery bookshelves were assembled, we used wood filler to fill the holes and then painted the shelves with Sherwin-Williams ProClassic® Waterbased Paint in Bright White and a nap roller for a smooth finish.

HANG THE SHELVES

Nursery Bookshelves DIY

Nursery Bookshelves DIY

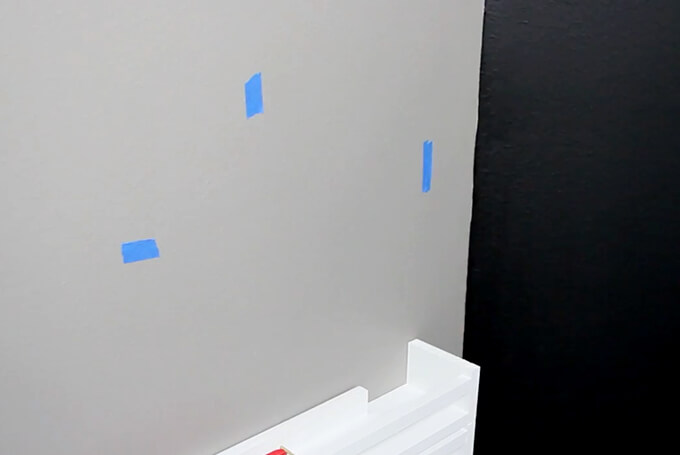
6. Before hanging the shelves, we marked the wall studs with painters tape.

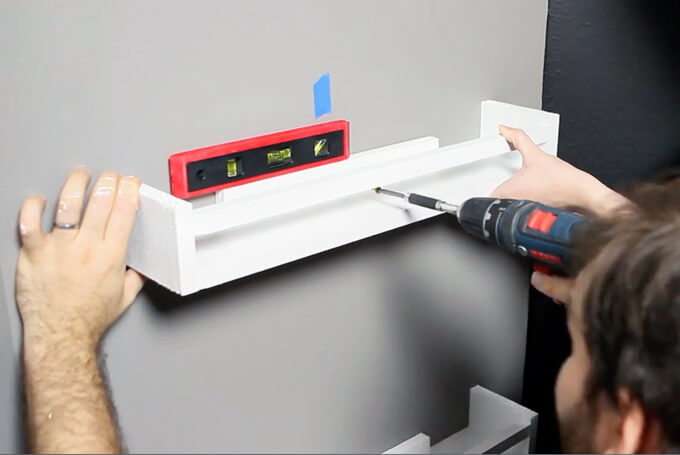
Then we centered each shelf on the wall and made sure it was level (with our level).

Finally, we screwed the shelves into the wall over the studs with 3” screws.

Nursery Bookshelves DIY

The nursery bookshelves were super simple to build and turned out great. We love filling the nursery bookshelves up with books. We have been receiving books as gifts and it is so fun to add them to the shelves as we start a collection for our baby boy.

PIN FOR LATER

A tutorial showing how to make your own larger versions of the Ikea Bekvam Spice Rack Bookshelf. The step by step guide for our DIY wall-mounted nursery bookshelves project includes a video tutorial. Great idea if you are looking for DIY floating shelves for a nursery.

Baby Clothes Rack Nursery Storage

Baby Clothes Rack

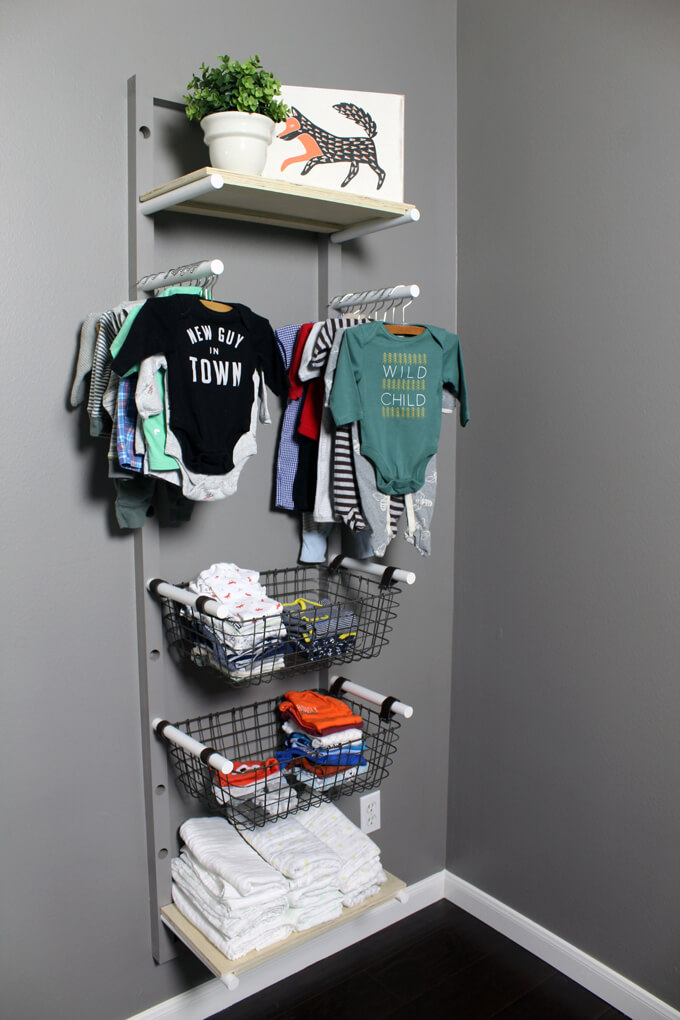
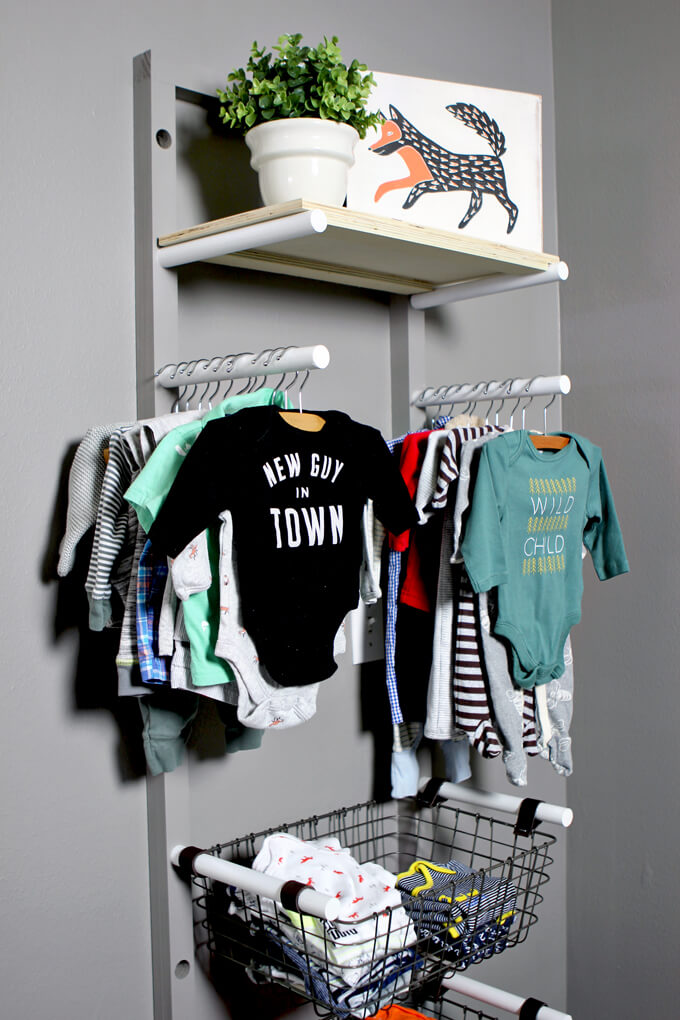
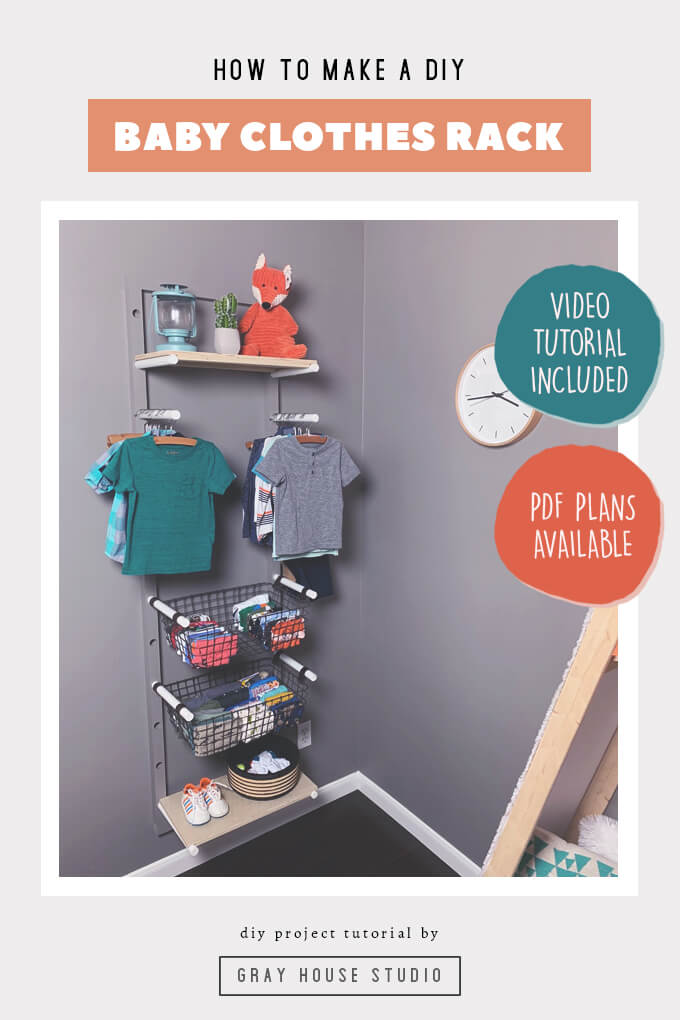
We built a wall-mounted baby clothes rack to hang and store clothes in our nursery to make up for the lack of closet in this room. You can buy the PDF plans for our DIY Baby Clothes Rack in our shop.

Baby Clothes Rack

You know the proverb, “necessity is the mother of invention”? Well, Brent and I found ourselves needing to apply this saying to our baby clothes storage situation in the nursery.

The problem: The nursery does not have a closet therefore there was no designated space to store and organize baby clothes.

I can’t tell you how many hours I would sit in the nursery and just stare at the wall we designated for clothes storage and try and brainstorm ideas for how to store the clothes.

I was frustrated because I knew I wanted something specific, I just didn’t know what that something was.

We could have used a dresser but with the crib, changing table and a wood reading nook tent we are building, we didn’t have room for anymore large furniture.

I spent hours searching for ideas everywhere but everything I could find would take up too much floor real estate.

I had two criteria in mind: I didn’t want it to take up a lot of space and I wanted it to look like a display you would see in a store since the clothes were going to be out in the open and not behind closet doors.

Baby Clothes Rack

Then, I came across an image of dowel rods holding a sack of potatoes and a light bulb went off. Seriously, inspiration can come from the strangest of places.

Since starting Gray House Studio I have come a long way in my ability to visualize designs and concepts and the fact that I could see a baby clothes rack from this idea makes me pretty proud.

I explained my vision to Brent and he executed my idea perfectly and even threw in a few other great suggestions because he is awesome like that and thus our wall-mounted baby clothes rack was made!

Baby Clothes Rack

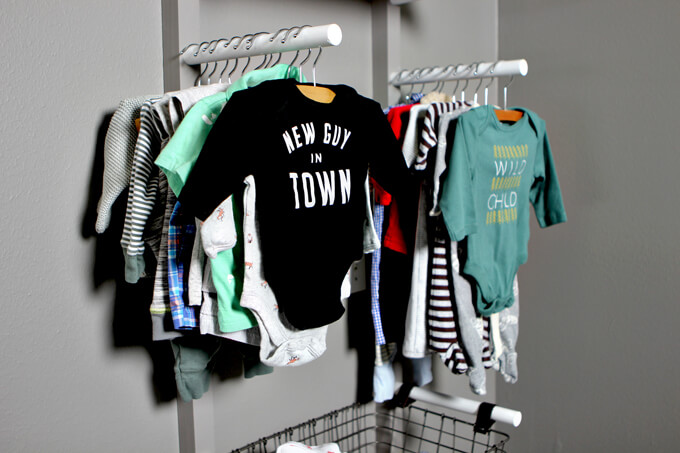
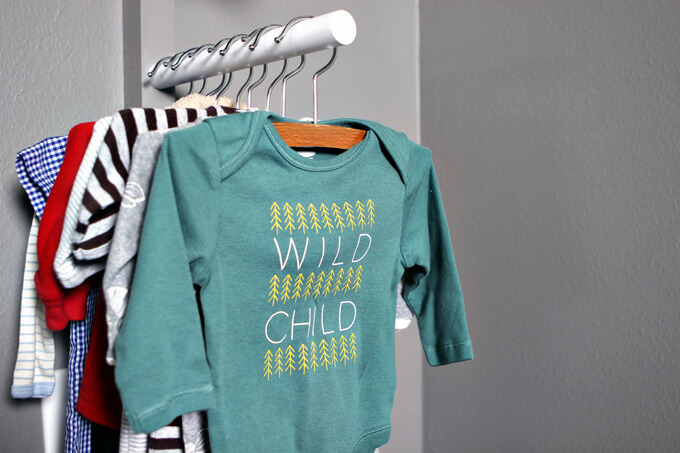
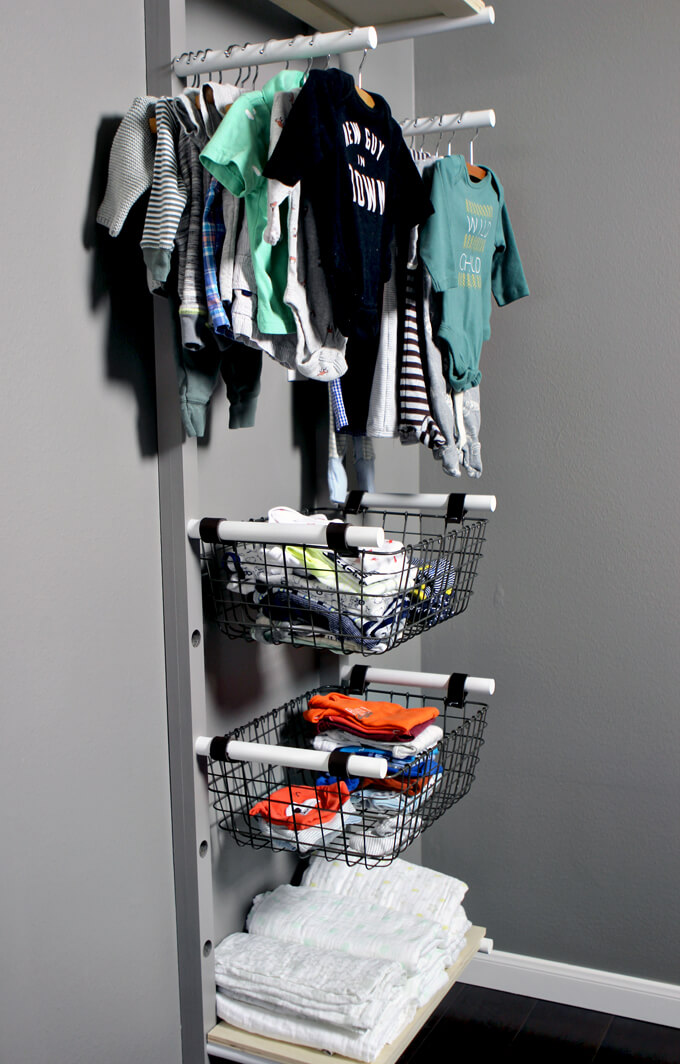
On the top dowel rods are hanging shirts, pants and some of my favorite onesies.

I ordered wood hangers to make it look more like a display. Plus, is there anything cuter than baby wood hangers? They are so tiny!

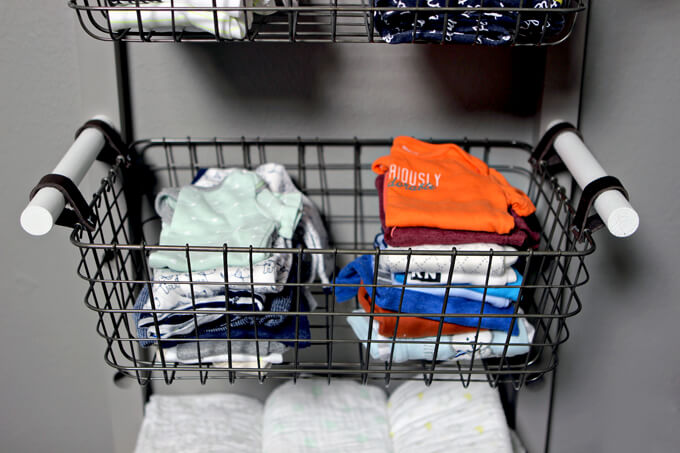
We purchased these metal wire baskets from Target.

We bought them first so we could build the width of the baby clothes rack frame around them so they would fit perfectly.

They had gold handles which were not the style we were going for and would not hang on the dowel rods anyway so Brent removed them.

Baby Clothes Rack

Brent had the great idea to create leather straps out of some leather scraps to hang the baskets on the dowel rods. This worked really well and tied the look to the nursery wall storage bar on the opposite wall.

Baby Clothes Rack

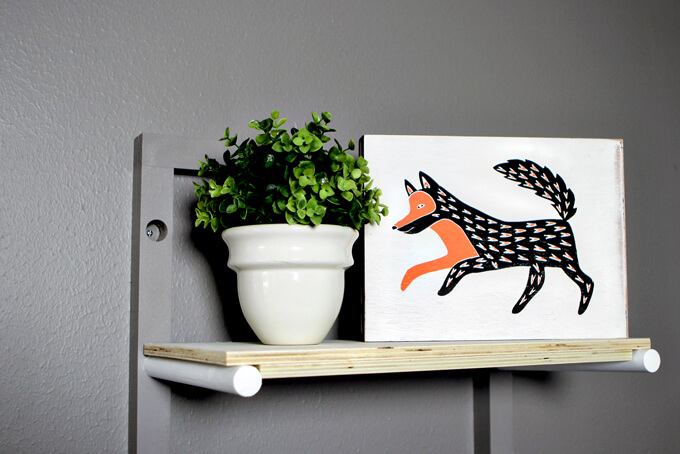
We added a shelf at the top to add a few decor items. I stole the fox artwork from the gym shelves but it fits with this room better anyway because we are incorporating little foxes here and there throughout the room.

To see how we built our baby clothes rack, check out the video or follow along with the steps below.

2022 Personalized Christmas Ornaments
*** Thanks so much for supporting our small shop – Moon Rock Prints – this holiday season! ***

How We Made Our Baby Clothes Rack

SUPPLIES

FYI: This post contains a few affiliate links to products we used to make this project. Gray House Studio does receive commissions for sales from these links but at no extra cost to you. We appreciate you supporting this site. Read our privacy and disclosure policy. You can also easily shop our recommended products here.

PROJECT PLANS

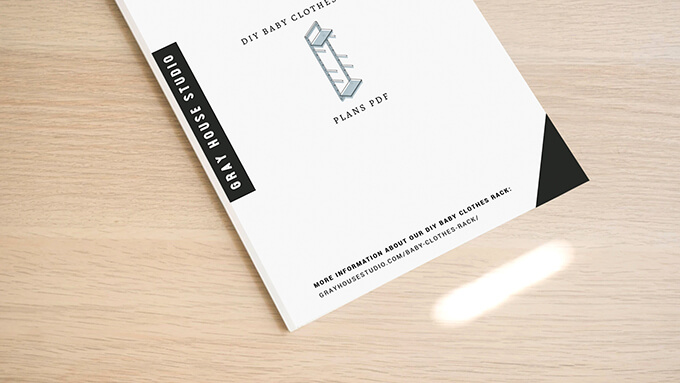
DIY Baby Clothes Rack Woodworking Plans

Get our Baby Clothes Rack Plans

When you purchase our DIY wood baby clothes rack plans you get a PDF with a detailed materials list, a cut list, exact dimensions for each piece, building instructions – all for only $7. We appreciate you supporting Gray House Studio!

TUTORIAL VIDEO

STEPS

Baby Clothes Rack

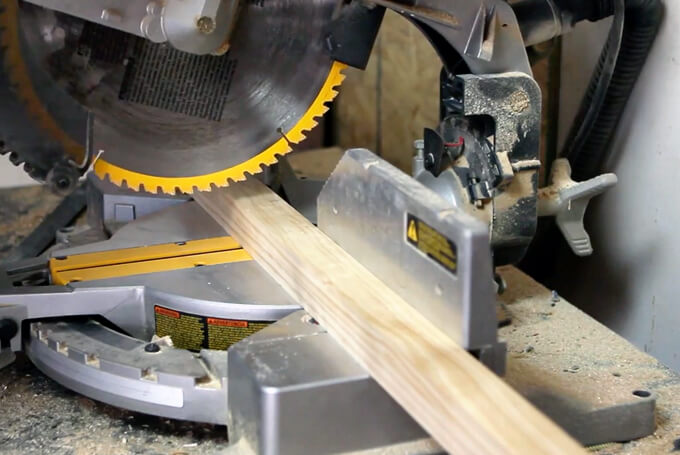
1 To start the baby clothes rack, we used our miter saw to cut two pine 2×2”s into four pieces. Two long pieces for the sides of the rack and two short pieces for the top and bottom of the rack.

Baby Clothes Rack

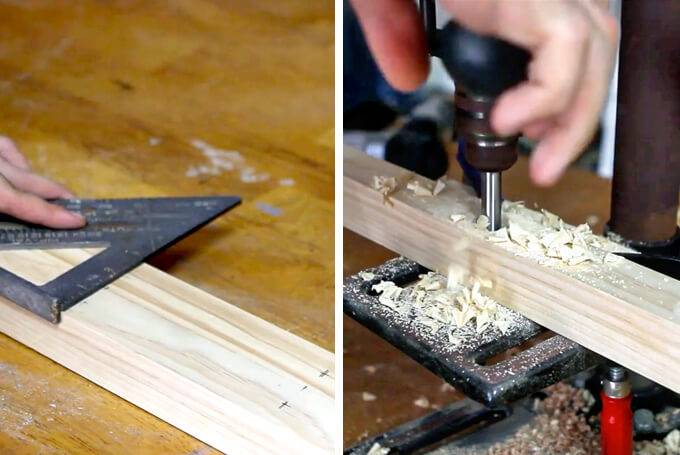
2 On the two side pieces we used a framing square to make marks six inches apart where we needed to make the holes for our dowel rods.

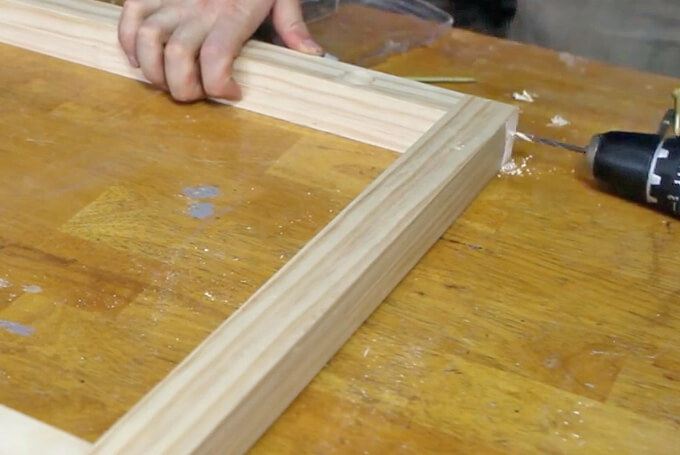
We used a drill press with a 1” forstner bit to drill the holes in the side pieces but stopped each hole ¼” shy of going all the way through the board.

Baby Clothes Rack

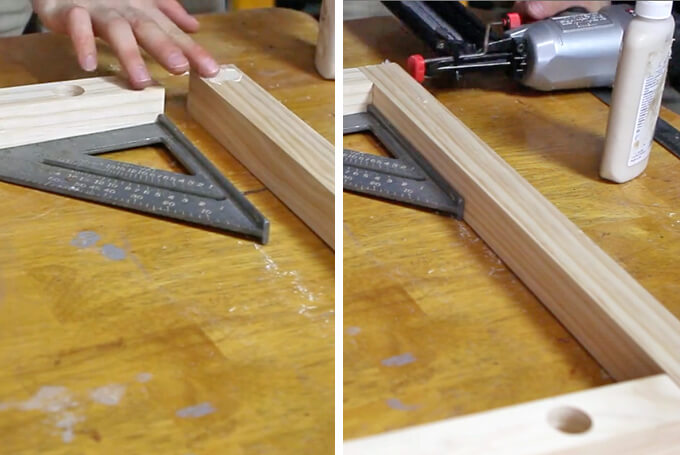
3 Next, we attached the four pieces of the frame together using wood glue and 1 ½” finishing nails.

Baby Clothes Rack

4 To provide extra strength and support, we came back and drilled pilot holes and secured the pieces of the frame together using 3” decking screws.

Baby Clothes Rack

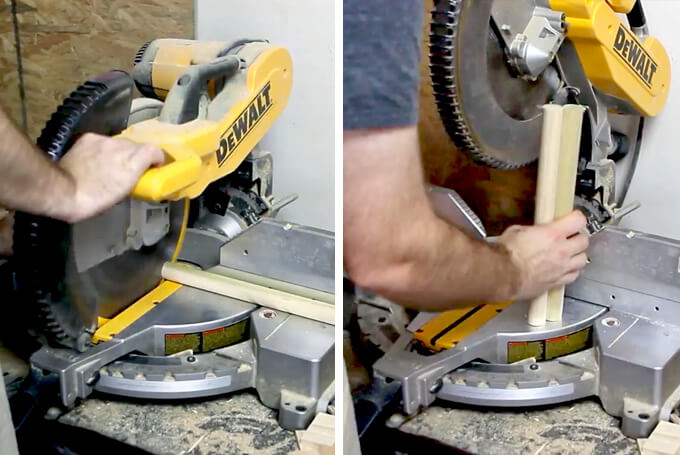
5 Once the frame was assembled we took our two dowel rods and cut them down to 12” pieces using the miter saw.

Baby Clothes Rack

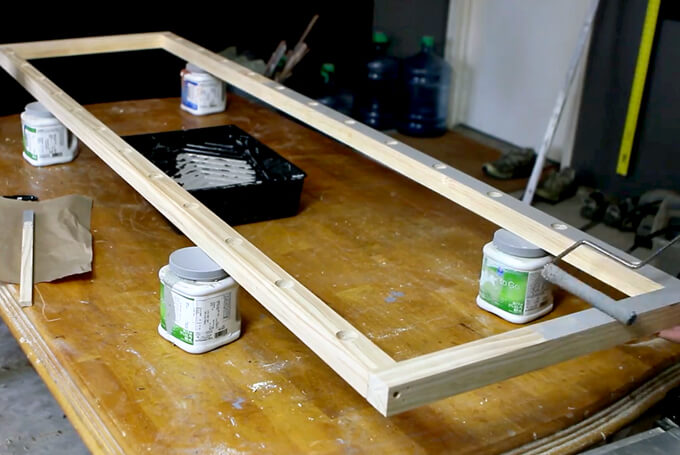
6 We used a roller to paint the frame of the baby clothes rack with Sherwin-Williams ProClassic® waterbased paint in Dovetail, the same color as the wall in the nursery.

We used a smaller paintbrush to paint in the holes of the frame.

Baby Clothes Rack

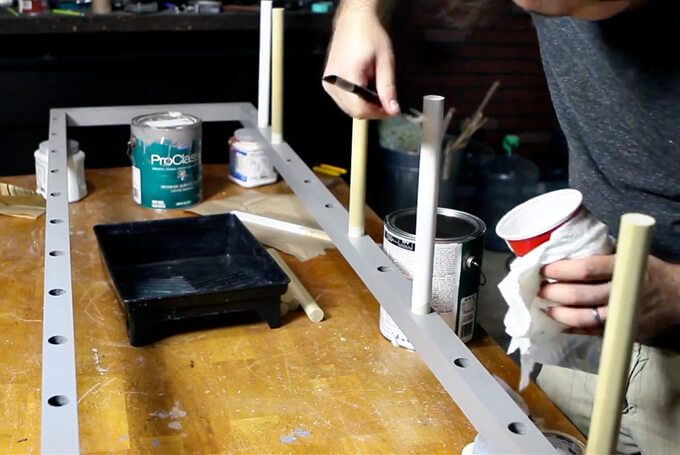
7 Then we painted all the dowel rods with Sherwin-Williams ProClassic® waterbased paint in Bright White with a smaller paintbrush.

Baby Clothes Rack

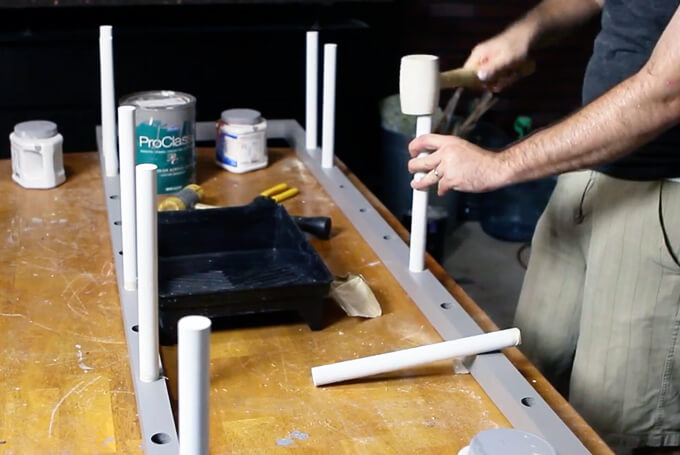
8 We inserted the dowel rods into the holes of the clothes rack frame with a few taps of a rubber mallet.

Baby Clothes Rack

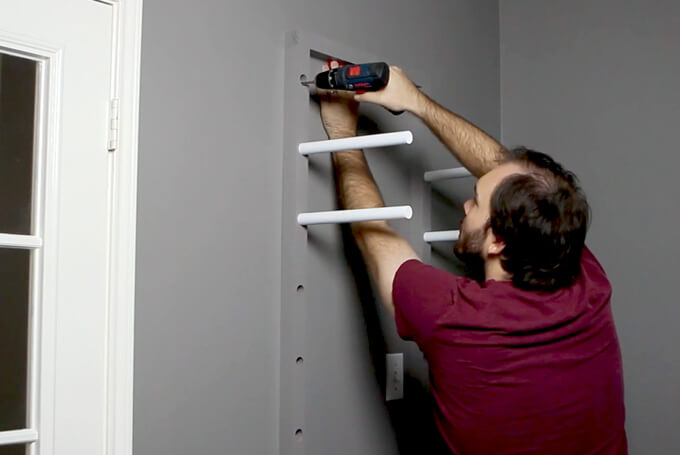
9 We installed the frame in the nursery by using a drill to screw the rack into the wall studs and used a level to make sure it was straight on the wall.

Baby Clothes Rack

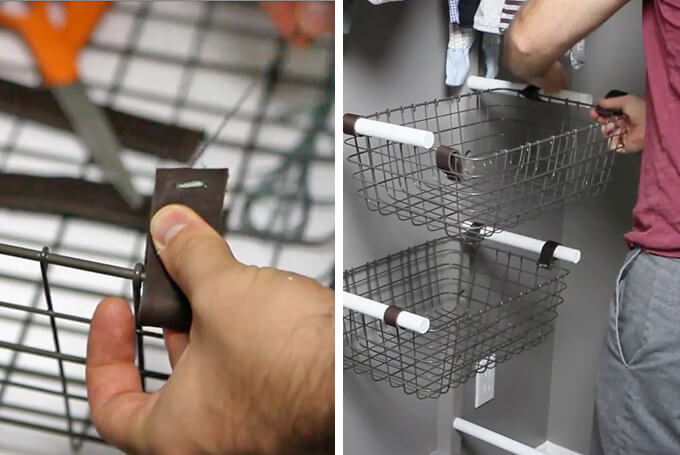
10 Finally, we removed the handles that came on the baskets and used embroidery floss to sew 1” wide leather loops out of leather scraps onto the metal baskets so they would hang from the dowel rods.

Baby Clothes Rack

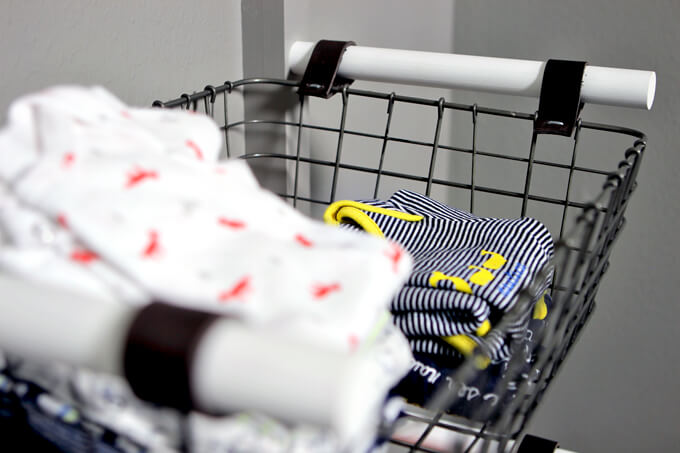
The metal baskets work really well.

They are the perfect depth for storing lots of onesies, hats, socks, etc. and are really easy to grab but still look nice and organized.

Baby Clothes Rack

I purchased wood baby hangers because I thought wood hangers would look nicer out in the open.

Baby Clothes Rack

We will probably store shoes on the bottom shelf once he has shoes but for now it is holding extra blankets.

I love all of the nursery projects we have made so far but the baby clothes rack is definitely one of my favorites because I think it is unique and Brent really made my idea come to life.

By being vertical and hanging on the wall it takes up no floor space but has plenty of storage space to keep baby clothes organized.

Plus, it looks nice enough to be out in the open displaying clothes.

PIN IT FOR LATER

Store and organize your baby's clothes in the nursery with this unique wall-mounted baby clothes rack. It is a great solution if a closet is not available. This diy project tutorial includes a video tutorial.

Nursery Wall Storage

Nursery Wall Storage

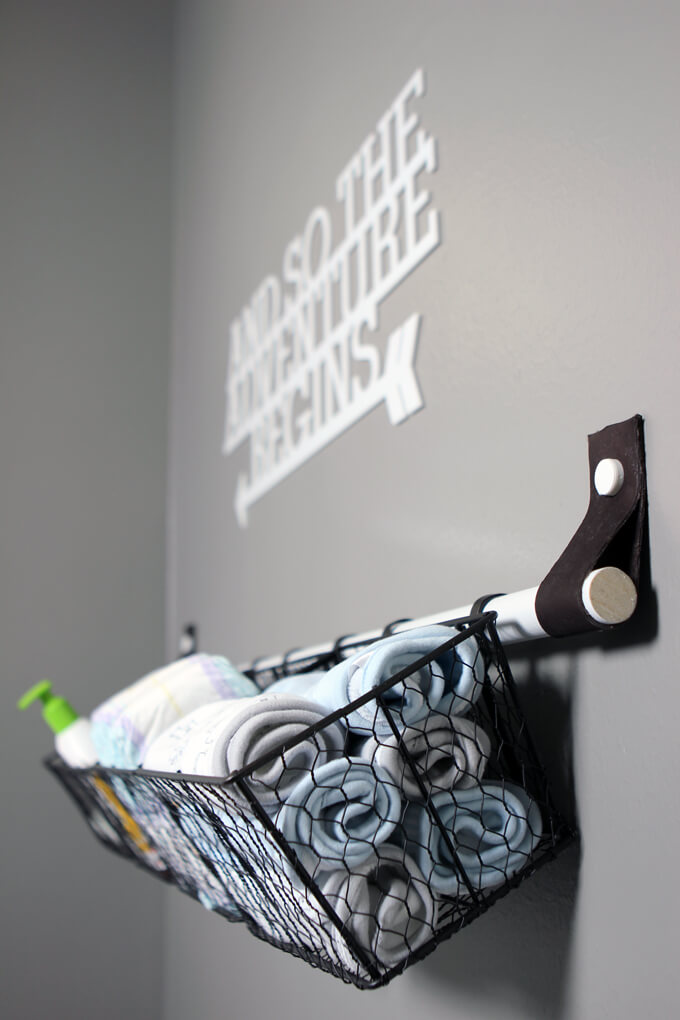
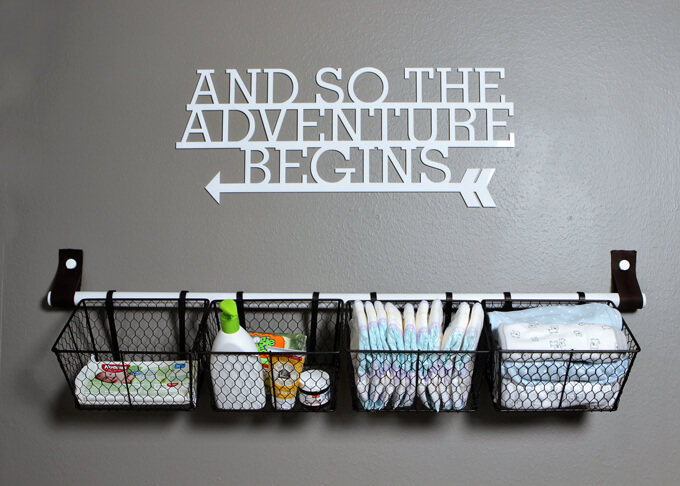
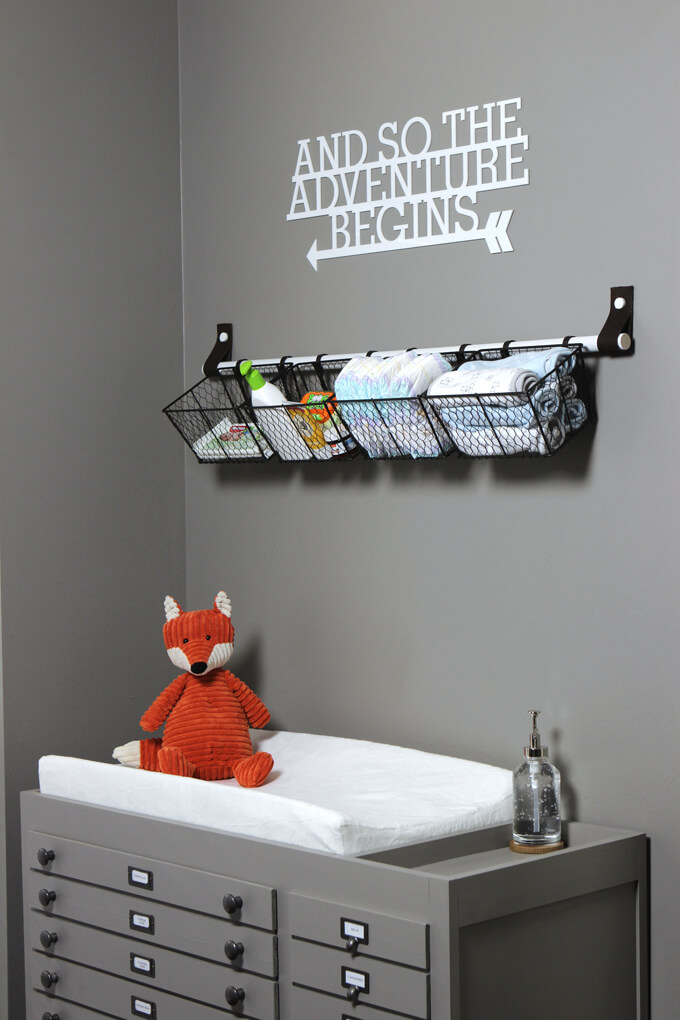
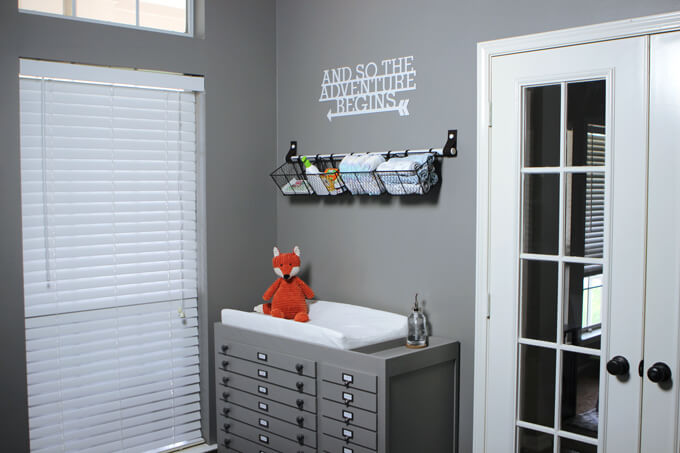
We used a dowel rod, scraps of leather, and a few baskets to create a simple nursery wall storage above the changing table in the nursery.

Nursery Wall Storage

Last week we shared the baby changing table that Brent built for the nursery.

This week we are sharing another project we worked on, a nursery wall storage solution to go above the changing table that turned out to be really simple to put together and cost us next to nothing to make!

The changing table offers plenty of space to store and organize baby supplies but I liked the idea of incorporating a way to store frequently used baby items, like diapers, so they are easy to grab in a second, right at arms length.

Nursery Wall Storage

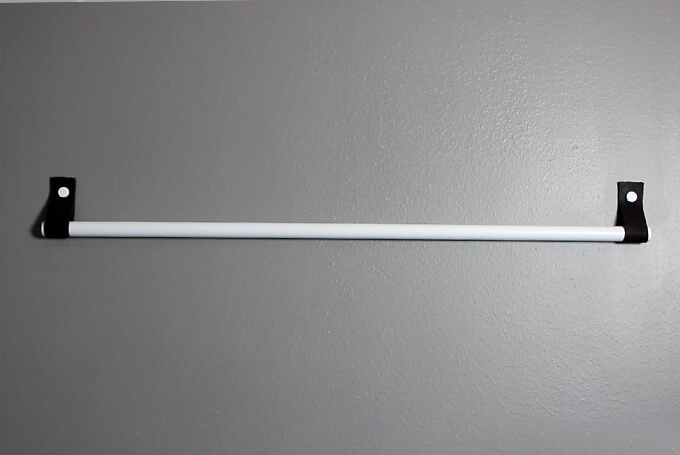
We ultimately decided to keep it simple and make a bar where we could hang a few wire baskets with supplies as a diaper storage solution.

We decided to use a dowel rod that we could spray paint white to match the vertical bars on the crib.

To mount the bar to the wall, Brent came up with the idea to make straps out of leather we already had leftover from another project to hold the dowel rod and match the leather straps on the baby clothes rack.

We bought two sets of these baskets from Kohl’s. They originally came with a different type of bar.

Nursery Wall Storage

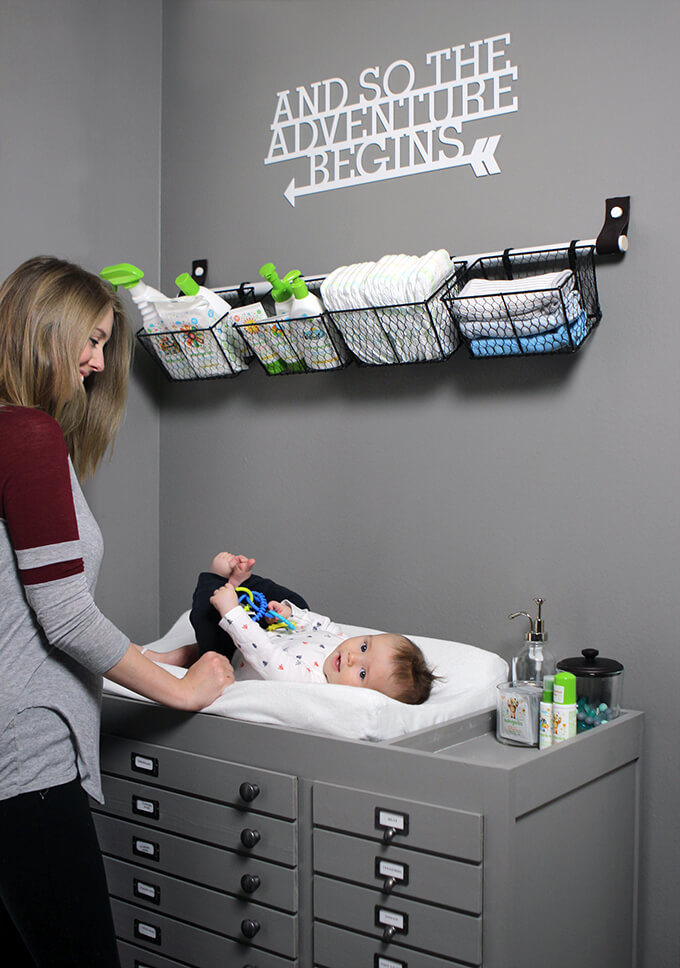
UPDATE: Now that we have a wiggly four month old, this nursery wall storage above the changing table has made our lives a thousand times easier. I can grab the supplies I need quickly from the baskets while keeping a hand on him at all times.

Nursery Wall Storage

Follow along with the video and steps below to see how to easily make this nursery wall storage project.

2022 Personalized Christmas Ornaments
*** Thanks so much for supporting our small shop – Moon Rock Prints – this holiday season! ***

How We Made Our Nursery Wall Storage

SUPPLIES

Shop the products we used for this project in one place.

FYI: This post contains a few affiliate links to products we used to make this project. Gray House Studio does receive commissions for sales from these links but at no extra cost to you. We appreciate you supporting this site. Read our privacy and disclosure policy. You can also easily shop our recommended products here.

TUTORIAL VIDEO

STEPS

Nursery Wall Storage

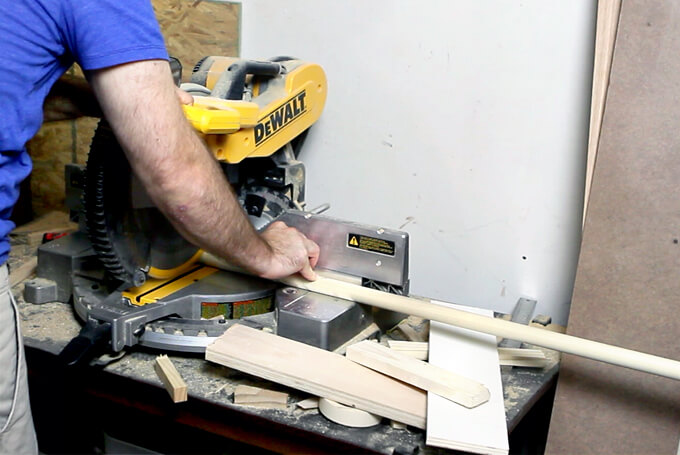
1. To begin the nursery wall storage project, we started by cutting the 1″ dowel rod on the miter saw to match the width of the changing table.

Nursery Wall Storage

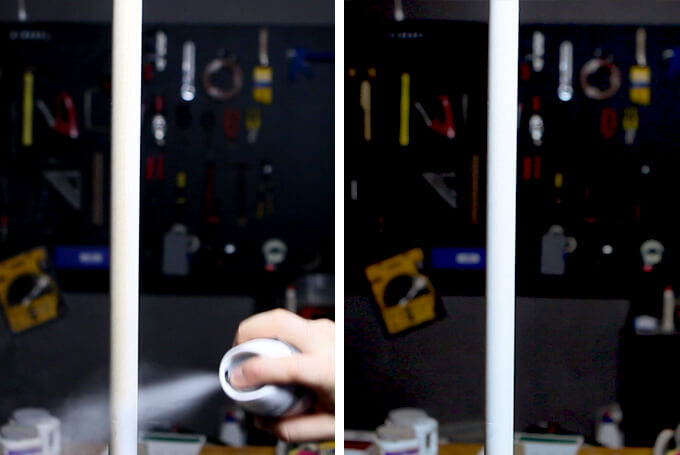
2. To make painting the dowel rod easier, we hung it from the garage door by attaching a screw in one side. We applied a few coats of white spray paint and then used 150 grit sandpaper to sand the rod and painted a few more coats.

Nursery Wall Storage

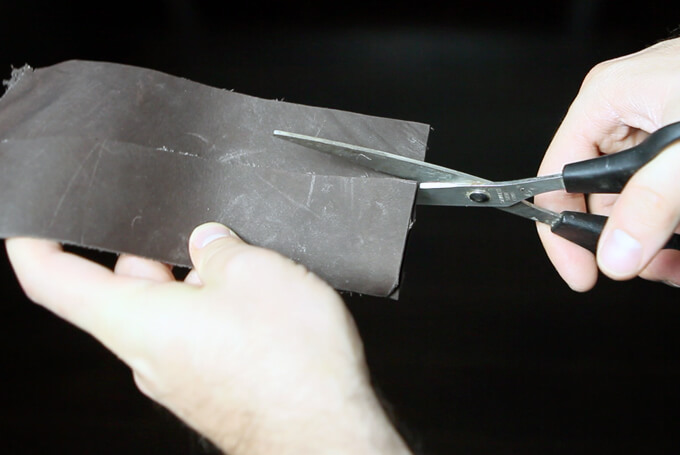
3. Next, we took some leftover leather scraps and cut two strips to use to hang the dowel rod.

Nursery Wall Storage

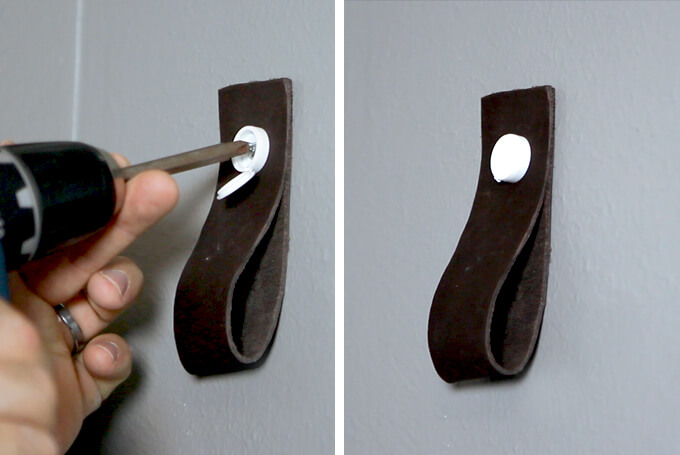
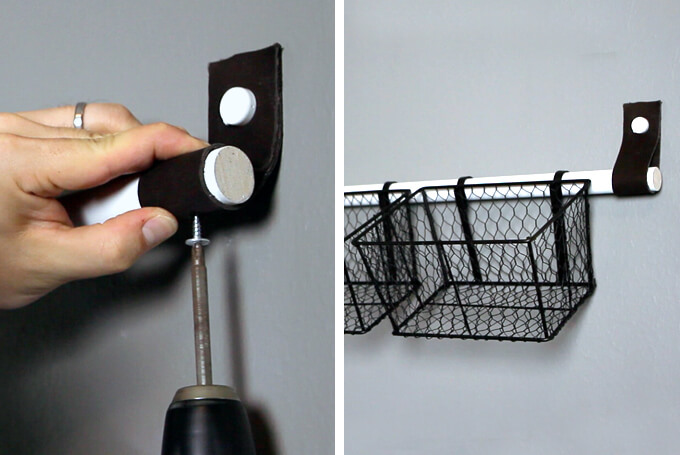
4. We measured and marked where we needed to drill the holes to hang the leather straps. Then used our drill to drill two holes into the wall to make inserting the drywall anchors easier.

We marked a hole in the center of the leather pieces and screwed the leather loop into the drywall anchor. We used a hinged screw cover to cover the screw to finish off the look.

Nursery Wall Storage

5. One the leather straps were in place, we hung the dowel rod from them.

Nursery Wall Storage

6. To secure the dowel rod to the leather straps, we drilled one 1/2″ screw from the back of each piece of leather into the dowel rod so they would be out of sight.

This just added an extra precaution that the dowel rod would not slip out of the leather straps.

Finally, we hung our wire baskets. They already had hooks attached because they were meant to hang on a different type of bar so we just adjusted the hanger part so they would securely fit around the dowel rod.

Nursery Wall Storage

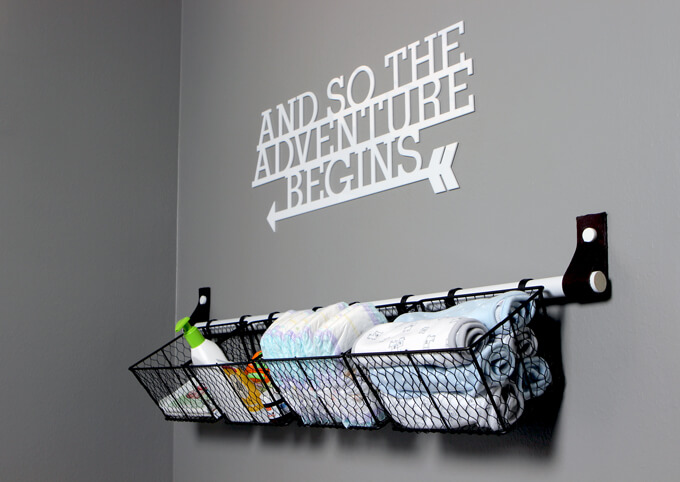
After the baskets were nice and secure on the rod, I added items I think we will need to grab often like burp cloths, diapers, lotion, wipes, etc.

Nursery Wall Storage

To finish up this wall, we hung an adventure sign above the nursery wall storage bar that fits with our modern outdoor nursery theme. I love how all the projects came together for this area of the nursery and how it has a cohesive but non cluttered feel.
I know I (better yet…we) will be spending a lot time standing here changing diapers!

PIN IT FOR LATER

We used a dowel rod, scraps of leather, and a few baskets to create a simple nursery wall storage above the changing table in the nursery to store diapers and baby changing supplies. This DIY project includes a video tutorial.